Hodogaya is the large region in the northwest of the Yokohama map, stretching from the south up to the Shibo border. For 100% completion you need 15 collectibles: 3 Veiled Edge Banners, 1 Public Order, 2 Fugitives, 1 Landmark, 1 Shrine, 3 Cats, 3 Treasure Chests and 1 Photograph. Finish them all and you receive Gardenia Fruit at your Longhouse in Miyozaki.
Related Guides:
Rise of the Ronin Kariba Collectibles
Rise of the Ronin Shibo Collectibles
Rise of the Ronin Game Guides Hub
All 15 Collectibles in Hodogaya
- Veiled Edge Banners – 3 collectibles
Hodogaya Post, Center Village, Northern Border - Public Order – 1 collectible
Center Village, 9 thugs - Fugitives – 2 collectibles
Shirodayu Shiramine, Green-Eyed Sanzaemon - Landmark – 1 collectible
Hodogaya Post - Shrine – 1 collectible
Wilderness far west of the Center Village - Cats – 3 collectibles
Chicken House Roof, Sleeping Calico Cat, Southern River - Treasure Chests – 3 collectibles
Center Village storehouse (Rusty Key), Fugitive hideout (Scroll of Charm), Mansion storehouse (Heirloom Revolver) - Photography – 1 collectible
Giant Ginkgo Tree
Total: 15 collectibles – 3 Veiled Edge Banners, 1 Public Order, 2 Fugitives, 1 Landmark, 1 Shrine, 3 Cats, 3 Treasure Chests, 1 Photograph
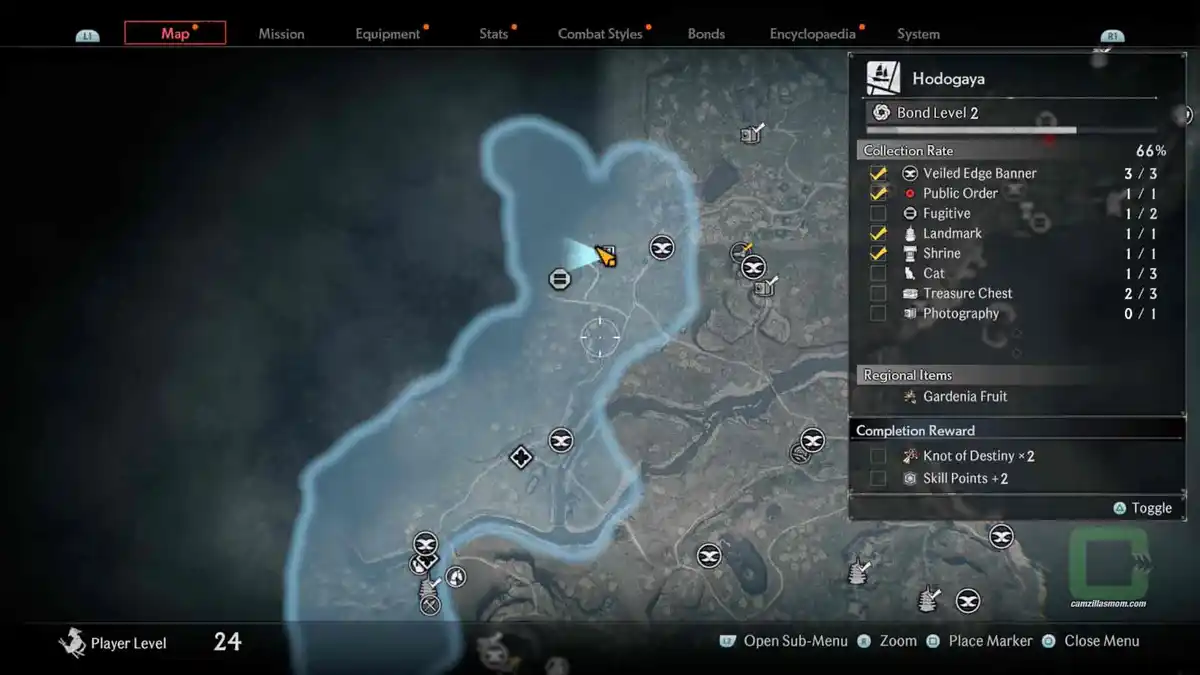
Rise of the Ronin Hodogaya Map
The in-game map with all 15 Hodogaya collectibles marked. Click the map to open it in full size.
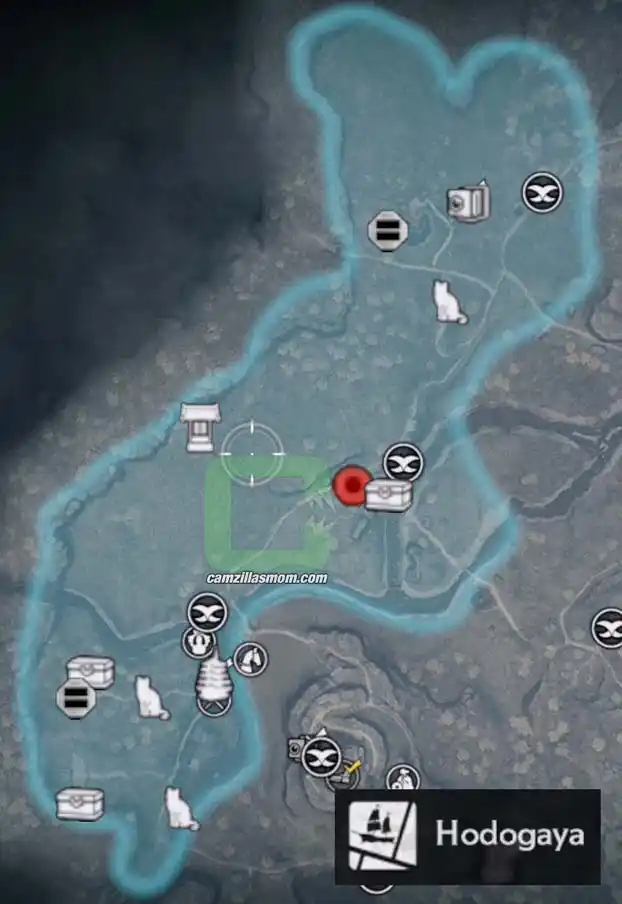
All collectibles show up on your map once you reach Area Bond Level 3 in Hodogaya. You raise the Area Bond by restoring Public Order, raising Veiled Edge Banners and finding collectibles. Nothing in Hodogaya is missable, so you can also come back after the story.
Hodogaya Veiled Edge Banners
Veiled Edge Banners are save and fast travel points. Raising one also restores your health and refills your medicine and sub-weapons, but defeated enemies may return. Hodogaya is big, so it has three, spread from south to north.
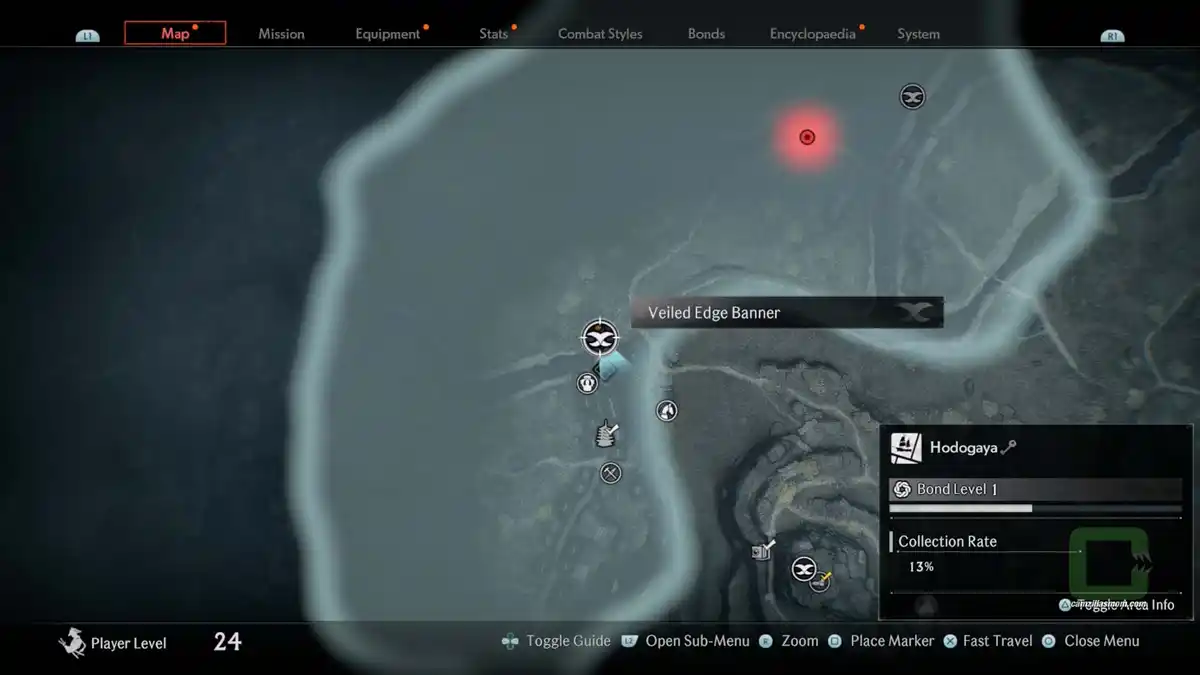
1. Hodogaya Post Veiled Edge Banner
Location: Northern entrance of the settlement in the south
Raise this banner at the northern entrance of the Hodogaya Post settlement in the south of the region.
2. Center Village Veiled Edge Banner
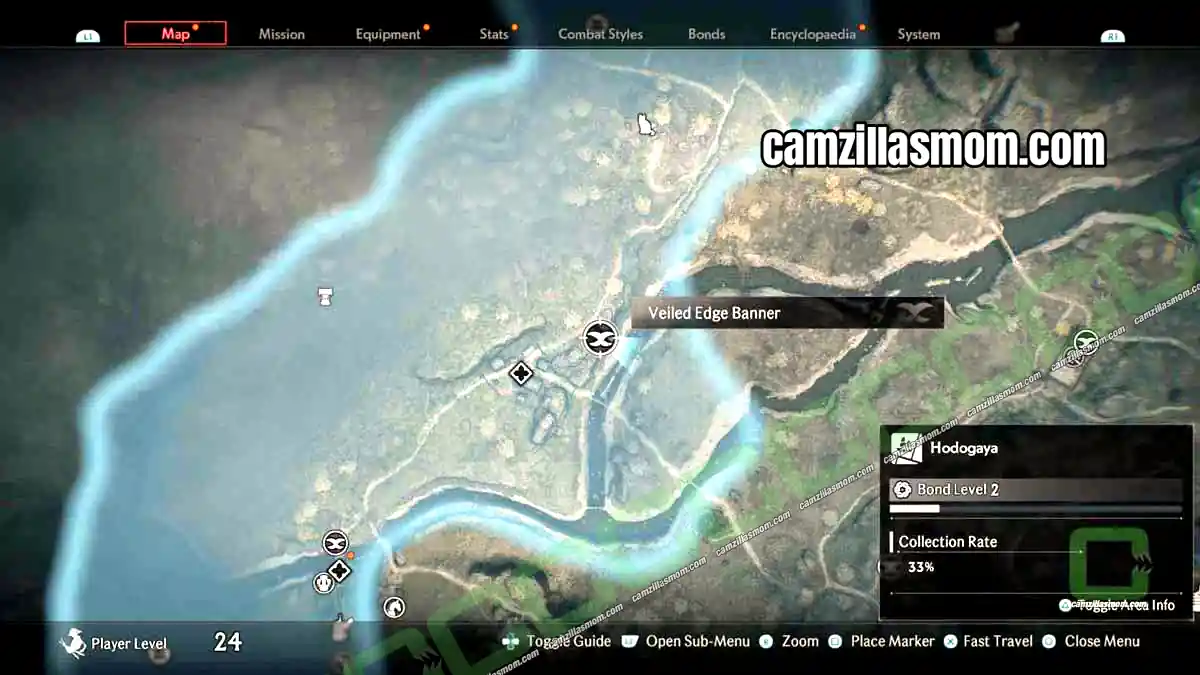
Location: North of the Center Village, at the Public Order site
Restore the Public Order in the Center Village first. Once the village is free, raise the banner on its northern side, which also gives you a great view over the region.
3. Northern Border Veiled Edge Banner
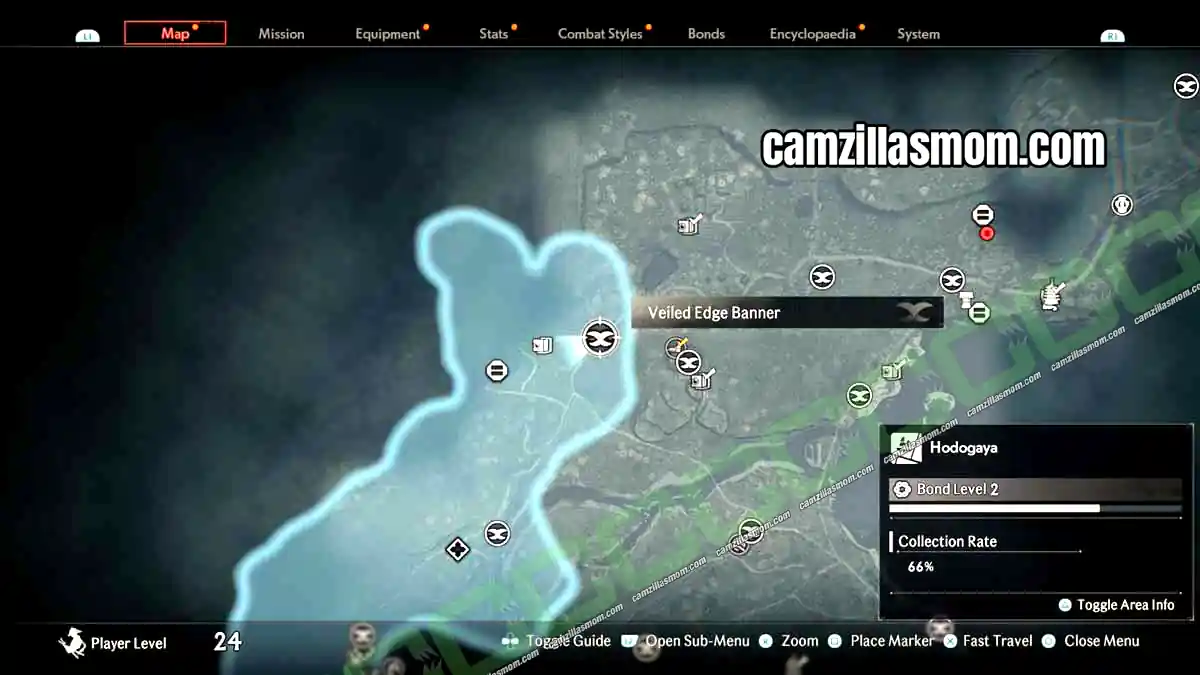
Location: North of the region, near the border to Shibo
The last banner is in the north of Hodogaya, close to the border with Shibo. The Green-Eyed Sanzaemon Fugitive and the Giant Ginkgo Tree photo are both west of here.
Hodogaya Public Order – Thugs in the Center Village
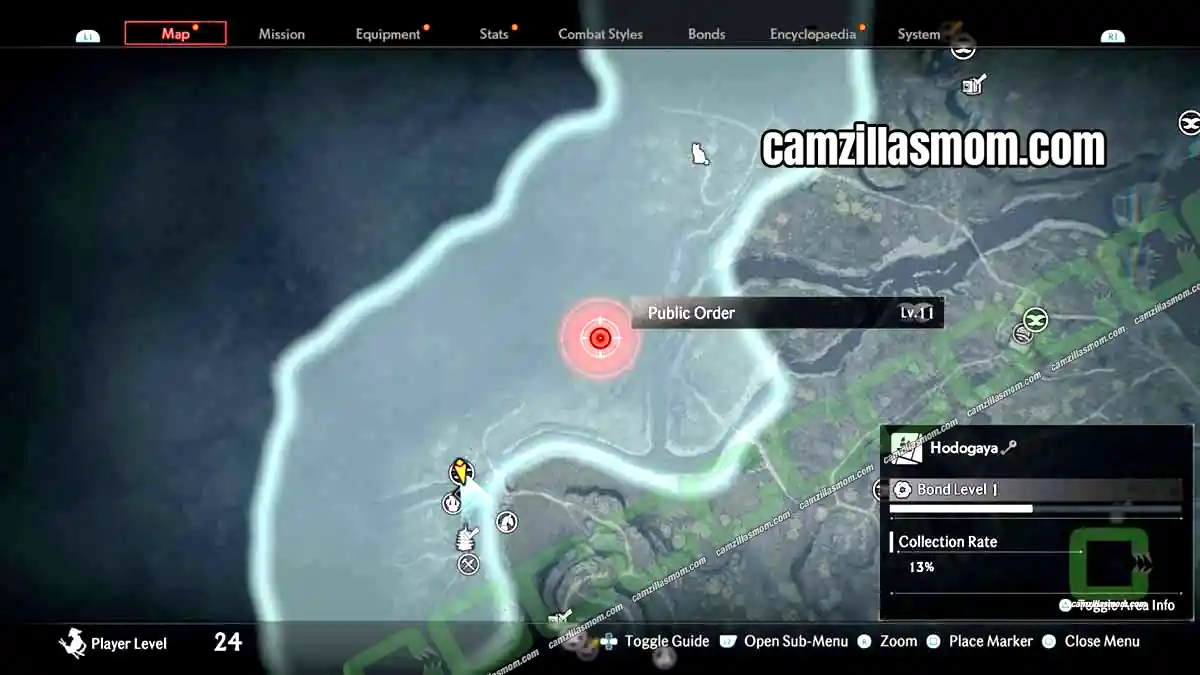
Public Order events are areas occupied by enemies, shown as a red dot on the map. Defeat all of them to restore order, raise your Area Bond and unlock the Veiled Edge Banner there.
Location: Fenced village in the center of the Hodogaya map
Nine thugs hold the Center Village, including two formidable foes. A wooden fence surrounds the village, and besides the main entrance there are gaps in the fence you can sneak through. The enemies show up as red dots in the top of your HUD, so you can choose to sneak or fight.
Their leader is the tall masked bandit with two metal claws. Defeat him to get the Rusty Key for the locked storehouse with the first Treasure Chest.
Hodogaya Fugitives – Shirodayu Shiramine and Green-Eyed Sanzaemon
Fugitives are bounty targets you have to find and defeat. You need 50 of the 91 Fugitives in the game for the Keeper of the Peace trophy. Both Hodogaya Fugitives reward you with a Kiheitai Combat Style.
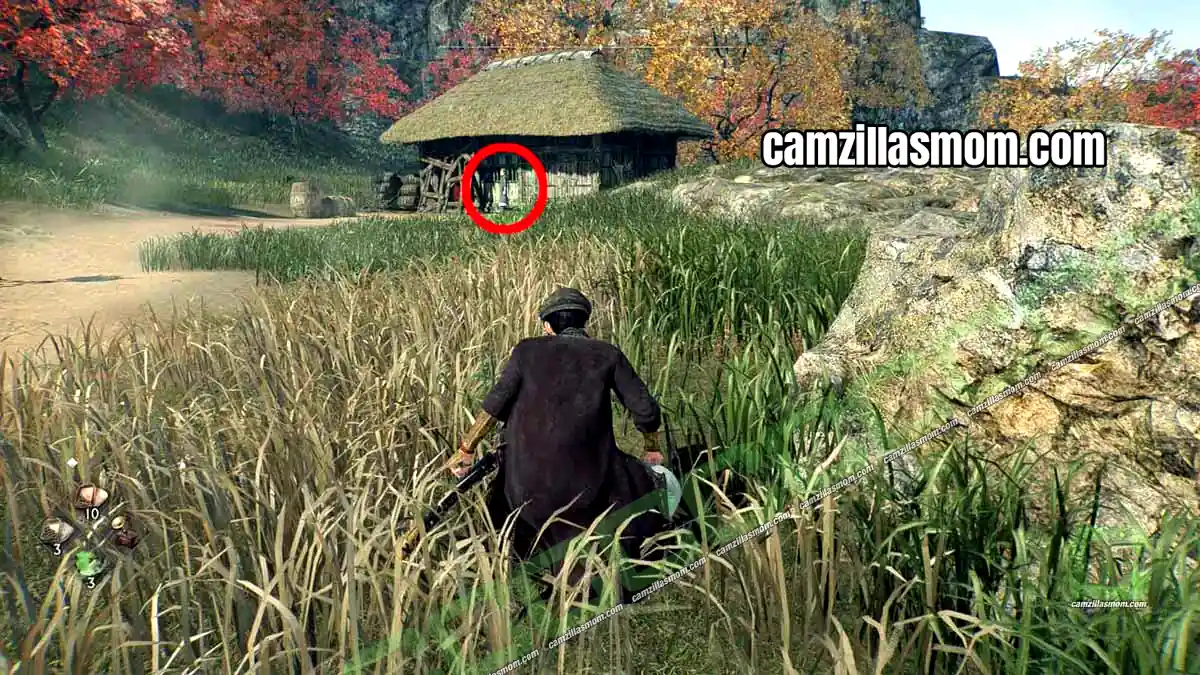
1. Shirodayu Shiramine – Lv.12
Location: Just west of the Hodogaya Post Landmark in the south
Look for a small, half-destroyed house with a barricaded door west of Hodogaya Post. Shirodayu Shiramine waits in front of it. The second Treasure Chest is inside the same house.
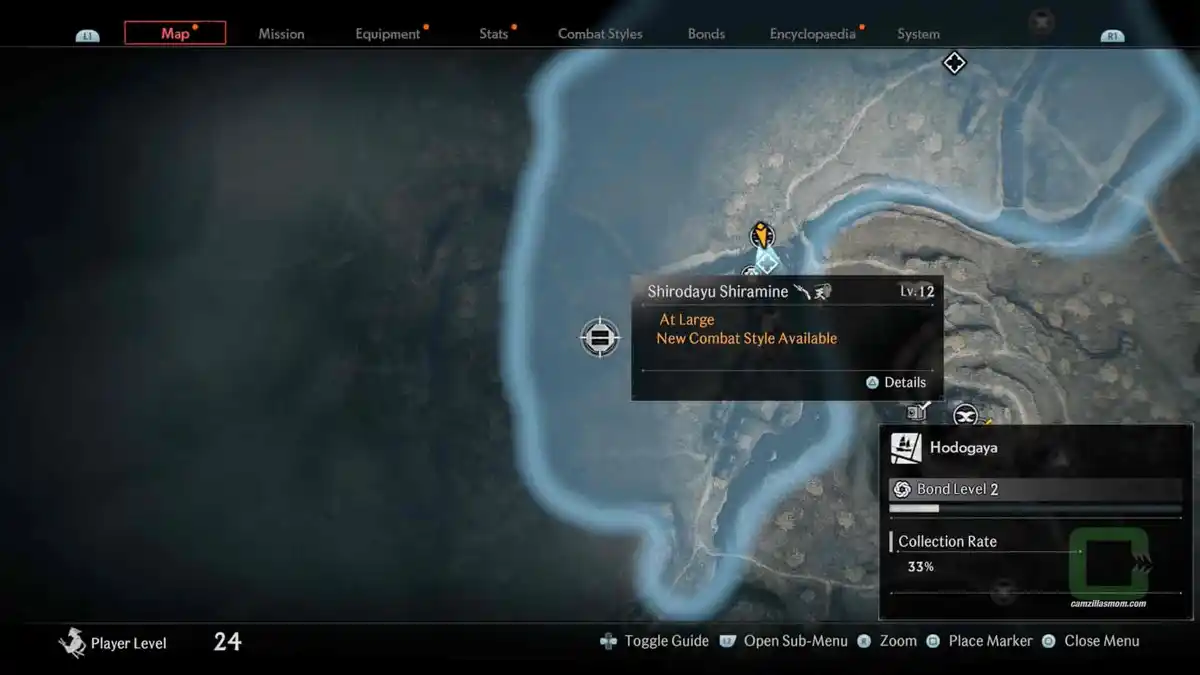
Reward: Bayonet: Kiheitai Style Novice Combat Style
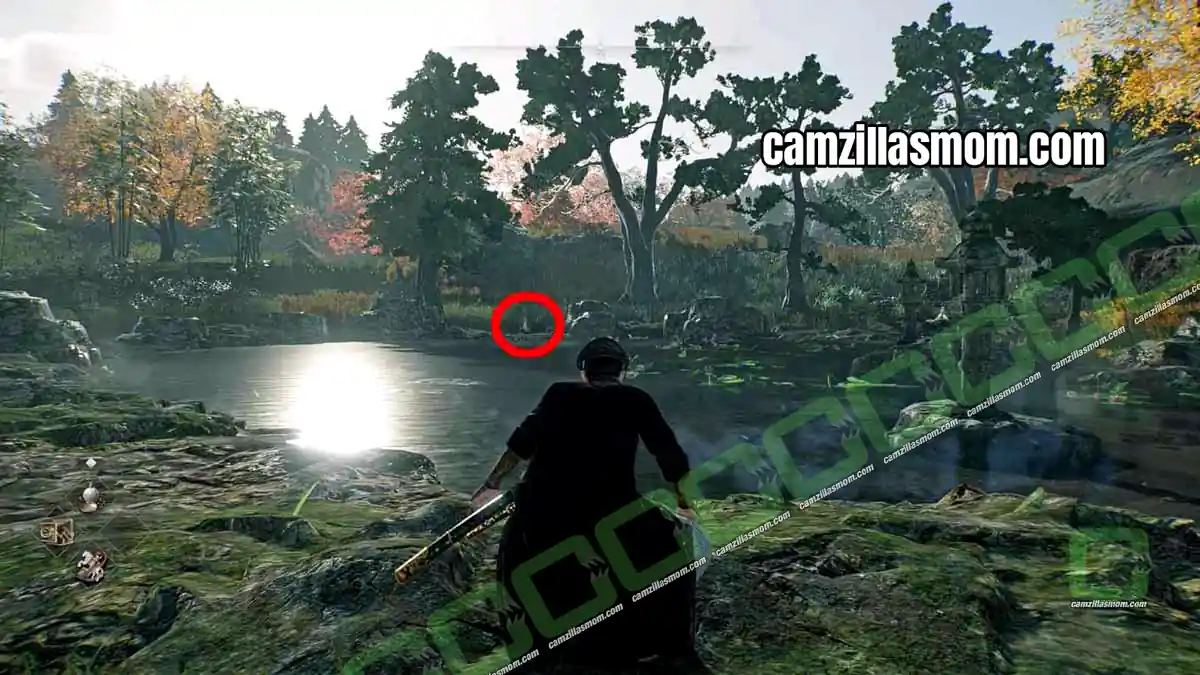
2. Green-Eyed Sanzaemon
Location: Pond far west of the Northern Border Veiled Edge Banner
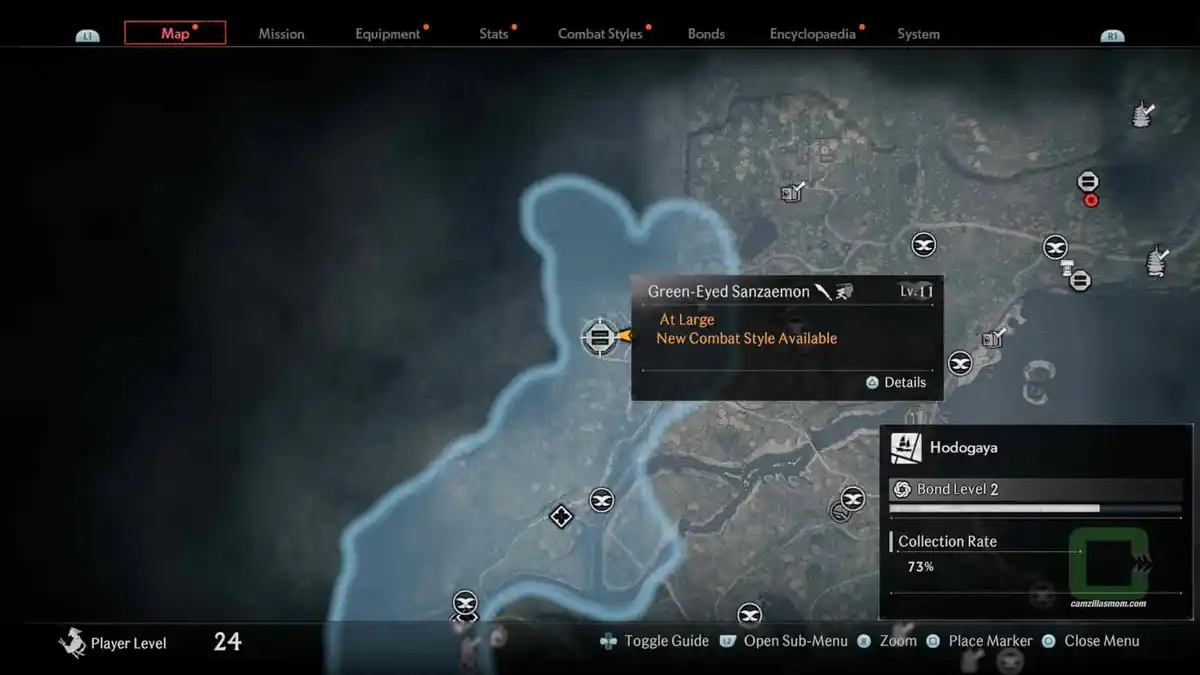
Look for a quiet pond surrounded by trees. Green-Eyed Sanzaemon sits meditating on its shore. Defeat him to receive the Oxtail Blade: Kiheitai Style Novice Combat Style.
Hodogaya Post Landmark
Location: Settlement in the south of the Hodogaya map
Landmarks are important places you only have to visit. Hodogaya has just one, Hodogaya Post, the fourth of the 53 stations on the Tokaido Road. Walk into the settlement to collect it. The Hodogaya Post Veiled Edge Banner is at its northern entrance, and you can read more about the post in the Areas section of the Encyclopaedia.
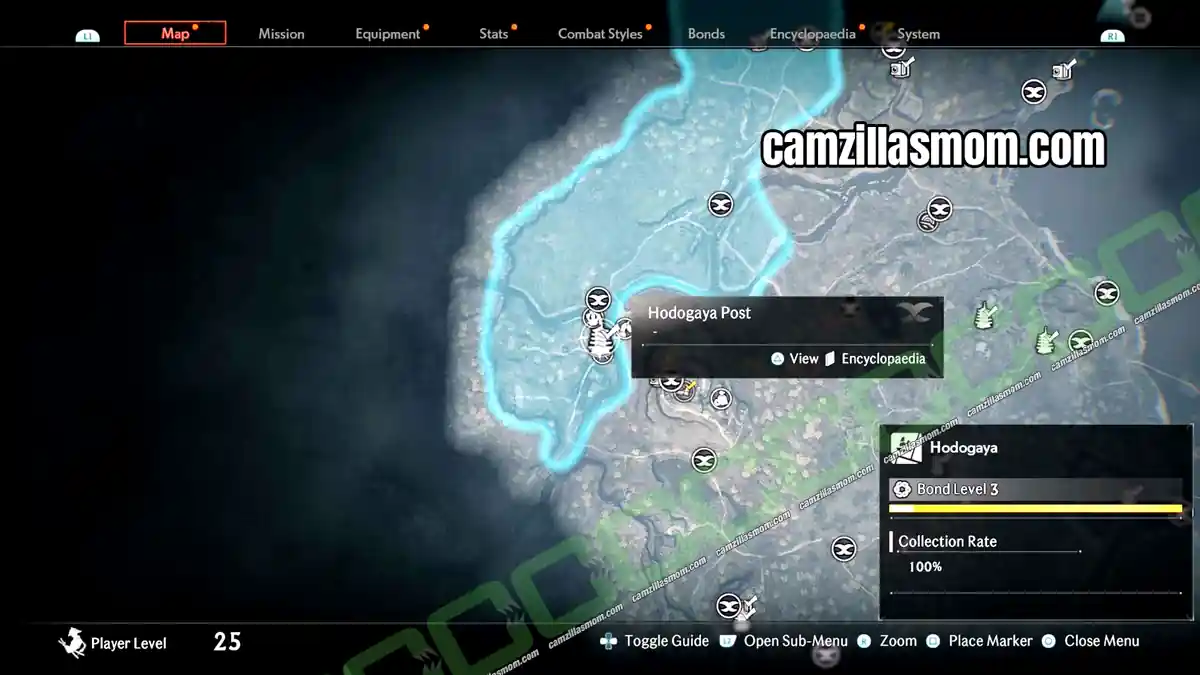
Tip: Hodogaya Post is also the subject of The Narrow Post Town photo, which you take from the cliffs in neighbouring Kariba.
Where to Find the Hodogaya Shrine
Location: Wilderness far west of the Center Village
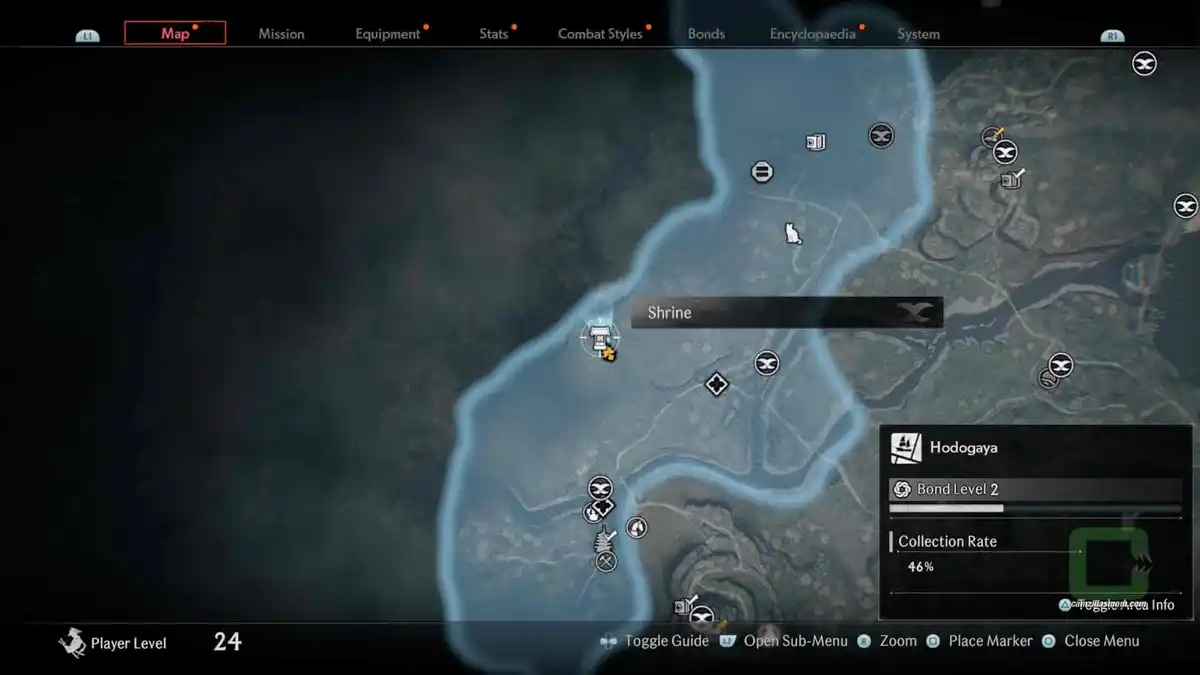
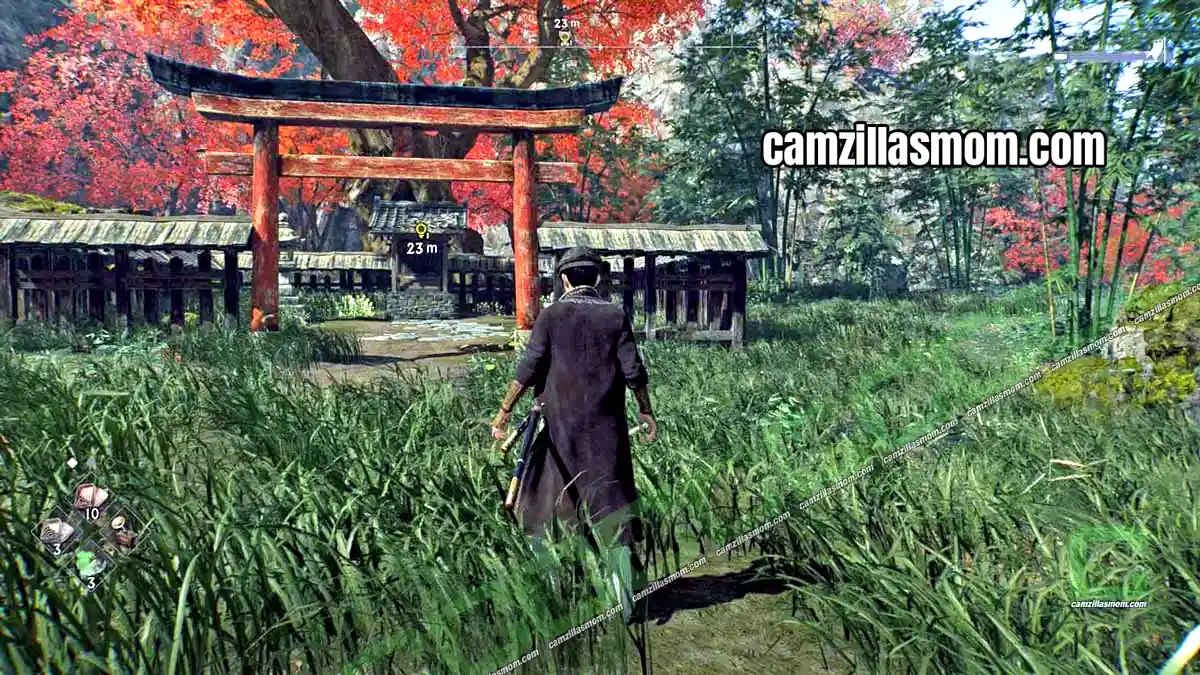
Shrines give you Skill Points and raise your Area Bond. This one is hidden far from any settlement. Follow the dirt path lined with shrine lamps until you reach the faded red gates, then pray at the overgrown shrine behind them.
Hodogaya Cat Locations
Cats are real cats you need to pet, not statues. Listen for meowing, which means one is close. Calico cats run off if you are noisy, so sneak up on them. You need all 100 cats in the game for the Cats Over All trophy, and you can trade them for rewards from Usugumo Dayu in the Pleasure District.
1. Cat on the Chicken House Roof
Location: Roof of a house with chickens, north of the Center Village Veiled Edge Banner
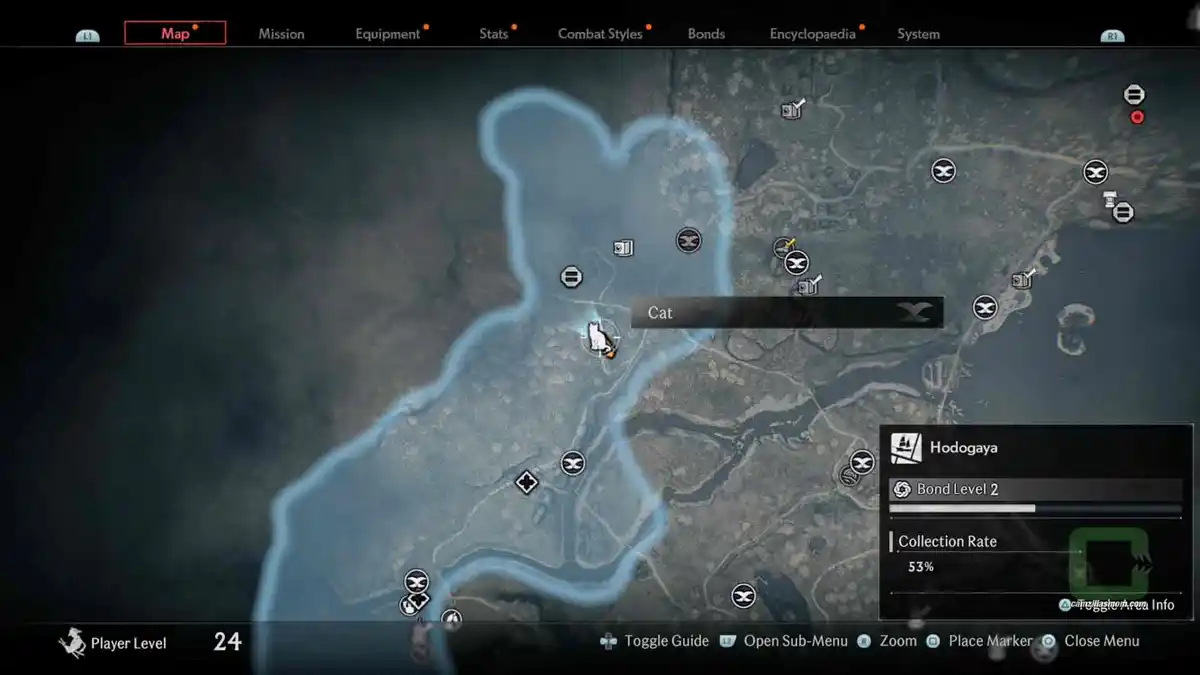
Head north from the Center Village banner until you see a small house surrounded by chickens. A black and white cat sits on its roof. Climb up via the rear roof of the house to pet it.
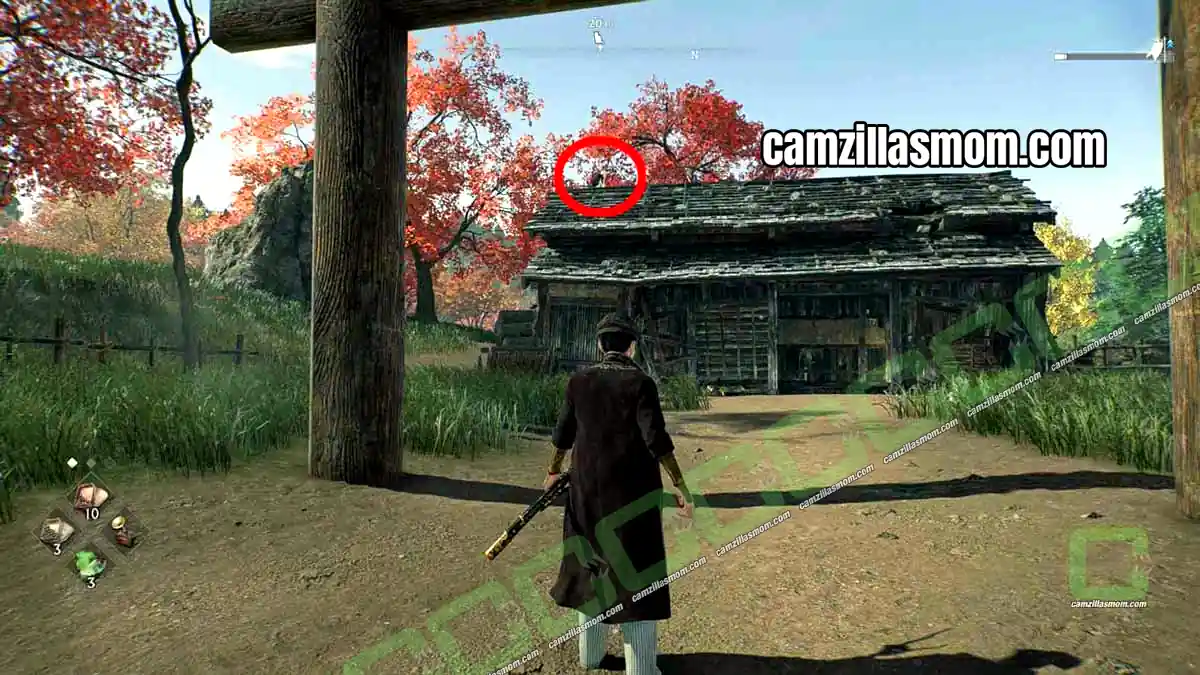
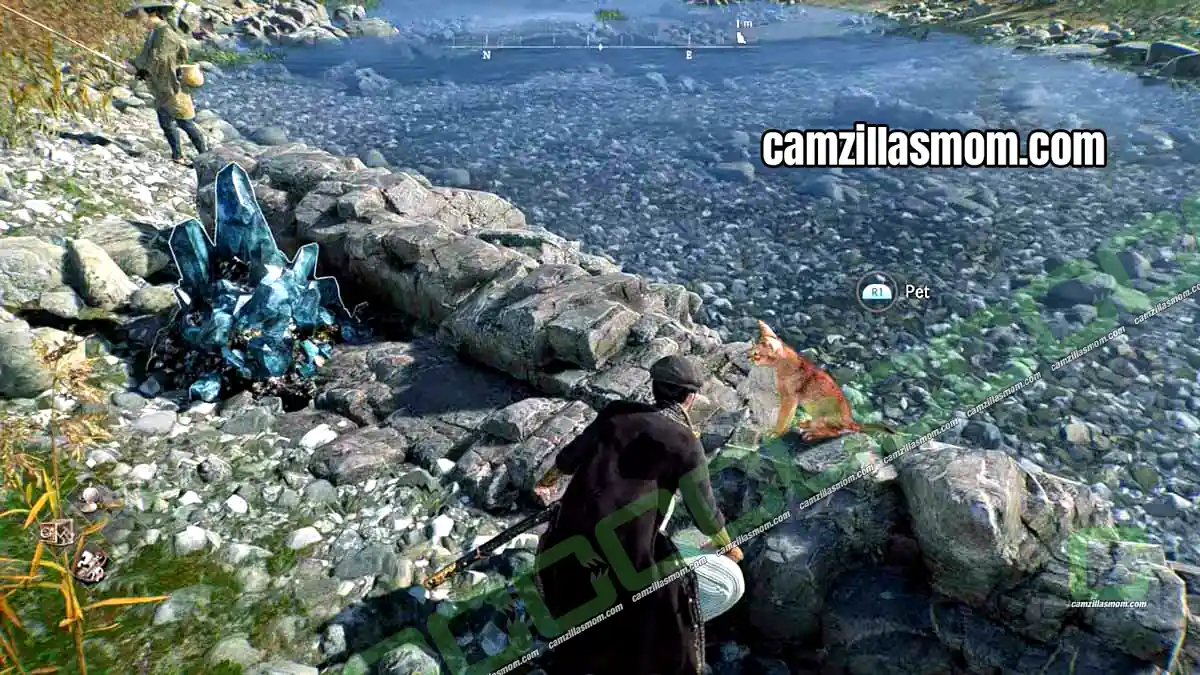
2. Sleeping Calico Cat
Location: Porch of one of two houses west of the southern settlement
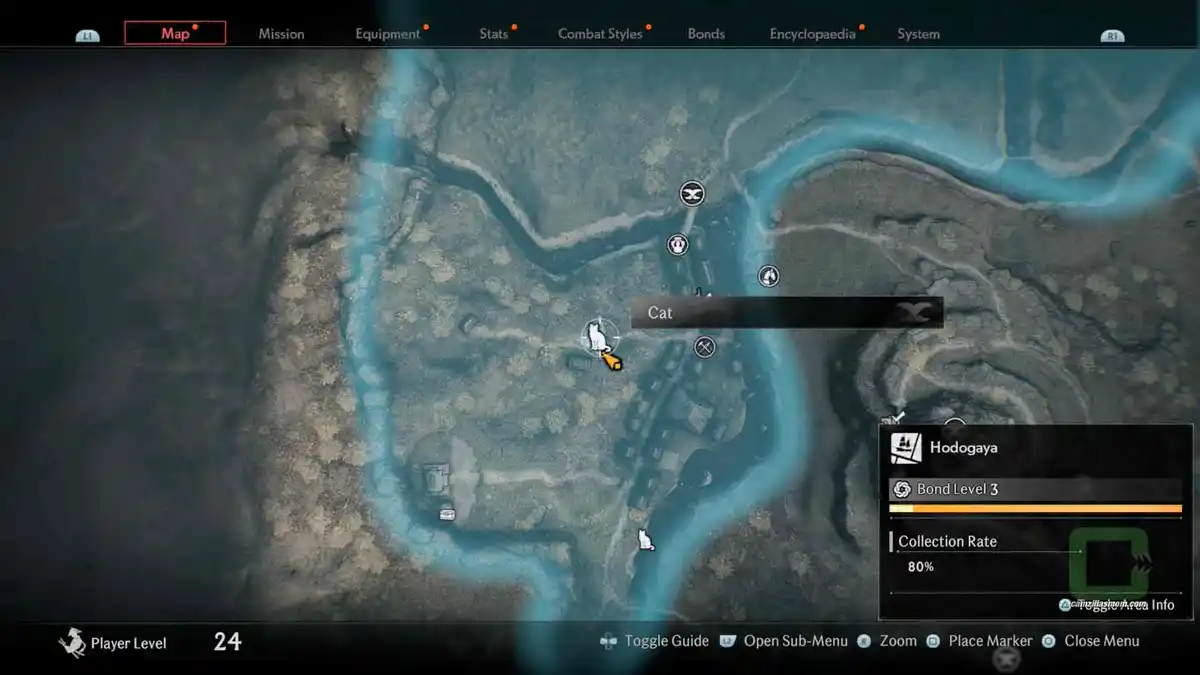
Leave the southern settlement heading west and you come across two houses. A Calico Cat is napping on the porch of one of them. Approach slowly, or it runs away.
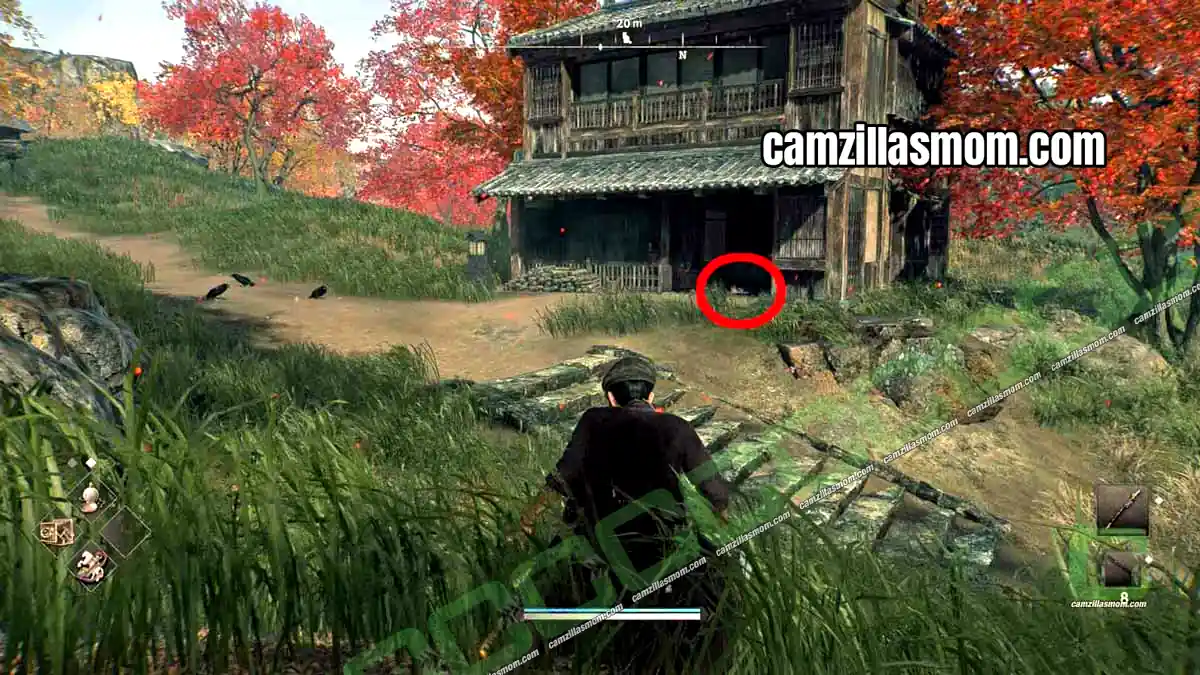
3. Southern River Cat
Location: By the river in the south of Hodogaya
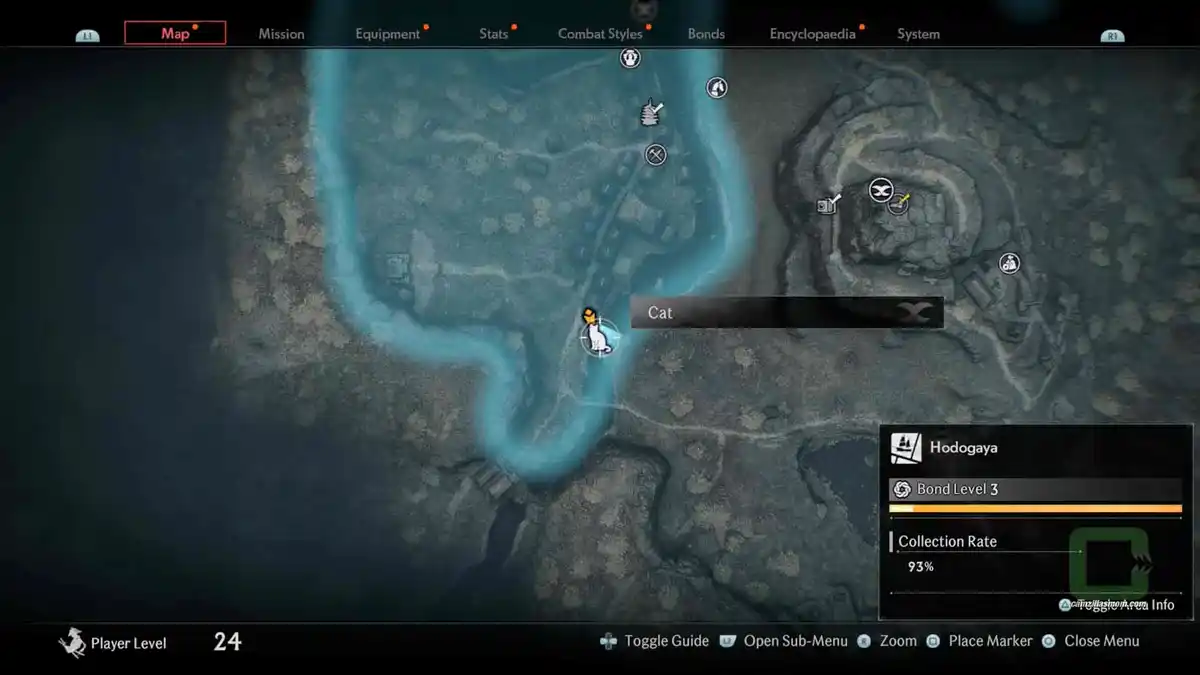
The third cat sits by the river in the southern part of the region, waiting for a cuddle.
Hodogaya Treasure Chest Locations
Hodogaya has three Treasure Chests, and all three are behind a locked door or a barricade.
1. Center Village Storehouse Treasure Chest – Rusty Key
Location: Locked storehouse in the heart of the Center Village
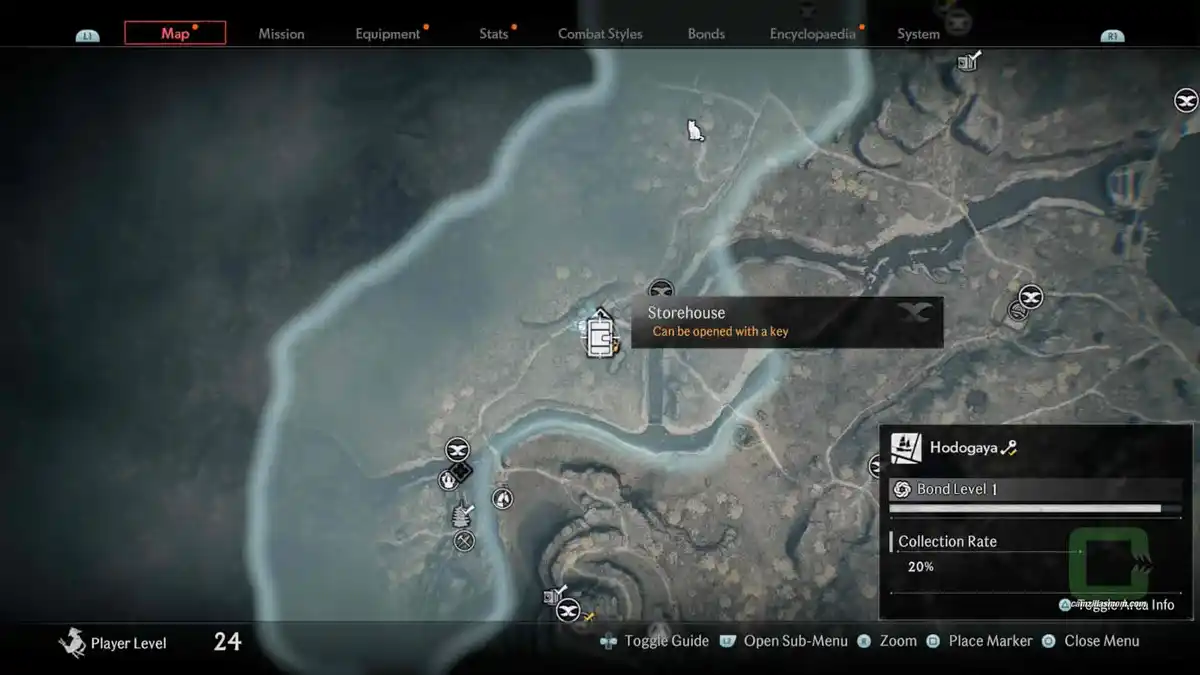
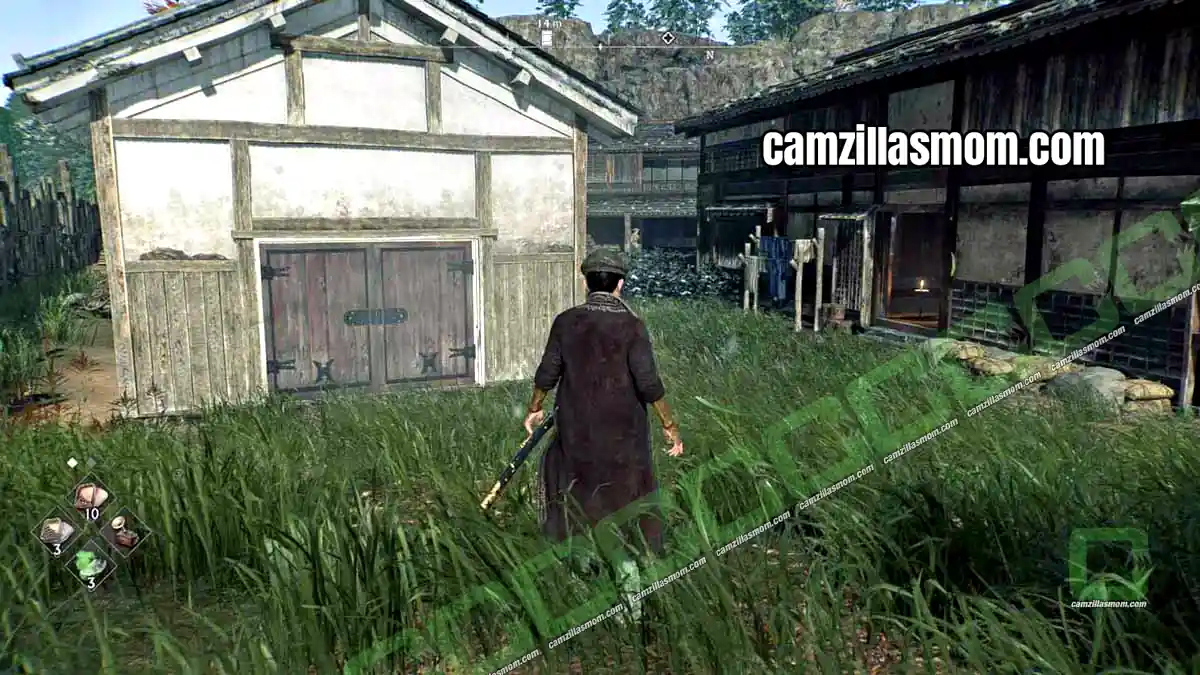
The storehouse in the Public Order village is locked. Defeat the masked thug leader with the two metal claws to get the Rusty Key, then open the storehouse. The chest contains the Kiheitai Uniform and a Treatise on Charm.
2. Fugitive Hideout Treasure Chest – Scroll of Charm
Location: Barricaded house west of the Hodogaya Post Landmark
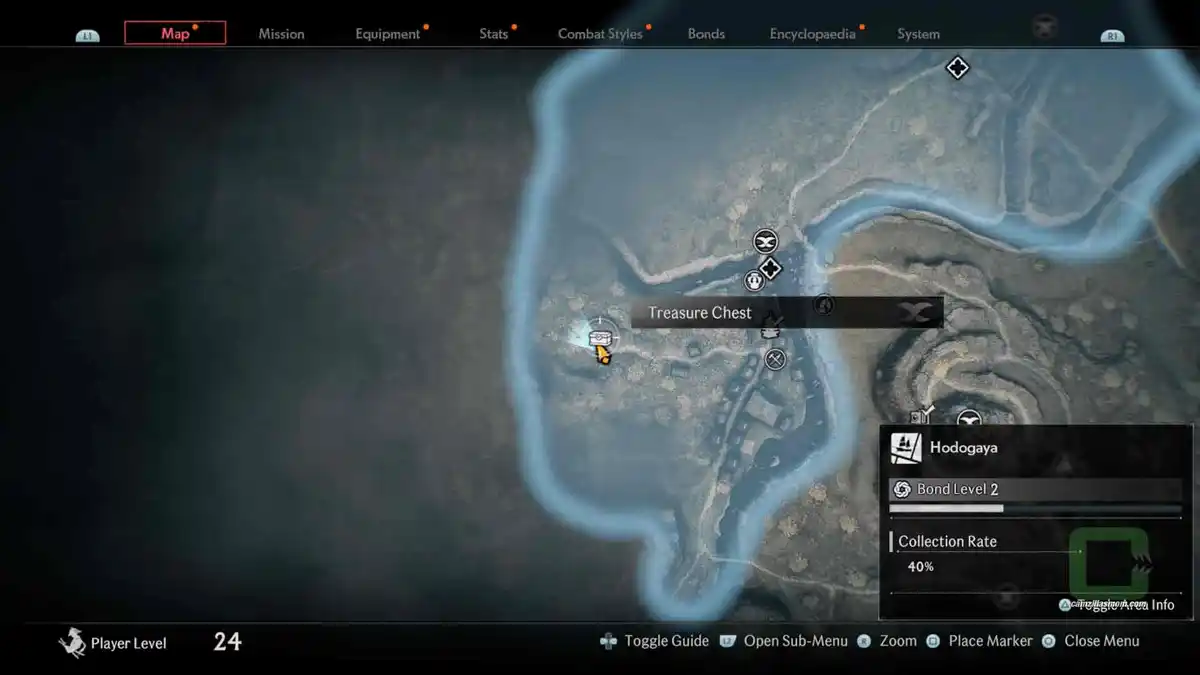
This chest is inside the half-destroyed house where the Fugitive Shirodayu Shiramine hides. Equip the Fire Pipe sub-weapon and burn through the barricade blocking the door. The chest inside contains the Scroll of Charm.
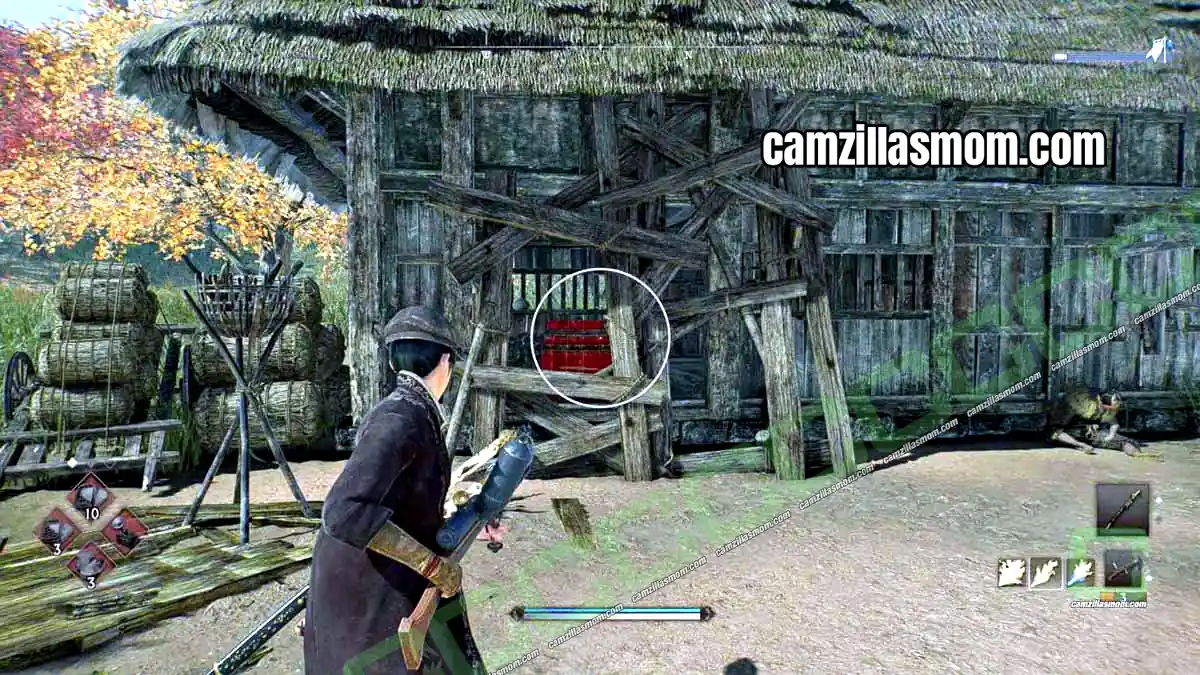
3. Mansion Storehouse Treasure Chest – Heirloom Revolver
Location: Storehouse of the mansion on the hill west of the southern settlement
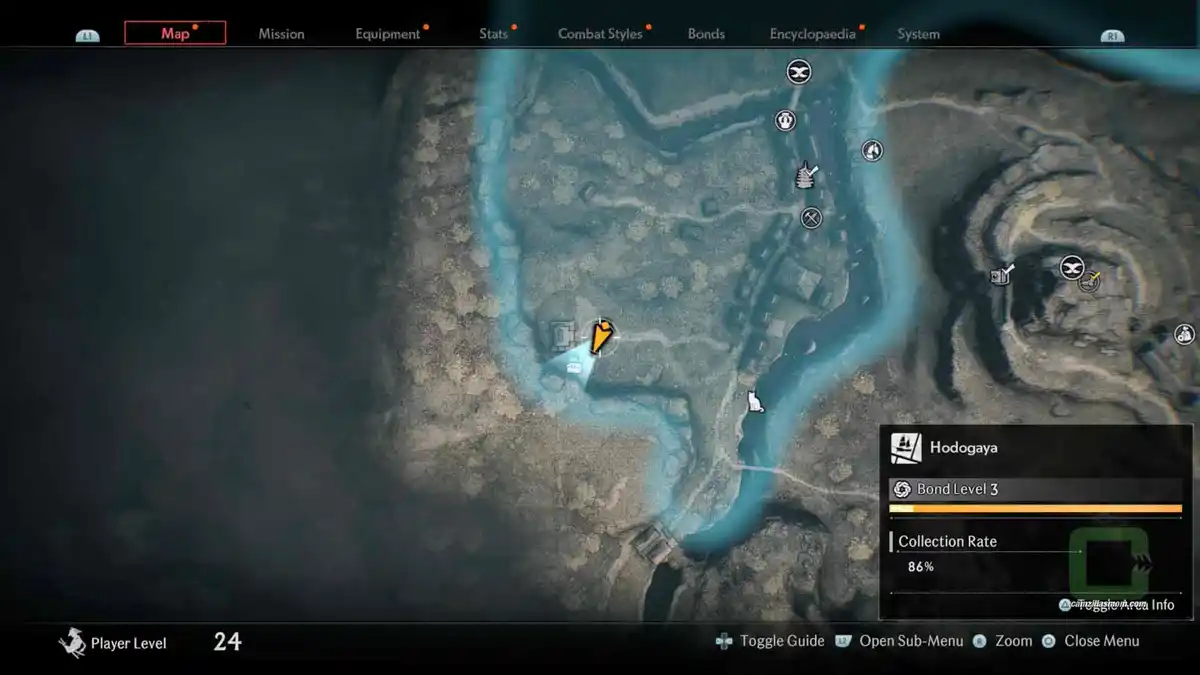
From the southern settlement, take the stone road west and climb the staircase. A mansion with a locked storehouse sits on top of the hill.
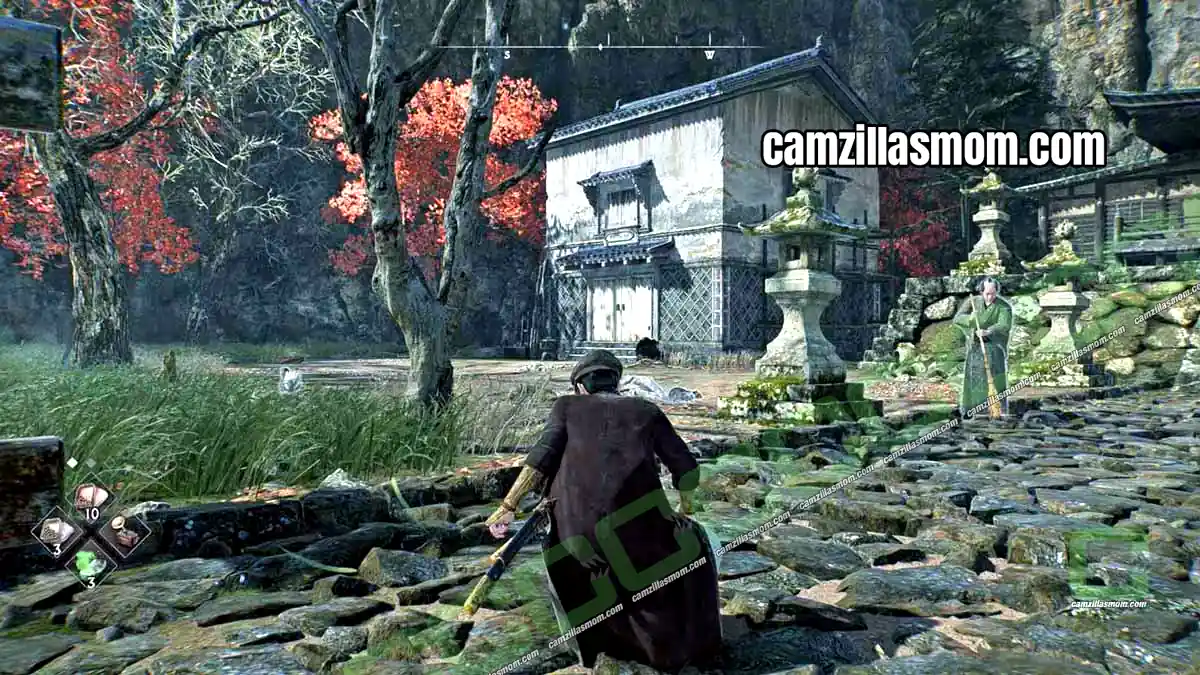
How to Get Into the Mansion Storehouse
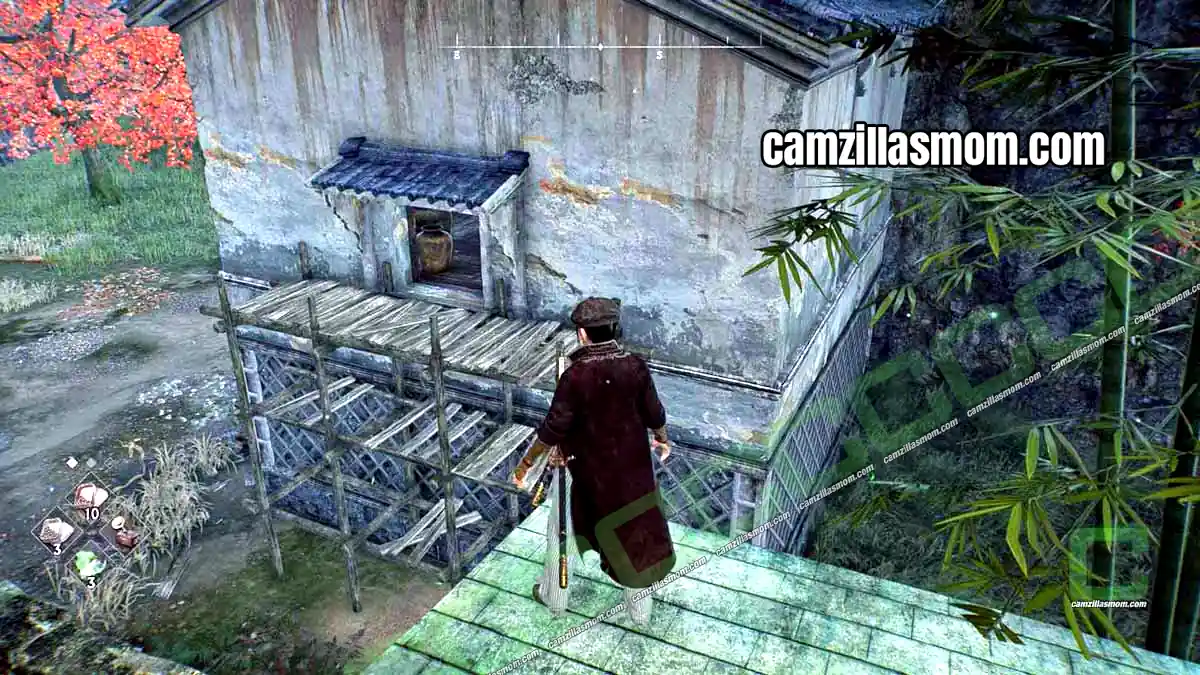
Like most storehouses in Rise of the Ronin, the door is locked from the inside, but there is an open window on the top floor. There is no visible way up to the mansion roof next to it, so climb the mountain behind the mansion instead and glide down onto the roof.
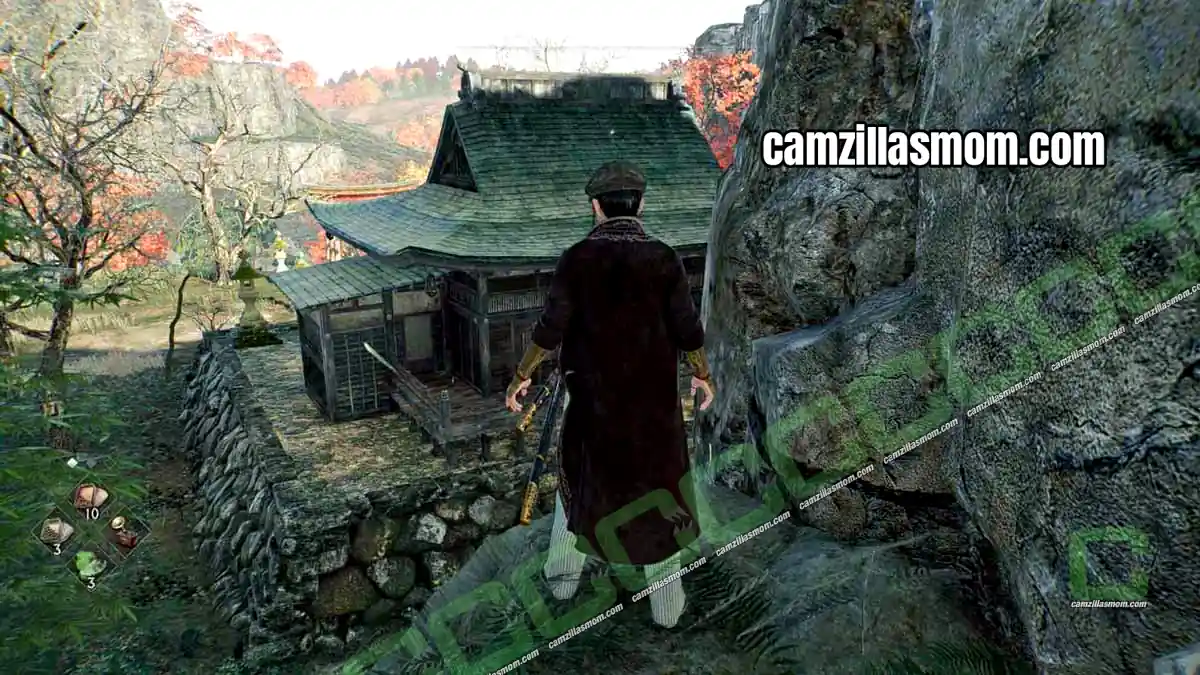
From the mansion roof, the storehouse window is just a jump away. Open the chest to get the Heirloom Revolver, and smash all the pottery in the storehouse, since more loot may be hiding there.
Giant Ginkgo Tree Photo Location
Photography spots give you rewards from the photography studio. Put the camera in one of your loadout slots and use it from there. You need all 44 photos in the game for the Sightseer trophy.
Photography Details:
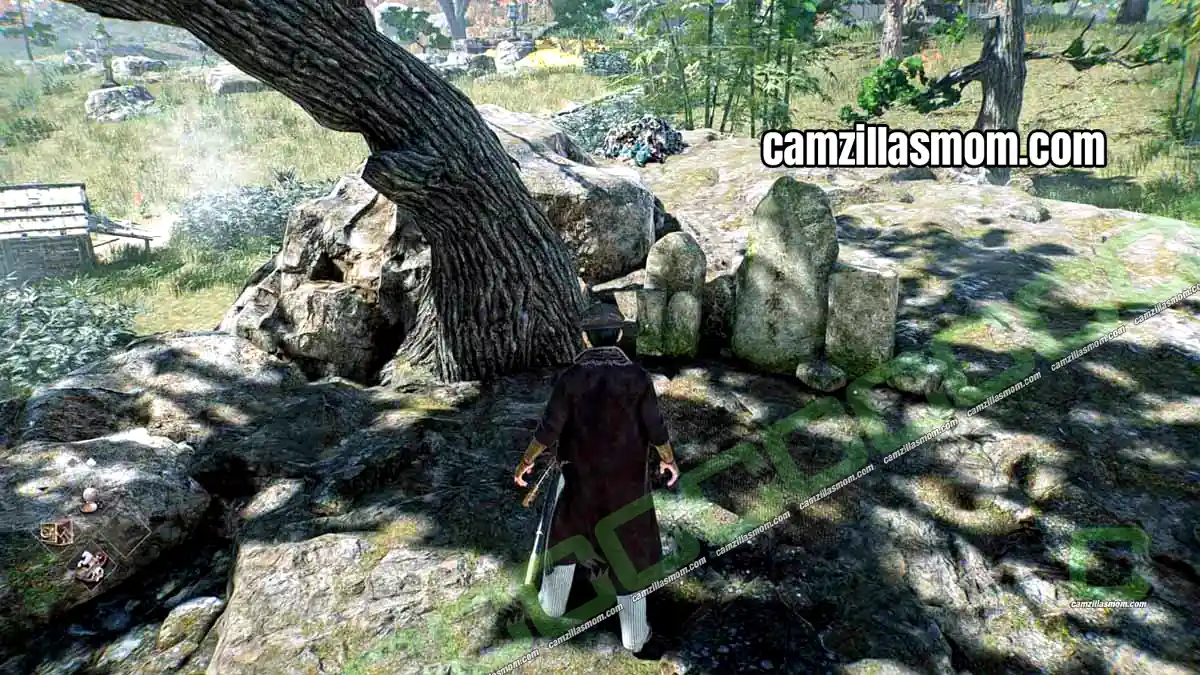
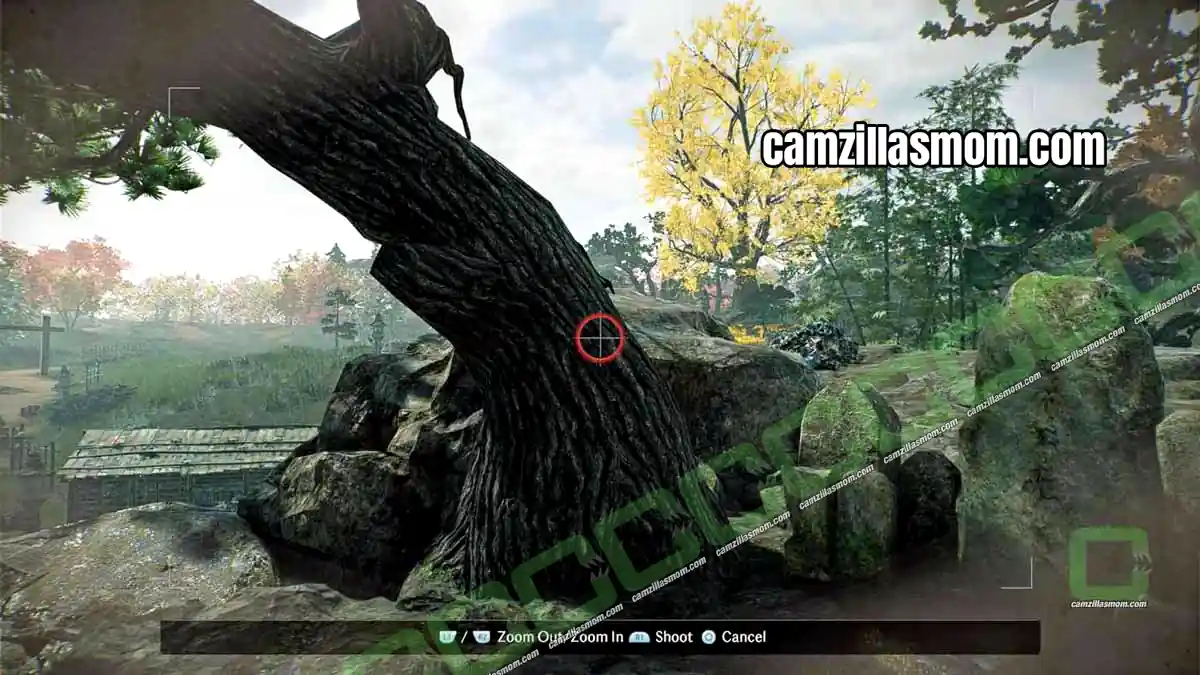
Stand next to the small stone monument under the pine tree and take a photograph of the giant ginkgo tree.
Location: Just west of the Northern Border Veiled Edge Banner
Look for a rocky platform with a small stone monument, surrounded by flat carved stones.
How to Take the Giant Ginkgo Tree Photo
Stand next to the monument, take out your camera and aim at the trunk of the ginkgo tree. Adjust your position until the circle in the center turns red, then take the photo.


About Rise of the Ronin
Release: March 22nd, 2024
Developer: Team Ninja
Publisher: Sony Interactive Entertainment
Official Website: https://www.playstation.com/en-us/games/rise-of-the-ronin/