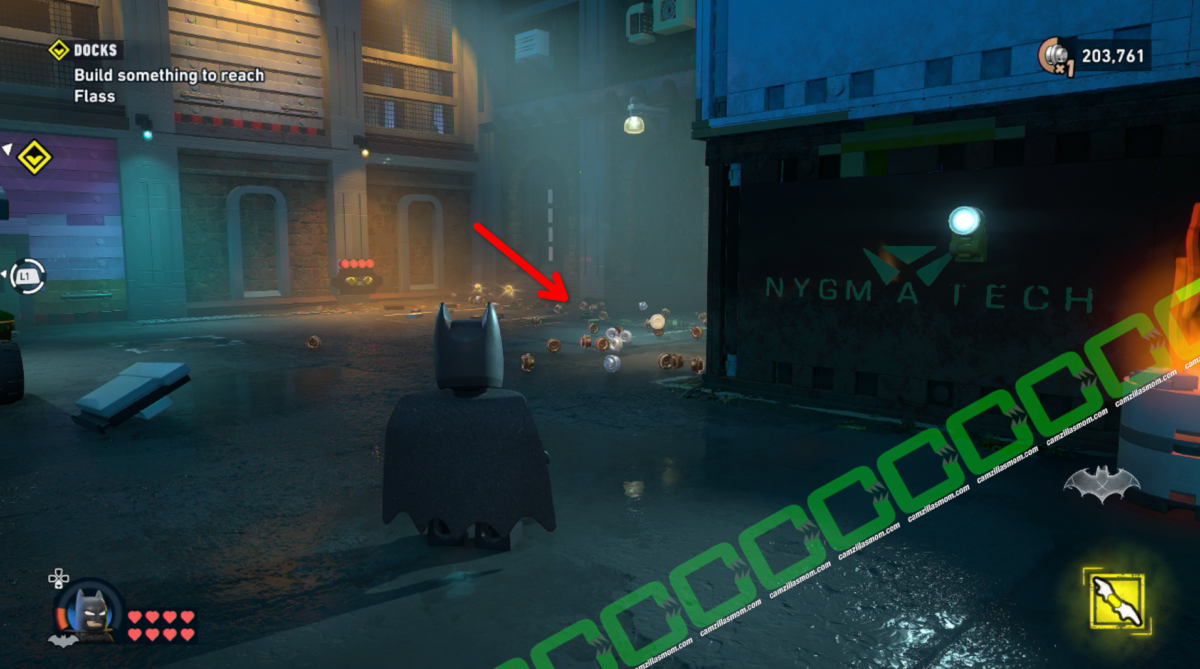
Mission 4: Carmine Falcone is the first mission in LEGO Batman: Legacy of the Dark Knight to require open-world prep before you can start. Two objectives – the Tricorner Investigation and the Riddle Me This puzzle sequence – must be completed first. Once those are done, you’ll infiltrate the Iceberg Lounge, sneak past cameras, solve the safe puzzle in the V.I.P. Lounge, and chase Falcone through his House of Fun playground. This guide covers everything, including all 5 Disco Balls, the Filthy Rich Red Brick, and all 5 Wayne Tech Caches.
Related Guides:
Mission 2: Infiltration
Mission 3: New Beginnings
Mission 5: The Red Hood Gang
LEGO Batman: Legacy of the Dark Knight Hub
All Collectibles in Mission 4: Carmine Falcone
Apart from the yellow Skill Brick at the end of the mission, you can also find:
How to Replay a Mission
In case you didn’t find all collectibles in the first story playthrough, don’t worry. You can still get it. Play the story to Mission 6: Shreck’s Department Store, where you restore the Batcave.
Then, travel to the Batcave and interact with the computer at the top, next to the red batphone. Here you can select the mission you would like to play again.


You will also see the status. If the box is ticked: Congratulations, you’ve found all the collectibles in this mission. If not, there is still work to be done!
Batcave Trophy: Disco Balls
Find and destroy 5 Disco Balls in this Mission to receive the Batcave Trophy: Disco Balls. Each adds up to the total of 170 Trophy Collectibles. Therefore, you will have 5 of 170 Trophy Collectibles after destroying all five Disco Balls.
Here’s where they are:
Red Brick: Filthy Rich
The Red Brick is in the V.I.P. Lounge. Speak to Flass. Then you can find two notes that give a clue about the safe code. You can see the code in the screenshot below.

Wayne Tech Caches
Find and open 5 Wayne Tech Caches in this Mission to receive a total of five WayneTech Chips.
Here’s where they are:
Tricorner Investigation
Investigate the Radio Call
You now have access to the open world map. Drive to the next mission destination.
(Coordinates: 295,151)


Head up to the train station and help the citizen who is being mugged.

Drive to the Break-In
Next is a break-in.
(Coordinates: 192, 167)


Grapple or climb up to the roof. Defeat the thugs on the rooftop. Renee Montoya will contact you after.


Talk to Renee
Meet Renee Montoya and talk to her as Jim Gordon.
(Coordinates: 147, 192)


Find the 3 Poster Pieces
Renee has drawn a poster of the suspect, and the three poster pieces are now scattered in the area. They are highlighted on the map. Their coordinates are:
150, 194: At the top of the roof
138, 195: At parking lot 05.
142, 211: At the top of the left storage tank.


Talk to Renee
Return and talk to Renee as Jim Gordon. Put the poster pieces together. You have to select the LEGO pieces according to the clue.
Track Down Cobblepot
Head to the highlighted location in the south of Tricorner and search for Cobblepot in the yellow area. He’s eating fish near the fishmonger. Interact with him to continue with the mission.
(Coordinates: 234, 123)


Stop Cobblepot
Chase Cobblepot with the Batmobile. You have to drive into him many times for him to crash. Pull him out of the car wreck once you have him.

Riddle Me This
Go to Harvey Bullock
Drive to the west of Tricorner (Coordinates: 136, 152) and talk to Harvey Bullock as Jim Gordon and enter the building.


Complete the Mirror Puzzle
How to solve the Mirror Puzzle:
There are three pedestals and a teddy bear. Place the teddy bear on the left pedestal. After solving the puzzle, the Riddler will officially introduce himself.


Complete the Second Mirror Puzzle
Looks like the first Mirror Puzzle was just a warmup. The second puzzle wants you to place a bust, a lamp, and a candlestick in this order from left to right. The candlestick is already there, but on the wrong pedestal. Let’s move it to the right first.
Remember: You can always use “Detect”.


Now, destroy everything to find the bust and the lamp. The bust is in the pile to the right of the mirror. Pick it up and place it on the left pedestal.


The lamp is next. Head upstairs and find the lamp next to the desk. Place it on the center pedestal to solve the puzzle.


Complete the Third Mirror Puzzle
Move on to the third Mirror Puzzle. This time, you need a lamp and a radio. Destroy everything to find the radio behind one of the shelf units. Pick it up and place it on the right pedestal.
For the lamp, just take the one from the Second Mirror Puzzle and place it onto the left pedestal of the Third Mirror Puzzle. Sneaky one!


Pick up the Riddler Puzzle Box. It is 1 of 9 of the Tricorner World map and one of a total of 121 in the game. Leave the Riddler Room when you’re done.

Back to the Iceberg Lounge
The Iceberg Lounge is in the far east of the Tricorner district (Coordinates: 238, 154). Take care of the thugs in front and enter. This is the official Mission Start!


Note:
During these open-world activities, you have been rewarded with 4x WayneTech Chips.
Iceberg Lounge
Reach the V.I.P. Lounge
After entering the Iceberg Lounge, you are introduced to Shield Enemies and how to defeat them with a dodge roll. Then, grapple up to the lights equipment to work your way to a crawlspace.


Batcave Trophy: Destroy 5 Disco Balls
Destroy 5 Disco Balls in this Mission 4: Carmine Falcone to receive the Batcave Trophy: Disco Balls as a reward. Every Disco Ball counts as 1 of 170 trophy collectibles.
The first is just next to the crawlspace. You can also shoot them with the batarang.

There is a control room at the end of the crawlspace. Here you will be introduced to Security cameras and how to avoid them by throwing a batarang to temporarily disable the camera.


5 WayneTech Caches
Find and open 5 Wayne Tech Caches in this Mission 4: Carmine Falcone to receive the 5 Wayne Tech Chips as a reward.
Before going through the control room crawlspace, the first Wayne Tech Cache is in the same control room as the security camera introduction.

Exit the control room crawlspace on the other side. Use a batarang to destroy the padlock on the spinning lights. Then switch to Jim Gordon and use his Foam Sprayer to block the mechanism.


Batcave Trophy: Destroy 5 Disco Balls
Destroy 5 Disco Balls in this Mission 4: Carmine Falcone to receive the Batcave Trophy: Disco Balls as a reward. Every Disco Ball counts as 1 of 170 trophy collectibles.
The second is after the control room crawlspace. Throw a batarang to destroy it.

With the lights no longer moving, you can now cross over to the other side. There is another camera here. Shoot it with a baterang to reach the other side. The door with the label Warning: Restricted Area is locked, but you can grapple towards the windows on the same level.


Shimmy to the right, and then climb up the rails to the top, where you can reach another crawlspace. As soon as you exit, the objective changes to “Defeat the enemies“.


Speak to Flass
After defeating all enemies, Flass appears, and you can talk to him. Before you do that, consider picking up the Red Brick in the other room and destroying Disco Ball 3 of 5.

Red Brick: Filthy Rich
This Red Brick is in the V.I.P lounge in the room with the windows. There is a note on the red couch. When you turn it, it says X96.


The last two numbers for the Red Brick safe are 9 and 6. Now it is just a matter of trial and error to figure out that the code is 596. There is a second note in Selina’s room that reads “59x”. She will open the door after talking to Flass.
Batcave Trophy: Destroy 5 Disco Balls
Destroy 5 Disco Balls in this Mission 4: Carmine Falcone to receive the Batcave Trophy: Disco Balls as a reward. Every Disco Ball counts as 1 of 170 trophy collectibles.
The third is in the V.I.P. Lounge.

Reach Falcone’s Office
After Selina has opened the big door with the snowflake symbol, you will see that the next area is heavily guarded by thugs and cameras. Sneak past them. Then, destroy everything, including the silver fish on the wall, to build a giant fist. Interact with it to blast the door open.
Defeat the thugs inside the kitchen.


Search for the Food Items
Open the fridge to find a huge burger. Place it on the center plate.


Enter the walk-in fridge and shoot the two cold-air blasters using Jim Gordon’s Foam Sprayer. This will melt the ice, and you can take the ice cream to the plate. Return to the walk-in fridge to find a blue stud.


For the last food item, shoot the padlock on the kitchen door. It’s another walk-in fridge. Interact with the mechanism and turn it only as far as you can get to the sushi behind the row of fish. Switch to your other character to grab it. Take it to the last plate.


Reach Falcone’s Office
You take the cart and ride the elevator up to the next floor with Falcone’s Office. Take down the thugs here, and descend to find more thugs and cameras.


5 WayneTech Caches
Find and open 5 Wayne Tech Caches in this Mission 4: Carmine Falcone to receive the 5 Wayne Tech Chips as a reward.
Before heading down to Falcone’s Office, look for a crawlspace in the “Sha-kham Asylum” sign area. Crawl through to find an electric box. Stop it with Jim Gordon’s Foam Sprayer.

Now you can pick up the power cord and plug it into the slot where the Wayne Tech Cache is locked in. Then, throw a batarang at the foam to restore power and access the Wayne Tech Cache.


More thugs await in an area called “Falcone’s House of Fun“. Take care of the thugs, then destroy everything. The skull needs to be destroyed. Notice that it has a mechanism in its mouth. Shoot it with Jim Gordon’s Foam Sprayer to destroy it. Now you have all the parts you need to build a catapult. There are bowling balls nearby. Place one in the catapult, then use it to blast a hole in the wall above the door.


Grapple through that hole and slide down into the ball pool and a playground area. There are plenty of grapple points here to take down the thugs silently. Red arrows on floors and walls will point the way.


5 Wayne Tech Caches
Find and open 5 Wayne Tech Caches in this Mission 4: Carmine Falcone to receive the 5 Wayne Tech Chips as a reward.
Just after entering the playground, with the first slide, get on the upper level of the first room. Here, squeeze through the two blue rolls to find the third WayneTech Cache.

Batcave Trophy: Destroy 5 Disco Balls
Destroy 5 Disco Balls in this Mission 4: Carmine Falcone to receive the Batcave Trophy: Disco Balls as a reward. Every Disco Ball counts as 1 of 170 trophy collectibles.
The fourth Disco Ball is in Falcone’s House of Fun.

Continue to the second slide and use the grapple points if you want an overview before engaging the thugs down there.

5 WayneTech Caches
Find and open 5 Wayne Tech Caches in this Mission 4: Carmine Falcone to receive the 5 Wayne Tech Chips as a reward.
In this pool, right after the slide, there’s a vent (covered with balls but interactable) you can go through to the other side, into a storage room with a Wayne Tech Cache.


Reach the next building area, which has a DJ. and a bouncy castle. Block both stereos with Jim Gordon’s Foam Sprayer so you can get past them to slide to the next level.


5 WayneTech Caches
Find and open 5 Wayne Tech Caches in this Mission 4: Carmine Falcone to receive the 5 Wayne Tech Chips as a reward.
Before leaving, look for the padlock above the bouncy castle and shoot it with a batarang. Then do a Big Bounce on the bouncy castle to reach the last of the five Wayne Tech Caches.


After the long slide, take care of the two thugs, destroy everything to build a drill that takes you to Falcone’s office without using the elevator. At the bottom, you will have to play a little dance mini-game for studs.


Batcave Trophy: Destroy 5 Disco Balls
Destroy 5 Disco Balls in this Mission 4: Carmine Falcone to receive the Batcave Trophy: Disco Balls as a reward. Every Disco Ball counts as 1 of 170 trophy collectibles.
Before leaving with the drill, make sure to destroy the last Disco Ball in this area.

Chase Falcone
After the little dance mini-game at the bottom of the drill, you will have to fight some more thugs and chase after Falcone. Starting at the V.I.P. lounge, you get the second opportunity to get the Red Brick in case you’ve missed it before. Just follow the golden studs. Then chase after Falcone, following the signs to the Warehouse.


Follow him through the party area to a door at the other end, where you will have to fight another round of thugs and keep following Falcone.


Rewards
Completing the fourth Mission, Carmine Falcone, grants:
-> 1 Skill Brick (Yellow Brick)
Additional Collectibles:
-> Batcave Trophy: Disco Balls
-> Red Brick: Filthy Rich
-> 5x Wayne Tech Caches
Suit Collectibles:
-> 1x Batman (Bronze Age)
-> 1x Jim Gordon (Golden Age)
More LEGO Batman: Legacy of the Dark Knight Guides

LEGO Batman Legacy Mission 3 New Beginnings Walkthrough – All Collectibles, Surfboards & Red Brick
Step-by-step walkthrough for Mission 3: New Beginnings in LEGO Batman: Legacy of the Dark Knight. In…

LEGO Batman Legacy Tricorner – 100% Collectibles Guide
Complete guide to all activities and collectibles in the Tricorner district of LEGO Batman: Legacy o…

LEGO Batman Legacy: All 14 Falcone Fortune Heists
Complete guide to all 14 Falcone Fortune Heist locations and solutions in LEGO Batman: Legacy of the…

LEGO Batman Legacy: All 15 Puzzle Room Locations and Solutions
Find all 15 Puzzle Room locations and solutions in LEGO Batman: Legacy of the Dark Knight. Covers al…

LEGO Batman Legacy: All 20 WayneTech Caches in Tricorner
All 20 WayneTech Cache locations in Tricorner with coordinates, overview map and puzzle solutions – …

LEGO Batman Legacy: All 23 Red Bricks – Locations and Looks
Complete guide to all 23 Red Bricks in LEGO Batman: Legacy of the Dark Knight. Find all Story Missio…


About LEGO Batman: Legacy of the Dark Knight
Release: May 22nd, 2026
Developer: TT Games
Publisher: Warner Bros. Games
Official Website: https://legobatmangame.com/


