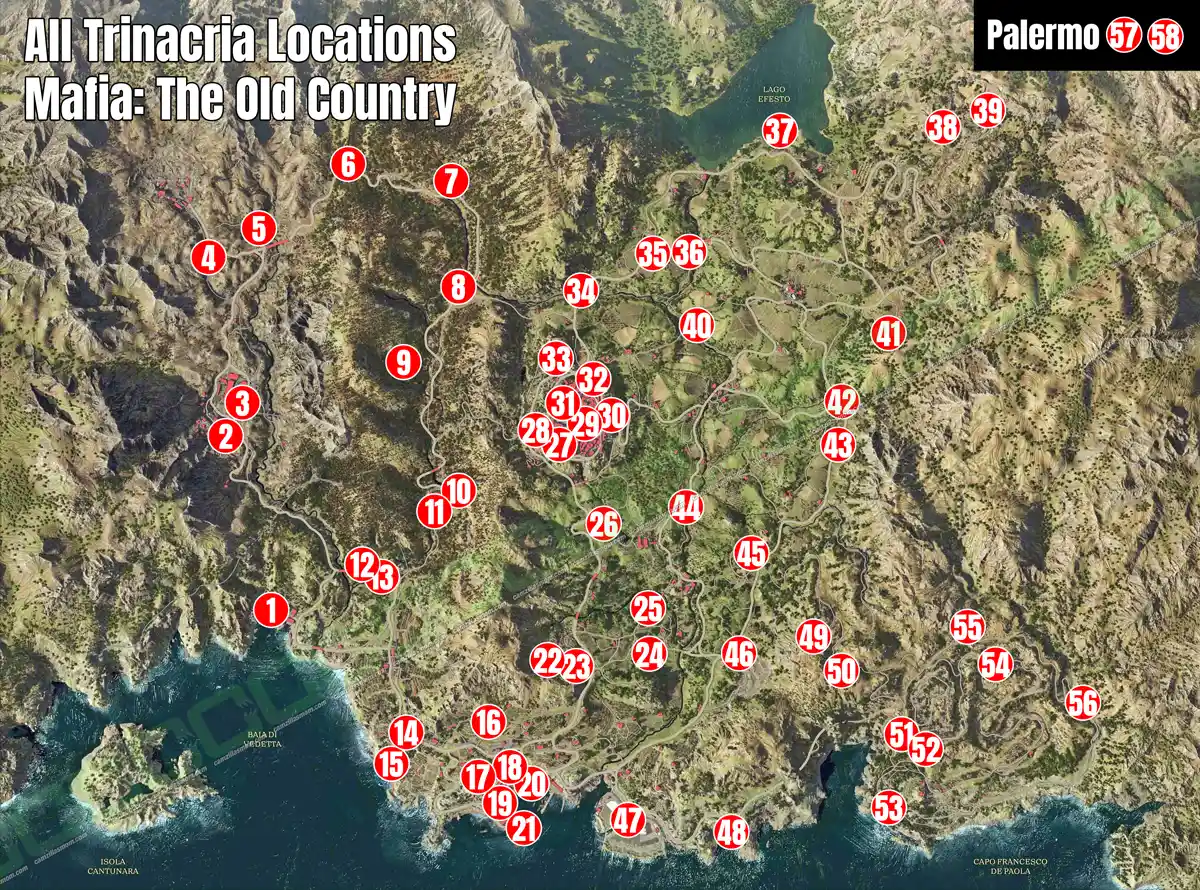
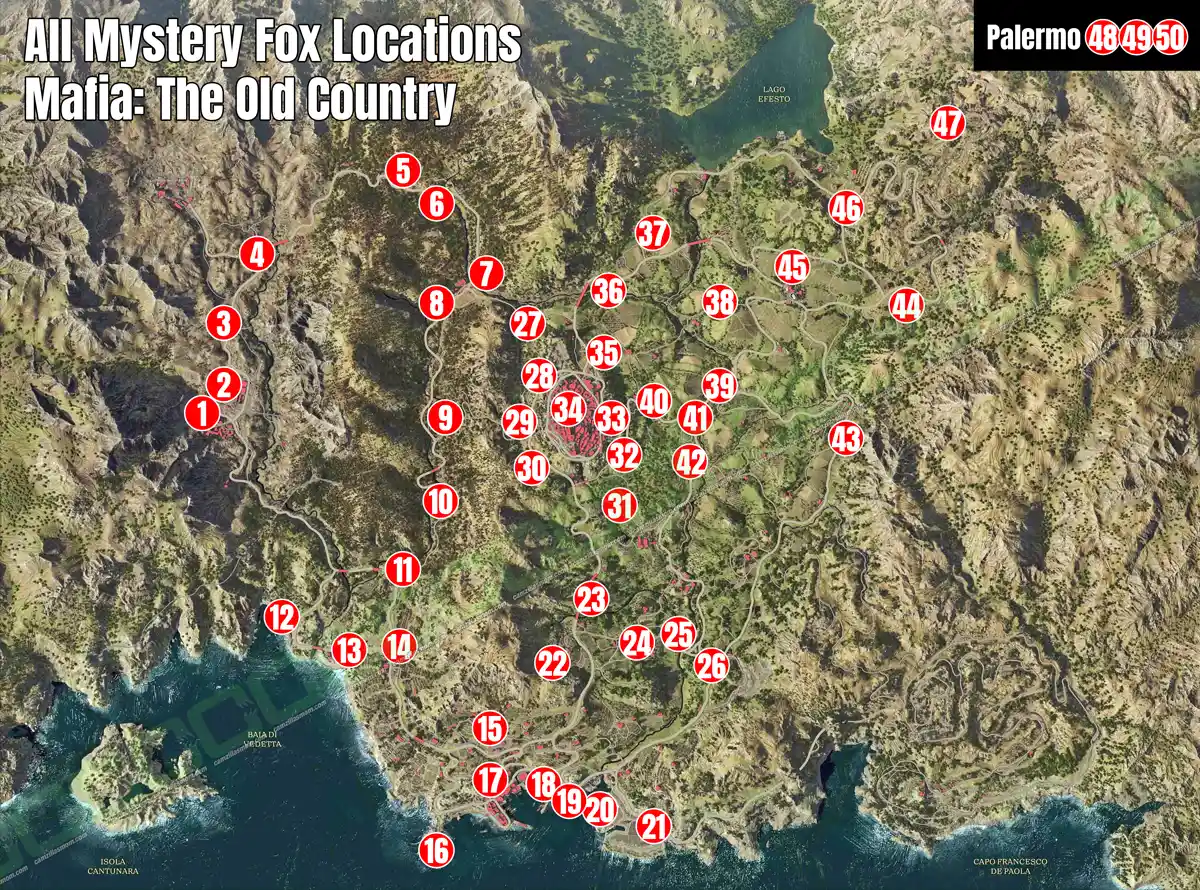
If you’re diving into the immersive world of Mafia: The Old Country and aiming to uncover every hidden gem, this guide is your ultimate ally. Packed with detailed maps, chapter-specific breakdowns, and step-by-step instructions, it ensures you won’t miss a single collectible. From Trinacrias to Saints’ Cards, and everything in between, this comprehensive resource is designed to enhance your gameplay and help you achieve 100% completion.
-> More Guides at the Mafia: The Old Country Hub
Prologue – Tremori
In the Prologue: Tremori, there are 10 collectibles:
9 Journal Notes, and 1 Saint’s Card.
First Mine Section
Journal Note 1 of 9
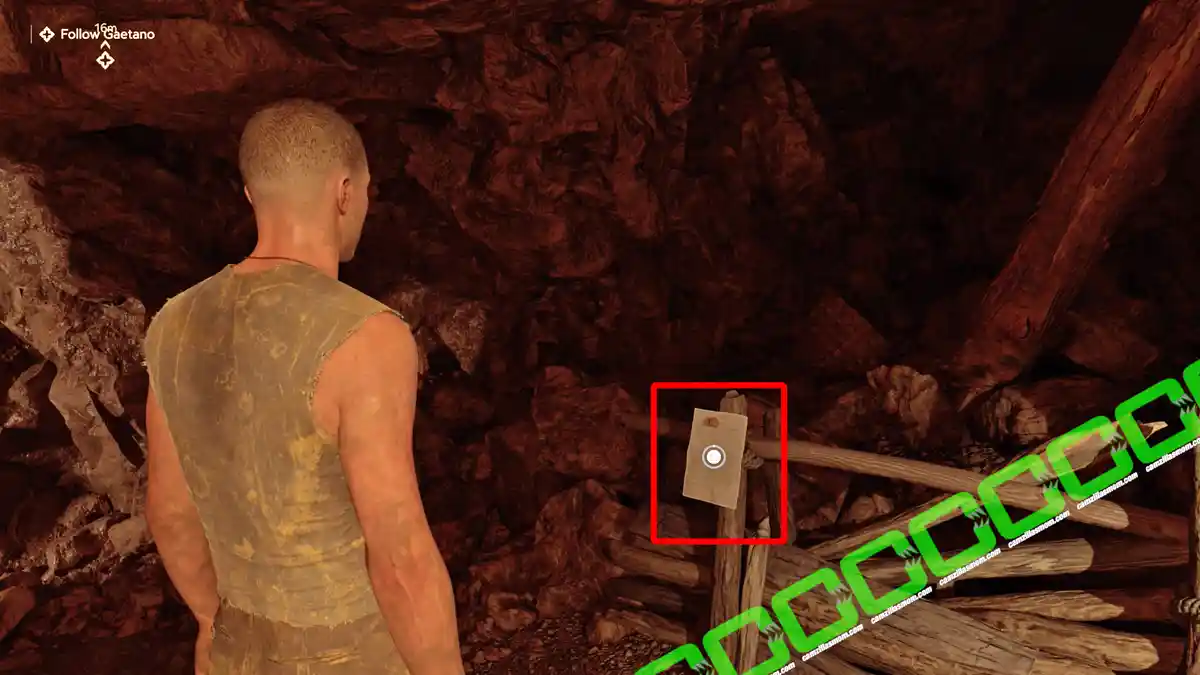
You can find this Journal Note: “Notice – Mine Decommissioned” collectible in the Prologue at the very beginning of the Chapter. After retrieving the money and watching Enzo discard his toy horse in the sulfur mine, proceed along the mine’s path. Keep an eye out to your right for an interactive note. – Please note, the map is not accessible at this point.
Outside of the Mine & Food
Saints’ Card: Santa Barbara

The card of Santa Barbara is the first of the Saints Cards to collect in Mafia: The Old Country. After leaving the sulfur mine with Galetano in the Prologue, Galetano tells Enzo to pray at the shrine. Interact with the shrine to receive the Saints Card.
Journal Note 2 of 9
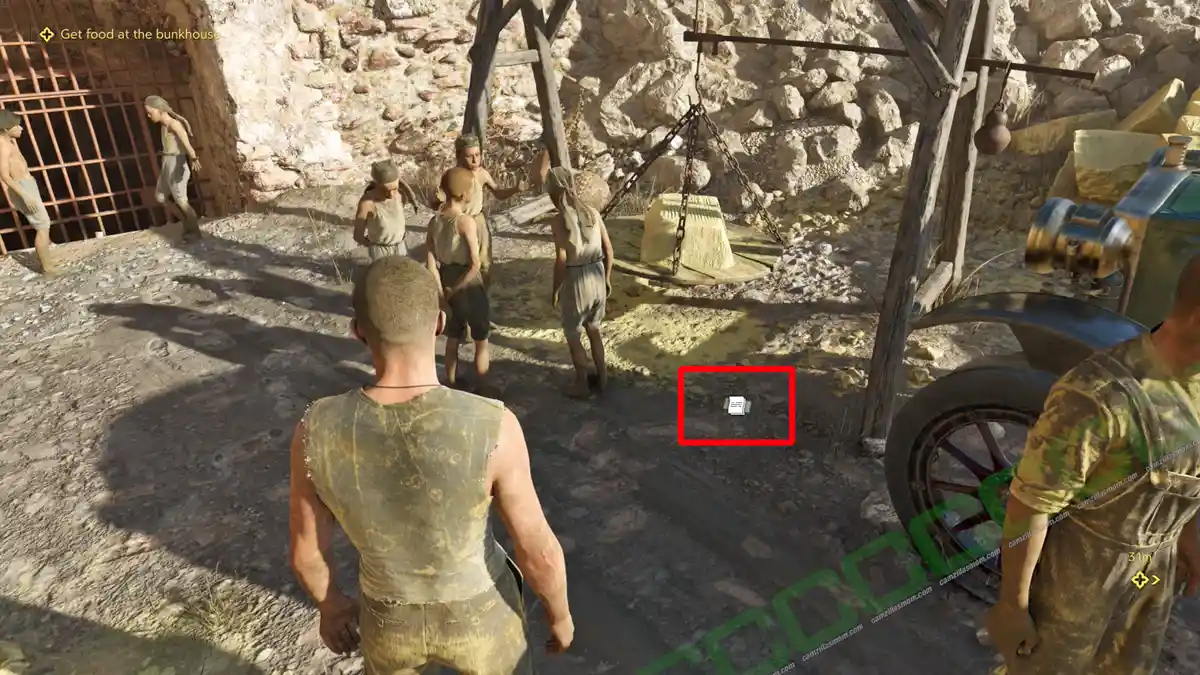
After picking up the Saints’ Card, don’t follow Gaetano to the kitchen yet. From the Saints Card location, turn right at the bottom of the path to find the Note: “Drawing of Il Merlo” in front of a truck.
Journal Note 3 of 9
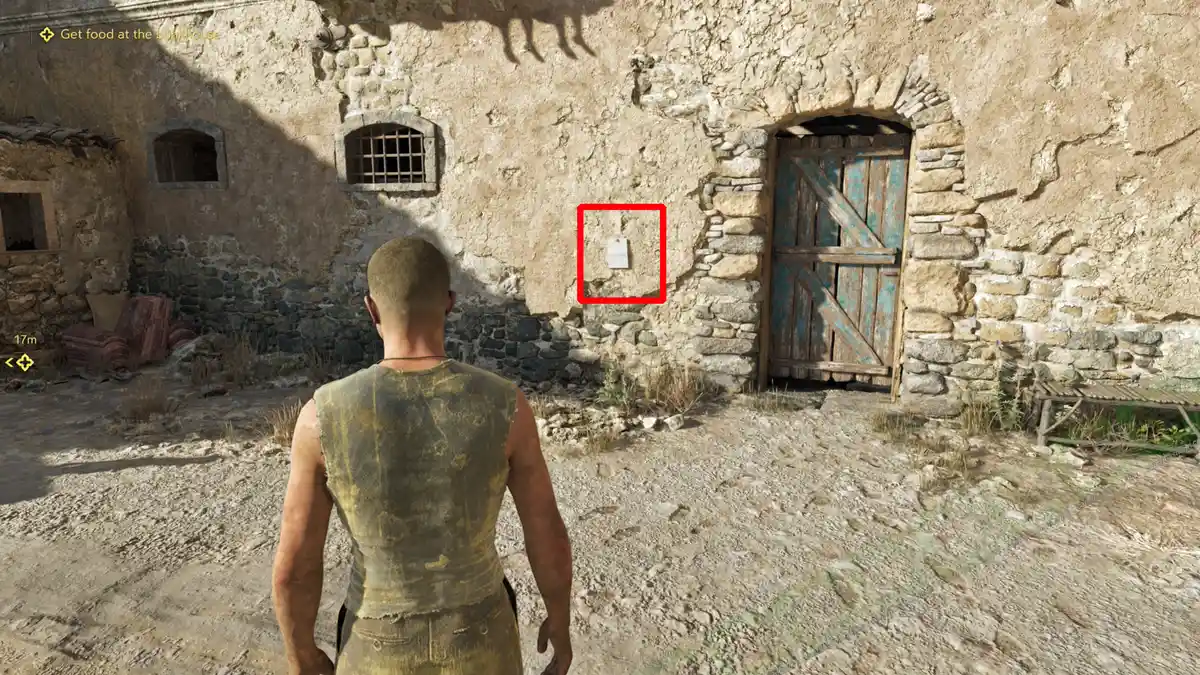
Then, walk towards Gaetano and pick up the note next to the blue door.
Journal Note 4 of 9
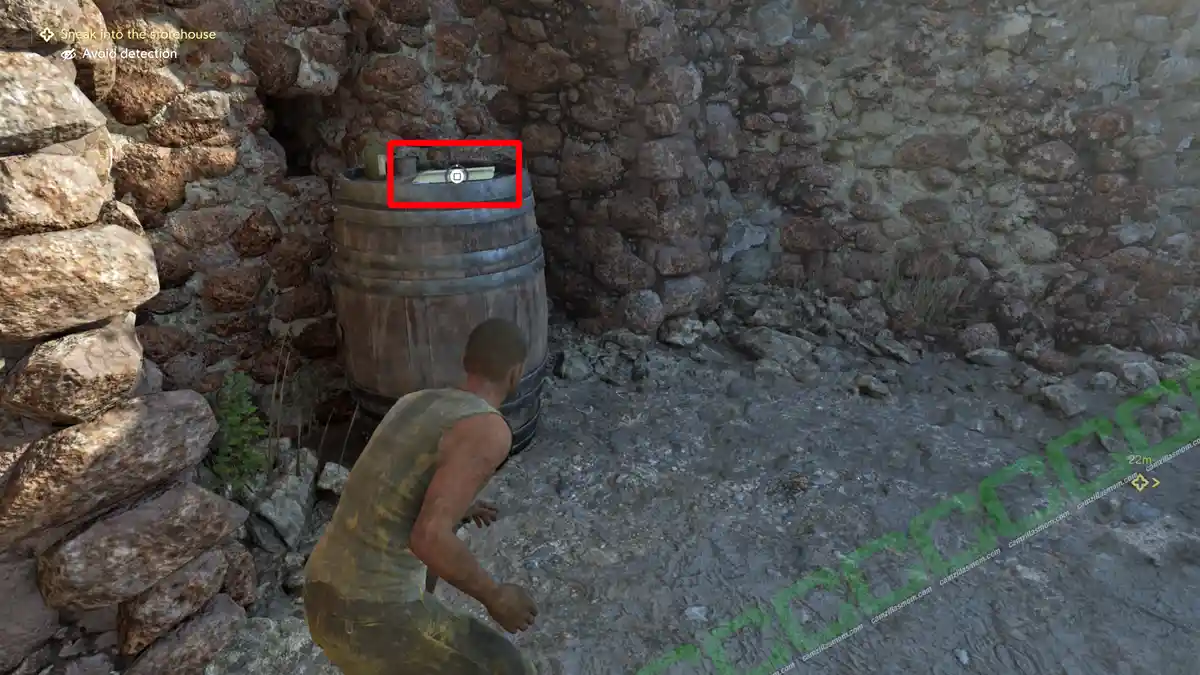
Enzo and Gaetano discover that the kitchen is closed. Hungry, Enzo goes off to steal some food. In this section of the game, sneaking is introduced. After sneaking past the first two guards, you can find the note: “Stakeholder Friction” on top of a barrel.
Journal Note 5 of 9
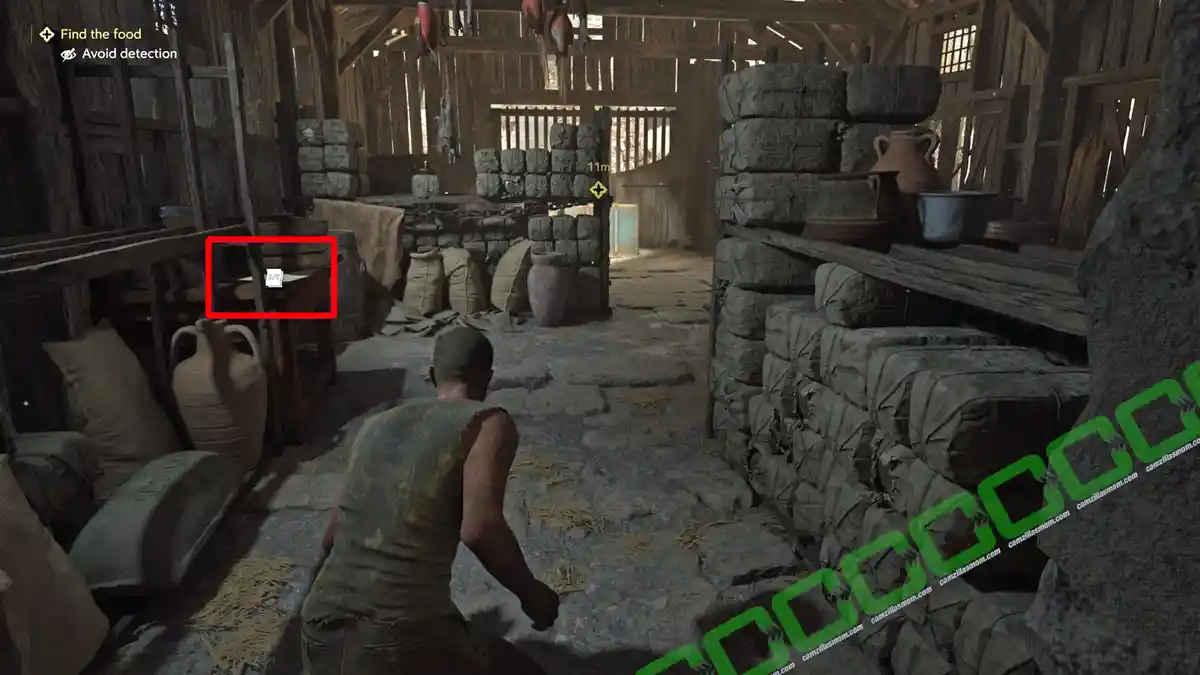
Further along, Enzo finds a knife to break the lock of the storeroom. After entering the storeroom, the note: Letter – Board of Directors is to the left.
Journal Note 6 of 9
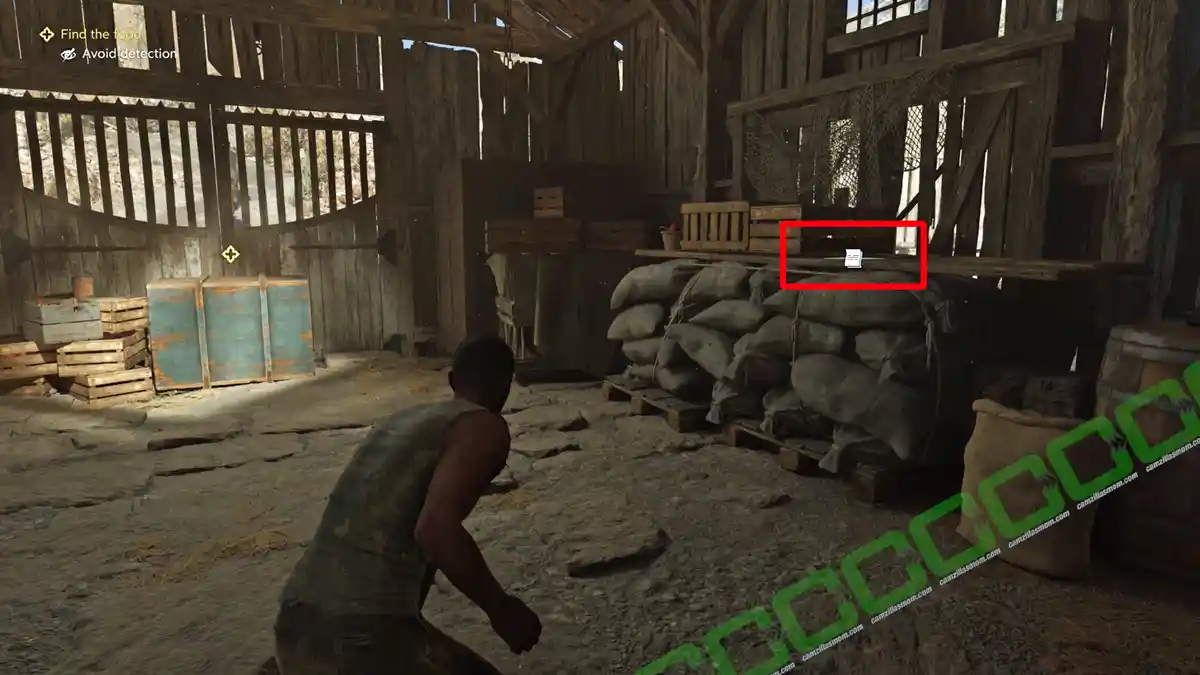
Also in this storeroom, close to the food box, is the note: “Delivery Invoice – Policardo Supplies”.
Journal Note 7 of 9
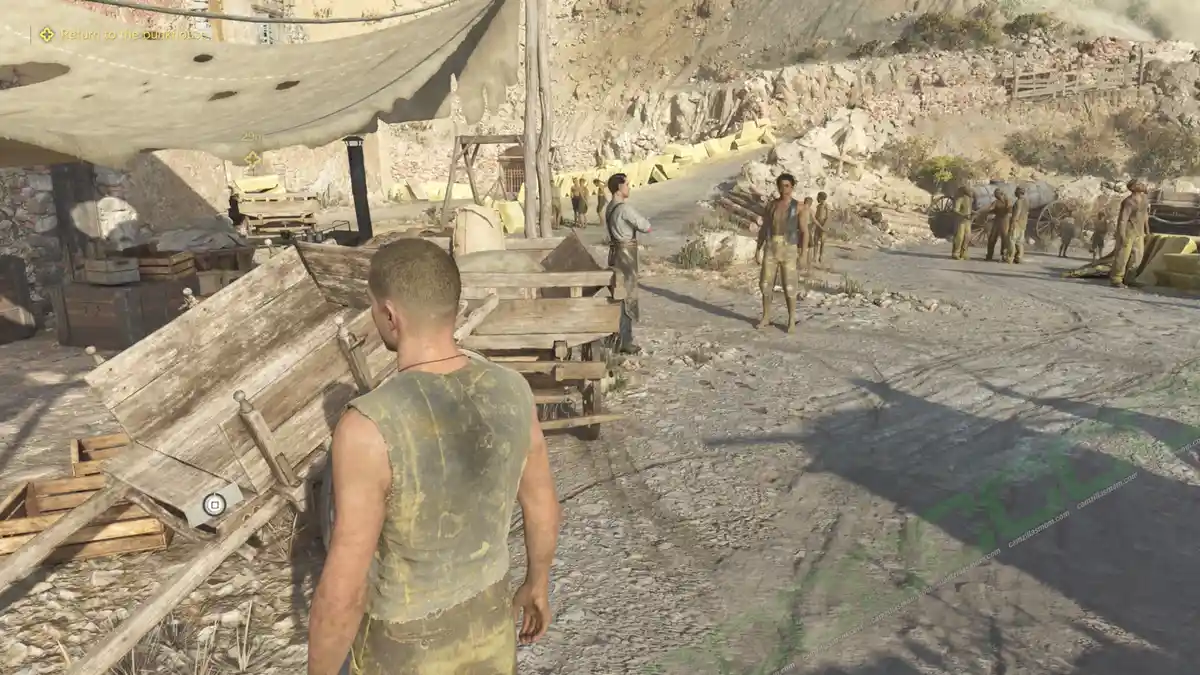
After climbing out of the window with a piece of bread, the friends return to the kitchen, where you can find the note: “Cutting Portions” on top of a cart.
Missing Miners
Journal Note 8 of 9
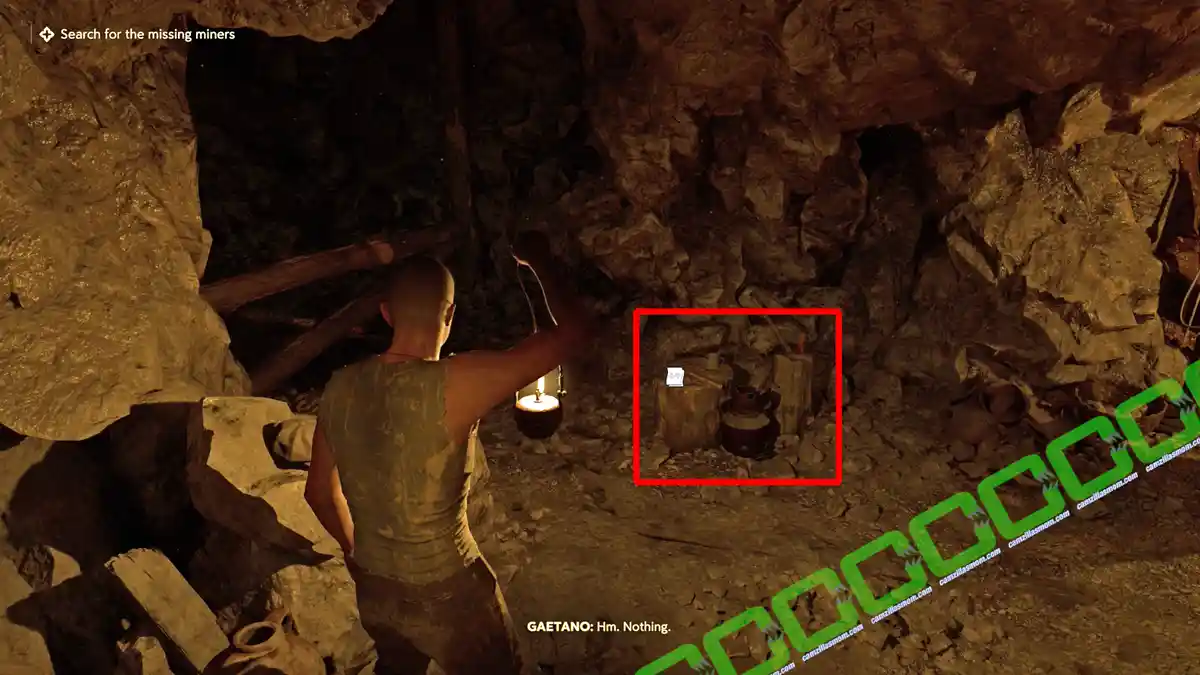
Next, Gaetano and Enzo are sent down to the mine by Il Merlo and Don Spadaro to find the missing miners. Walk until you get to a closed-off passage, where Gaetano will call out to Federico, one of the miners. Here, to the left of the closed-off passage, is the note: New Deposits – East Mine.
Journal Note 9 of 9
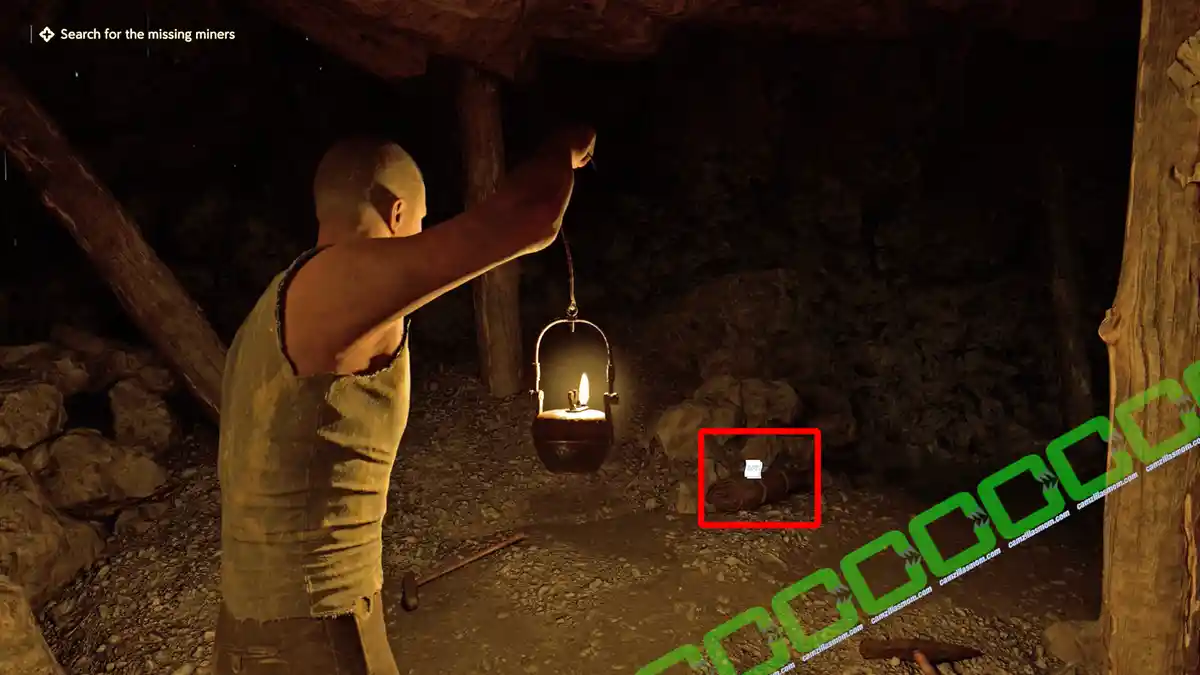
Head to the left from the last note to find a place where they usually store water. But the water is all used up or dried up. Slide down, deeper into the mine. At the end of the slide, you will discover this bundle together with the note: Catarina’s Letter.
Chapter 1 – Famiglia
In Chapter 1: Famiglia, there are 9 collectibles:
8 Journal Notes and 1 Charm.
Journal Note 1 of 8
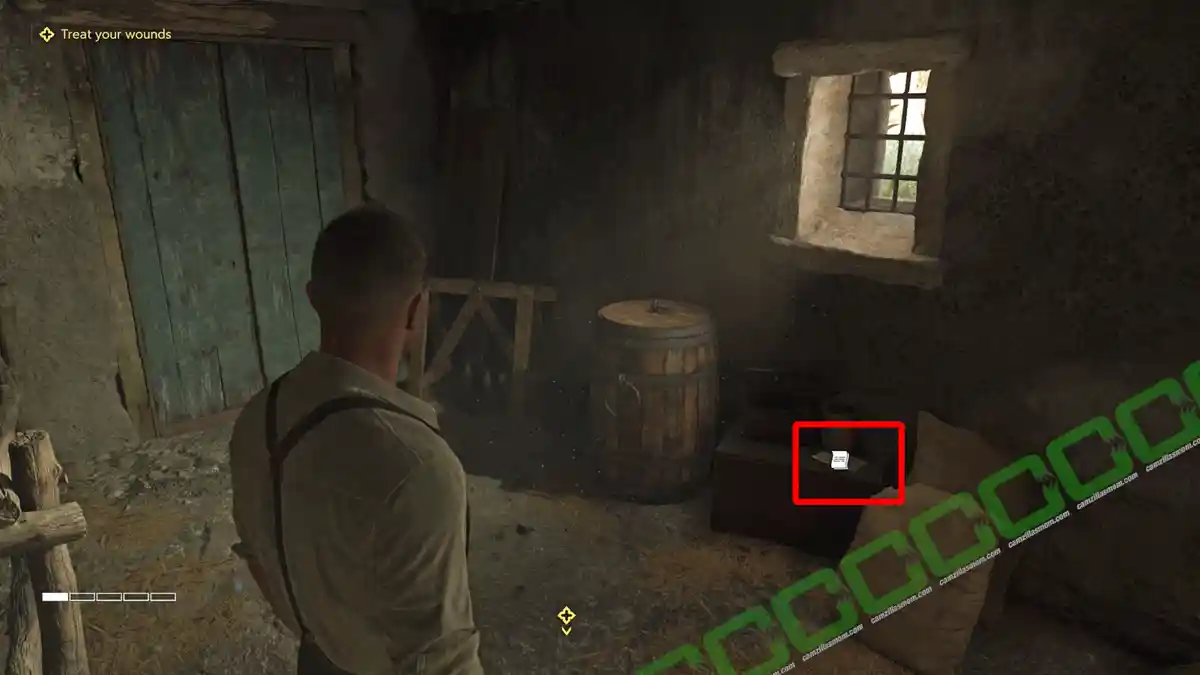
In Chapter 1: Famiglia, Enzo is recruited by Don Torrisi and gets to stay in a shabby room. Next to the bed, the note: Harvest Instructions can be found
Journal Note 2 of 8
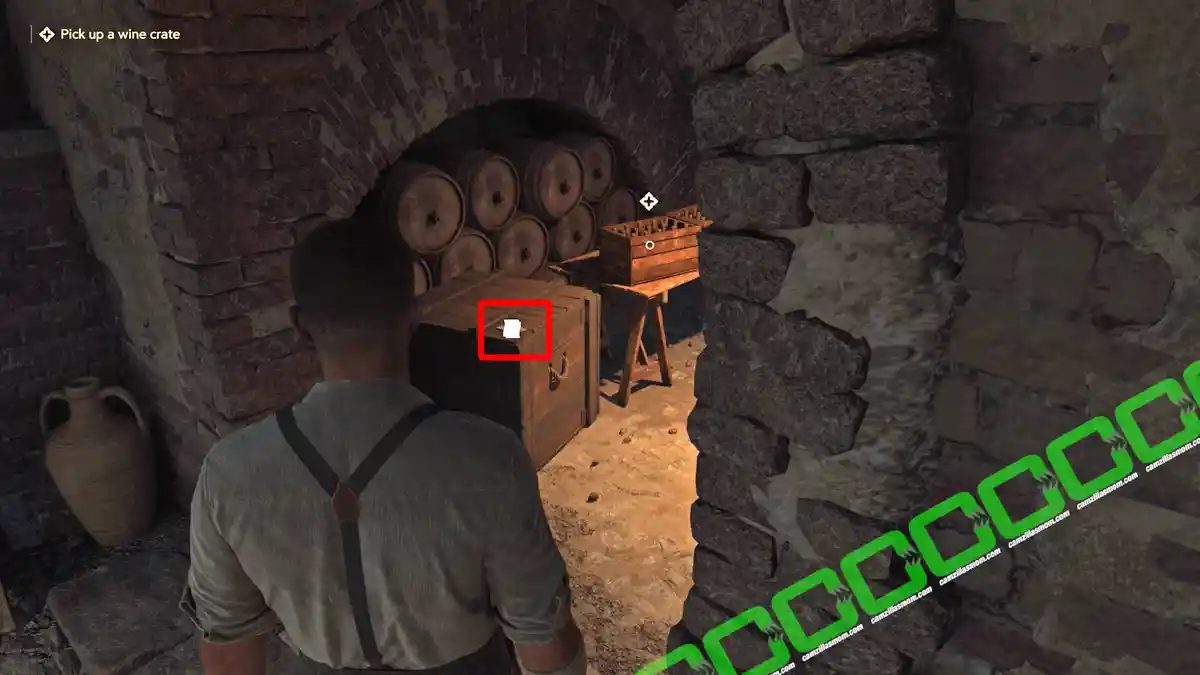
Cesare then has a job for Enzo in the Wine Cellar, where you can pick up this Journal Note: Delivery Schedule right next to the quest crate that he needs to carry next.
Journal Note 3 of 8
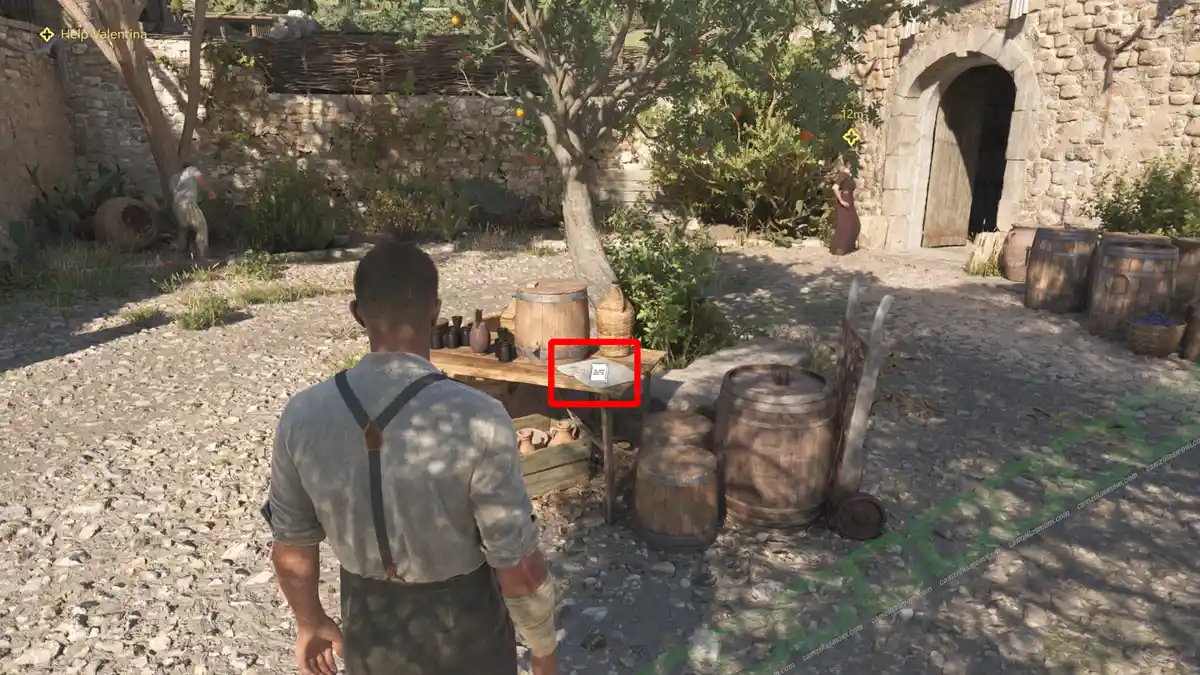
After, Cesare instructs Enzo to seek out Valentina for work. Within the small courtyard, a note: Bandit Menace can be found resting on a table.
Journal Note 4 of 8
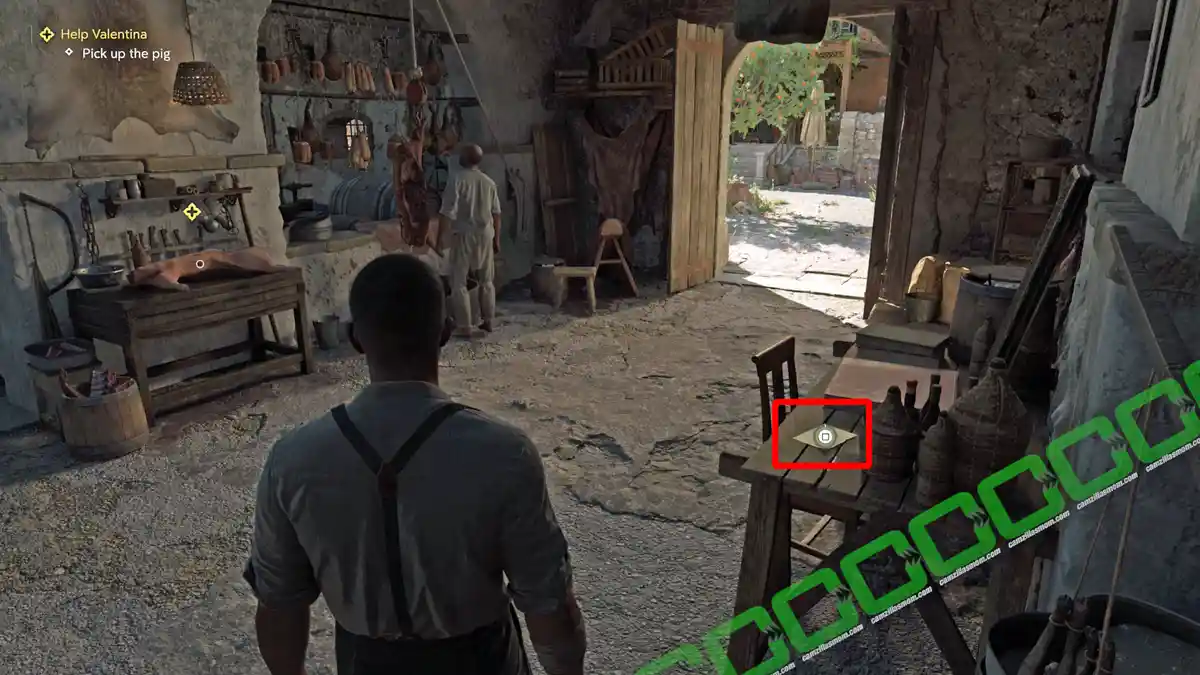
Valentina wants Enzo to carry a pig. In the same room as the pig is the note: A Gift From Gulotta.
Journal Note 5 of 8
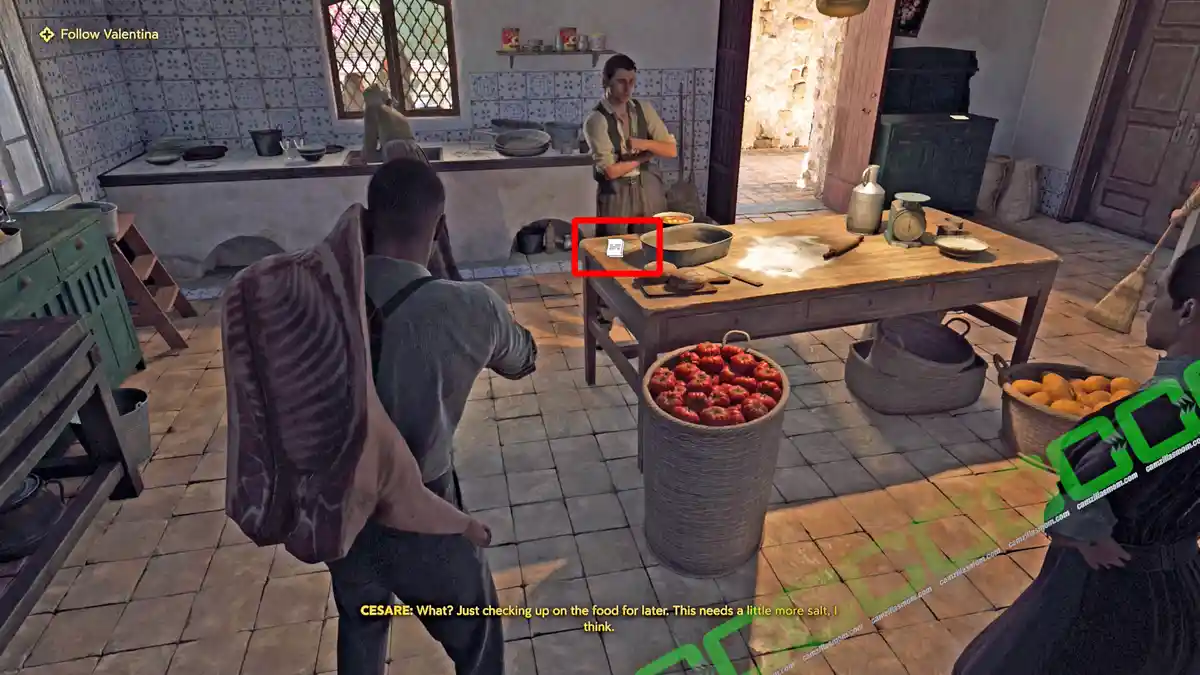
Follow Valentina into the kitchen, carrying the pork. The recipe: Valentina’s Pork Spezzatino is on the kitchen table.
Journal Note 6 of 8
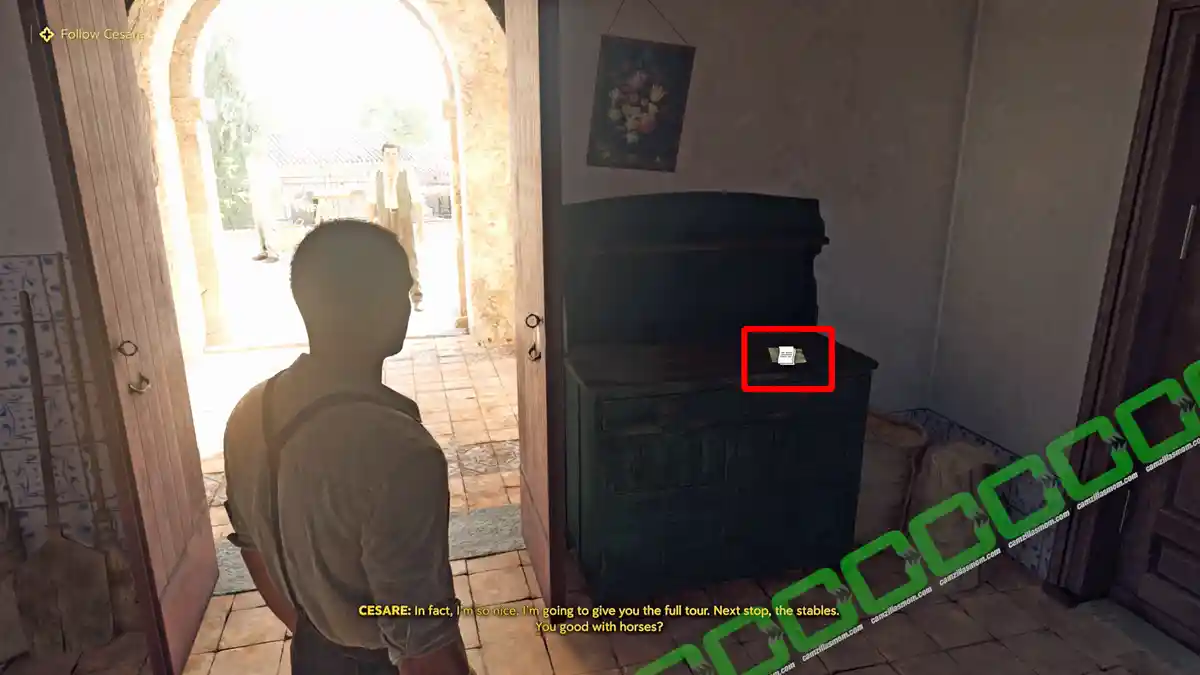
Also in the kitchen, find the note: Guest List on top of a piece of furniture.
Journal Note 7 of 8
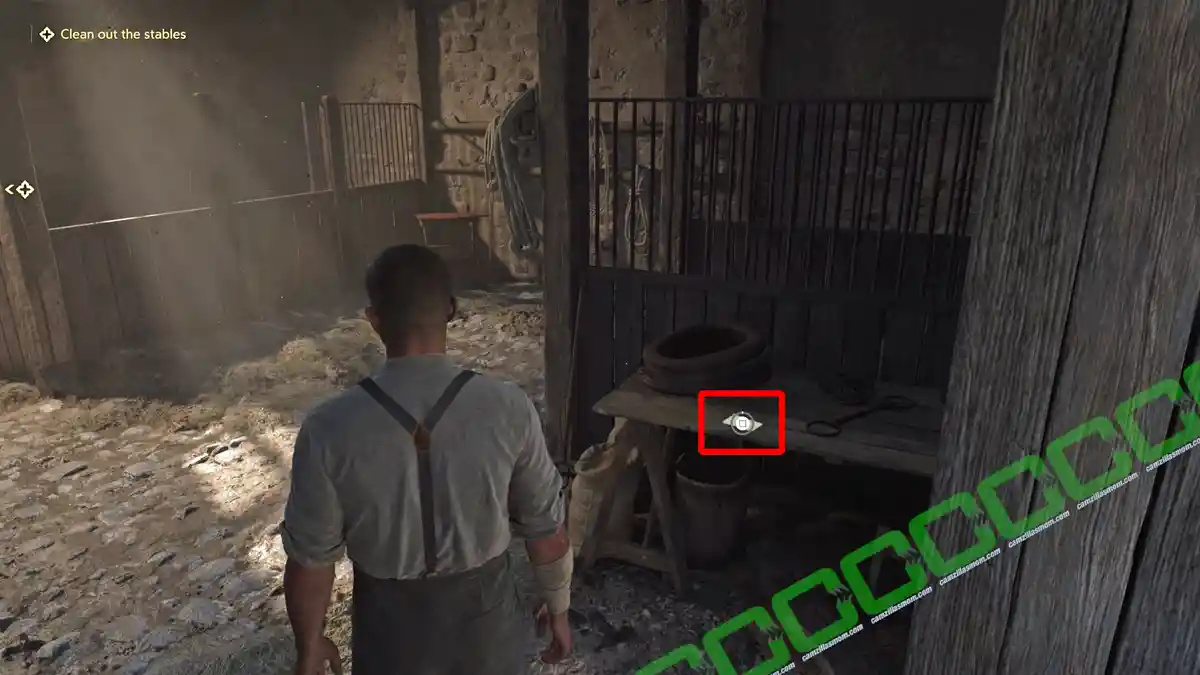
Enzo has to clean the stables next. The note: Cosimo’s Care is inside the stables.
Journal Note 8 of 8 & Sant’Agata Medallion Charm
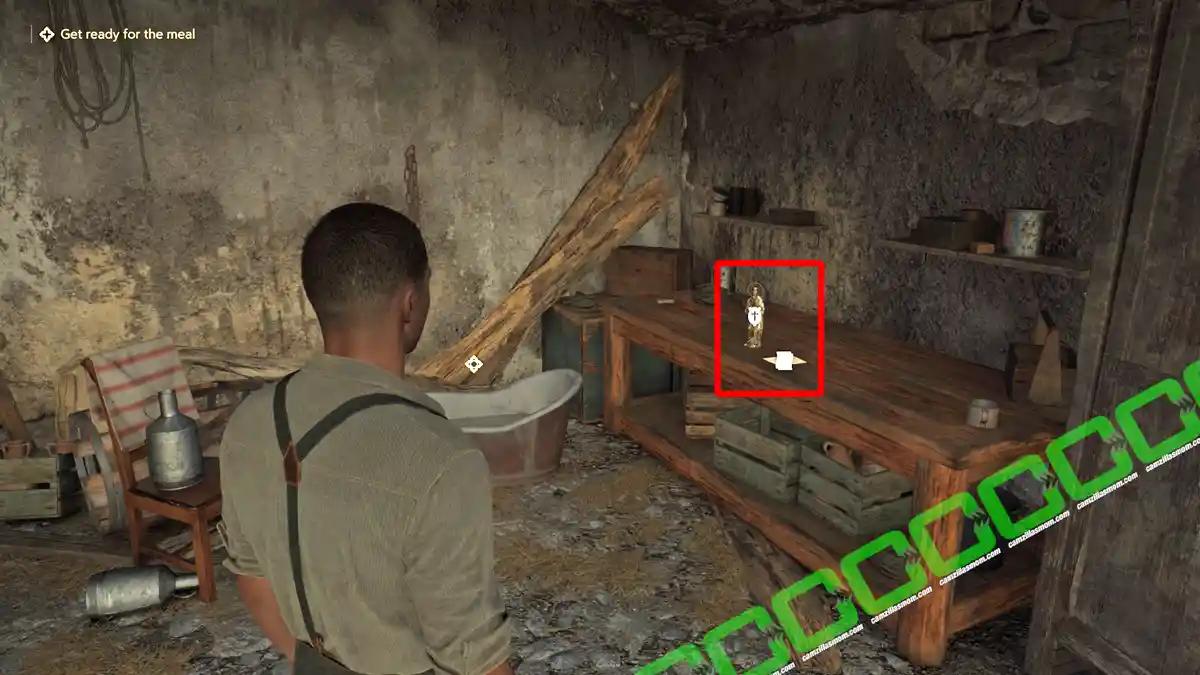
At the end of the day, Enzo meets Father Ciccone for the first time. He leaves the note: Note from Father Ciccone, together with the first Charm collectible in the game: The Sant’Agata Medallion. With this, the Charms menu is unlocked.
Chapter 2 – Palio
In Chapter 2: Palio, there are 6 collectibles:
2 Charms, 3 Journal Notes, and 1 Newspaper.
“Astuzia” Bead Charm


As Chapter 2: Palio begins, Isabella wants to meet Enzo in the garden. Once she leaves, take a moment to explore the area. In the garden ruins, you’ll find the Beads Charm: Astuzia resting on the fireplace mantle.
Journal Note 1 of 3
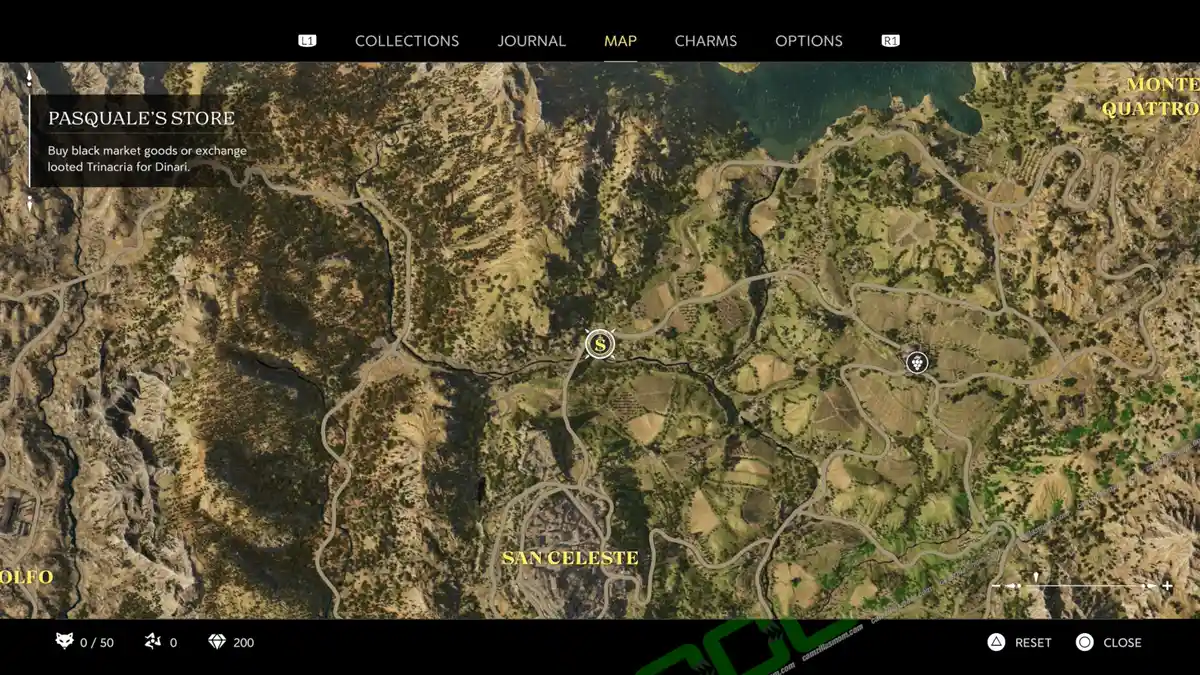
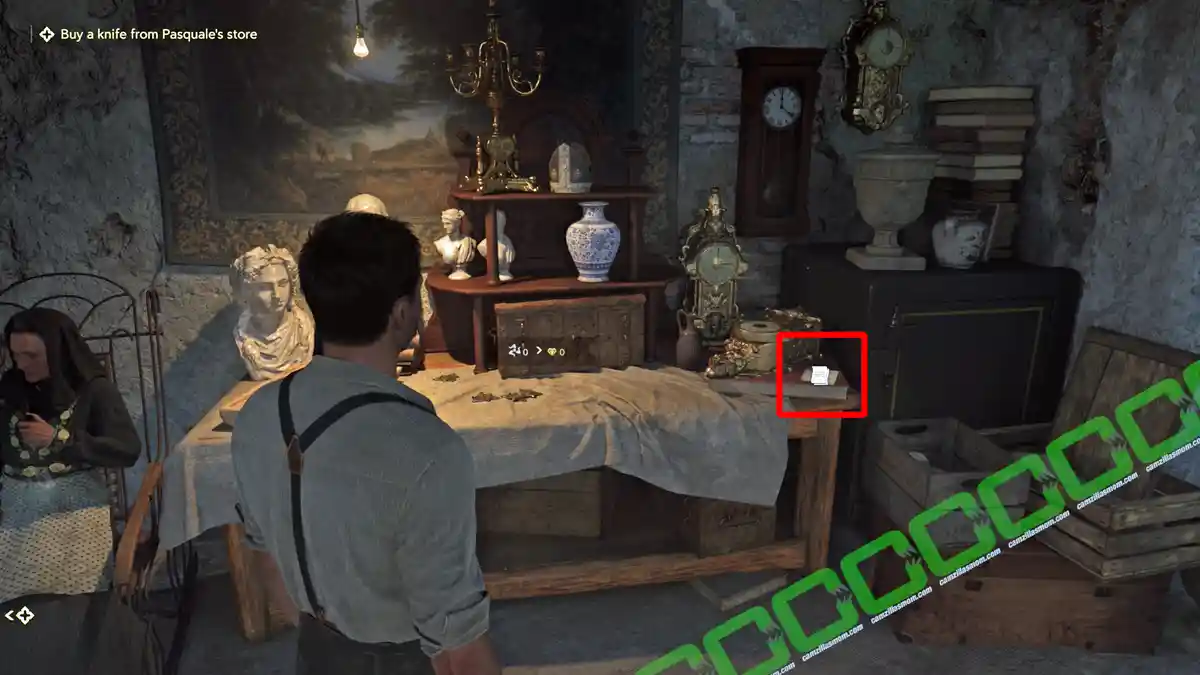
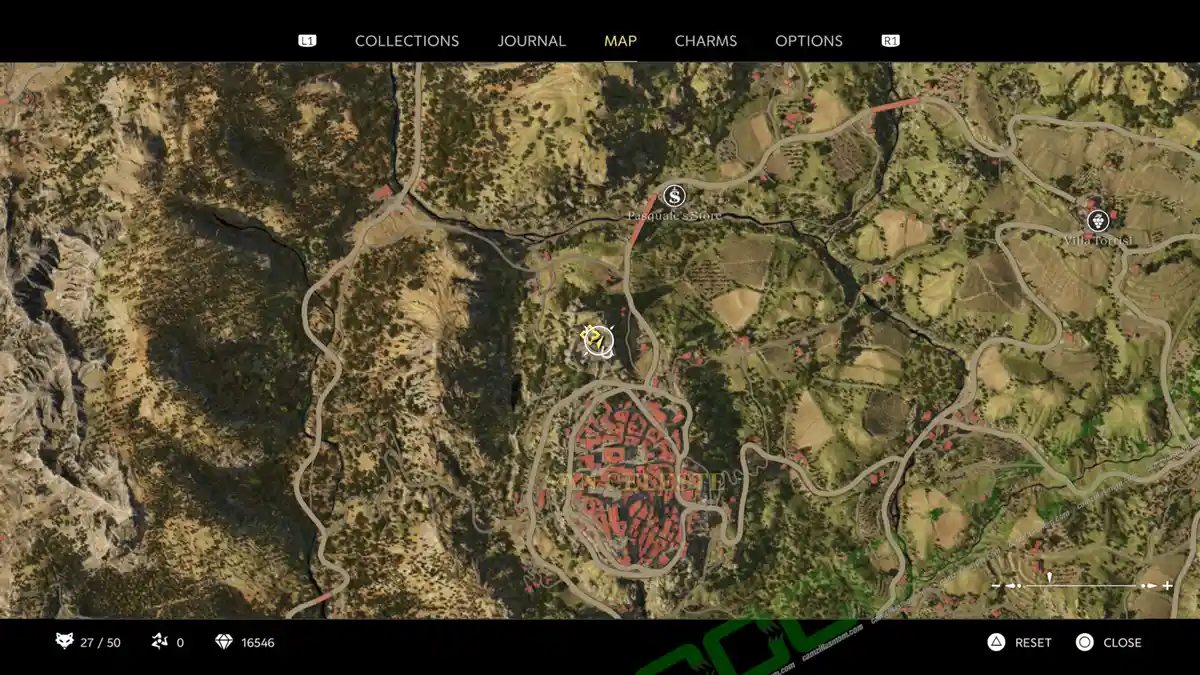
Then, Luca and Enzo are riding off to deliver some wine to Pasquale. The note: The Sicilian Trinacria can be found inside Pasquale’s Store. It’s on the table next to Benedetta, who buys Trinacria. With this, the Trinacria Collectibles are introduced.
Journal Note 2 of 3

As they arrive at the racing grounds, Enzo can look around before going into Don Torrisi’s tent. Look for a man taking bets. The note: Racing Odds is in front of him.
Journal Note 3 of 3


Look for a stage in this area. The note: Cantastoria’s Tale – The Bandit Prince is on the right side of it.
“Fortunato” Bead Charm


Look for the wooden platform with stairs in the center of the area. There rests the Fortunato Beads Charm.
Newspaper: Floods in Europe


Chapter 2: Palio, Enzo, and Luca set out on horseback, heading toward a race just north of the town of San Celeste. There, on a table behind the wooden platform, is the Floods in Europe Newspaper.
Chapter 3 – Pizzu
In Chapter 3: Pizzu, there are 18 collectibles:
8 Journal Notes, 6 Locked Boxes, 1 Mystery Fox, 1 Charm, and 2 Trinacrias.
Initial Stops
Journal Note 1 of 8
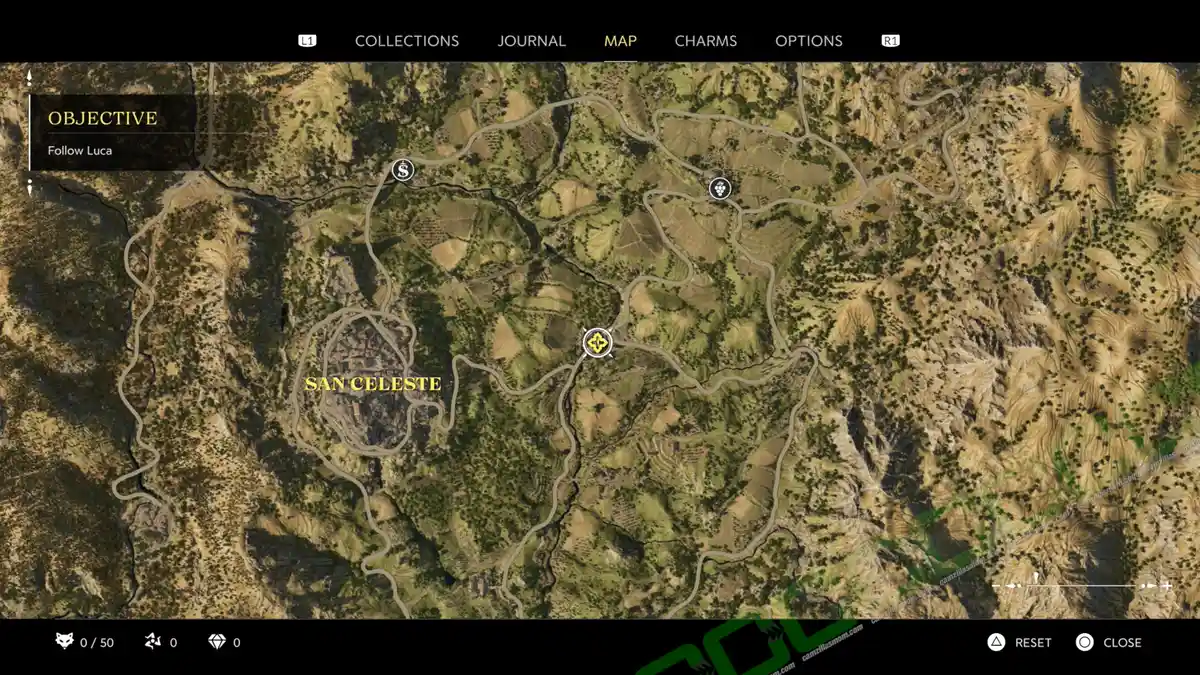
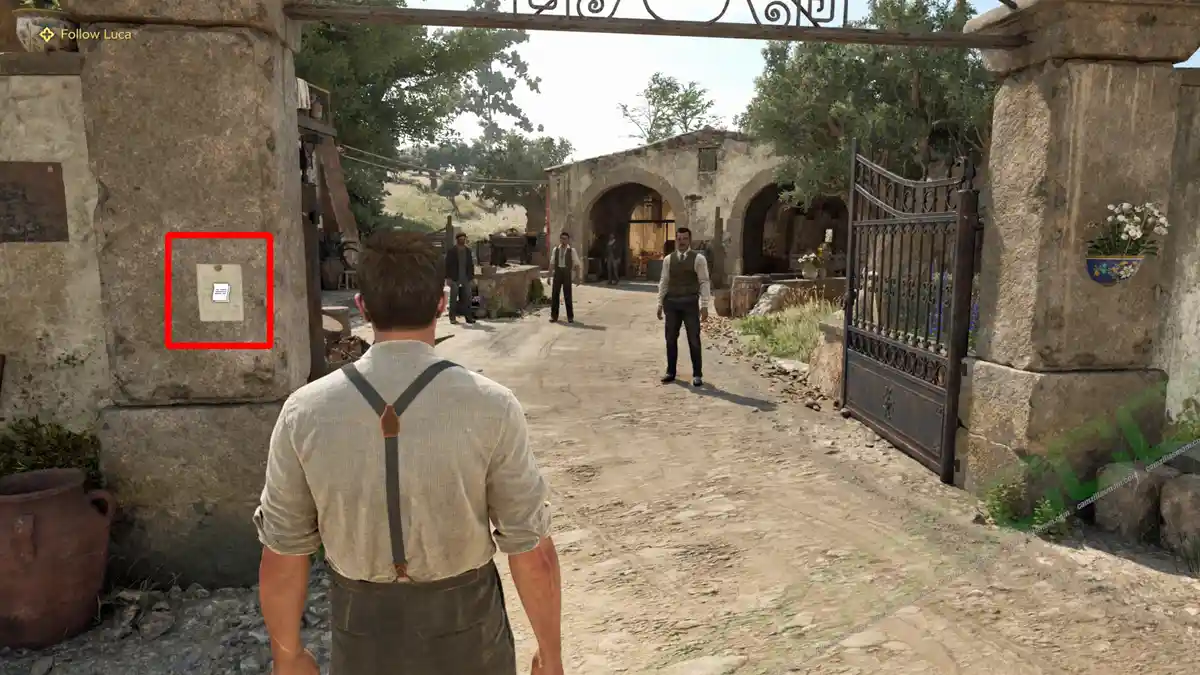
In Chapter 3: Pizzu Enzo is riding out with Luca Casare for a collection round. At the first stop, he can read the note: Public Warning that is pinned to the entrance gate.
Journal Note 2 of 8
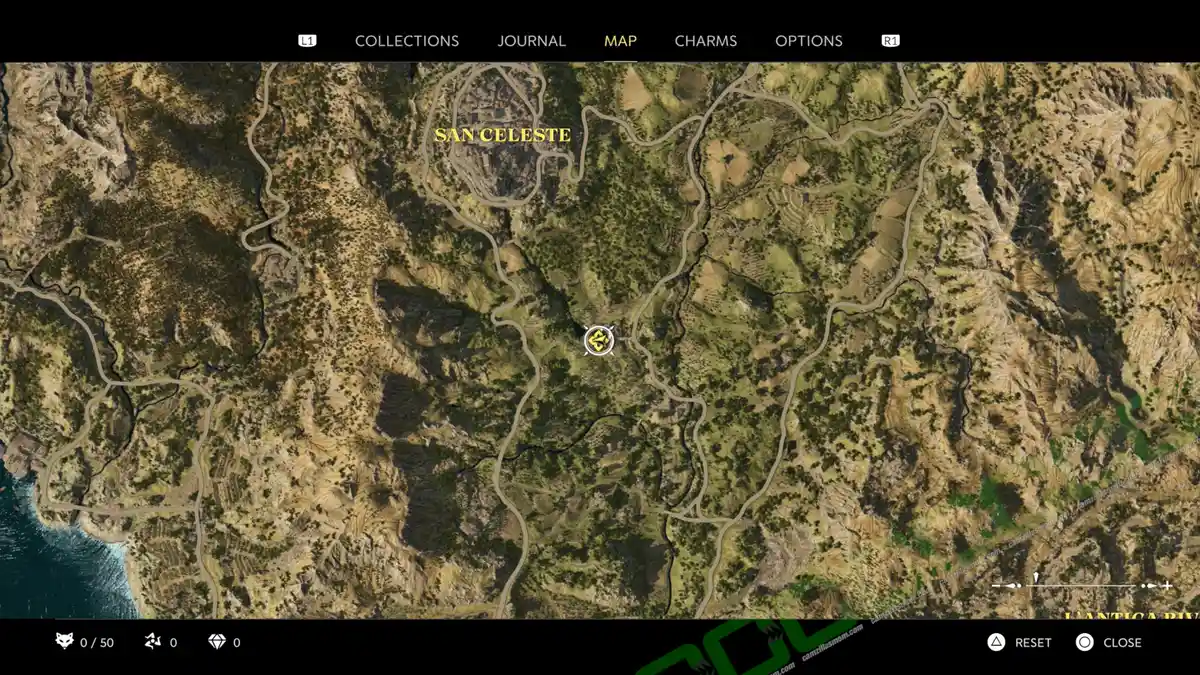
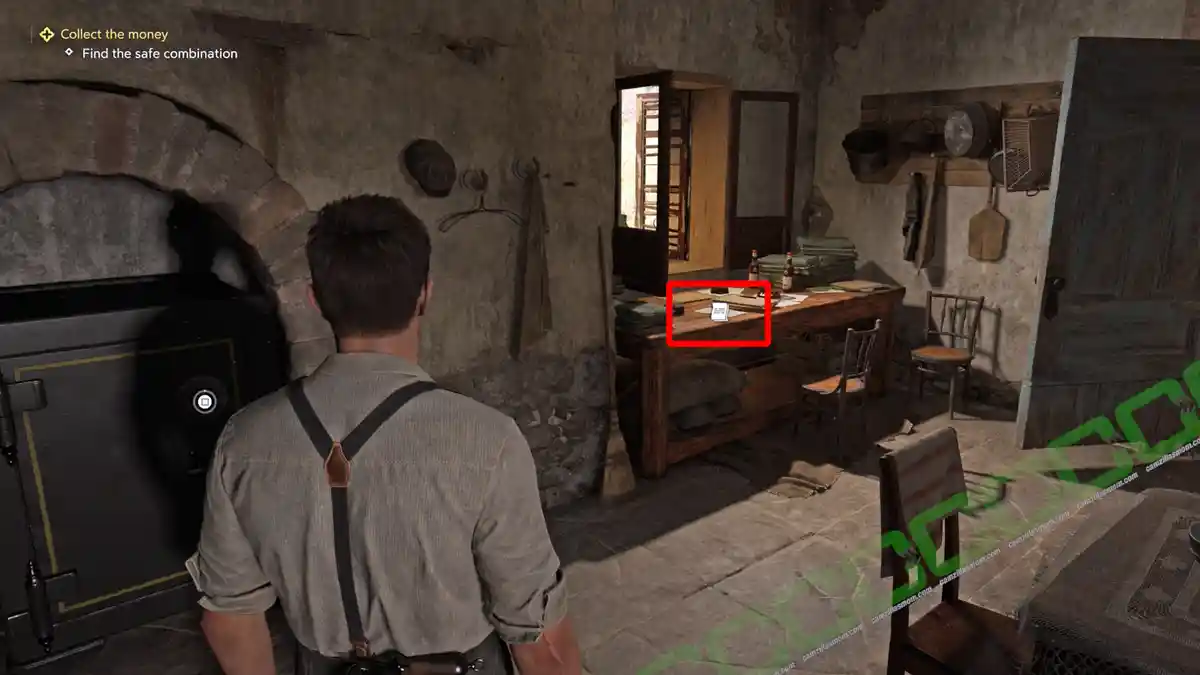
Next stop is the lemon farmer, who has a safe in the office. In the same room as the safe, there is also the note: Appeal for Information on the desk.
Journal Note 3 of 8
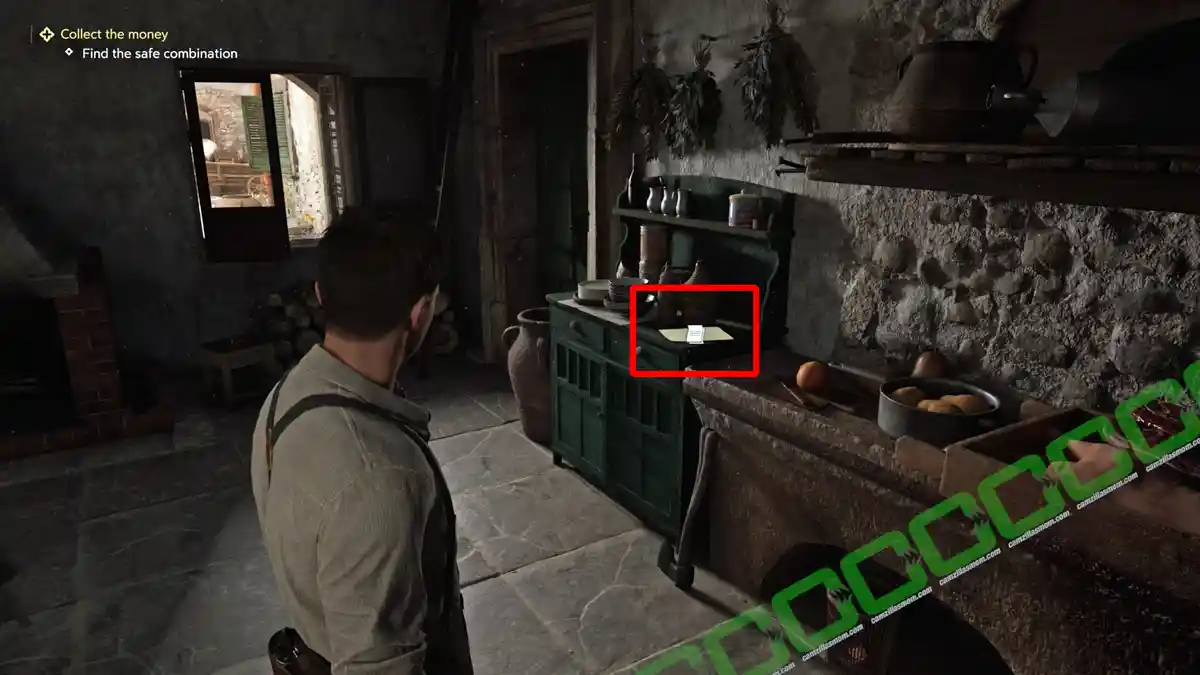
There is also this note: Outgoing Payments on top of a piece of kitchen furniture.
Journal Note 4 of 8
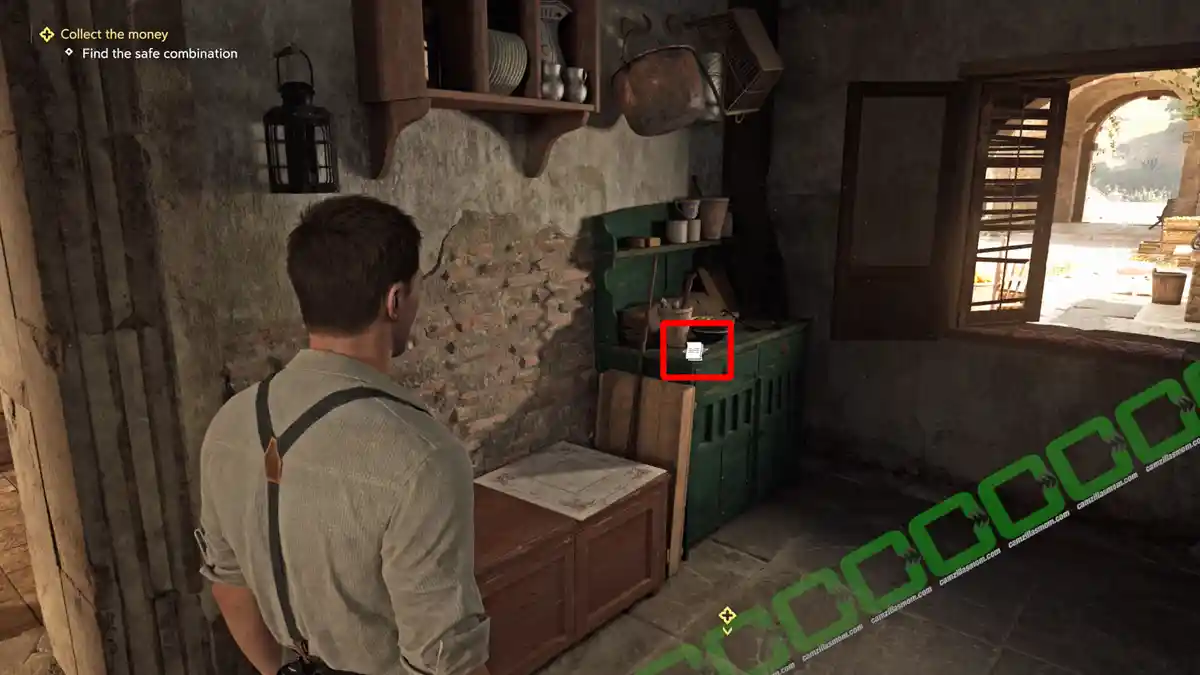
Finally, you can find a note: Farmer’s Romantic Poem containing the safe’s combination (10-20-30). It’s placed on top of a green kitchen cupboard near the window.
Impound Yard
Journal Note 5 of 8 & Locked Box 1 of 6

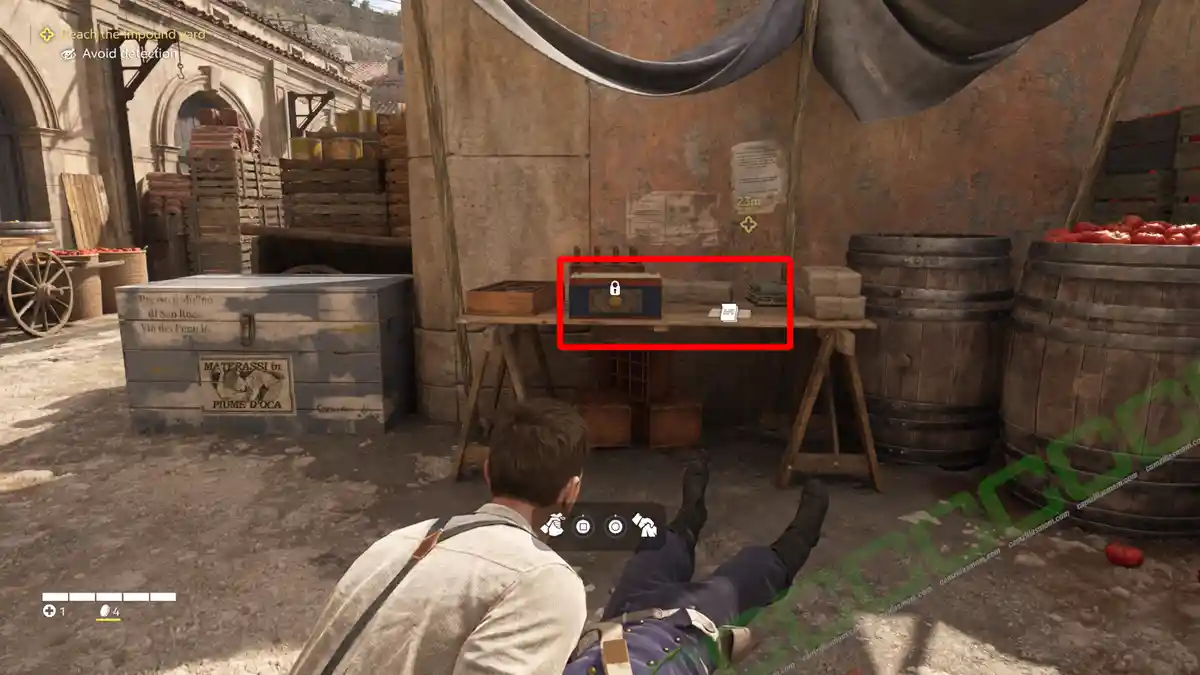
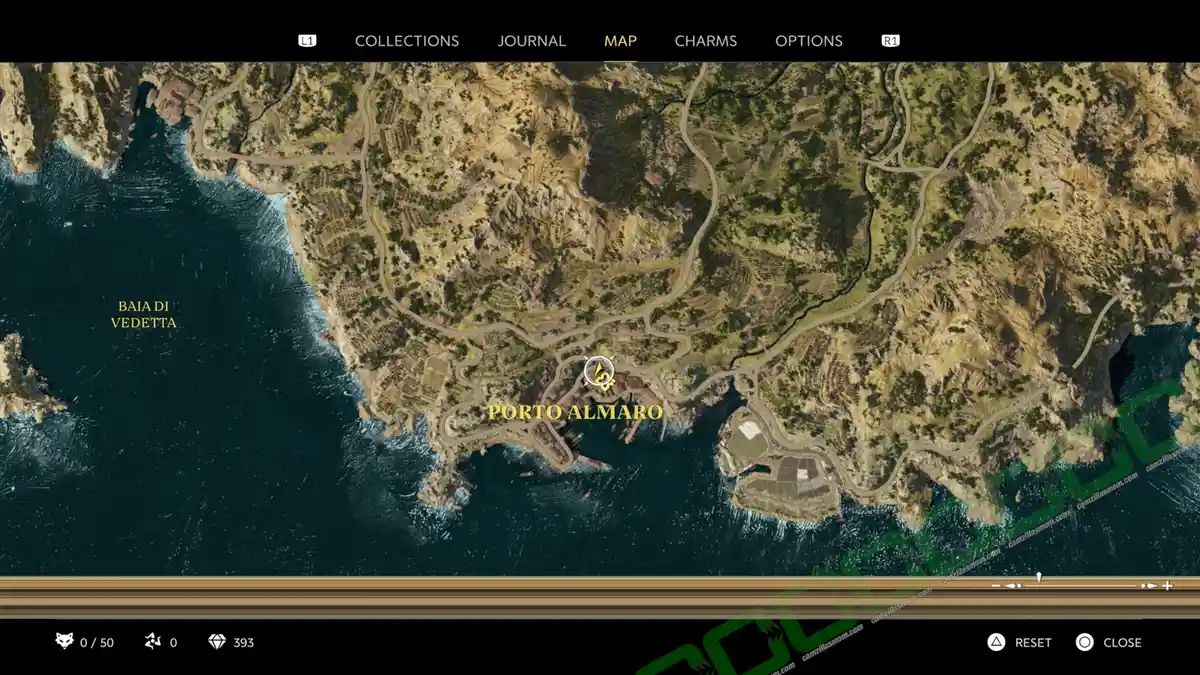
Next, Enzo, Luca, and Cesare ride to Porto Almaro, where Enzo has to sneak into the Customs Office and the Impound Yard. On the table, near the first officer he encounters, is the note: Customs Office Report next to a locked chest.
Journal Note 6 of 8
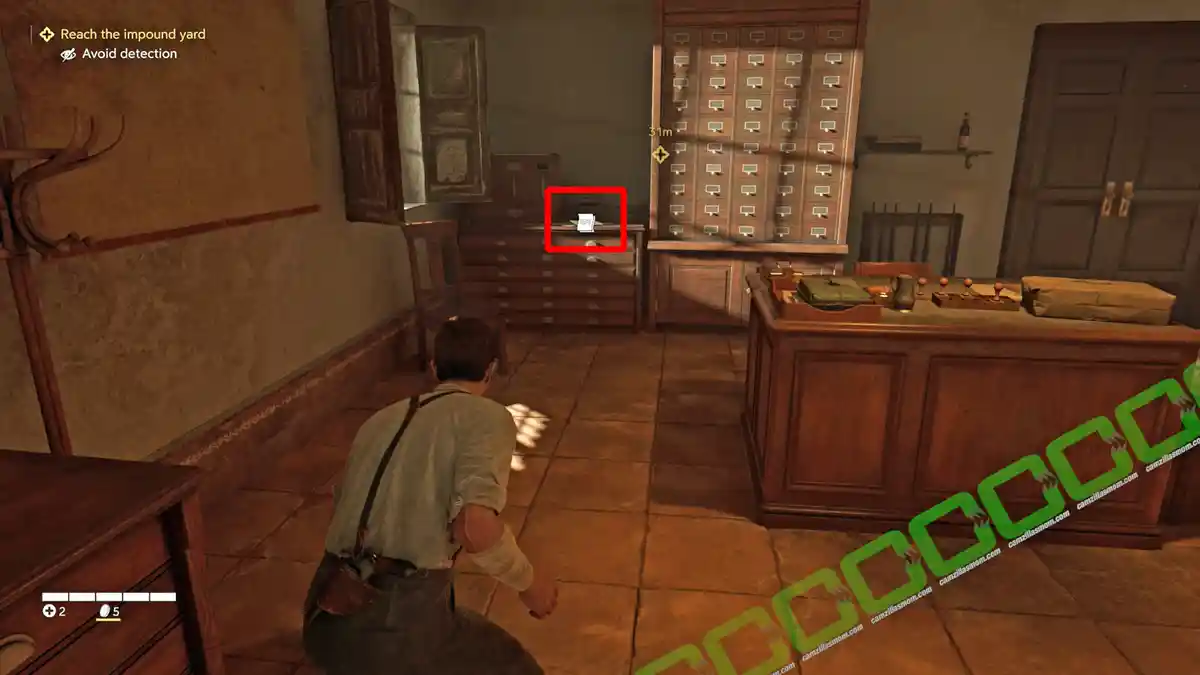
Sneak to the back office with a safe before heading to the Impound Yard. The note: Impound Yard – Incident Reports is in the same room as the safe, on top of a drawer unit.
Journal Note 7 of 8
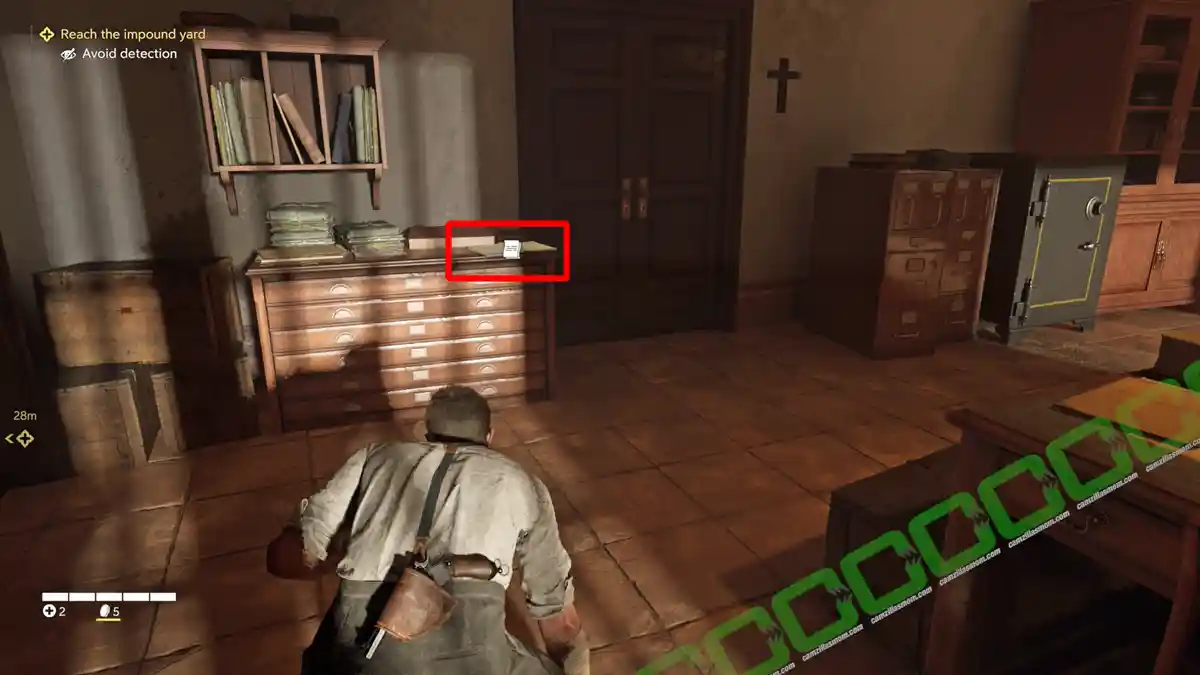
The note: Ludovici’s Investment is on top of a drawer unit near the safe.
Locked Box 2 of 6
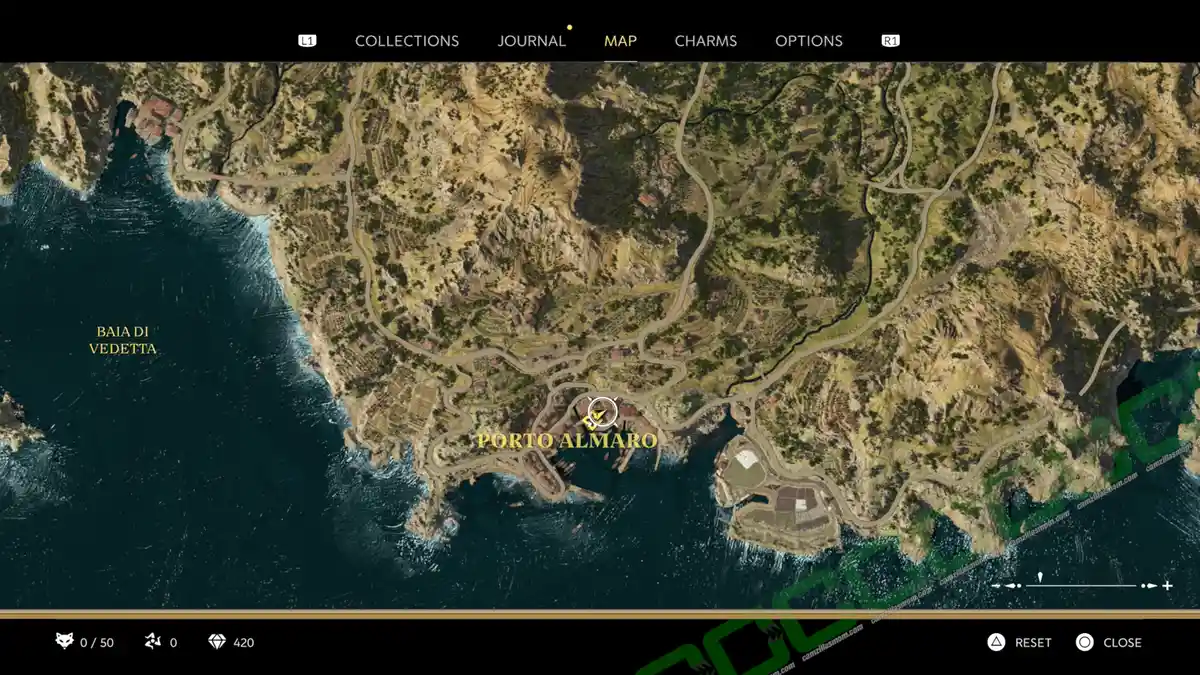
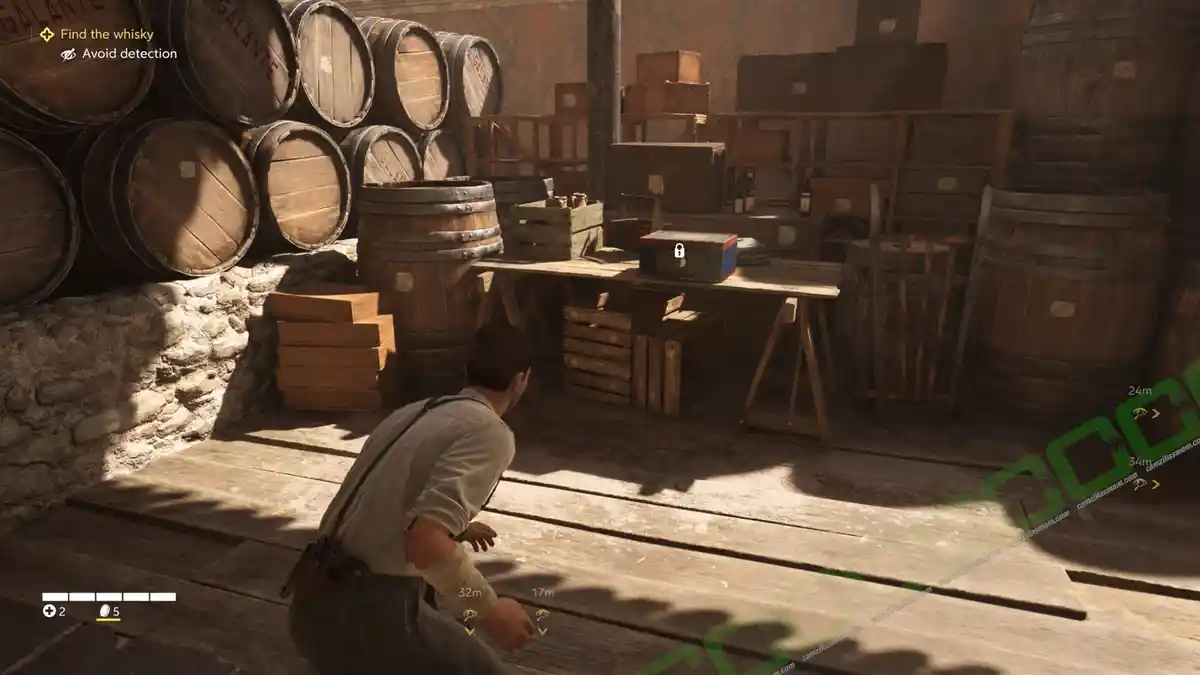
Now go to the Impound Yard. Near the first guard is this locked chest.
Mystery Fox
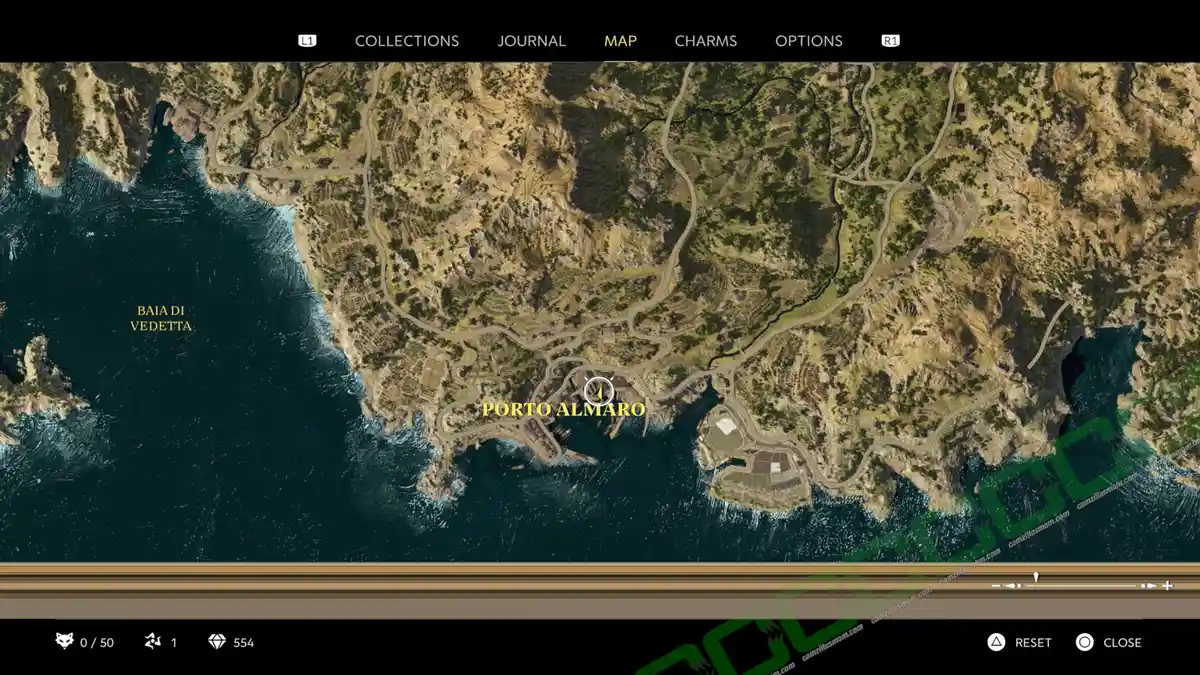
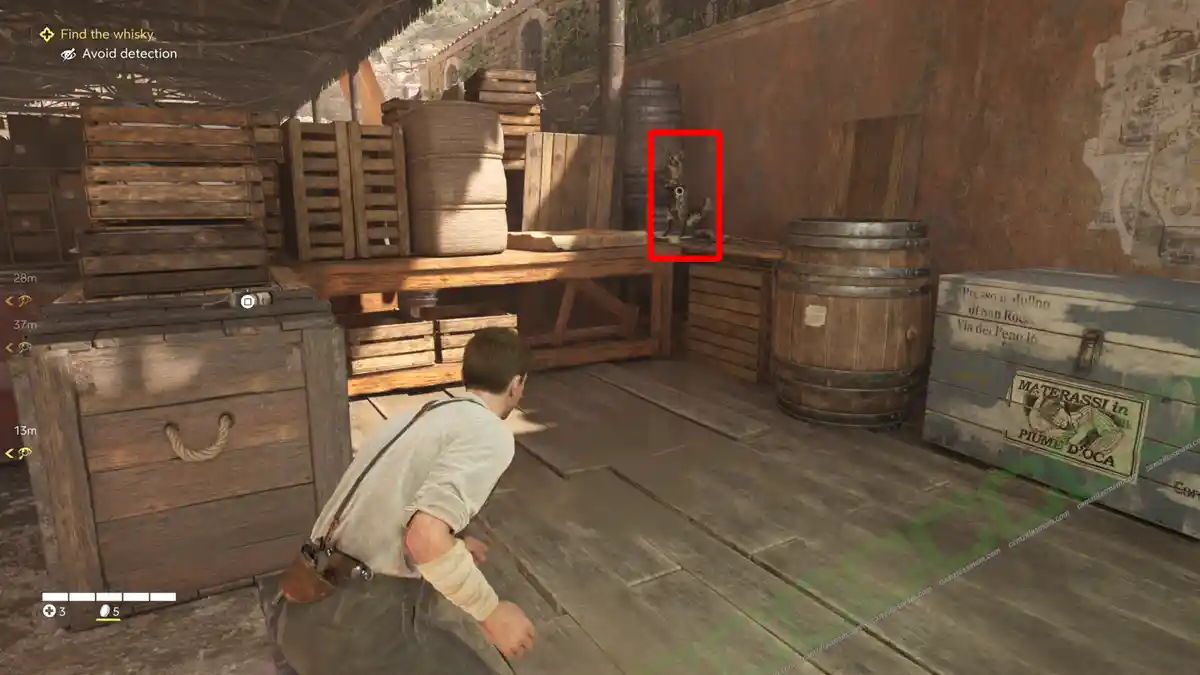
Inside the impound yard, you can find a mystery fox in the far left corner, near the second patrolling guard.
Trinacria 1 of 2
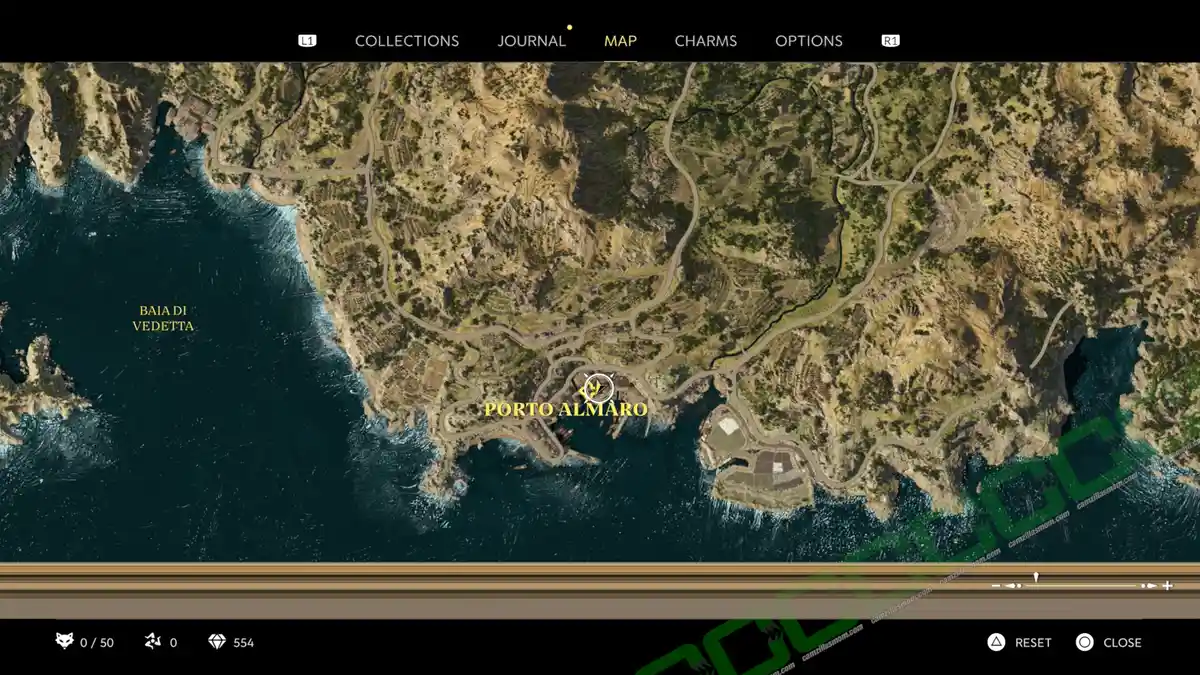
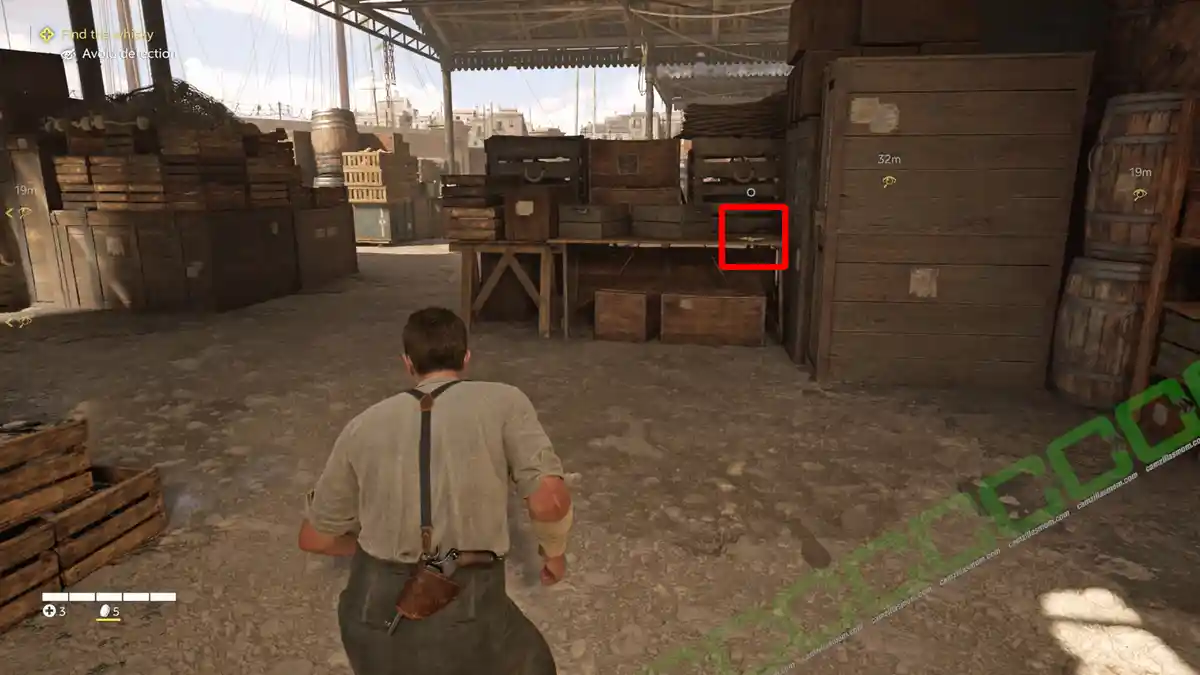
Inside the Impound Yard, you can find a Trinacria on top of one of the tables, where the guards stop when patrolling the area.
Locked Box 3 of 6

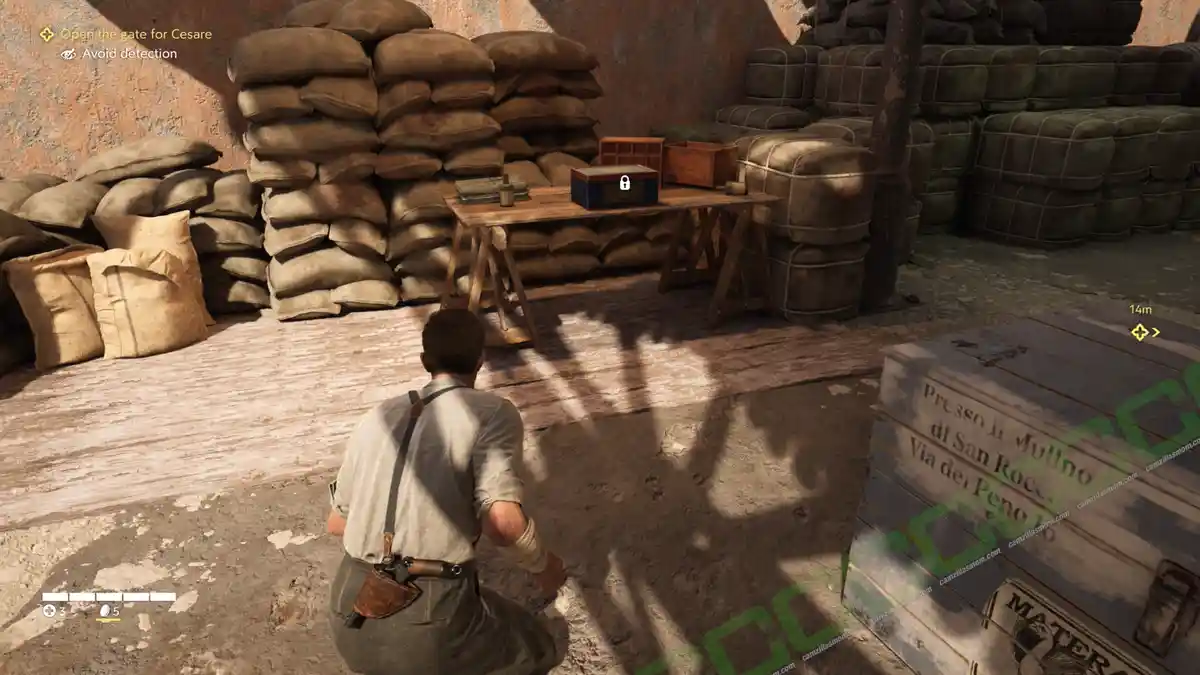
Near the car and the whiskey that needs to be found for the quest is a locked box.
Abandoned Farm
Locked Box 4 of 6
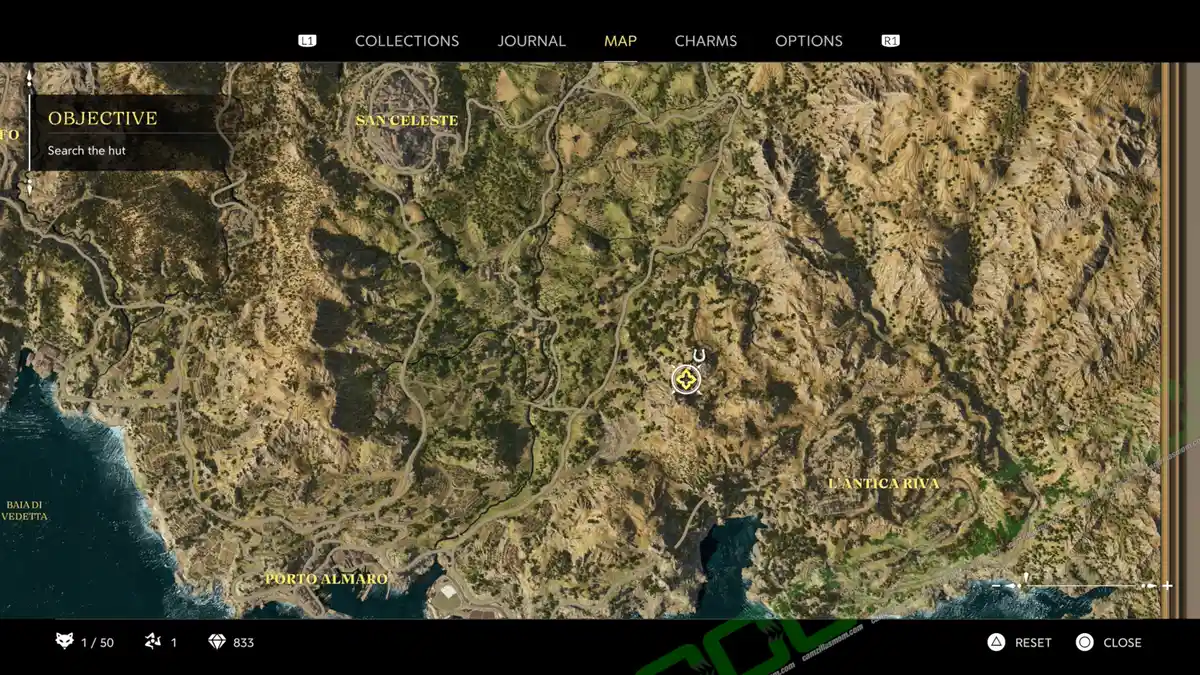

After retrieving the whiskey in the Porto Almaro impound yard, Enzo and Cesare end up cleaning out an Abandoned Farm – it’s where Enzo gets to shoot for the first time. Here, in a ruined side building, is a chest.
Journal Note 8 of 8 & Locked Box 5 of 6
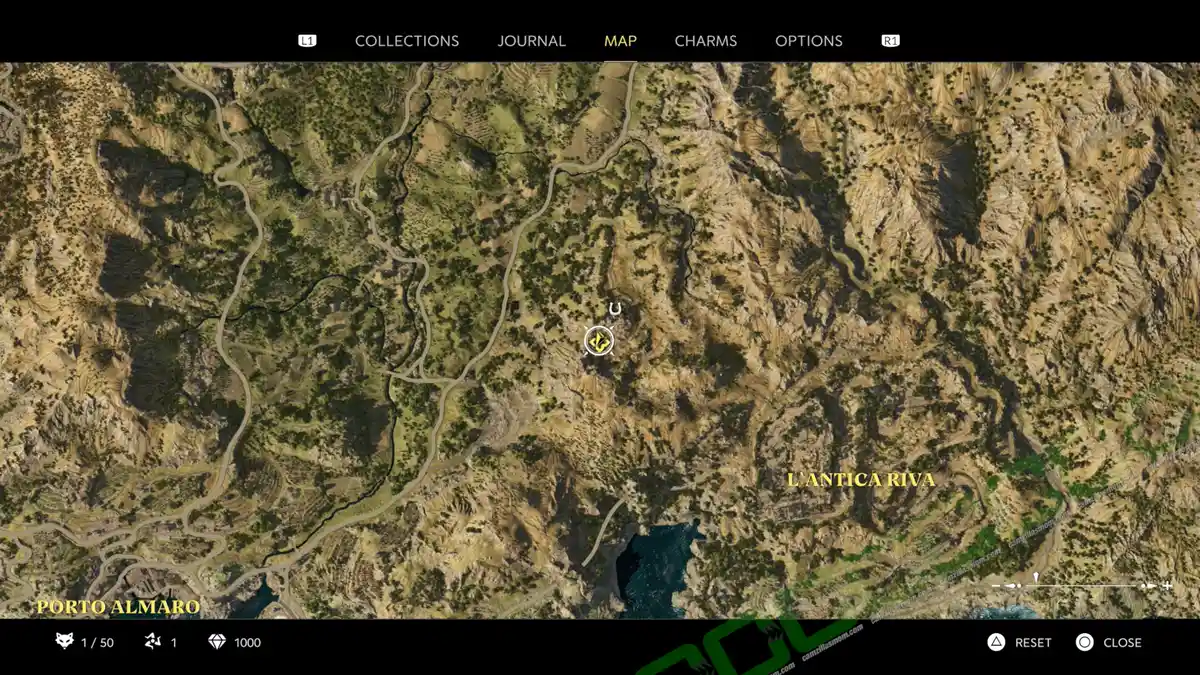
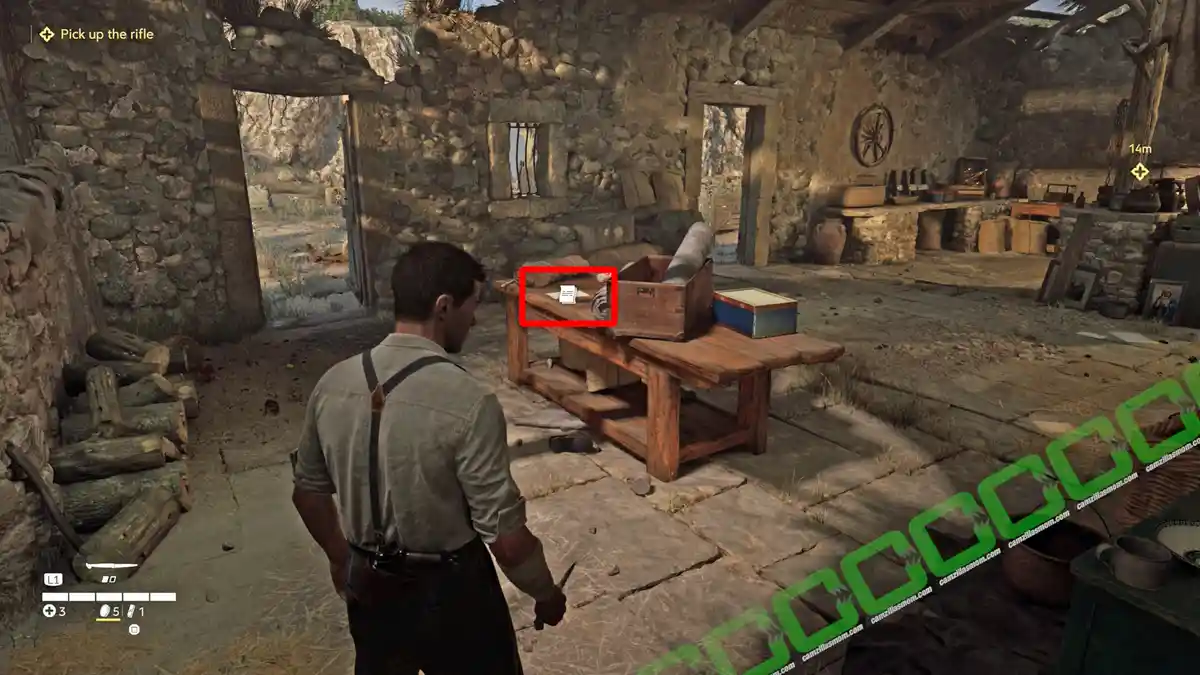
Inside the main building, on the table, is the note: List of Targets and a locked box.
“Ingegnoso” Bead Charm

In the center of the main building is the Ingegnoso Bead Charm.
Trinacria 2 of 2 & Locked Box 6 of 6
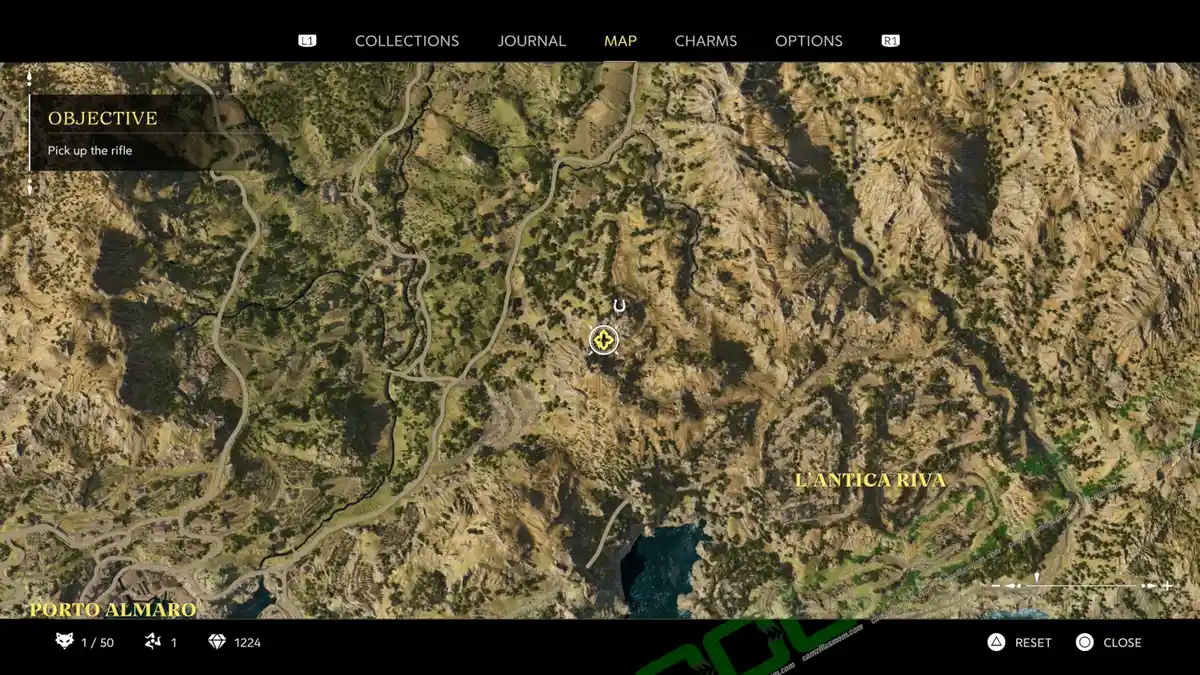
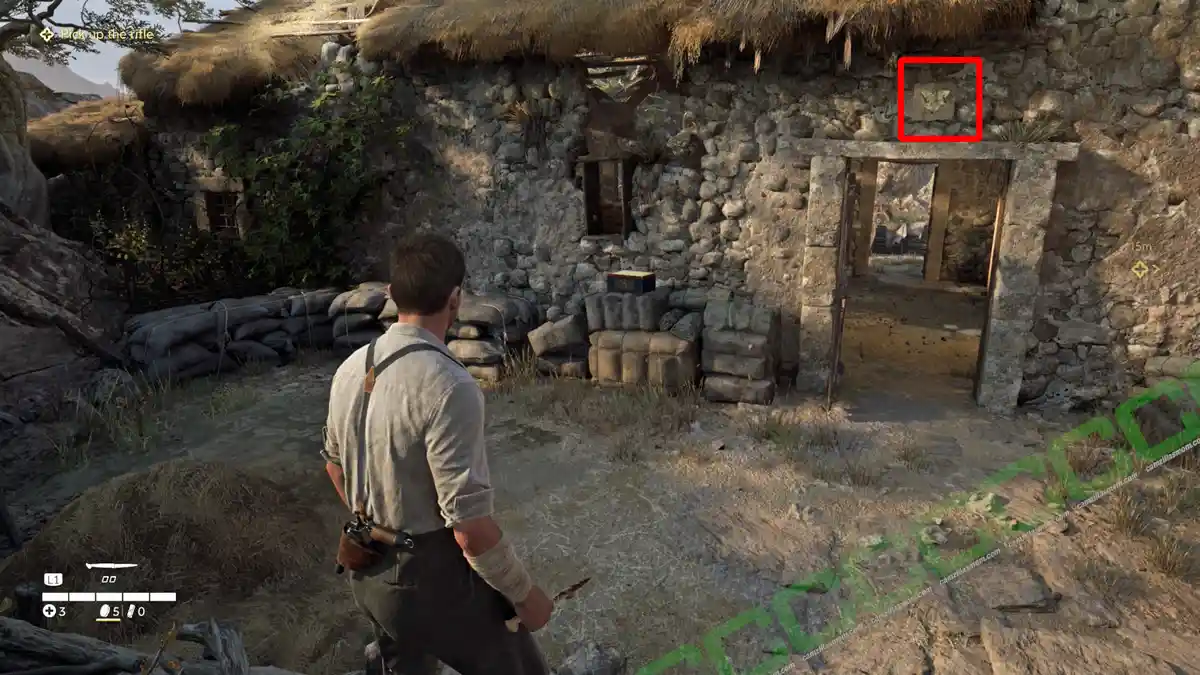
In the main building, destroy the padlock to the backyard. Exit to the backyard and look above the exit door. Shoot the Trinacria to collect it. Next to it is a locked box.
Chapter 4 – Il Barone
In Chapter 4: Il Barone, there are 19 collectibles:
1 Photograph, 8 Locked Boxes, 2 Charms, 4 Journal Notes, 2 Trinacria, 1 Newspaper, and 1 Mystery Fox.
Temple Ruins
Photograph: The Temple Complex
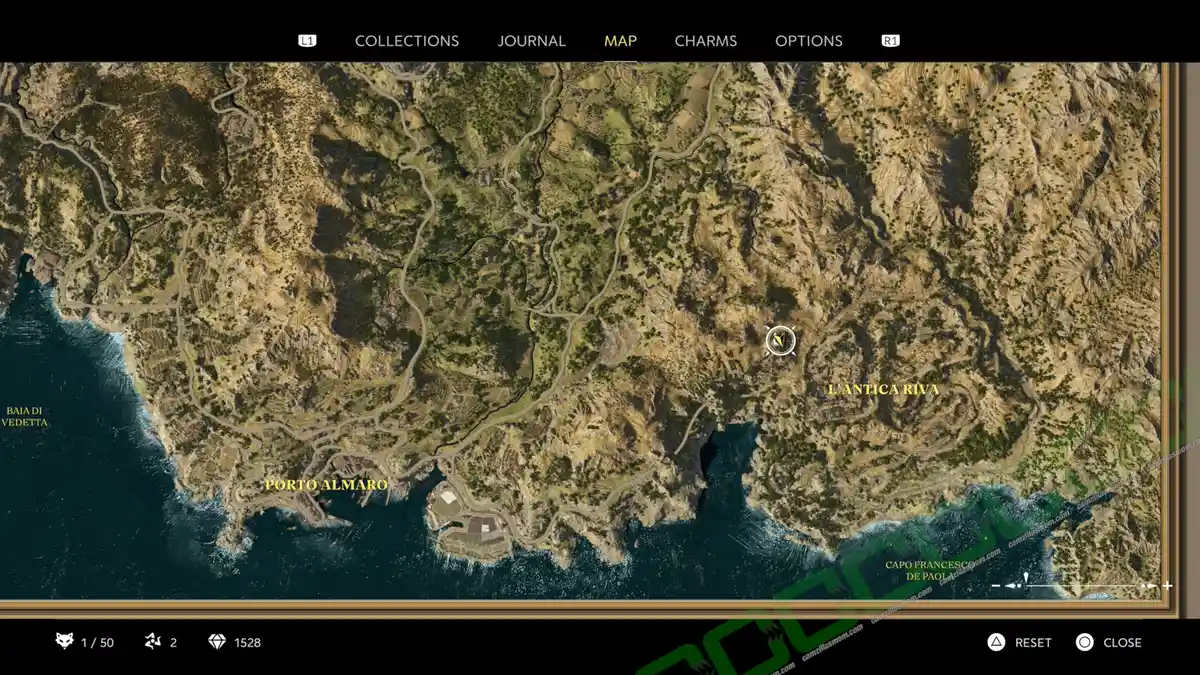
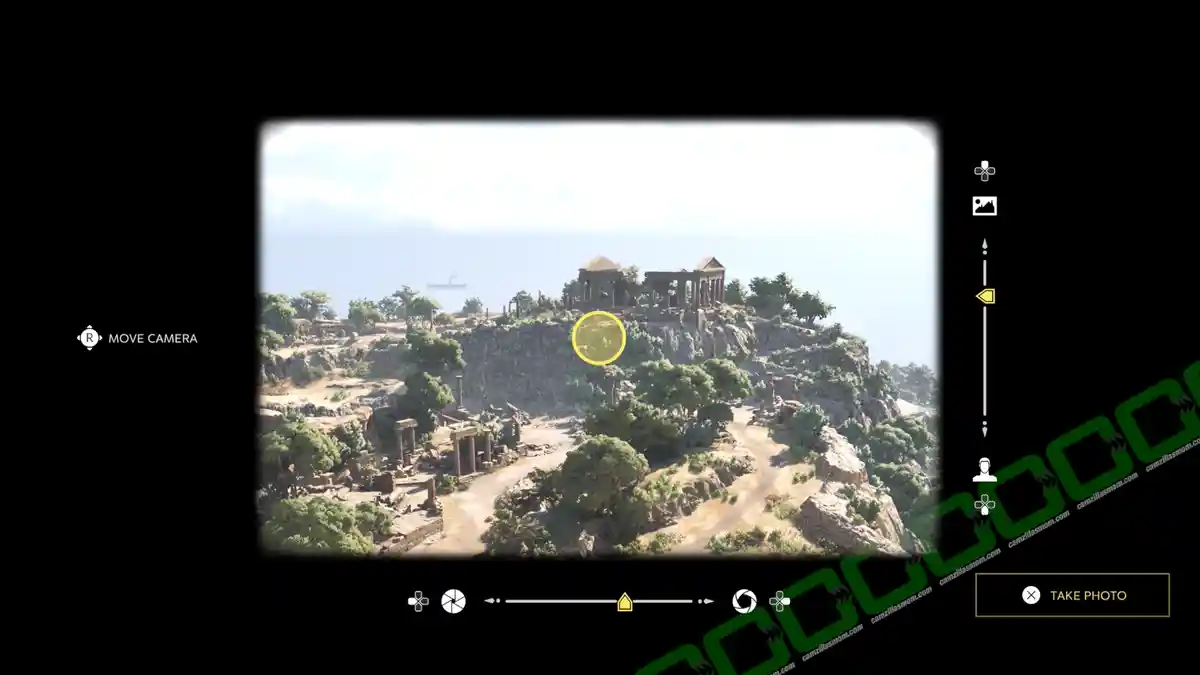
In Chapter 4: Il Barone, Enzo and Isabella are riding to the ruins where she will introduce him to the Photography collectibles. This is the first photograph to be taken in Mafia: The Old Country.
Locked Box 1 of 8
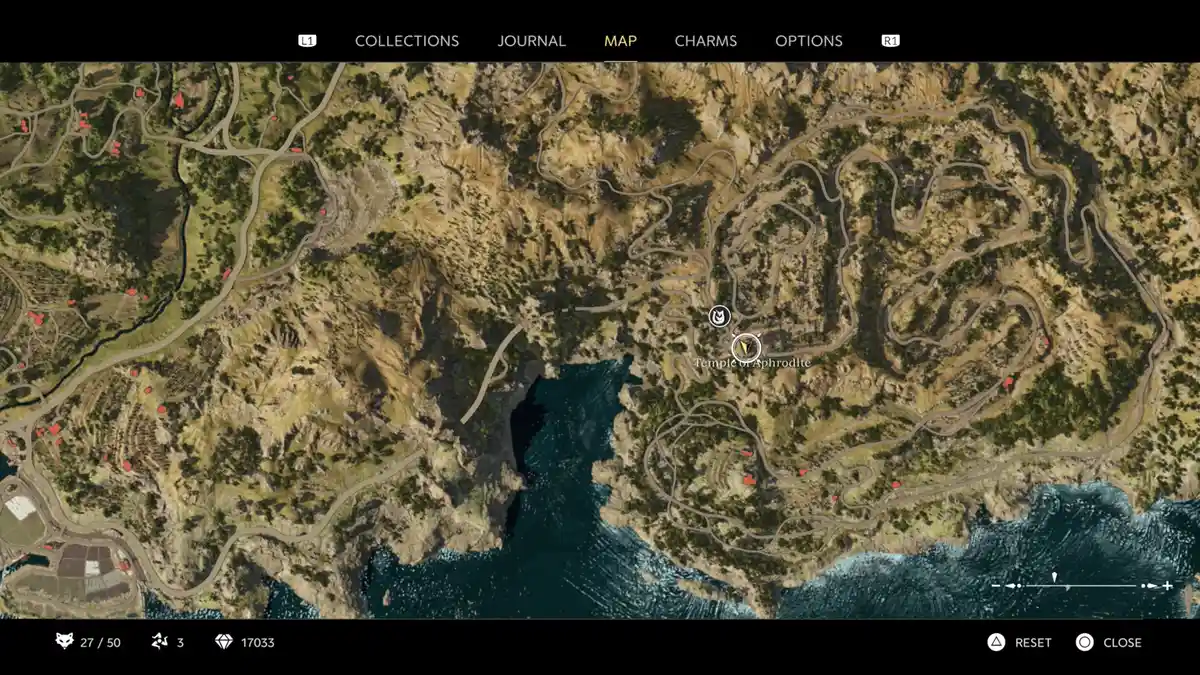
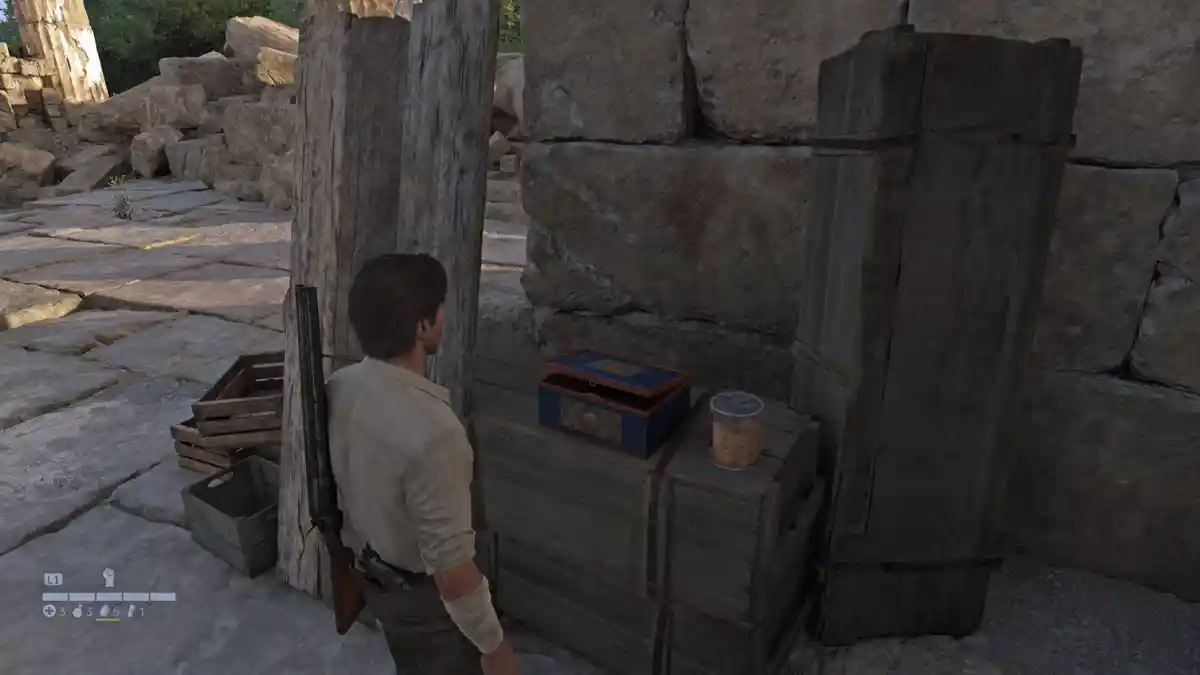
In Chapter 4: Il Barone, Enzo is visiting the Temple of Aphrodite, where Isabella is kidnapped. Don’t miss the locked box inside the temple.
Messina’s Camp – Lower Part
“Fantasma” Bead Charm


Enzo prevents Isabella from being captured by Messina and follows him to his camp. At the starting spot, right after the cutscene, you can find the Fantasma Bead Charm.
Locked Box 2 of 8

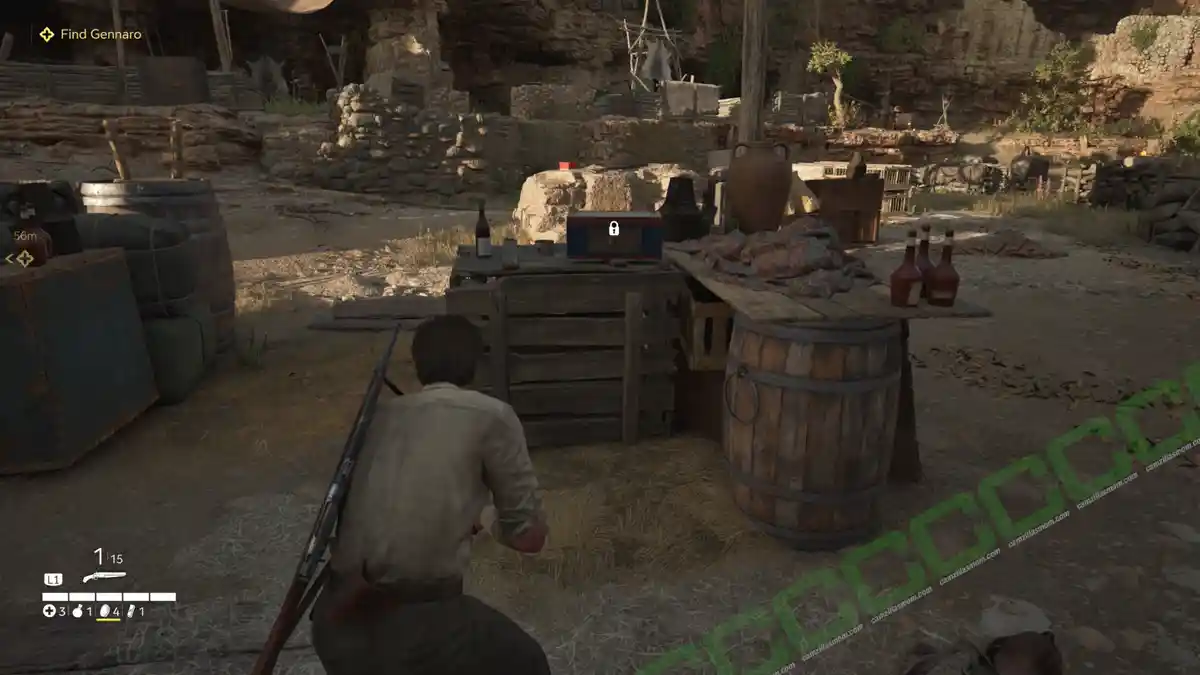
On the ground level of the camp, near the first campfire, you can find this chest.
Journal Note 1 of 4
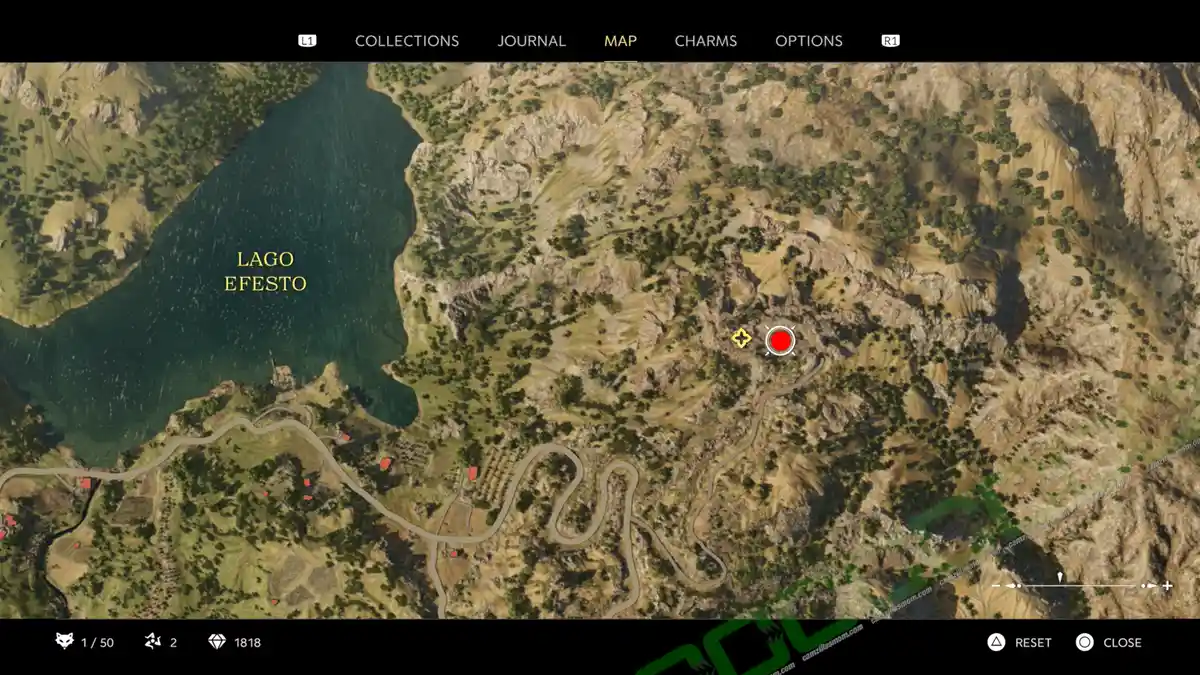
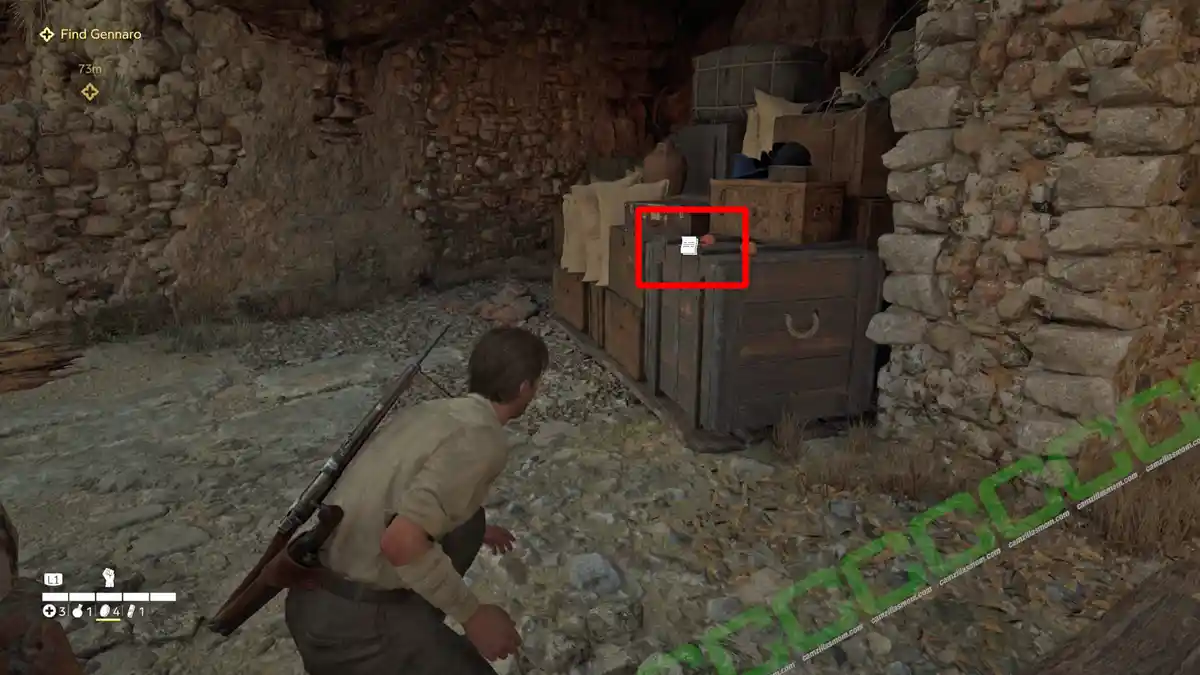
If you head to the right after the cutscene, you can go through a cave to the right. At the bottom, exit the cave and stay on the right to find the note: The Owl’s Instructions.
Trinacria 1 of 2
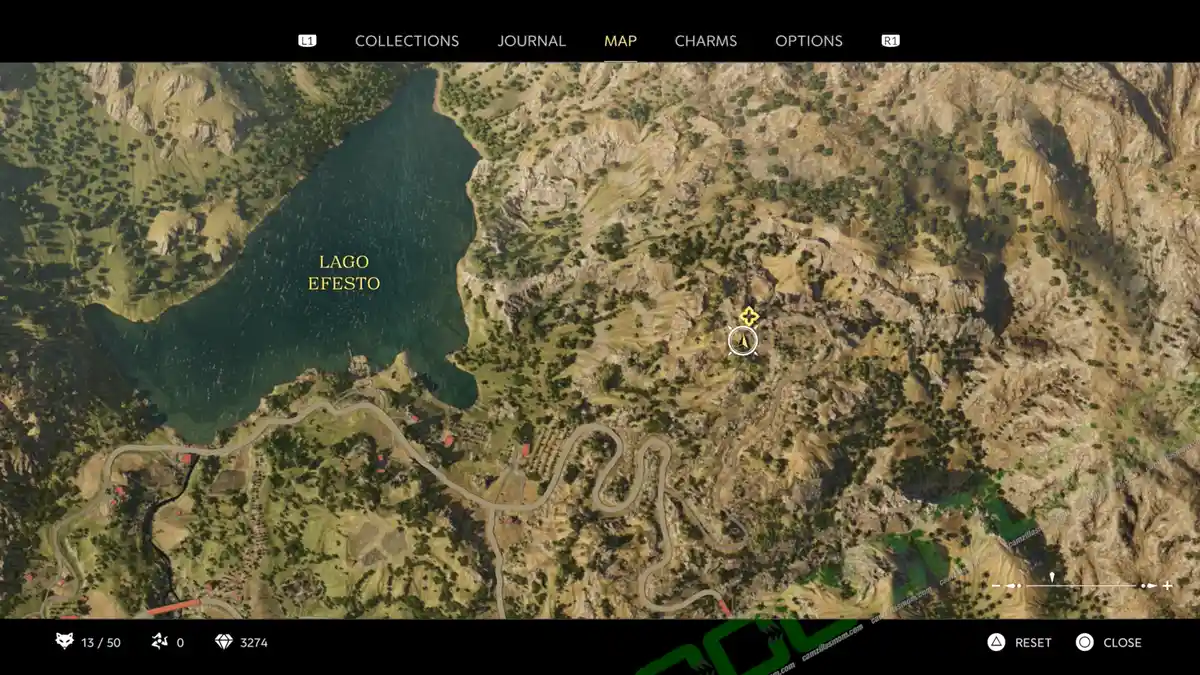

Head to the very back, where the tents are, before entering the caves. The Trinacria hangs on the outside mountain wall and has to be shot down.
Journal Note 2 of 4
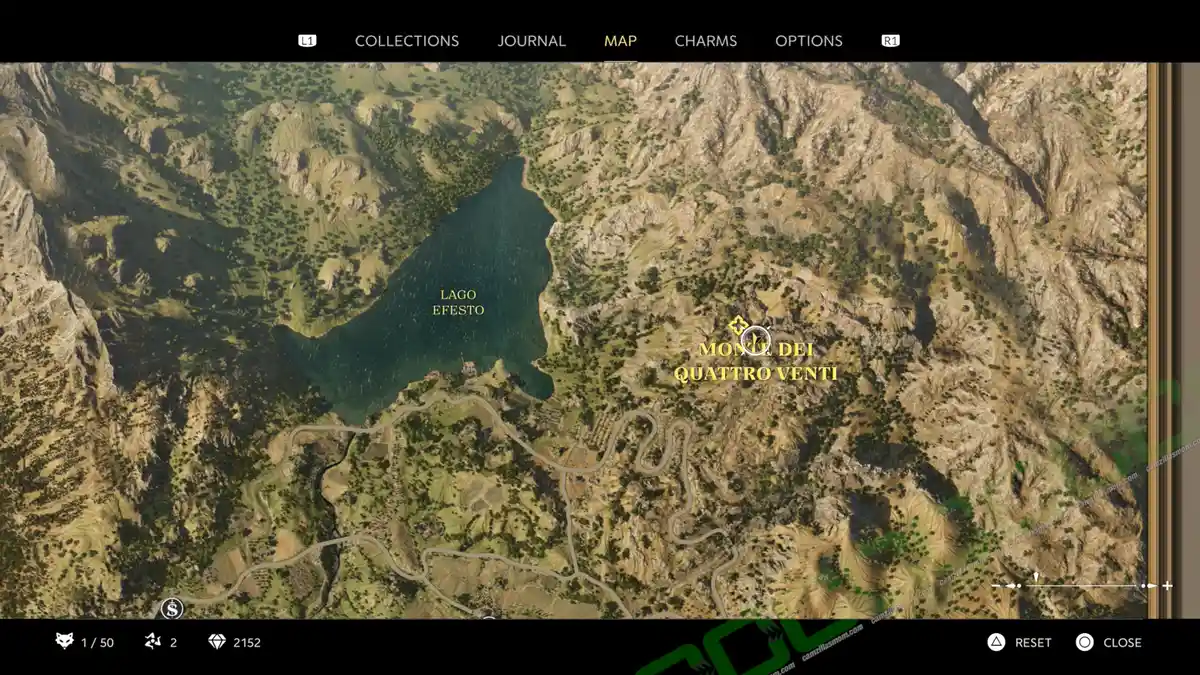
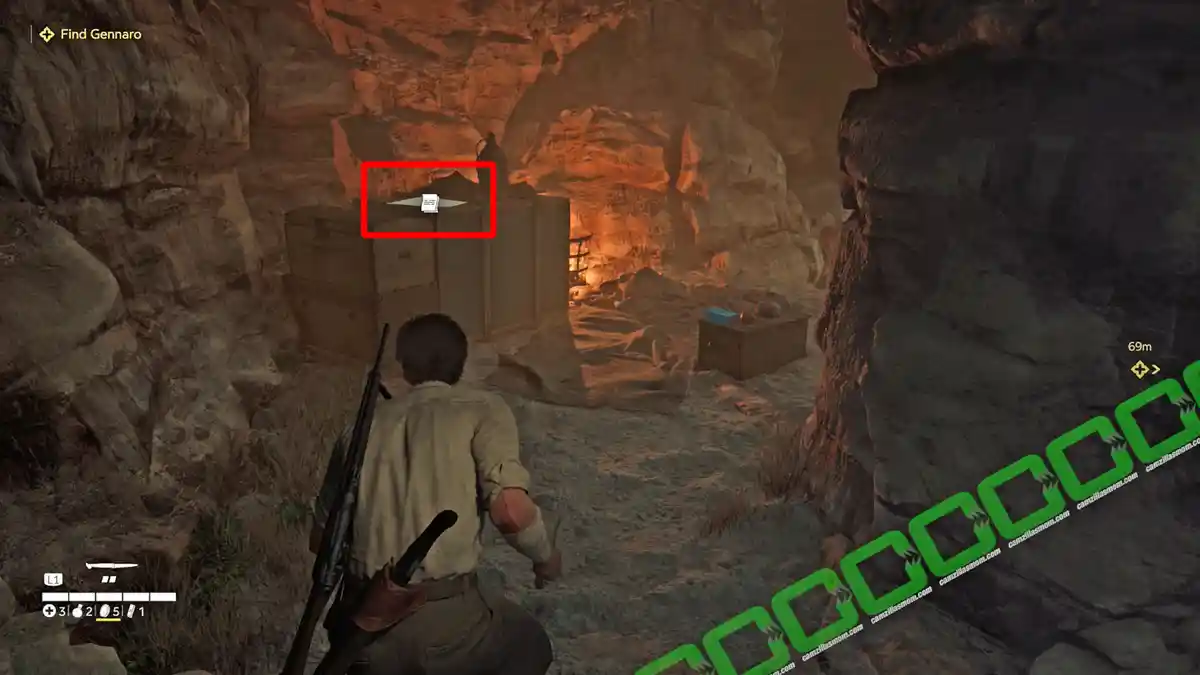
Thoroughly search the upper part of the camp caves for the note: The Hunt for Messina.
Locked Box 3 of
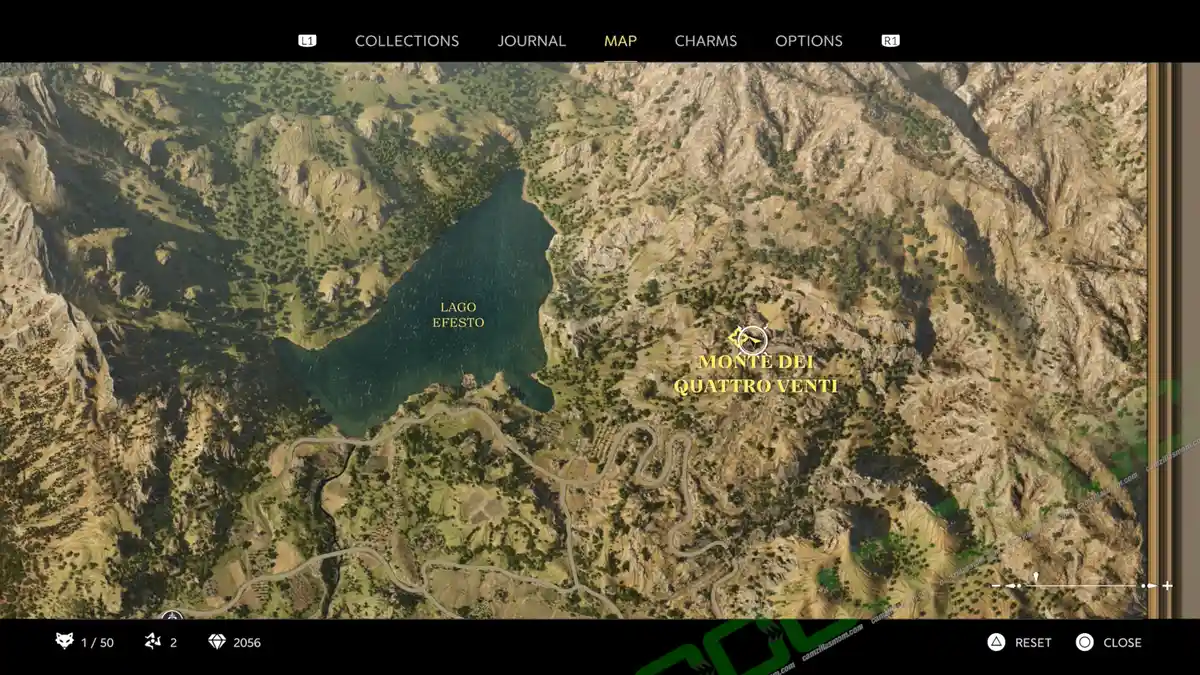
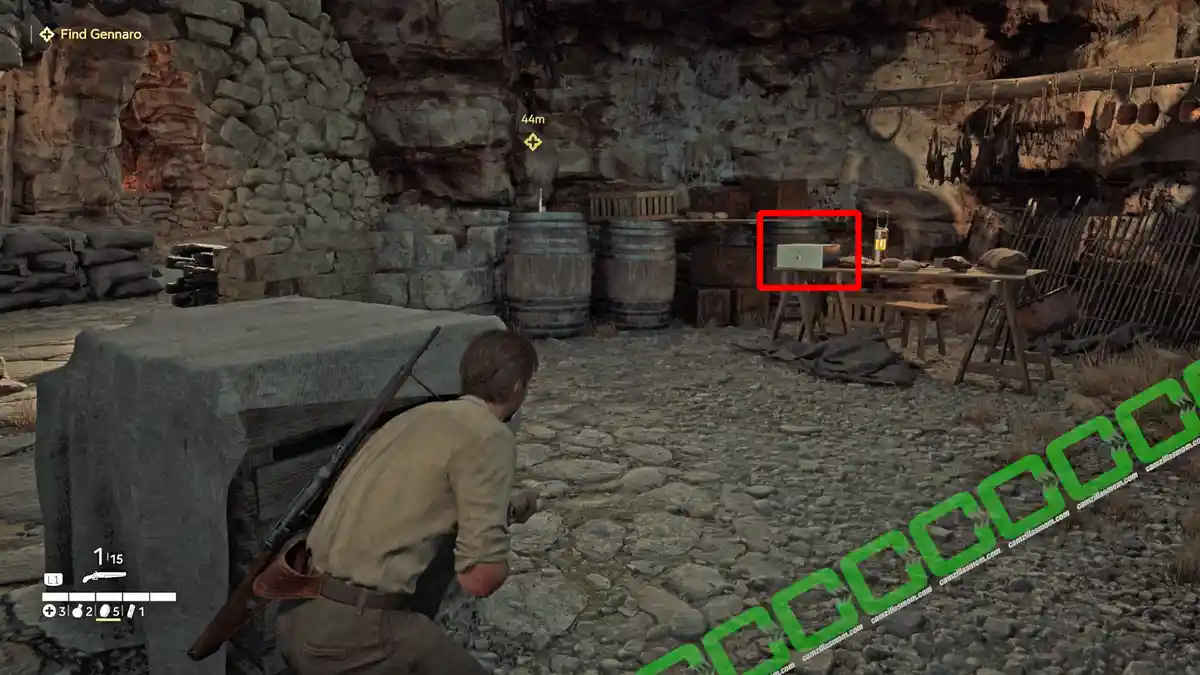
Deeper inside the cave of the Messina camp, closer to the “Find Gennaro” mission marker, is another locked box on top of a table.
Locked Box 4 of 8
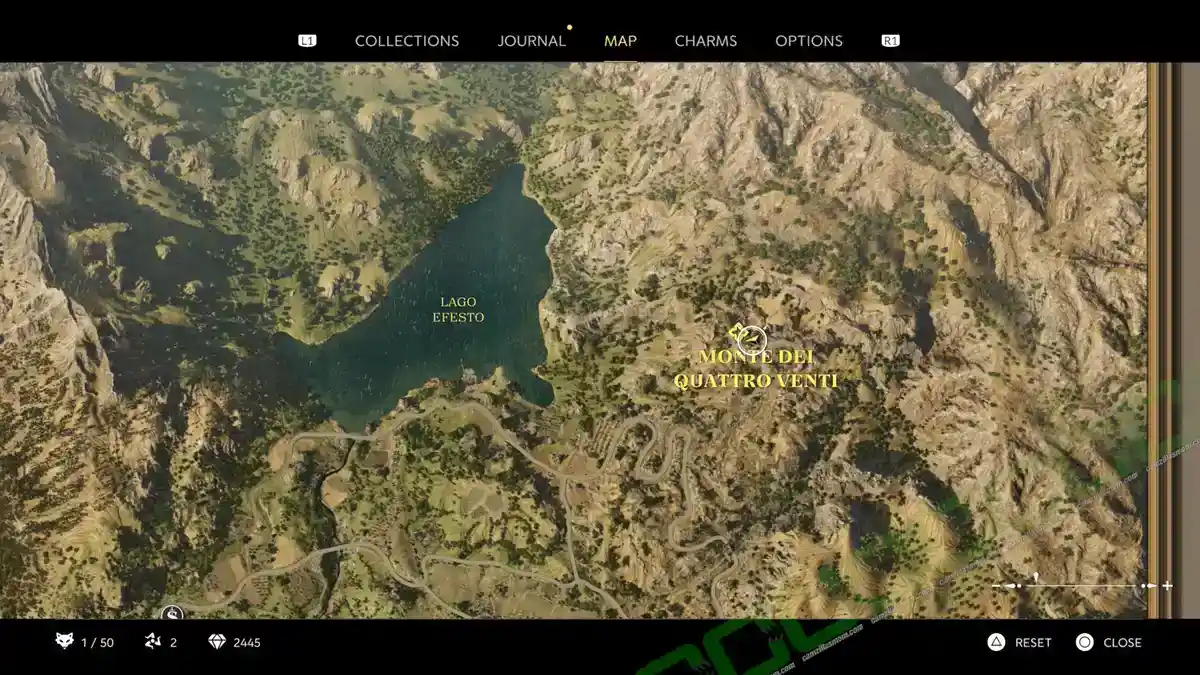
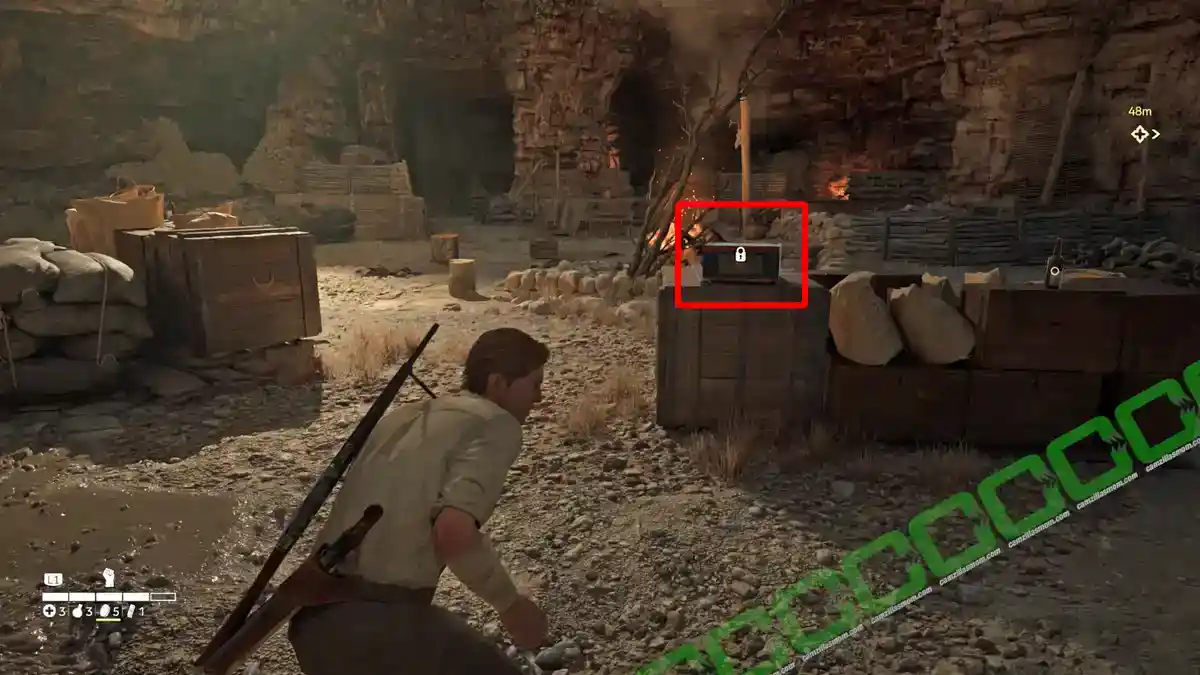
Close to the previous chest is the main camp area in the cave with a campfire and a newspaper. Here you’ll find a locked chest.
Newspaper: Russo-Japanese War


The Newspaper: Russo-Japanese War is not far from the previous chest near the campfire.
Locked Box 5 of 8
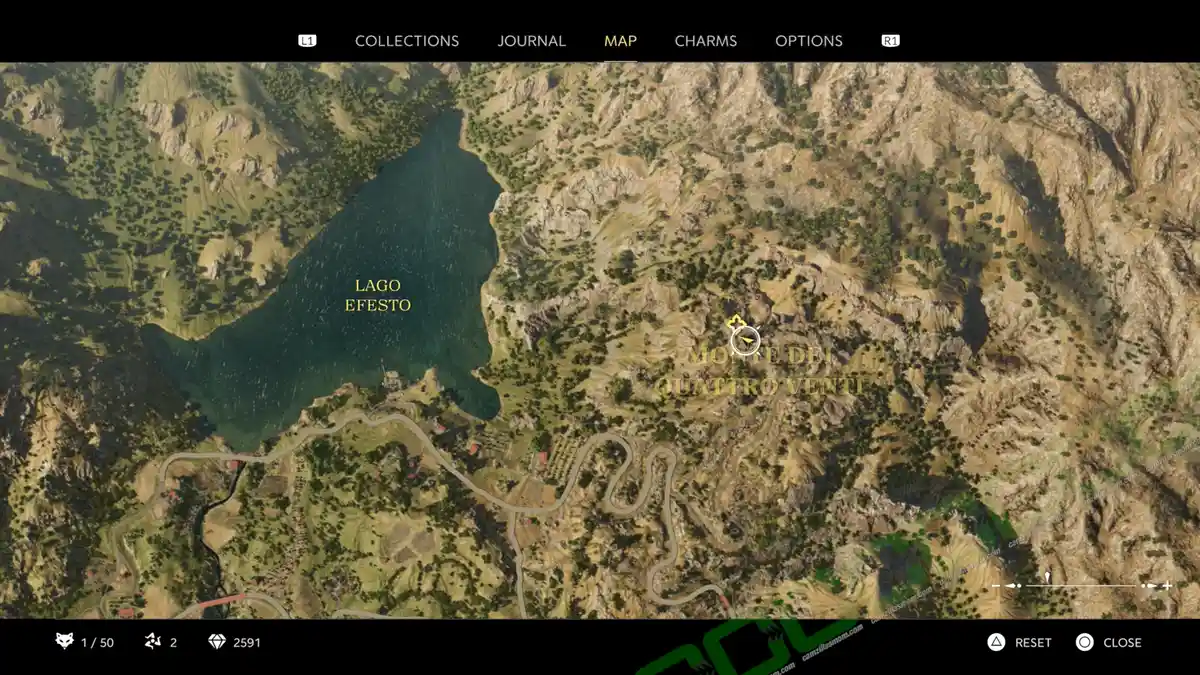

Not far from the cave campfire is an elevated area with this locked box.
Messina’s Camp – Upper Part
Mystery Fox
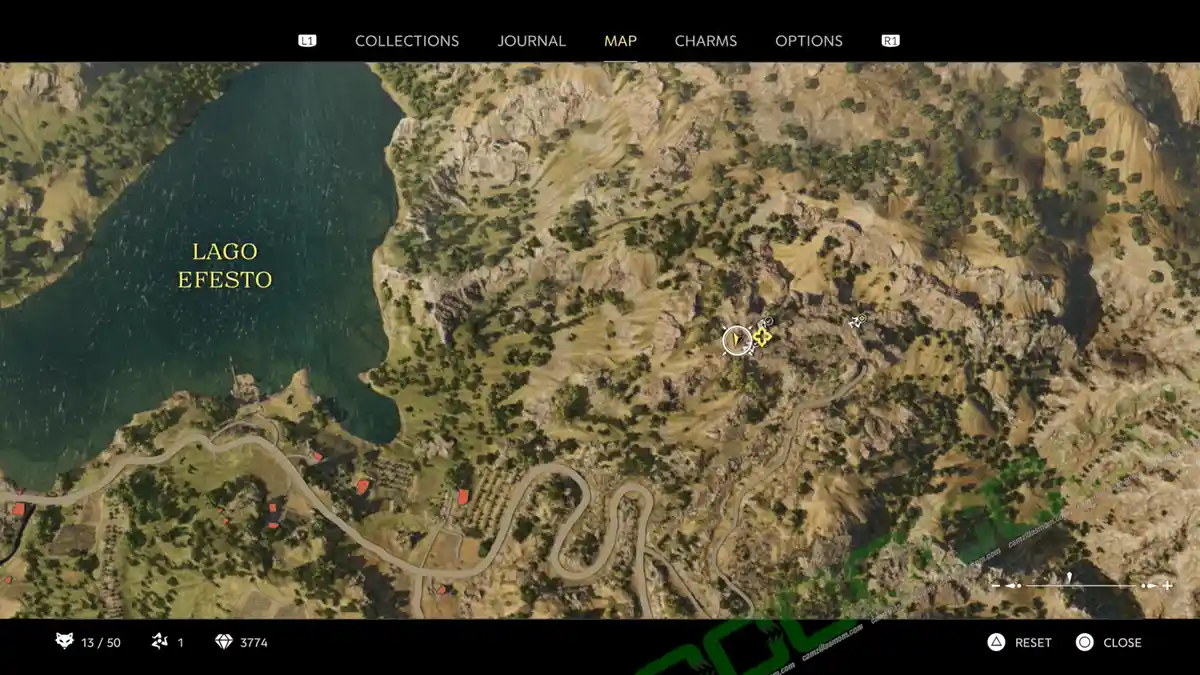
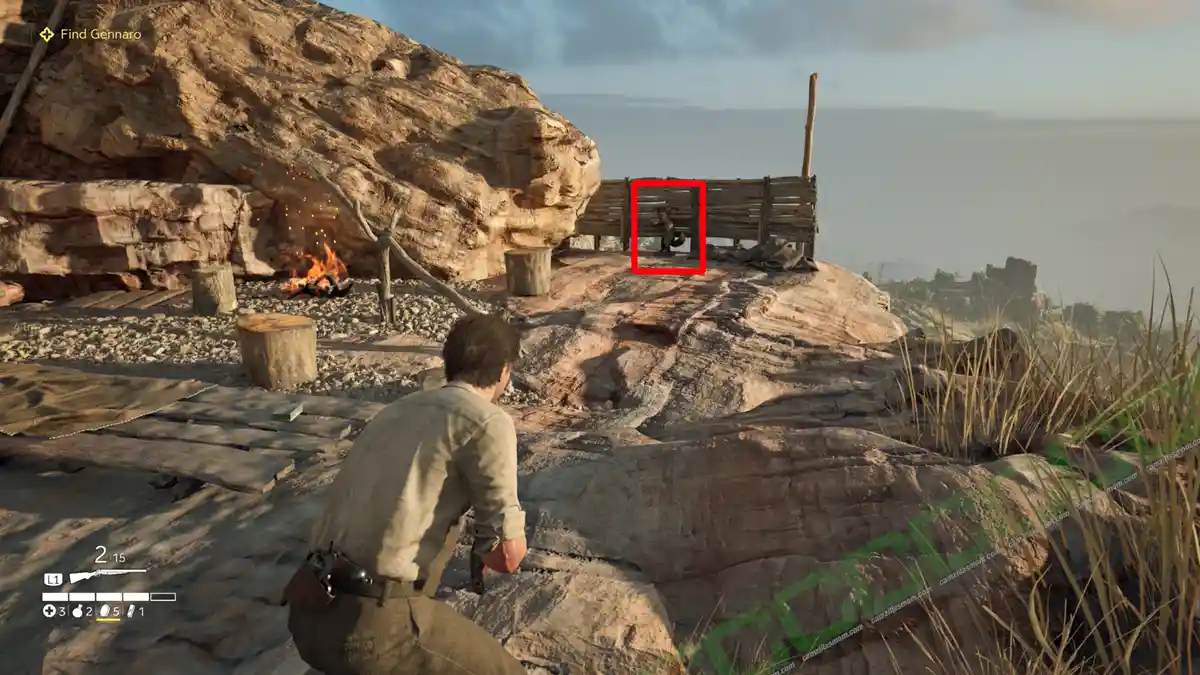
Exit the cave up the staircase to reach the upper camp, following the mission marker. At the very start of the upper camp, there is a Mystery Fox at the ledge to the right.
Locked Box 6 of 8
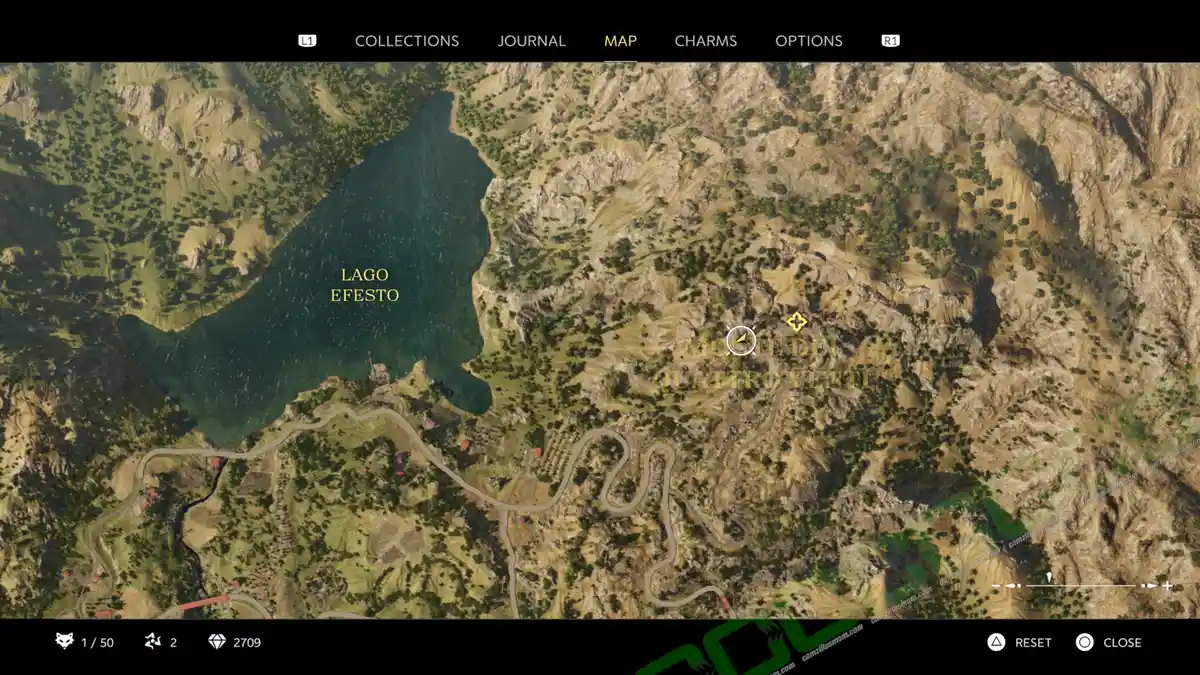
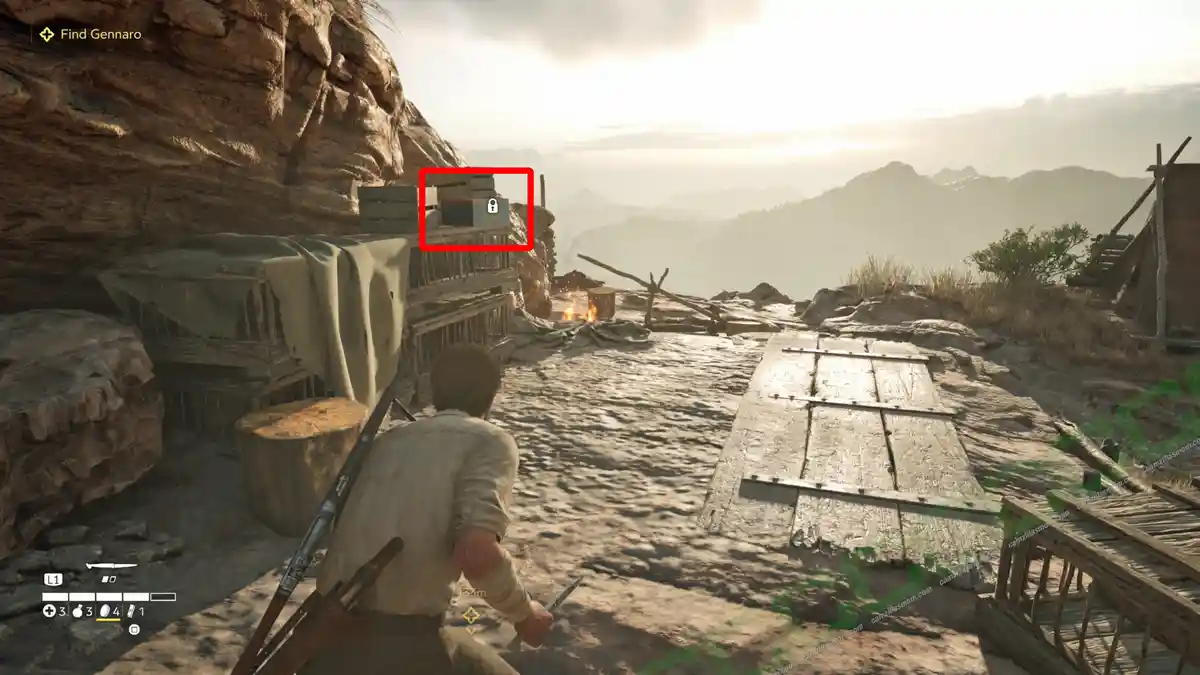
Not far from the Mystery Fox is also a locked chest.
Journal Note 3 of 4
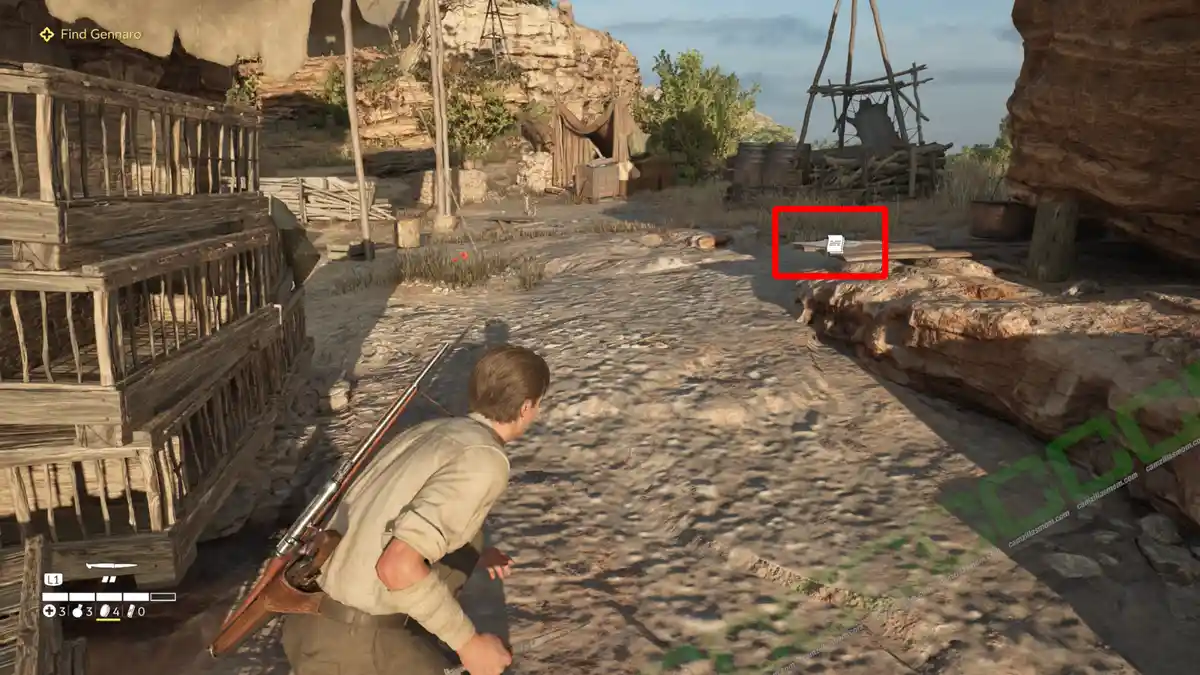
The note: Gennaro’s Acquisition is right next to the previous chest.
Locked Box 7 of 8
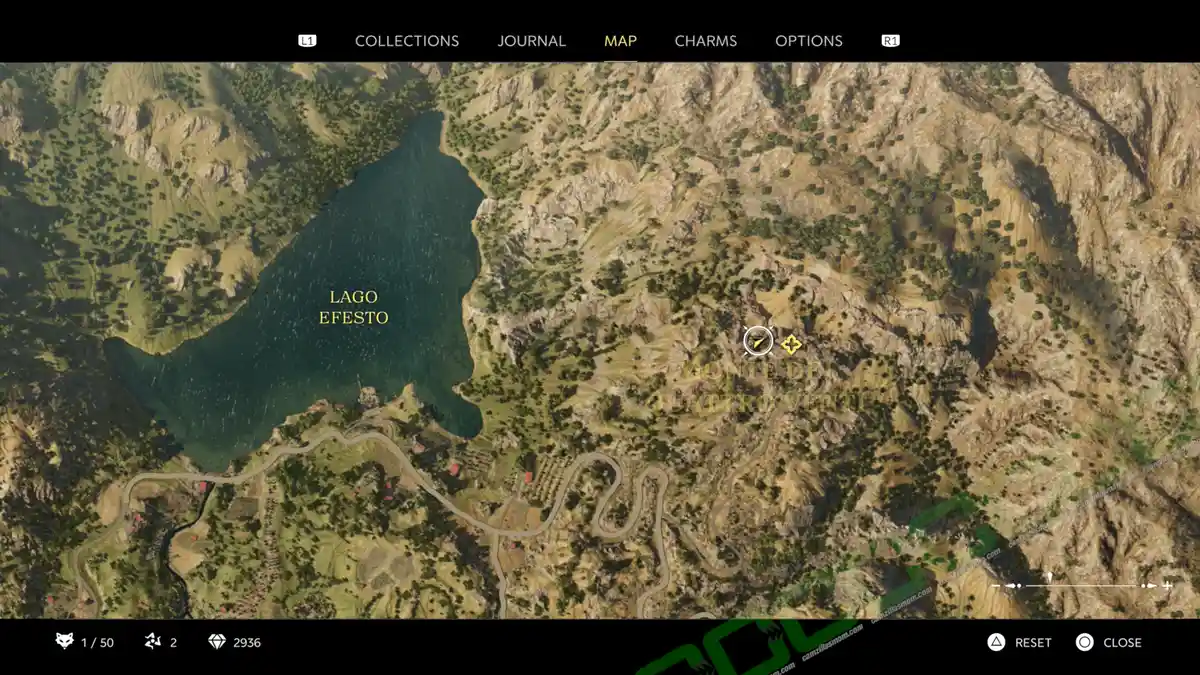
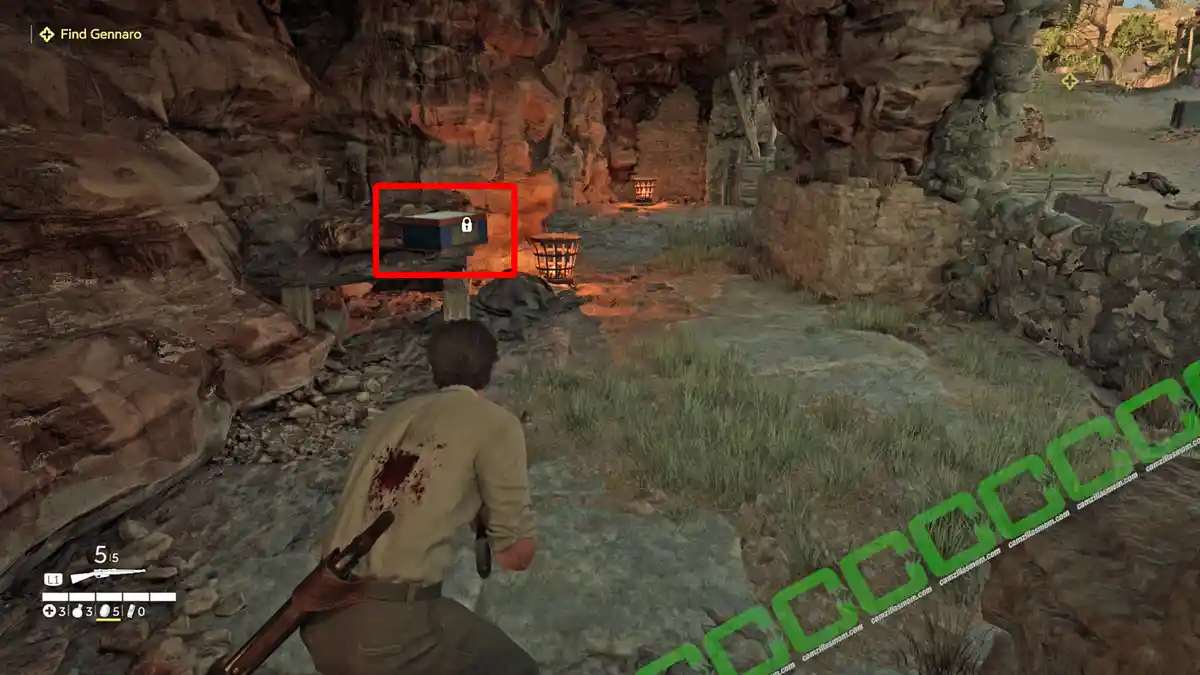
Follow the path until Enzo encounters Messina, triggering a fight. Once the battle concludes, you’ll discover a chest located in the initial combat area.
Locked Box 8 of 8
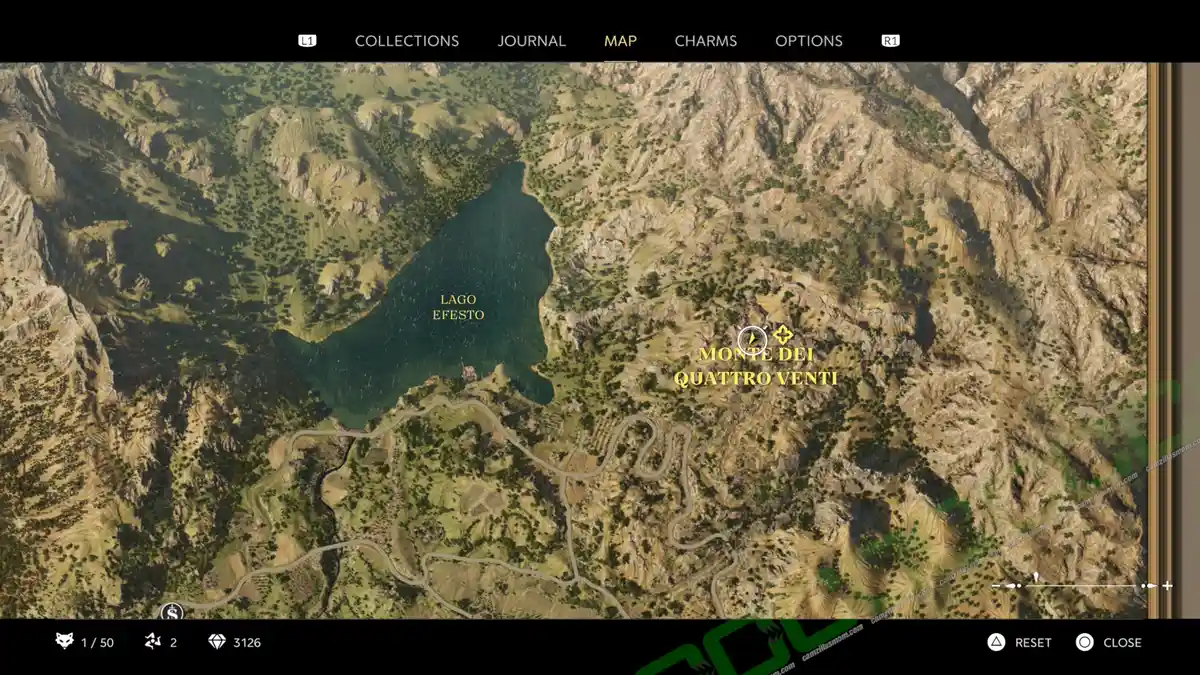
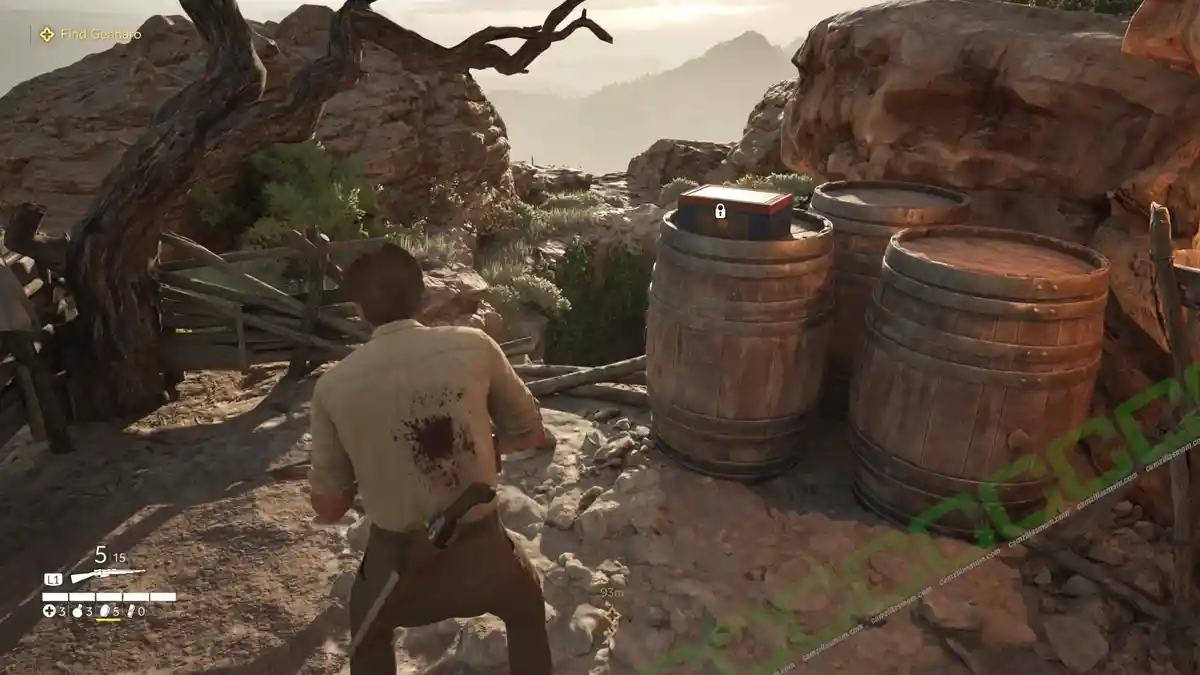
Go back to where the fight started. There is an elevated area where you can find another locked chest.
Journal Note 4 of 4
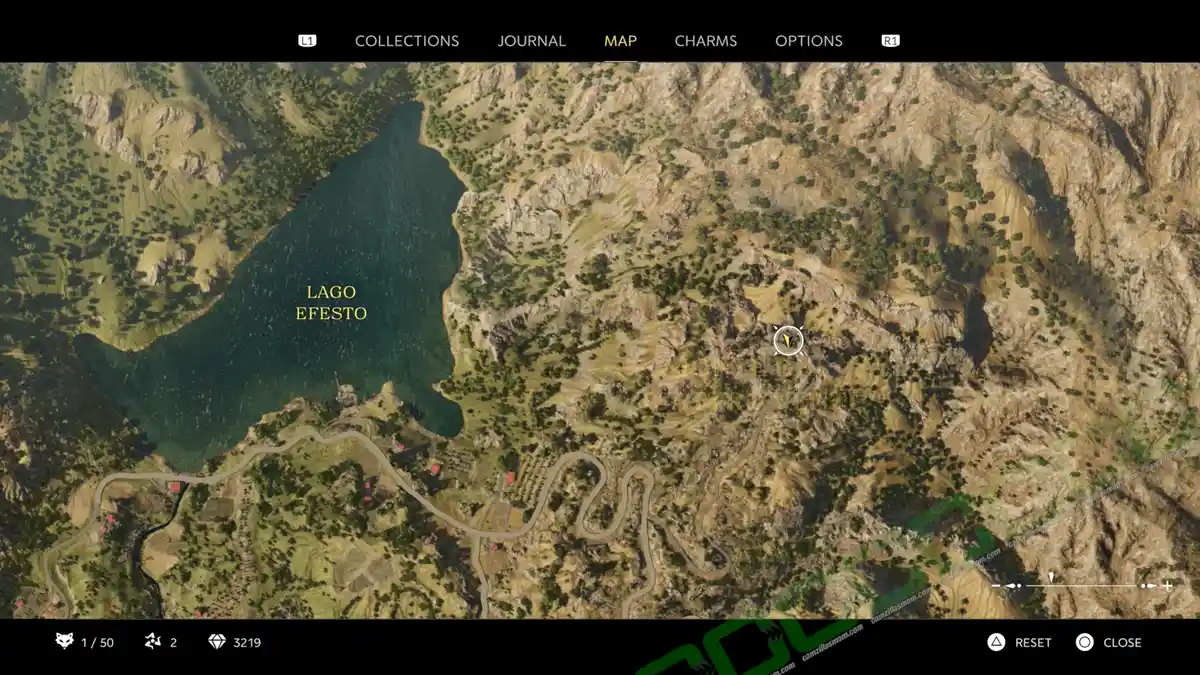
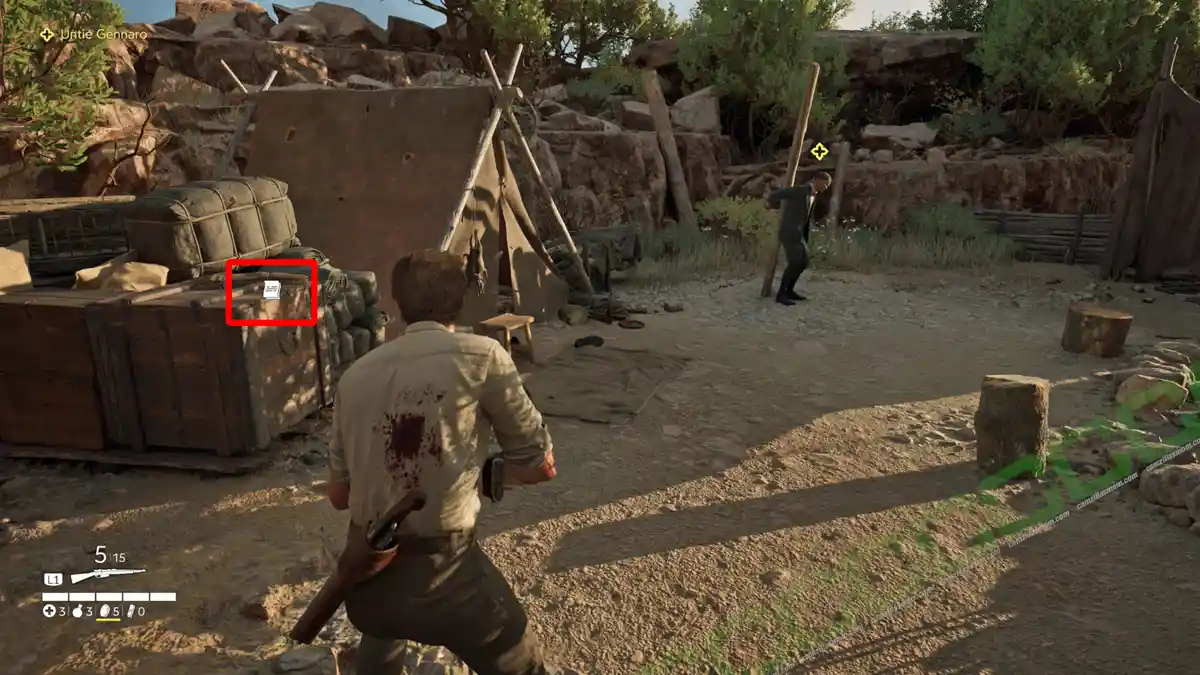
The note: Ransom Note: Gennaro is just a couple of steps away from Gennaro at the top of Messina’s Camp.
“San Giuda” Medallion Charm


The medallion charm “San Giuda” is just a couple of steps away from Gennaro.
Trinacria 2 of 2
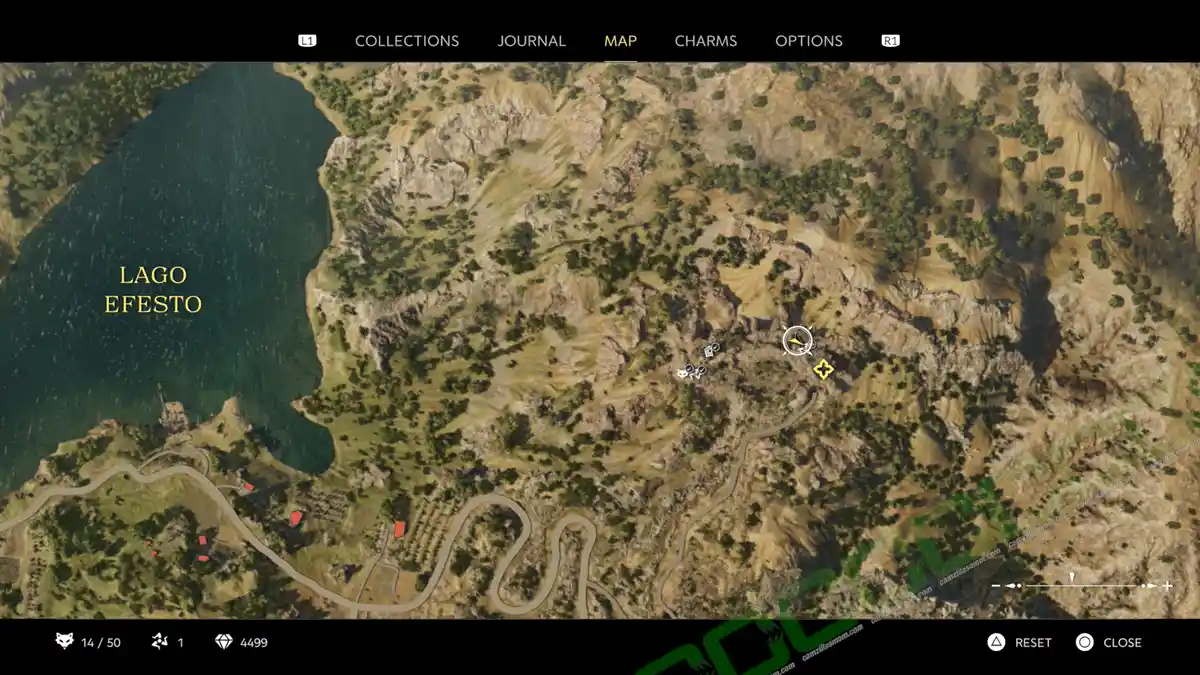
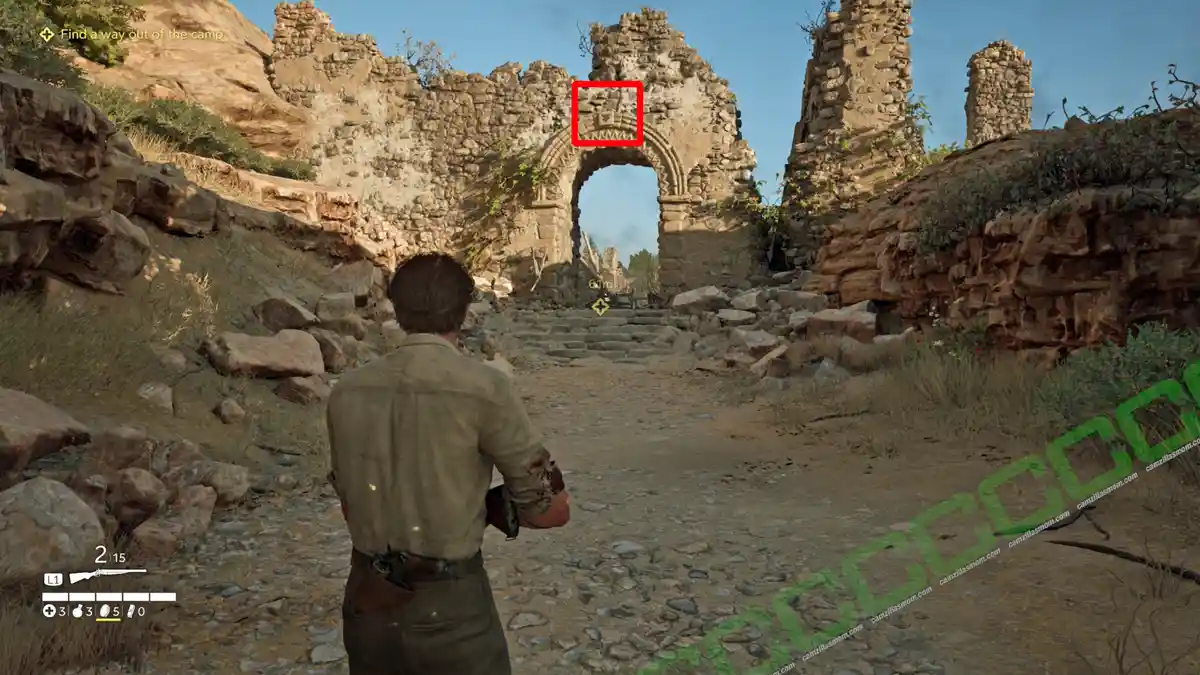
After freeing Gennaro in Messina’s camp, they flee through a ruined archway toward the Messina knife fight. Here, on top of the arch, is the Trinacria.
Chapter 5 – Vendetta D’Onore
In Chapter 5: Vendetta D’Onore, there are 15 collectibles:
6 Journal Notes, 4 Locked Boxes, 2 Trinacrias, 1 Newspaper, 1 Charm, and 1 Mystery Fox.
Journal Note 1 of 6
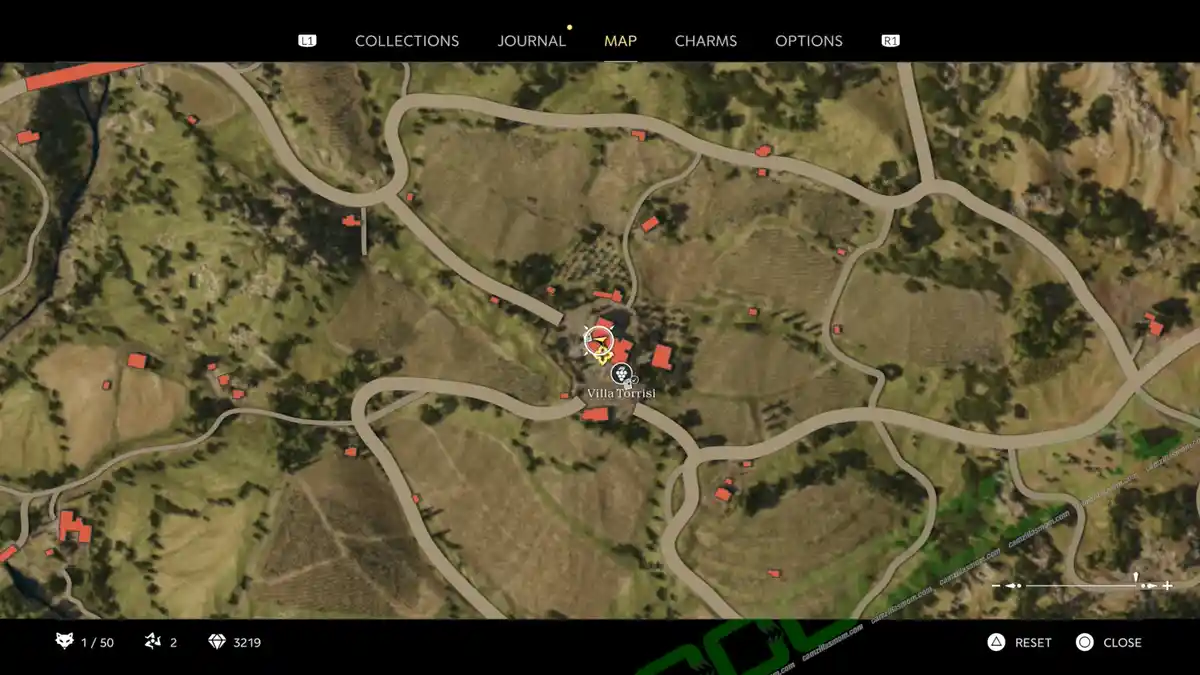
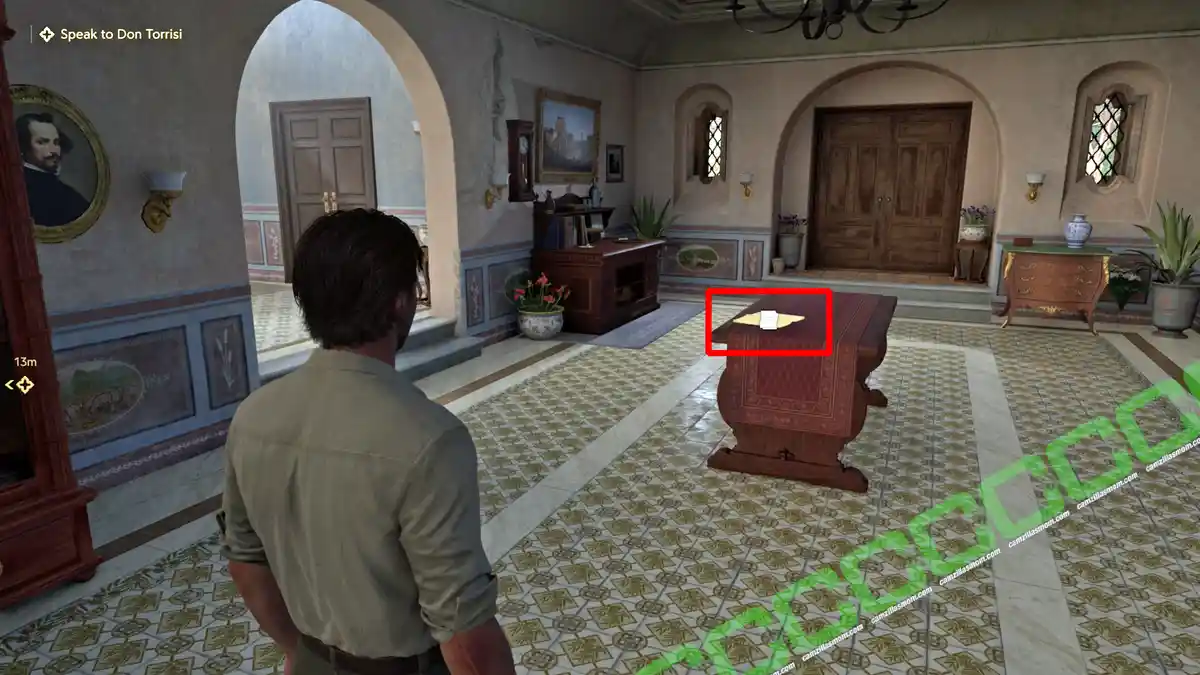
In Chapter 5 of Vendetta D’Onore, Enzo can enter the main building at Villa Torrisi and find the note: Cleanup Initiative on the ground floor, on top of the table.
Journal Note 2 of 6

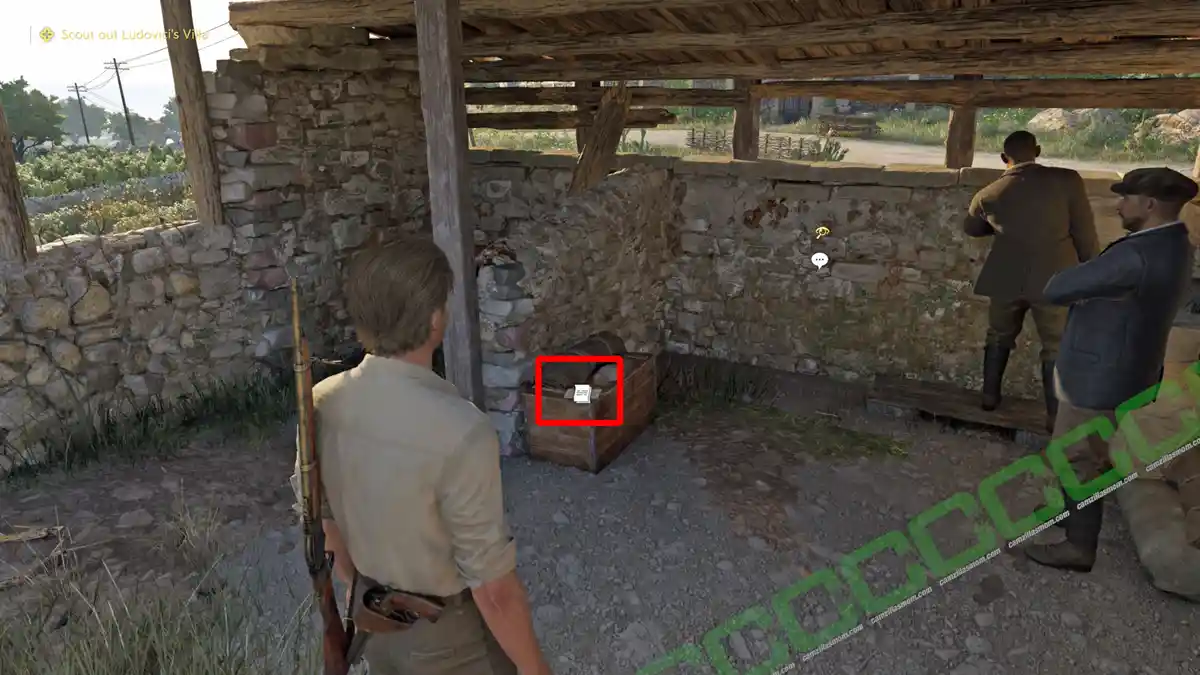
Enzo now has to meet with Tino just north of Porto Almaro. Right at the lookout, after meeting Tino’s men, you can find the note: Torrisi Logbook.
Locked Box 1 of 4
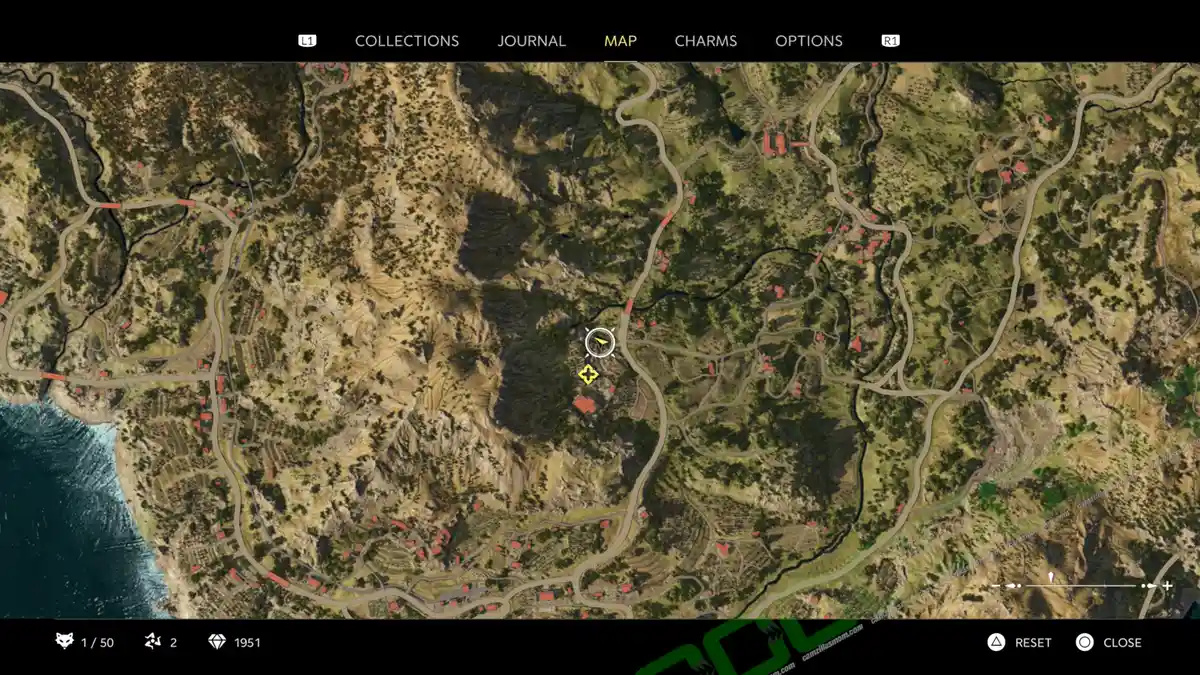
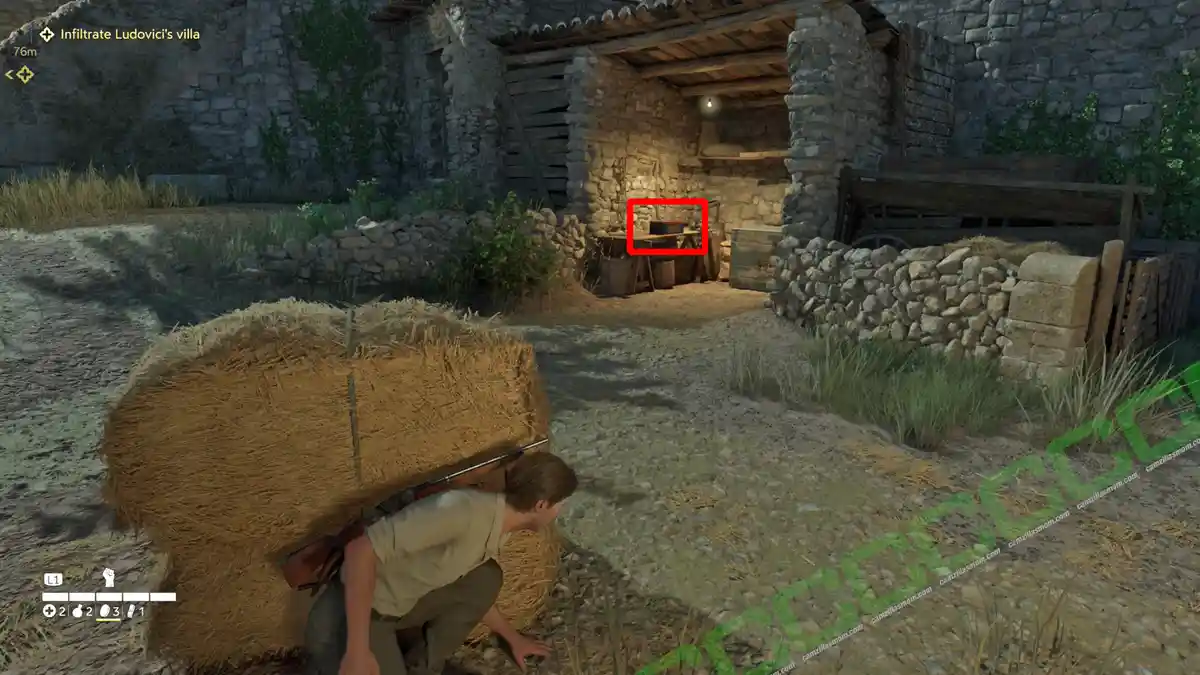
Right after the main gate is this locked box next to a body hiding box.
Locked Box 2 of 4
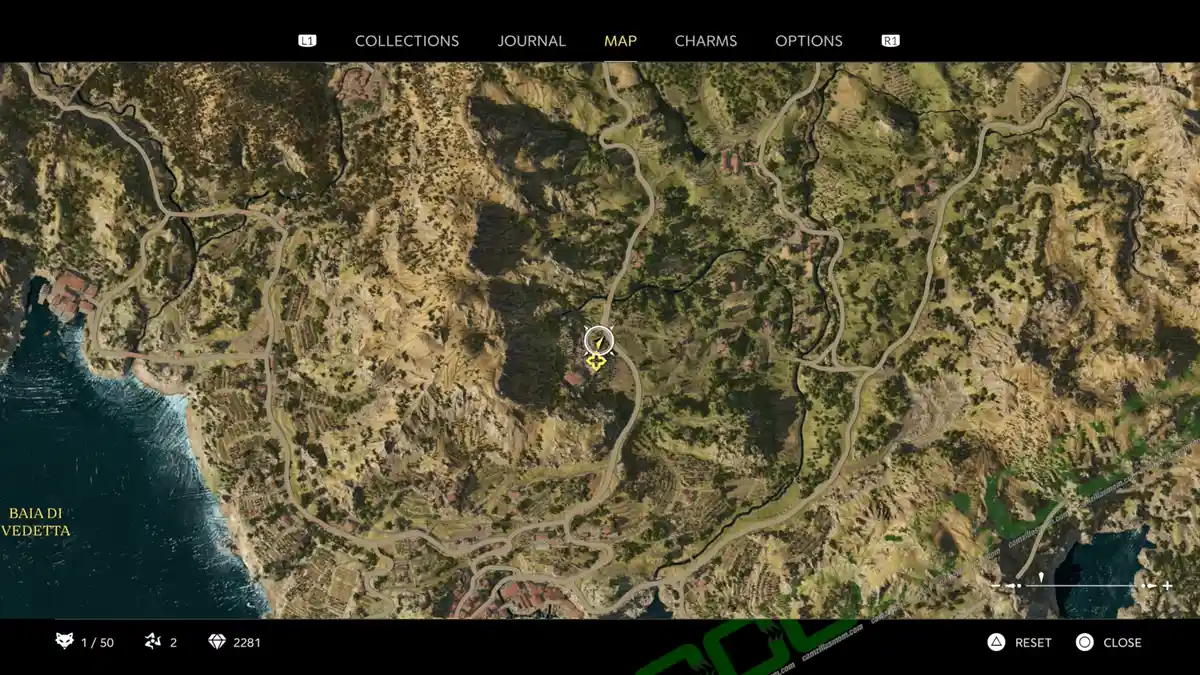
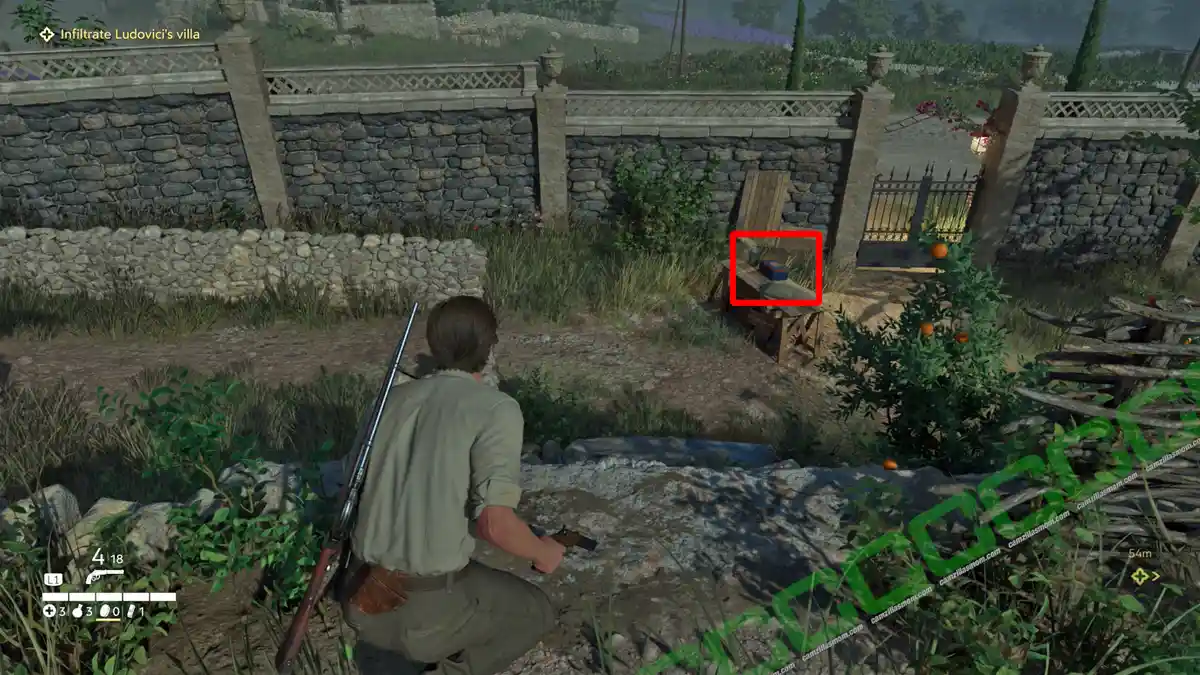
From the previous chest, cross the road (take care of the guards first, of course) and head towards a small gate, where you can find another locked box.
Locked Box 3 of 4 & Trinacria 1 of 2
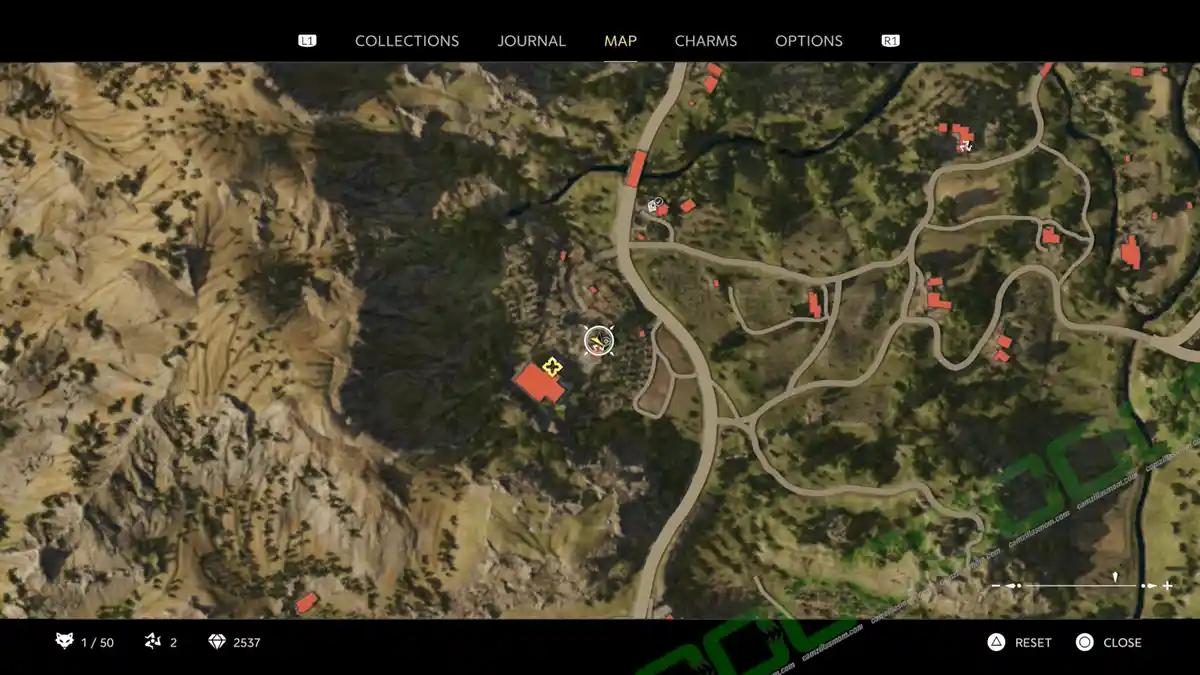
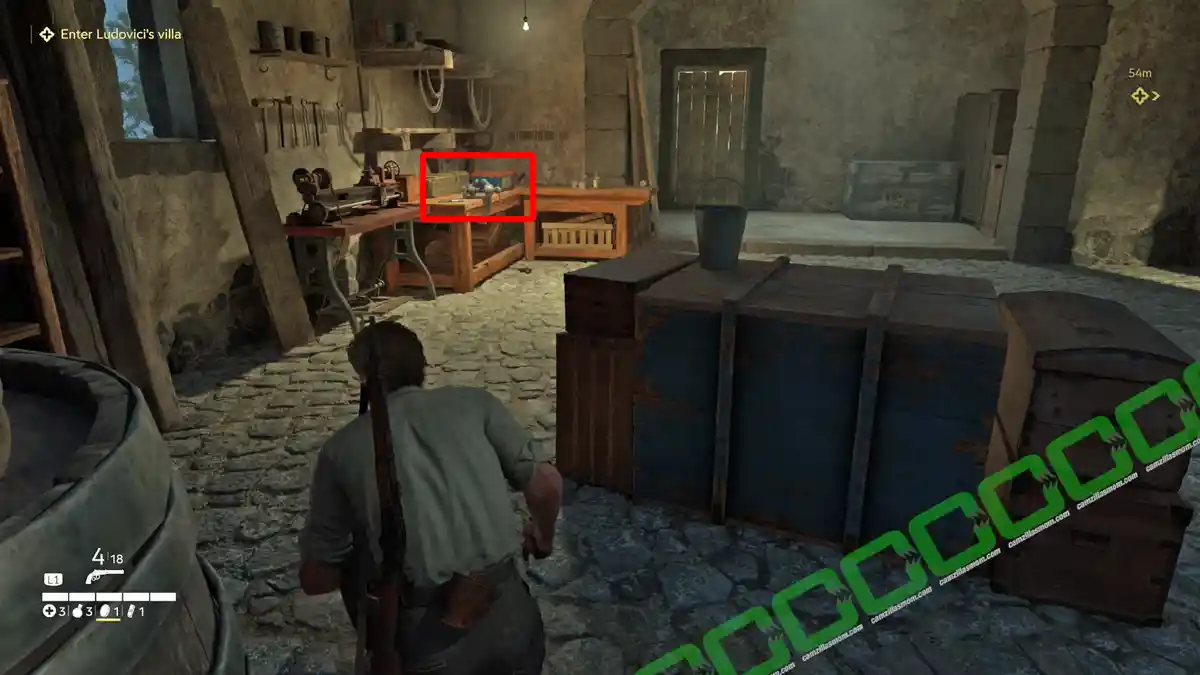
Further ahead, inside the side building of Ludovicis Villa, is a workbench with a locked chest and a Trinacria collectible.
Newspaper: Sicilian Parades


Just below the villa’s main entrance is a bench with the newspaper: Sicilian Parades.
Locked Box 4 of 4
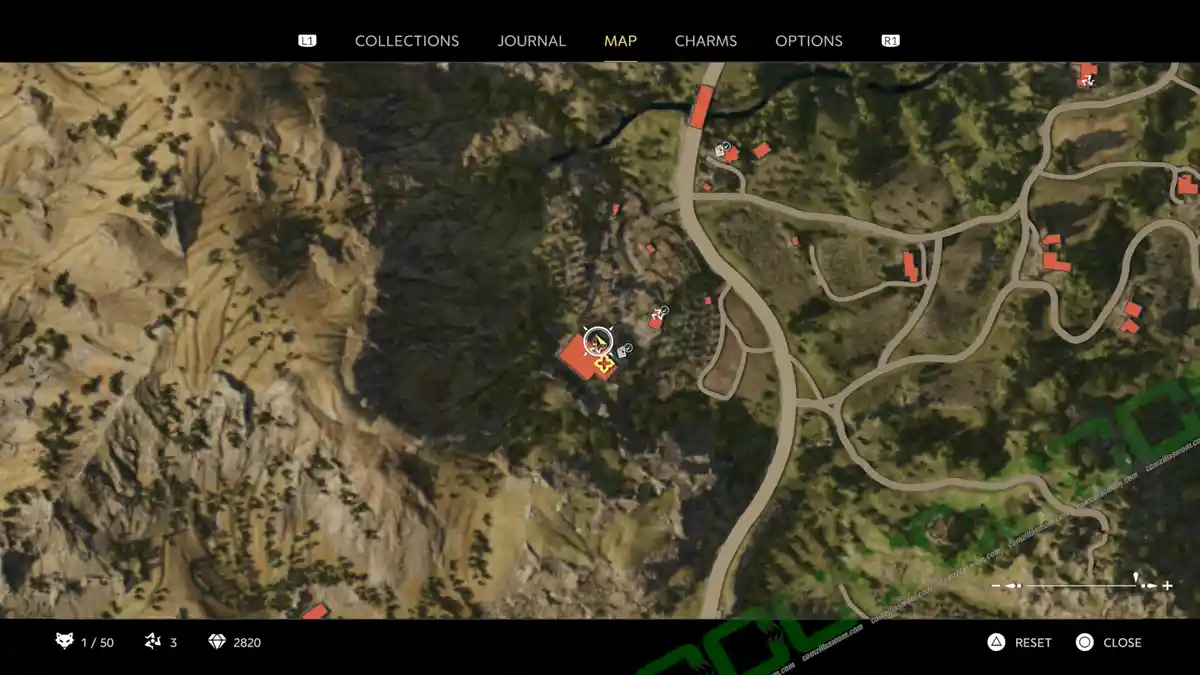
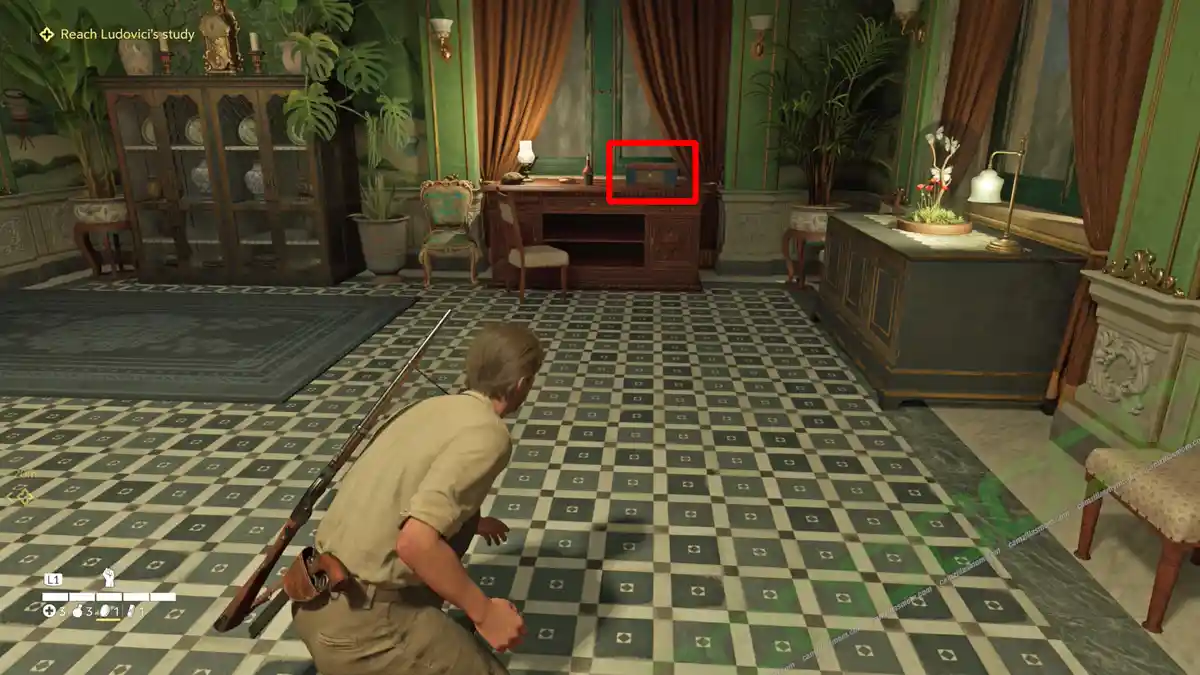
The next box is inside the villa, in the entrance hall, on top of a table.
Journal Note 3 of 6
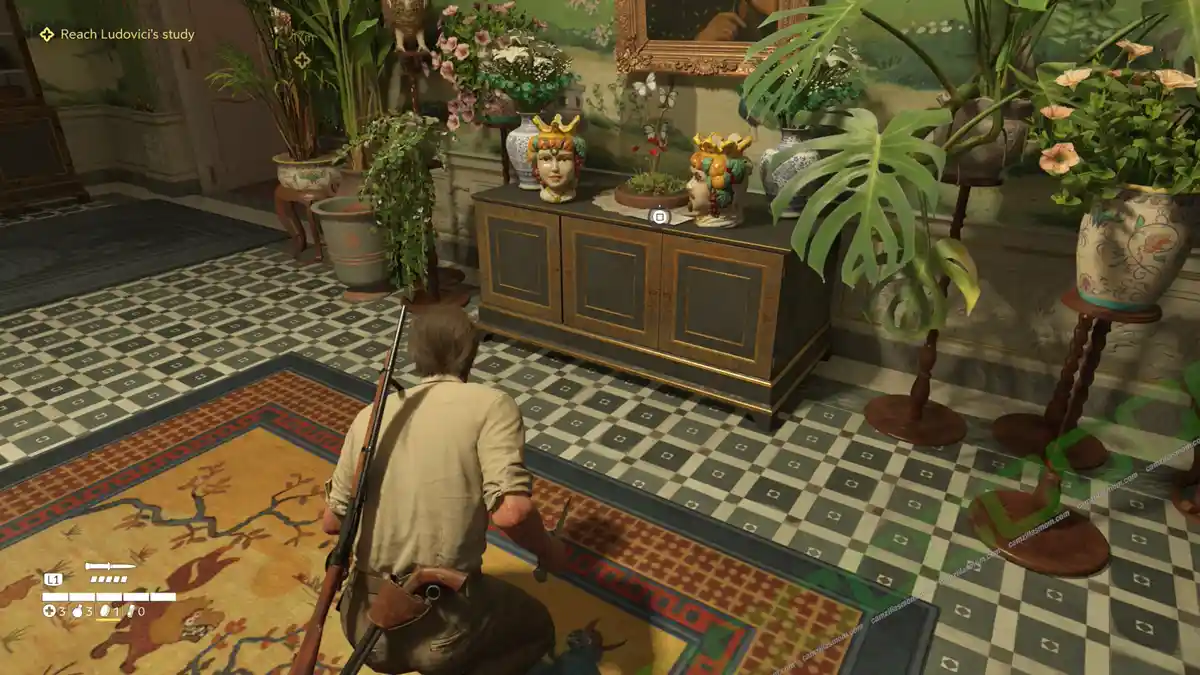
The note: Opera Advertisement can be discovered resting on the centerpiece furniture, positioned between two vibrant porcelain heads.
Journal Note 4 of 6
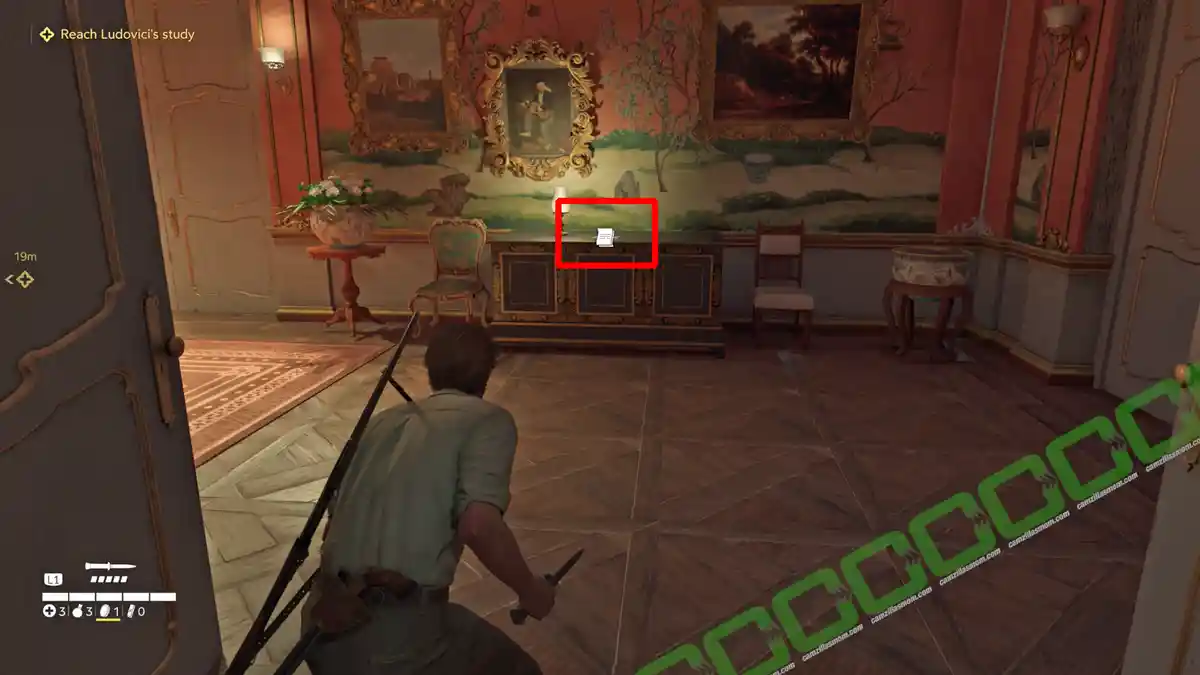
Go to the corridor, where you can find the note: Ludovici’s Collection.
“Caricato” Bead Charm


Also in the corridor, look for a statuette on top of a table – that’s the Caricato Bead Charm.
Trinacria 2 of 2
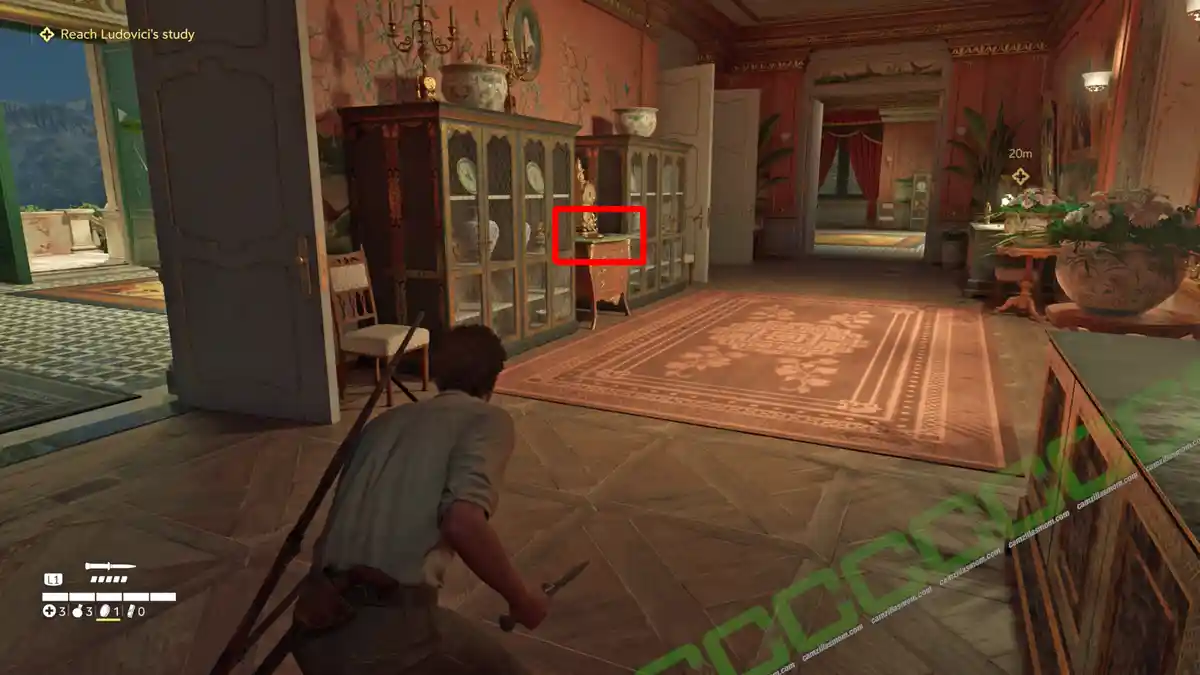
Also, look for a big, golden bracket clock on top of a drawer unit. There you will find the Trinacria.
Journal Note 5 of 6
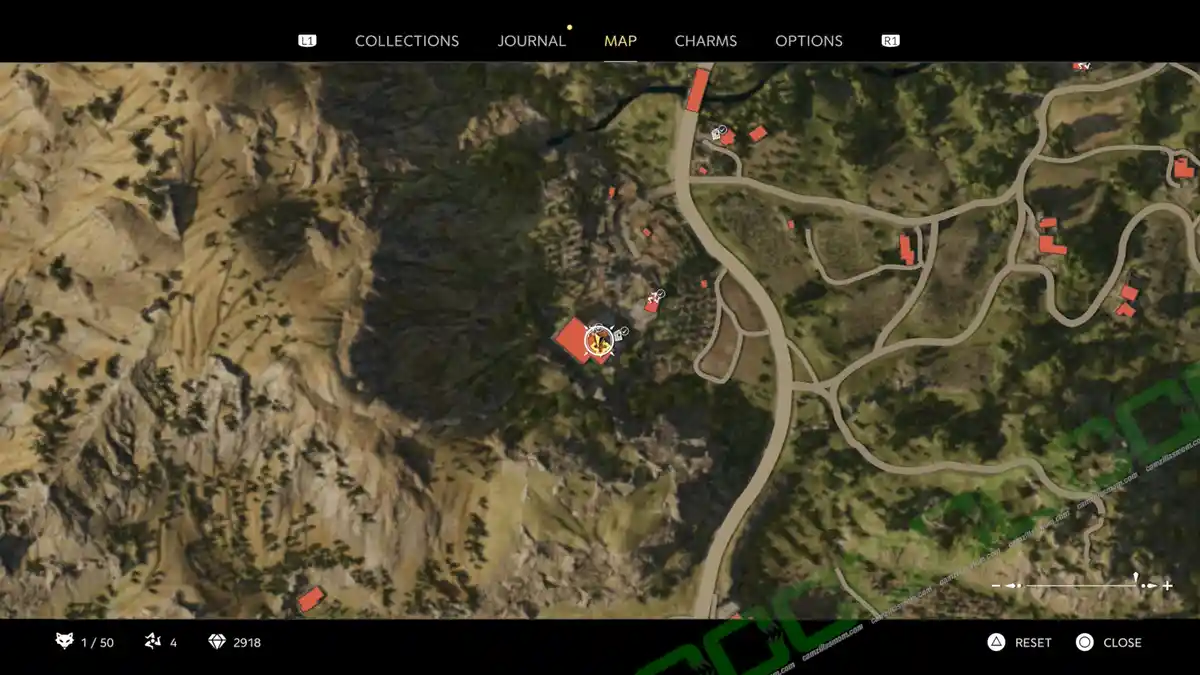
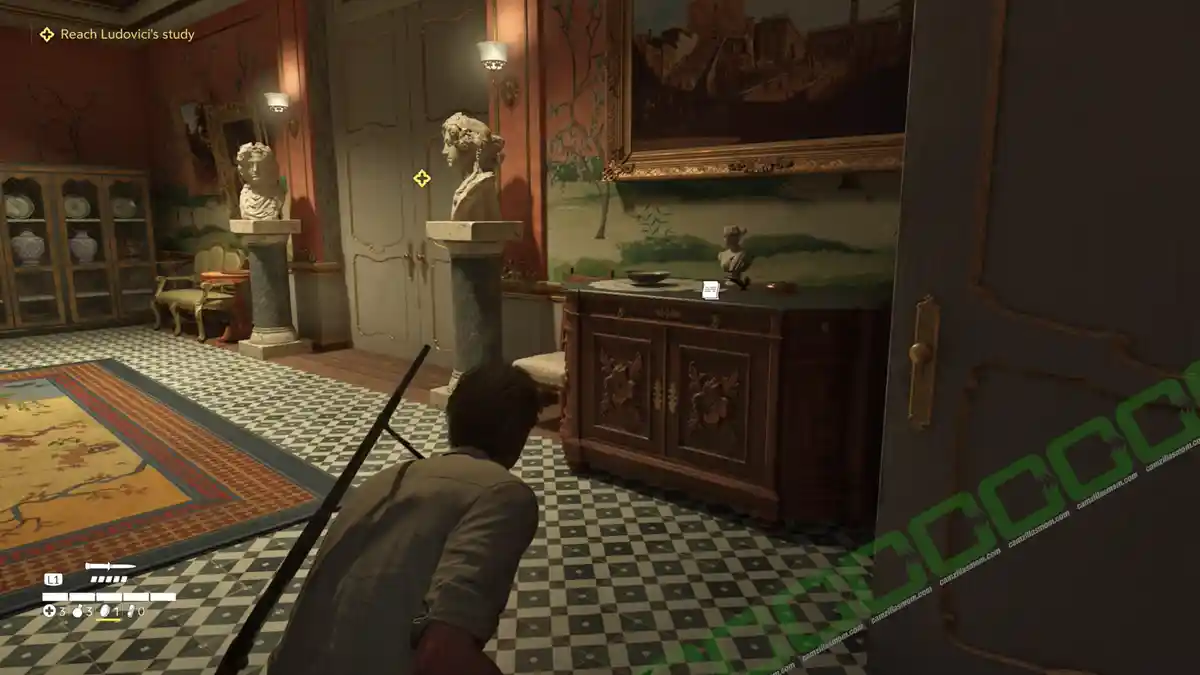
Next to Ludovici’s study door is a piece of furniture with the note: Protection Agreement.
Mystery Fox
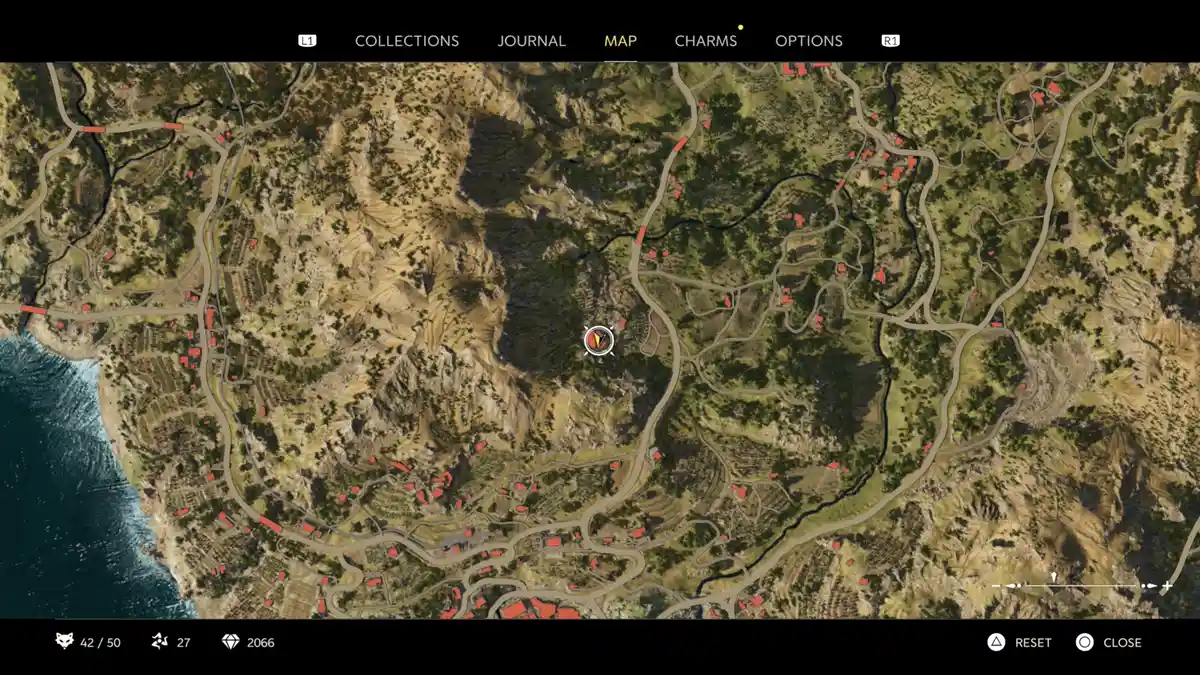
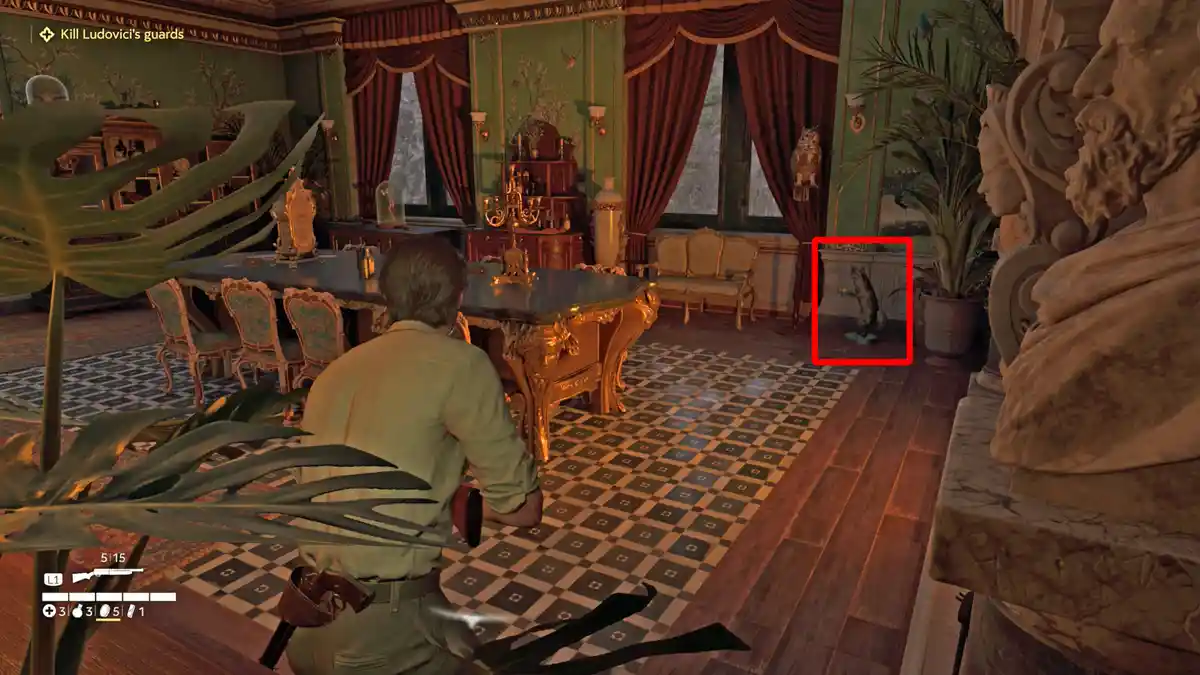
Approach the study door to trigger a cutscene showing Ludovici making his escape. Before pursuing him, step into the study – revealed to be a dining room – where you’ll discover a hidden Mystery Fox tucked away in the corner.
Journal Note 6 of 6
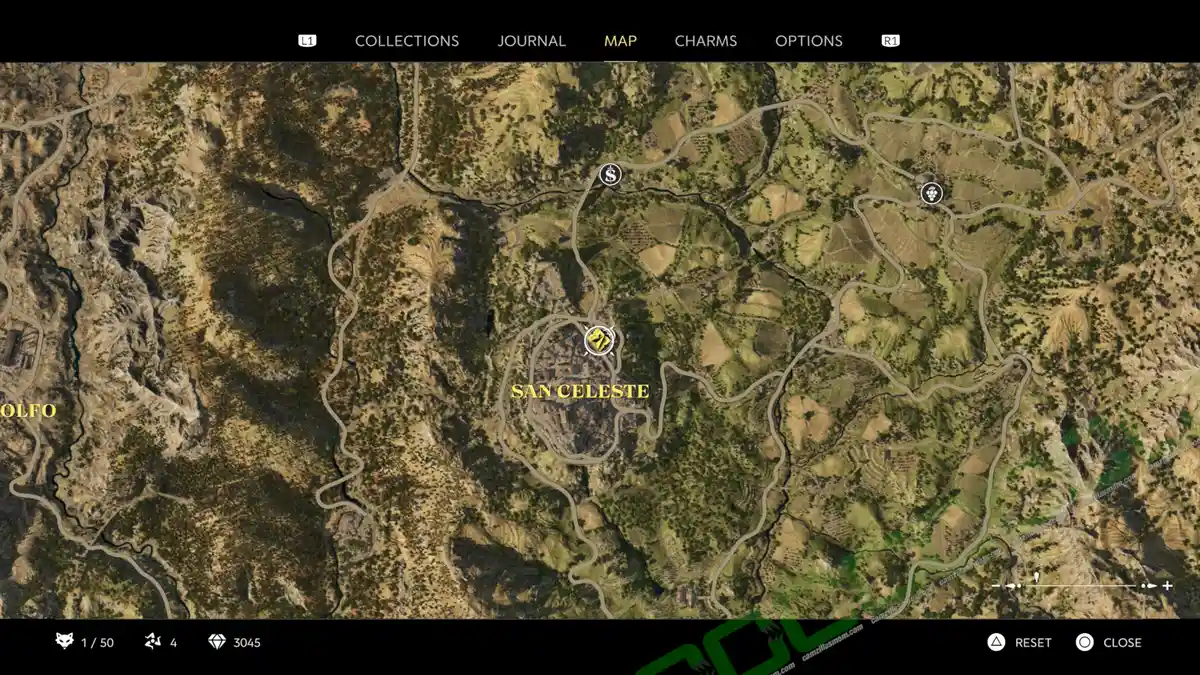
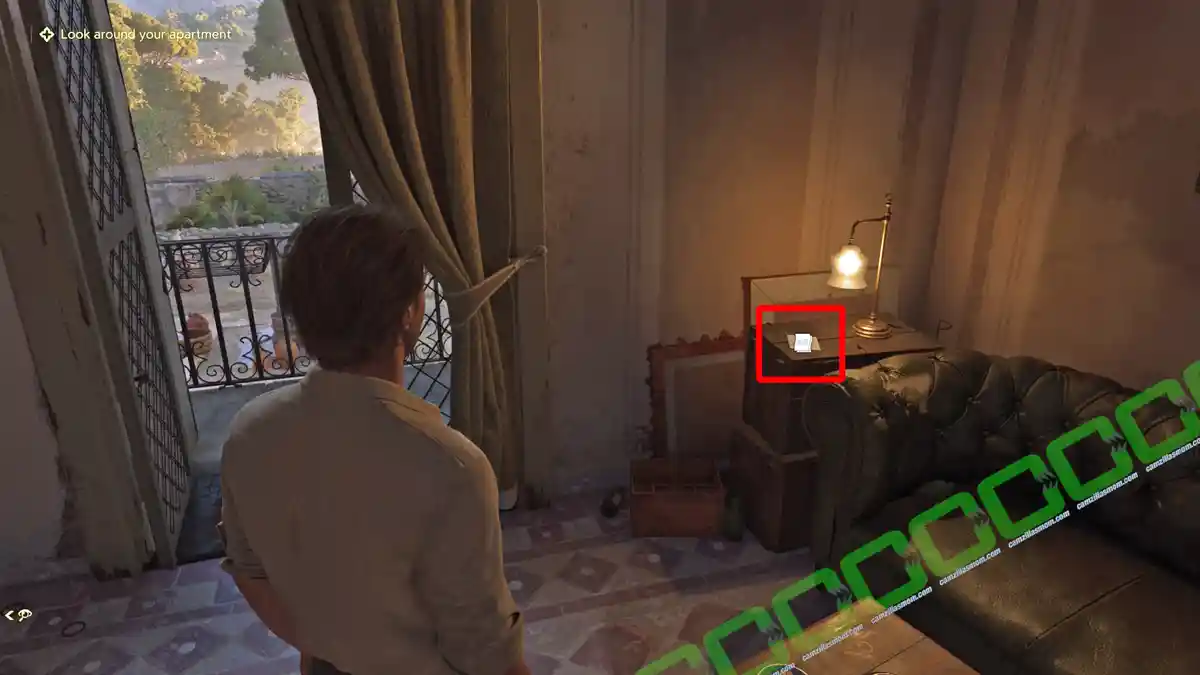
At the end of Chapter 5, Enzo will receive his own apartment in San Celeste. The note: Threatening Letter is on the table next to the couch.
Chapter 6 – La Difesa Siciliana
In Chapter 6: La Difesa Siciliana, there are 29 collectibles:
2 Newspapers, 7 Locked Boxes, 16 Journal Notes, 1 Mystery Fox, 1 Trinacria, and 2 Charms.
Tannery
Newspaper: Labor Protests & Locked Box 1 of 7


In Chapter 6: La Difesa Siciliana, Enzo visits the Tannery together with Cesare for a meeting. After the talk, stay in the tannery’s basement, where you can find this newspaper: Labor Protests next to a locked chest.
San Celeste – Daytime
Journal Notes 1 of 16
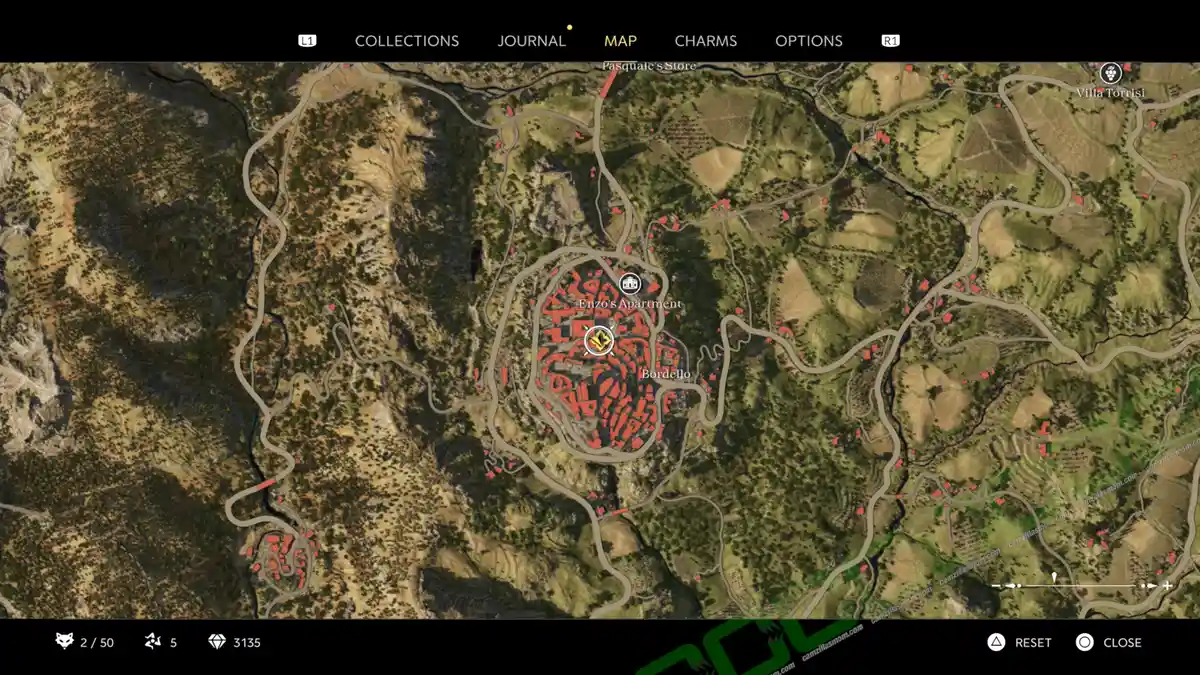
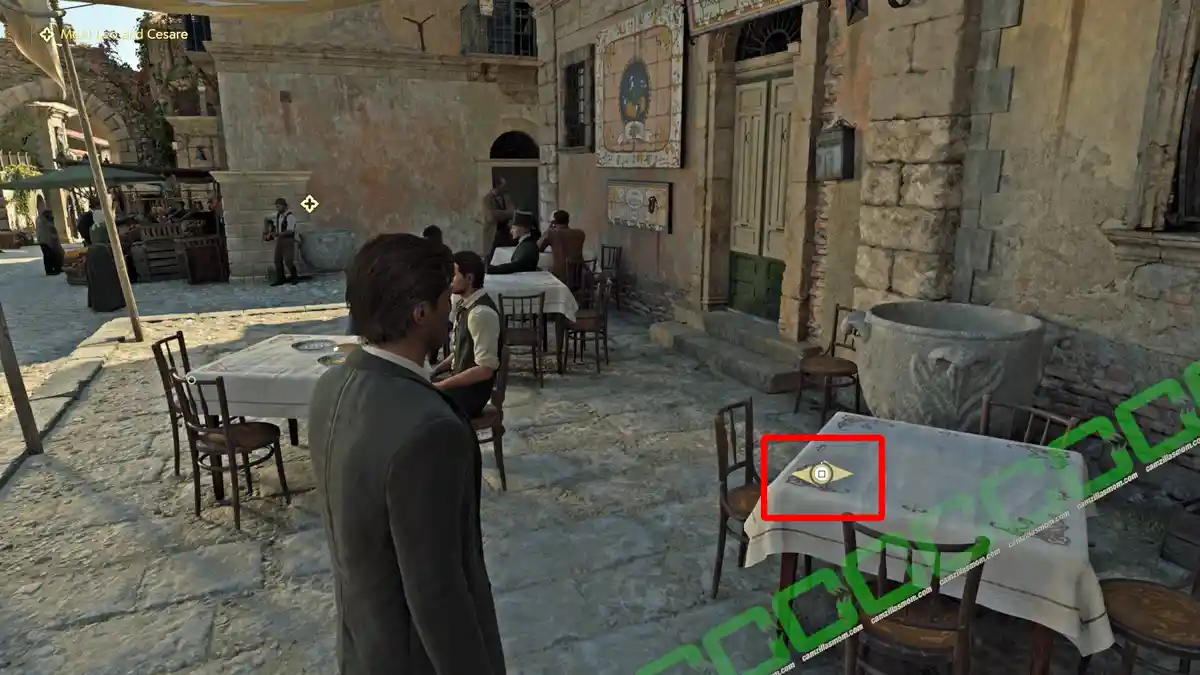
Later, they travel to San Celeste. The note: Café Menu is at the café near the Town Hall in San Celeste.
Journal Notes 2 of 16
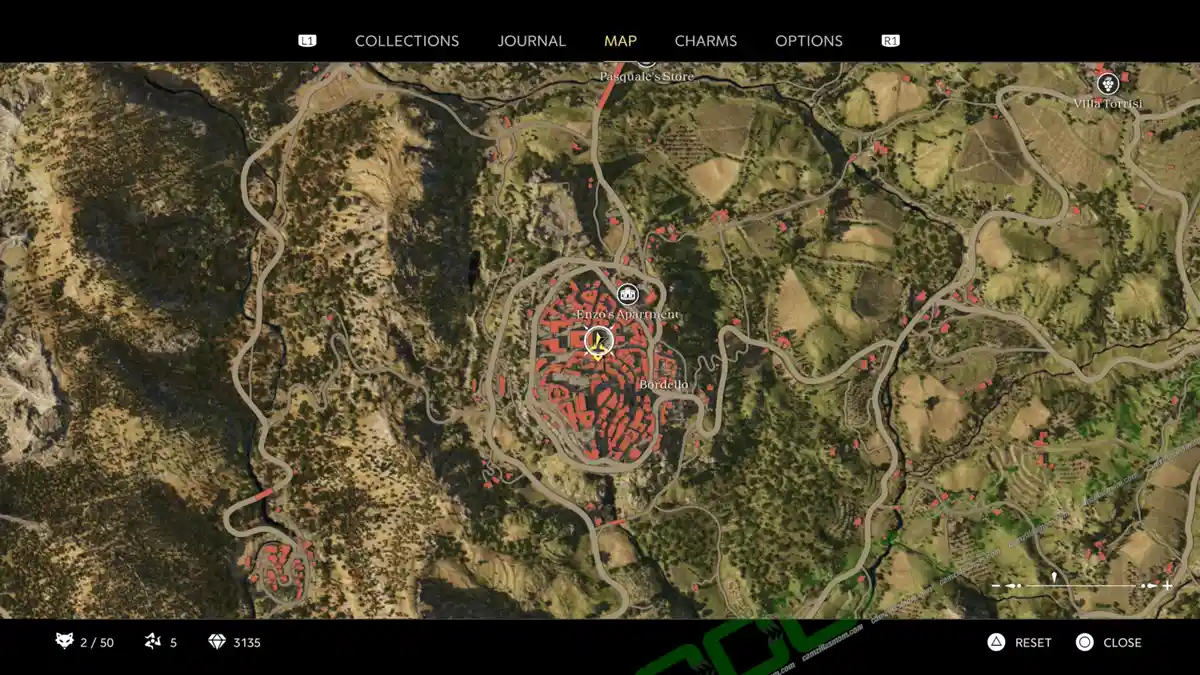

The note: Velocita Interview is at a market stall near the Town Hall at San Celeste.
Journal Notes 3 of 16
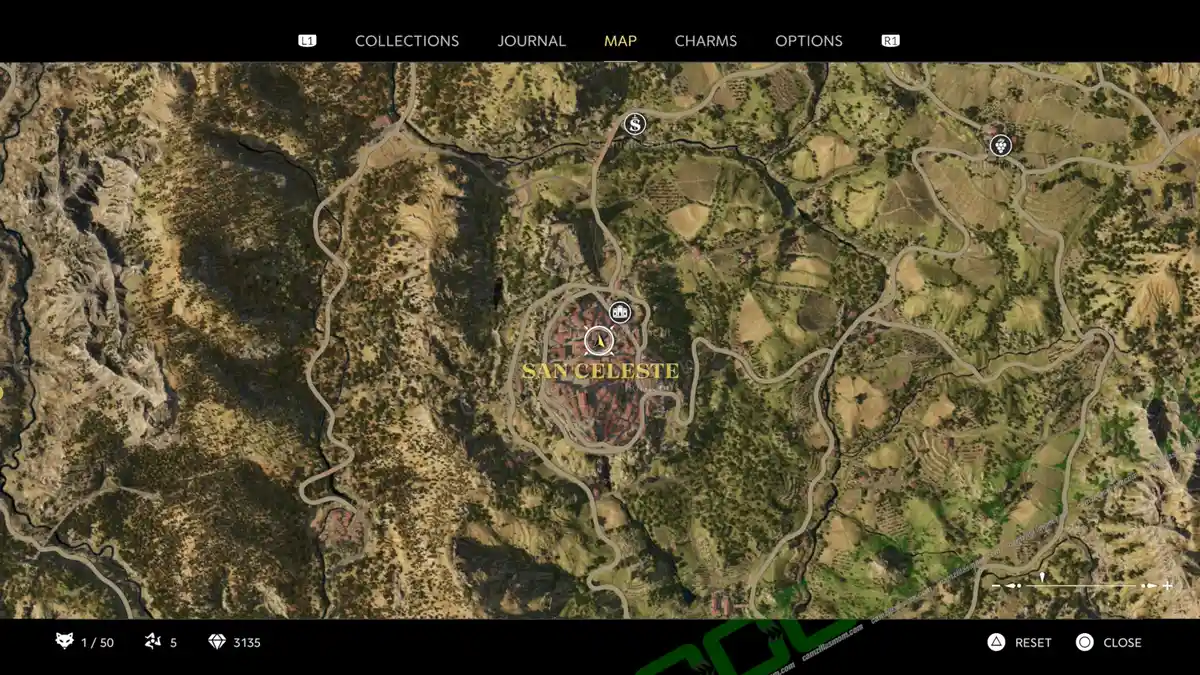
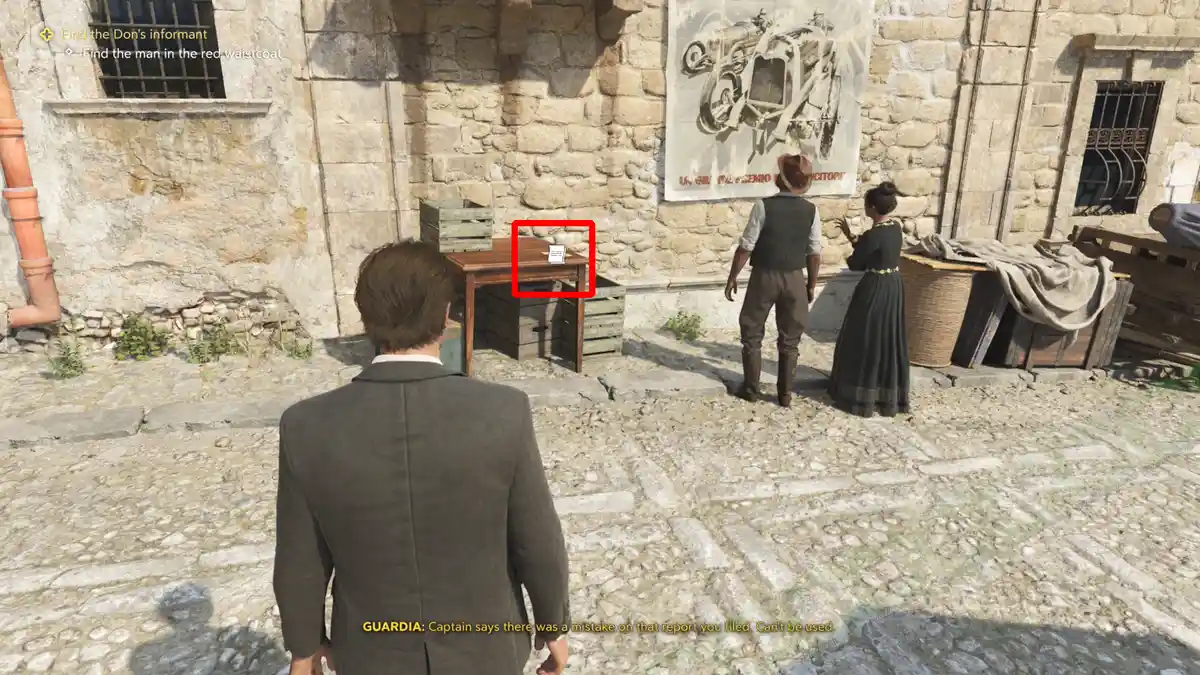
The note: Targa Pamphlet rests on a table at the northern side of San Celeste’s vibrant Market Square.
Locked Box 1 of 7
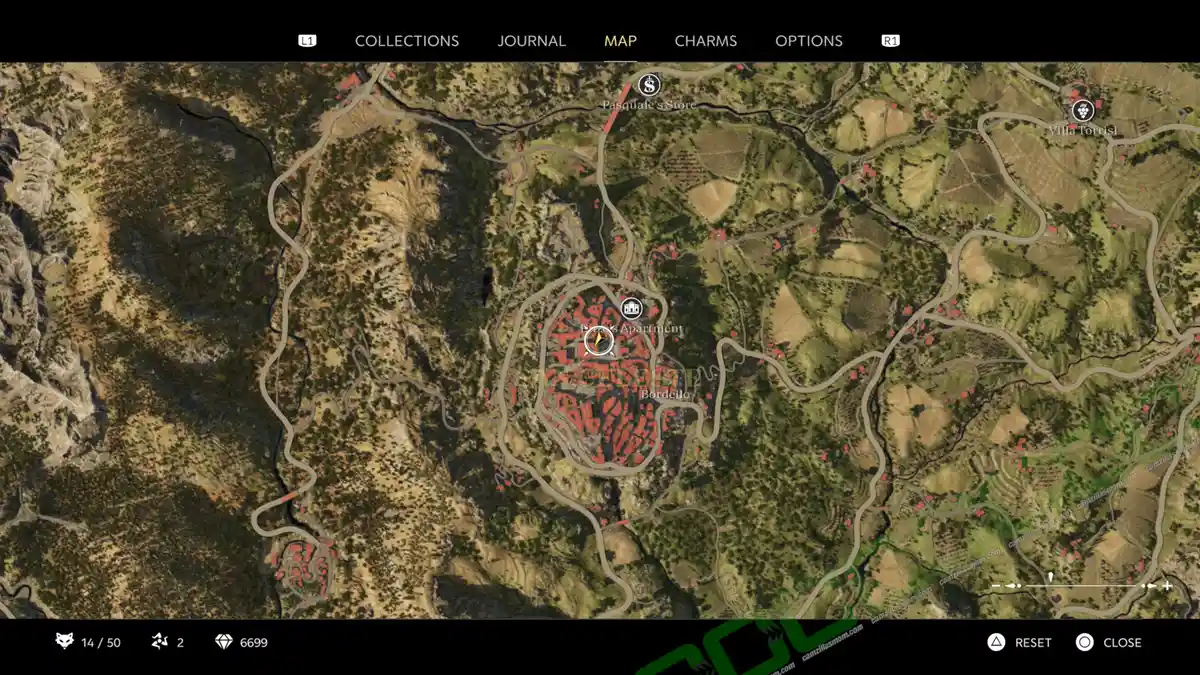
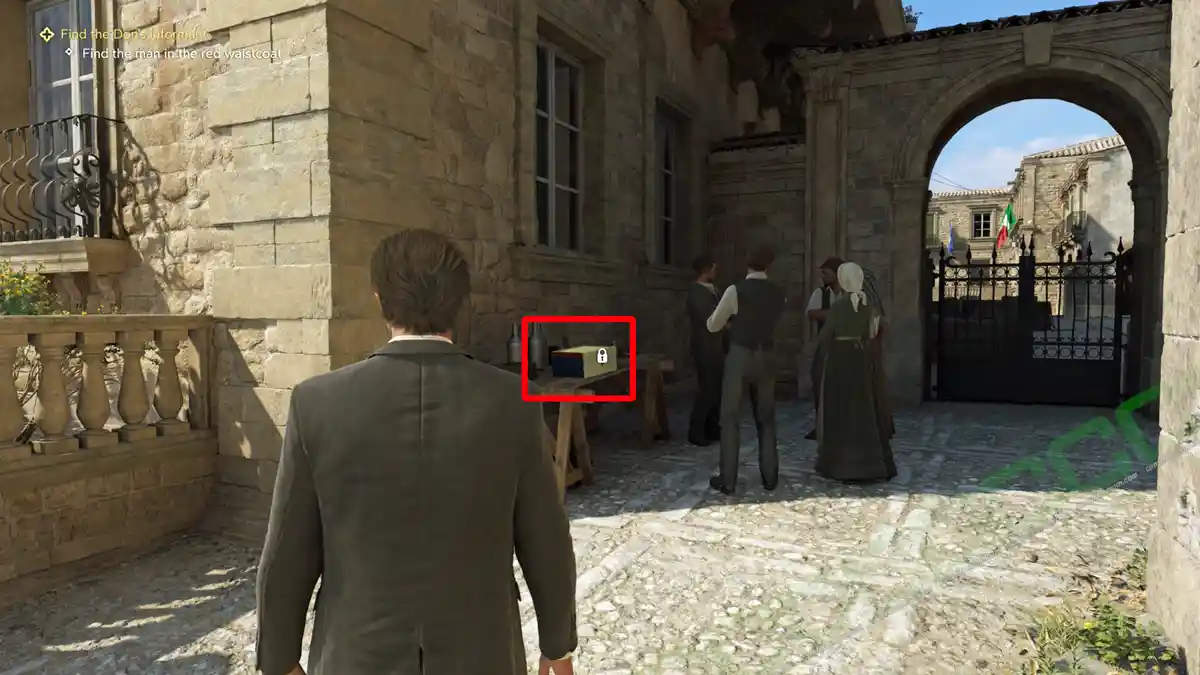
There is a locked box at the northwestern gate of the Market Square.
Newspaper: Tunnel Completed


Now enter the Town Hall and turn left into the first room, where you can find the newspaper: Tunnel Completed.
Mystery Fox

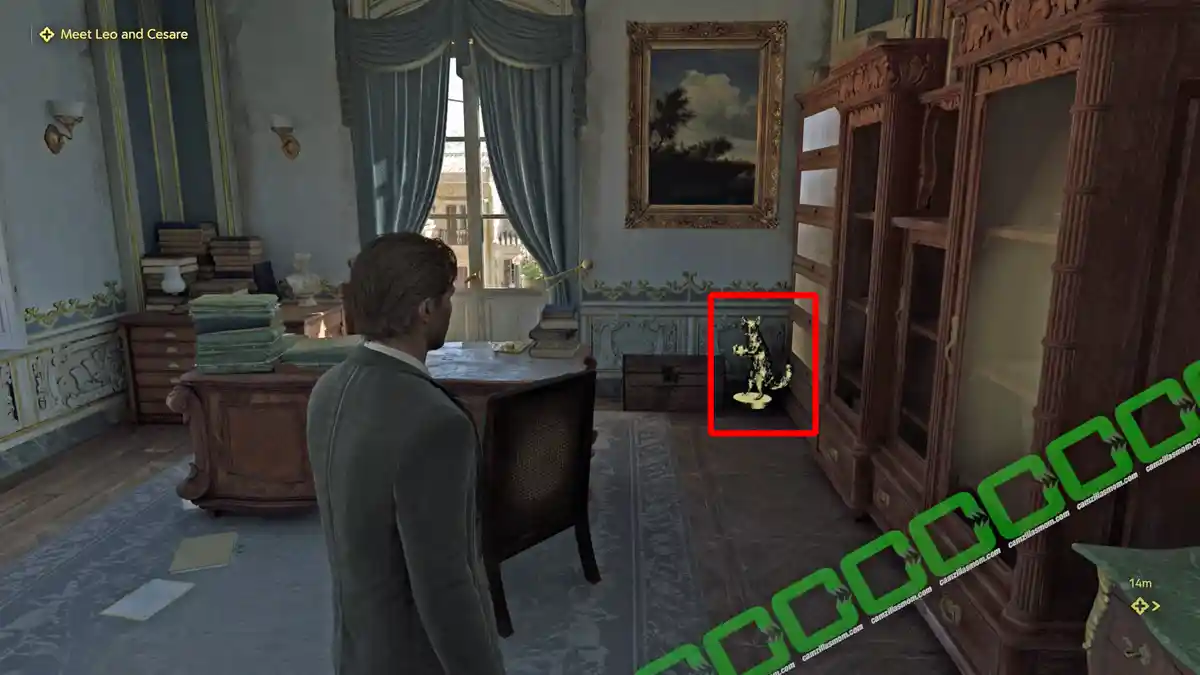
Go upstairs to the northeastern corner office to find a Mystery Fox there. You can also find it at night.
San Celeste – Nighttime
Locked Box 2 of 7

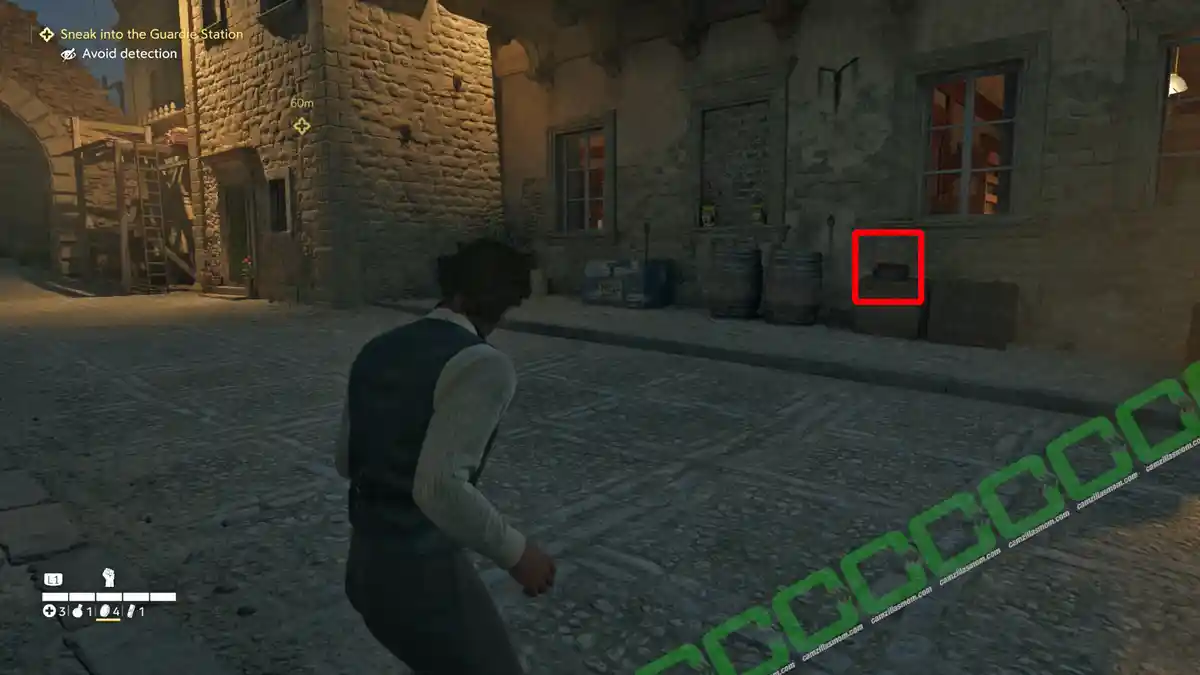
At night, there is a locked box on the south side outside wall of the Town Hall.
Locked Box 3 of 16
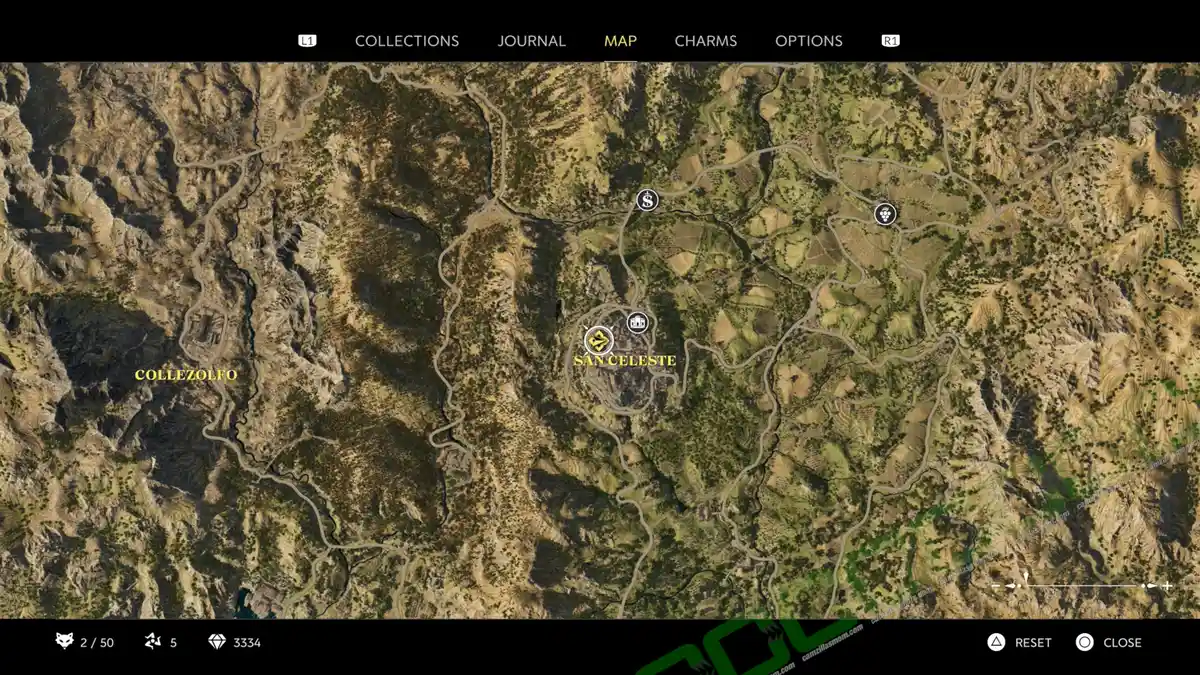
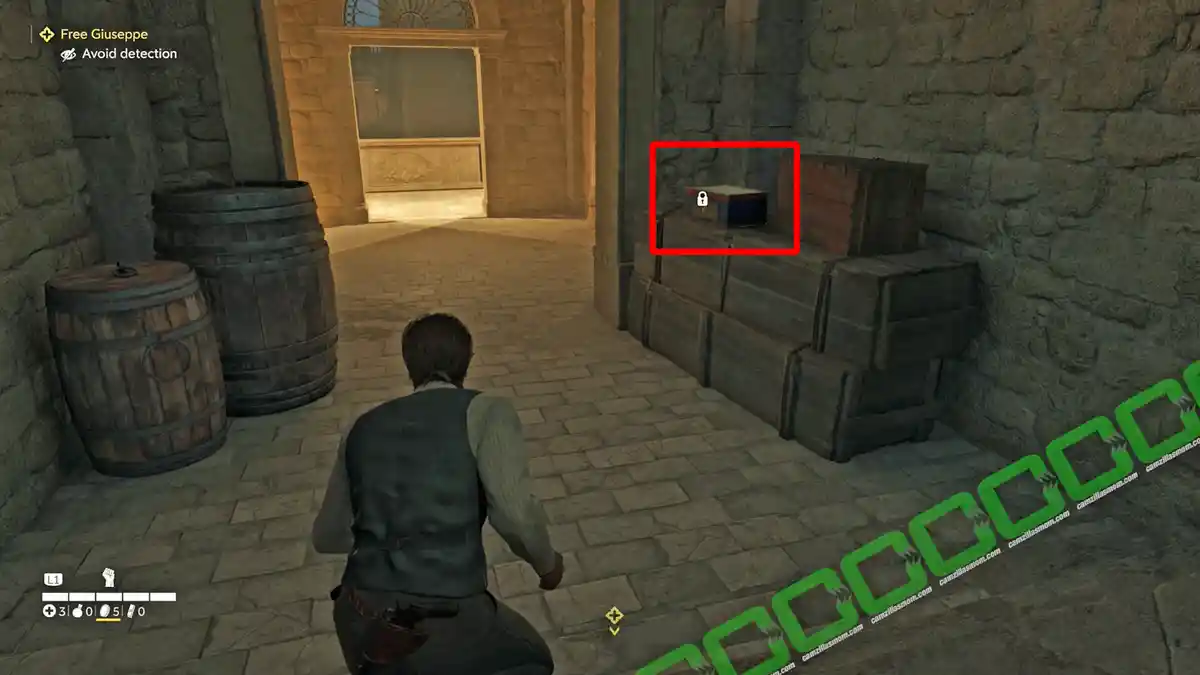
You’ll find this locked chest in the first room of the prison building, conveniently located near the entrance.
“Abile” Bead Charm


Head downstairs. The “Abile” Bead Charm collectible is right in front of the prison cell.
Trinacria
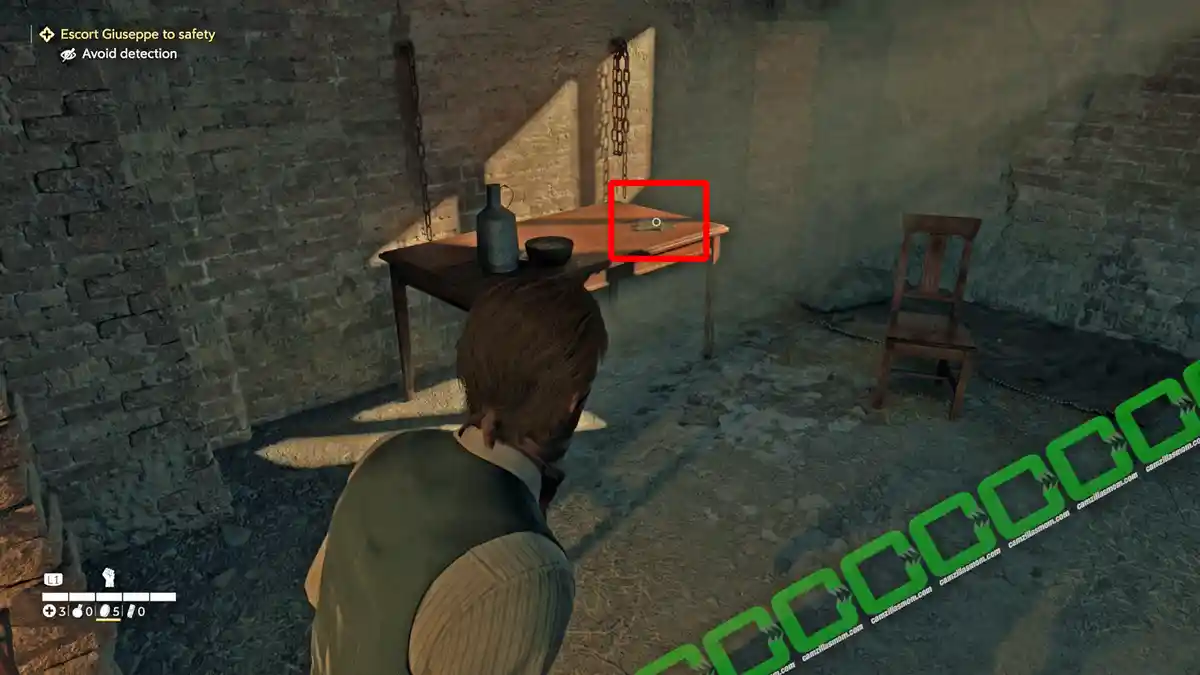
There’s a Trinacria inside Giuseppe’s prison cell, on the table.
Journal Notes 4 of 16 & Locked Box 4 of 7
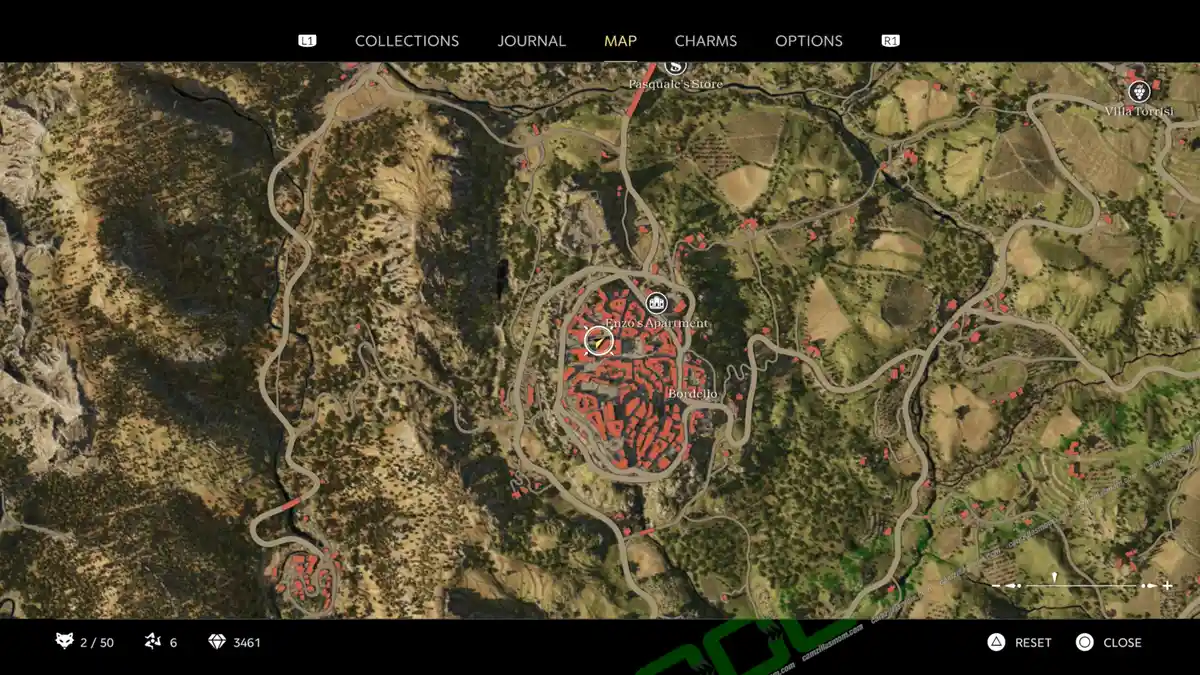
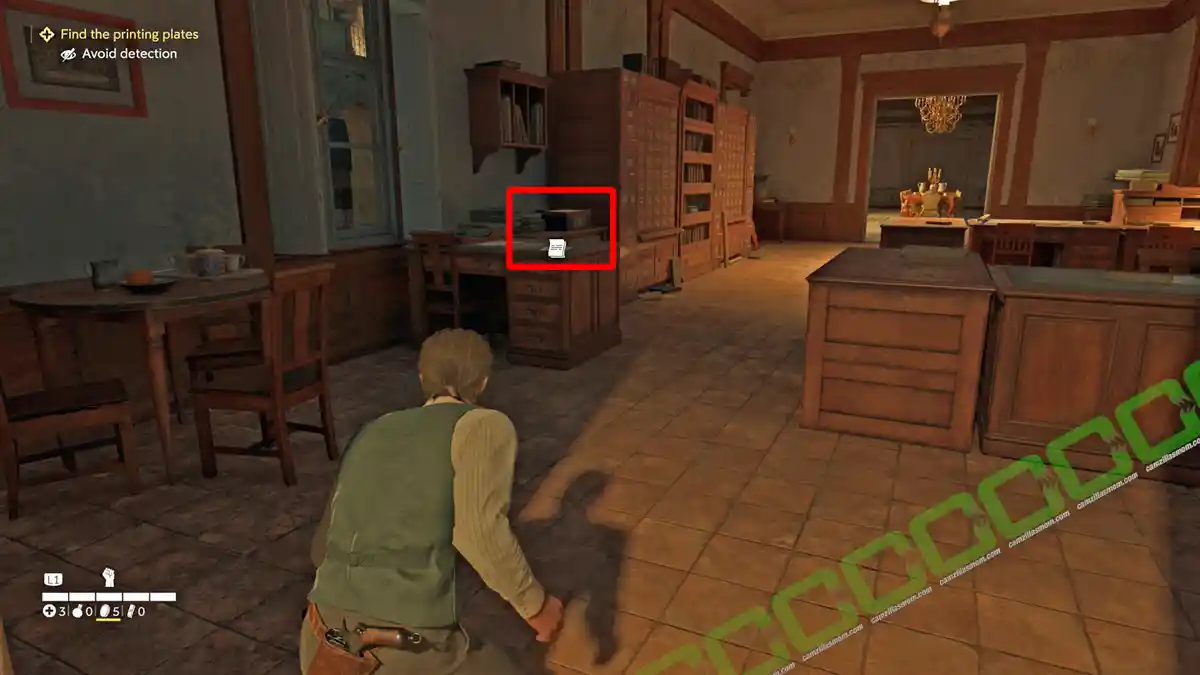
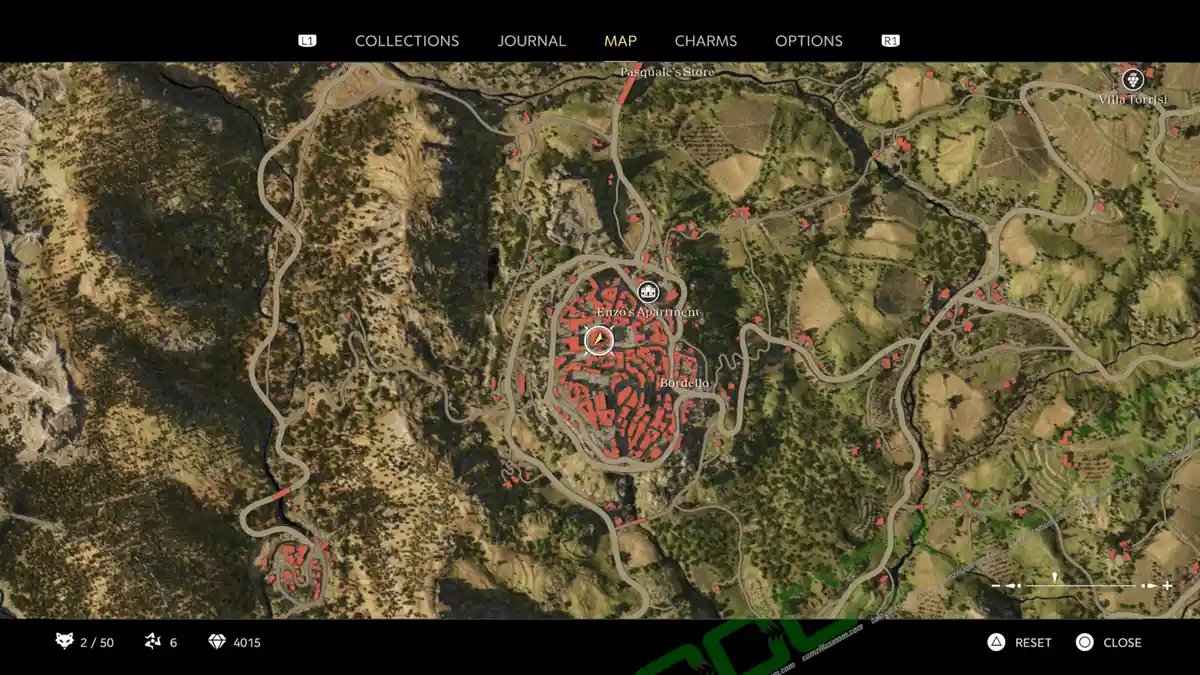
Now Enzo has to retrieve the printing plates from inside the Town Hall. Enter through the door just opposite the prison building. In the first room, you’ll find a note: Employee Memo. There is a second, same memo to be found in the northwestern, ground-floor shared office. And a third one on the ground floor on a pinboard. There is also a locked box nearby.
Journal Notes 5 of 16
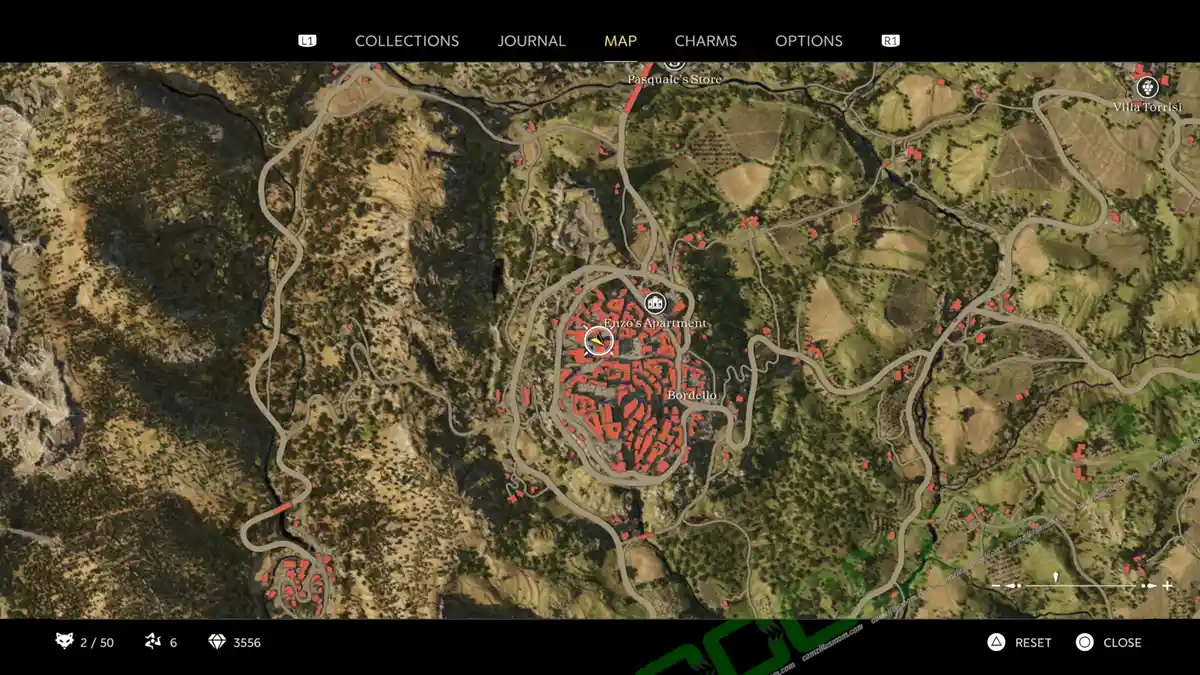
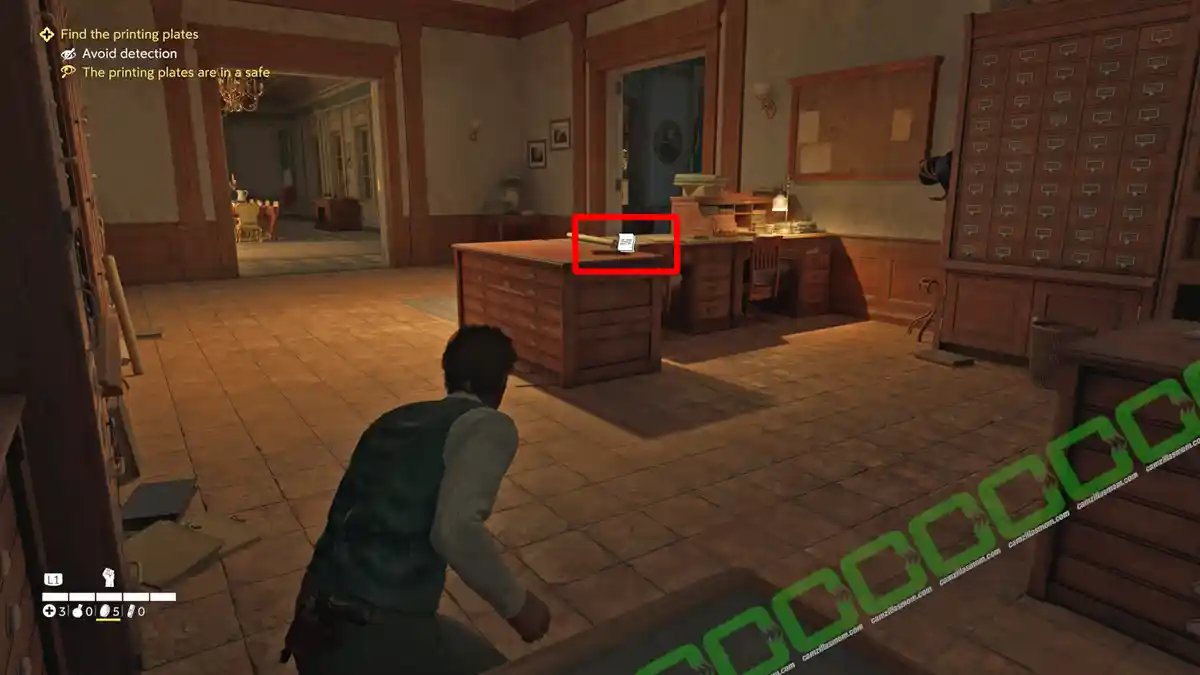
On the other desk in the same room, you can find the note: Arrest Record – Unknown Male.
Journal Notes 6 of 16
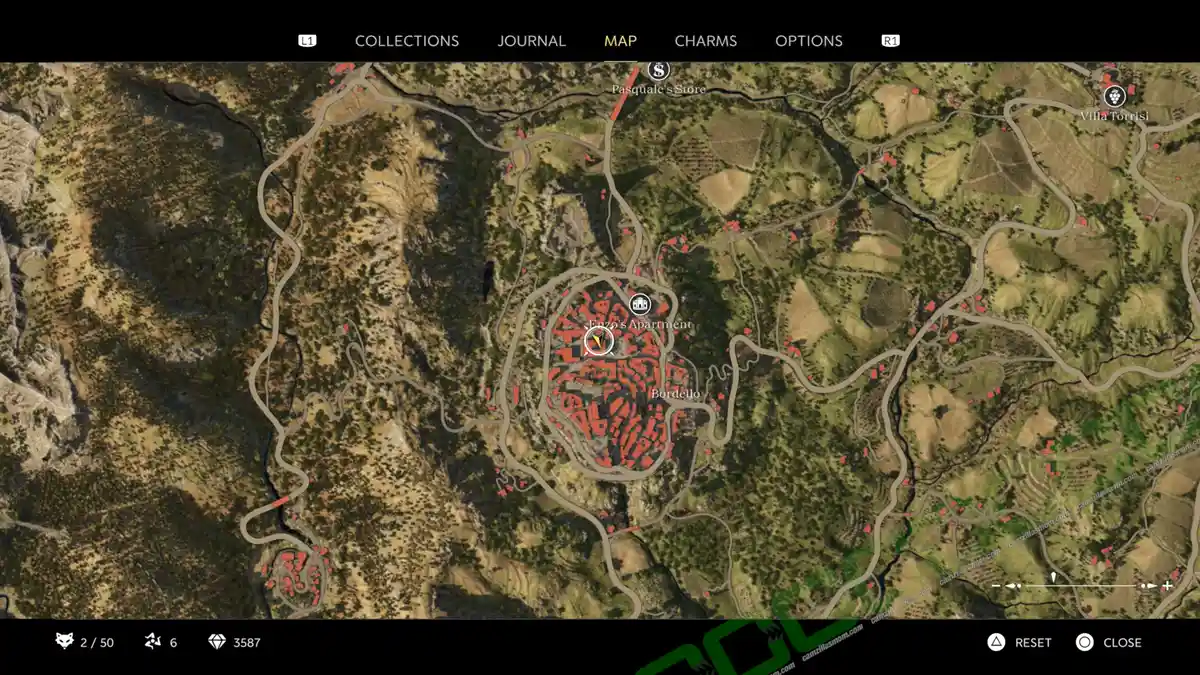
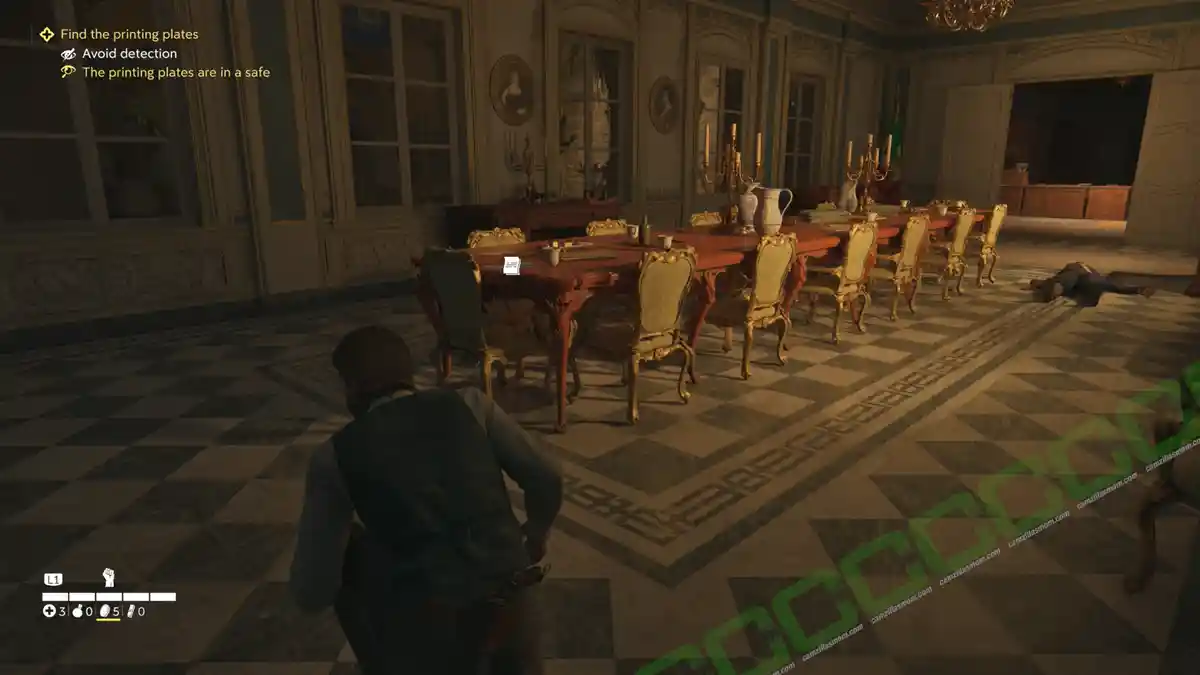
Enter the dining room, which is straight ahead from the previous room. Here on the table is the note: D’Amico’s Observations.
Journal Notes 7 of 16 & Locked Box 5 of 7
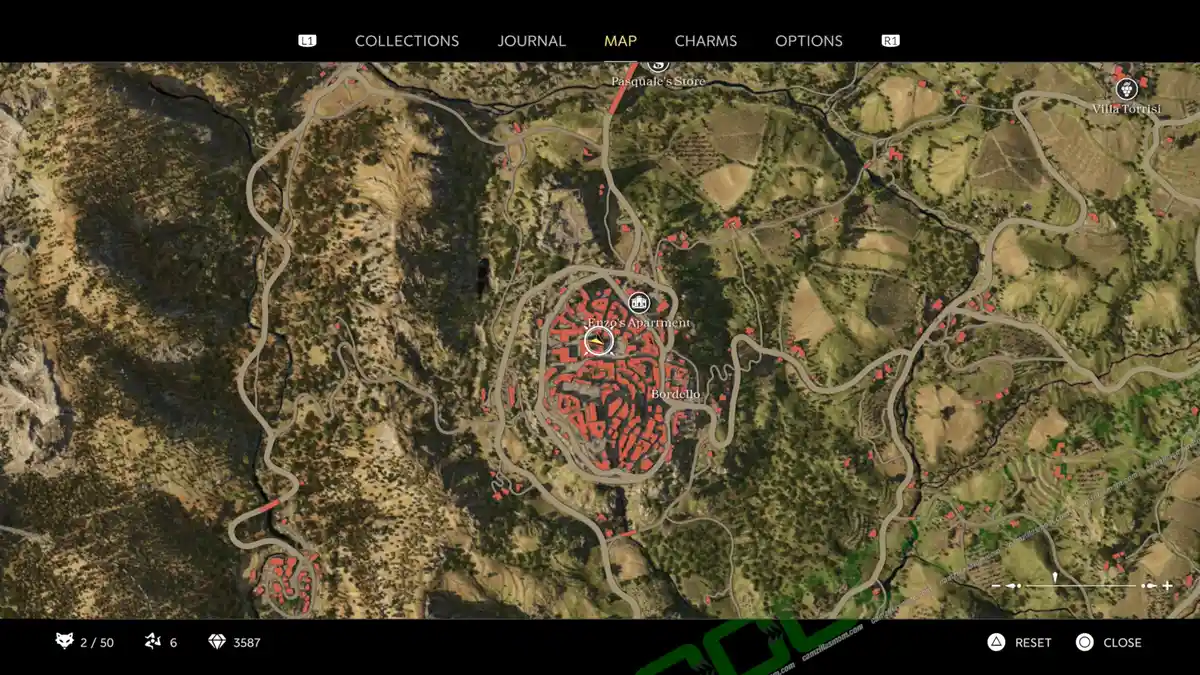
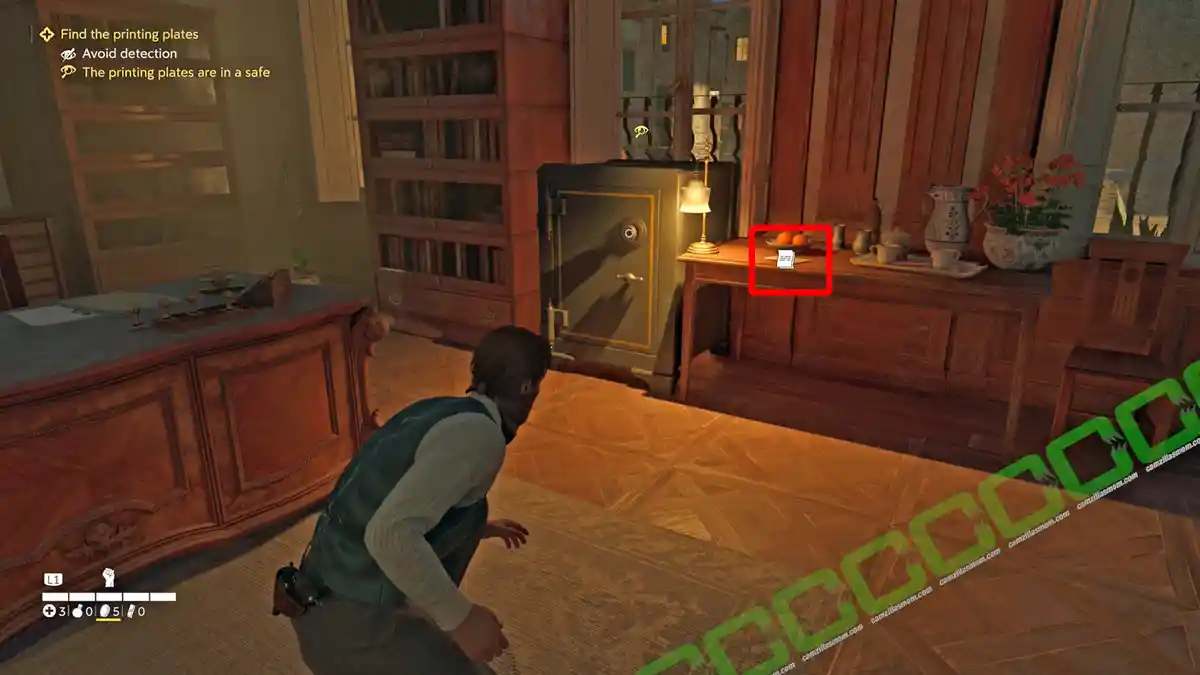
Now, go to the ground floor, the southwestern corner of the building. There is a safe with the note: Safe Repair Record next to it. There is also a locked box in this room
Journal Notes 8 of 16
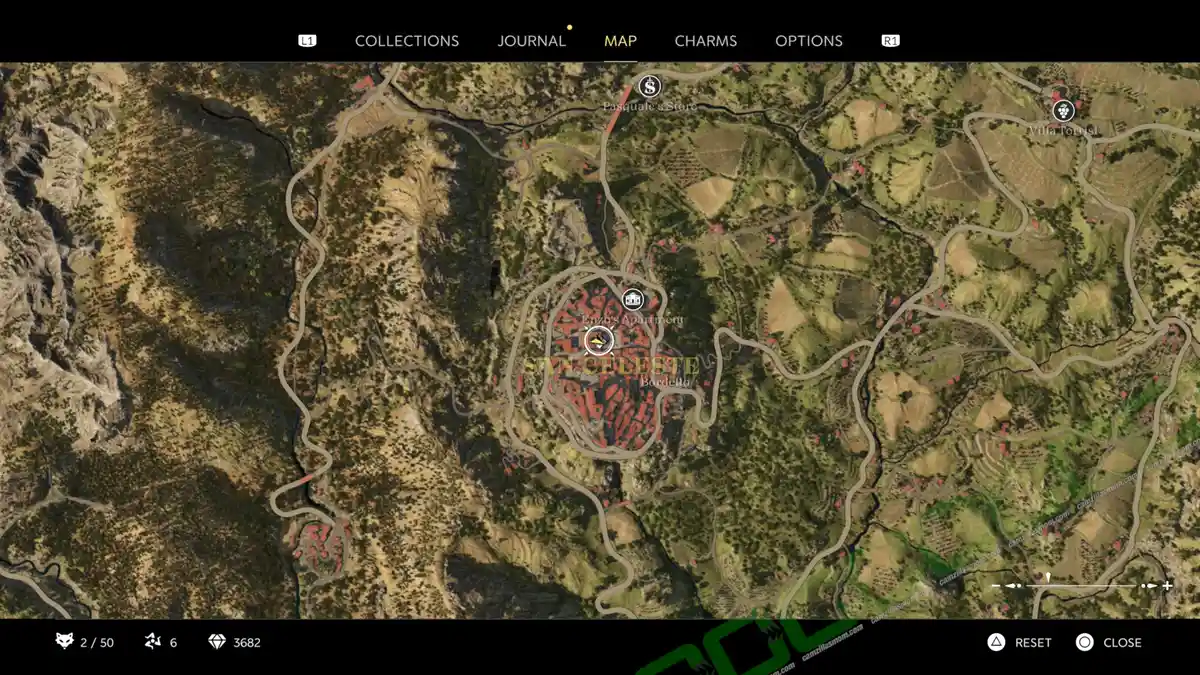
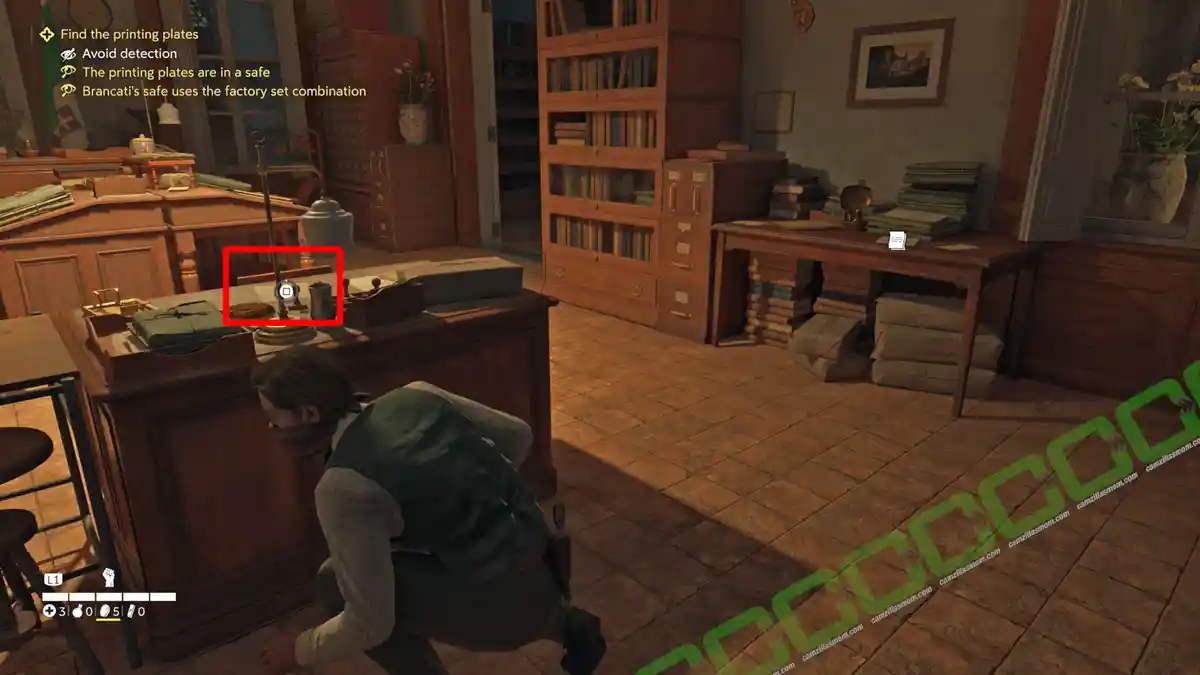
Cross the corridor from the safe room to enter the office, where you found the newspaper earlier in the day. It contains the combination note: Invoice – T. Wallace & Son for the safe.
Journal Notes 9 of 16
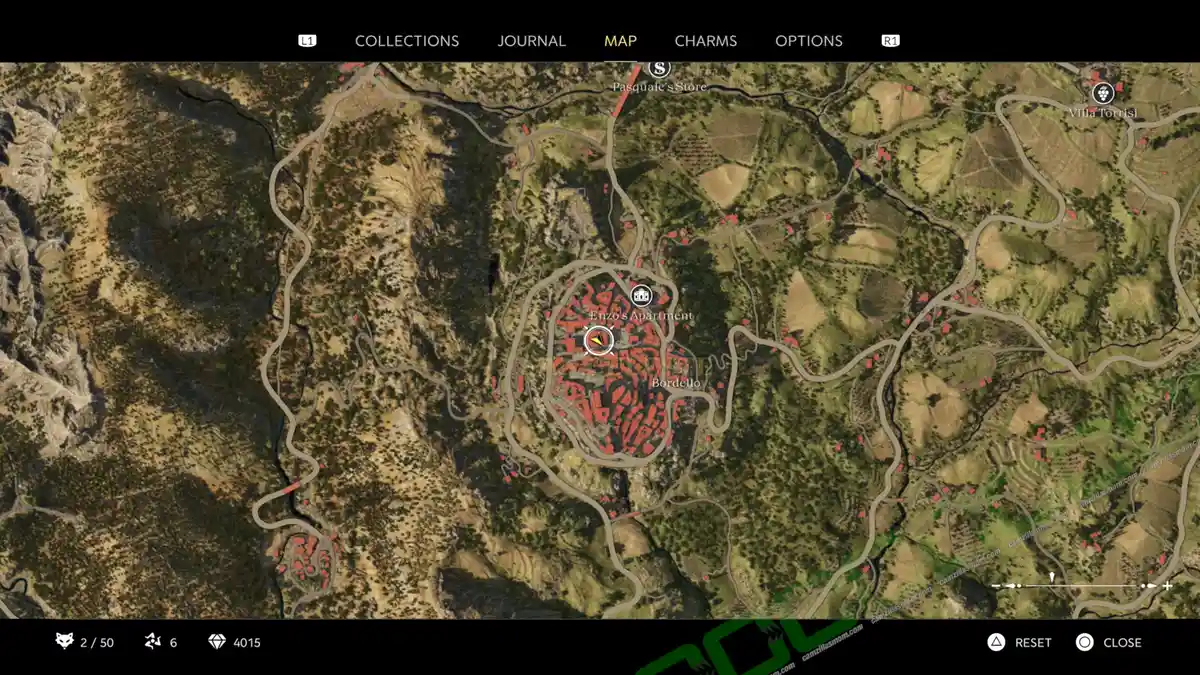
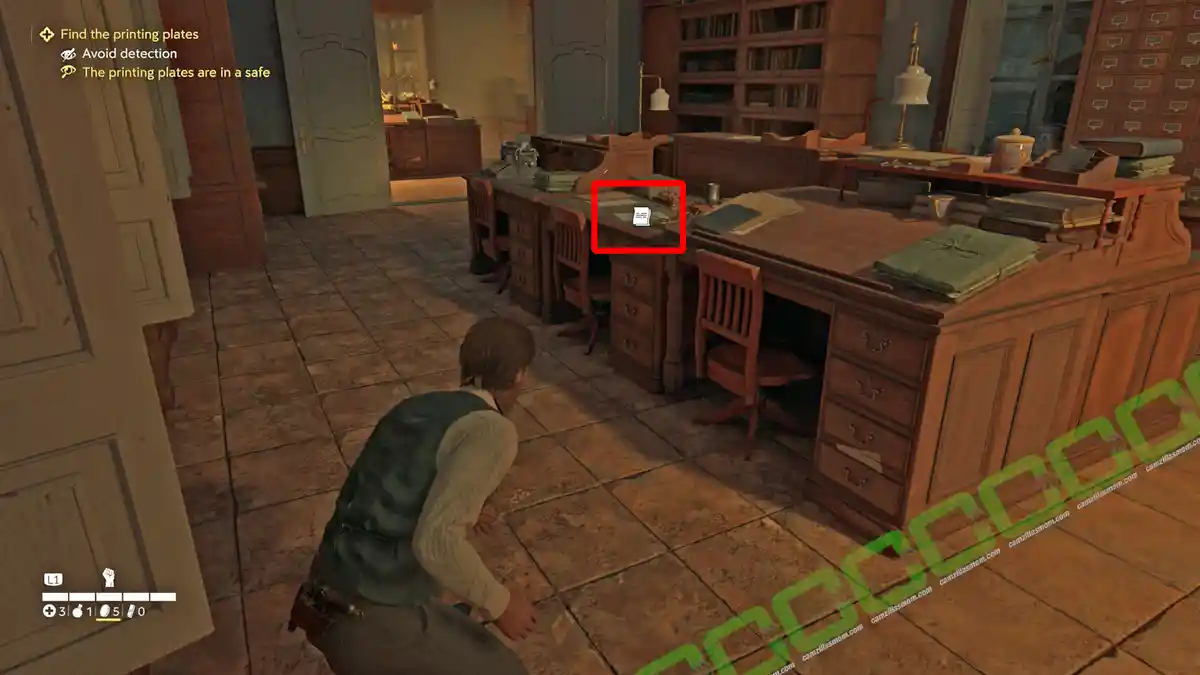
In the next room is the note: Arrest Record – Ennio Salieri in the southern ground-floor office on the desk.
Journal Notes 10 of 16
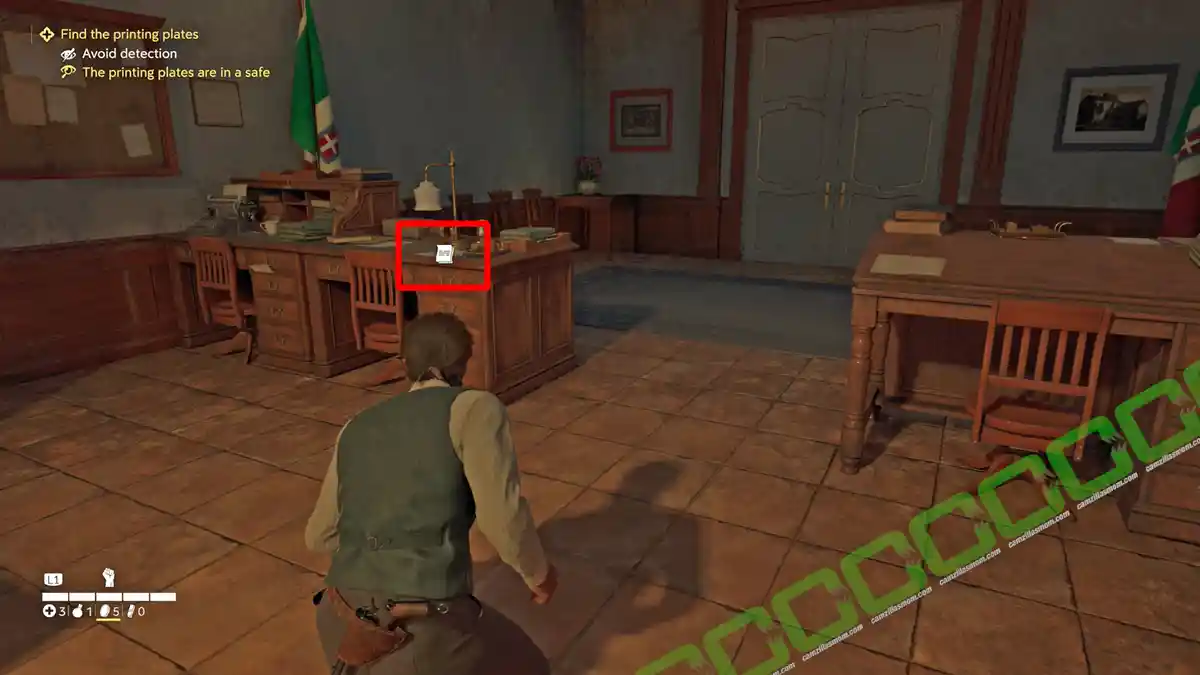
In the same room but further west, towards the room with the white double doors that contains a second safe, is the note: Arrest Record – Corrado Bastoni.
Journal Notes 11 of 16

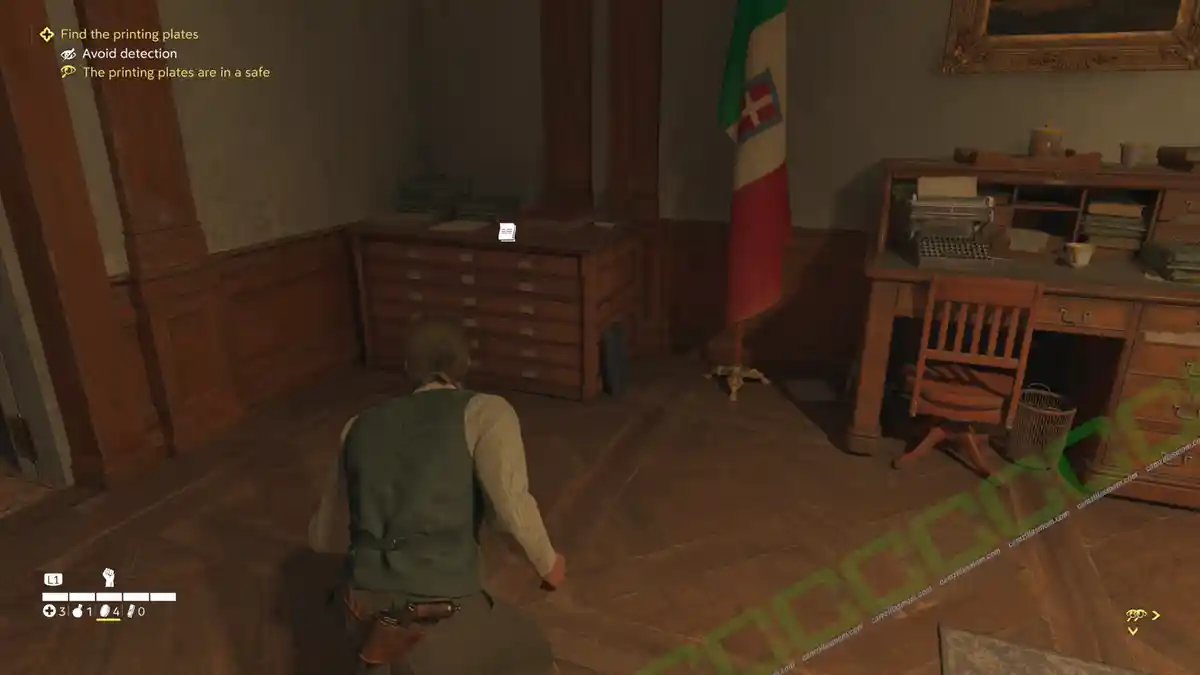
Inside the next room with the double white doors and the safe is the note: A Reminder from Fresta, just by the door.
Journal Notes 12 of 16 & Locked Box 6 of 7
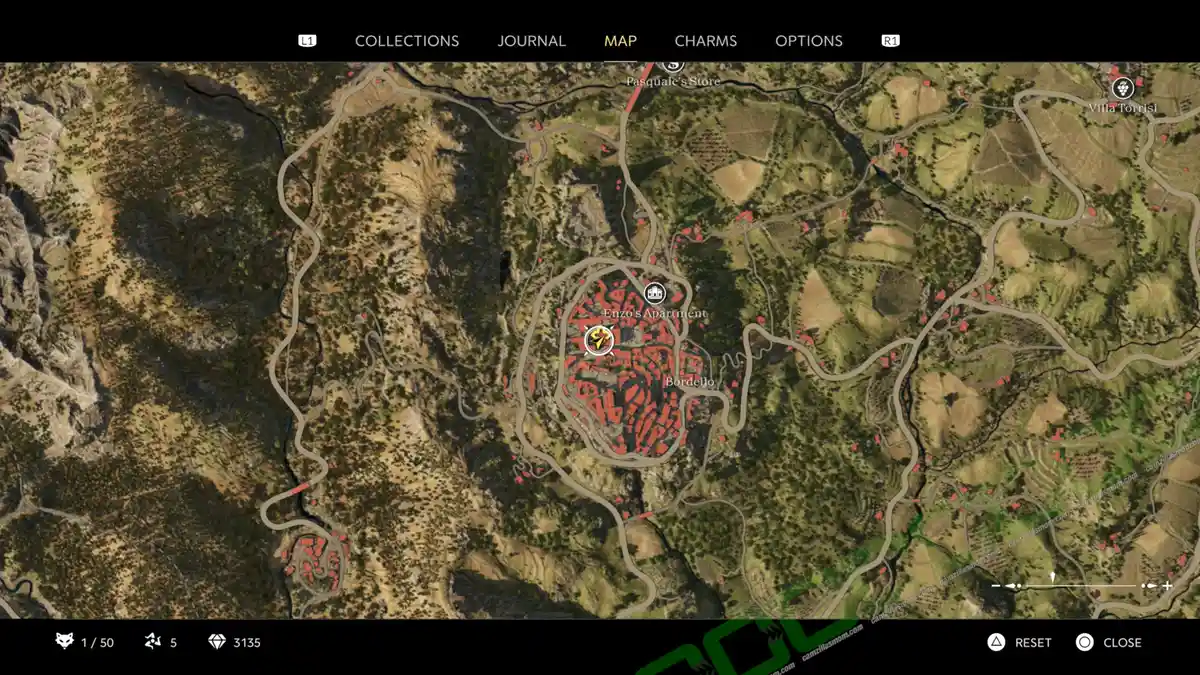

On the table next to the second safe is the note: Marino’s Combination Record. It contains the combination for the safe. Combination: 28-34-12. There is also a Locked Box on the table in the center of the room.
Journal Notes 13 of 16
The note: Printing Plates Relocation is inside the safe. With the combination for D’Amico’s safe upstairs.
Locked Box 7 of 7
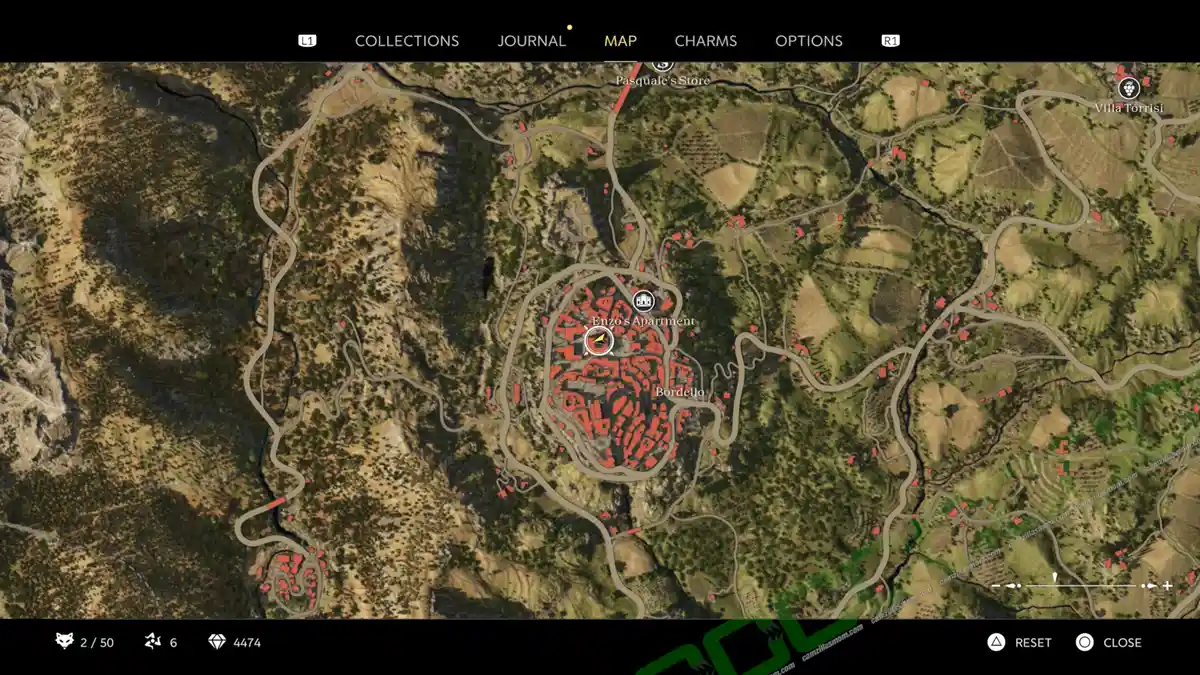
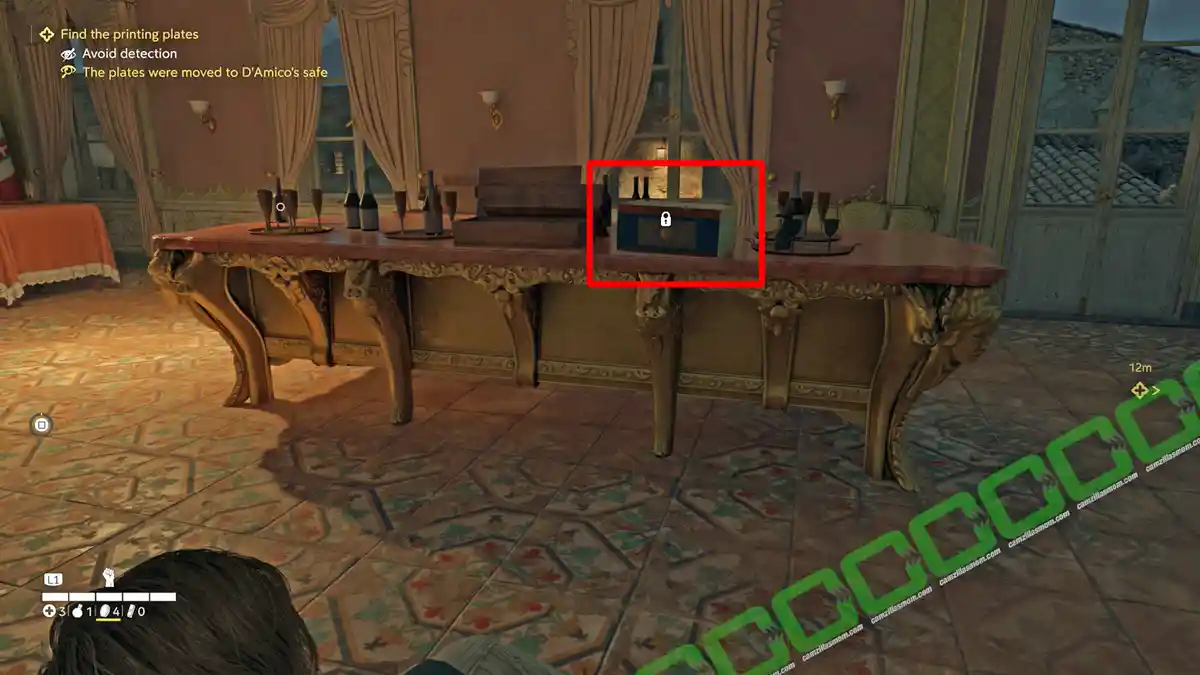
This locked chest is in the upstairs dining room.
Journal Notes 14 of 16
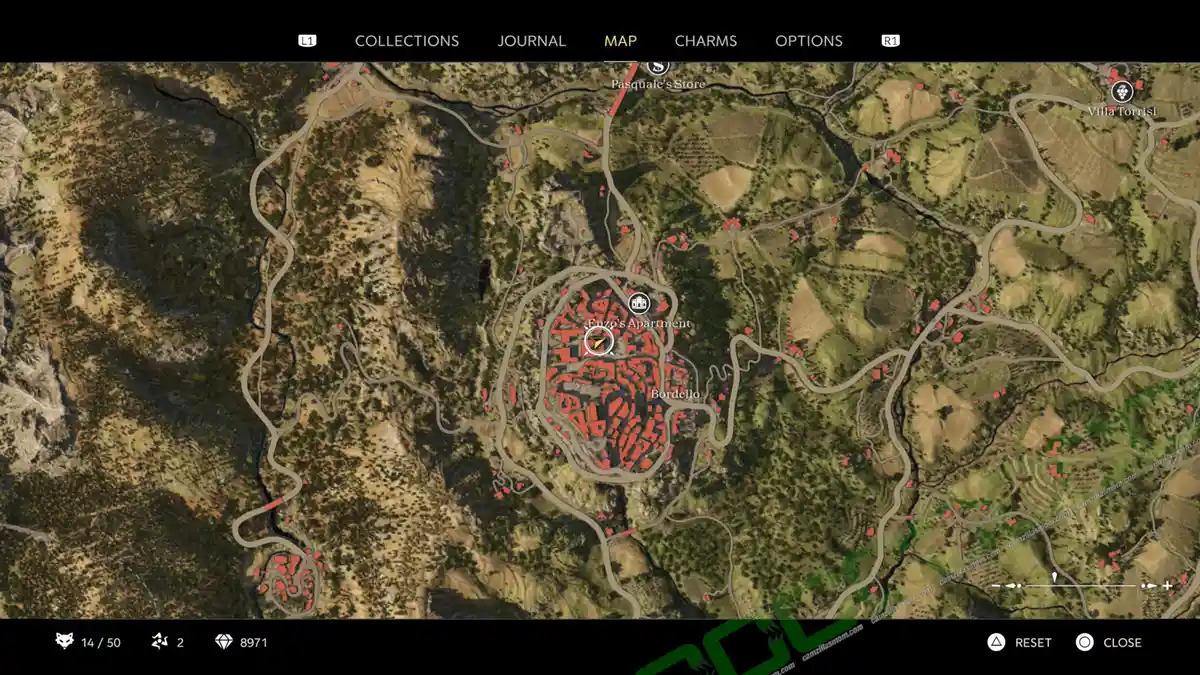
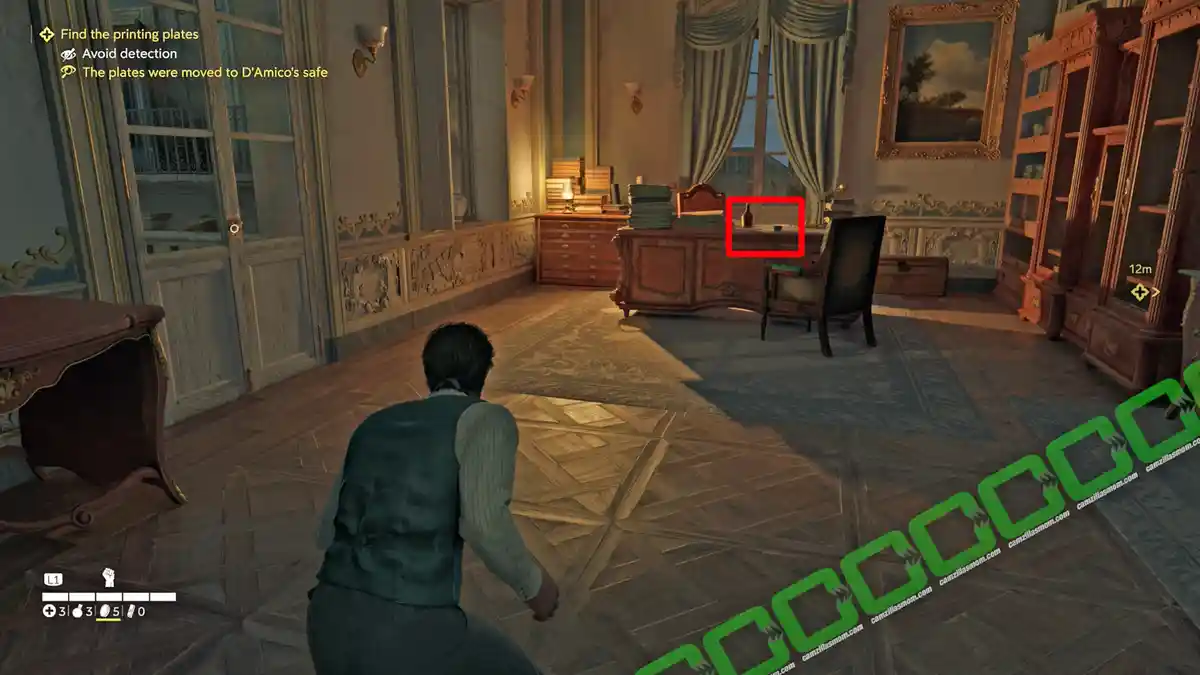
In the upstairs, northeastern corner office is a note: Handover to Lieutenant on the desk. The Mystery Fox is also in this room, if you have not picked it up at daytime.
Journal Notes 15 of 16
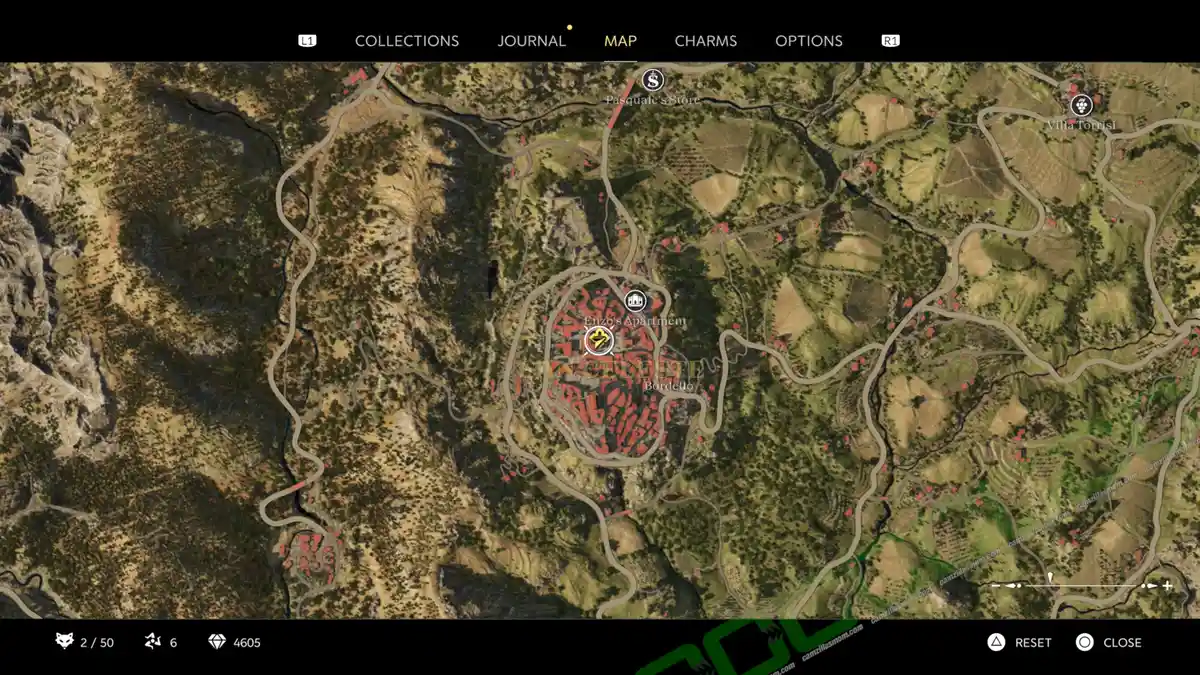
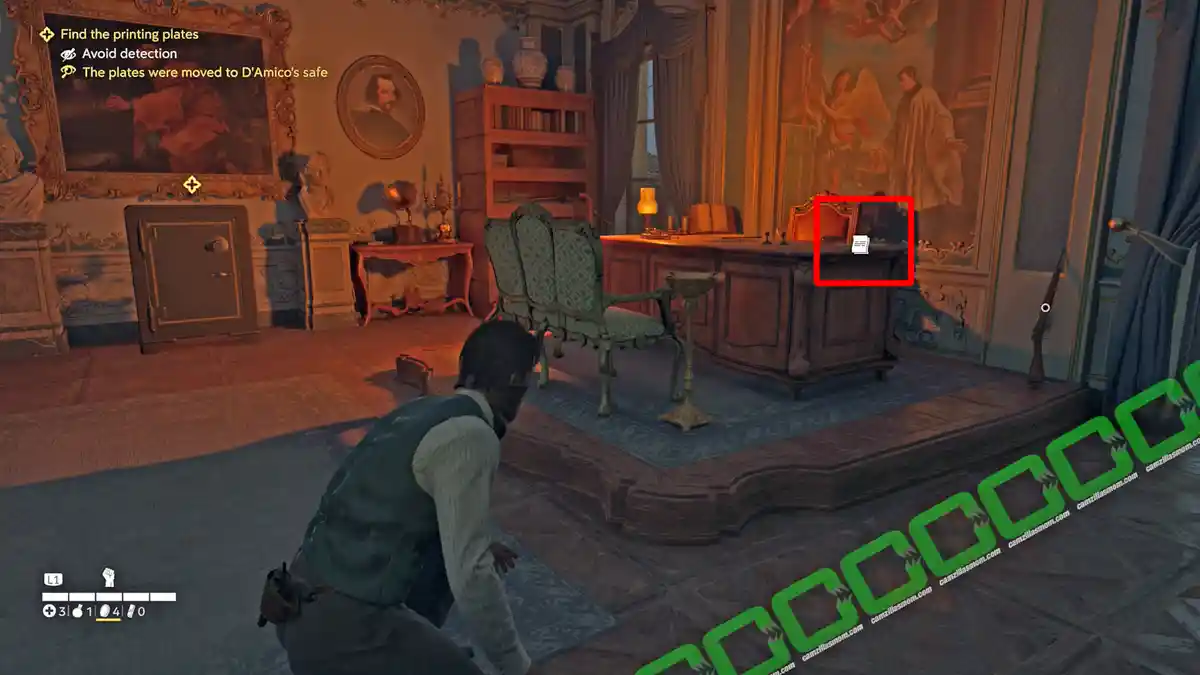
Now go to the upstairs office at the back. It’s D’Amico’s office and guarded. This note: Monthly Reminders is on the desk.
Journal Notes 16 of 16
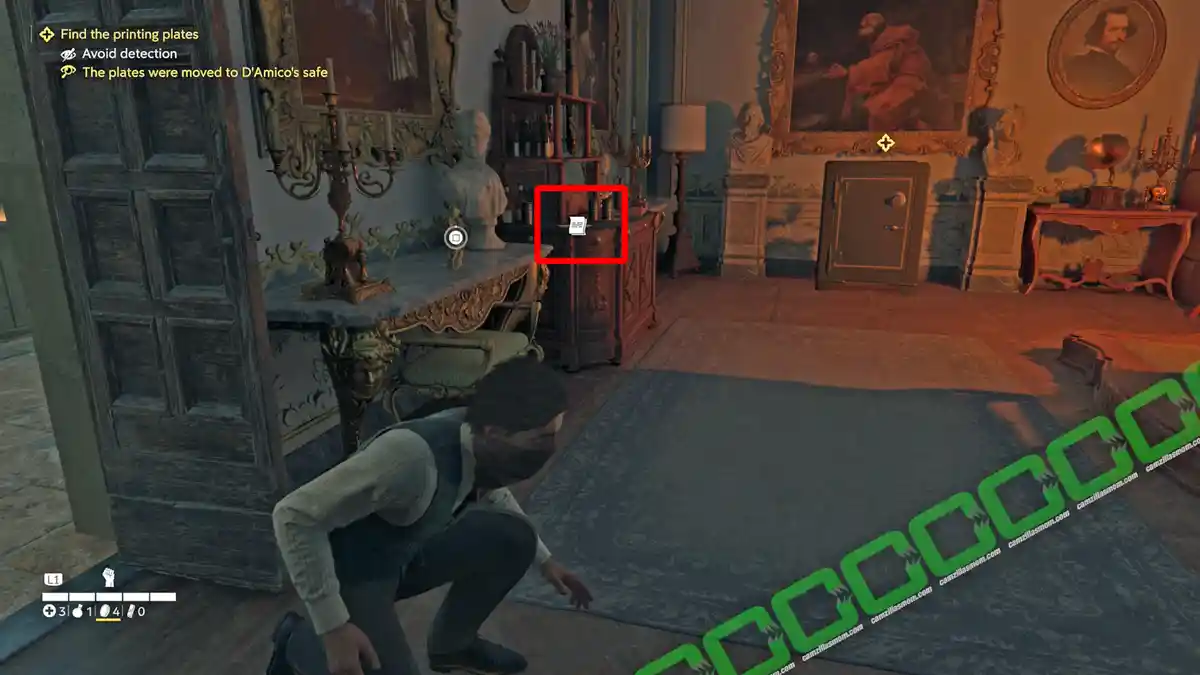
Another note: Authorization Request is on a piece of furniture near the safe.
“Acuto” Bead Charm

Near the previous Journal Note is also the Acuto Bead Charm.
Chapter 7 – Spirito Sportivo
In Chapter 7: Spirito Sportivo, there are 11 collectibles:
4 Journal Notes, 2 Charms, 2 Locked Boxes, 1 Trinacria, and 2 Photographs.
Daytime
Journal Notes 1 of 4
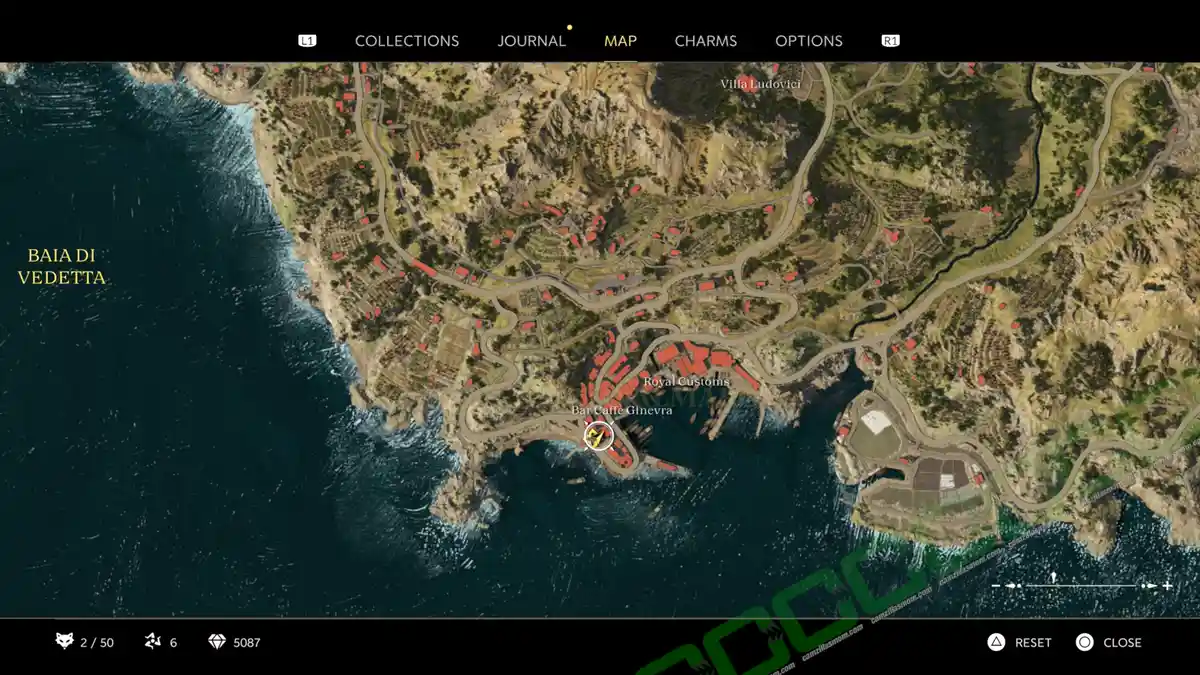
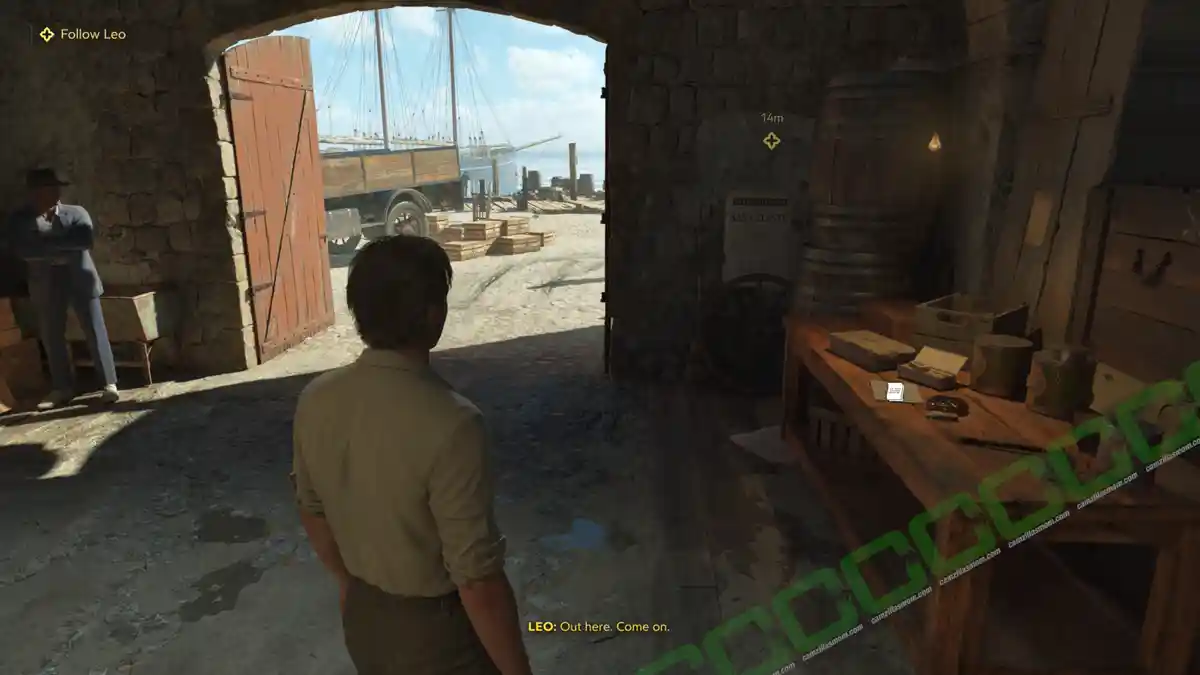
Chapter 7: Spirito Sportivo starts at a storage building by the water in Porto Almaro. Inside this warehouse is note: Shipping Manifest on the table.
“Astuto” Bead Charm


Just on the other side of the room is the Astuto Bead Charm.
Locked Box 1 of 2
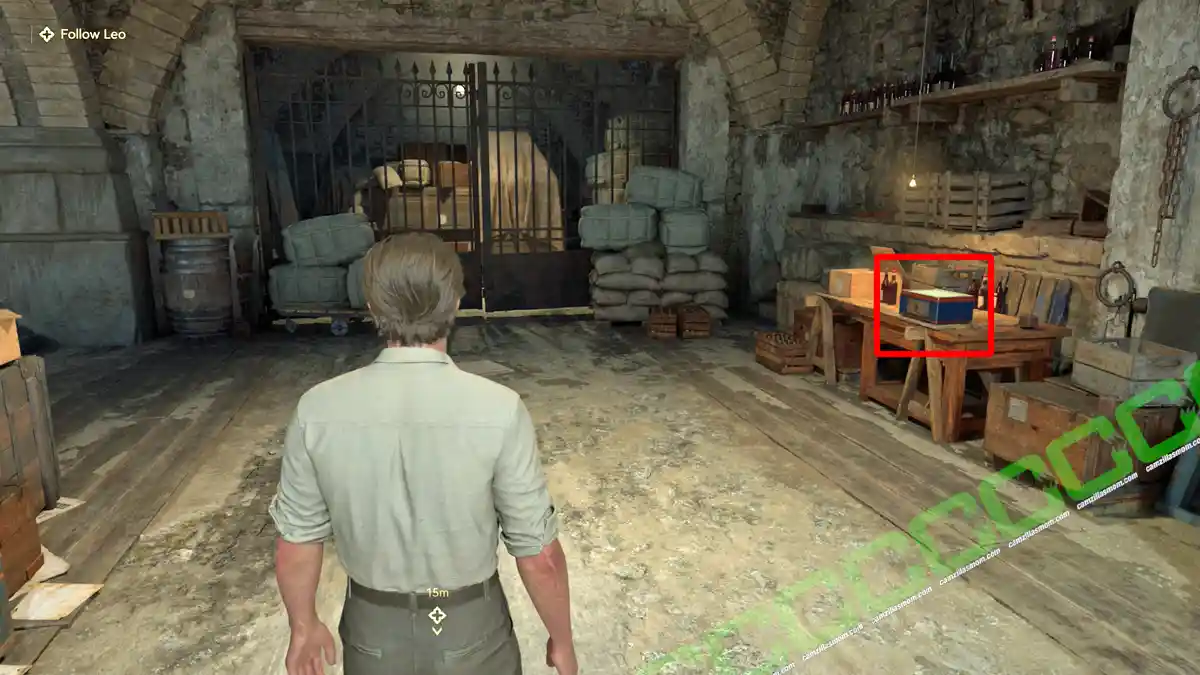
Inside this room is also a locked box.
Locked Box 2 of 2
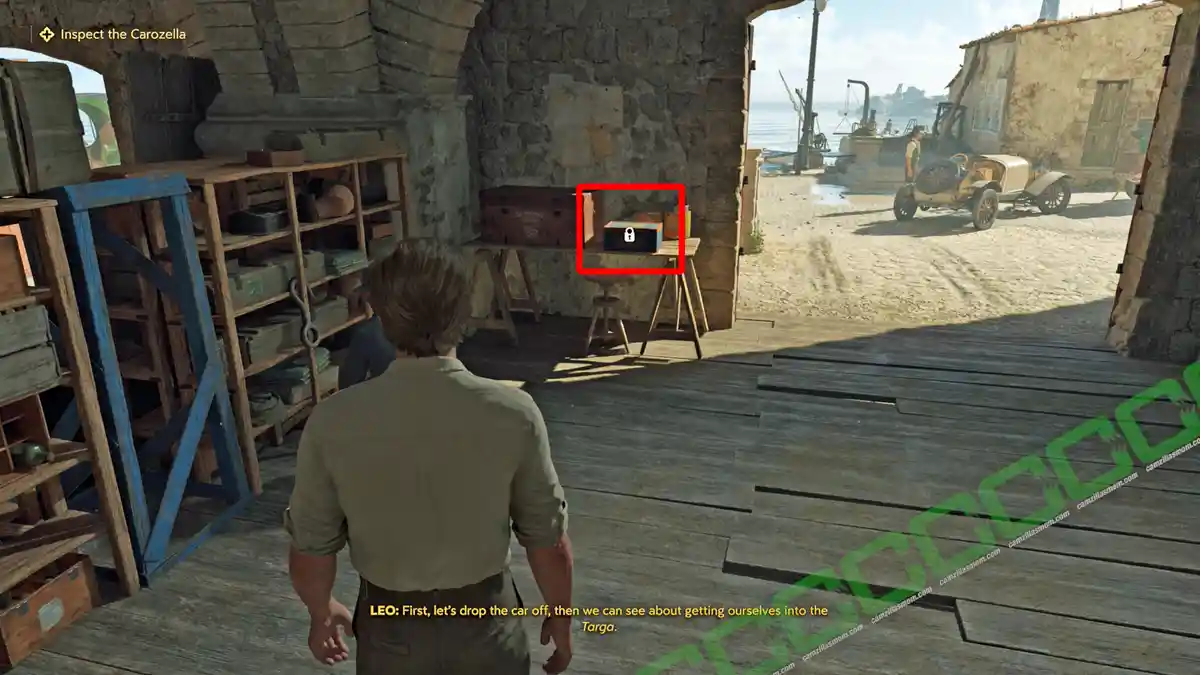
A second locked box is in the other warehouse room. The one with the racing car in it.
Journal Notes 2 of 4
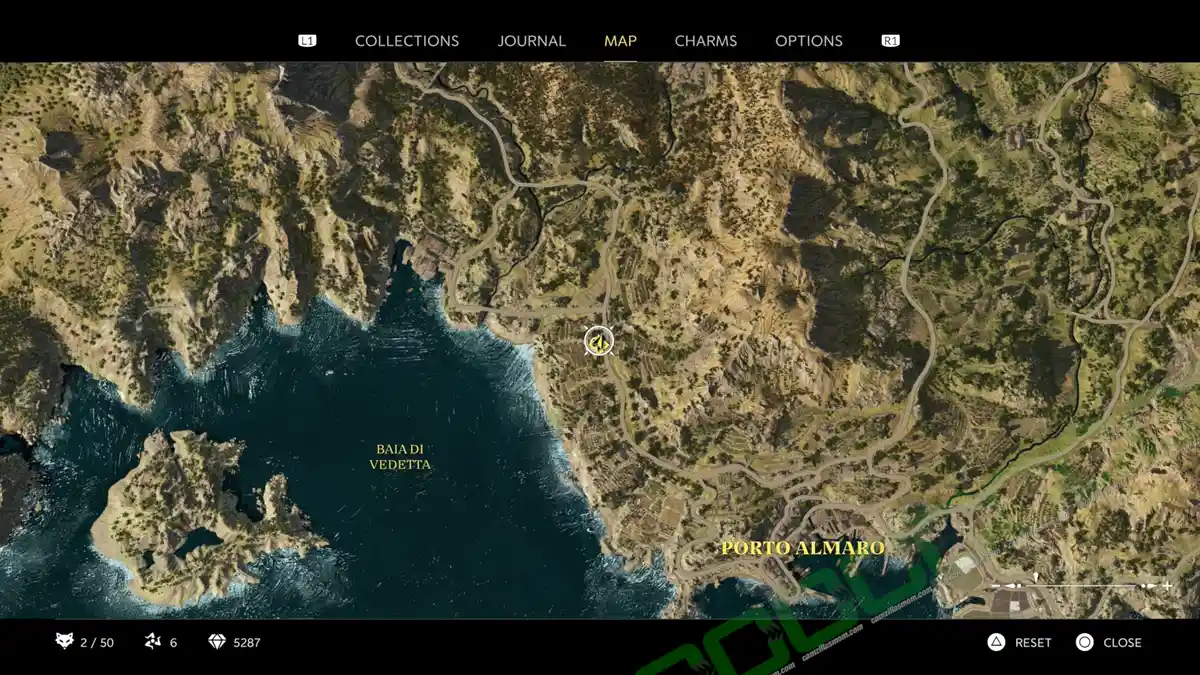
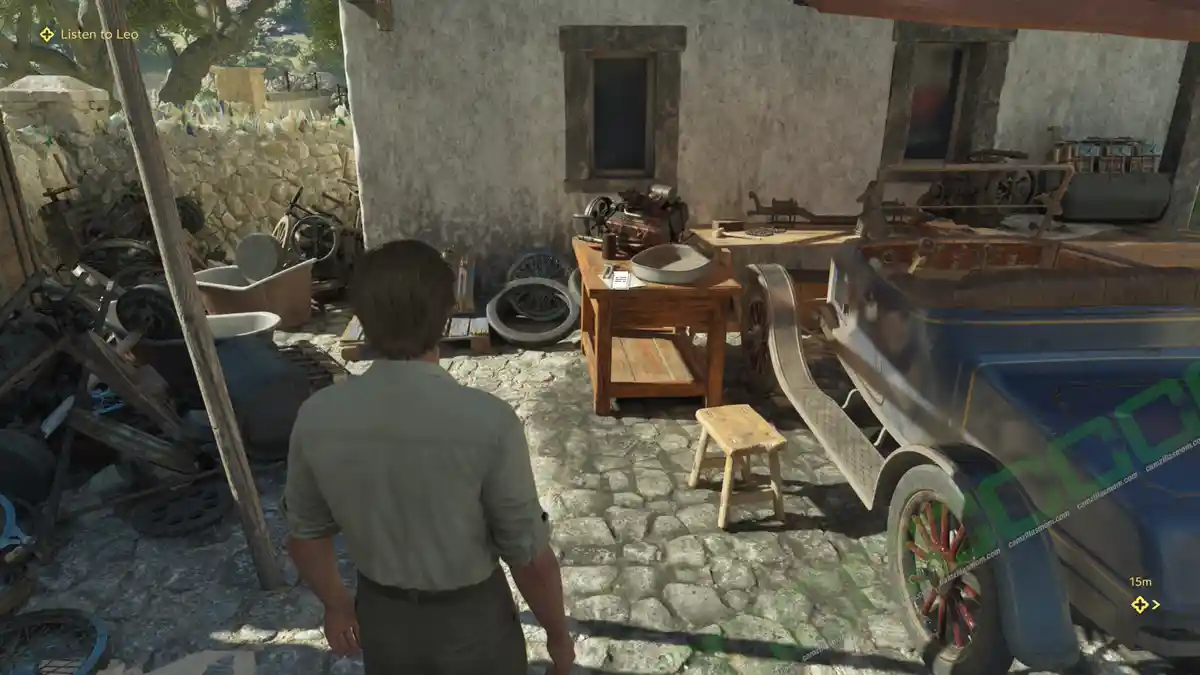
Continue with the story until you reach Pasquale’s Gas Station, where you can find the note: Targa Siragusa Poster on the table next to the car.
Nighttime
Journal Notes 3 of 4
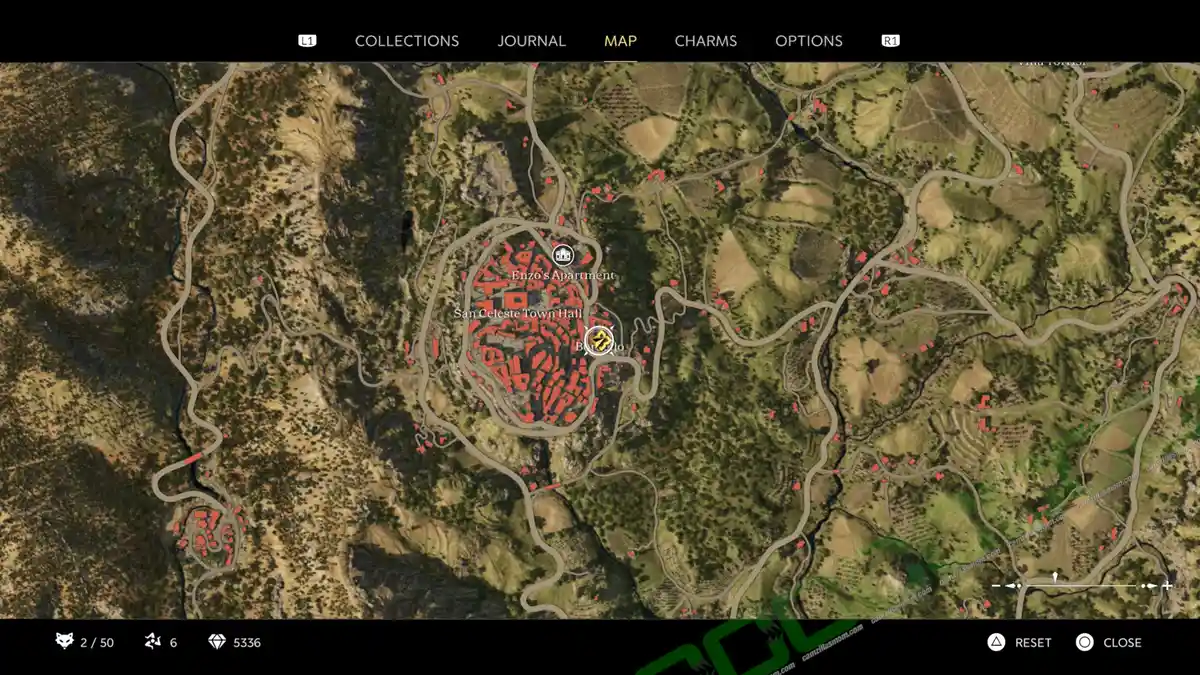
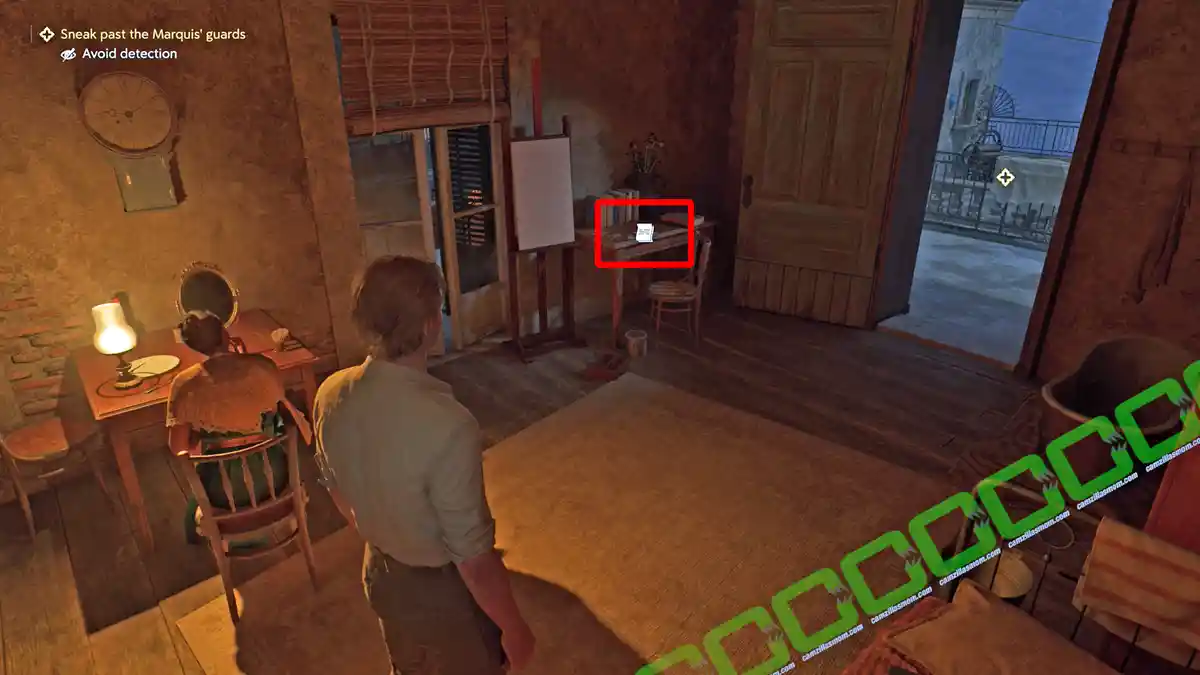
At nighttime, they head to the Bordello to sneak inside. Once in the building, this note: Alfredo’s Love Letter is in the first room.
“Medicale” Bead Charm
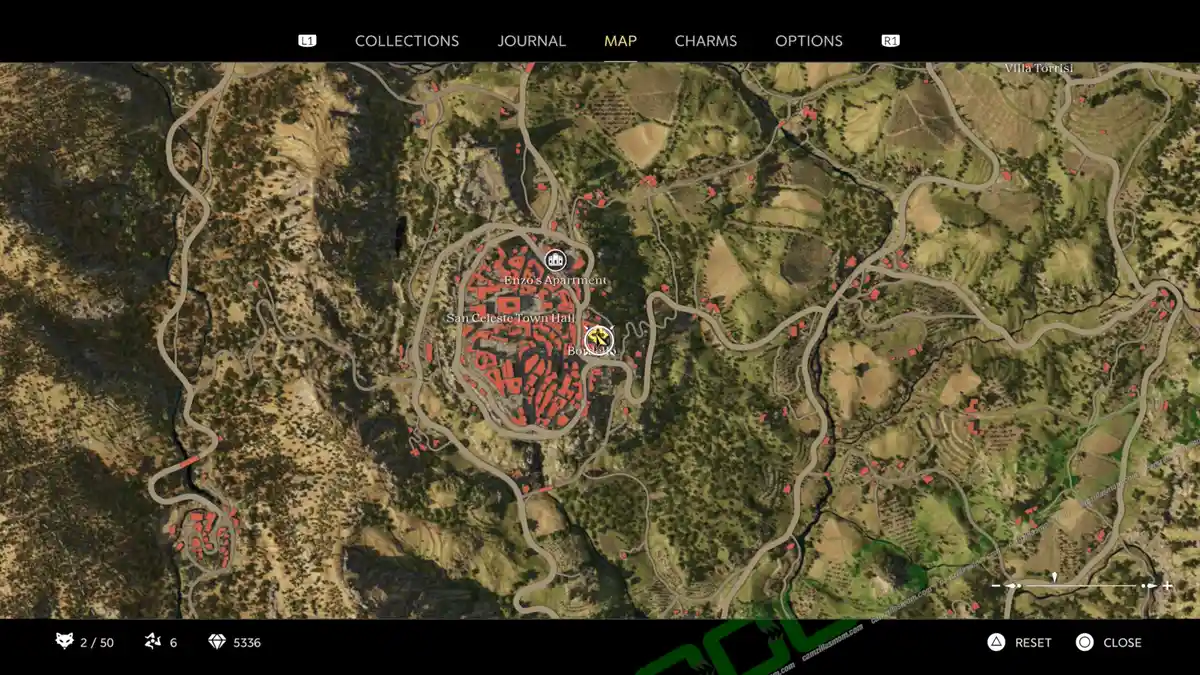

Exit the first room and cross over to another room that holds the Medicale Bead Charm.
Journal Notes 4 of 4
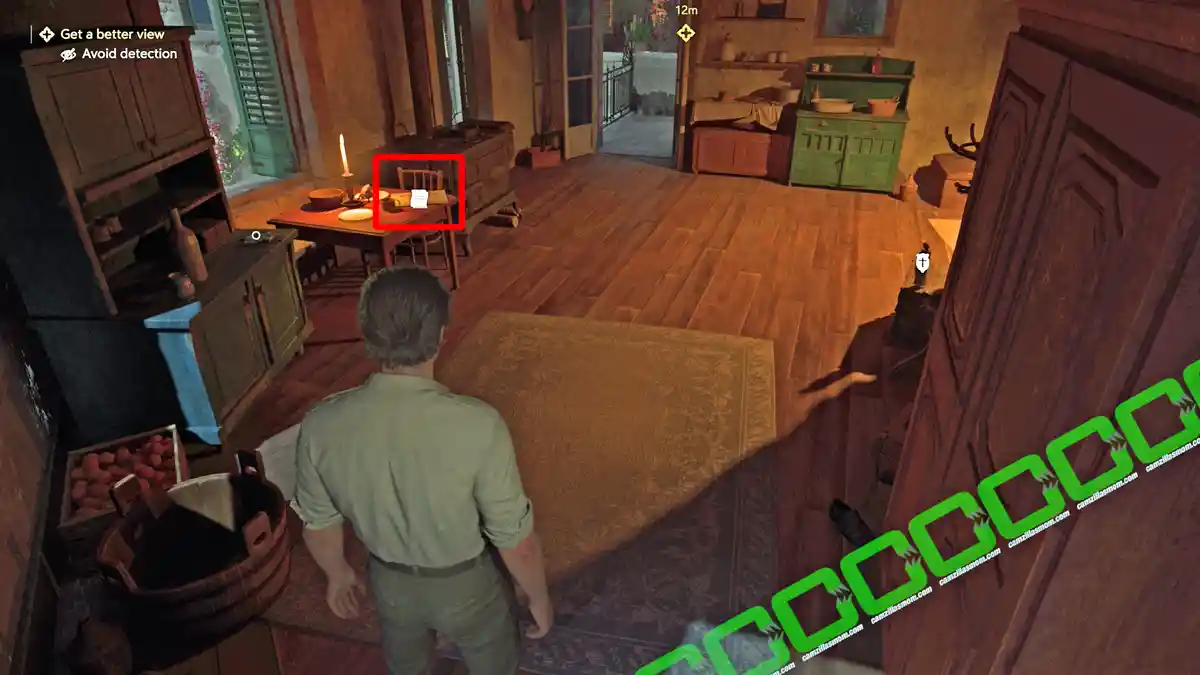
In the same room as the Medicale Bead Charm is the note: Chasing Shadows.
Trinacria
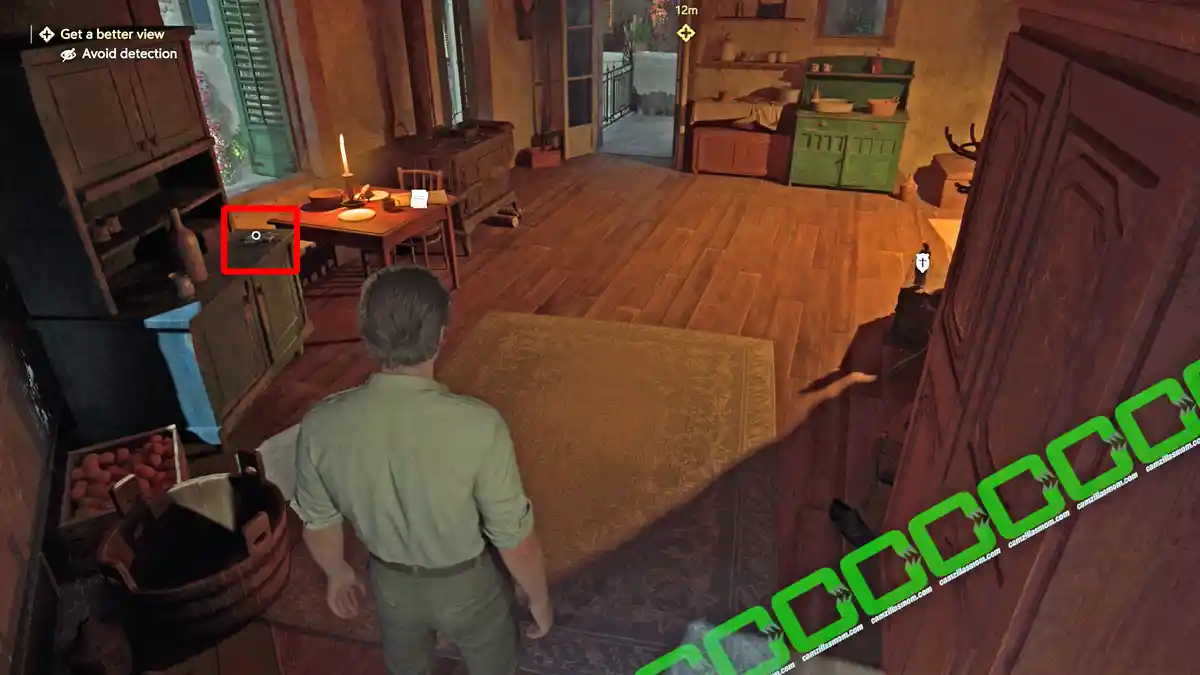
In the same room as the Medicale Bead Charm and the Journal Note is also a Trinacria on the cupboard.
Photograph: Marquis Siragusa
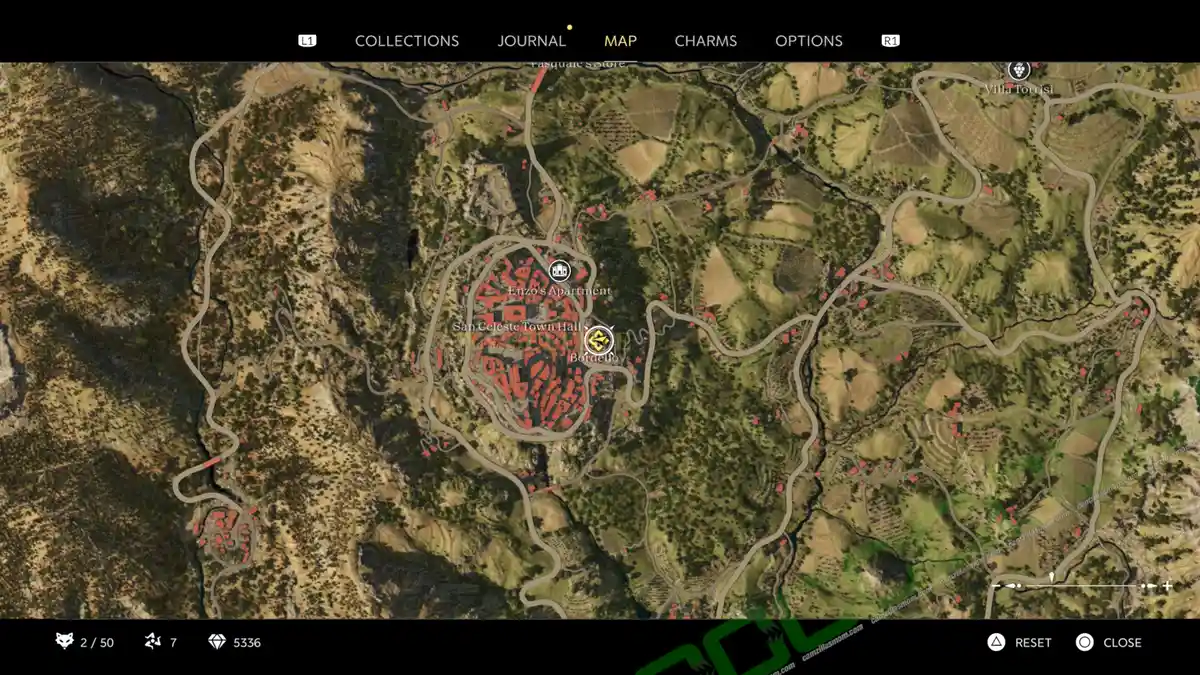
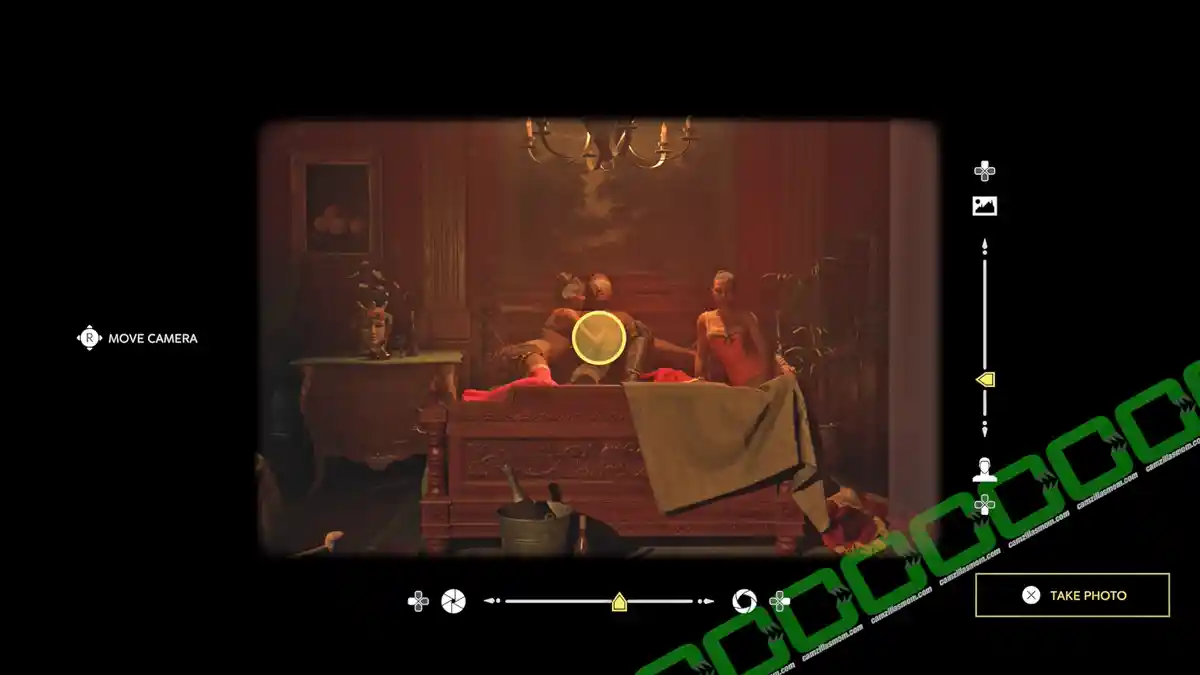
Reach the other side of the previous room to take a photograph of Marquis Siragusa through an open window.
After Winning the Race
Photograph: Winning Team
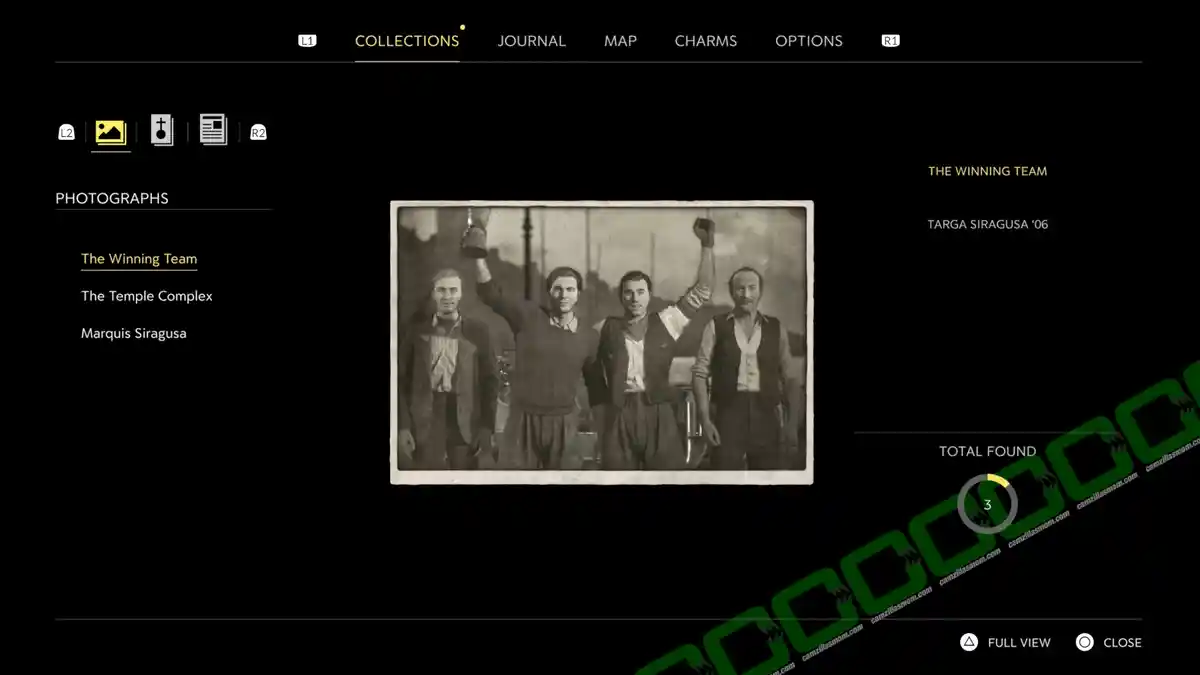
Win the race in Chapter 6 to get the Winning Team photograph.
Chapter 8 – Disgrazia
In Chapter 8: Disgrazia, there are 8 collectibles:
2 Journal Notes, 3 Locked Boxes, 1 Newspaper, and 2 Charms.
Journal Notes 1 of 2 & Locked Boxes 1&2 of 3
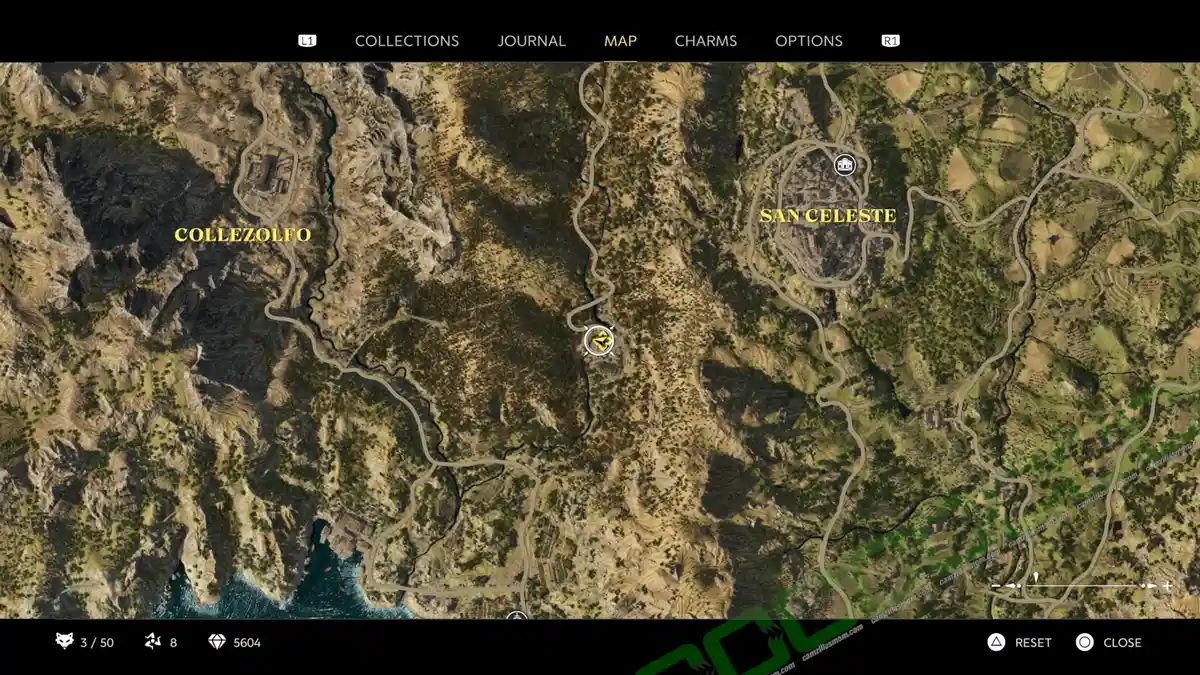
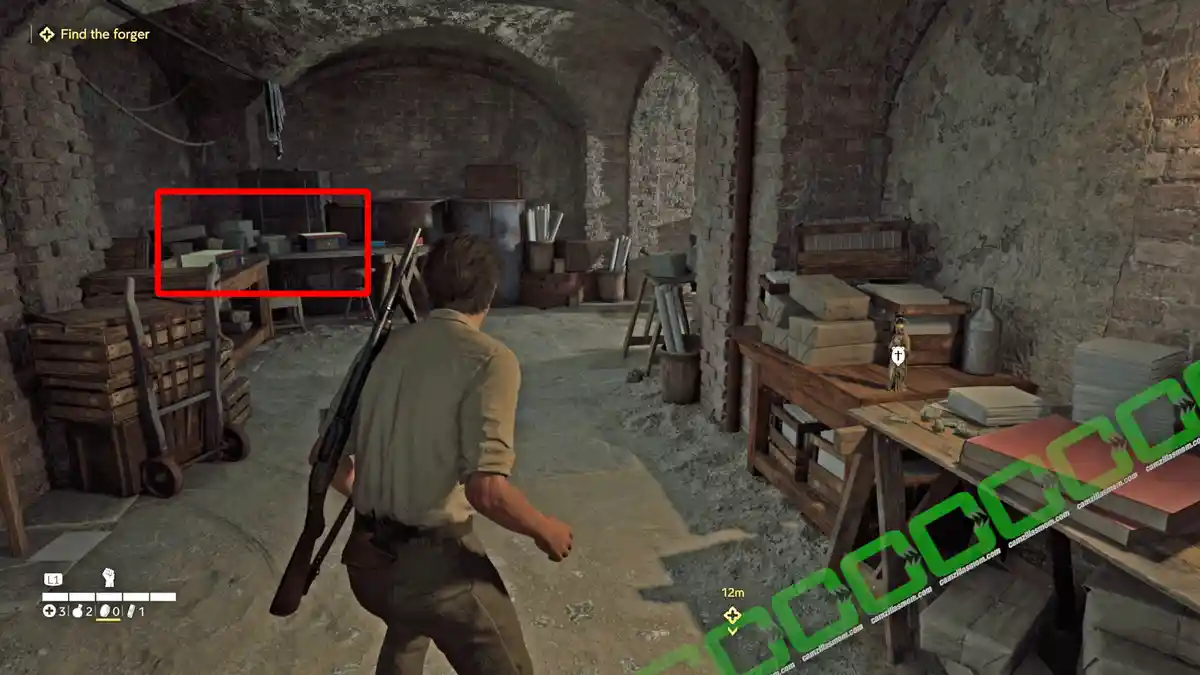
In Chapter 7: Disgrazia, Enzo has to reach the forger in the basement of the Tannery (Fiumansa). After the forger is found, look for two locked chests and the note: Giuseppe’s Progress Report.
“San Bernardo da Corleone” Medallion Charm

The San Bernardo da Corleone Medallion Charm collectible is in the same room as the previous Journal Note and the two chests.
Journal Notes 2 of 2
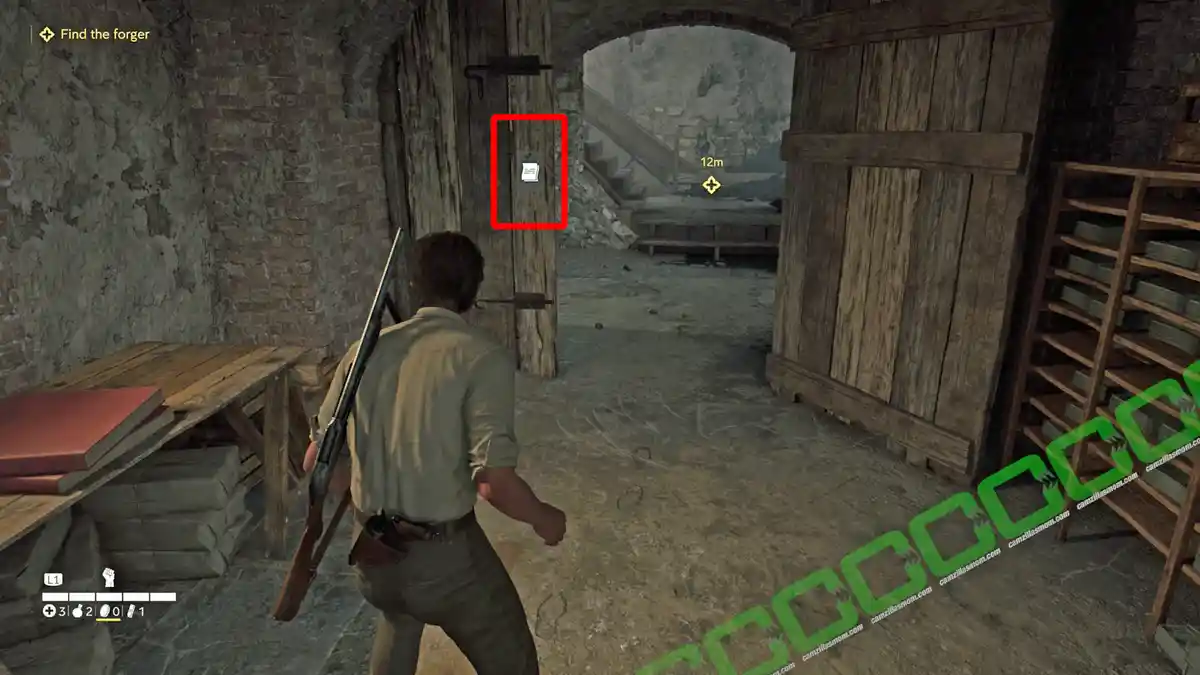
Before leaving the Tannery basement, there is a note: Tannery Rules pinned to the exit door.
Locked Box 3 of 3
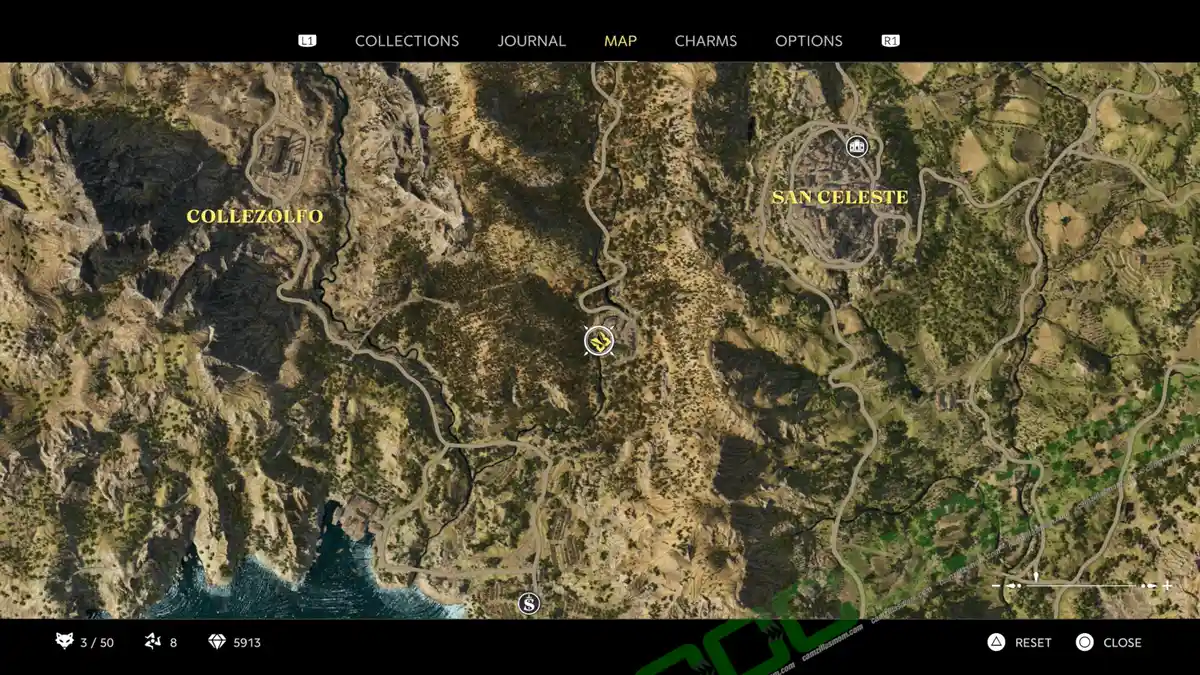
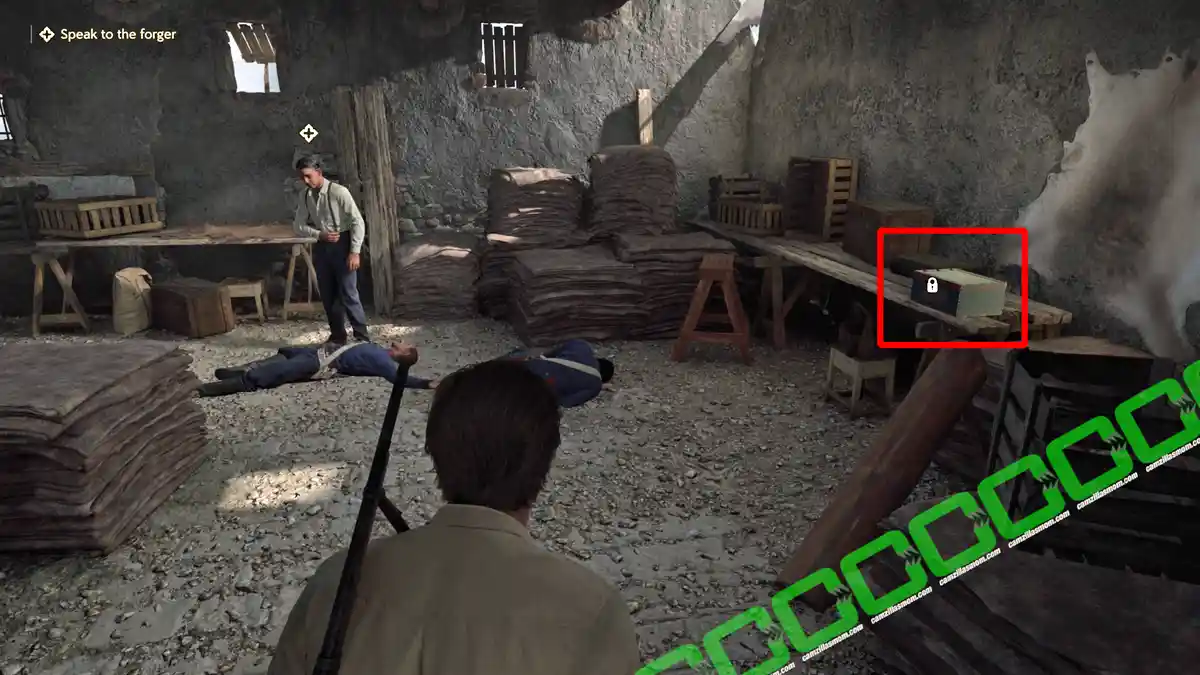
Later, Enzo finds the forger in the southwestern-most barn, where you can open this locked box.
“Collettore” Bead Charm


Later, Enzo and Cesare chase after L’Ombra. L’Ombra has an accident just south of Collezolfo. Here, behind a wooden cross, is this Colletore bead charm collectible.
Newspaper: Headwave


Also, search the windowsill of a ruined house for the newspaper: Heatwave.
Chapter 9 – Industria
In Chapter 9: Industria, there are 12 collectibles:
4 Journal Notes, 3 Charms, 2 Locked Boxes, 1 Newspaper, 1 Mystery Fox, and 1 Trinacria.
Lorenzetti’s Office
Journal Notes 1 of 4
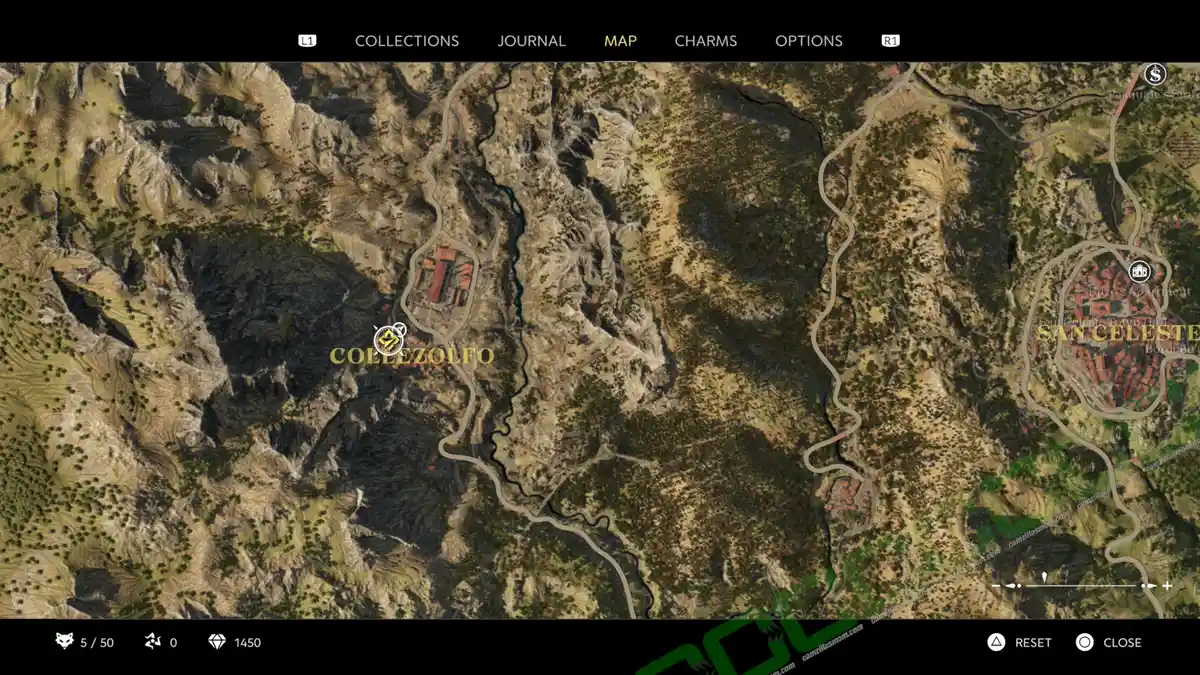
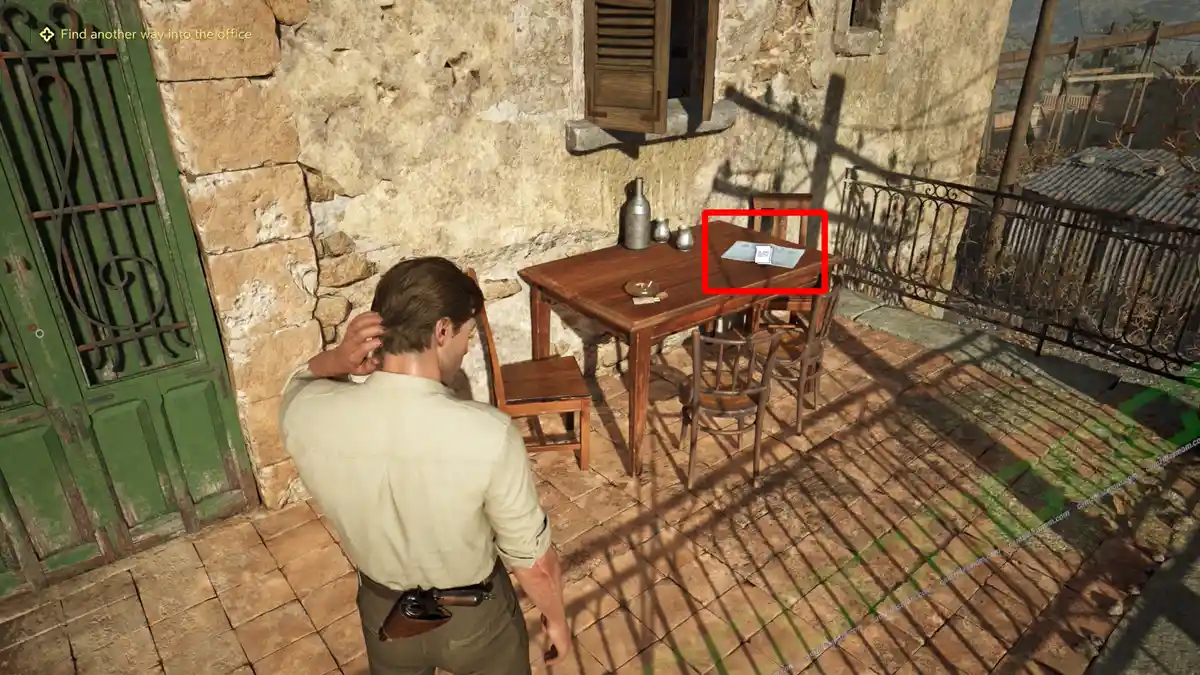
In Chapter 9: Industria, the note: Police Chief Dismissal is on the table of Lorenzetti’s office balcony in Collezolfo. You can climb up to the balcony from the courtyard below.
Journal Notes 2 of 4
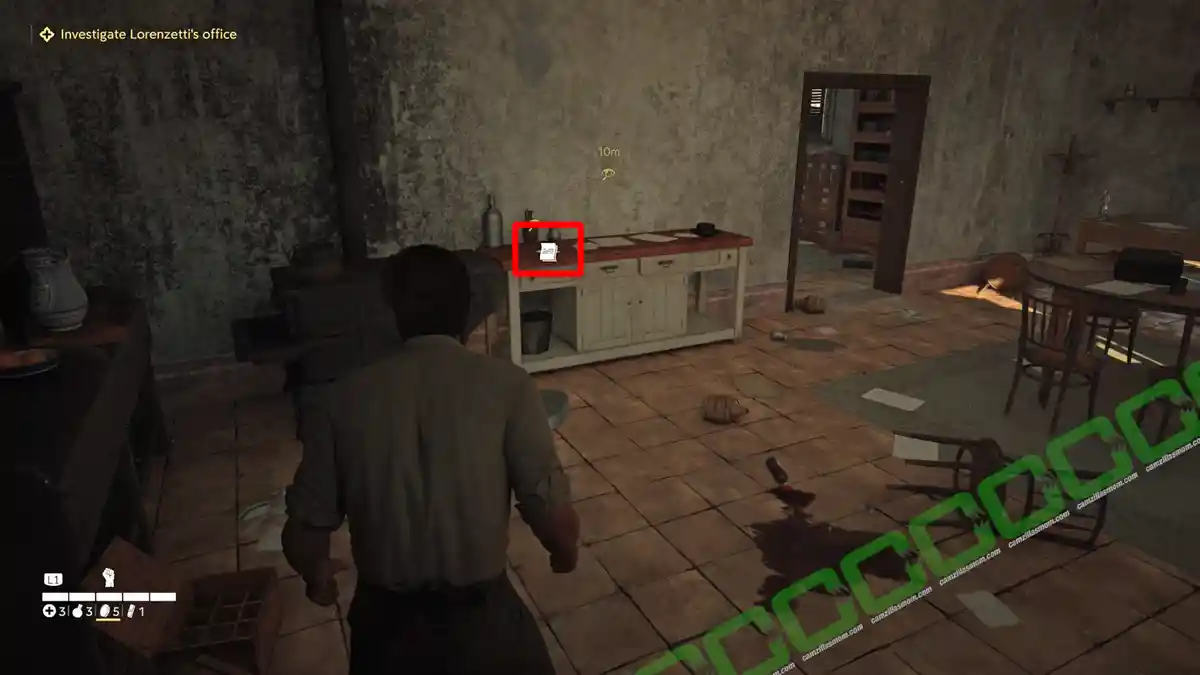
Inside, in the first room with the kitchen, is the note: Advice on Proposed Strikes.
“Perseveranza” Bead Charm
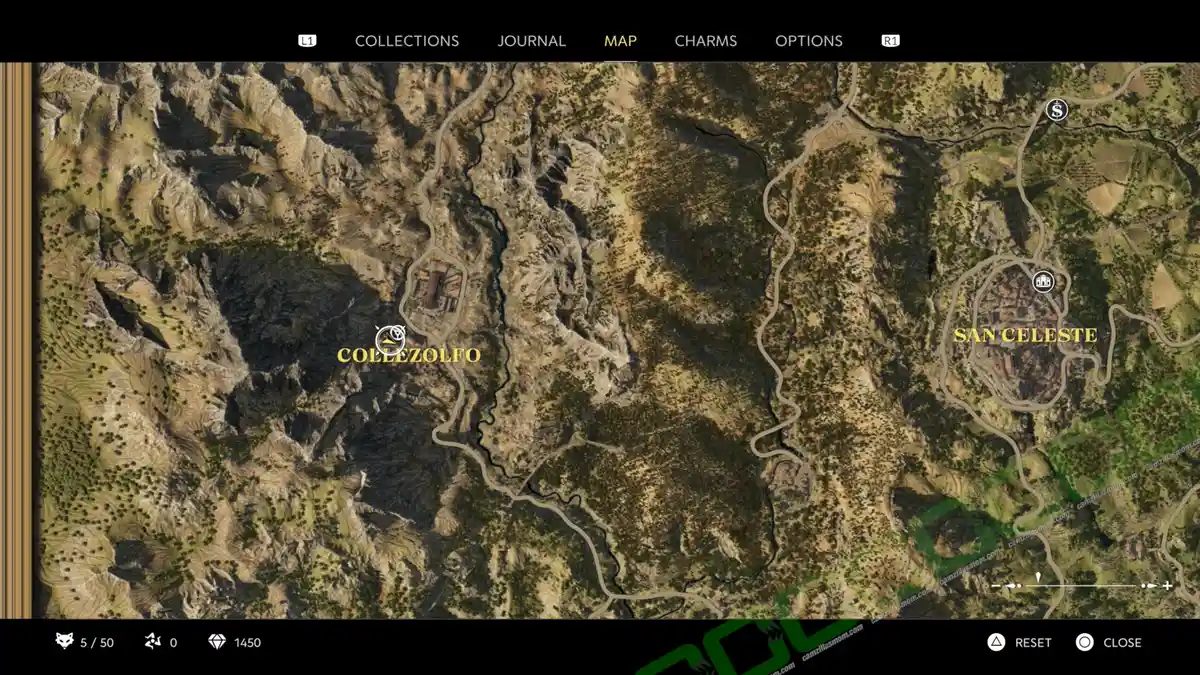

In the same room is also the Perserveranza Bead Charm.
Journal Notes 3 of 4
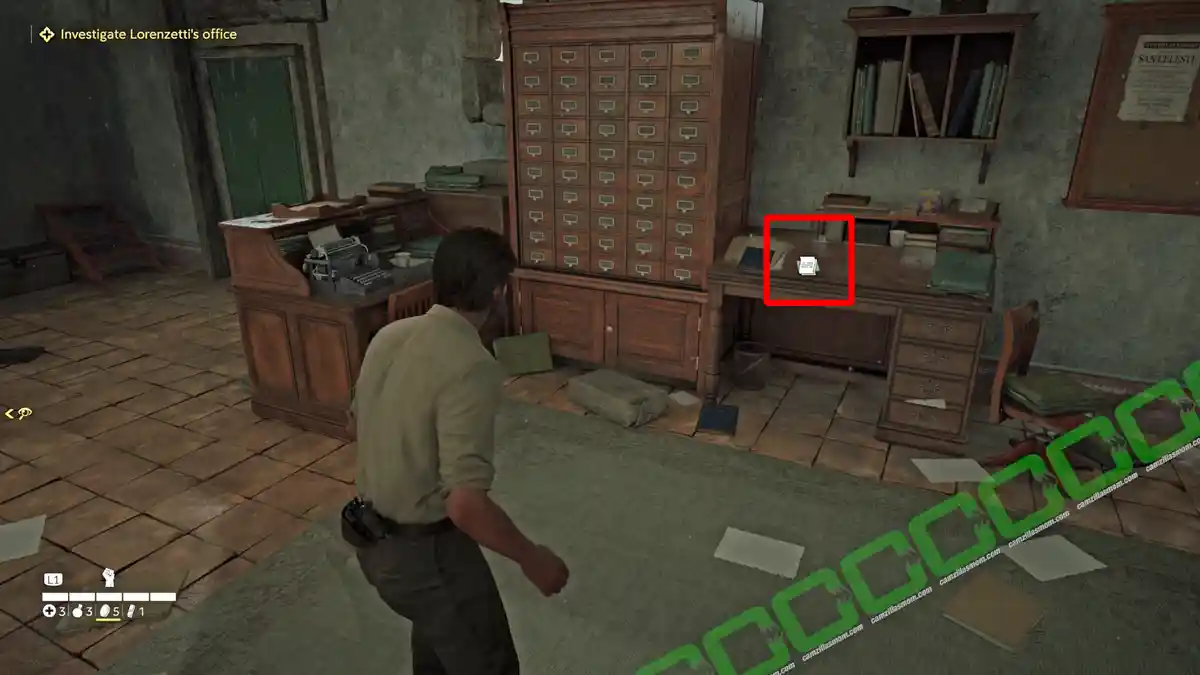
In the next room is the note: Spadaro’s Demands is near the typewriter.
Journal Notes 4 of 4
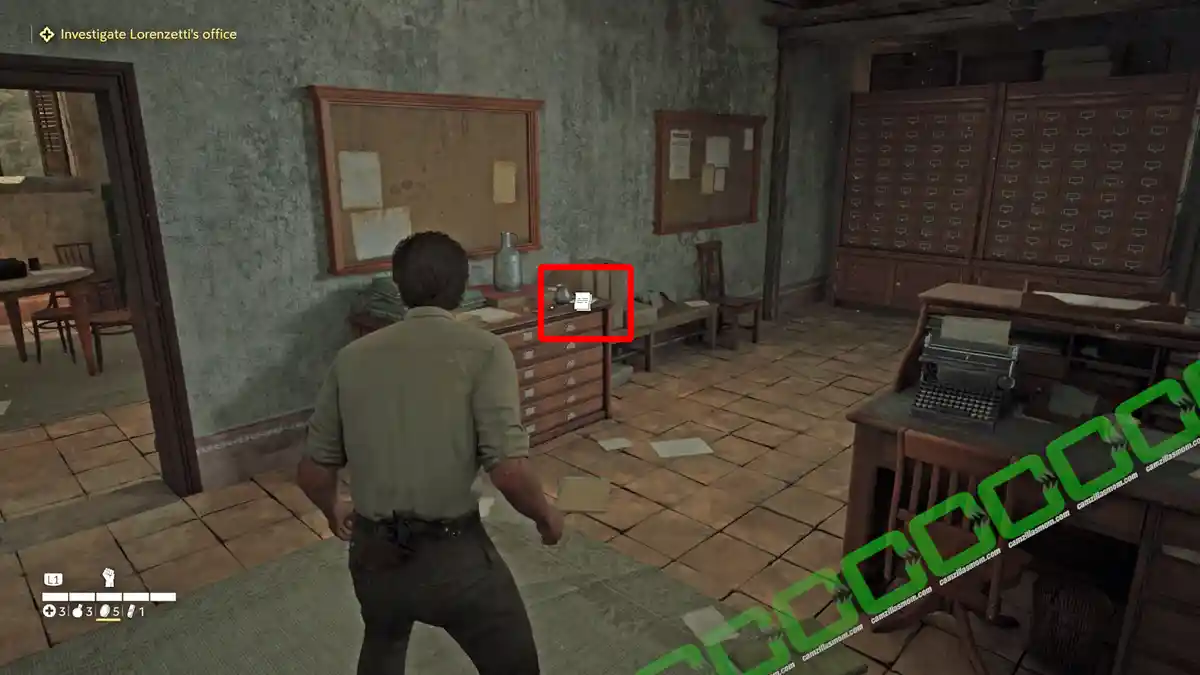
And closer to the exit is the note: Letter from Lorenzetti.
Factory
Locked Box 1 of 2
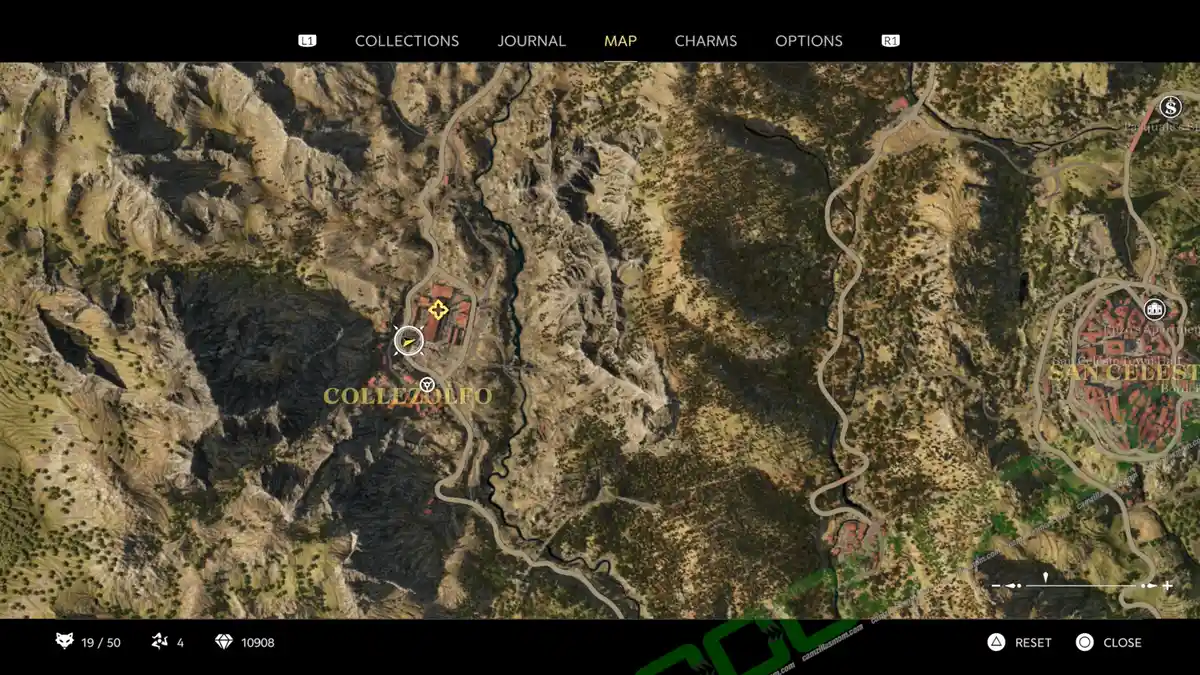
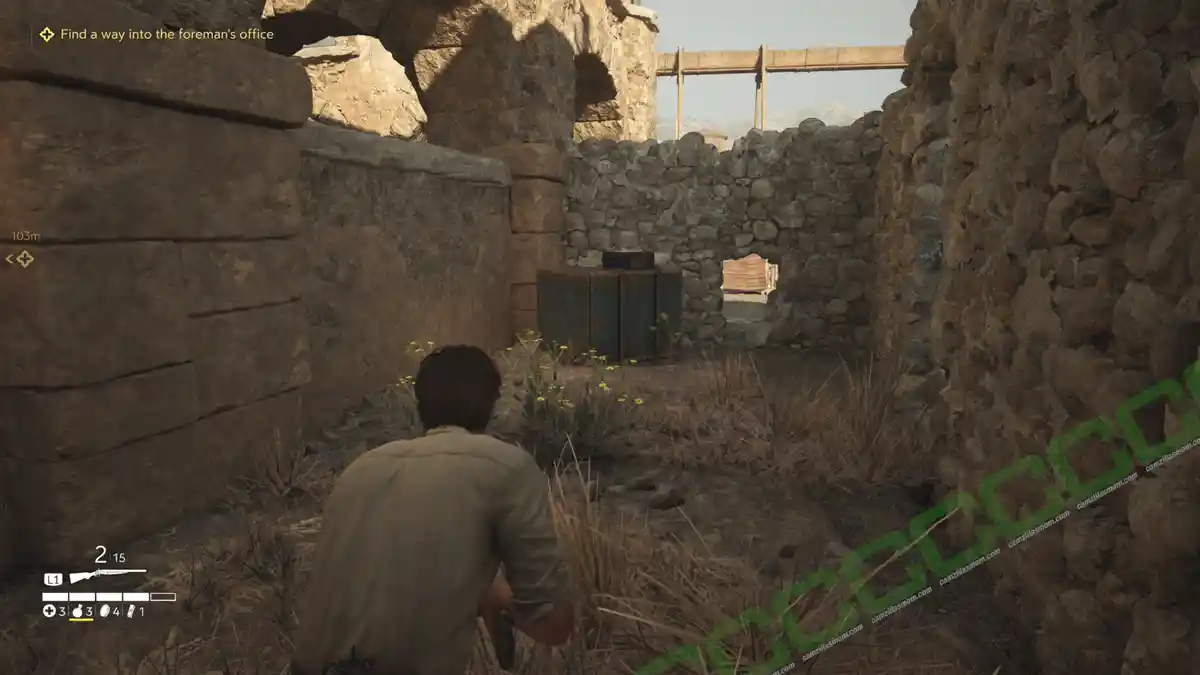
Sneak into the factory. There is a locked box in the southwestern corner of the factory.
Newspaper: Chaos in Tbilisi


In the factory yard at the southeast is this newspaper: Chaos in Tbilisi.
Locked Box 2 of 2
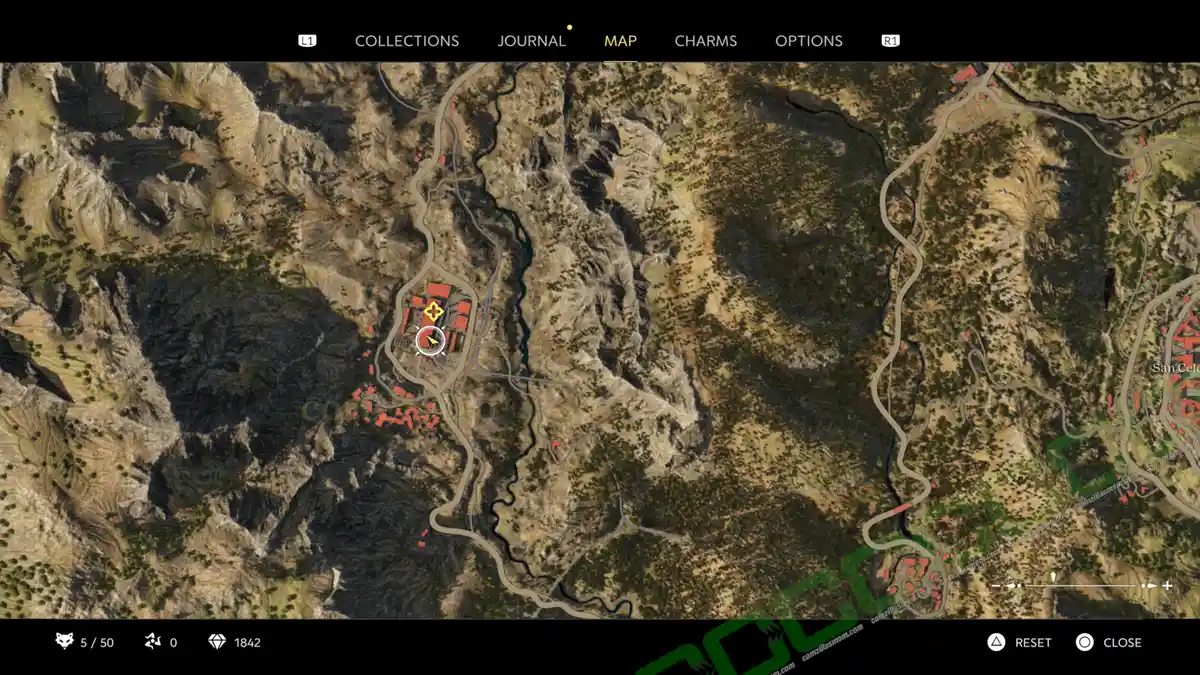
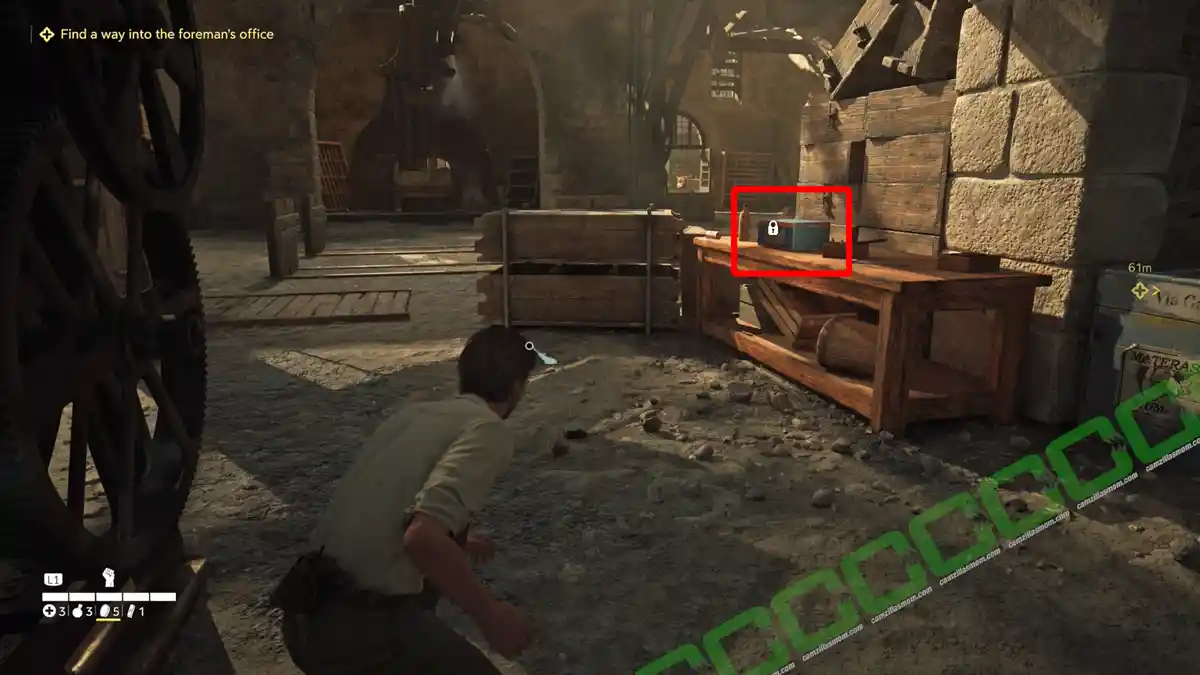
Enter the factory from the previous yard, and you can find this locked box.
“Pragmatico” Bead Charm


At the factory’s first section, just before passing through the metal gate that splits the building, there’s a table. On it, you’ll find the Pragmatico bead charm.
Mystery Fox
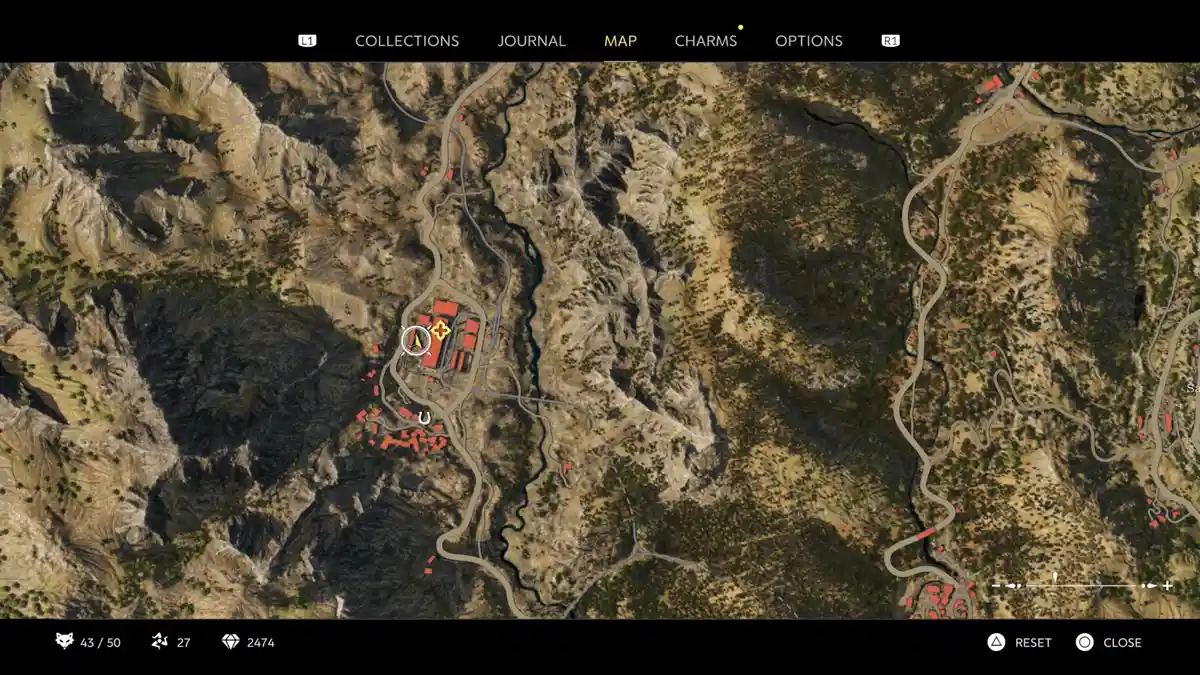
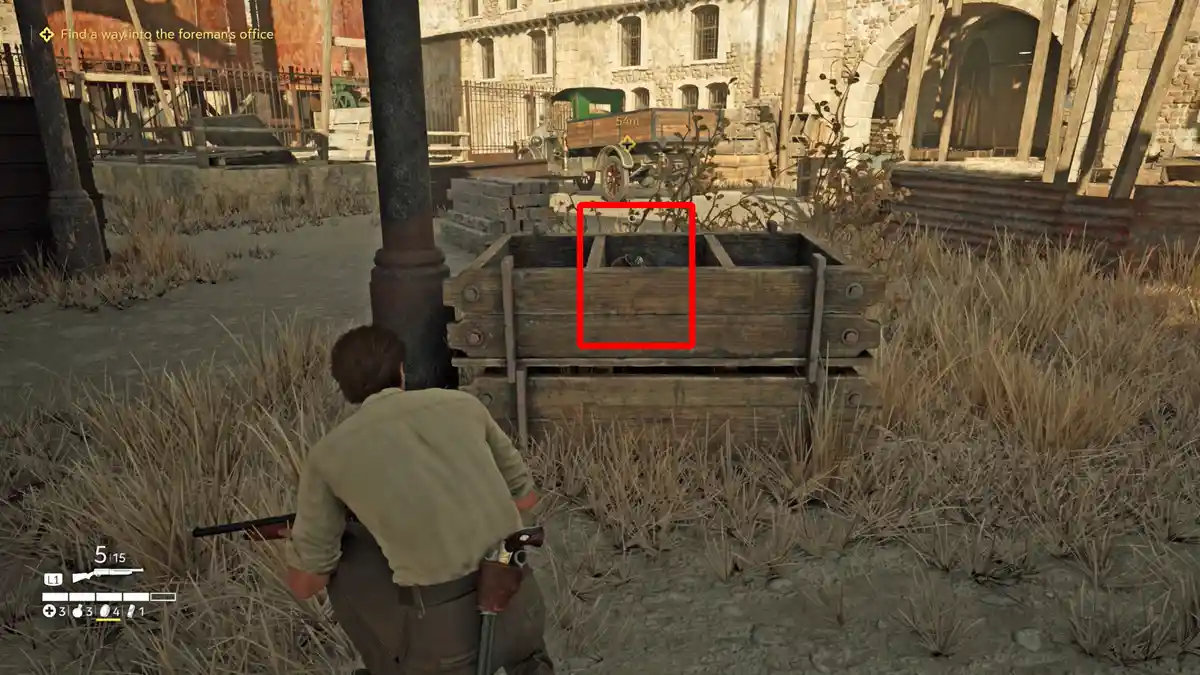
Head to the western outside yard of the factory to find the Mystery Fox inside one of the crates.
Trinacria
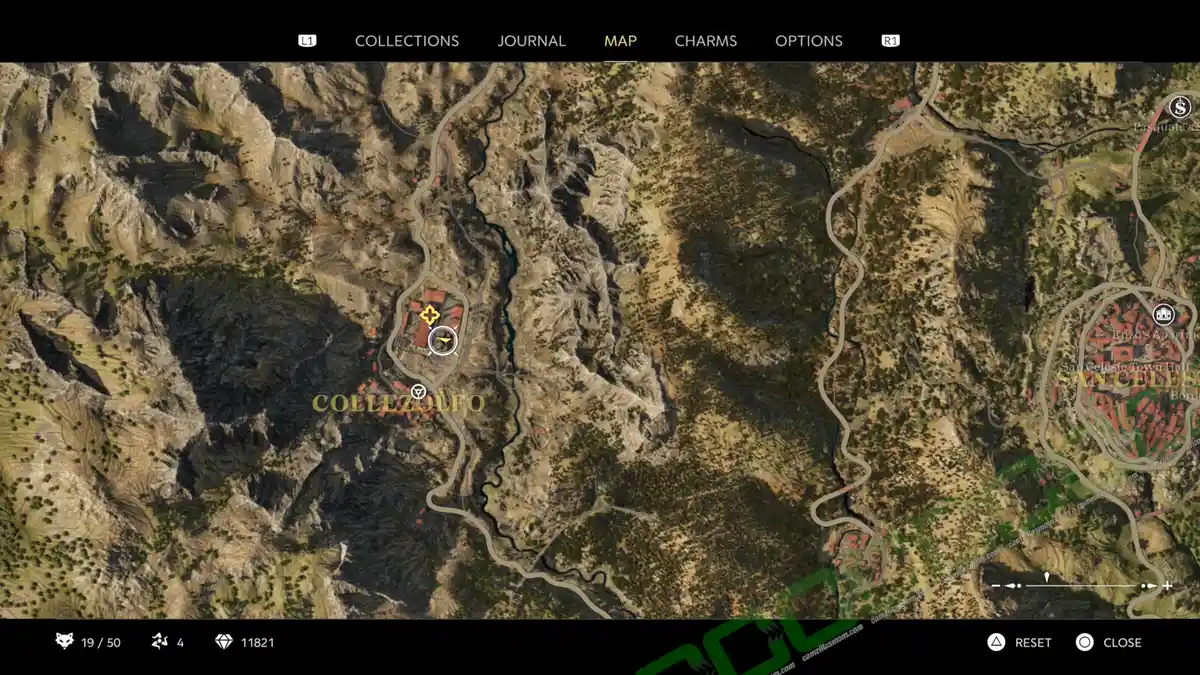
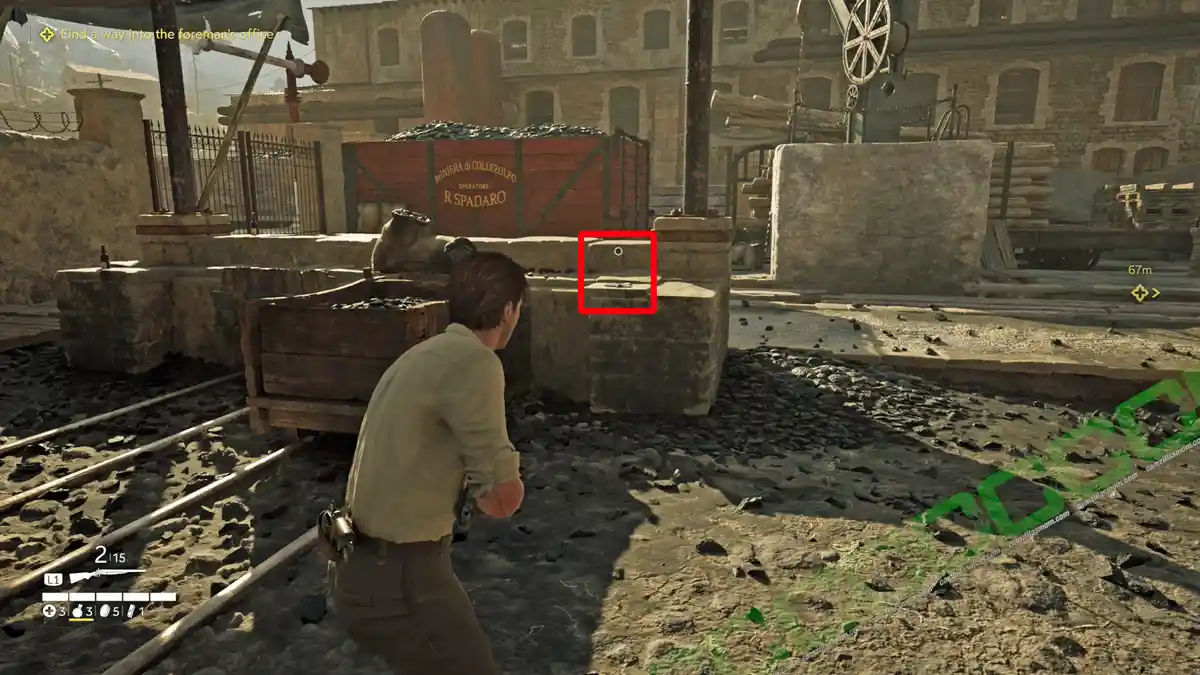
At the eastern outside yard, where the coal is stored, is a Trinacria.
“Brutale” Bead Charm


Continue on to the Foreman’s office. Right in front of it, on a wooden bench, is this Brutale Bead Charm collectible.
Chapter 10 – La Festa
In Chapter 10: La Festa, there are 6 collectibles:
4 Journal Notes, 1 Charm, and 1 Newspaper.
Journal Notes 1 of 4


At the start of Chapter 10: La Festa, Enzo is driving Isabella to San Celeste. After he parked the car, they walked up a staircase with a nice vista and benches at the top. Here’s the note: Saint’s Day Pamphlet.
“San Cristoforo” Medallion Charm


As they make their way toward the church, they notice the San Cristoforo Medallion tucked beside a door along the roadside. This is before passing the band.
Newspaper: Marathon Scandal


Before Isabella wants to look around at the market stalls, you can talk to her. There is the newspaper: Marathon Scandal behind her.
Journal Notes 2 of 4
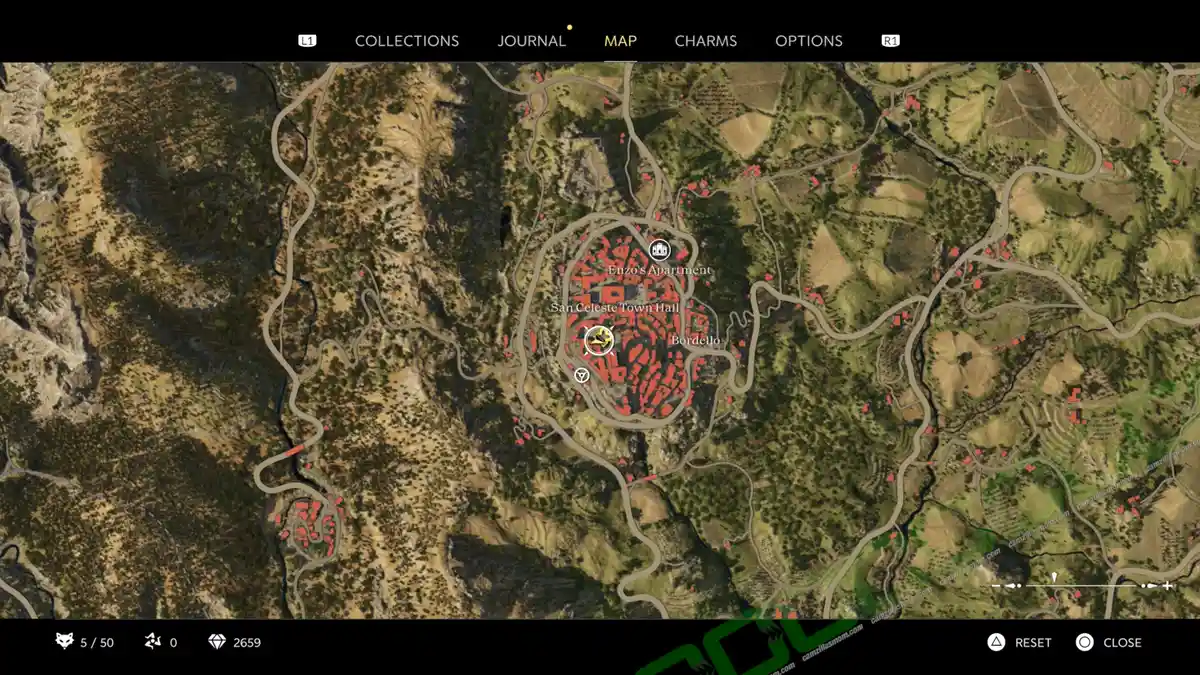
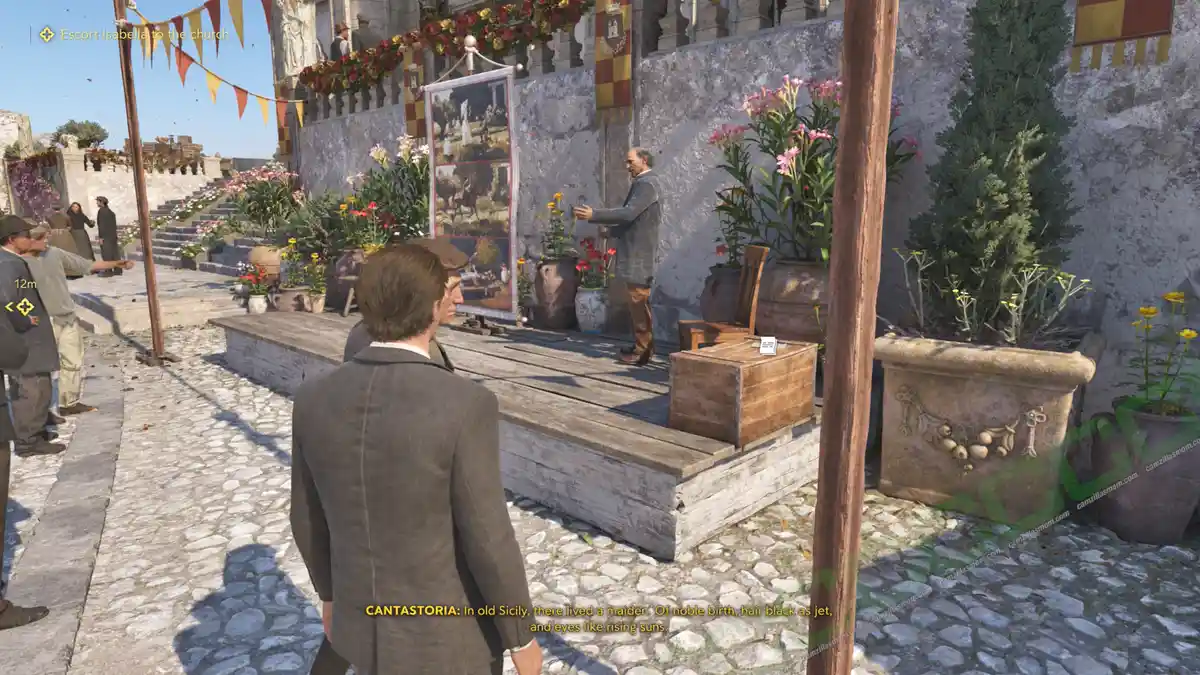
Similar to Chapter 2, there is also a stage on the market square. On the stage’s right side is a box with the note: Cantastoria’s Tale – Testa di Moro.
Journal Notes 3 of 4
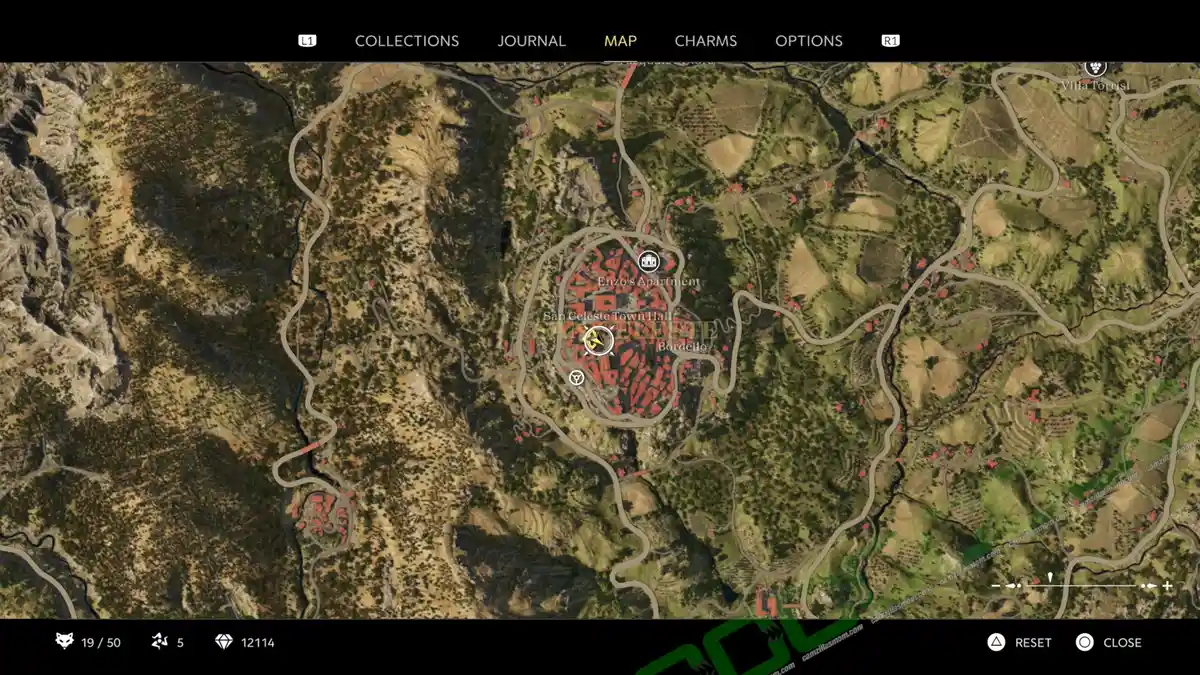
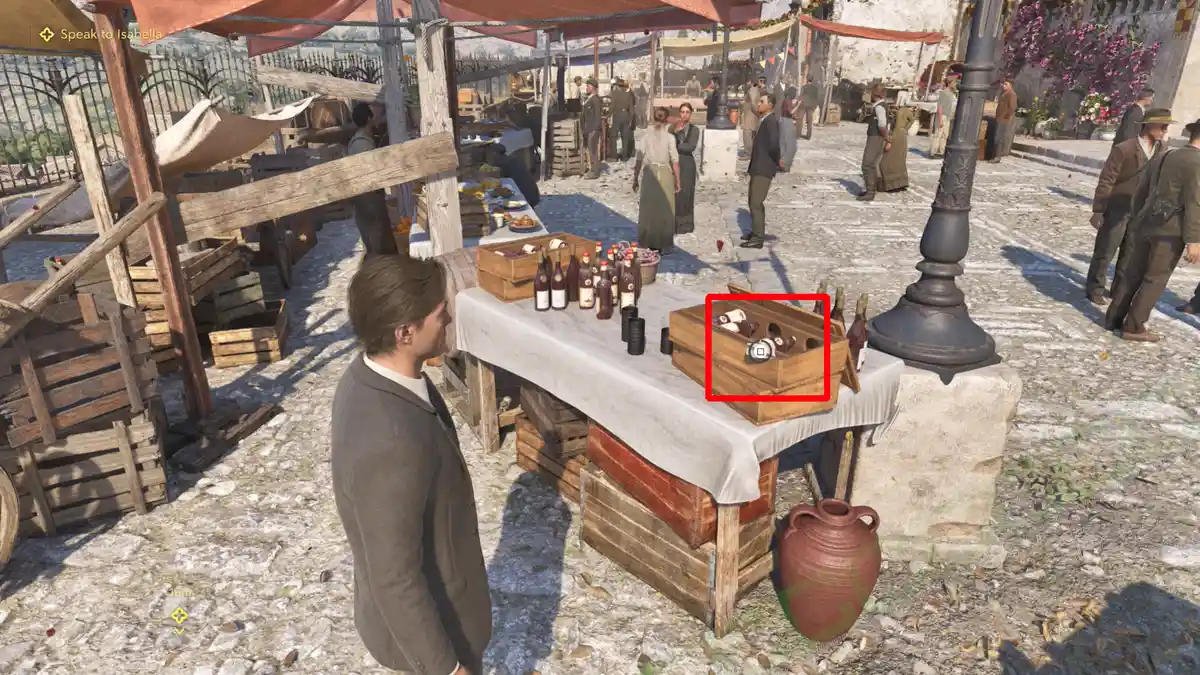
Check the market stalls thoroughly for this note: The Don’s Gratitude is inside a wine crate.
Journal Notes 4 of 4
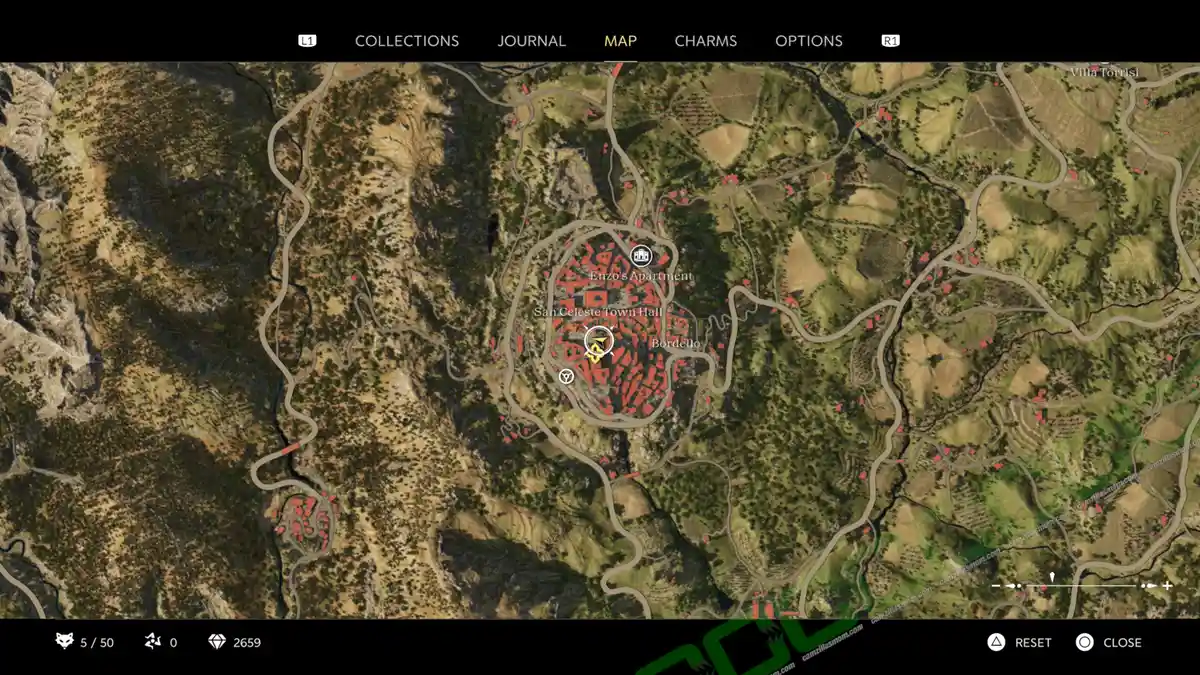
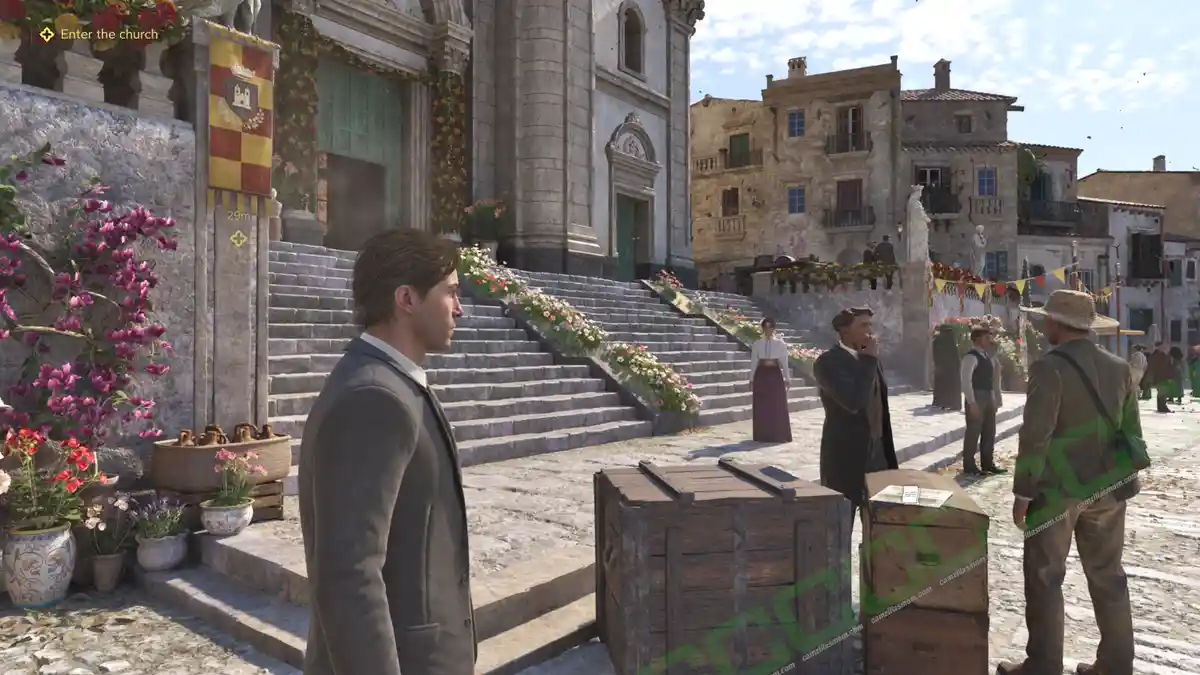
The last Journal Note: Marittimo Italiano is on top of a wooden box near the flower shop.
Chapter 11 – Mattanza
In Chapter 11: Mattanza, there are 6 collectibles:
2 Charms, 1 Journal Note, 1 Mystery Fox, 1 Trinacria, and 1 Newspaper.
“Economico” Bead Charm
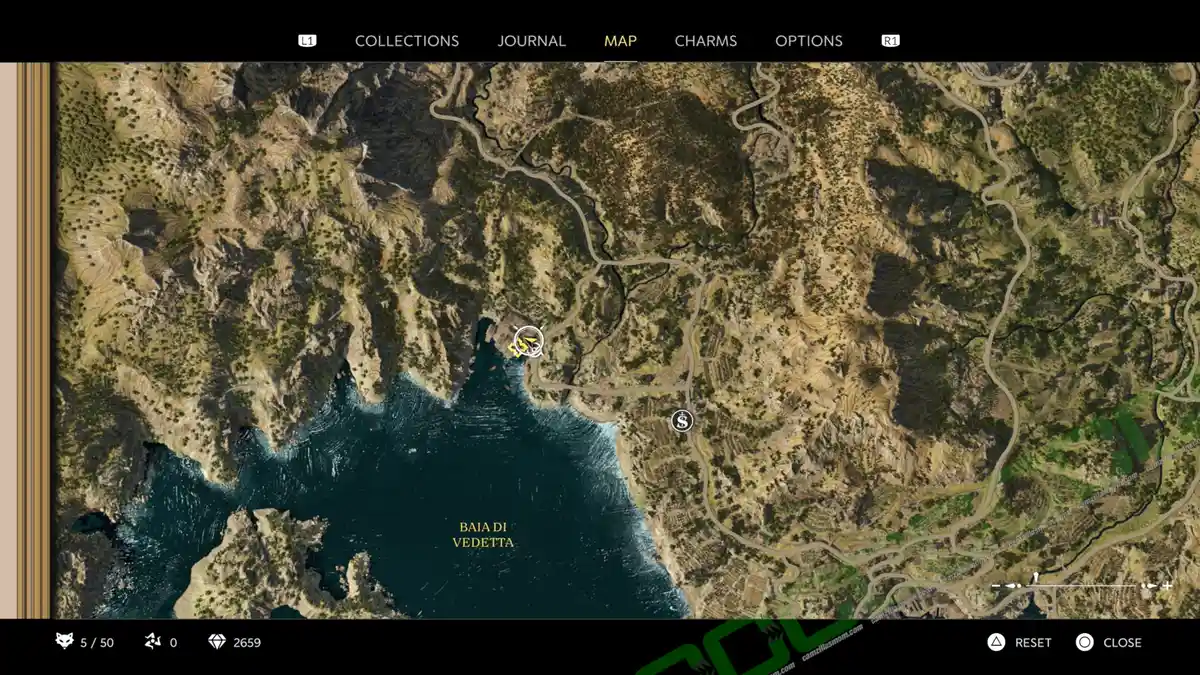

In Chapter 11: Mattanza, Don Torrisi, Luca, Cesare, and Enzo drive to Don Galante’s tuna factory northwest of Porto Almaro for a peace talk. Here, near the entrance, is the Economico bead charm.
Journal Note

A bit further ahead, on the gate, is a note: Tonnara Temporary Closure.
Mystery Fox
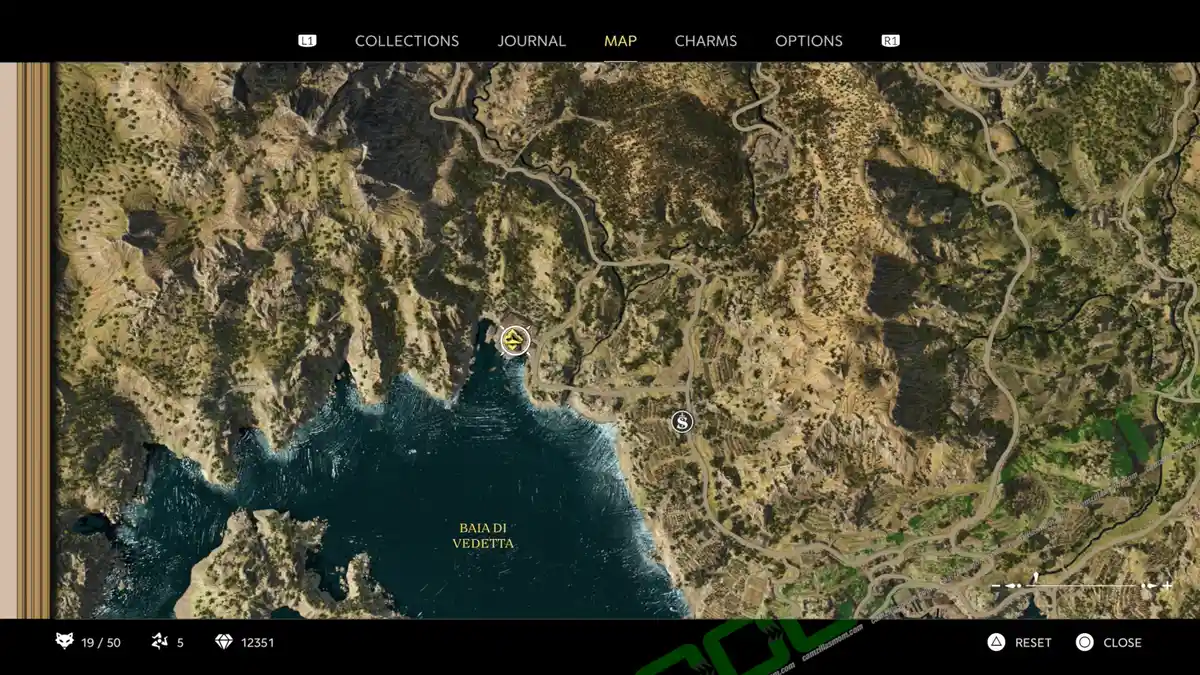
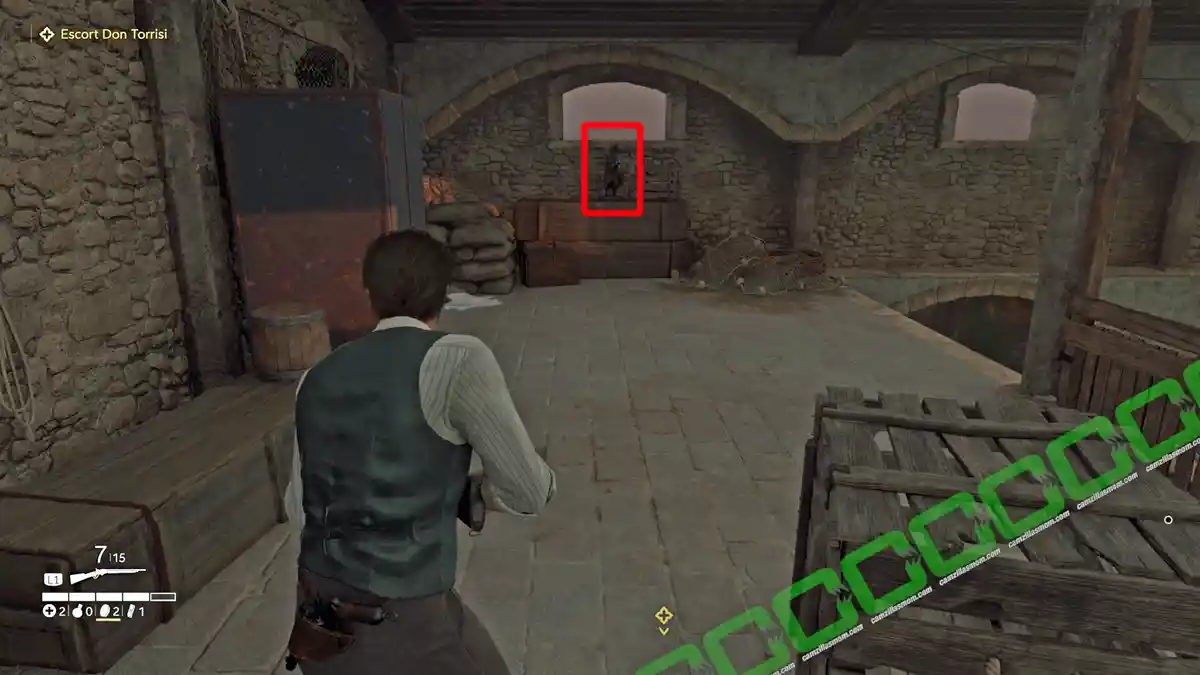
After the failed meeting, a shootout starts. In the first room of the shootout, head upstairs, where the snipers are, to find a Mystery Fox.
Trinacria
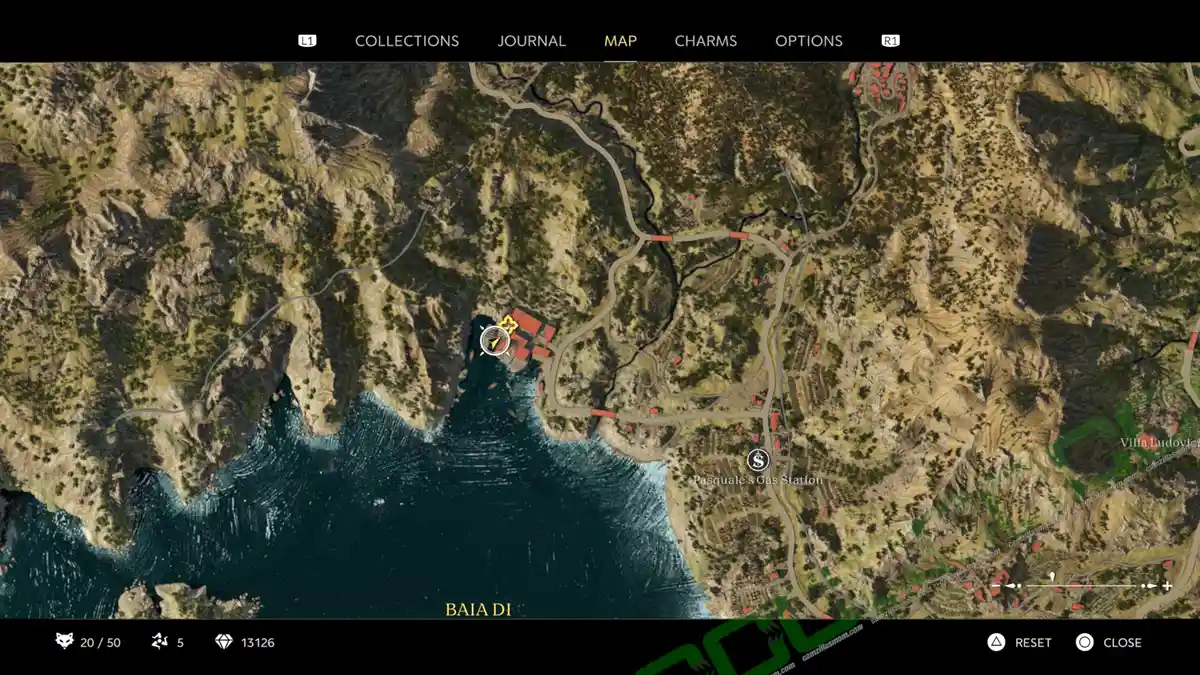
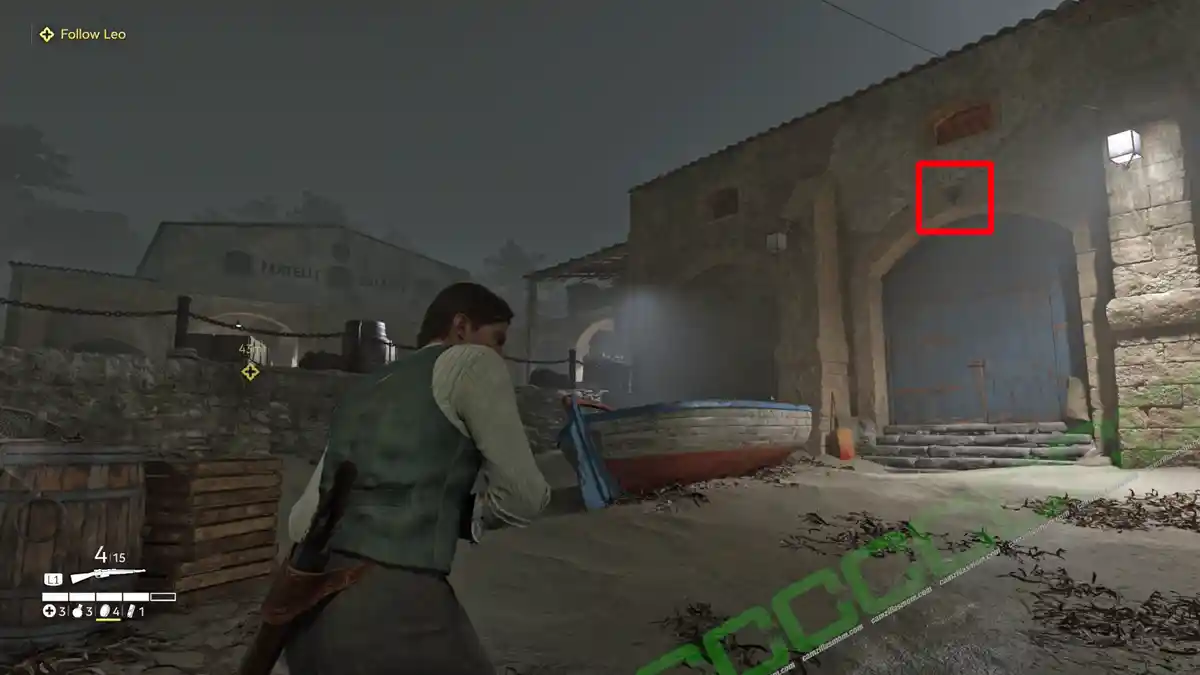
Continue until reaching a big outside yard. During the shootout, Enzo has to reach a sniper, while Leo covers him. Check the top of the blue gate they came through to find a Trinacria.
Newspaper: Crowds at Car Race


After all the enemies are defeated in the same inner yard, make sure to enter all open rooms before leaving the tonnara to find this newspaper: Crowds at Car Race.
“Valore” Bead Charm


Proceed through the next blue gate, and as soon as you pass through, take a right. You’ll find the Valore Bead Charm resting atop a workbench.
Chapter 12 – La Forza Del Destino
In Chapter 12: La Forza Del Destino, there are a total of 16 collectibles: 6 Journal Notes, 1 Saints’ Card, 2 Charms, 3 Mystery Foxes, 2 Trinacrias, 1 Newspaper, and 1 Locked Box.
Journal Note 1 of 6
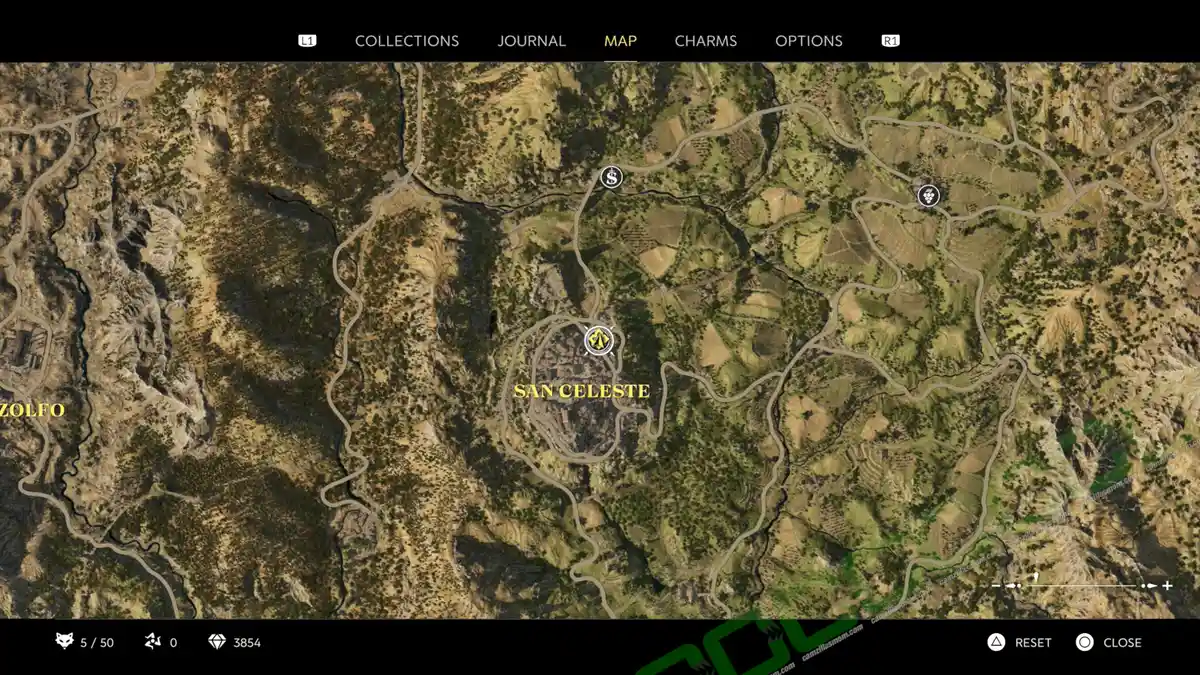
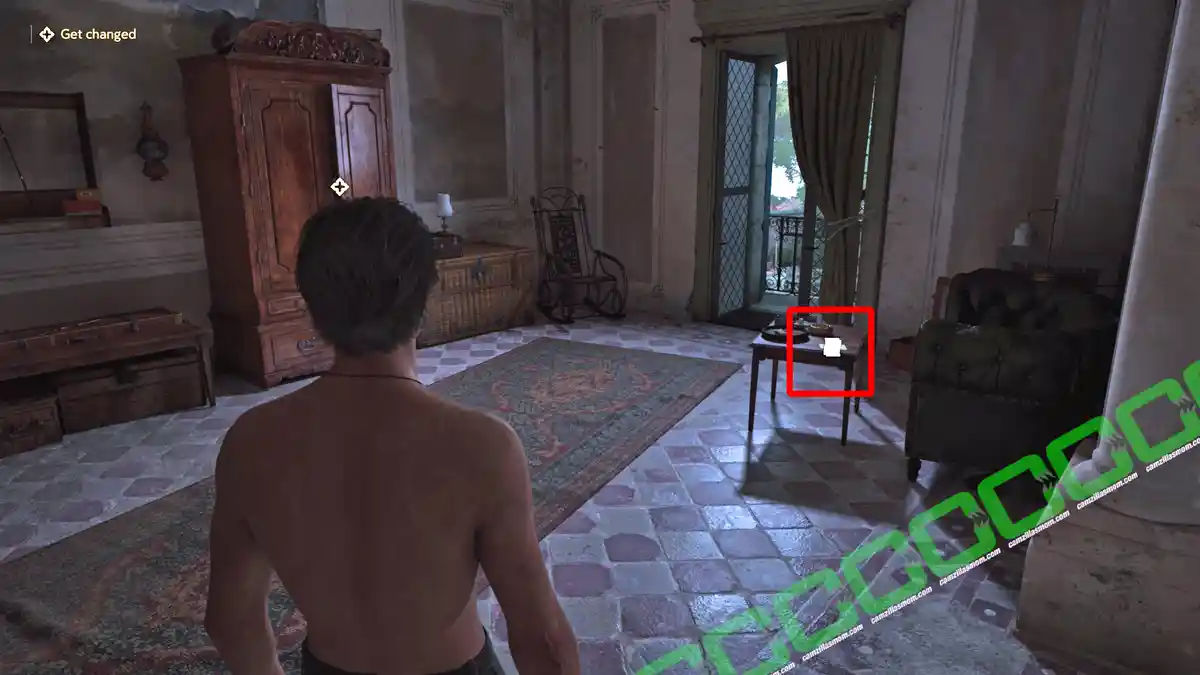
At the start of Chapter 12: La Forza Del Destino, you can find the note: Isabella’s Plea on a table in Enzo’s apartment.
Santa Rosalia Sants’ Card
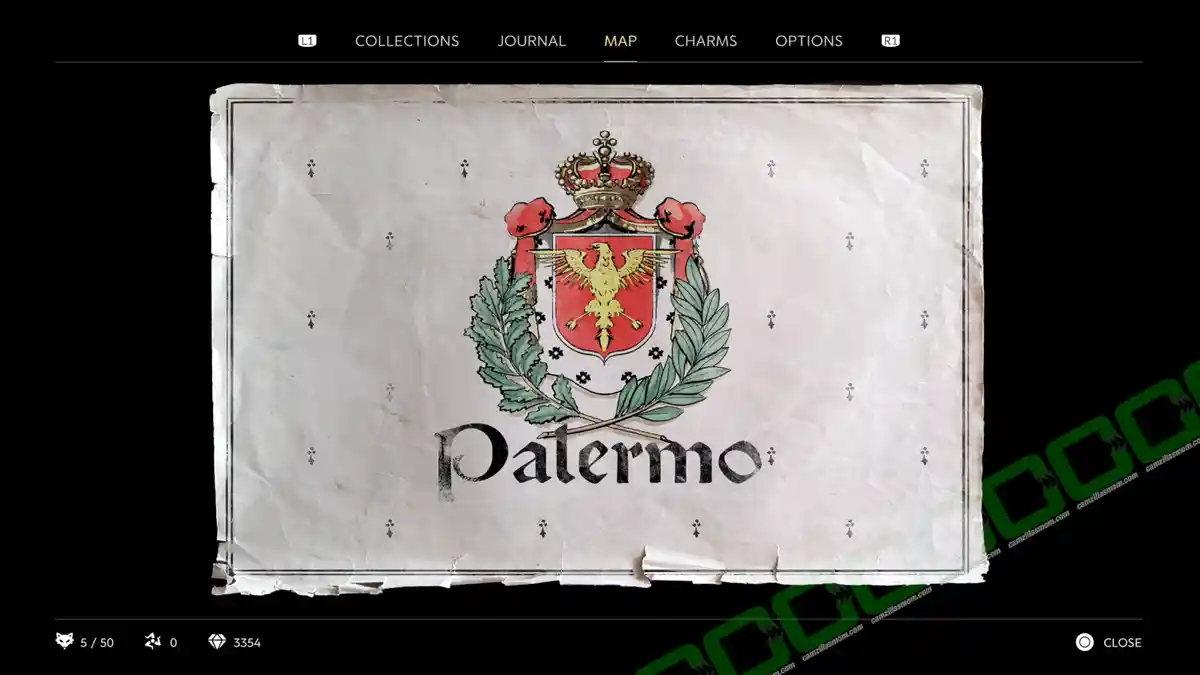

After arriving in Palermo, you can find the Santa Rosalia Saints Card at the arrival courtyard shrine.
Journal Note 2 of 6
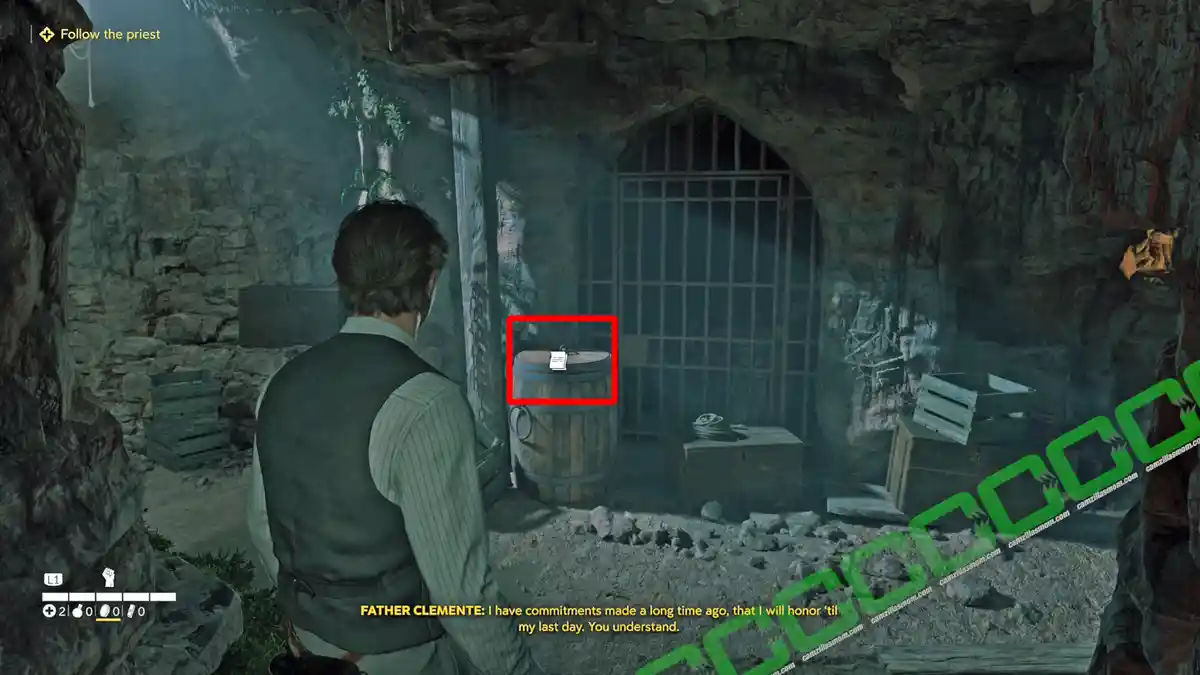
During the “Follow the priest” section, after moving the coffins away to open a secret passage, you can find this note: Smuggler’s Message on top of a barrel.
“Resistenza” Bead Charm

Next, Enzo has to follow a small stream to open a gate from the other side. He will encounter two skeletons. One of them died because of a cave-in. Nerby is the Resistenza Bead Charm.
“Paziente” Bead Charm

After climbing a ladder up from the sewers, you will exit into a small storage area before heading up to the Dressing Room. Here is the Paziente Bead Charm.
Mystery Fox 1 of 3
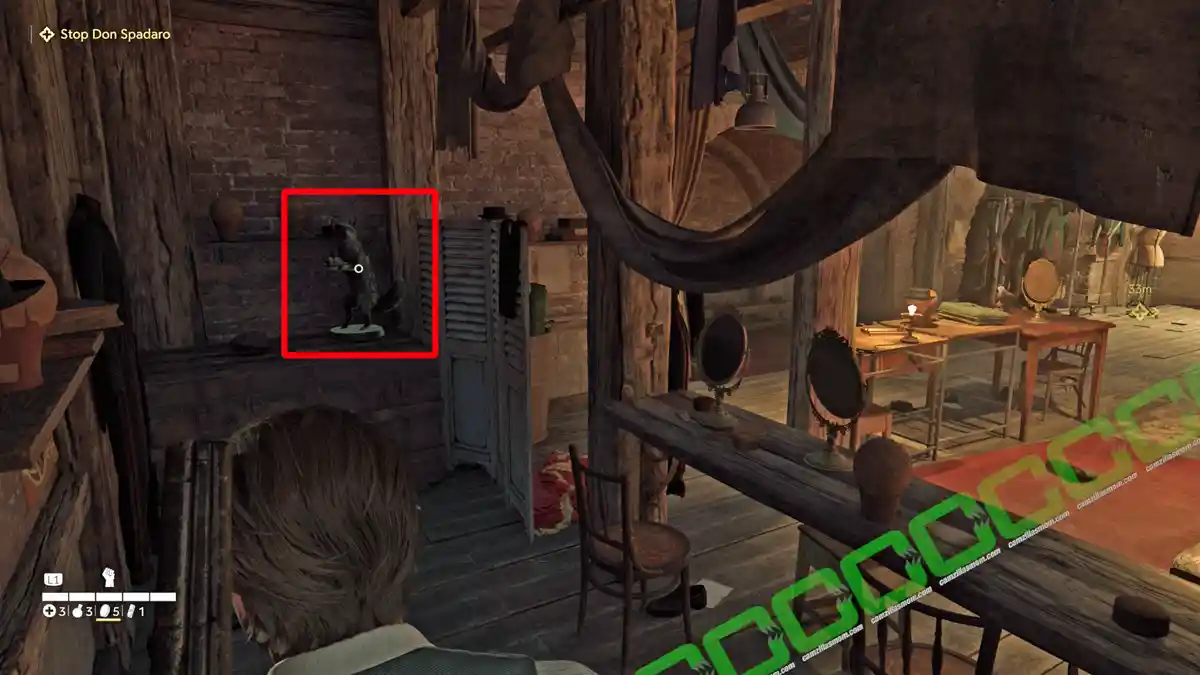
There is a Mystery Fox hiding in a corner of the Dressing Room.
Journal Note 3 of 6
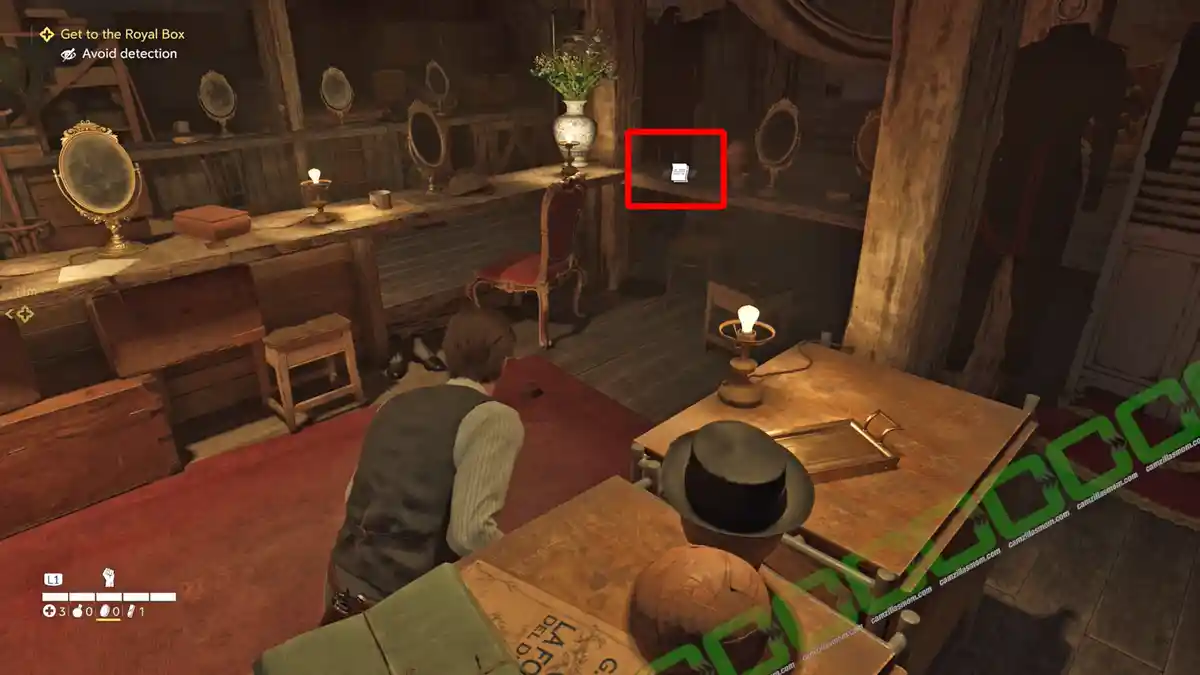
The note: La Forza del Destino Script is on one of the tables in the dressing room.
Journal Note 4 of 6

Exit the Dressing Room and enter the backstage area. Here is the note: Instructions for Night Watch on the first wooden box you encounter.
Trinacria 1 of 2
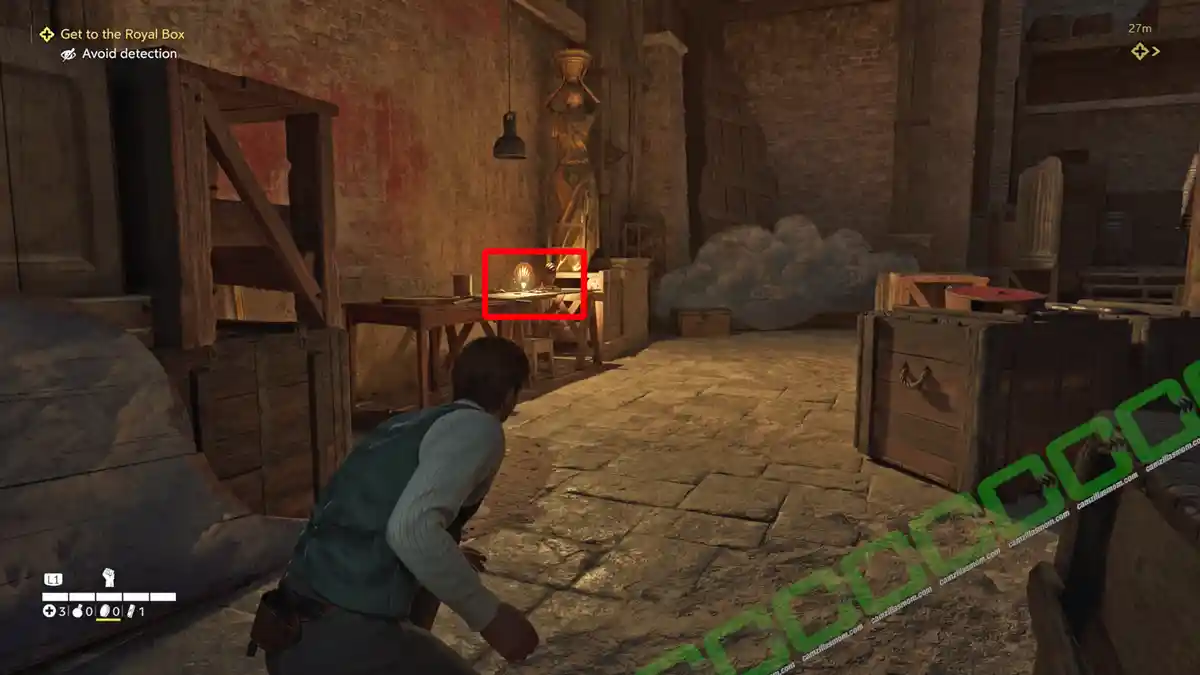
Follow the left-hand wall to find a Trinacria on top of a table.
Mystery Fox 2 of 3
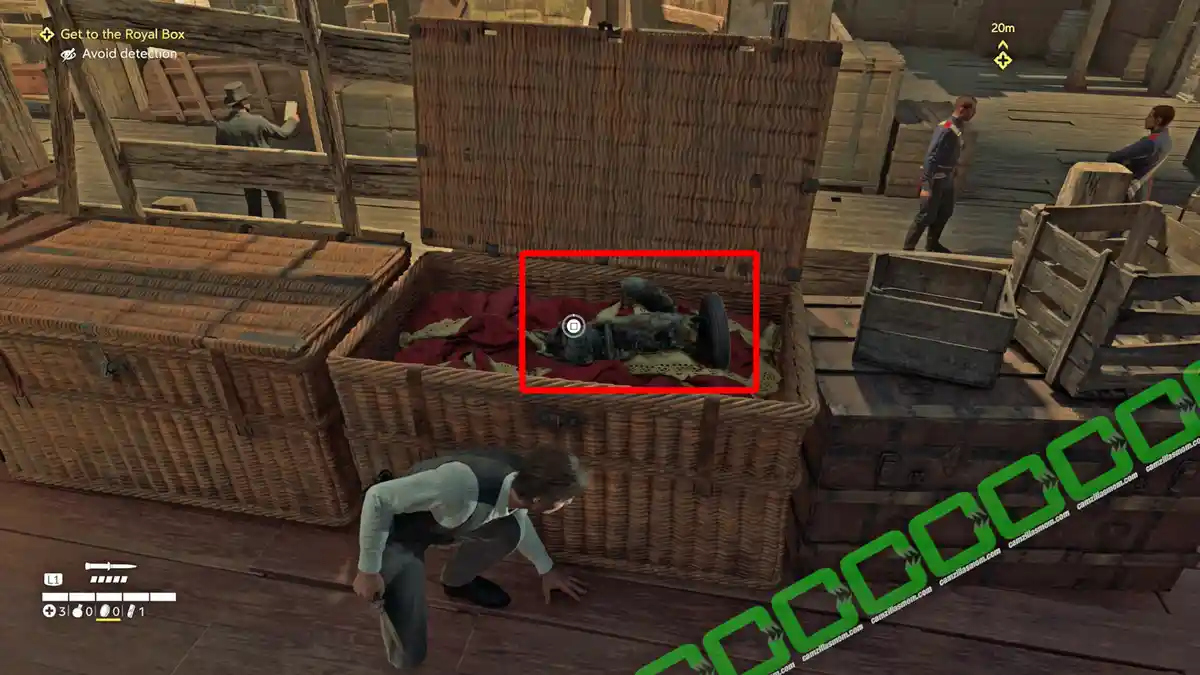
Opposite the Trinacria, you’ll find the elevated stage. To reach it, follow the walls in a counterclockwise direction. Upon arrival, you’ll discover an open wicker basket containing a Mystery Fox.
Newspaper: Camel Riders

Next, reach the ladder to climb up to the platform above the stage. Cross over, and on the other side, you will find the newspaper: Camel Riders.
Journal Note 5 of 6
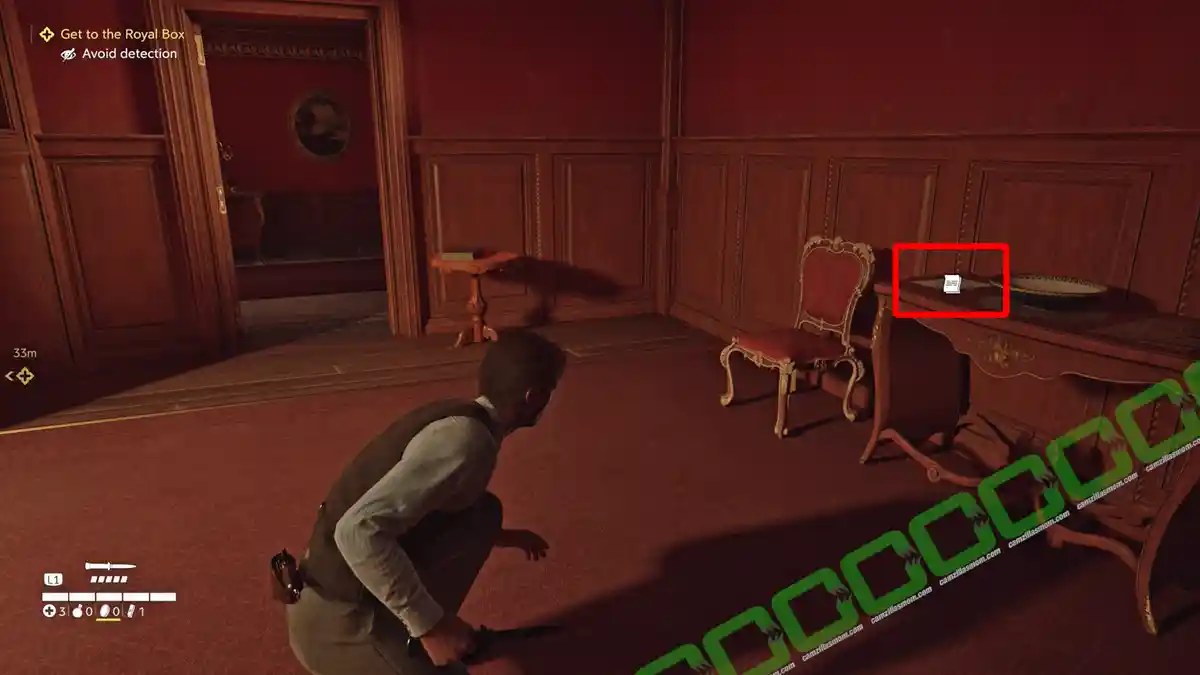
Leave the backstage area and enter the red auditorium corridor. Turn left, and you will find the note: Public Security Guidelines on a piece of furniture.
Journal Note 6 of 6
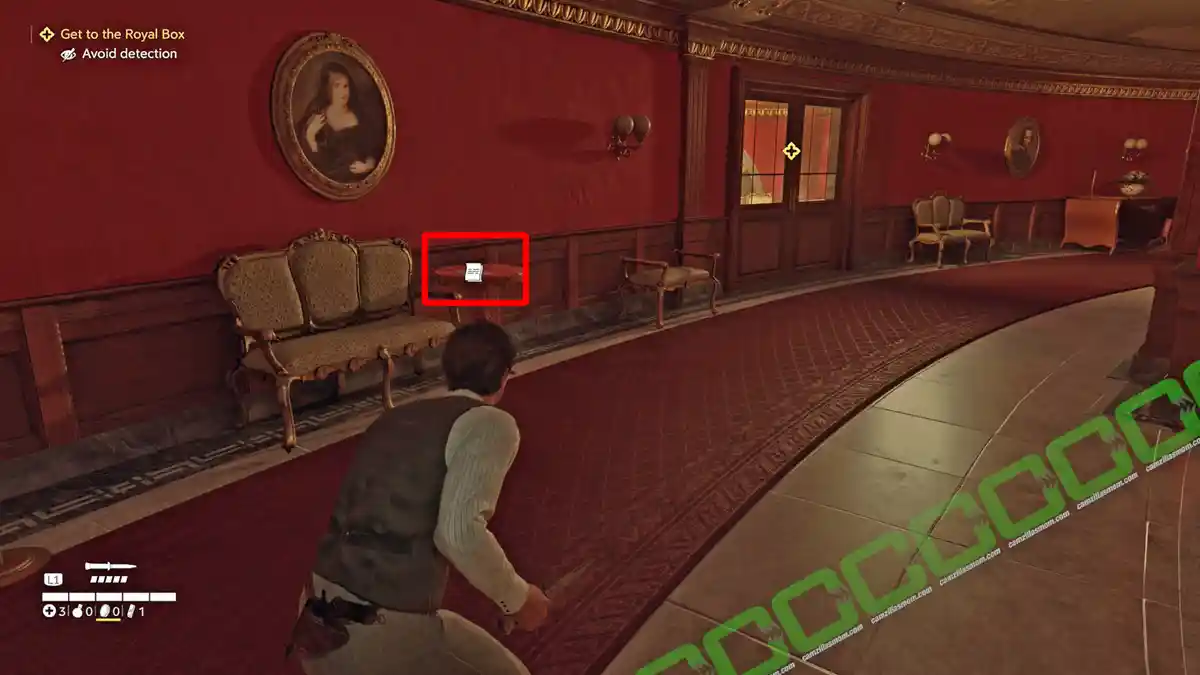
Next, follow the long red corridor, where Enzo has to go through a red door that leads to a staircase. The note: Opera Programme is near that door.
Mystery Fox 3 of 3
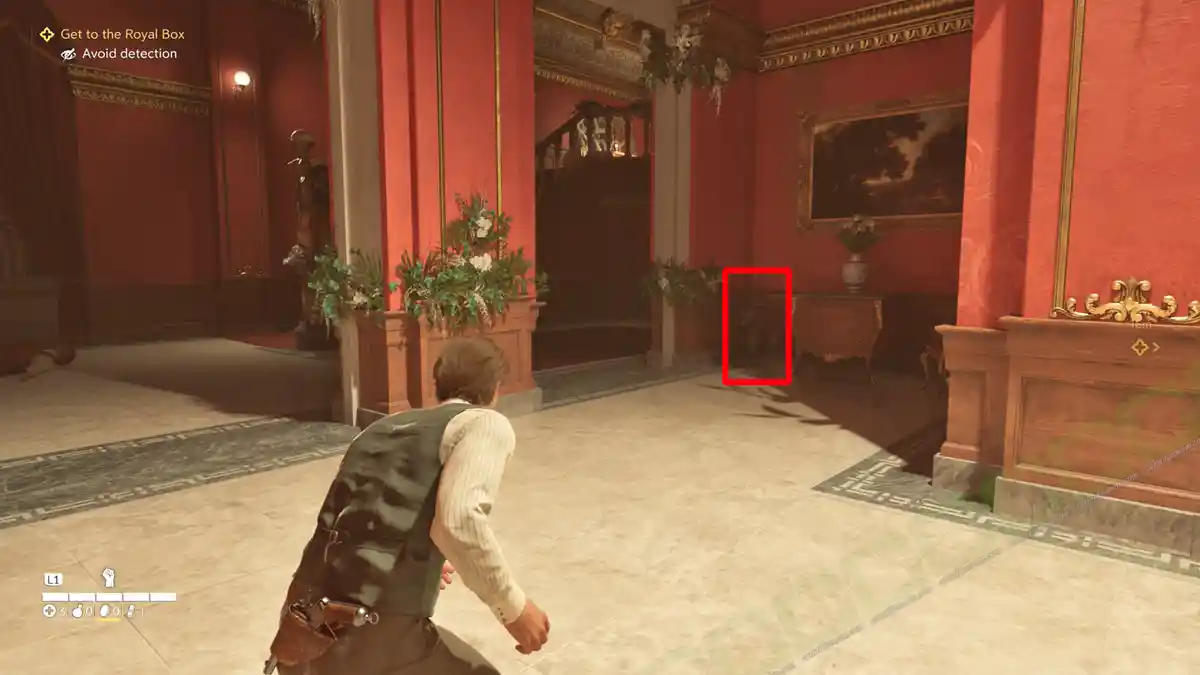
Go through the double doors and head downstairs, where you can find a Mystery Fox near the staircase.
Trinacria 2 of 2
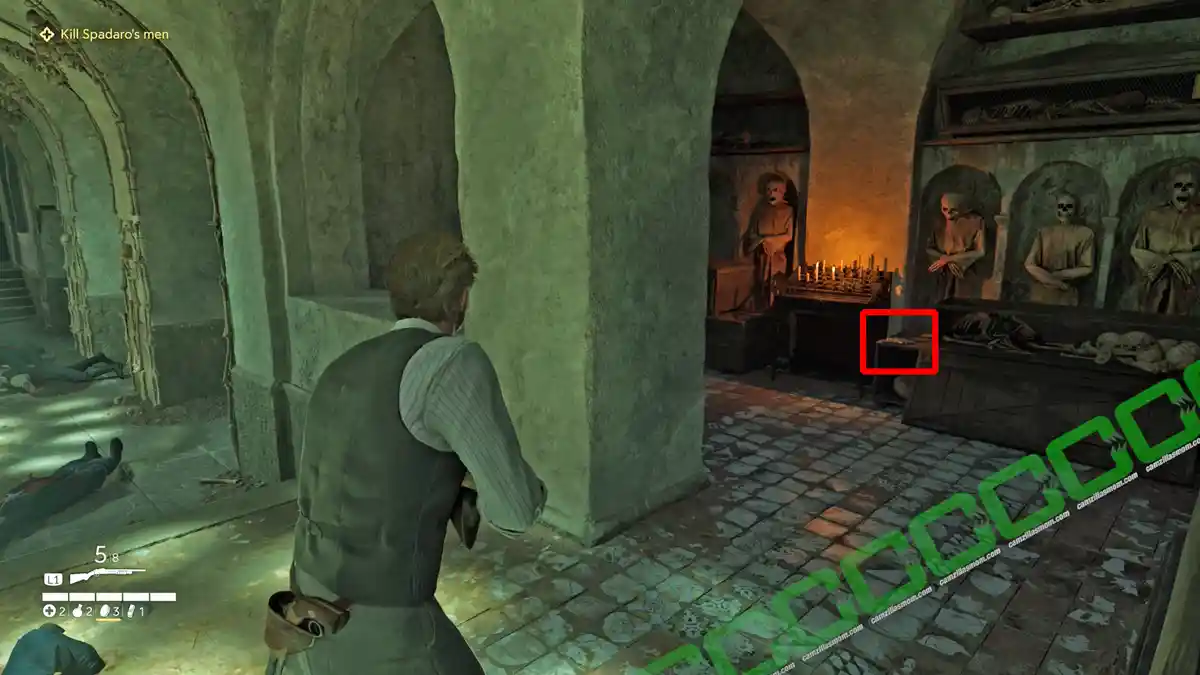
After killing the Baron in the opera, Enzo follows Spadaro through the sewers, where he enters a crypt before facing Spadaro in a knife fight. When entering the crypt from the sewers, turn left and left again at the top of the stairs to find this Trinacria.
Locked Box
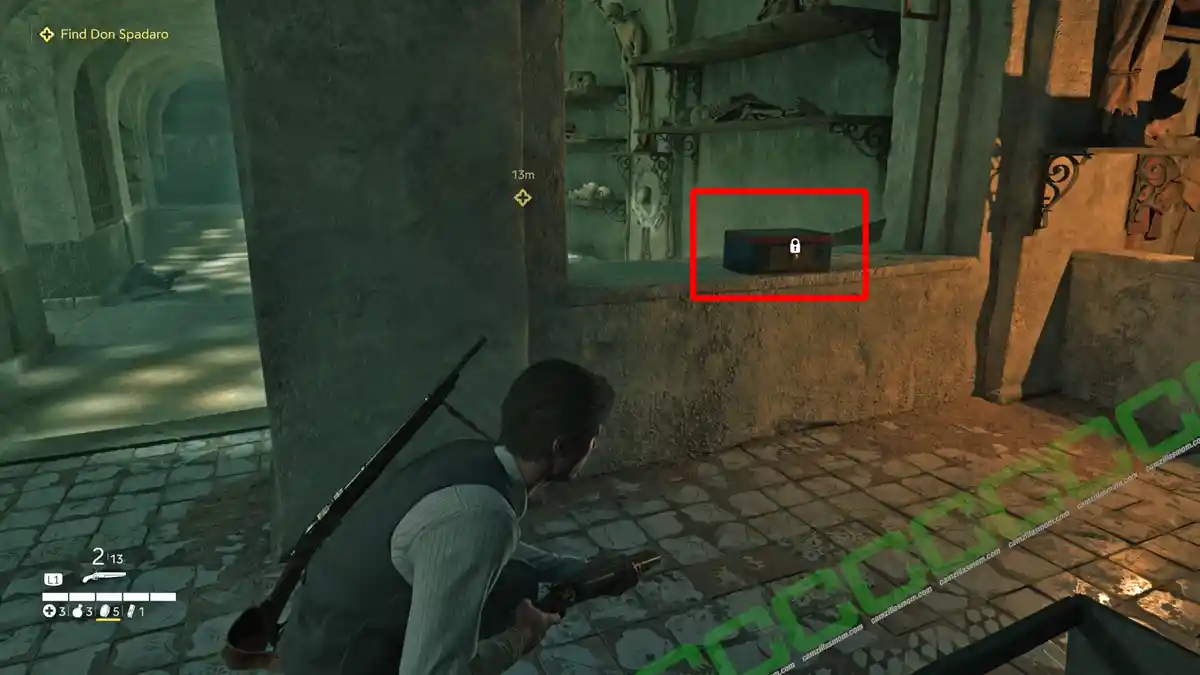
Before facing Don Spadaro in the knife fight, look for this locked box near the knife fight door.
Chapter 13 – Capiregime
In Chapter 13: Capiregime, you can find 3 Journal Notes, 4 Locked Boxes, 1 Charm, 1 Newspaper, 2 Trinacrias, and 1 Mystery Fox.
Journal Note 1 of 3
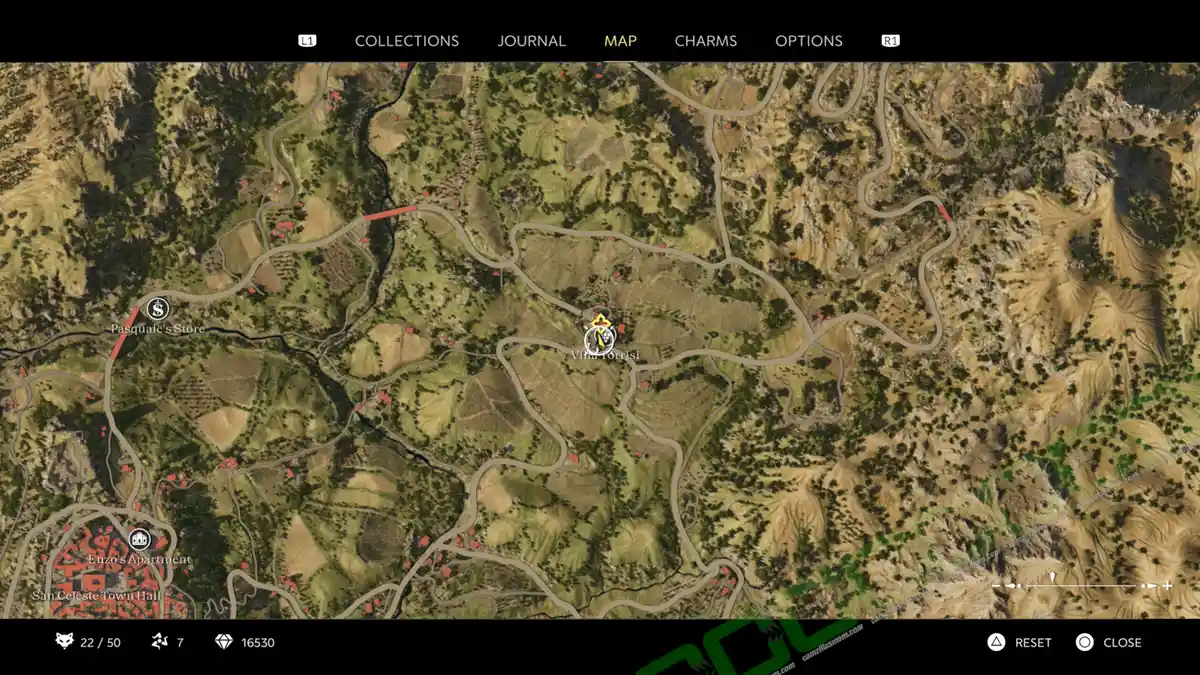
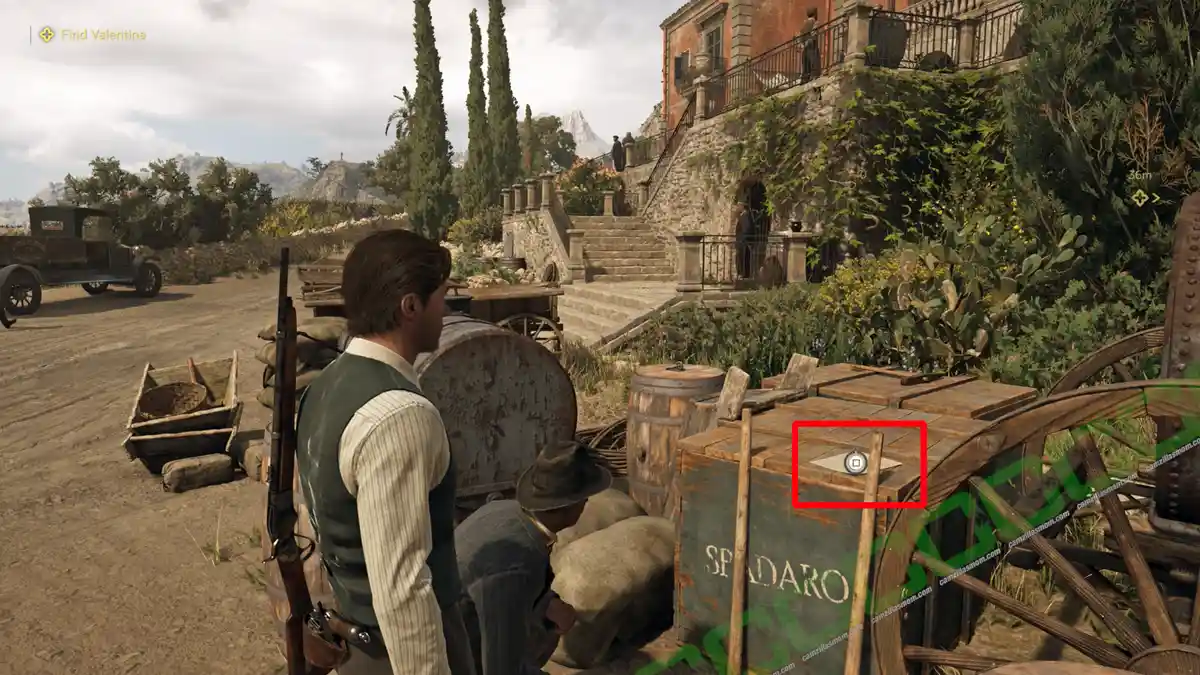
In Chapter 13: Capiregime, Enzo returns to Villa Torrisi after disposing of a body with Tino to find crates for the mines in front of the villa. Here you can find this note: Sulfure Mine Manifest.
Journal Note 2 of 3
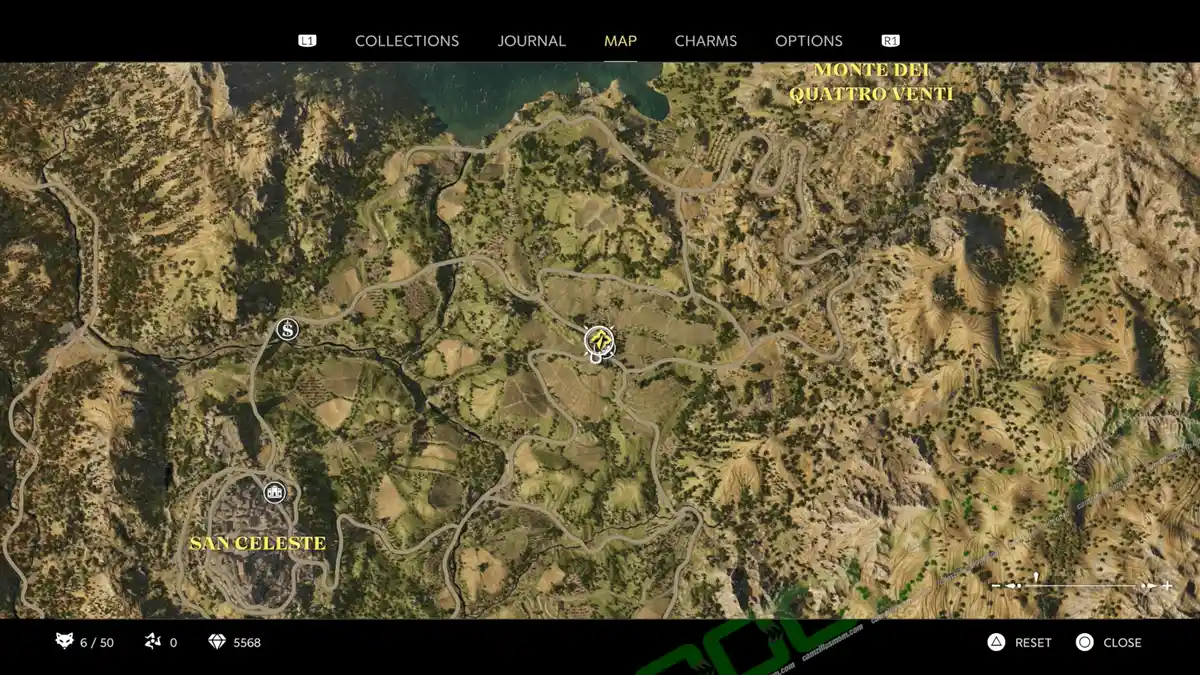
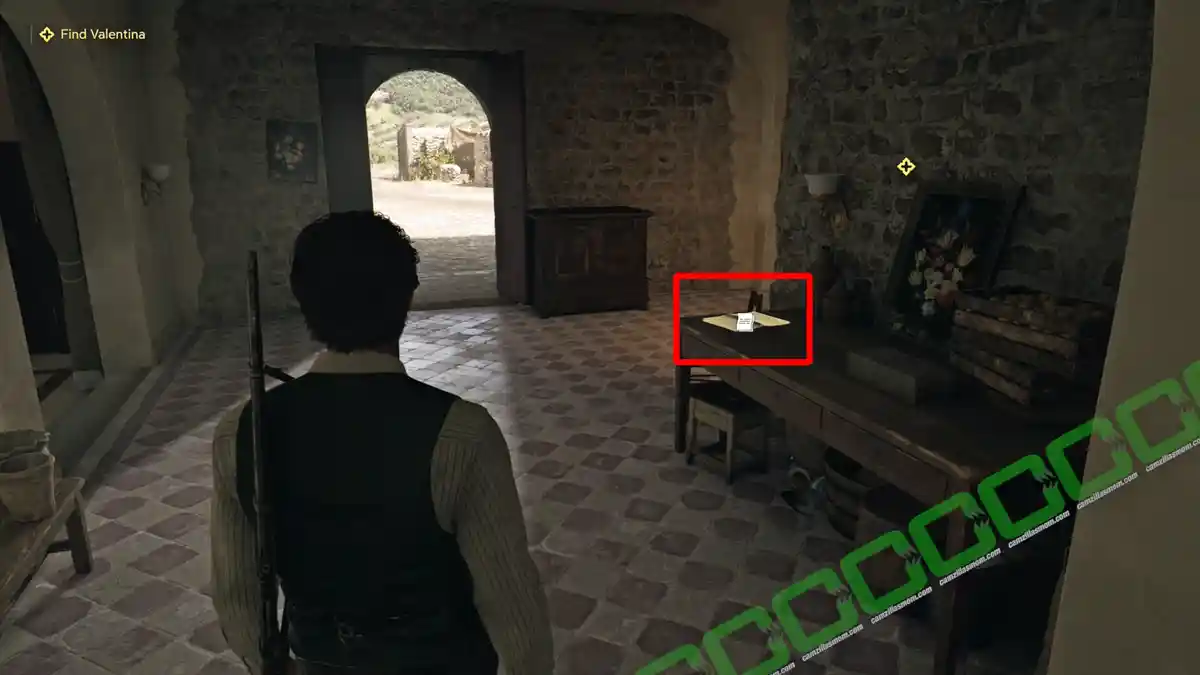
Enter Villa Torrisi to find the note: Ongoing Investigations on the ground floor near the kitchen.
Locked Box 1 of 4
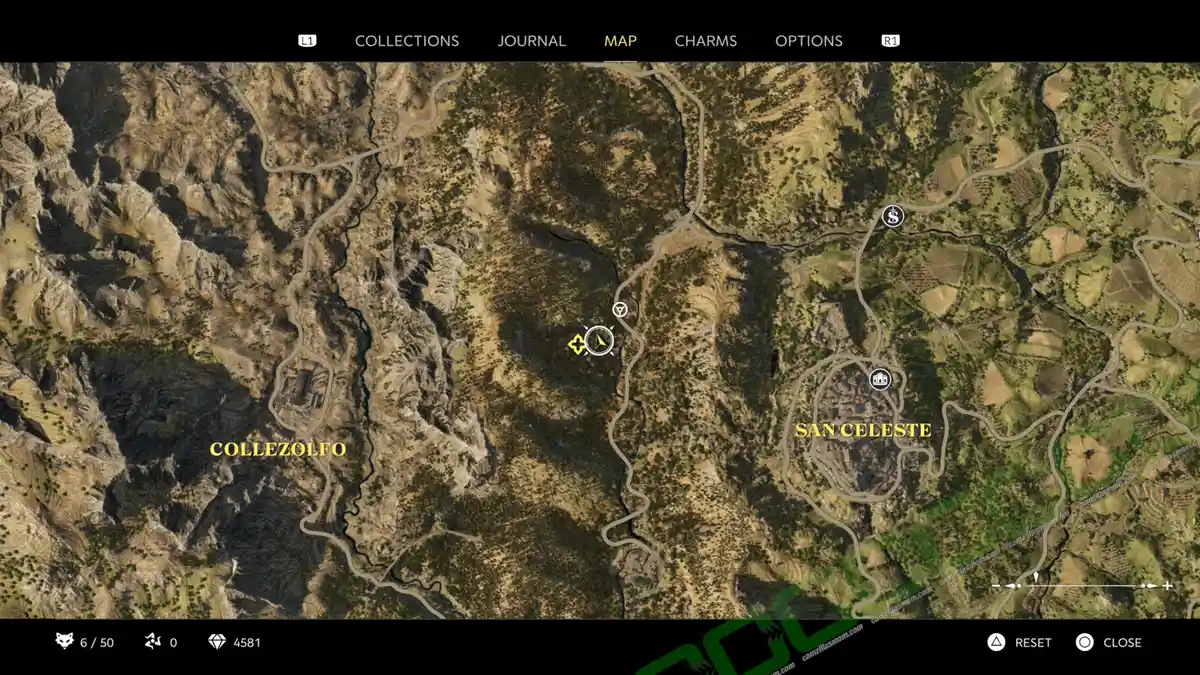
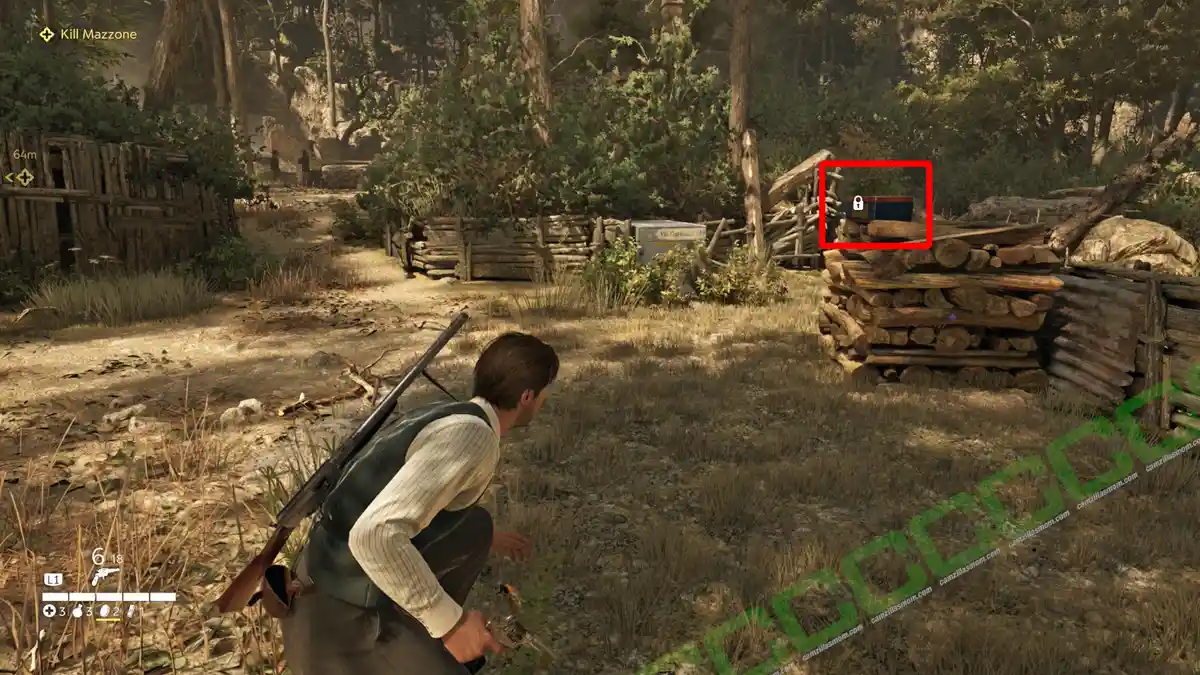
Next, Enzo sneaks into an abandoned village in the forest to kill Mazzone. Here, just above the stream, is a locked chest.
Locked Box 2 of 4
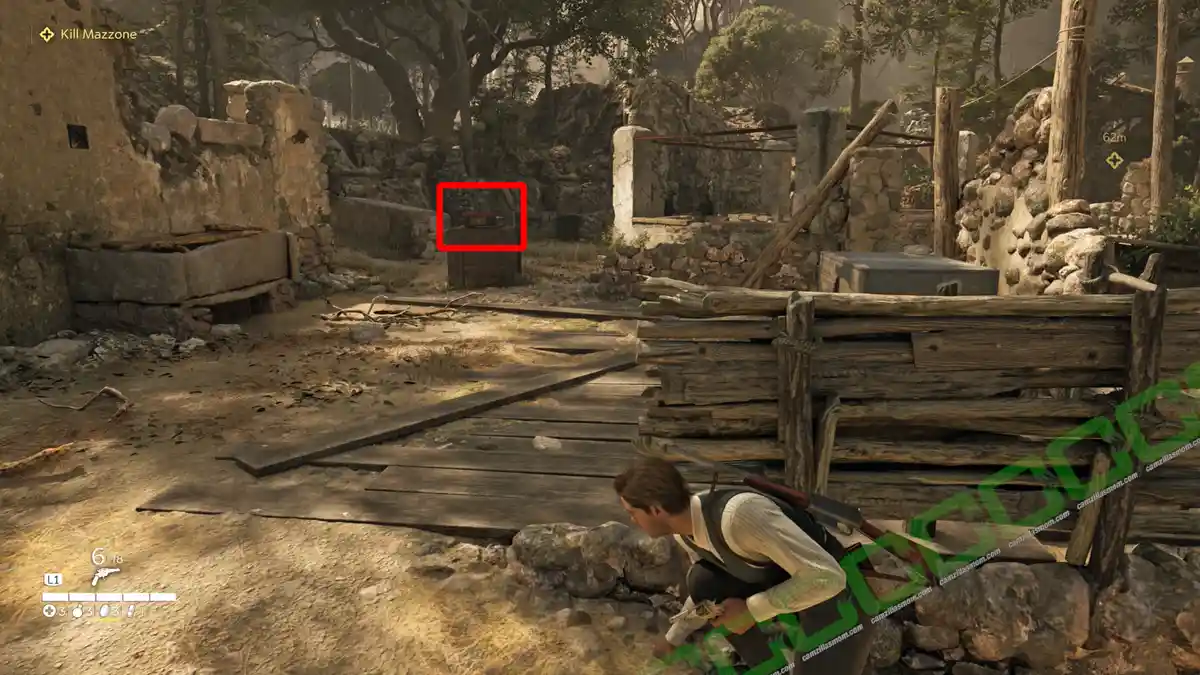
There is a second locked box not far from the first one at the Abandoned Village.
Locked Box 3 of 4
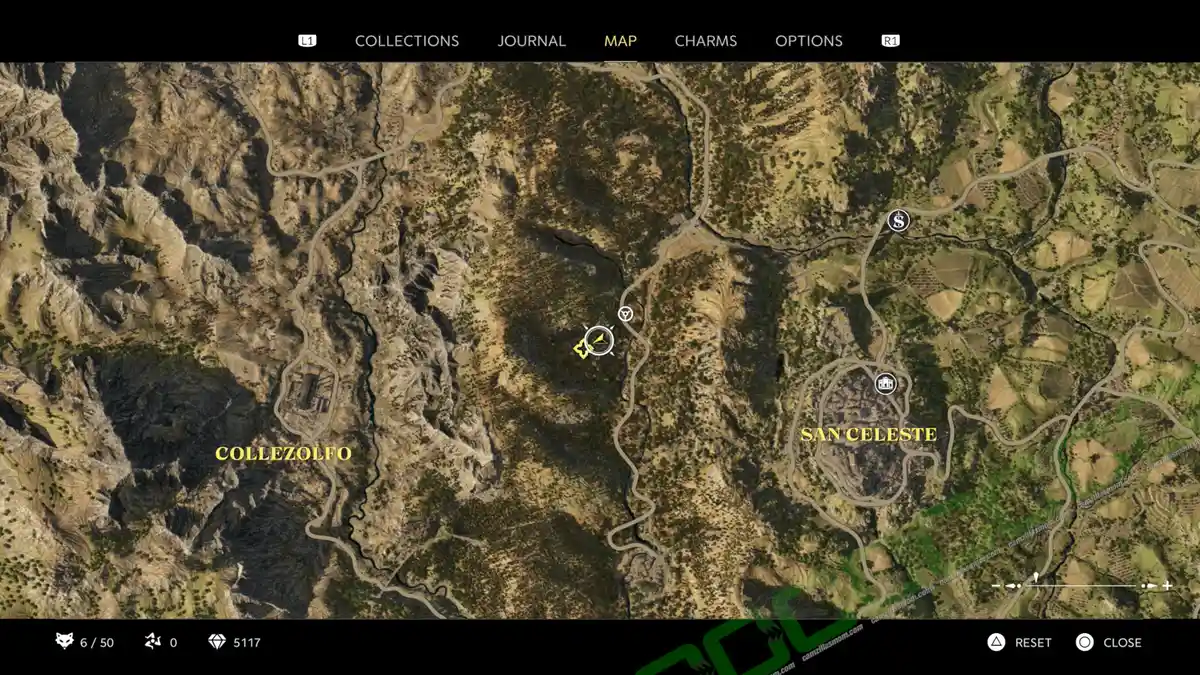

Further ahead, there is a locked chest inside the ruined house.
Trinacria 1 of 2
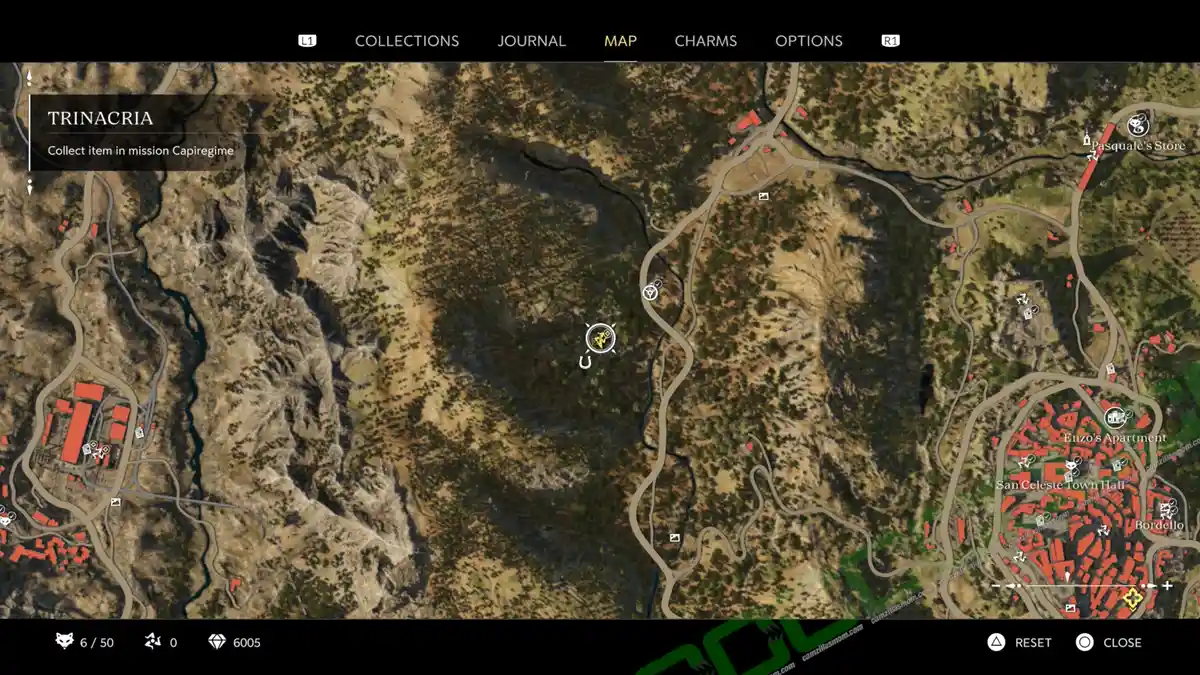
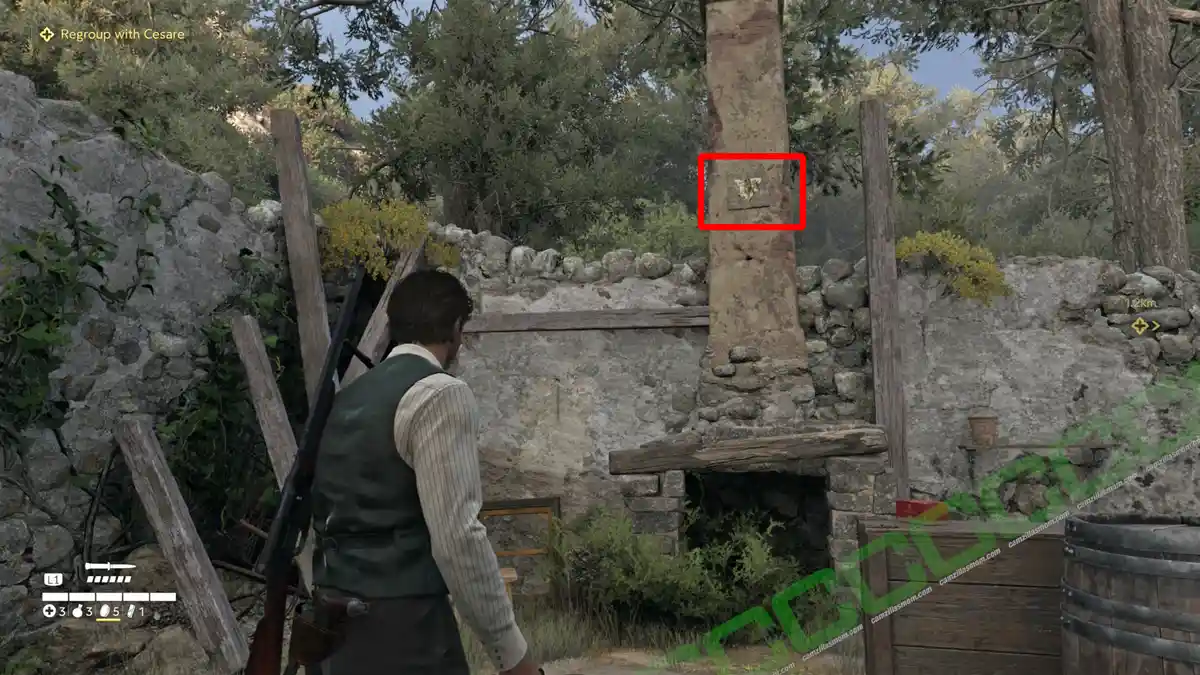
There is a Trinacria in the same ruined house, but it is above the fireplace and requires shooting. If you like it silent in this chapter, come back in explore mode. You can use the Trinacria guide if you like.
Locked Box 4 of 4
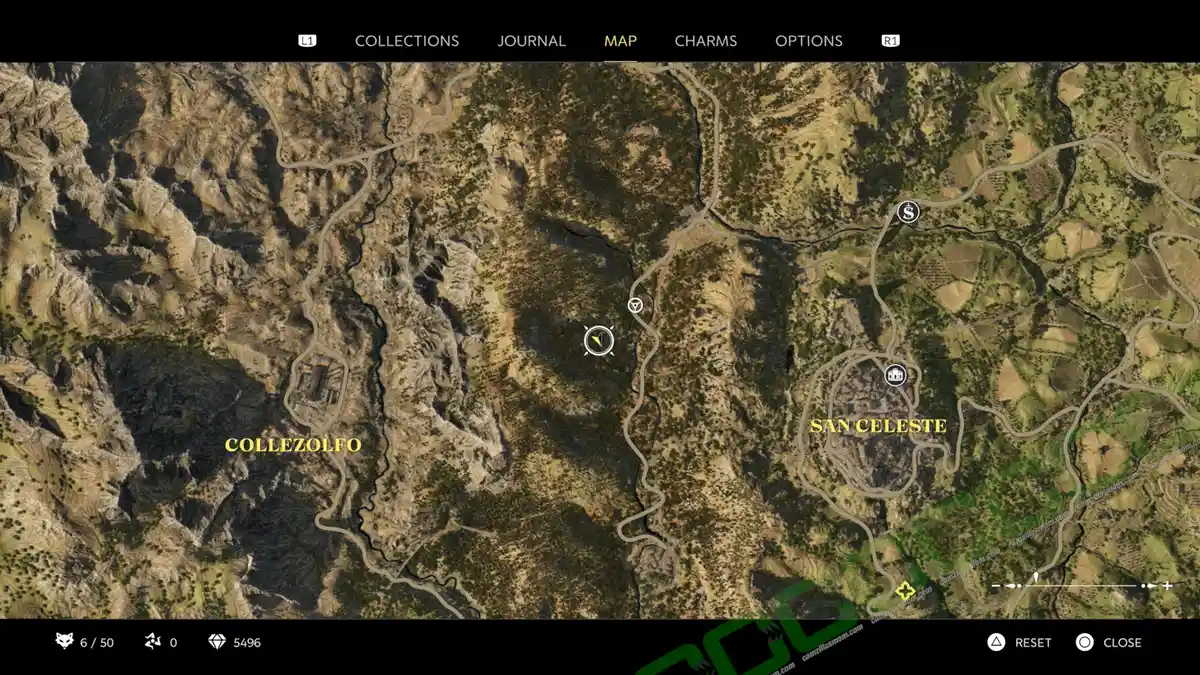
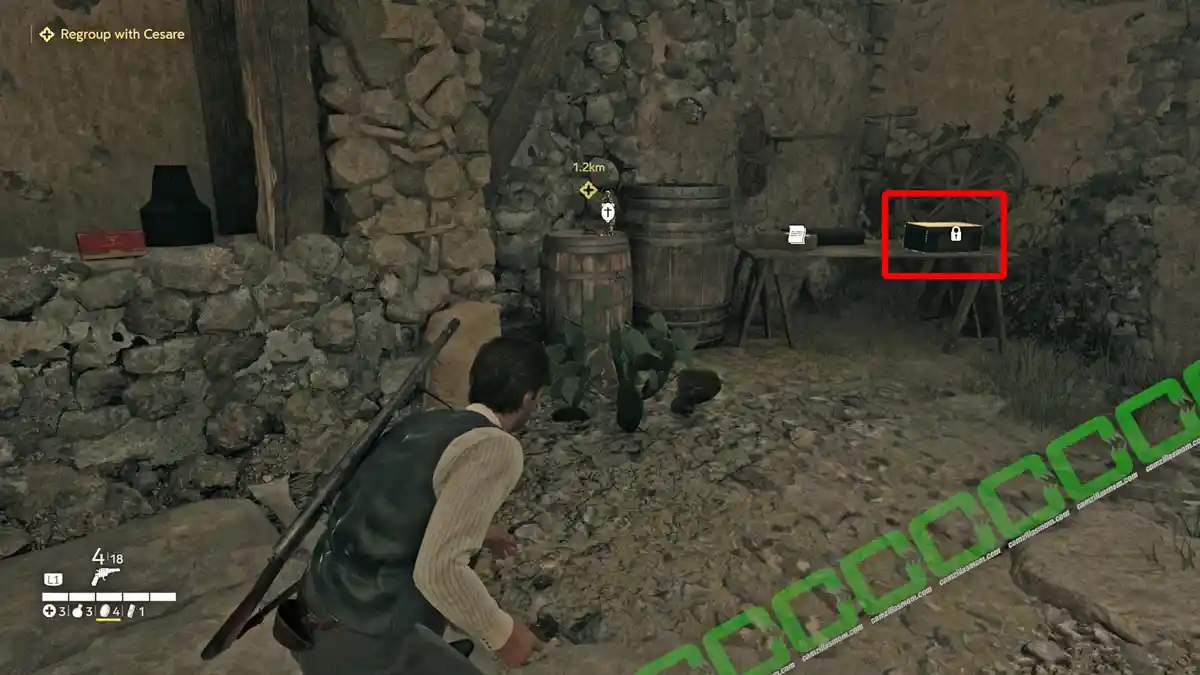
In the area where Enzo finds Mazzone, there is also this locked box.
Journal Note 3 of 3
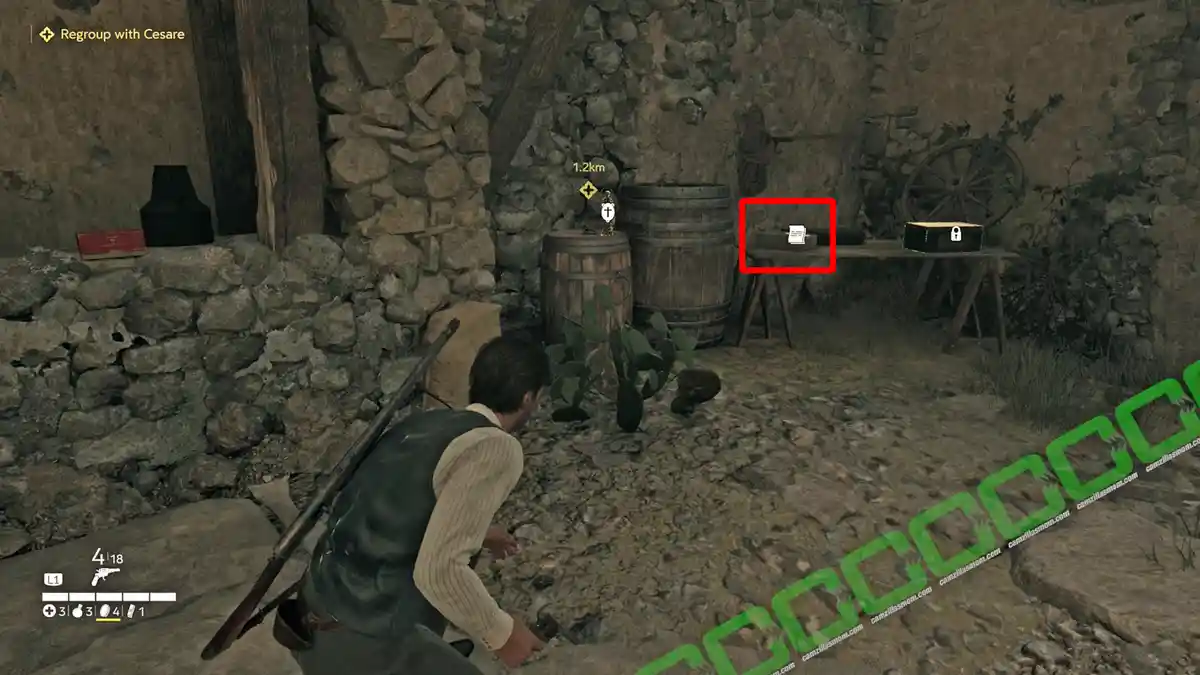
here is also this note: Mazzone’s Letter.
“Destrezza” Bead Charm

… and the Destrezza Bead Charm.
Newspaper: Police Shootout


Further along in the chapter, Enzo and Cesare are on the way to reach a church north of Porto Almaro. Here, you can find this newspaper: Police Shootout.
Trinacria 2 of 2
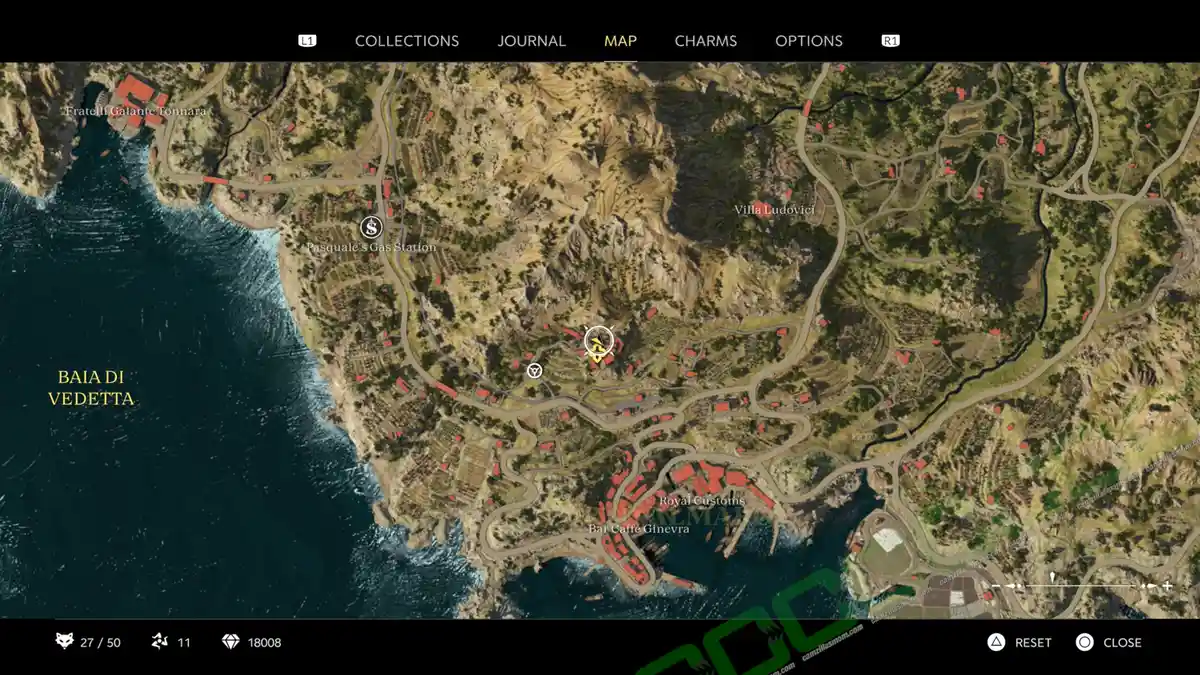
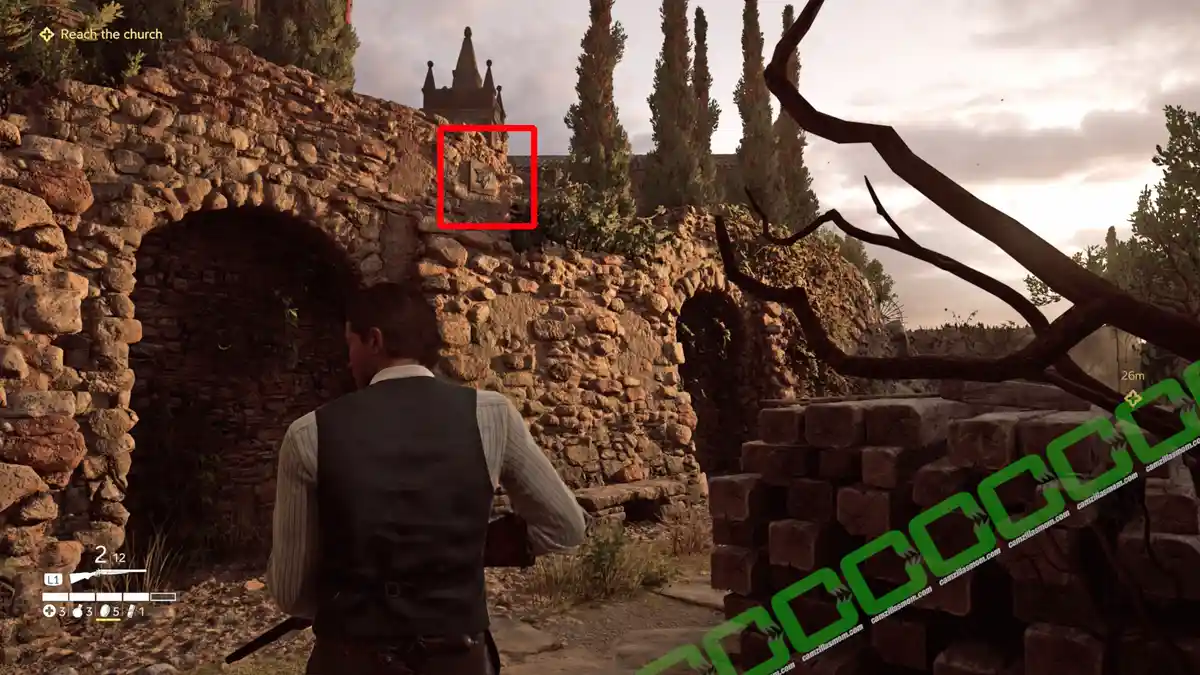
Just below the church are some ruins where you can find this Trinacria.
Mystery Fox
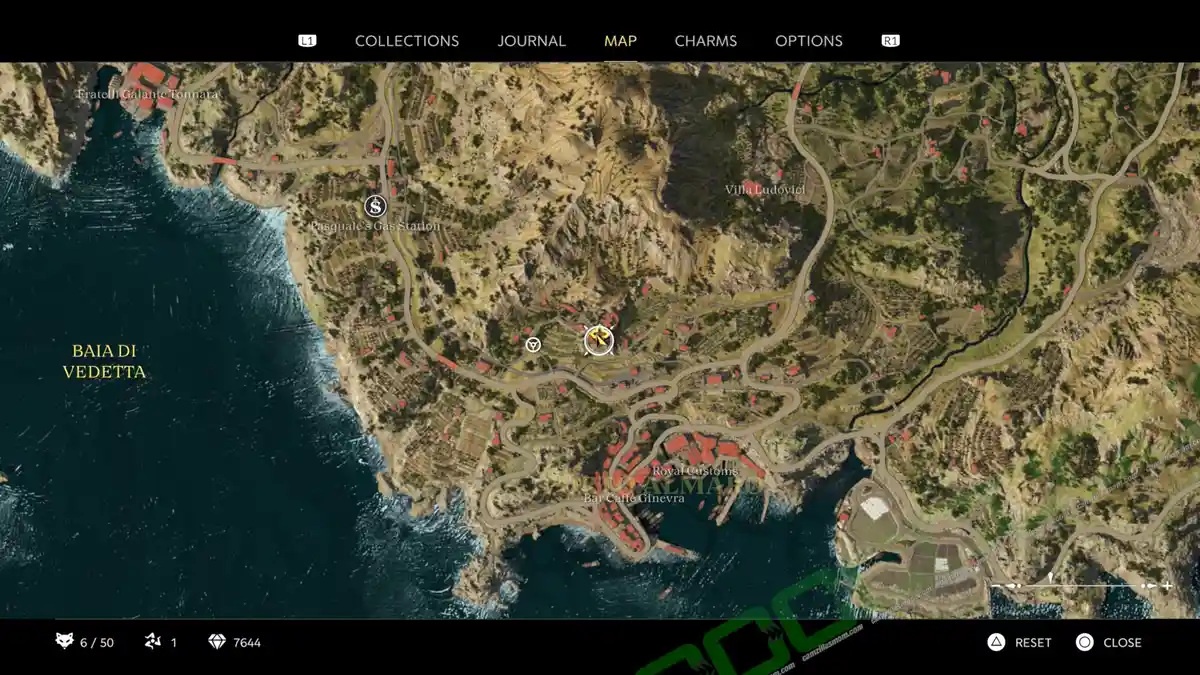
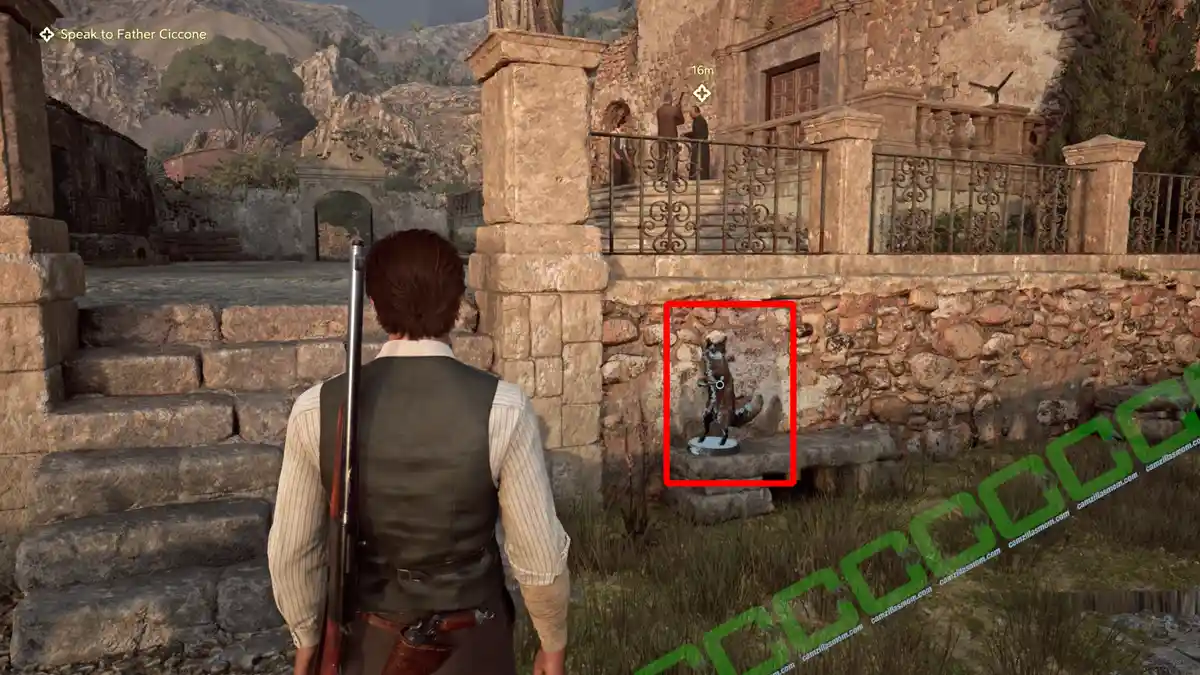
Just below the church is a vista terrace overlooking Porto Almaro. Here is a Mystery Fox.
Chapter 14 – La Merica
In the final chapter of Mafia: The Old Country, there are 9 Journal Note collectibles and a Newspaper to be found.
Journal Note 1 of 9
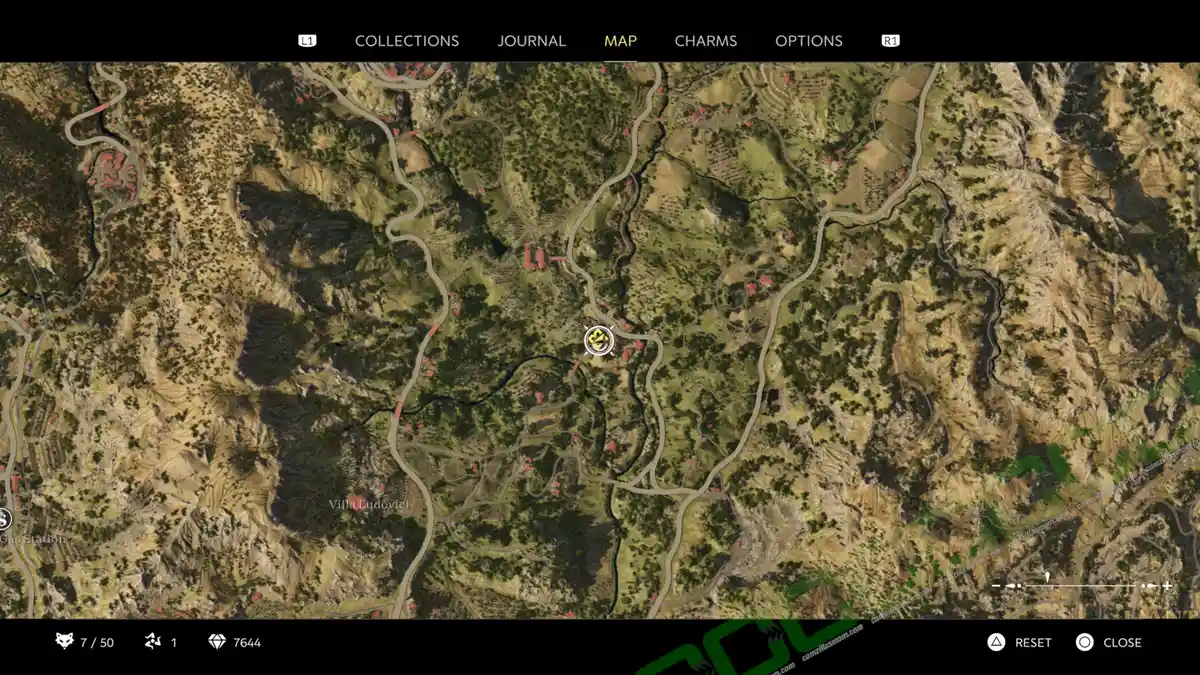
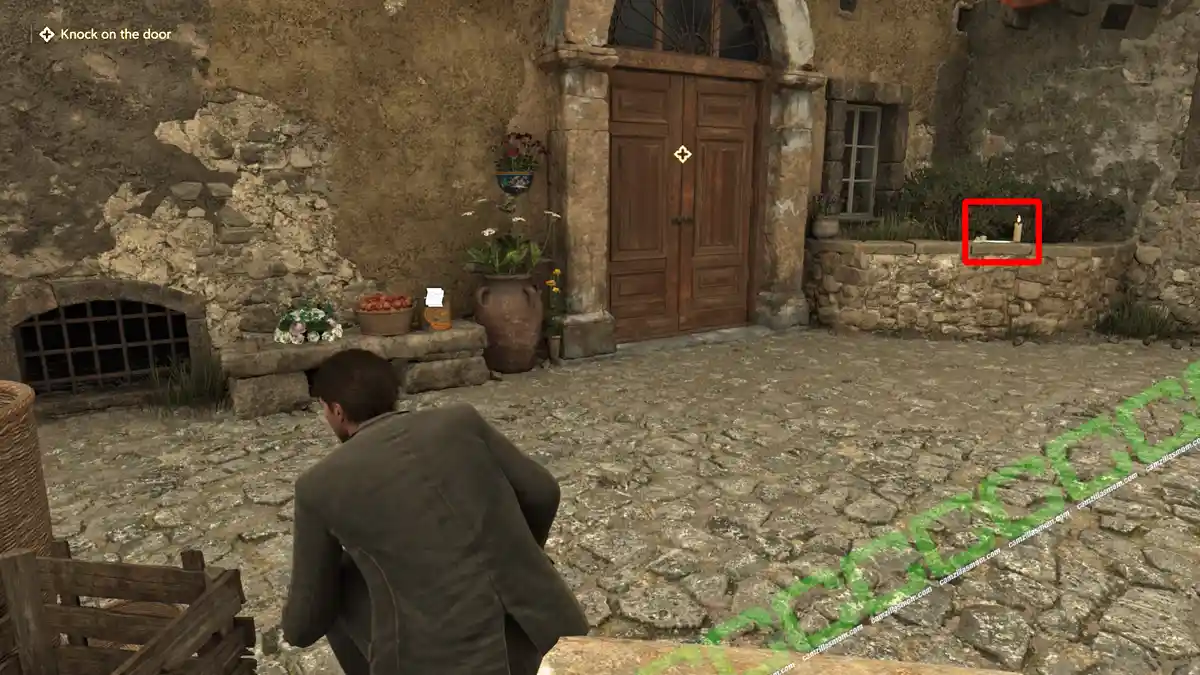
At the start of Chapter 14: La America, Enzo is driving to the meeting point at Valentina’s house. When he arrives, you can find this note: Avvisi Funebri – Luca near the door.
Journal Note 2 of 9
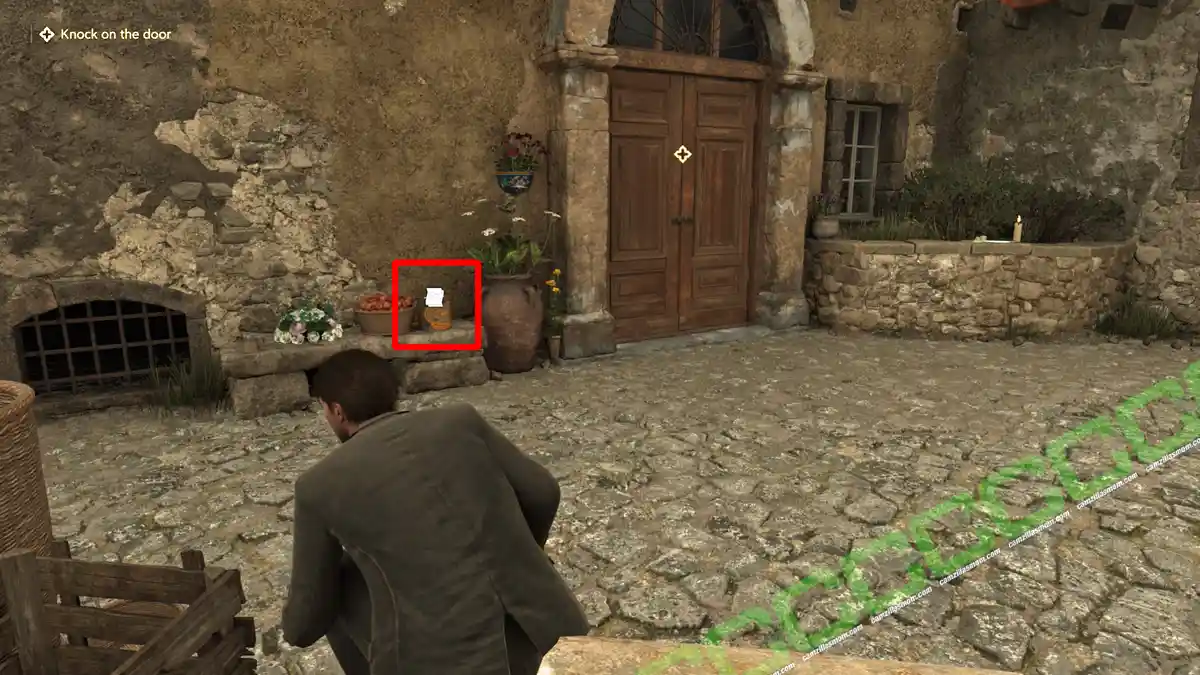
On the other side of the door is the note: A Concerned Neighbor.
Journal Note 3 of 9
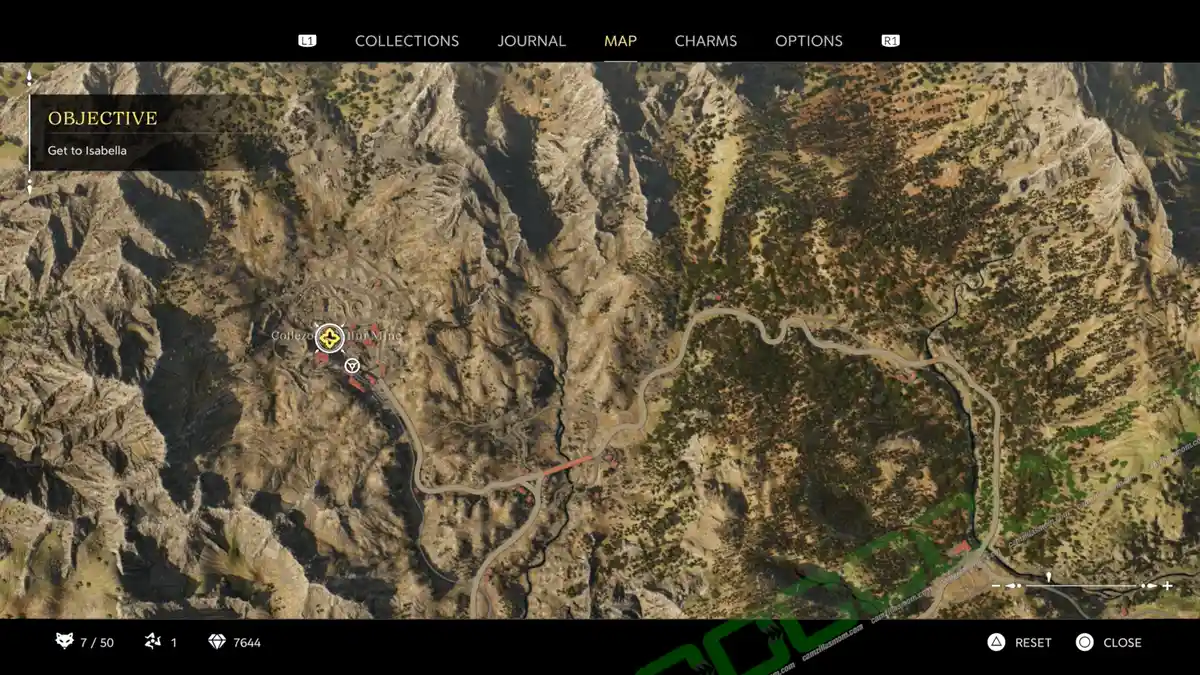
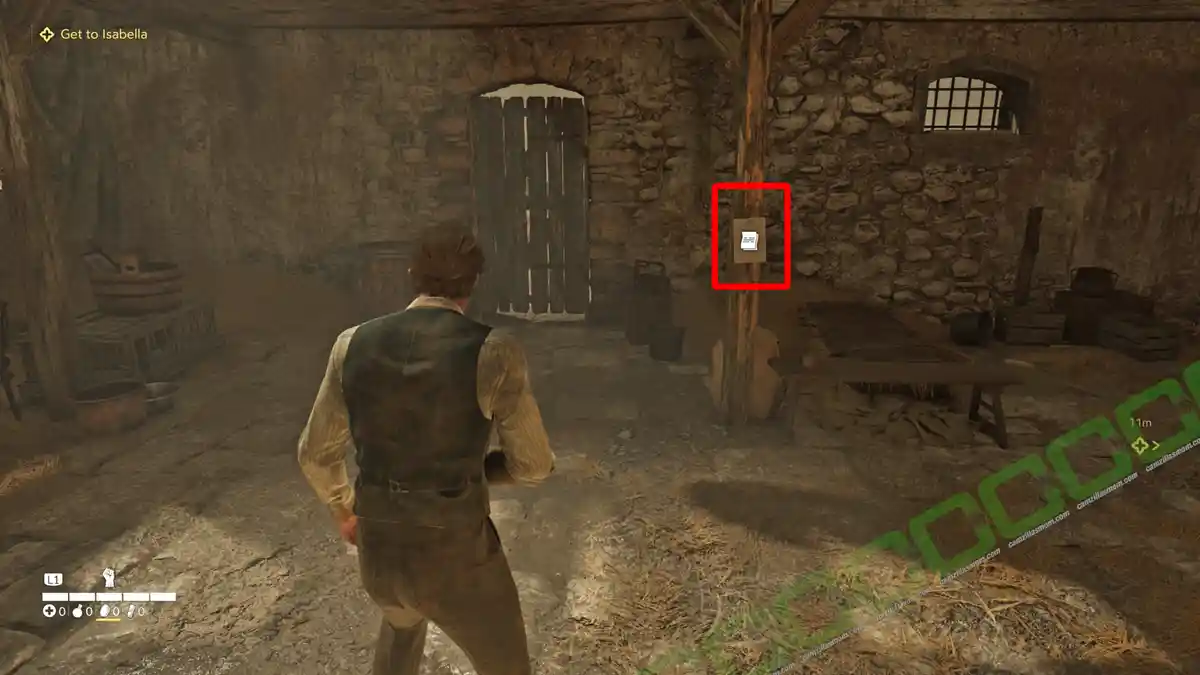
After the fight with Cesare at the Sulfur Mine in Chapter 14: La Merica, this note: Notice – New Working Hours is pinned in the room after the cutscene.
Newspaper: Courtroom Drama


At the end of the shootout, in the area where a car arrives, look around for this newspaper: Courtroom Drama.
Journal Note 4 of 9
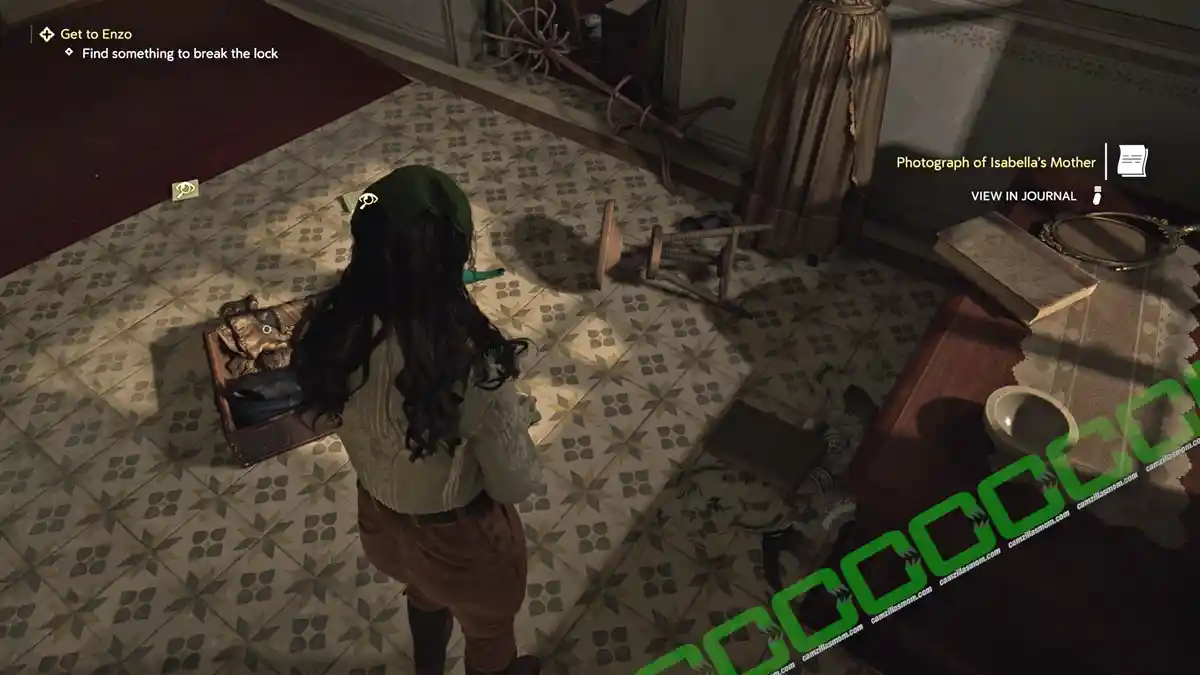
Playing as Isabella, find the note: Photograph of Isabella’s Mother on the floor.
Journal Note 5 of 9
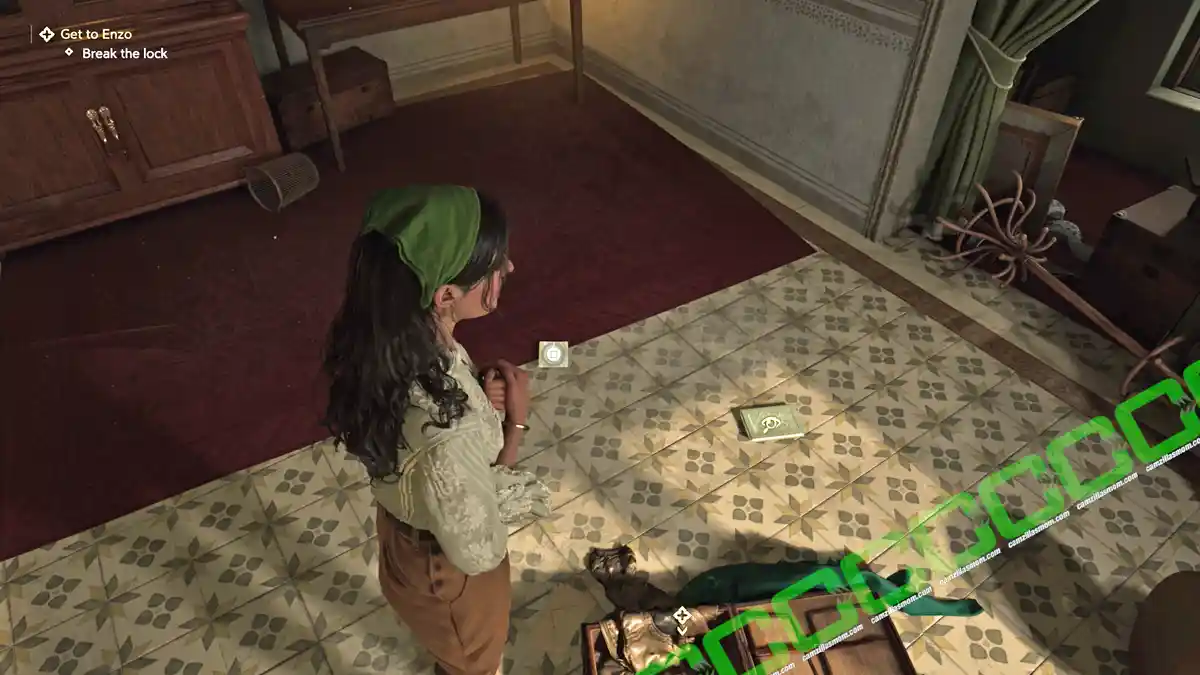
There is also the note: Enzo’s Letter…
Journal Note 6 of 9
… and Isabella’s Journal.
Journal Note 7 of 9
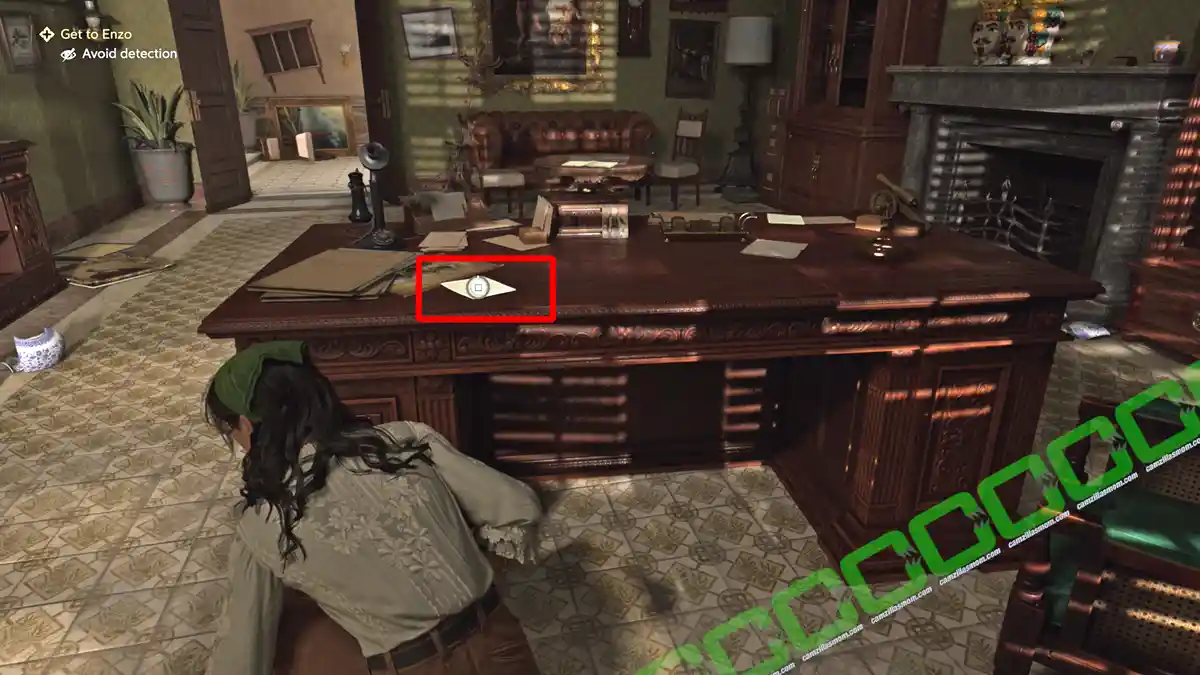
Exit Isabella’s room through the balcony and enter Don Torrisi’s office. The note: Tino’s plan is on the desk.
Journal Note 8 of 9
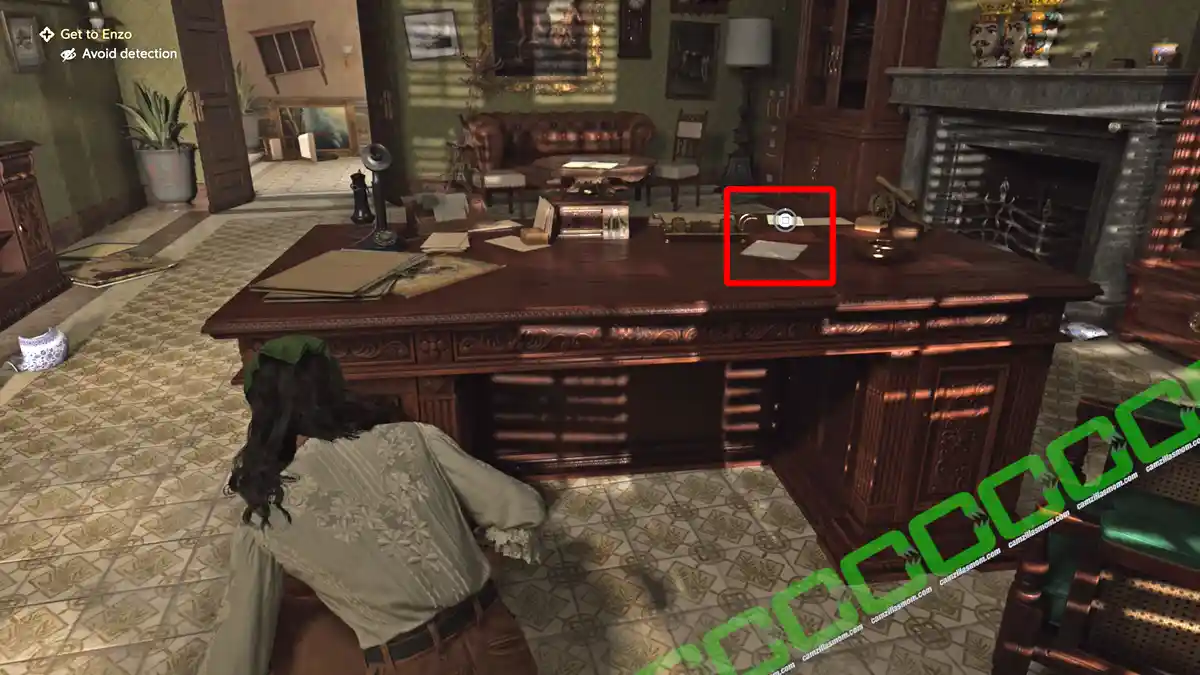
There is also a note: Letter From Don Torrisi.
Journal Note 9 of 9
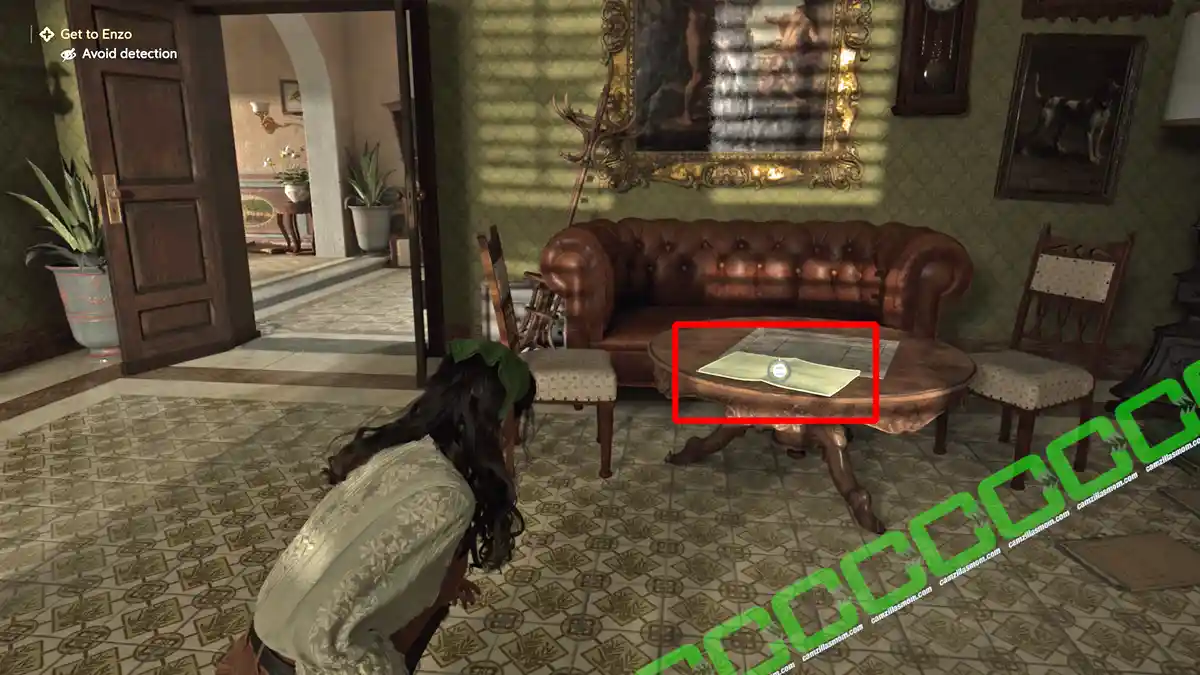
On the coffee table in the same room is the note: Torrisi’s Expansion.


Mafia: The Old Country
Release: August 8th, 2025
Developer: Hangar 13
Publisher: 2K Games
Official Website: mafiagame.com