
This Desolatium walkthrough covers all 13 chapters, from Carter’s hospital escape to the Nameless City. Each chapter starts with a floor plan, and the numbers in brackets match the rooms on it. Every required item, optional note and puzzle solution is listed room by room.
Desolatium Walkthrough by Chapter
- Chapter 1 – Hospital Escape – Carter Scott
Coin for the vent, Rusty Key and Shiny Key - Chapter 2 – The Office – Sophie Whalen
Carter’s letter and the Silver Key - Chapter 3 – The Garage – James Oslac
Fire alarm, Luminol and the blood trail - Chapter 4 – Newsroom and Archive – Christopher Black
Archive file order puzzle - Chapter 5 – Carter’s Apartment – Carter Scott
Laptop password and wardrobe safe code - Chapter 6 – Innsmouth and the Lighthouse – Sophie Whalen
Whiskey, shore code and lighthouse floor puzzle - Chapter 7 – Zotiques Enterprises – James Oslac
Access Card, coffee with pills and the Old Dagger - Chapter 8 – The Bookshop – Christopher Black
Crowbar, light switch and the Blood-Stained Book - Chapter 9 – The Omen – Carter Scott
Bust of a Woman and the secret room - Chapter 10 – Back to Innsmouth – Sophie Whalen
Patch the boat, Amulet and Silver Key - Chapter 11 – The Bar – Christopher Black
Acid for the lock and the UV poster code - Chapter 12 – The Truth Is Very Close – Christopher Black
House Keys of Society and the mugshots - Chapter 13 – The Nameless City – Carter and James
Pieces of the Door and the endings
Total: 13 chapters – 4 playable characters – Carter, Sophie, James and Christopher
Desolatium Walkthrough Overview
Game: Desolatium, a first-person Lovecraftian point-and-click adventure
Playable characters: Carter Scott, Sophie Whalen, James Oslac and Christopher Black
Chapters: 13
Floor plans: A hand-drawn plan for every chapter except the Nameless City
Items: Required to progress
Notes: Mostly optional, but some hold puzzle answers
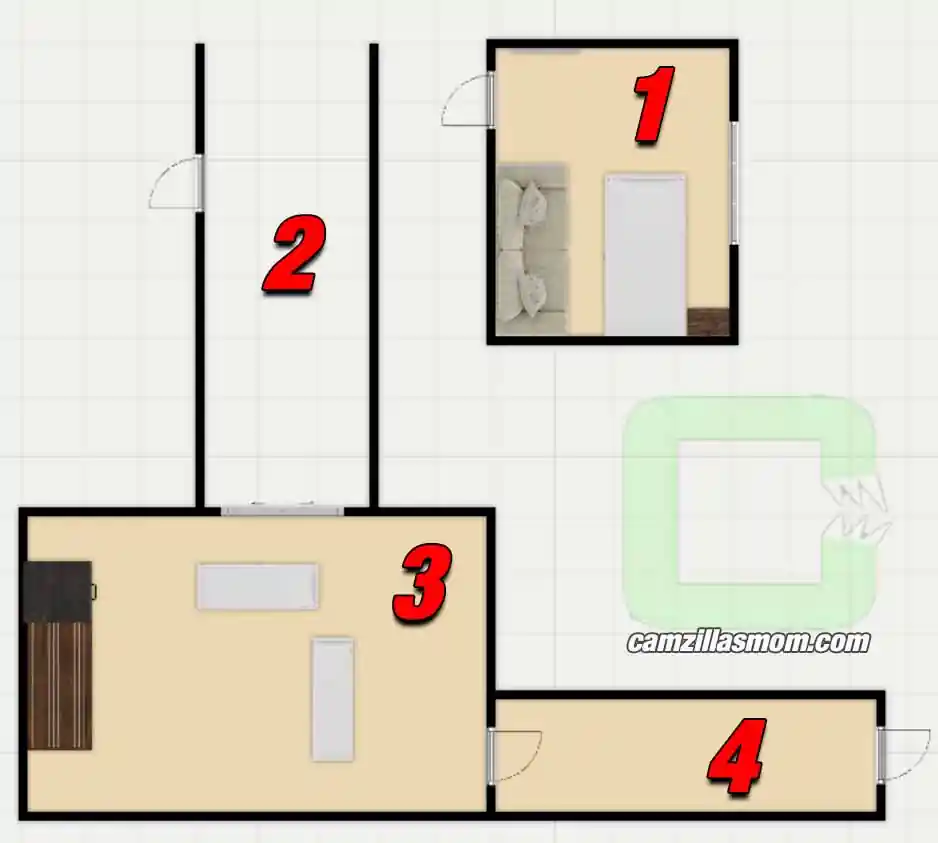
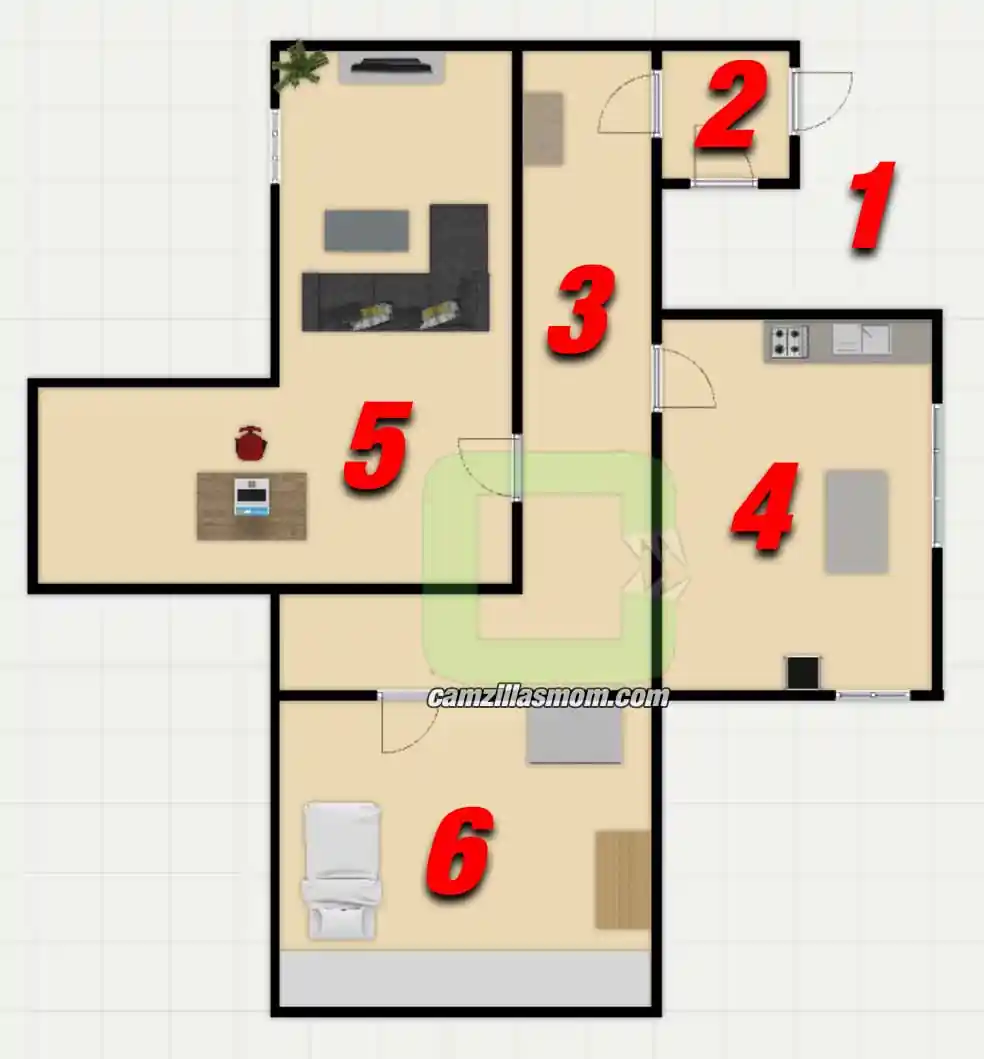
Each chapter starts with a floor plan. The starting point is number 1, and the rooms are numbered in the order you visit them. Only important rooms get a number. The number in brackets in each heading matches the number on the plan.
Most puzzles are solved in the inventory. Open it, pick an item and use it on an object in the room, or on another item to combine them.
Chapter 1 – Carter Scott – Hospital Escape
Carter Scott wakes up in a hospital room with a locked door and no memory of who he is. Your goal is to escape the hospital through the morgue.
Hospital floor plan:
1 – Bedroom
2 – Corridor
3 – Morgue
4 – Exit
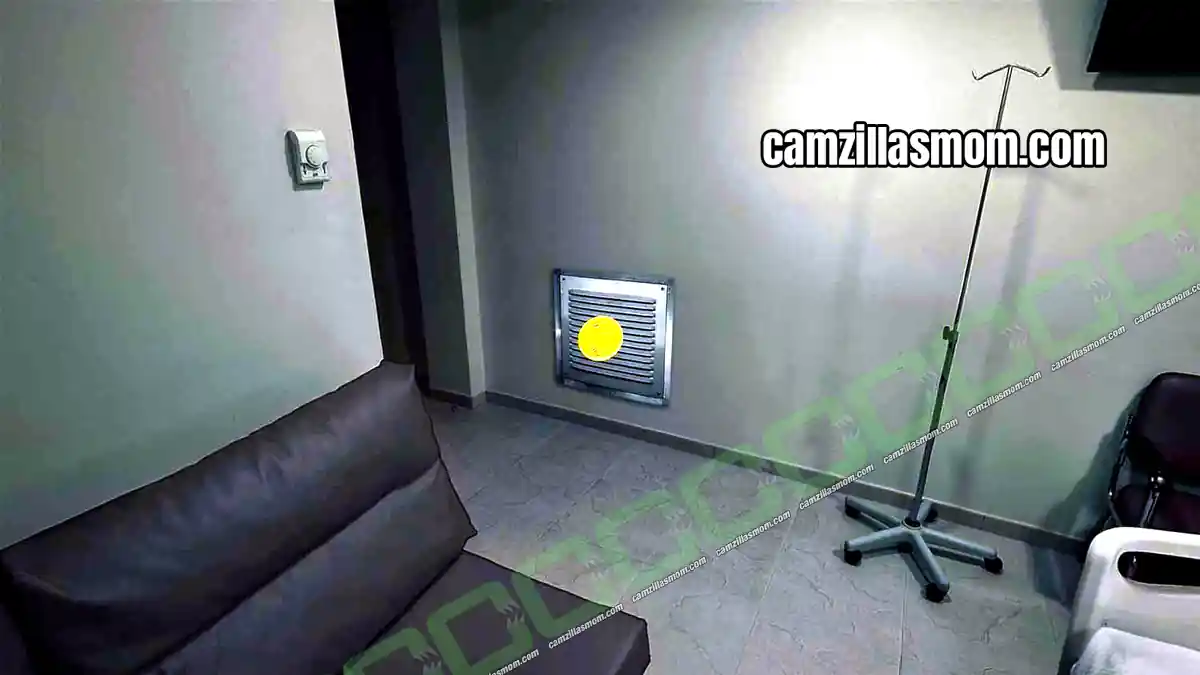
Bedroom (1) – Coin for the Vent
Item: Coin, hidden in the sofa
Note: Medical Report on the bedside table
Open your inventory and use the coin on the vent cover next to the door. Carter slips out into the corridor (2).
Morgue (3) – Rusty Key and Shiny Key
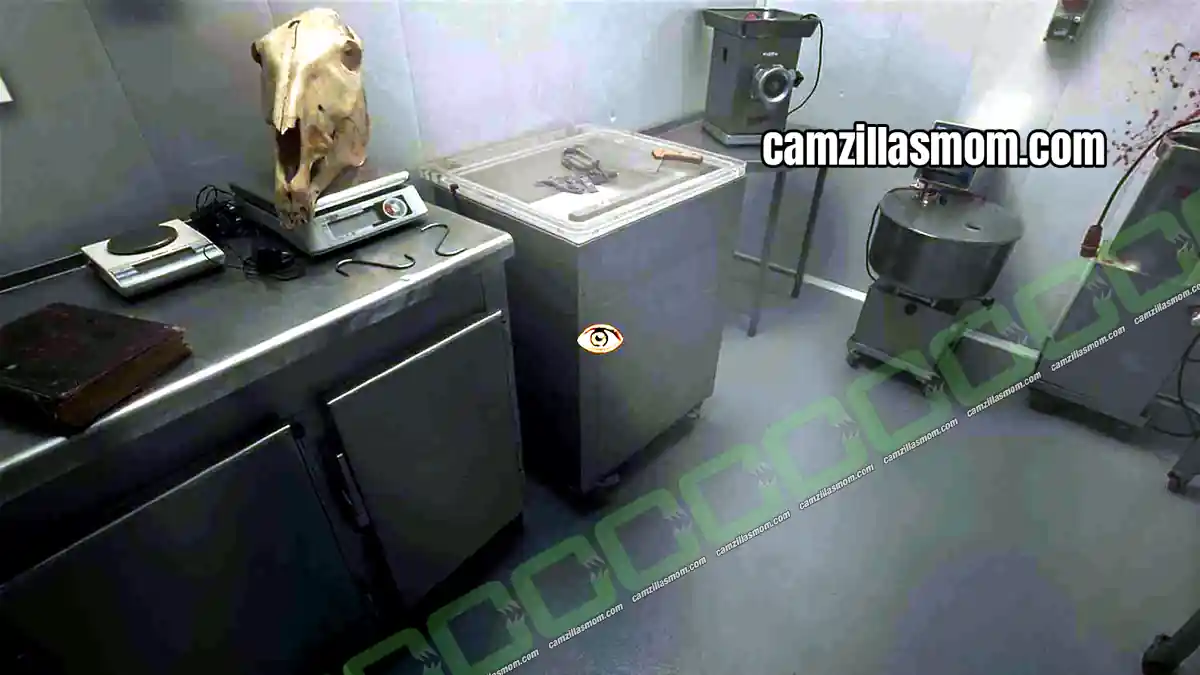
Walk down the corridor (2) to the morgue and look at the big table with the animal skull.
Item: Coke can on the table
Notes: Herbert West’s Diary (two parts), Tape Recorder with Experiment 112
Next to the table is a small drawer that is easy to miss. Move your cursor around the table until the eye symbol appears.
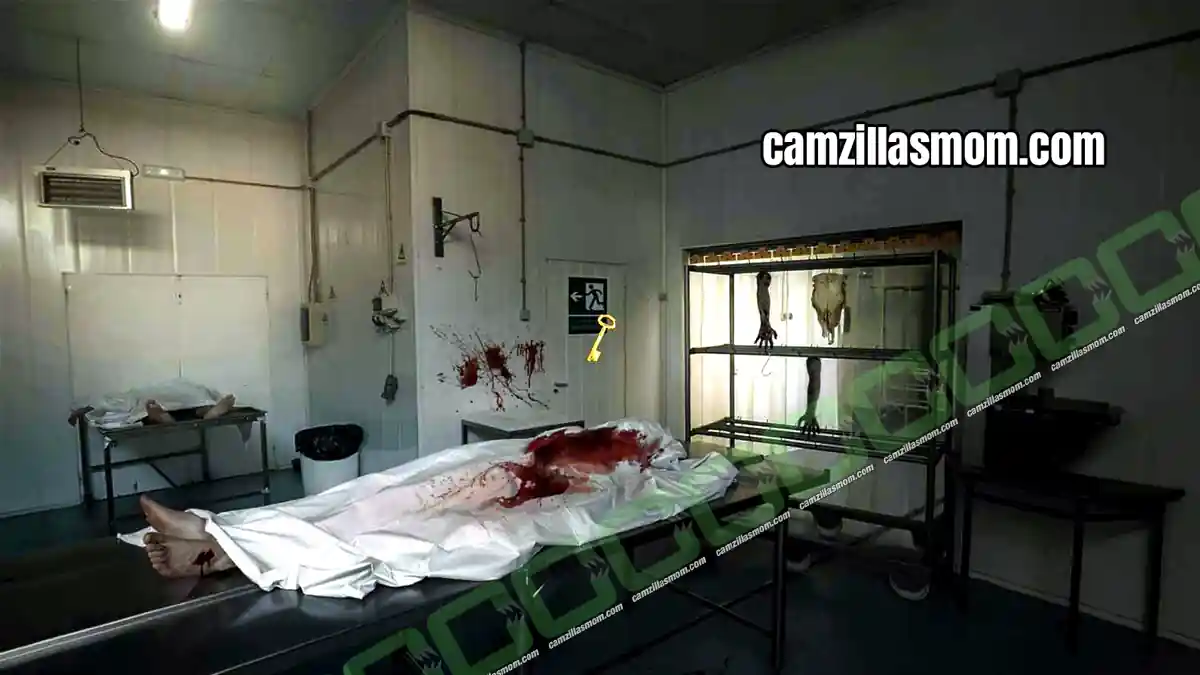
Items in the drawer: Set of Keys, Leather Wallet, Metal Pin, Rusty Key
The Rusty Key fits the emergency door, but it is too corroded to use. In your inventory, use the Coke on the Rusty Key to get the Shiny Key. Hold on to the Set of Keys, Metal Pin and Leather Wallet, as you need them later.
Use the Shiny Key on the emergency door. In the exit room (4), go through the exit door to finish Chapter 1.
Chapter 2 – Sophie Whalen – The Office
You now play as Sophie Whalen, Carter’s coworker, who starts in her office building.
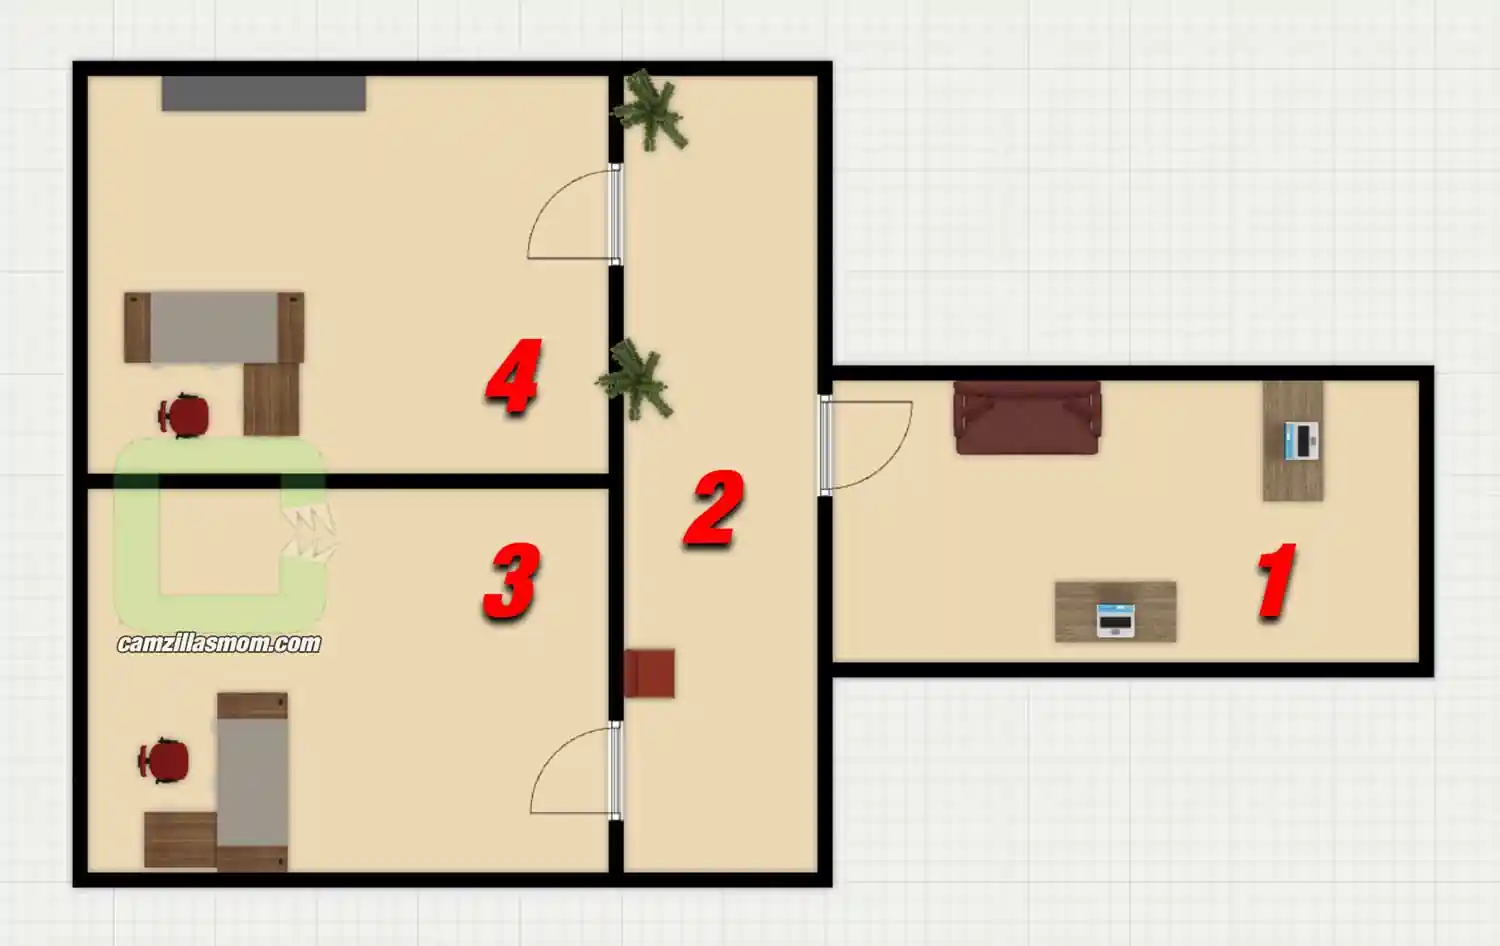
Office floor plan:
1 – Sophie Whalen’s Office
2 – Corridor
3 – Miriam’s Office
4 – Carter’s Office
Sophie Whalen’s Office (1)
Notes: The Cult of the Sleeping God, The Esoteric Order of Dagon, Paper Notes
Leave through the only door into the corridor (2) and walk to Miriam’s office (3).
Miriam’s Office (3) – Carter’s Letter
Talk to Miriam. She leaves an envelope on her desk that Carter left for Sophie. Take the letter. In it, Carter reveals where he hid something important.
Carter’s Office (4) – Silver Key
Carter’s office is a mess, as if someone searched it in a hurry.
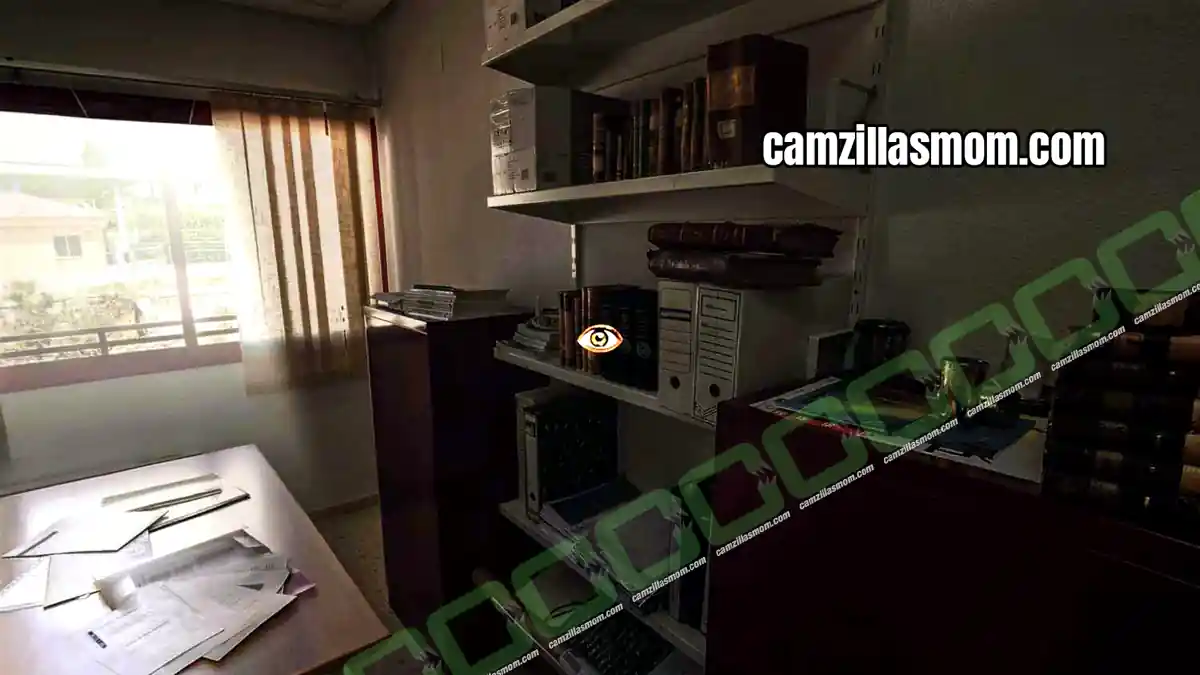
Item: Silver Key, inside the Pnakotic Manuscripts book on the bookshelf
Notes: The Eye of Azathoth (blue folder on the desk), The Esoteric Order of Dagon (paper on the desk by the window), Diary Sheet (inside the Pnakotic Manuscripts)
Keep the Silver Key, as Sophie needs it in Chapter 10. Leave through the office door to end the chapter.
Chapter 3 – James Oslac – The Garage
James Oslac, a private investigator and friend, searches for Carter Scott and Christopher Black at the office building where they were last seen together.
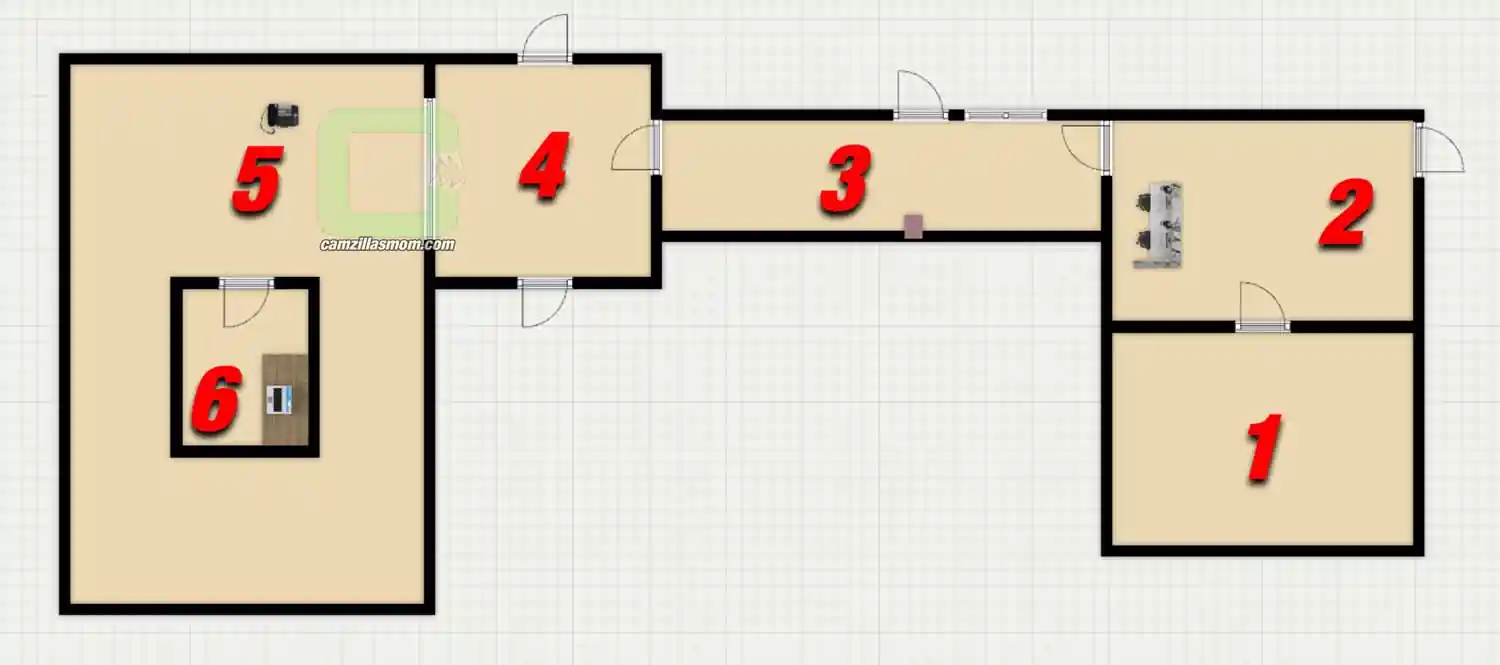
Office building floor plan:
1 – Outside
2 – Lobby
3 – Corridor
4 – Garage Corridor
5 – Garage
6 – Security Room
Lobby (2)
Enter the building from outside (1). As soon as James steps into the lobby, he hears Carter’s phone ringtone.
Note: Armitage, Books & Antiques
Leave the lobby to the left of the elevators.
Corridor (3) – Fire Alarm
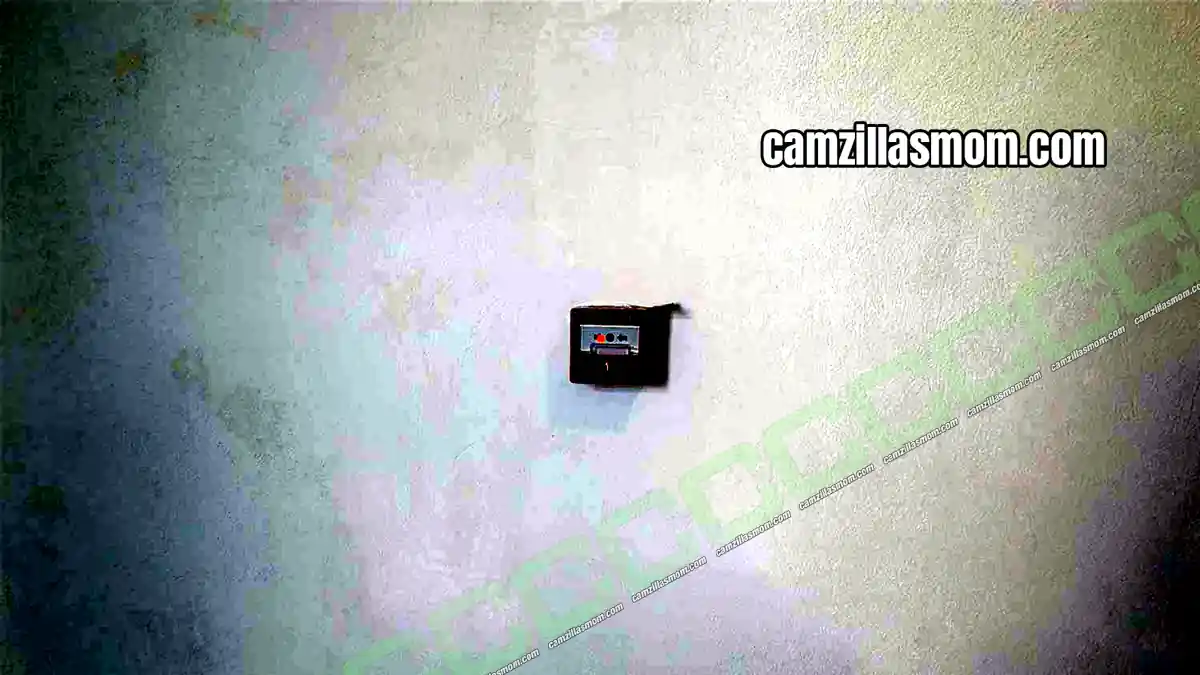
This corridor has a large glass window and three doors: a brown door to the garage, an open door with an emergency bar, and a white closed door.
Opposite the brown door is the fire alarm, a small red box on the wall. You need it in a moment. Go through the brown door into the garage corridor (4), then through the double door with the two red bars into the garage (5).
Garage (5) – Carter’s Phone
The garage looks like a war zone, with a fire burning and blood on the floor. Pick up Carter’s phone with a drawing note on it, lying on the floor opposite the fire.
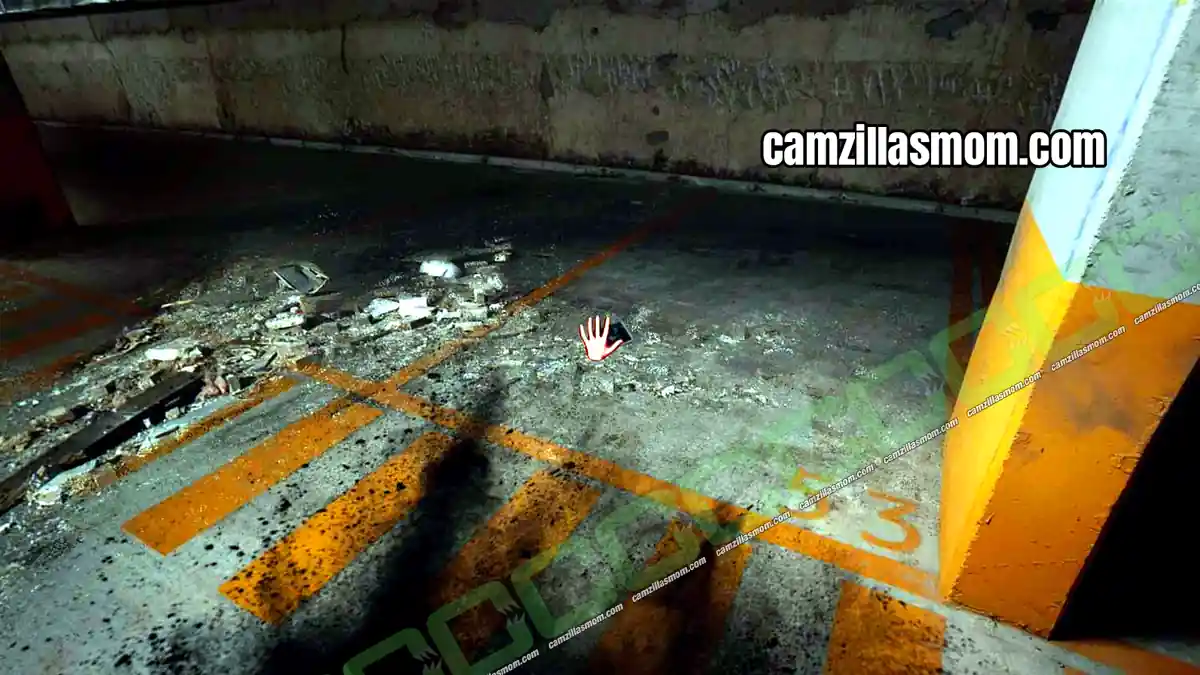
The fire blocks the Security Room door. Go back to the corridor (3) and use the fire alarm to put the fire out. Back in the garage, you can now enter the Security Room (6).
Security Room (6) – Luminol
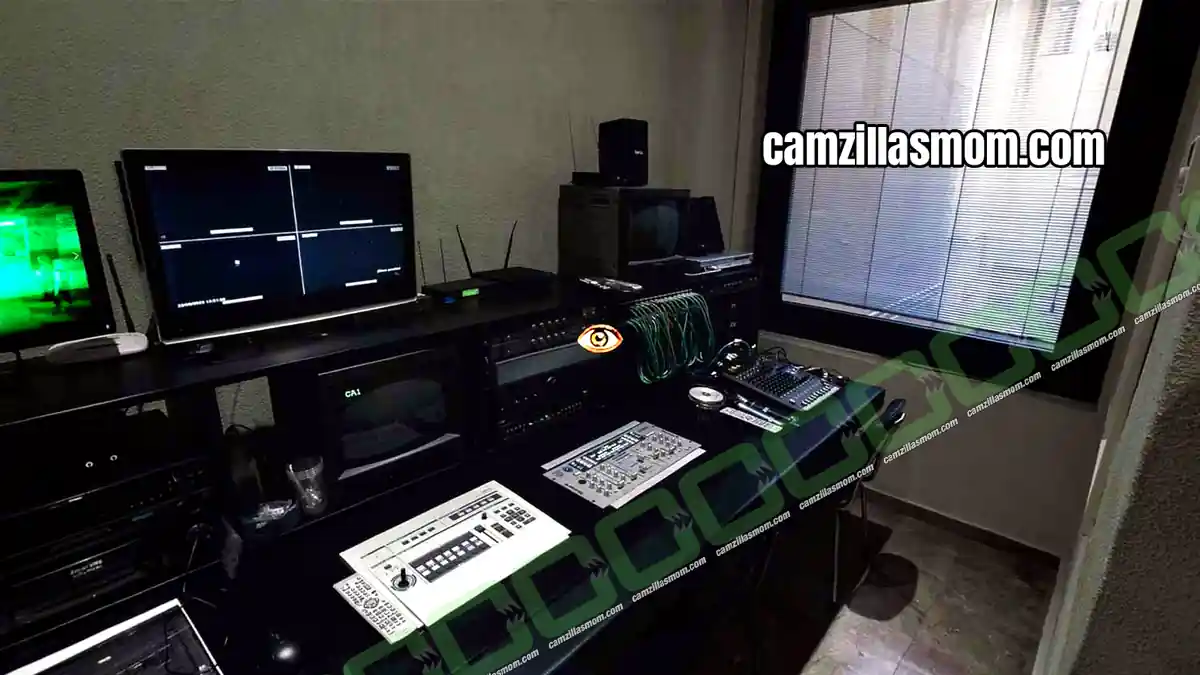
Interact with the green monitor to see what happened in the garage. Then open the drawer shown below and take the Luminol.
Garage (5) – Follow the Blood Trail
Back in the garage, open your inventory and use the Luminol on the blood spot on the floor near the Security Room.
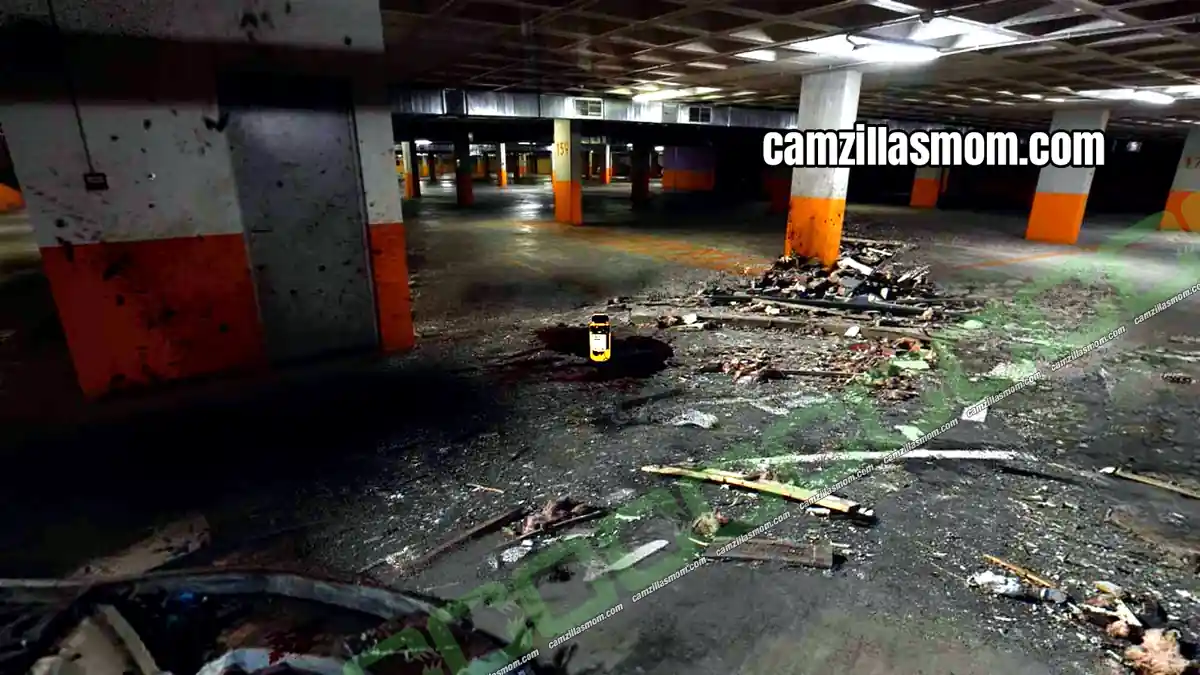
Follow the blood trail highlighted by the Luminol out of the garage to finish Chapter 3.
Chapter 4 – Christopher Black – Newsroom and Archive
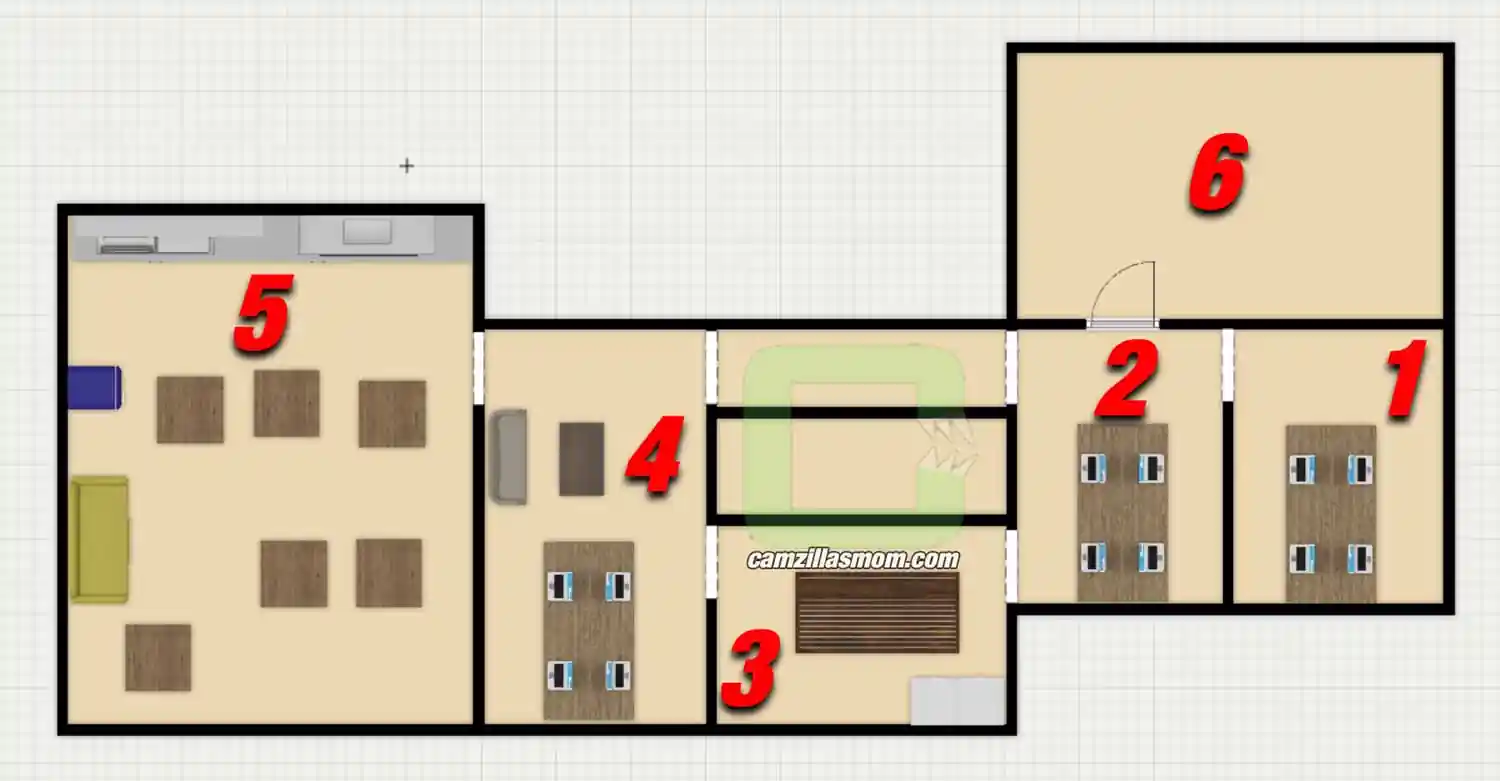
Christopher Black, an investigative reporter, starts in the newspaper office. Collect the notes and the picture on the way, as the Archive puzzle depends on them.
Newsroom floor plan:
1 – Room with Desks
2 – Second Room with Desks
3 – Game Room with a View
4 – Third Room with Desks and a Sofa
5 – Break Room
6 – The Archive
Room with Desks (1)
Notes on the desks: Article, Wooden Notebook, another Article
Walk through the exit on the left.
Second Room with Desks (2)
Notes on the desks: Article, another Article
Look at the picture of a man on one of the desks. You come back for it later. This room has four exits: back to the first room (1), the Archive (6), the Game Room (3) and the third room with desks (4) to the left.
Game Room with a View (3)
A room with a view, a gaming console, a long table and two copy machines.
Notes on the table: Shocking Discovery (purple leaflet), Robbery at the Cathedral’s Museum (article)
Leave to the third room with desks (4) on the left.
Third Room with Desks and a Sofa (4)
Notes: Emergency Call, Part 1 (on the desk), Emergency Call, Part 2 (on the coffee table)
Leave to the break room on the left.
Break Room (5)
The break room is at the far left of the floor.
Notes: Church Desecrated in MU (newspaper on the table), Envelope (yellow note on the table with the open magazine), The Faceless Man, Part 2 (table near the yellow sofa), The Faceless Man, Part 1 (table near the exit)
Leave the room to the right.
Second Room with Desks (2) – Henry Armitage Picture
Back in the second room with desks, you can now take the picture from the desk: Henry Armitage. Then enter the Archive (6).
The Archive (6) – File Order Puzzle
The Archive holds the files of old investigations. Move the shelves with the hand symbol and look through the files with the eye symbol. Each file you take names the next file to look for, so follow this order:
1 – A for Armitage: Henry Armitage’s file gives you San Martin Beldarrain, Xabier
2 – S for San Martin Beldarrain: gives you Diaz Garcia-Longoria, Alejandro
3 – D for Diaz: gives you Ortiz de Landazuri Izarduy, Enrique
4 – O for Ortiz: gives you Pendergast, Aloysius X.L.
5 – P for Pendergast: gives you Freeborn, Tyler M.
6 – F for Freeborn: gives you the real Armitage, Henry file
Taking the real Henry Armitage file ends Chapter 4.
Chapter 5 – Carter Scott – Carter’s Apartment
Carter escaped the hospital and now stands in front of his apartment building.
Apartment floor plan:
1 – Outside
2 – Staircase
3 – Apartment Corridor
4 – Kitchen
5 – Lounge
6 – Bedroom
Outside the Apartment Building (1)
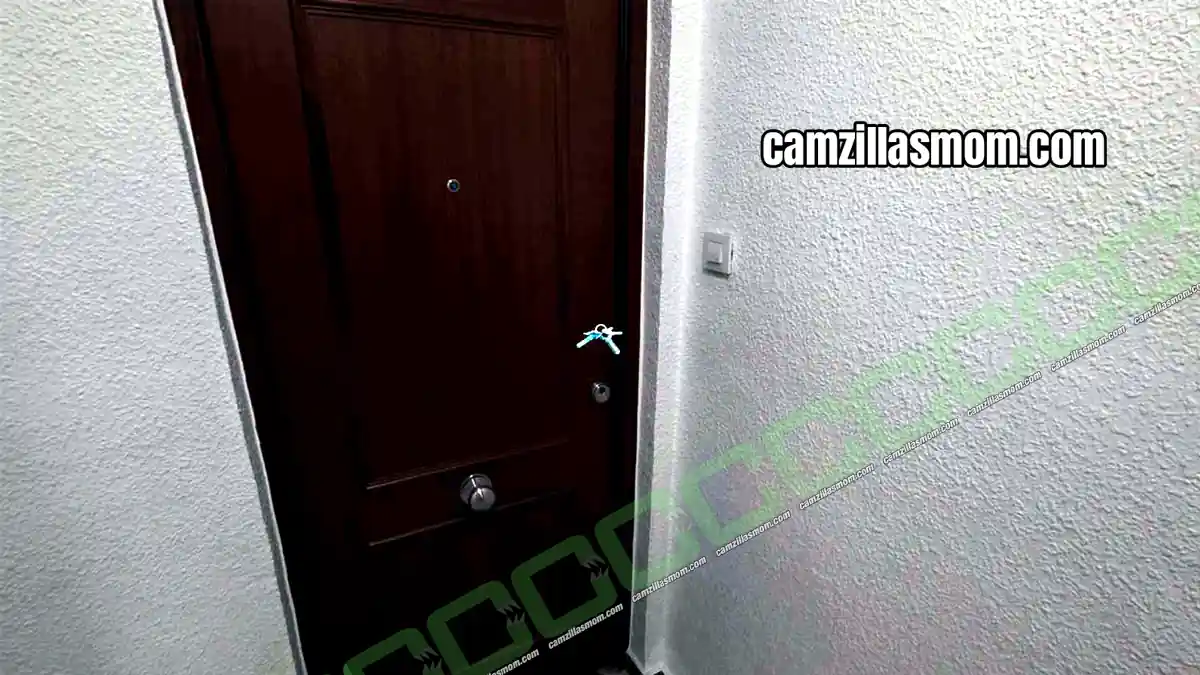
The front door is locked. Talk to the neighbors on the intercom. Telling them your name gets you in the fastest, and they let you into the staircase (2). At your apartment door, open your inventory and use the Set of Keys on the lock.
Apartment Corridor (3)
Look at the picture of Carter and Christopher on the wall. Then enter the kitchen (4), the door right next to the entrance.
Kitchen (4) – Laptop Charger
Item: Laptop Charger (cable on the kitchen table)
Note: News (article on the kitchen counter)
Go back to the corridor and enter the lounge (5).
Lounge (5) – Laptop Password
Notes: The Sleeping God (file on the coffee table), The Man in the Mask (file on the black folders on the floor), The Cult of the Sleeping God (paper on the laptop desk), Meteorite Dagger (book on the laptop desk), It All Begins With a Story (stack of books near the window)
Open your inventory and use the Laptop Charger on the laptop.
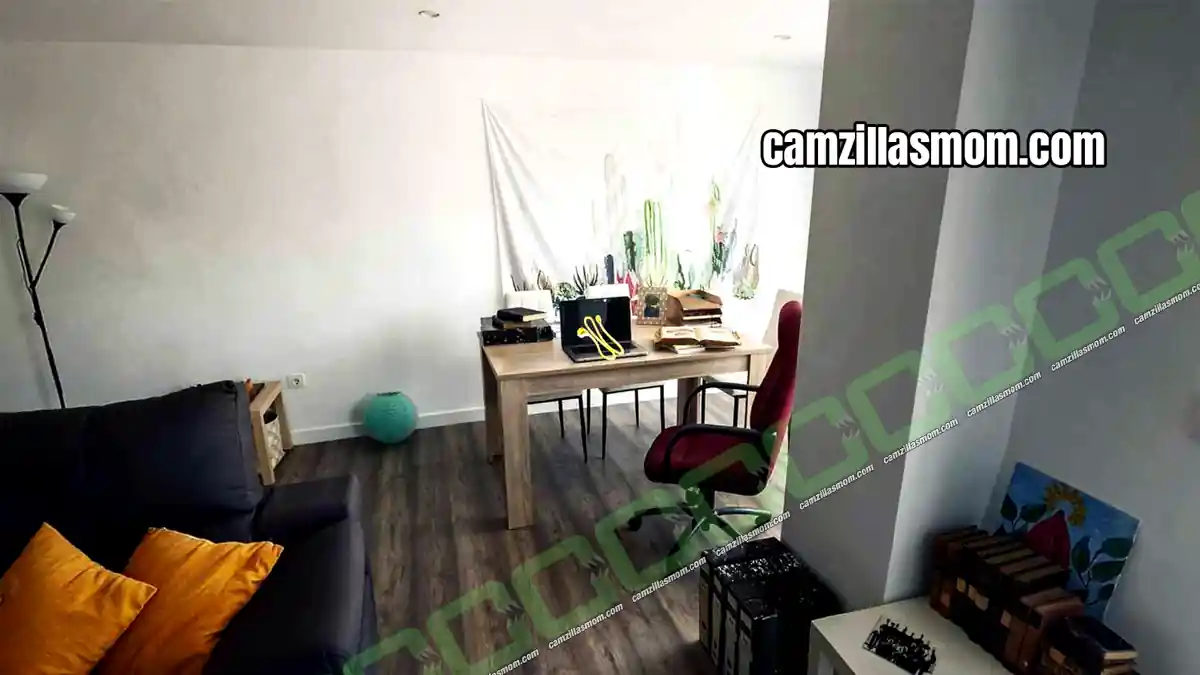
The laptop asks for a password with the hint Carioca. The answer is on one of the framed photos near the TV: the year Carter and Christopher went to Brazil. Enter 2013.
There is only one file on the desktop. Take it: The Door. The back of this file holds the code for the bedroom safe. Go back to the corridor (3) and enter the bedroom (6).
Bedroom (6) – Wardrobe Safe Code
Note: Warning (notebook on the small bookshelf)
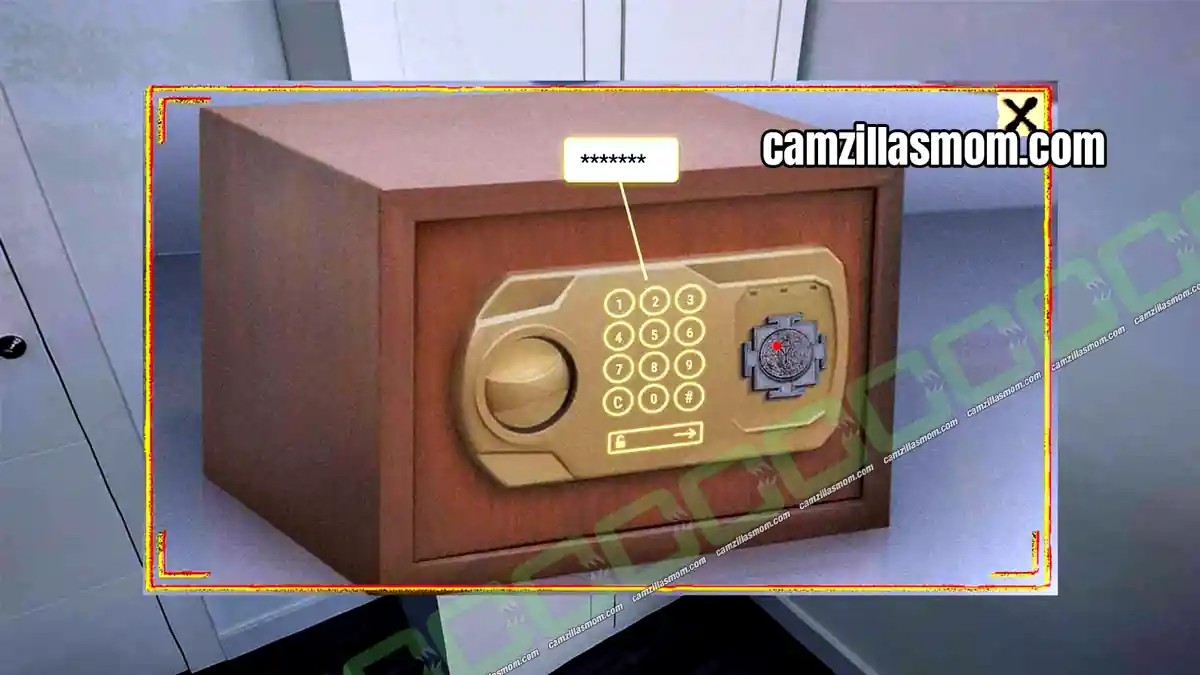
Look inside the wardrobe to find a safe. Use the Metal Pin on the safe, and it now asks for a code. Open The Door file in your notes and look at the back. Enter 151937# and don’t forget the hash key at the end.
Item in the safe: Pieces of the Door
Note: New Location
This finishes Chapter 5.
Chapter 6 – Sophie Whalen – Innsmouth and the Lighthouse
Sophie travels to Innsmouth to investigate the village. This chapter has two floor plans: the village above ground and the lighthouse. Jump to the lighthouse floor plan.
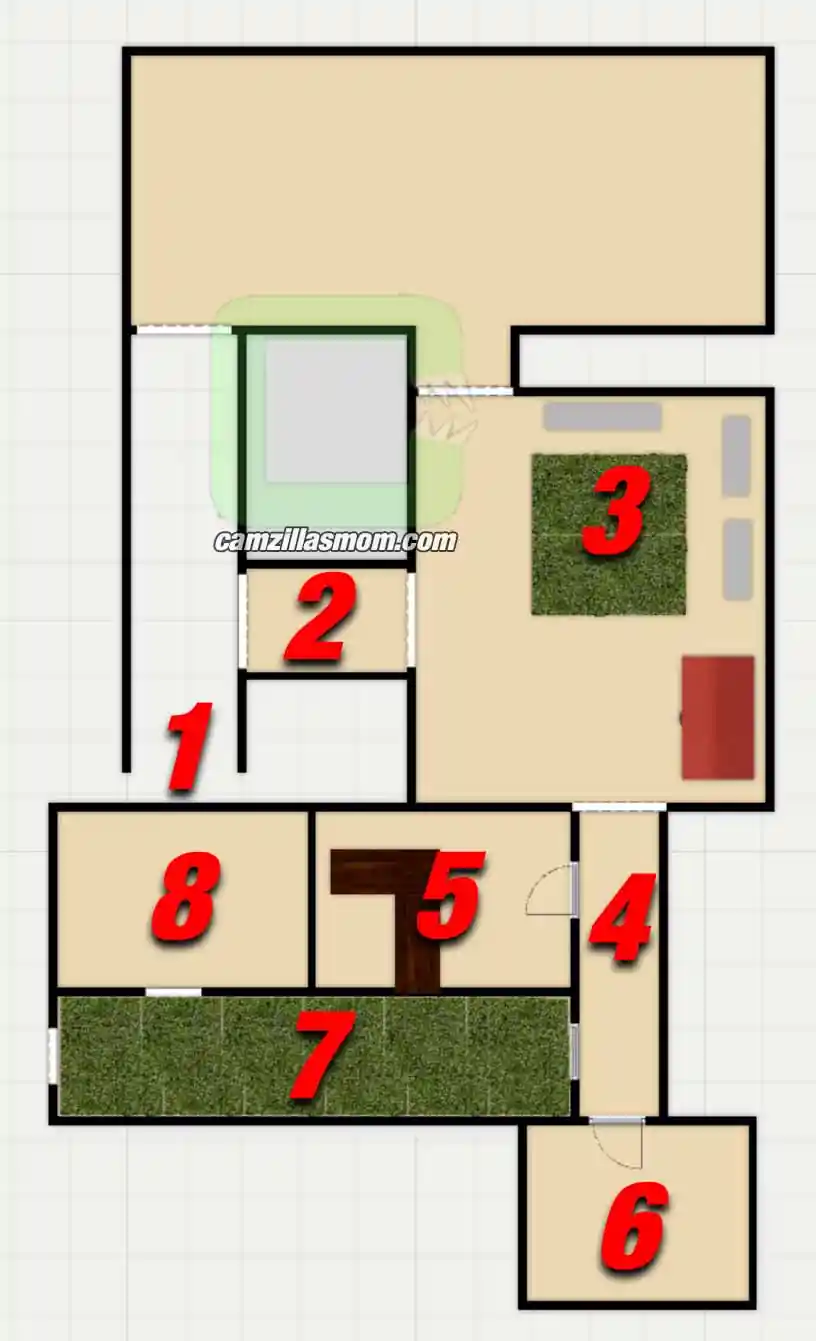
Innsmouth village floor plan:
1 – Village Entrance
2 – Village Right Alley
3 – Temple Park
4 – Village South Alley
5 – Village Bar
6 – Factory Building
7 – Path to the Lighthouse
8 – Shore
Village Entrance (1)
Look at the symbol of the Order (the eye) on the wall. It is part of the code for the secret entrance at the shore (8). You don’t have to write it down, as the solution is shown there. Turn right at the crossing.
Village Right Alley (2)
Look at the symbol on the wall to your right. It represents Hydra. Turn back the way you came to talk to the Bystander, then read the writing on the wall next to him.
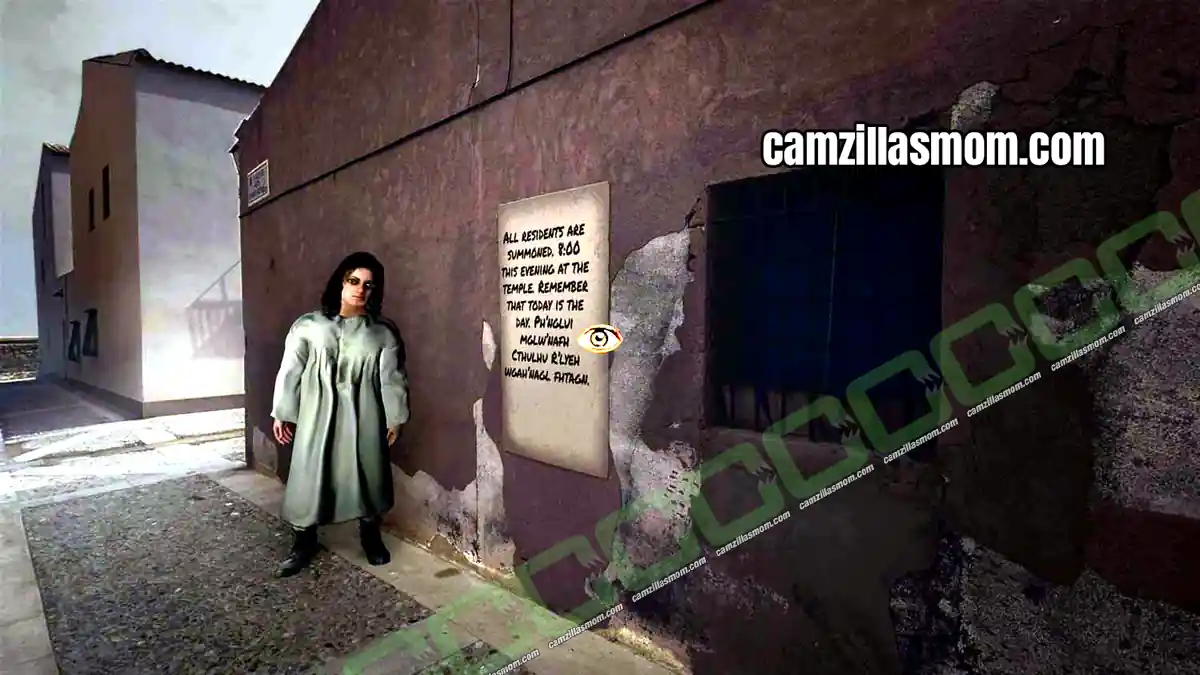
Walk down the alley to the park (3).
Temple Park (3)
At the end of the alley is an overgrown park and a big building that looks like a church. A girl with a basket stares at Sophie. When you talk to her, she warns you not to come any closer to the temple. Walk past the temple into the south alley (4).
Village South Alley (4)
Talk to the second Bystander. He tells you everything for some whiskey. After the conversation he leaves, and you can enter the bar (5).
Village Bar (5) – Screwdriver
Take the screwdriver from the top of the bar. Leave the bar to the south alley (4).
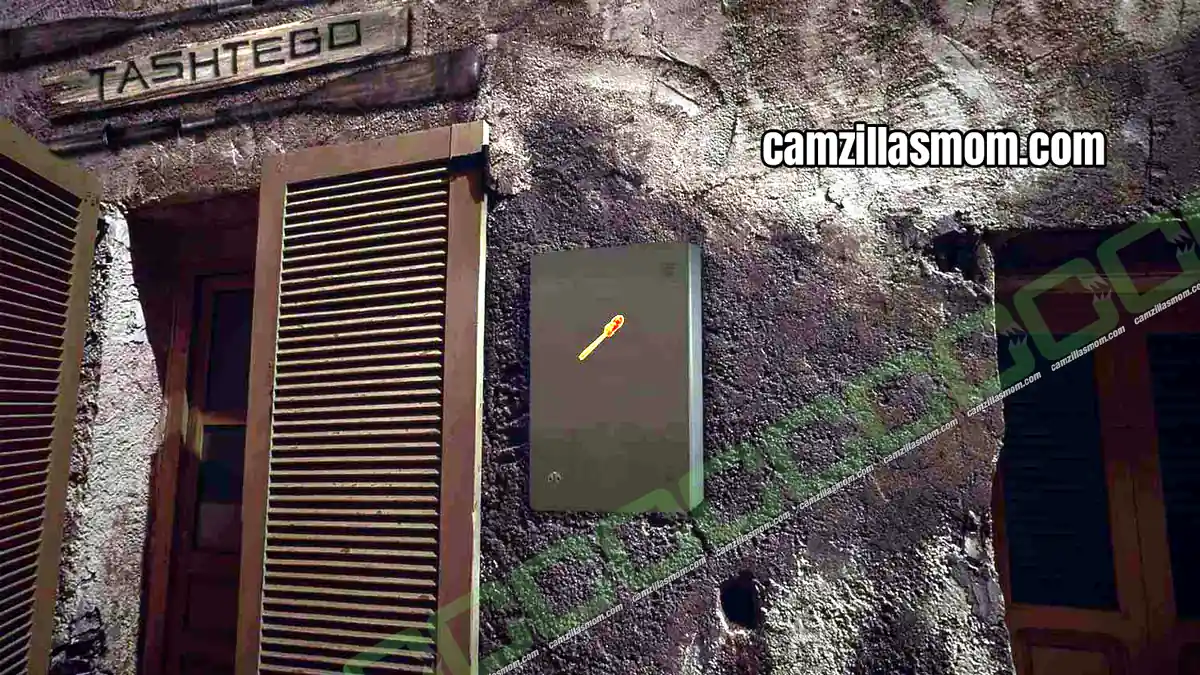
Fuse Box in the South Alley (4)
Find the fuse box right next to the bar entrance. Use the screwdriver on the fuse box to open it and kill the power. Enter the bar (5) again.
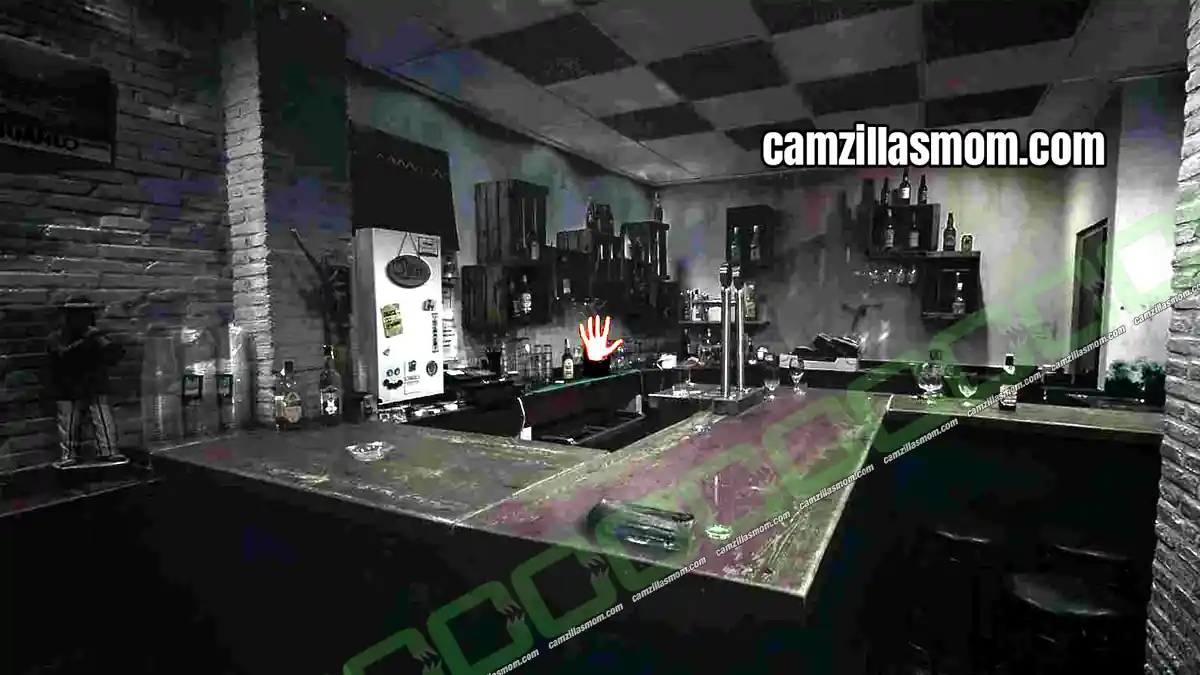
Village Bar (5) – Whiskey Bottle
With the power off, you can take a bottle of whiskey from the back of the bar. Leave the bar and go to the Factory Building (6) in the south.
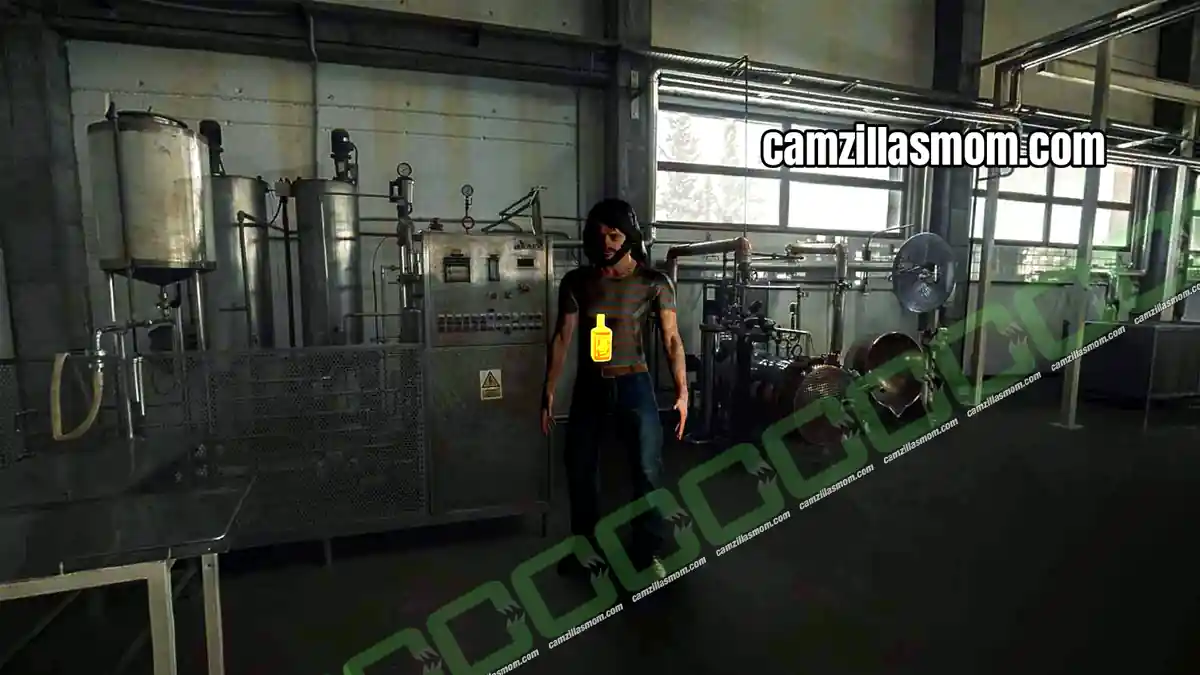
Factory Building (6) – Heavy Key
The drunk Bystander is waiting here. There is also a round symbol on the wall: Azathoth. Open your inventory and give the whiskey bottle to the Bystander. Talk to him, and at the end of the conversation he gives you the Heavy Key.
Lighthouse Fence (4) – Use the Heavy Key
Back in the south alley (4), find the lighthouse sign. The fence next to it has a door that is hard to see. Use the Heavy Key on the lighthouse fence and go through to the path to the lighthouse (7).
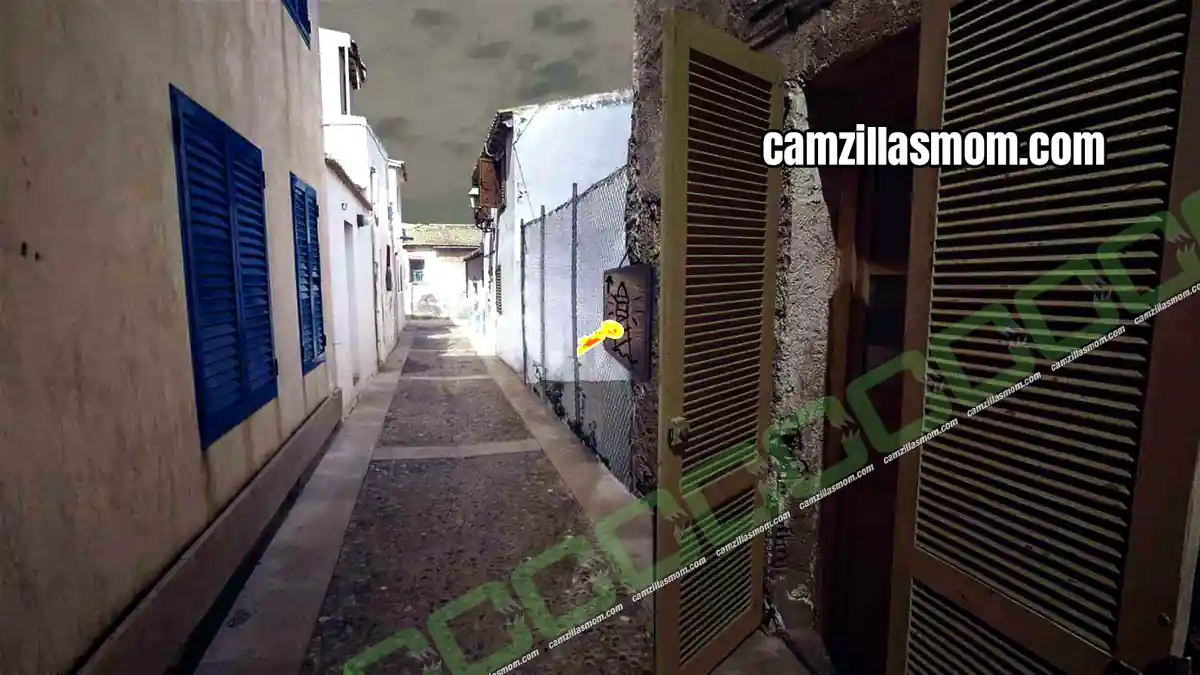
Path to the Lighthouse (7)
Three paths lead from here: back to the village, to the lighthouse and to the shore. Take the path to the shore (8).
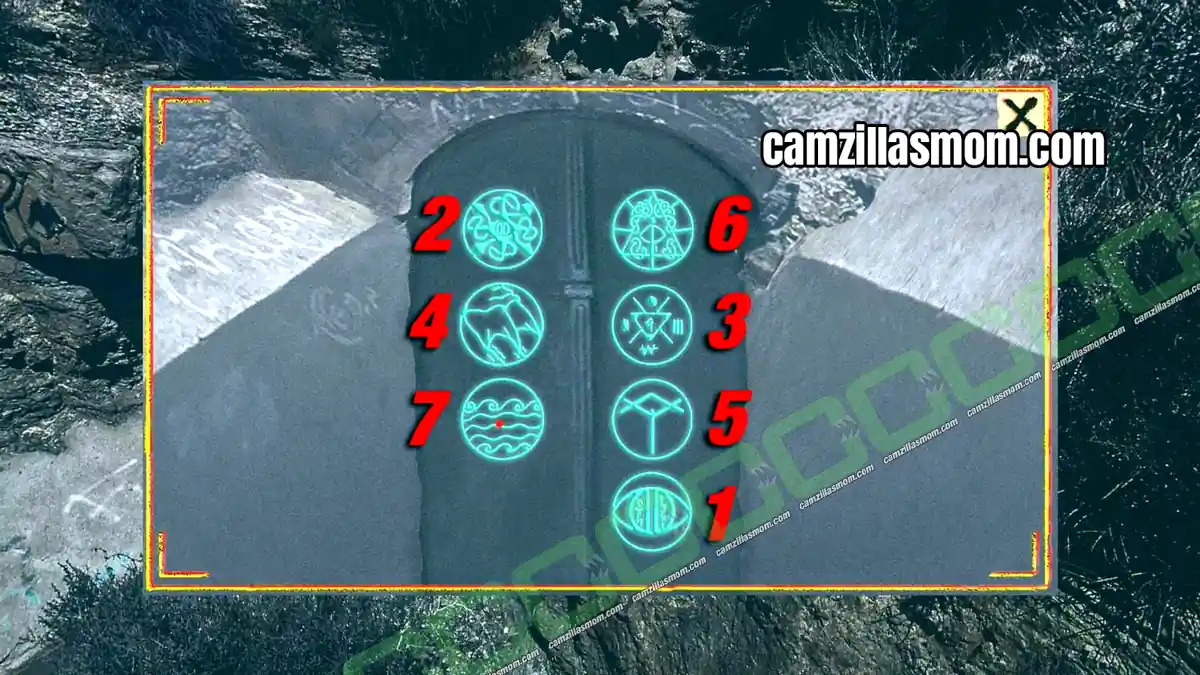
Shore (8) – Secret Entrance Code
At the shore is a secret entrance with seven buttons. Press them in the order shown in the screenshot below, from 1 to 7. Then enter the underground (9).
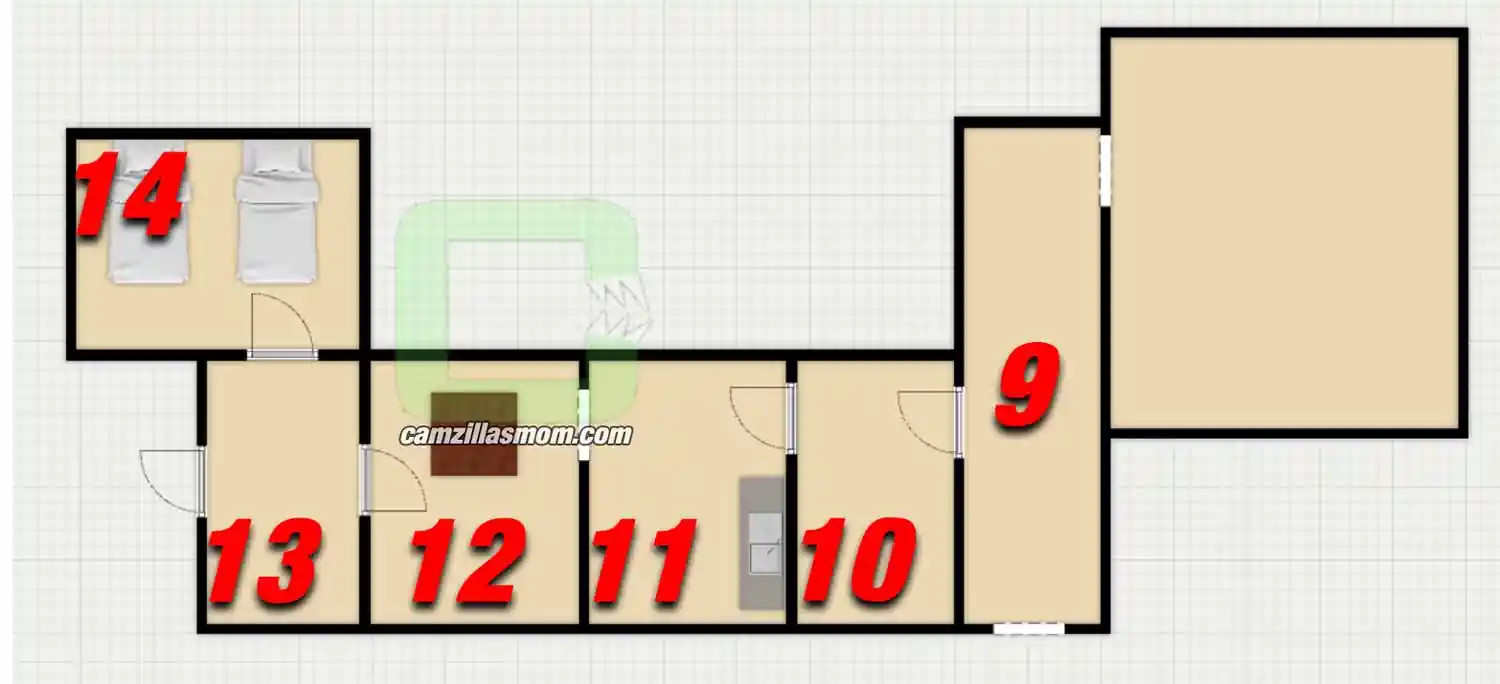
Lighthouse Floor Plan
Lighthouse floor plan:
9 – Underground Entrance
10 – Storage Room
11 – Kitchen
12 – Dining Room and Lounge
13 – Lighthouse Entrance
14 – Bedroom
Underground Entrance (9)
Two paths lead from here: the open door with the light, and a ladder going up. Climb the ladder.
Storage Room (10)
Look down and you see a puzzle on the floor. The solution is in the bedroom (14), so leave the storage room to the kitchen (11) for now.
Kitchen (11)
Take the note on the fridge. Then leave to the dining room (12).
Dining Room and Lounge (12)
Note: Chthonic Revelations (notebook on the dining table)
Leave through the wooden glass door.
Lighthouse Entrance (13)
In this entrance corridor, the door on the left takes you to the bedroom (14).
Bedroom (14) – Framed Map
Take the drawings from the wall: Manuscripts. Then look at the framed map. The arrows on it are the solution to the floor puzzle in the storage room.
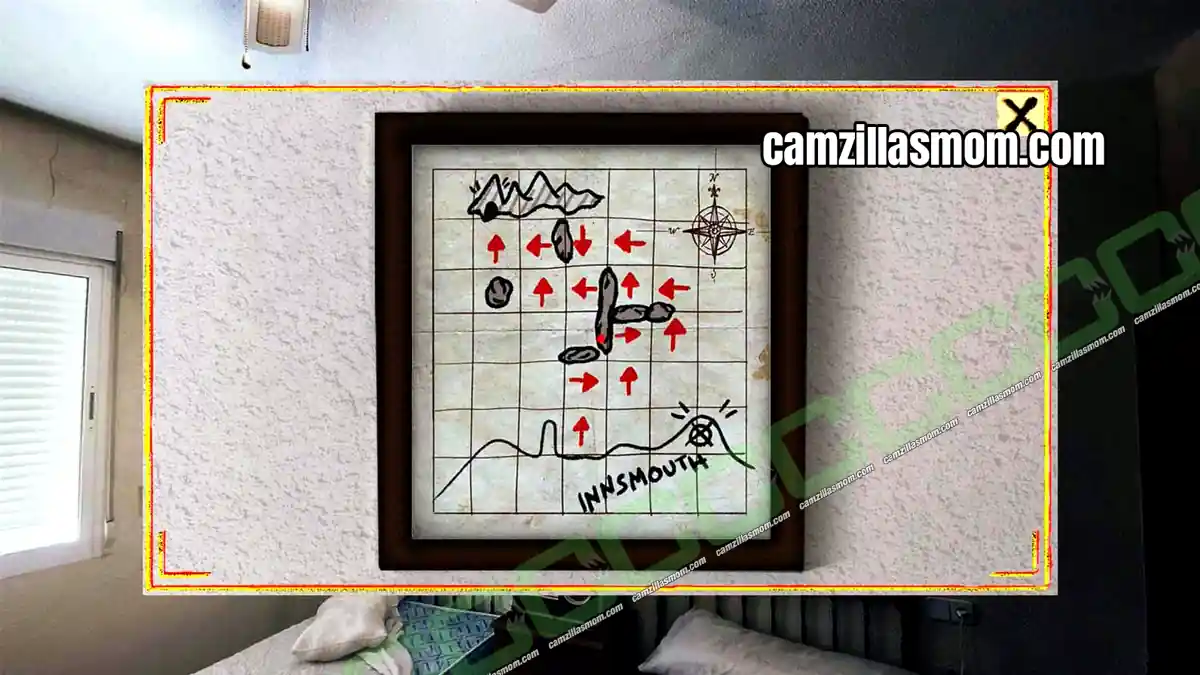
Storage Room (10) – Floor Puzzle Solution
Go back to the storage room and look down at the plate with a stick pointing up. Move the stick in the direction of the arrows on the framed map:
UP, RIGHT, UP, RIGHT, UP, LEFT, UP, LEFT, DOWN, LEFT, UP, LEFT, UP
This opens a secret safe.
Item: Statue of Dagon
Note: Diary
Keep the Statue of Dagon for Chapter 10. This finishes Chapter 6.
Chapter 7 – James Oslac – Zotiques Enterprises
James travels to Zotiques Enterprises, the company that owns the van from the surveillance footage. Inside, it turns out to be the same hospital Carter escaped in Chapter 1.
Zotiques Enterprises floor plan:
1 – Parking Lot
2 – Parking Lot
3 – Building Entrance
4 – Hospital Corridor
5 – Hospital Bedroom
6 – Morgue
7 – Exhibition Room
8 – Break Room
9 – Dagger Exhibition Room
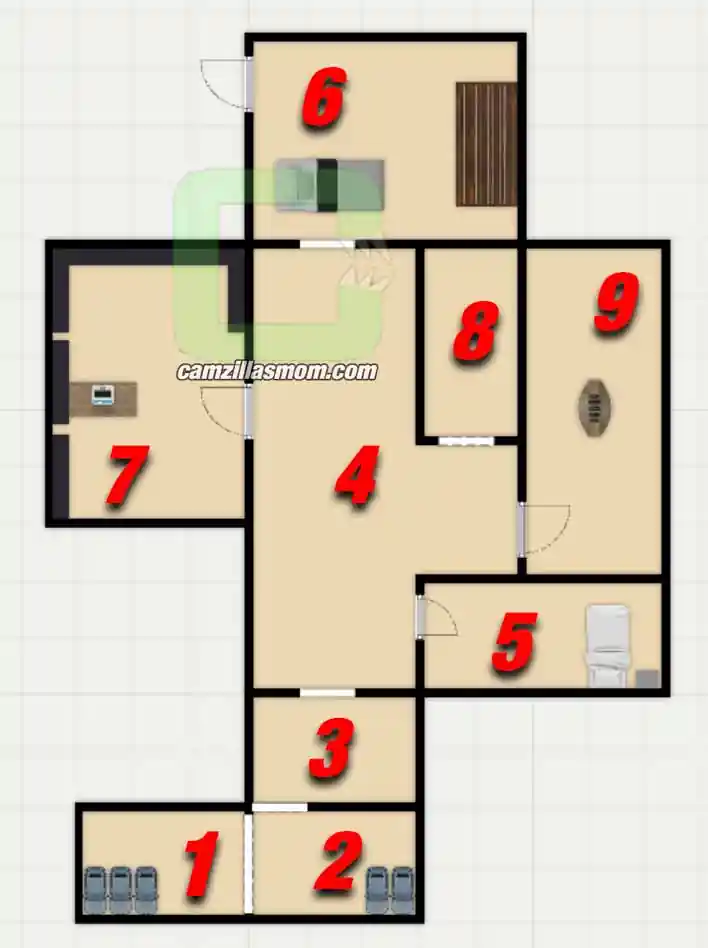
Parking Lot (1) – Lockpicks
Look at the open passenger door of the blue car and take the lockpicks from the glovebox. Then walk up the parking lot.
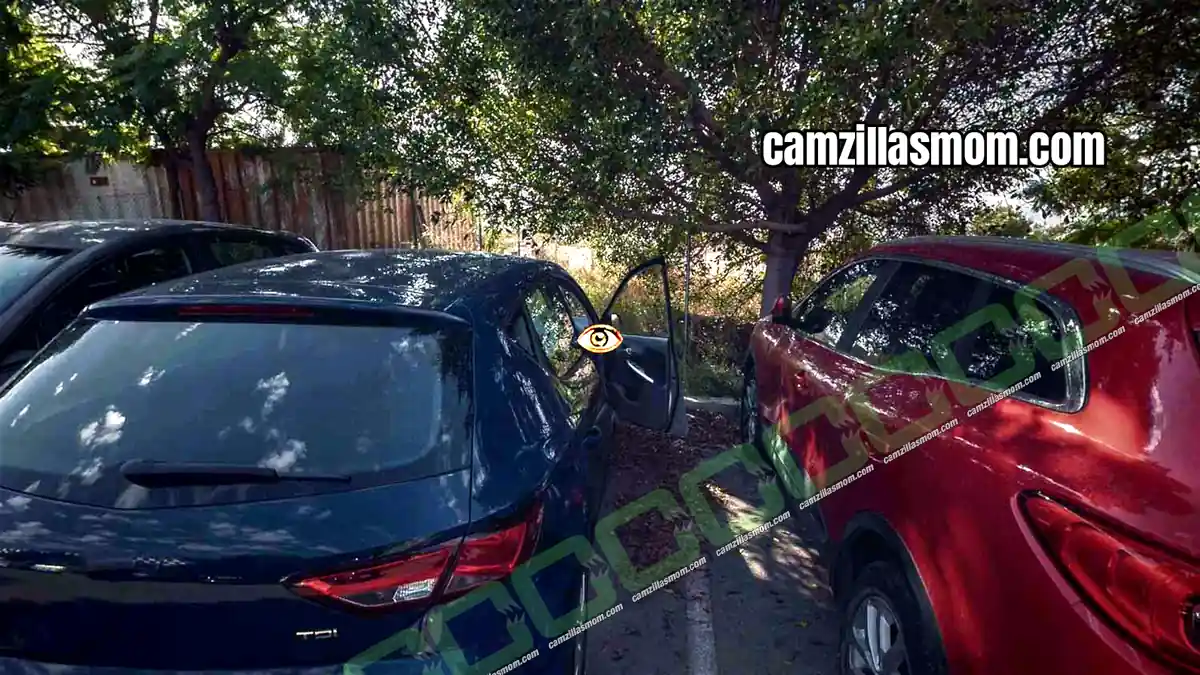
Parking Lot (2) and Building Entrance (3)
The second part of the parking lot (2) is right opposite the Zotiques Enterprises building. Cross over to the building entrance (3) and talk to the guard at reception. He wants to see your security card, so go back to the parking lot (2).
Parking Lot (2) – Access Card
One car here has a security card inside. Open your inventory and use the lockpicks on the car, then take the Access Card from the passenger seat.

Go back to the building entrance (3) and talk to the guard to hand him the card.
Hospital Corridor (4)
Talk to the guard in the corridor and ask him if he wants a coffee. The corridor leads to the hospital bedroom, the exhibition room, the morgue and the break room. Start with the hospital bedroom (5).
Hospital Bedroom (5) – Painkillers
This is the room Carter woke up in. Take the bottle of strong painkillers from the bedside table.
Morgue (6) – Coffee Mug
Go down the corridor to the morgue and pick up the coffee mug near the dead body.
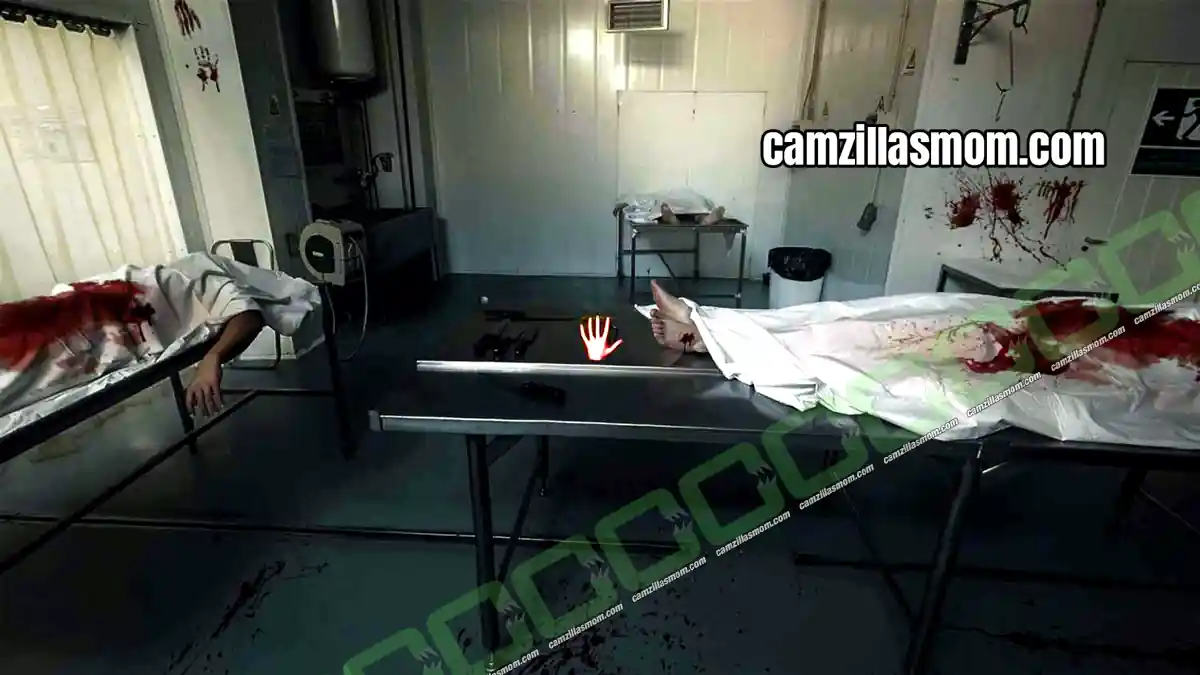
Exhibition Room (7) – Horrible Withering of the Soul
Notes: The Nameless City (rolled-up document on the table with the laptop), The Black Door Must Be Opened (document on the bookstand at the back)
Also open the drawer in this room to find Horrible Withering of the Soul. Keep it, as you need it for the ending choice in Chapter 13.
Break Room (8) – Coffee With Pills
Use the coffee mug on the coffee machine. Then, in your inventory, combine the bottle of strong painkillers with the cup full of coffee to get a cup full of coffee with pills.
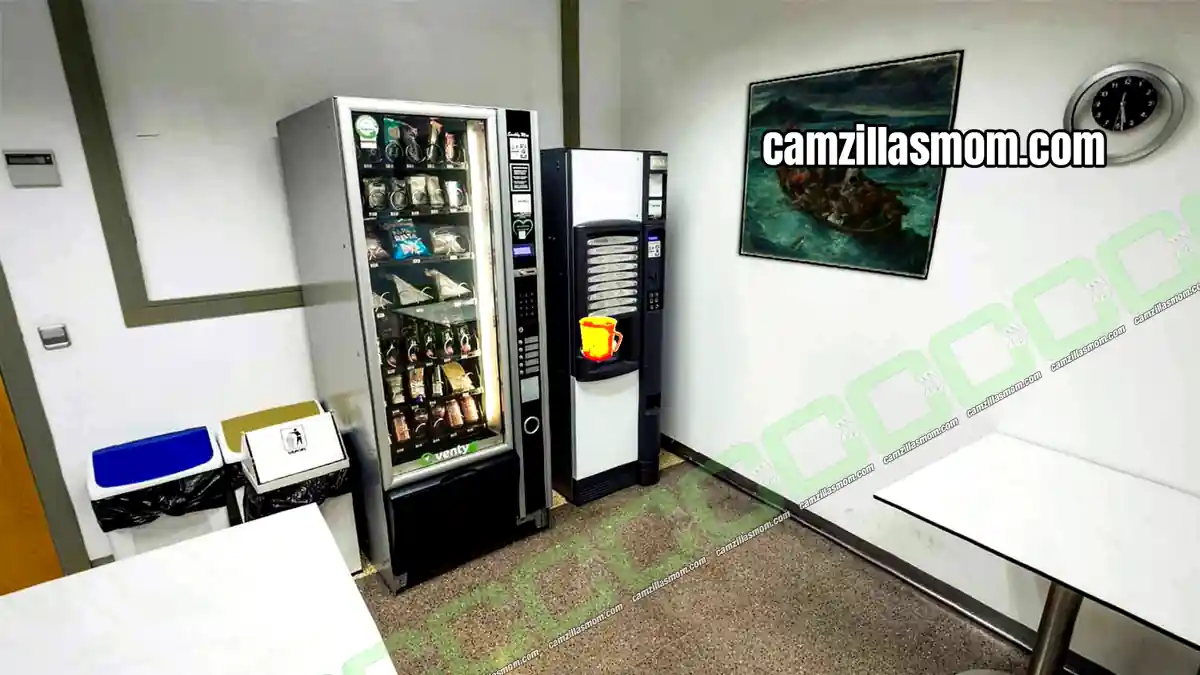
Go back to the corridor (4), talk to the guard and give him the cup full of coffee with pills.
Dagger Exhibition Room (9) – Old Dagger
With the guard out of the way, enter the room he was guarding. Take the dagger in the center of the room: Old Dagger.
Leave to the corridor and escape the hospital the same way Carter did, through the morgue. This finishes Chapter 7.
Chapter 8 – Christopher Black – The Bookshop
Christopher travels to Henry Armitage’s bookshop.
Bookshop floor plan:
1 – Front Bookstore
2 – Middle Bookstore
3 – Back of the Bookstore
4 – Backroom
5 – Secret Room
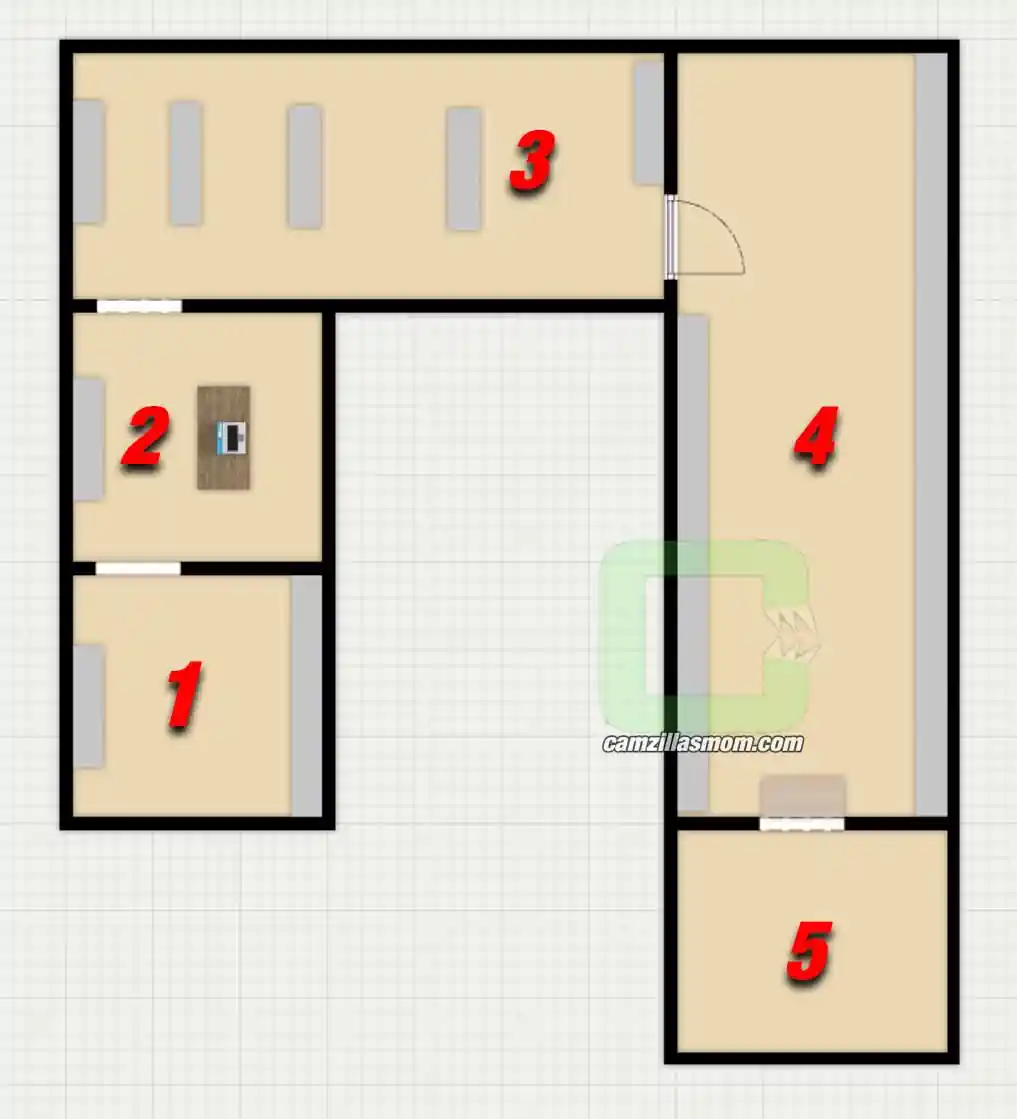
Front Bookstore (1) – Crowbar
Notes: Sedefkar Simulacrum (hand in a wooden box), The Black Power – Jackson Elias (thick yellow book near the entrance), Shankara Stones (three glowing stones inside a bookshelf), Dune – Benjamin James Taylor (book in the bookshelf on the right, with the entrance door behind you)
Item: Crowbar, the Old Lever, in a black box on the floor
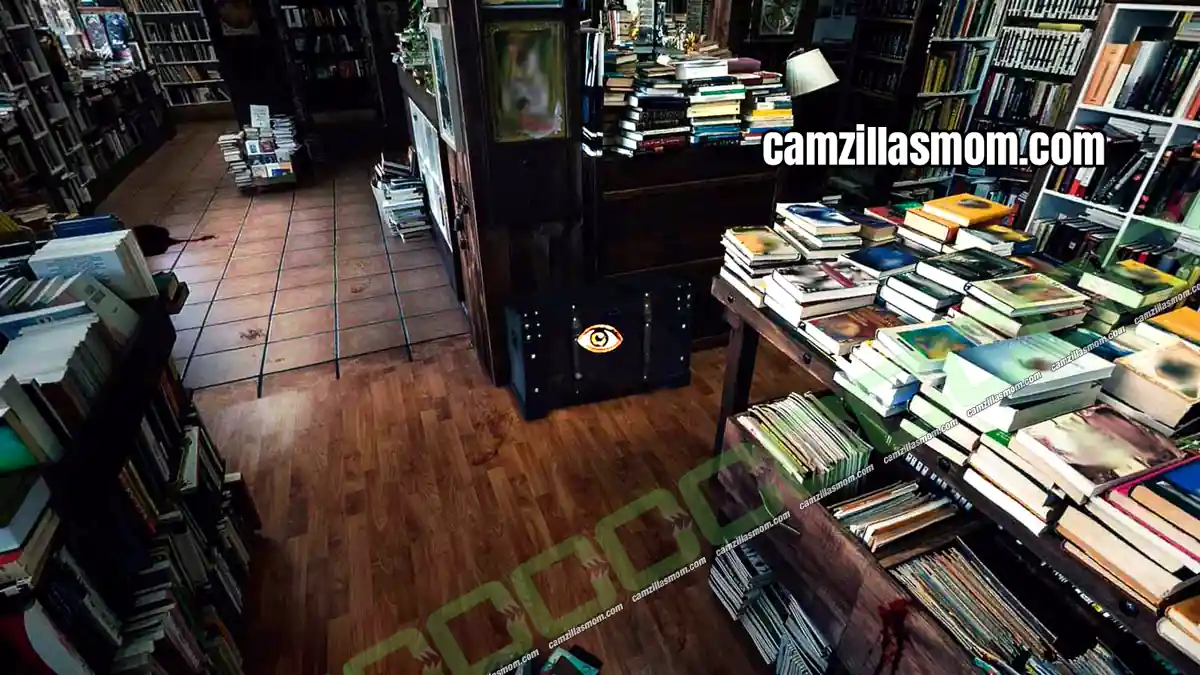
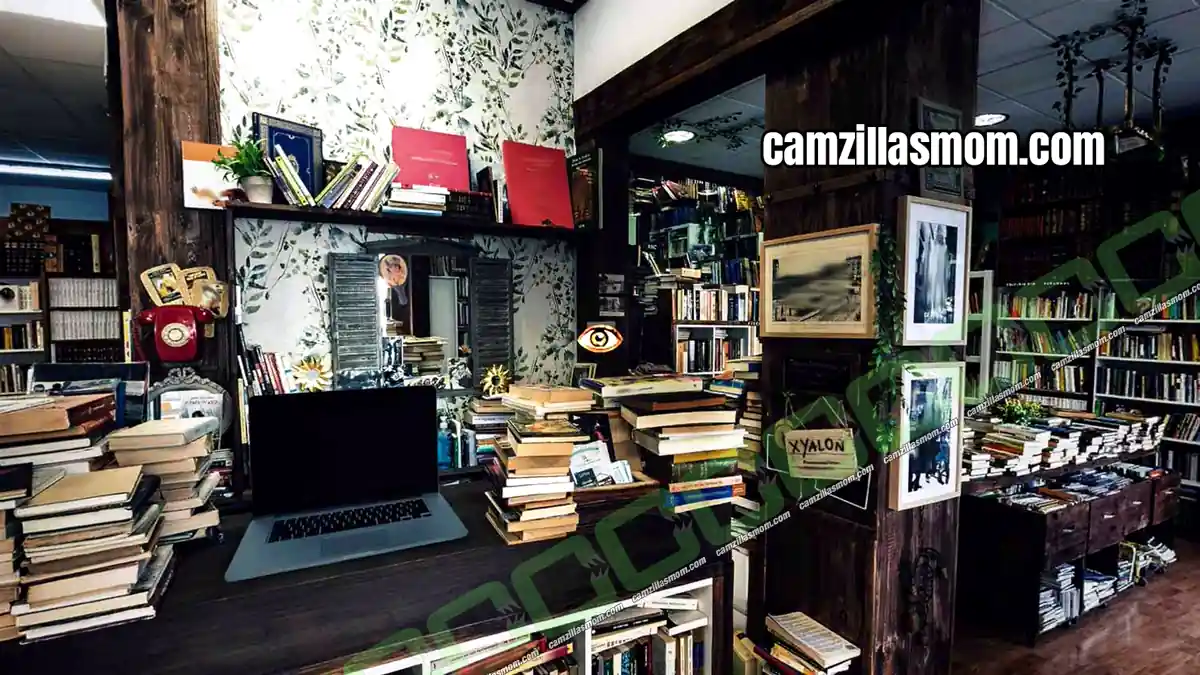
Middle Bookstore (2) – Light Switch
There is an open laptop here that is still on. Look up to see wires. Something was connected to them, and someone pulled it out.
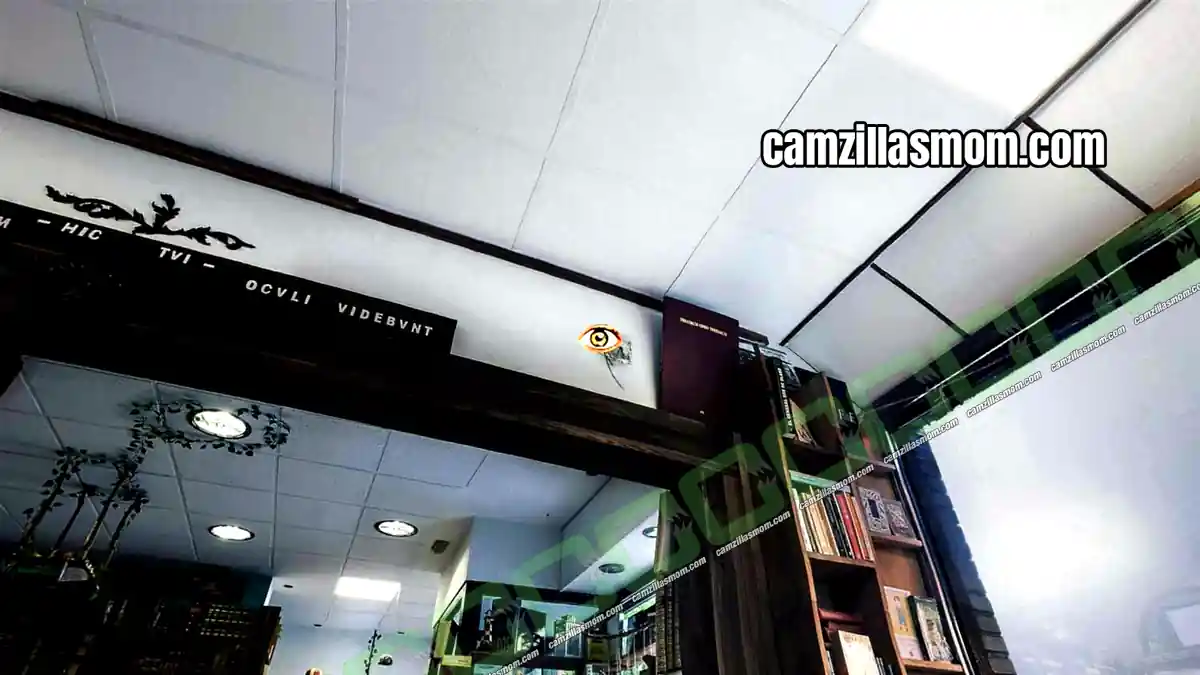
Before you head to the back, note the light switch shown below. It turns on the lights at the back of the shop. You need it once you find the backroom too dark to enter.
Back of the Bookstore (3)
Christopher hears something back here.
Notes: Elephant Heart (something bright red on top of books), Matchbox (box on the floor in the aisle with the pile of books), Cultes des Goules – D’Erlette (big brown book in the shelf on the right in the screenshot), Helter Skelter – Morgan Schackmuth (blue book on the shelf behind you)
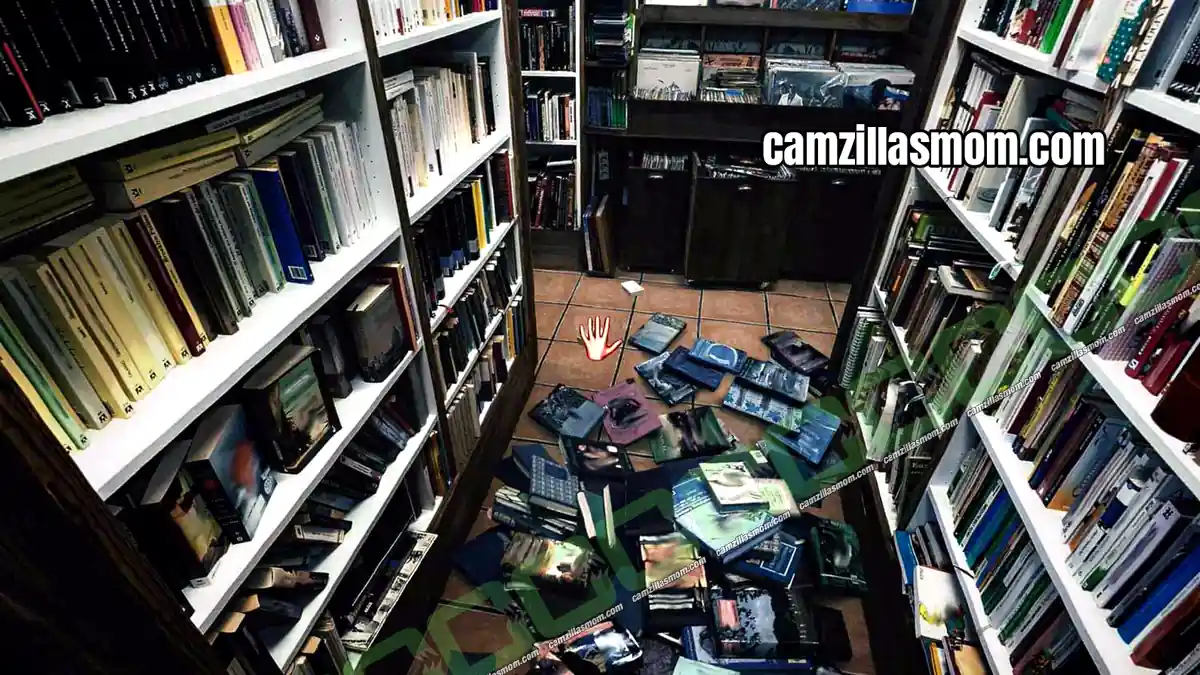
The door at the back is too dark to go through. Go back to the middle bookstore (2), flip the light switch and return.
Backroom (4) – Blood-Stained Book
The security camera lies on the floor. Look at it and take the memory card. You can watch it on the laptop in the middle bookstore (2), but you don’t need it to progress.
The white drawer with the blood is stuck. Use the crowbar on it.
Items and notes inside: Loose Page of a Diary, Note, Blood-Stained Book
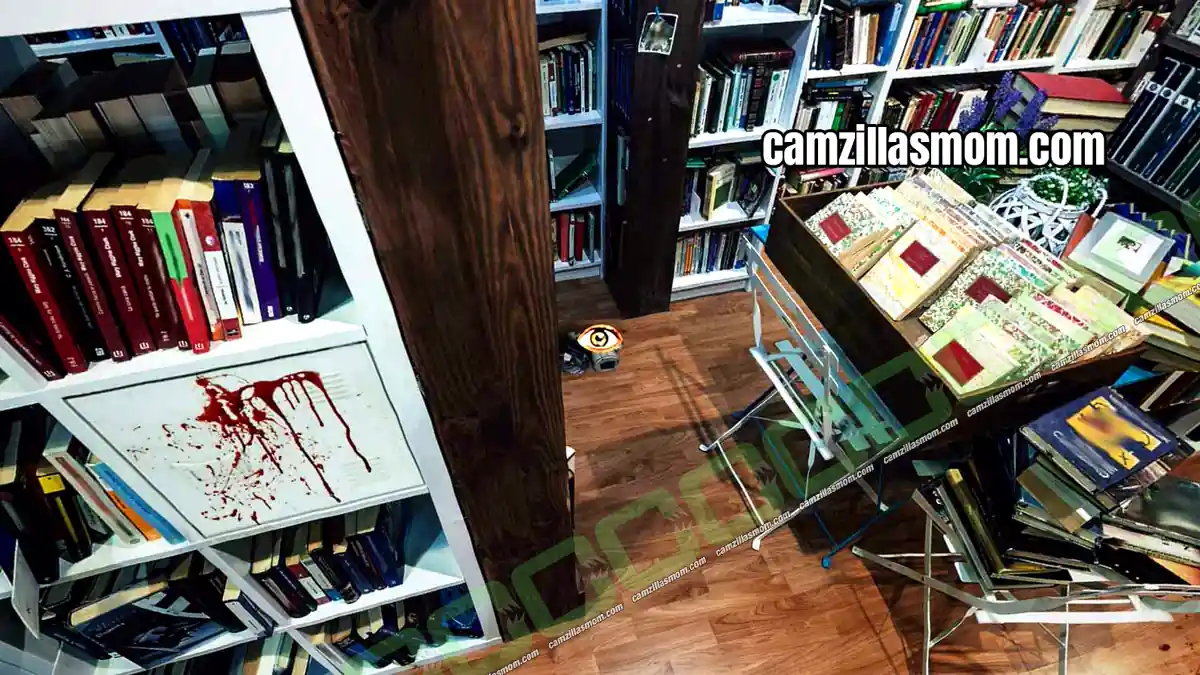
Use the Blood-Stained Book on the bookshelf at the very back, where the noise is coming from. Enter the secret room (5).
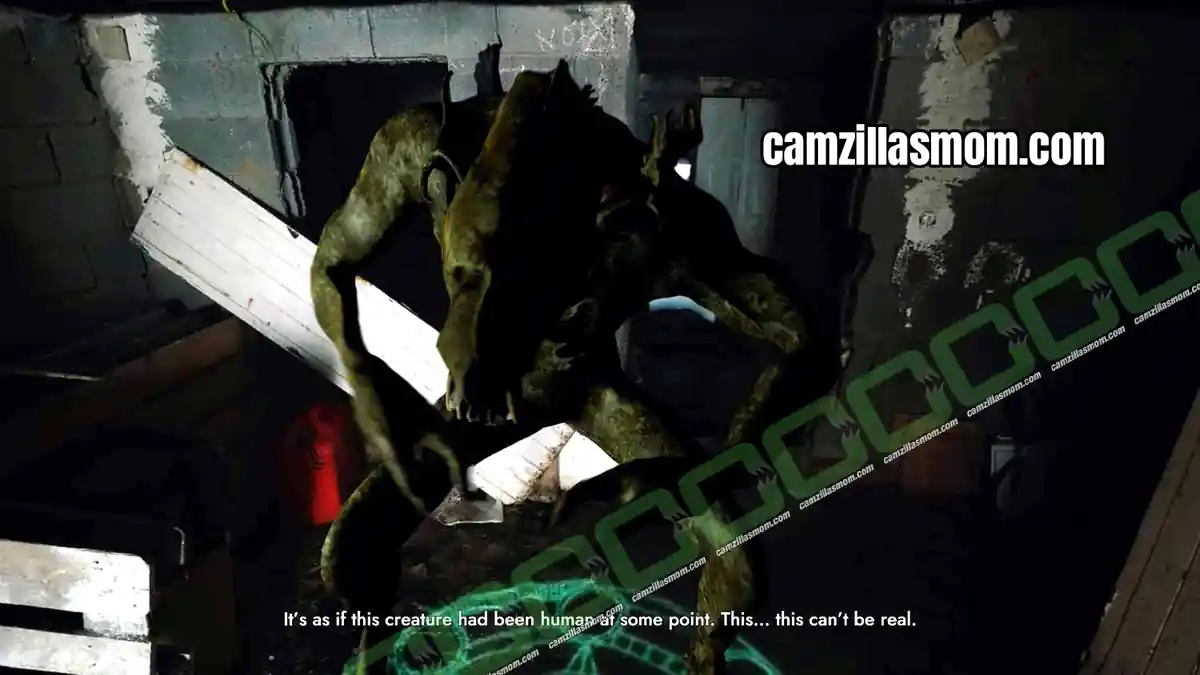
Secret Room (5)
You hear a noise in the secret room. Turn around and you come face to face with this monster. This finishes Chapter 8.
Chapter 9 – Carter Scott – The Omen
After Christopher meets the monster in the bookshop, Carter Scott finds himself in a forest, talking to IDH-YAA.
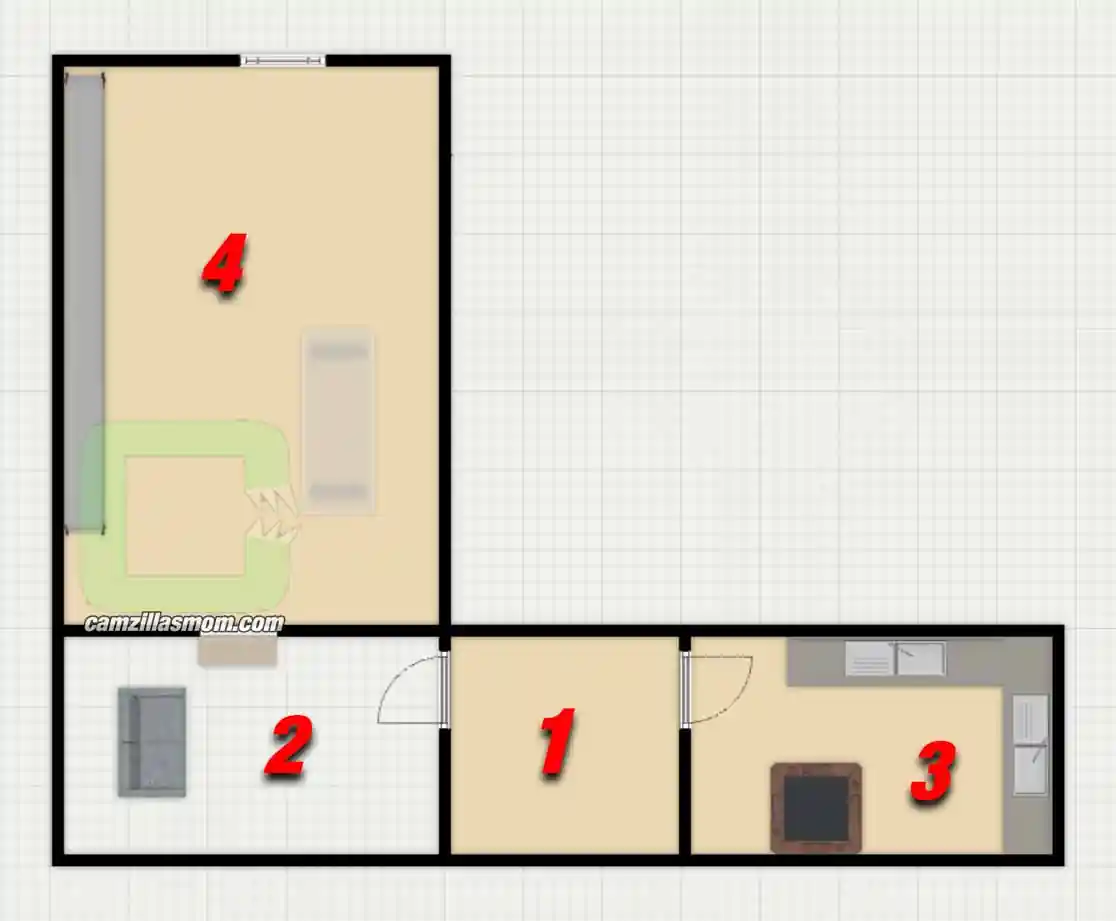
Cult house floor plan:
1 – Forest and House
2 – Lounge
3 – Kitchen
4 – Secret Room
Forest and House (1)
Walk in the only direction possible. Talk to the security system of the house and use the passphrase to get inside.
The slogan on the wall inside is the same one Carter just used to open the door. There is a door on each side of it: the lounge (2) on the left and the kitchen (3) on the right.
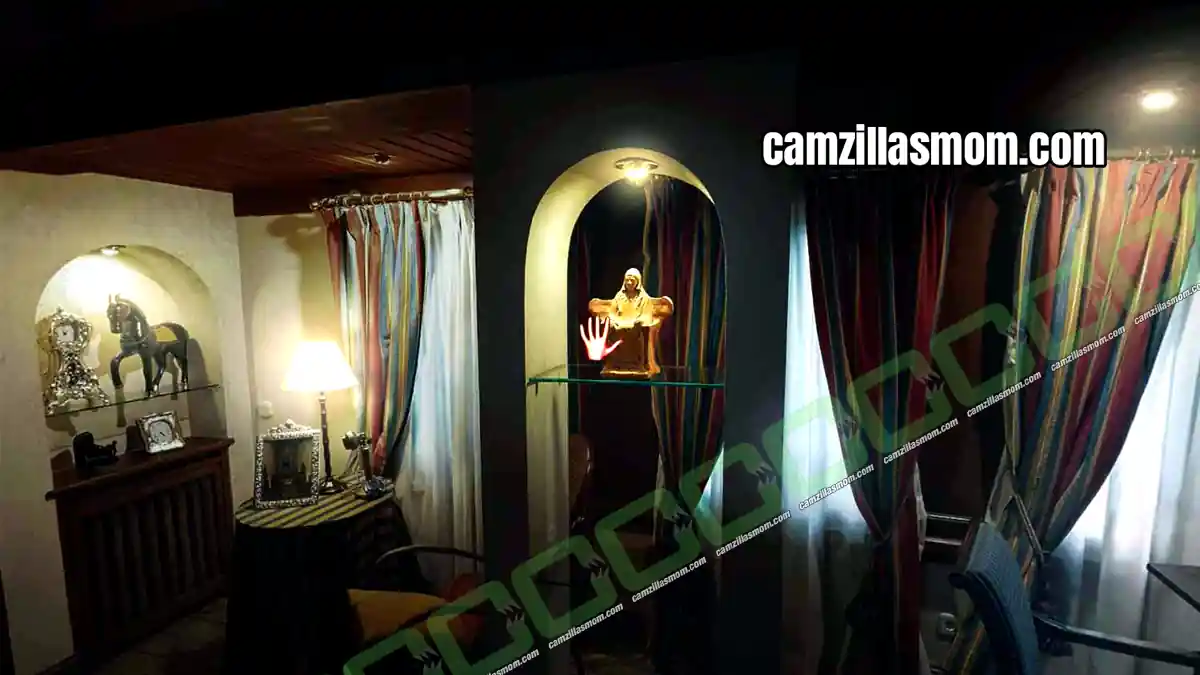
Lounge (2) – Bust of a Woman
Pick up the golden statue: Bust of a Woman. Then leave the lounge and go to the kitchen (3).
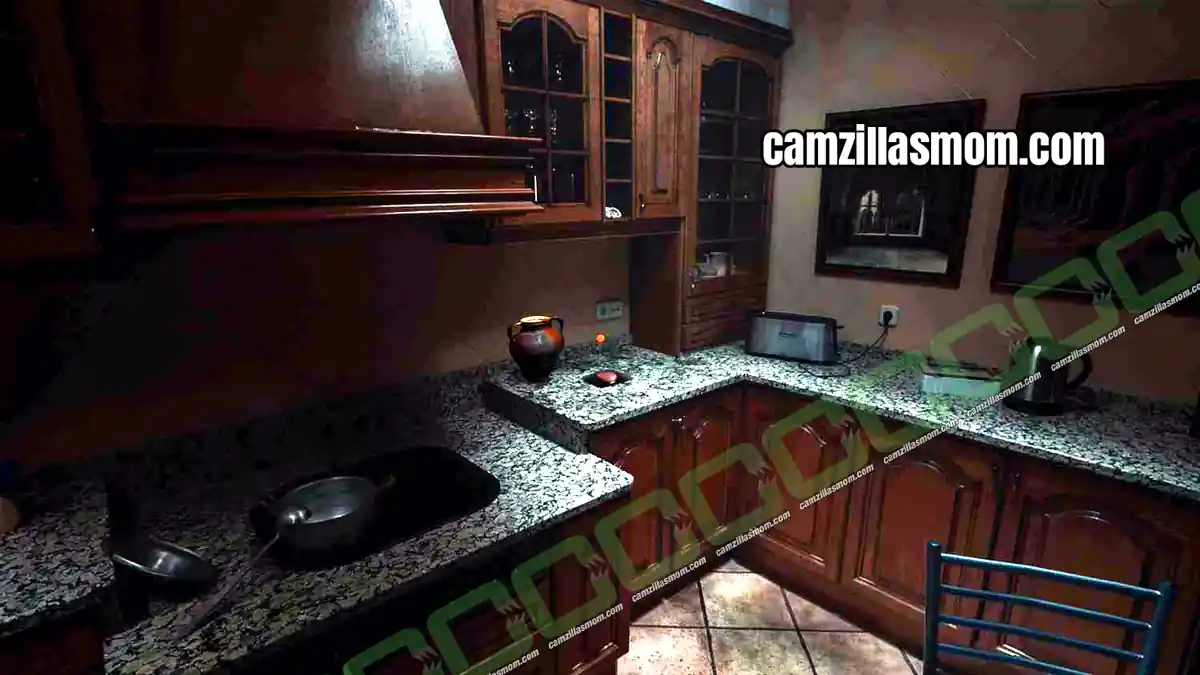
Kitchen (3) – Hidden Button
Take the newspaper from the table. Then move the strange vase on the kitchen counter to reveal a button. Use the Bust of a Woman on the button.
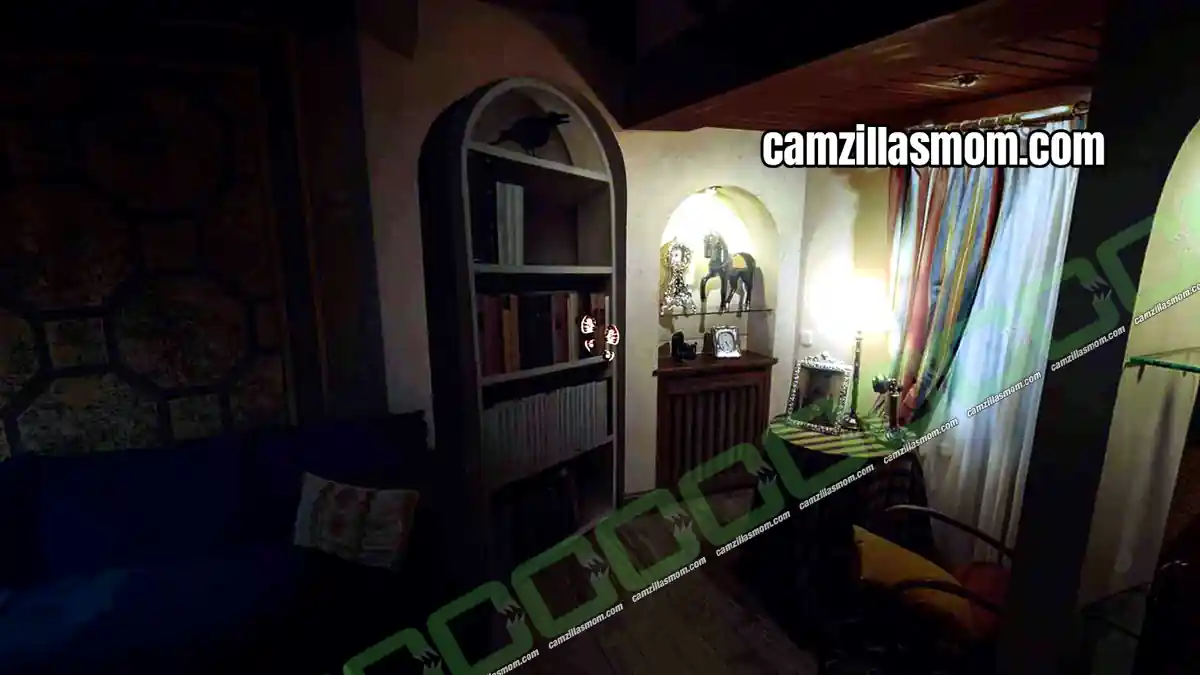
Lounge (2) – Secret Passage
Go back to the lounge. A bookshelf has moved, and you can go through the passage.
Secret Room (4) – Map and Compass
Items: Map (on the wall), Compass (on the glass table)
Notes: History of the Cult of the Sleeping God (document on the table), The Ambrose Chambers Society (document near the door), Obituaries (newspaper on the old bench), Milestones (document near the window)
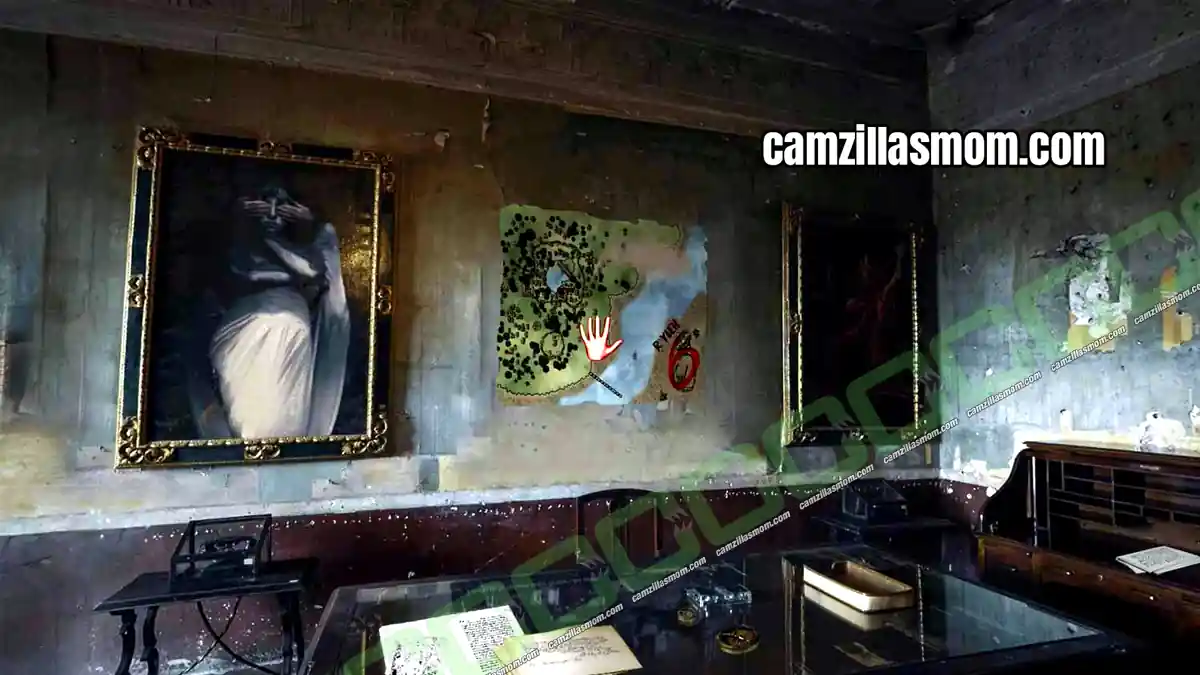
Leave through the bookshelf door to finish Chapter 9.
Chapter 10 – Sophie Whalen – Back to Innsmouth
Sophie is back in Innsmouth and needs to patch up a boat to reach the cave across the water. This chapter only plays if Sophie survived Chapter 6.
Innsmouth and cave floor plan:
1 – The Beach
2 – Village South Alley
3 – Factory Building
4 – Northern Park
5 – The Other Beach
6 – The Cave
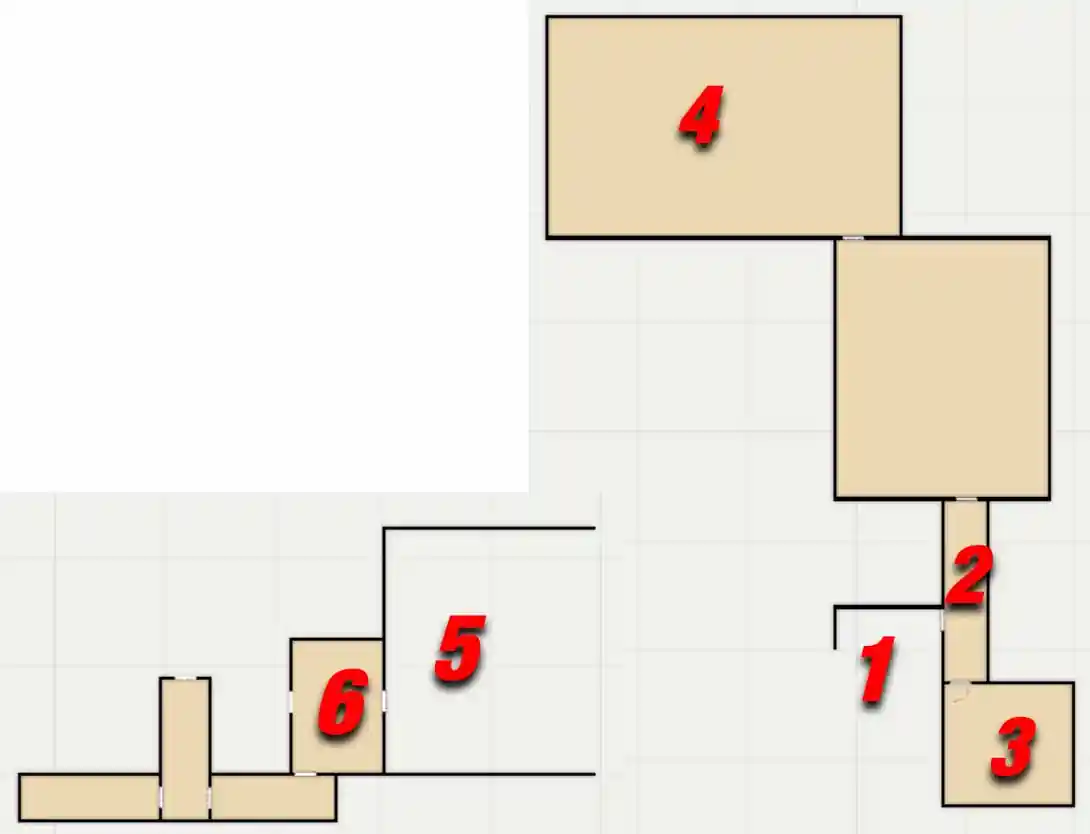
The Beach (1)
Check out the boat on the beach. It has a hole, and Sophie wants to patch it. The only way to go from here is into the village.
Village South Alley (2) – Oars
Sophie is back in the south alley with the bar. Look just above the bar entrance and grab the oars.
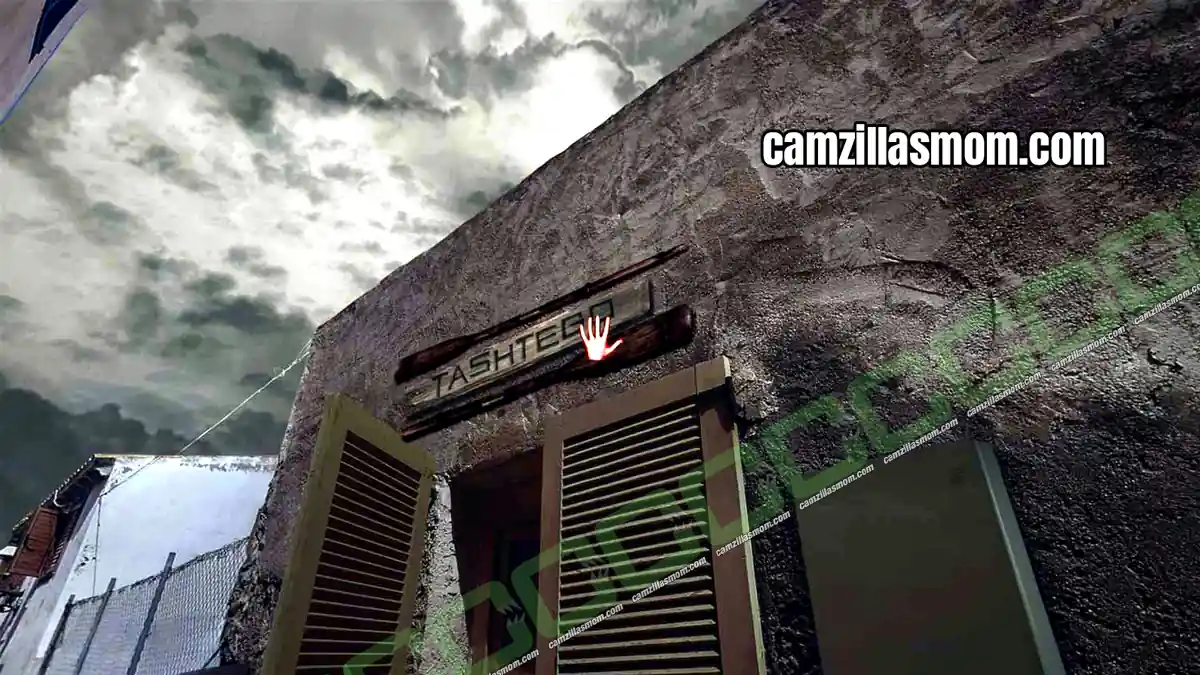
Factory Building (3) – Cork Stopper
The drunk Bystander has finished the whiskey. Pick up the broken bottle from the floor to get the cork stopper.
Leave the factory and walk down the other side of the south alley to the temple. All residents are inside the temple. Take the exit to the north to reach the northern park (4).
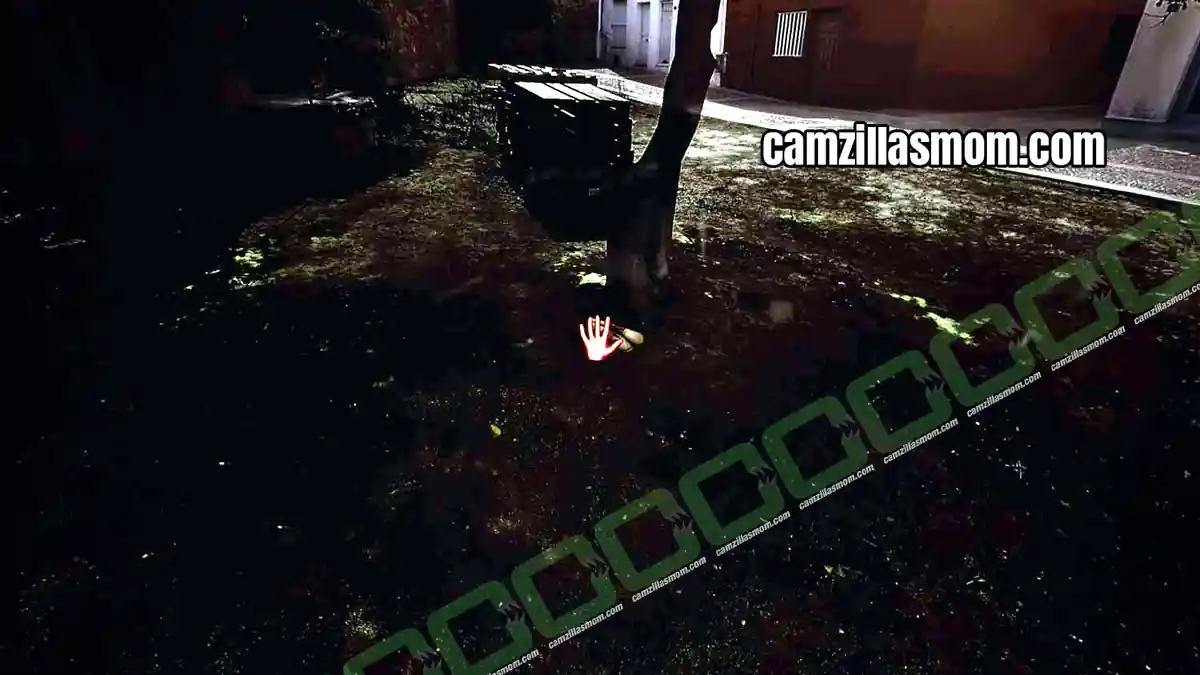
Northern Park (4) – Stained Handkerchief
Sophie didn’t visit this area before. It’s a small park with trees and a sign that says No Littering on the Coast. Find the rag on the floor next to a tree: Stained Handkerchief. Then head back to the boat.
The Beach (1) – Patch the Boat
Interact with the boat first so you can see the hole. Then open your inventory and use the items on the hole in this order:
1 – Stained Handkerchief
2 – Cork Stopper
3 – Oars
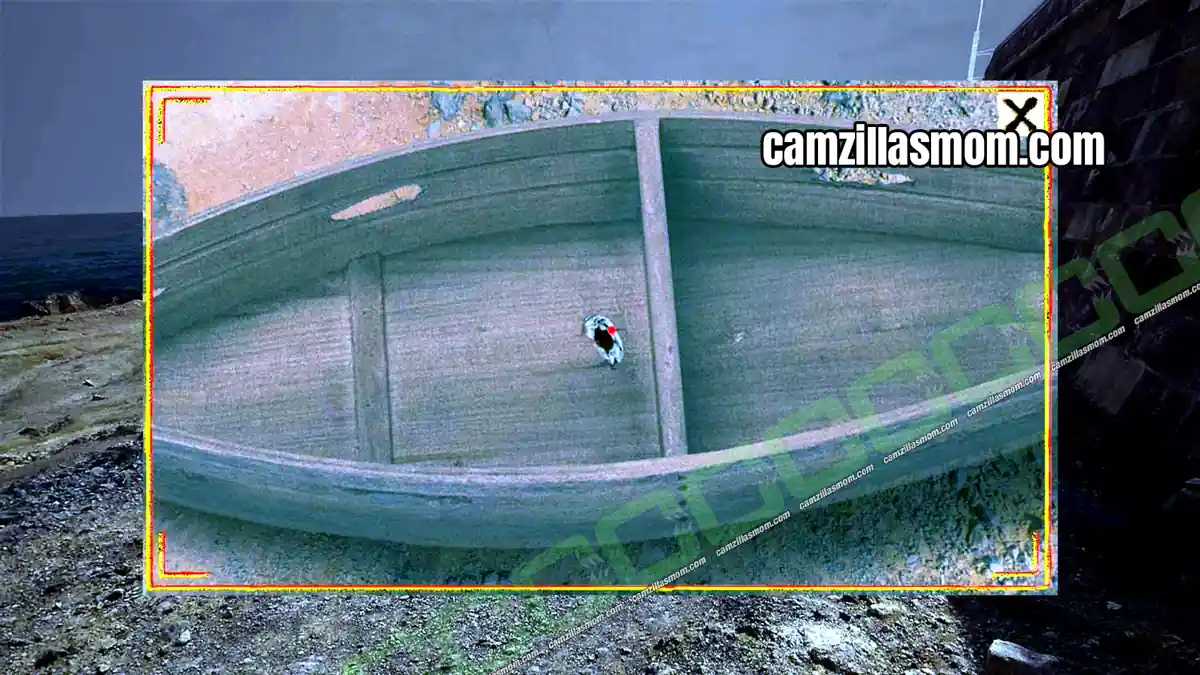
The Other Beach (5) and the Cave (6) – Amulet and Silver Key
Sophie arrives on the other beach (5). There is only one way to go: into the cave (6).
Look at the symbols, the drawings and the creepy footprints on the floor. The cave is hard to draw on a floor plan, so just walk straight ahead. In the next area, you find the symbol with the eye in the center. Straight ahead from here, a narrow passage leads to a door.
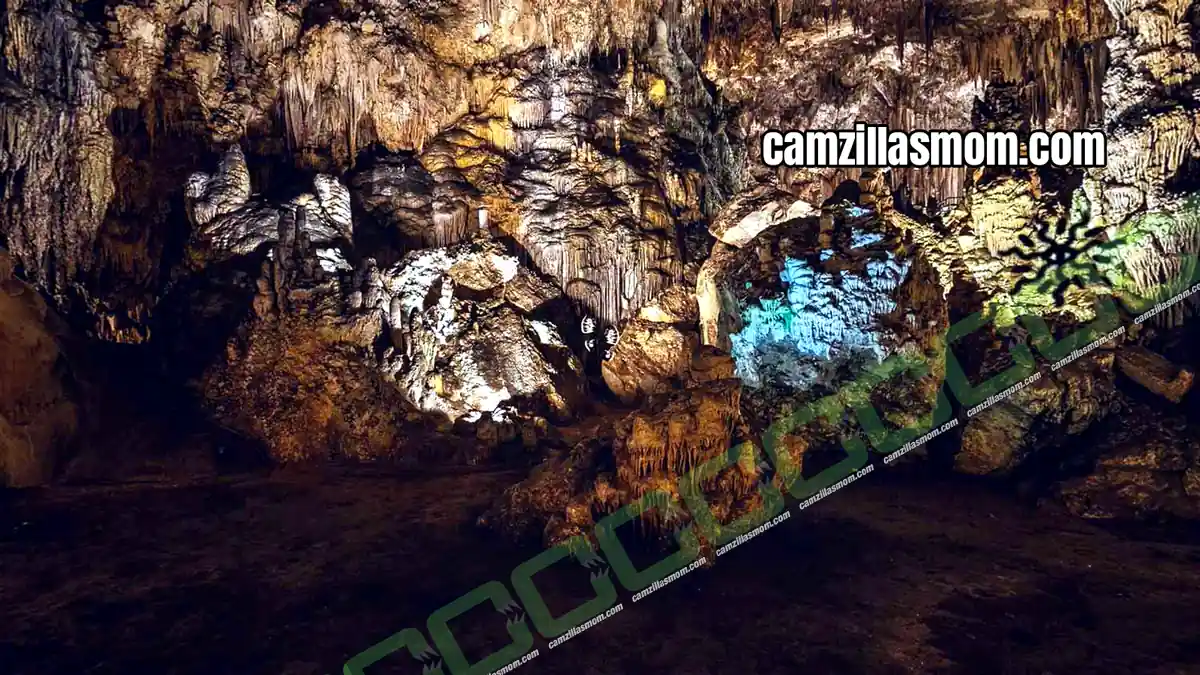
Interact with the door and you are automatically taken to the amulet pedestal and another door.
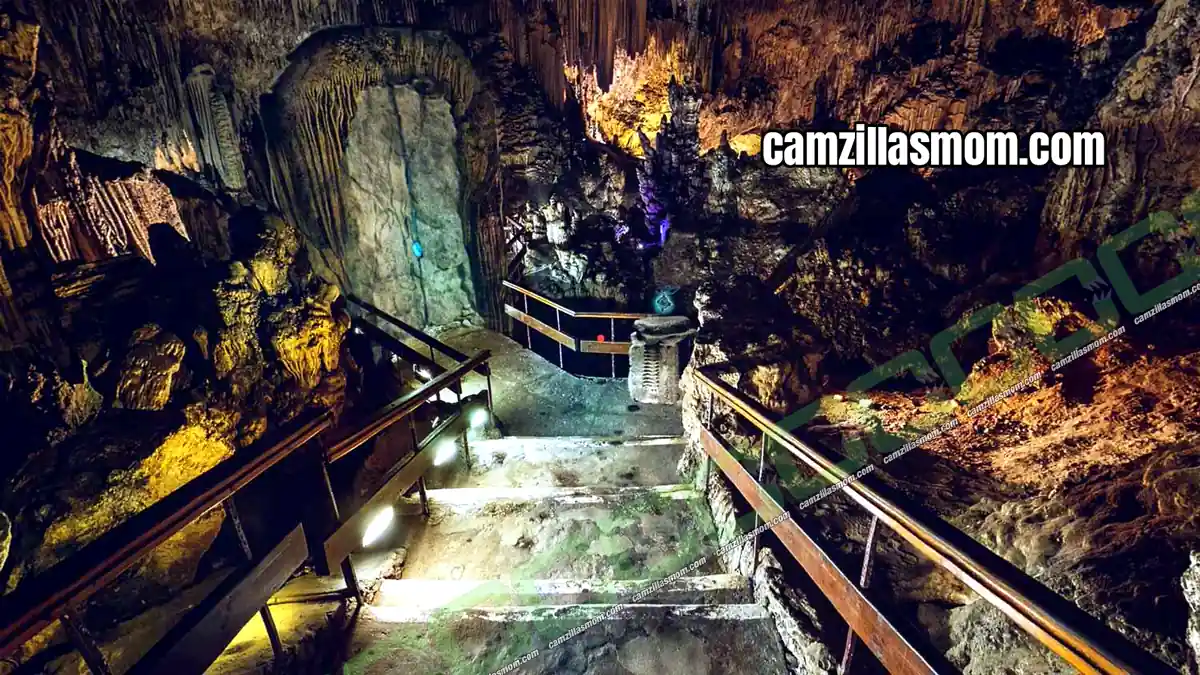
Use the Statue of Dagon on the pedestal to get the Amulet. Then use the Silver Key from Chapter 2 on the door next to it.
Chapter 11 – Christopher Black – The Bar
Christopher finds himself in an alley of an unknown town at night.
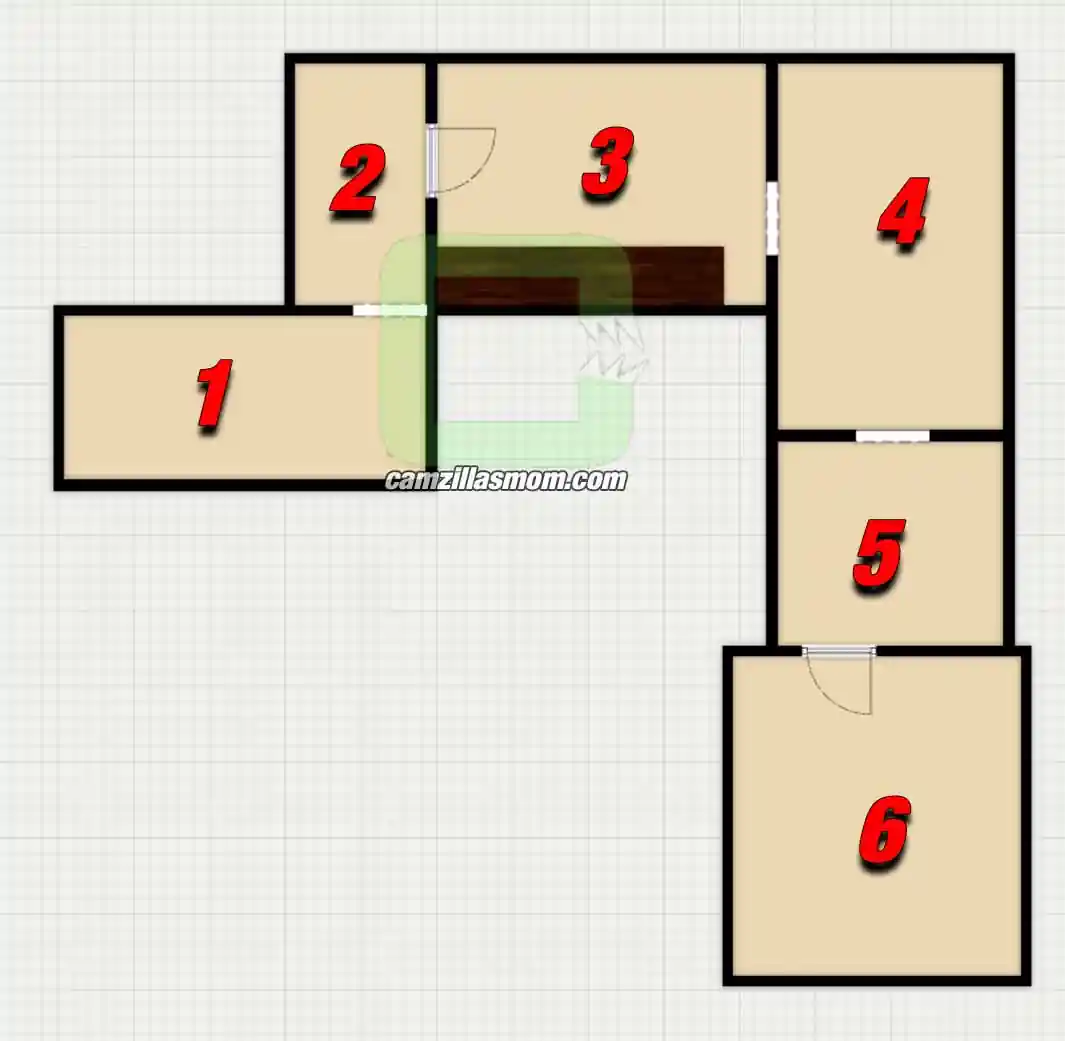
Town and bar floor plan:
1 – Empty Town Alley
2 – Stinky Back Alley
3 – Bar Entrance
4 – Center of the Bar
5 – Back of the Bar
6 – Employees Only
Empty Town Alley (1) – Toolbox
Christopher stands in front of a shop called La Puerta de Tannhäuser. Next to the red car parked in front of the shop is a toolbox. Open it and take the hammer and the glass pipette. Then take the path next to the shop.
Stinky Back Alley (2) – Acid for the Lock
Pick up the car battery. Open your inventory and combine the glass pipette with the car battery to get a glass pipette with acid.
Find the blue door in the alley and use the glass pipette with acid on the lock. Now you can go inside.
Bar Entrance (3) – Hidden Button
There is a button between the bottles on the bar. Push it, and you can go deeper into the bar, straight ahead from the entrance.
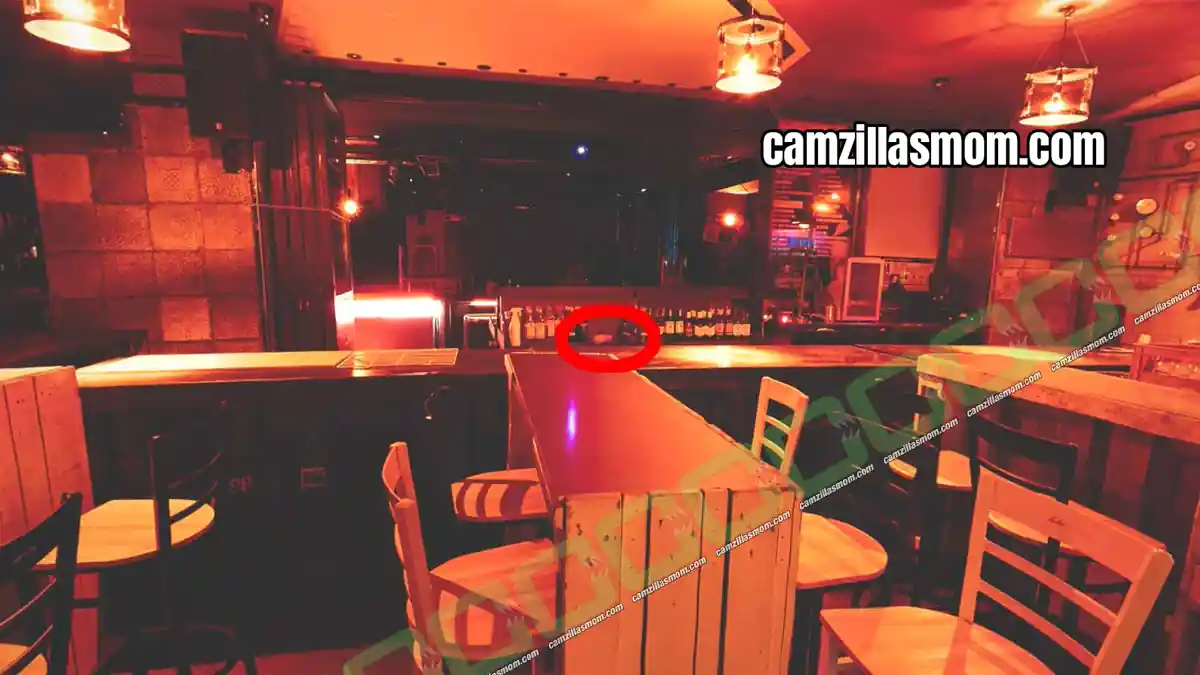
Center of the Bar (4)
Keep an eye on the posters on the walls here and at the back of the bar, as you need them later. At the back of this room, another path leads further in.
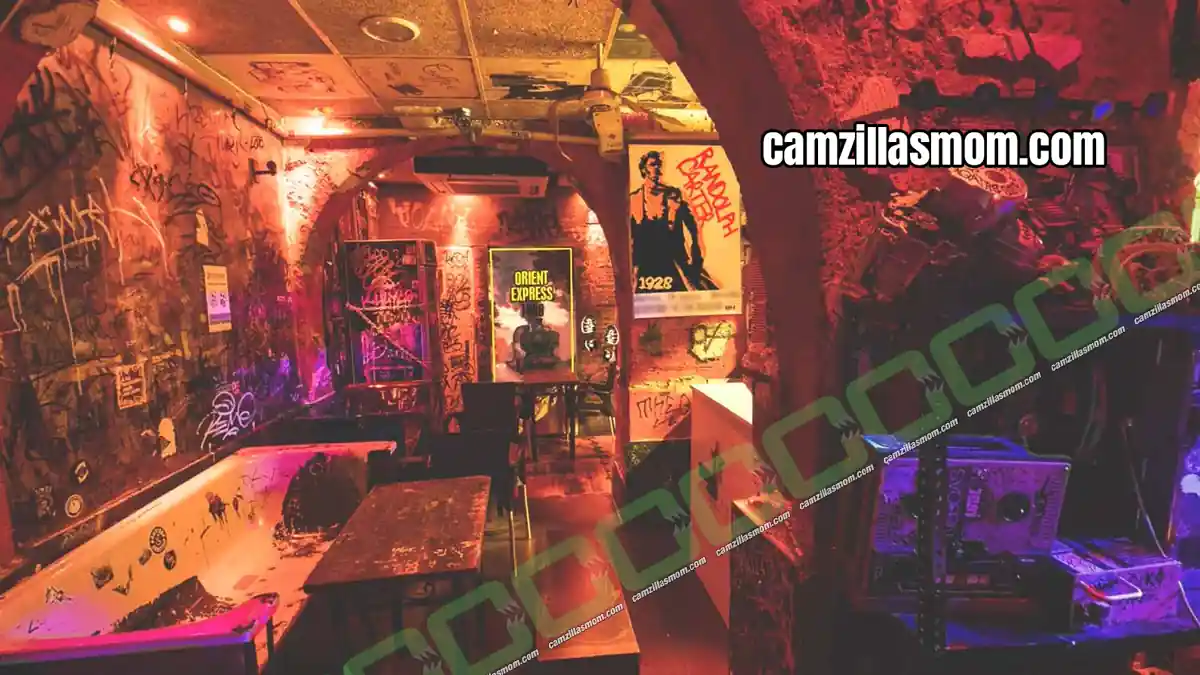
Back of the Bar (5)
Next to the video game station, the door with the red circle sign leads to the back office, Employees Only (6).
Employees Only (6) – Hidden Floor Safe
Notes: Book (on the table with the laptop), Report about Manson, Report about Archduke Franz Ferdinand of Austria, Report about Chernobyl
Look at the floor. It sounds hollow when you interact with it. Open your inventory and hit the floor with the hammer. This reveals a puzzle that needs five letters.
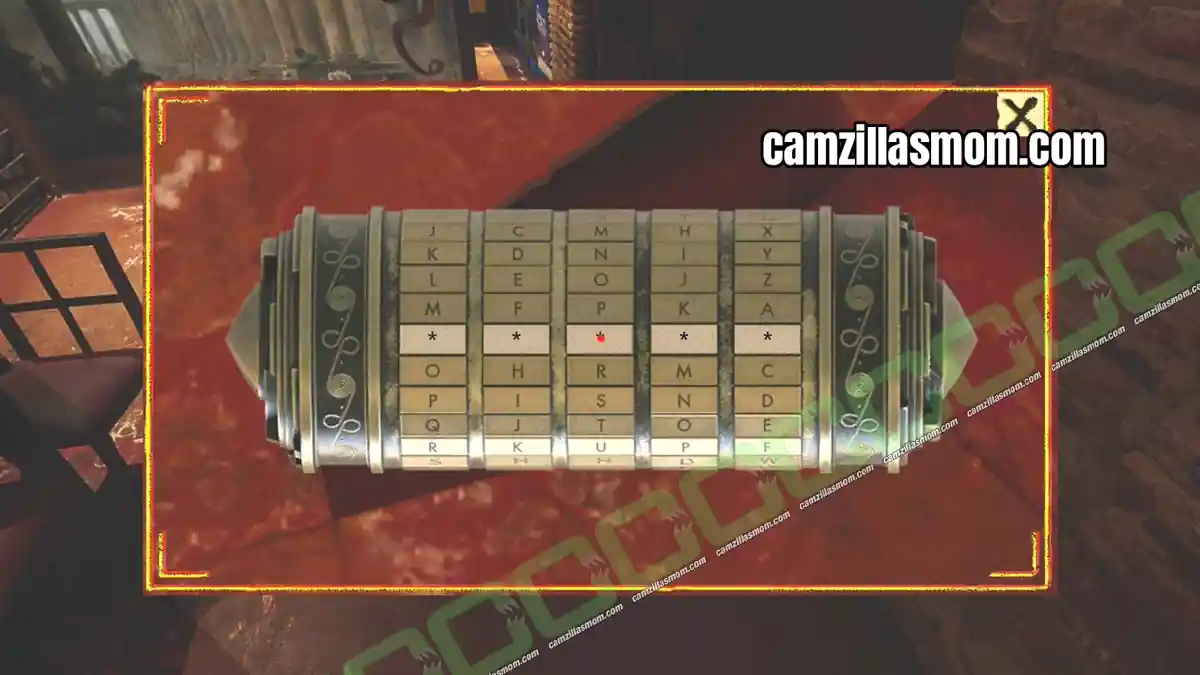
UV Poster Code – RIPHC
Hit the Party Mode button and go back into the bar. Everything is now in ultraviolet light, and one letter glows on each poster. Put the letters in order of the year on the poster, oldest first:
R – Orient Express (1888)
I – Elias Jackson (1925)
P – Randolph Carter (1928)
H – James Starkweather (1933)
C – Nameless City (2019)
Enter RIPHC in the floor puzzle.
Notes: Ritual to Keep Young, a paper with the coordinates 41.8286, -71.4052
Interact with the floor puzzle again to get the House Keys of Society. This finishes Chapter 11.
Chapter 12 – Christopher Black – The Truth Is Very Close
Christopher finds himself in the same forest Carter visited in Chapter 9. The cult house floor plan is the same, and this time Christopher only needs rooms 1, 2 and 4.
Forest and House (1) – House Keys of Society
Walk in the only direction possible. This time there is no security system to talk to, and the door is locked. Use the House Keys of Society on the door and enter the house. Inside is the same corridor with two doors: the kitchen on the right and the lounge on the left.
Lounge (2)
The secret bookshelf entrance is already open. Go through to the secret room (4).
Secret Room (4) – Mugshots
Take the document with the mugshots from the bench to start the backstory from 5 years ago, when Christopher met Carter.
Taking the mugshots ends the chapter. If you want every note, pick up the rest of the room first: News on the table, History of the Cult of the Sleeping God on the desk and The Ambrose Chambers Society.
Chapter 13 – Carter and James – The Nameless City
James and Carter are the main characters in the final chapter. You don’t need a floor plan here. Just follow the green glow, as you are meant to get lost.
The Nameless City – Follow the Green Glow
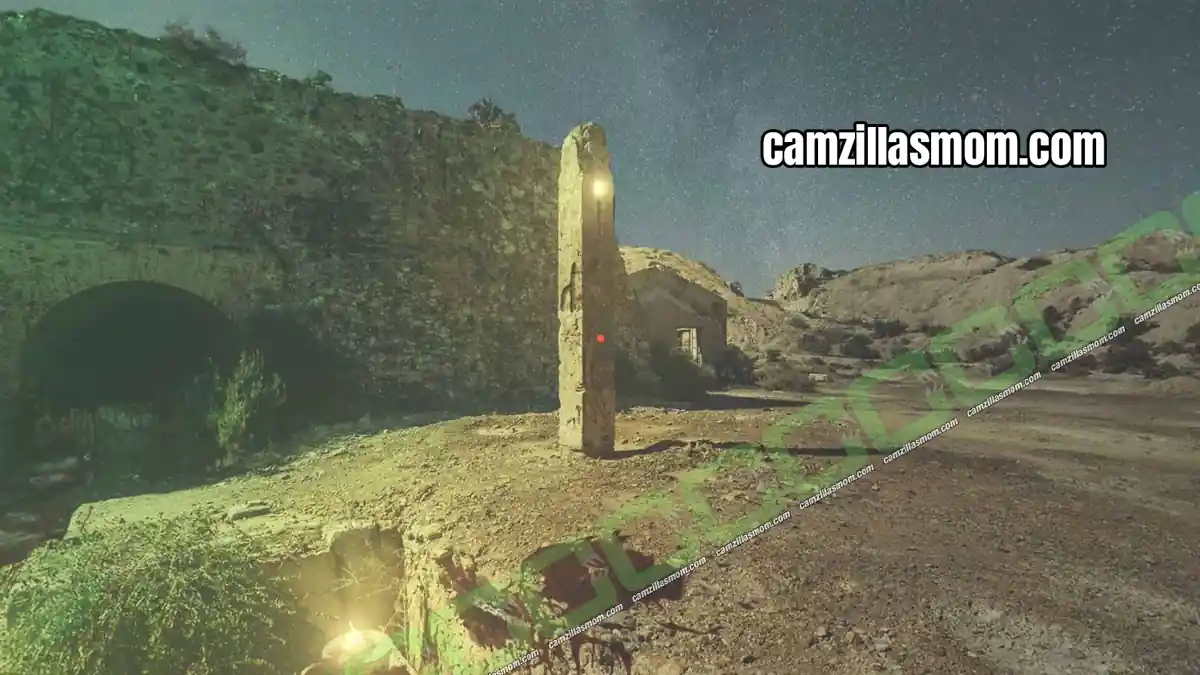
The chapter starts in the middle of nowhere, playing as Carter. Interact with The Nameless City sign to get the note Inscription, then walk towards the ruined church. In the ruins, it doesn’t matter where you go. Walk around and follow the green glow, like in the screenshot below, until you meet James.
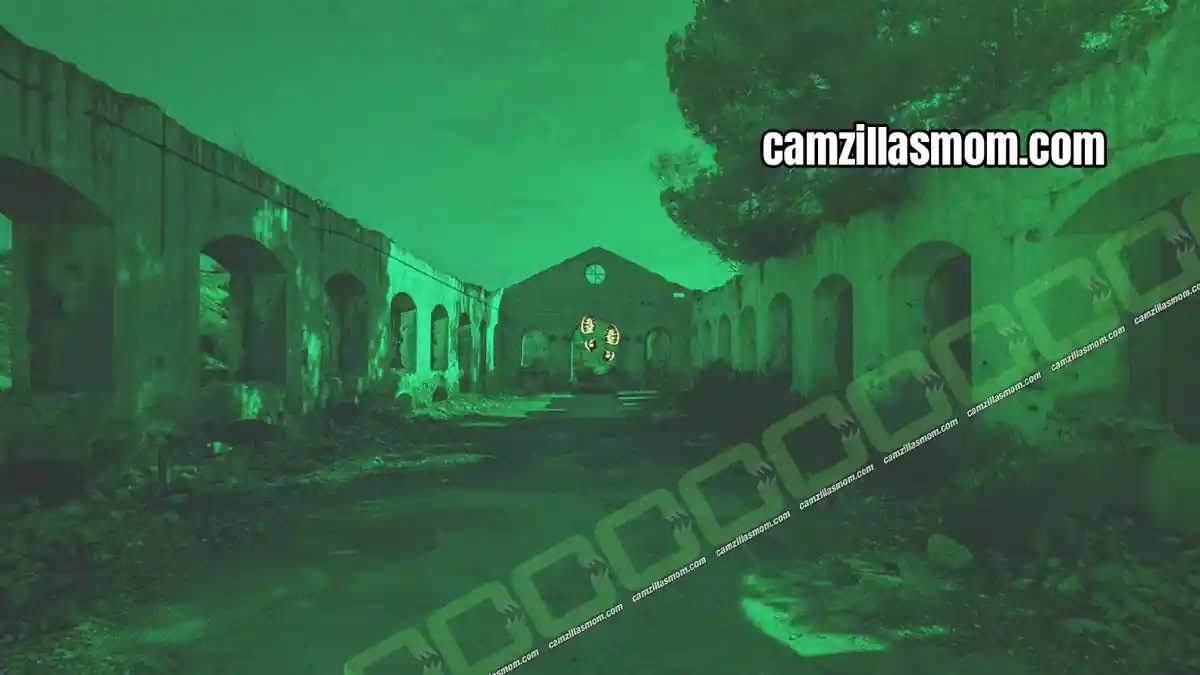
The Portal – Pieces of the Door
After the cutscene, you are at the portal, playing as Carter. Each pillar has an engraving for one of the Pieces of the Door in Carter’s inventory. Use the Pieces of the Door on the round hollow in the center of the portal, where the eye is.
Desolatium Endings – Scroll or Wallet
Next, the man with the mask arrives. Look at them, and after the cutscene IDH-YAA is standing behind you.
Which ending you get depends on the item you use at the door and on whether Sophie is still alive:
Savior: Sophie is alive and you use Horrible Withering of the Soul from Chapter 7
Martyr: Sophie is dead and you use Horrible Withering of the Soul
Awaken: You use the Leather Wallet from Chapter 1
Talk to IDH-YAA to see your ending. The End.
For more guides, head to the Games Index.


About Desolatium
Release: October 27th, 2023
Developer: Superlumen
Publisher: Soedesco
Official Website: https://desolatium.com/