
Explore every corner of the Terminus District in Borderlands 4 with this detailed guide. Uncover ECHO Logs, Vault Symbols, and other collectibles, while tackling side missions and activities. With clear maps and step-by-step instructions, this guide is your ultimate companion to mastering this region.
MORE DOMINION GUIDES
Carcadia District
Fades District
Upper Dominion
-> More Borderlands 4 Guides at the Hub
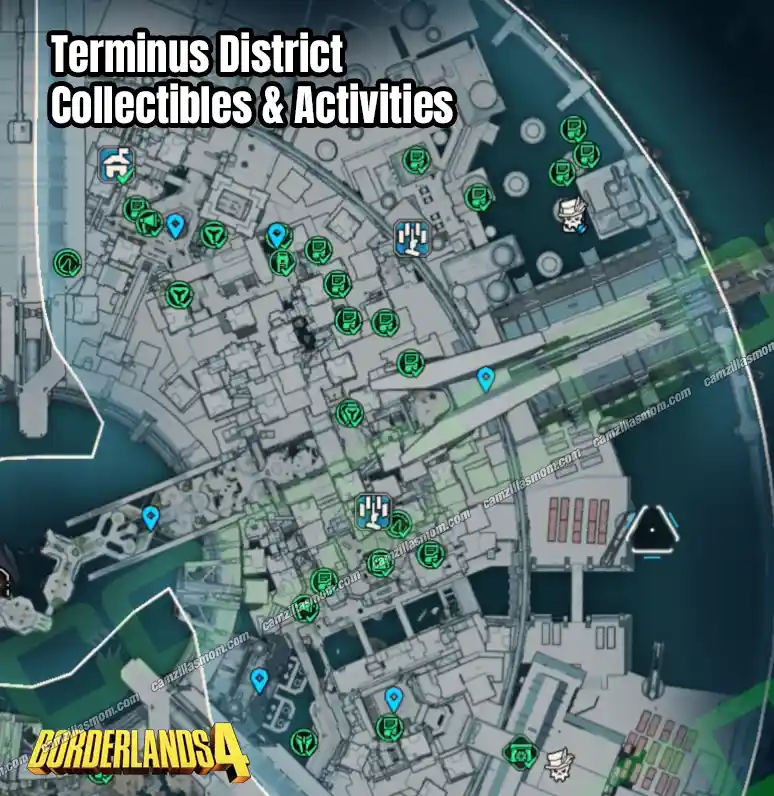
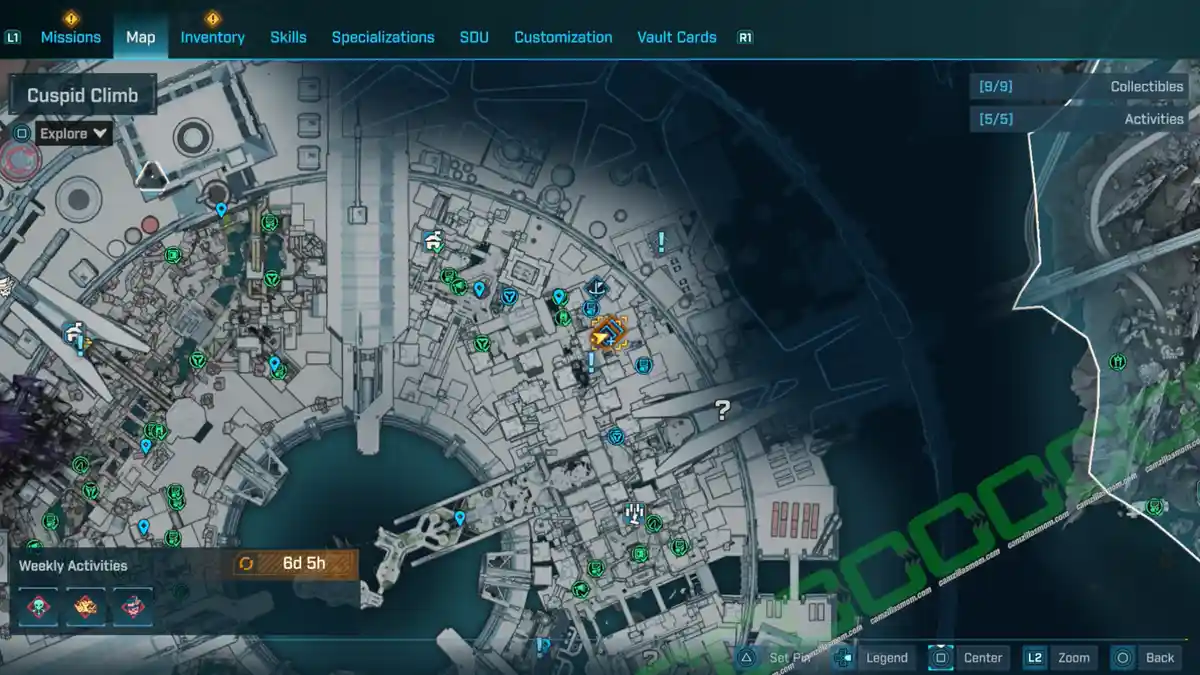
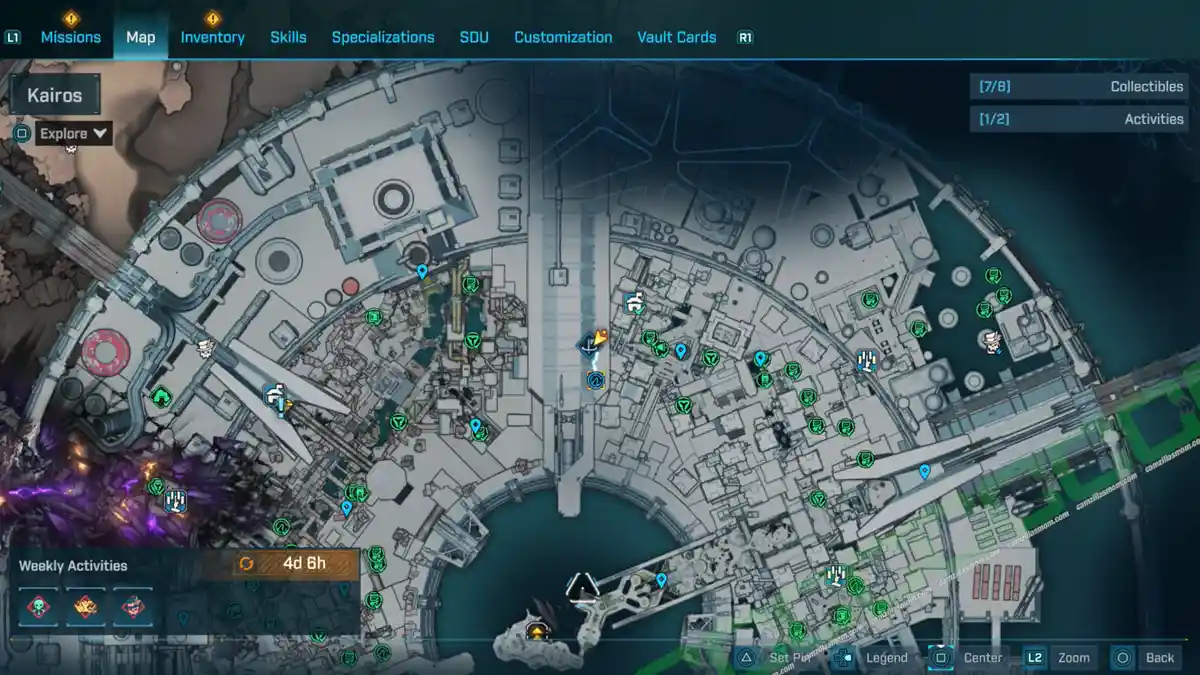
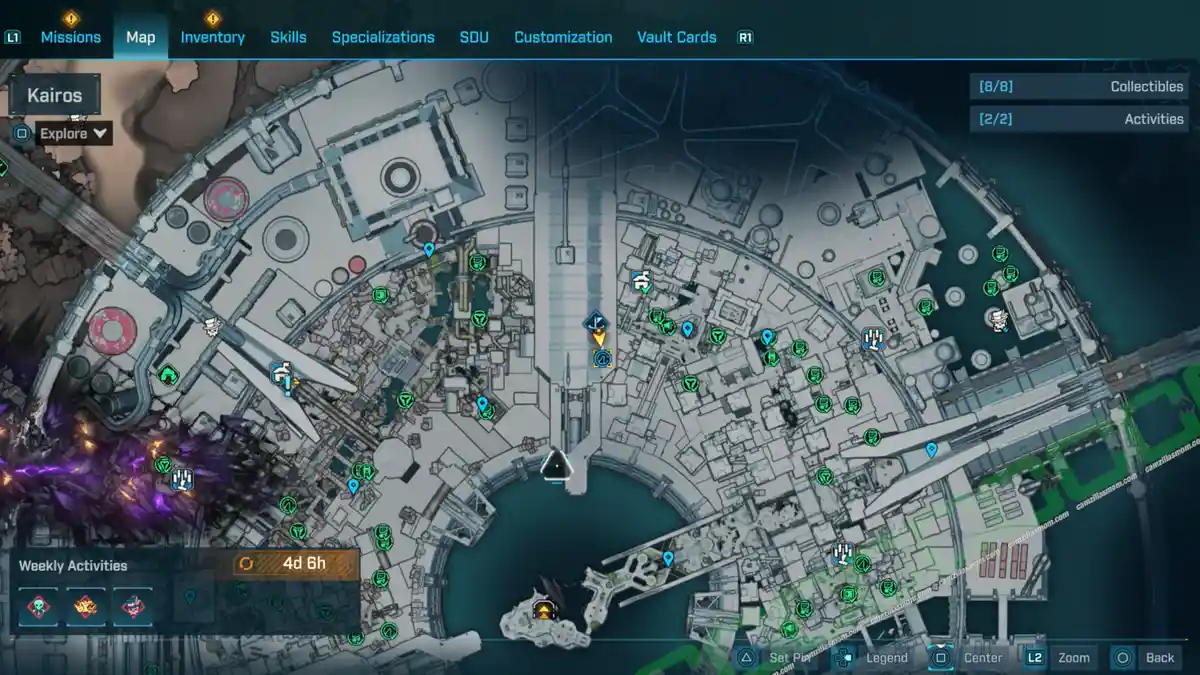
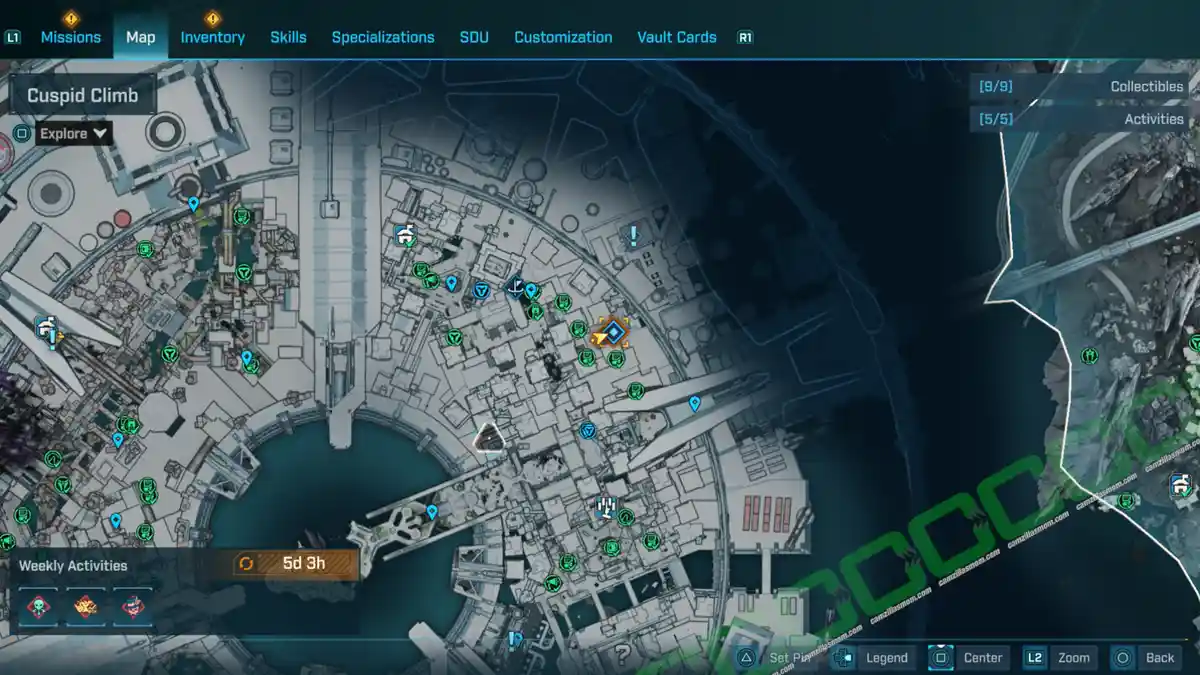
Terminus District Overview Map
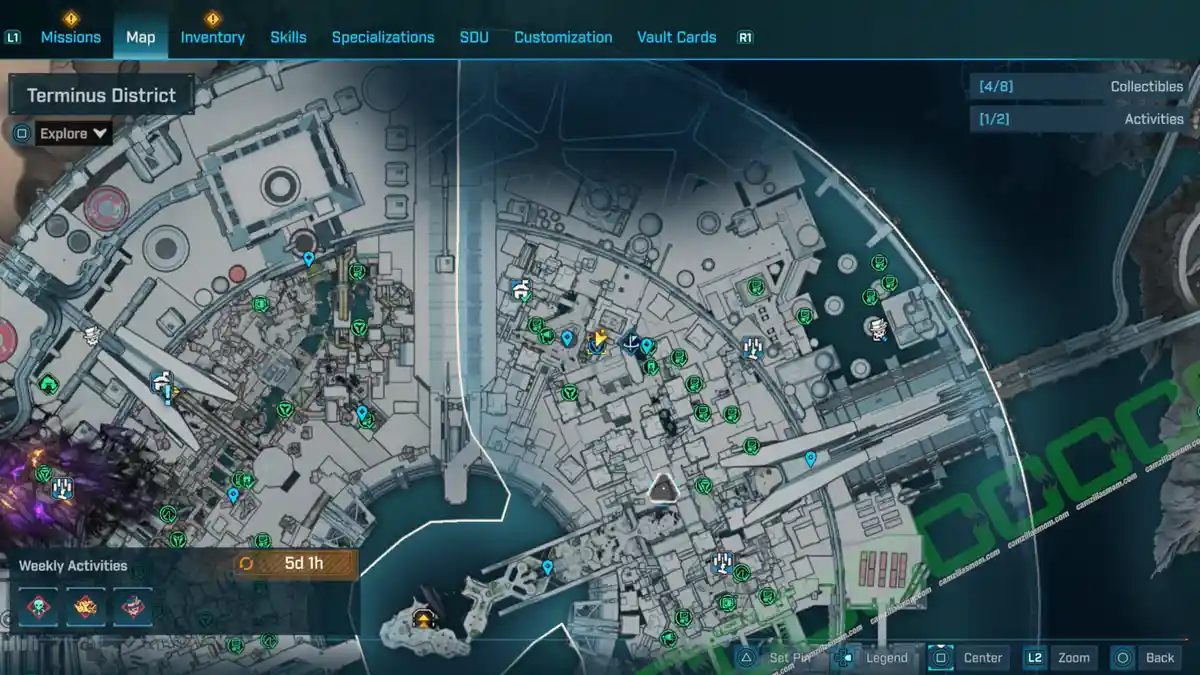
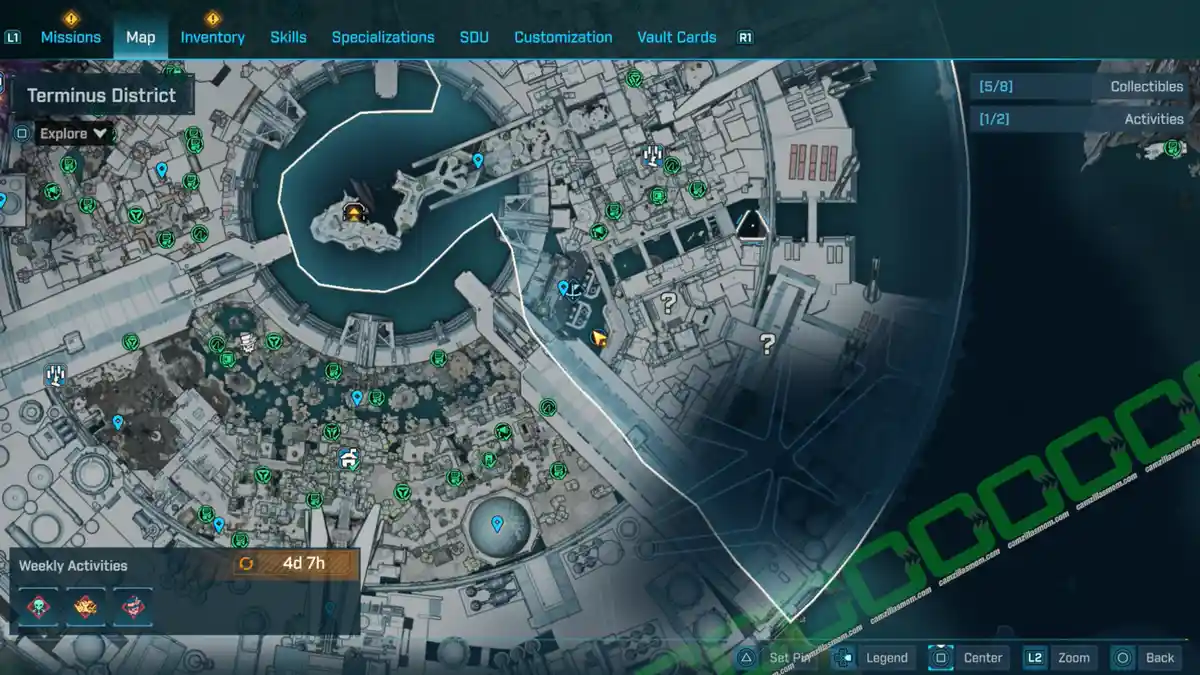
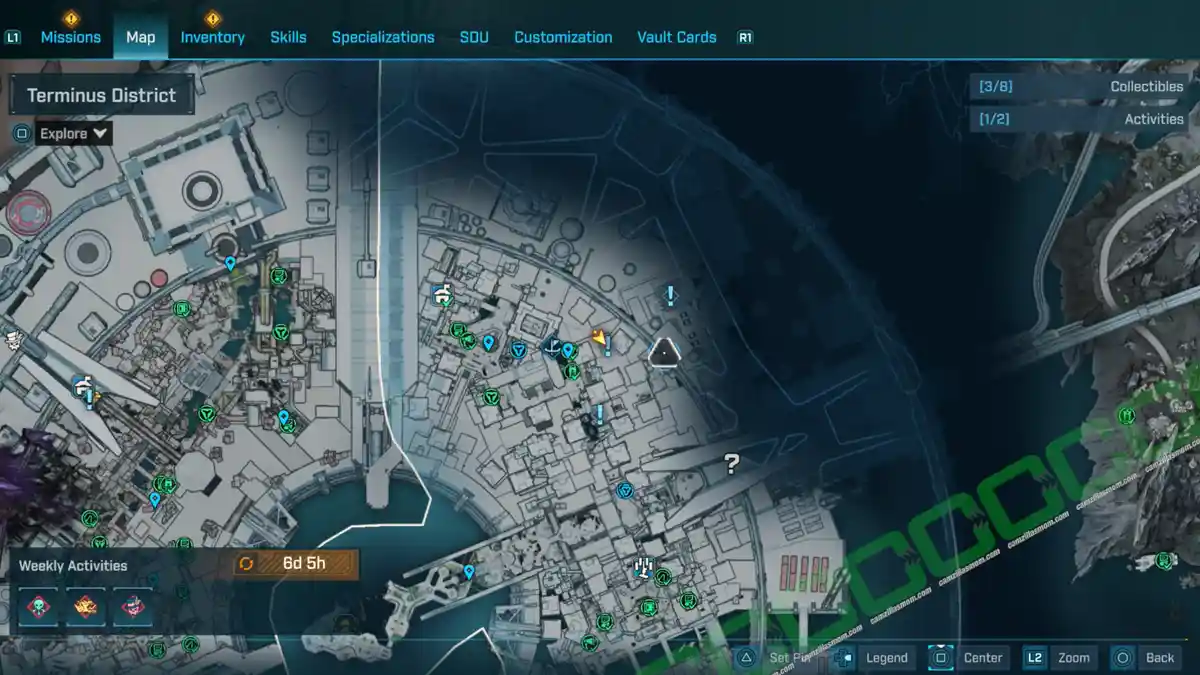
Below is the Terminus District Overview Map, which includes all collectibles and activities.
Terminus District POI’s
The Terminus District has six POIs – Points of Interest – on the map, marked with a blue pin. Below you will find all the POIs highlighted on the map.
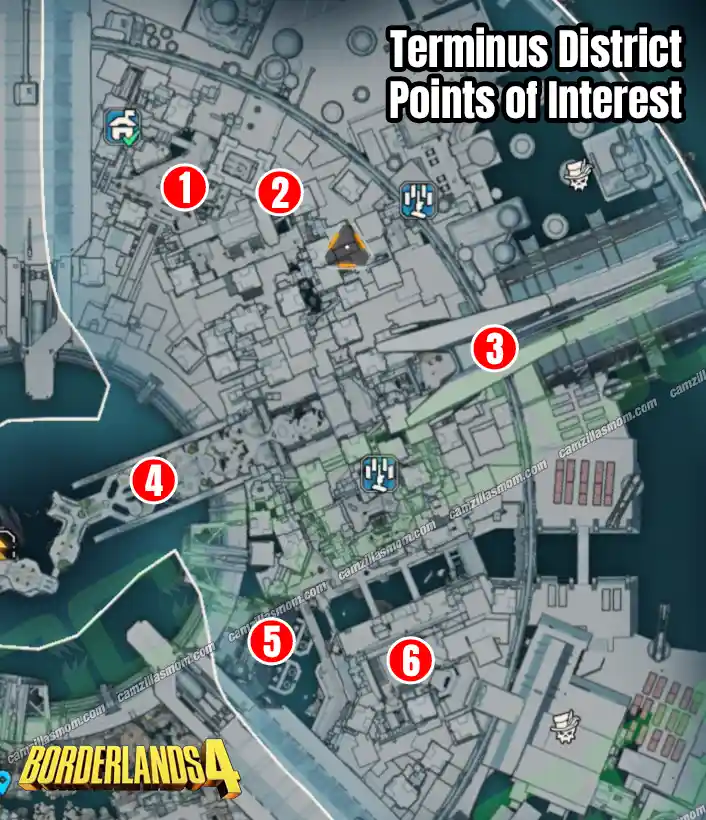
1 – One Kairos News Network
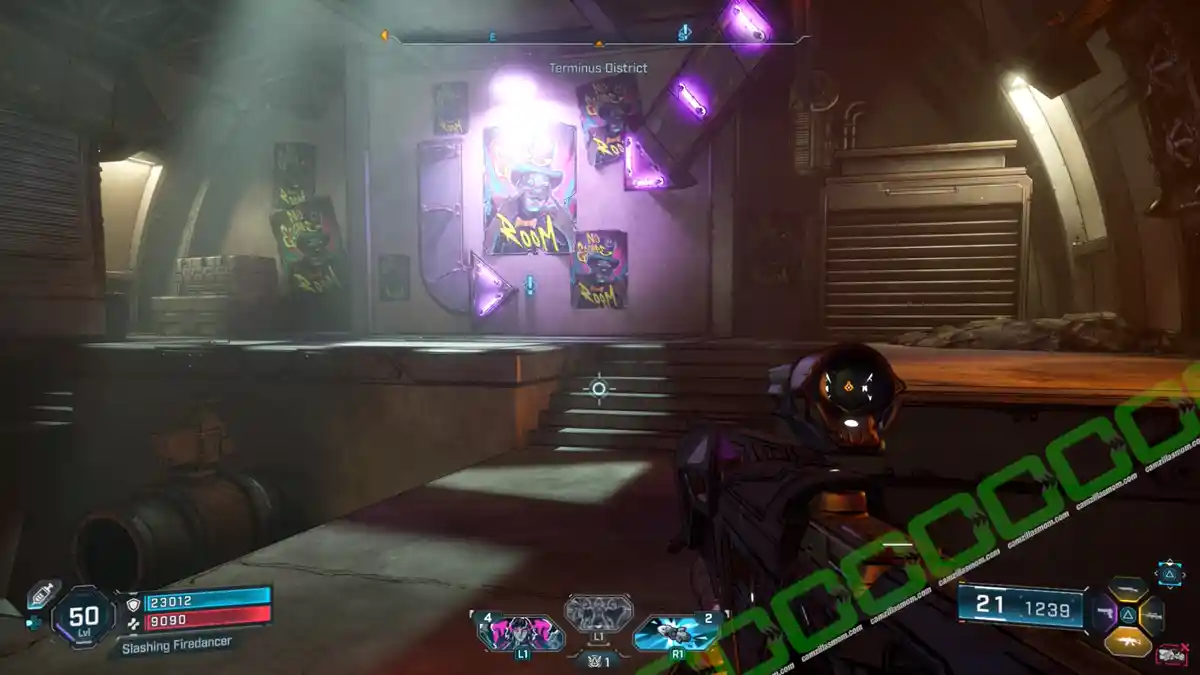
2 – No-Escape Room
3 – Tempered Manufactorium
4 – Ascension Plaza
5 – The Dunk
6 – Praetor’s Lecture
Collectibles
Vault Hunter’s Guide to Kairos – 1
In the center of the Terminus District map, between Ascension Plaza and Tempered Manufactorium, is a man who is wearing the Vault Hunter’s Guide to Kairos: Vault Hunting on his head.

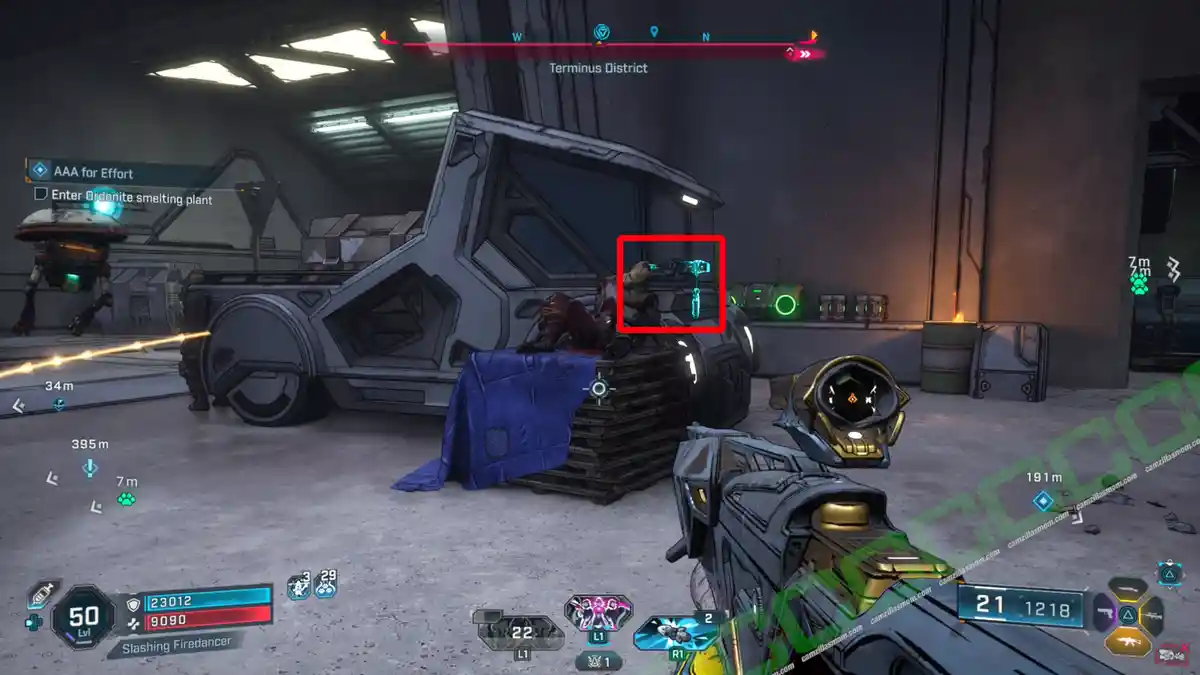
Description:
“Arjay contemplates life as a Vault Hunter.”
-> Also available: Guided Tour – All 12 Vault Hunter’s Guides
ECHO Logs – 14

-> Also available: Kairos Speaks – All ECHO Logs
1 – Propaganda Rehearsals
The ECHO Log is near the One Kairos News Network Propaganda Speaker, on a bench.
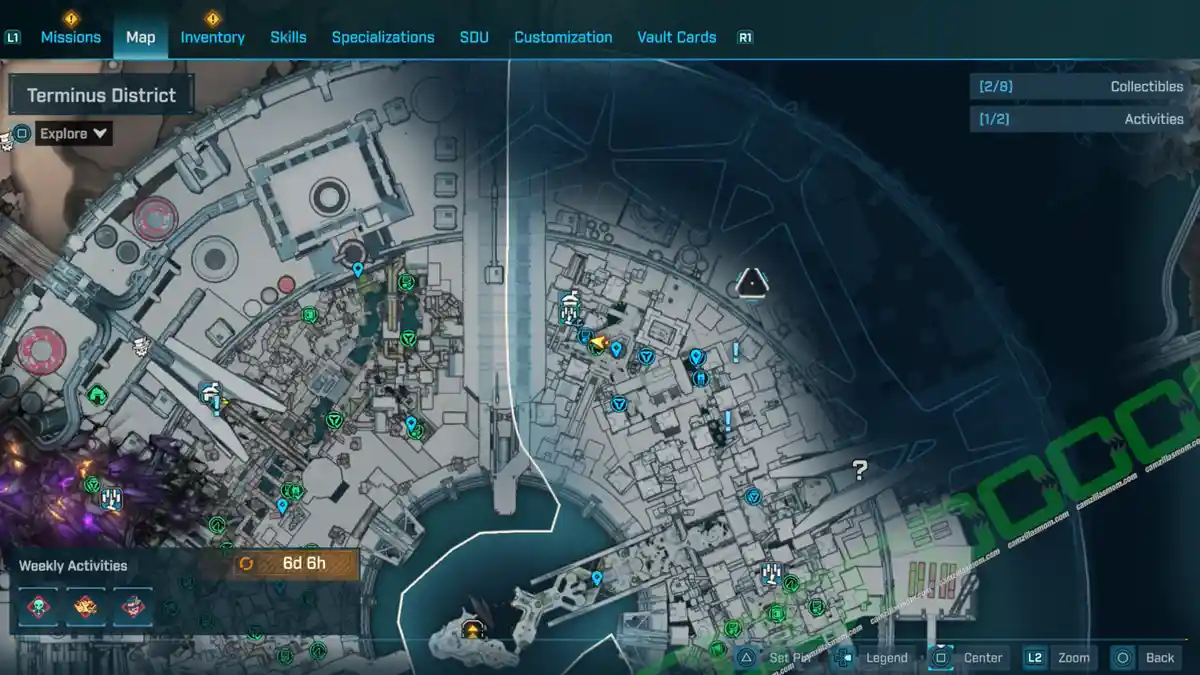
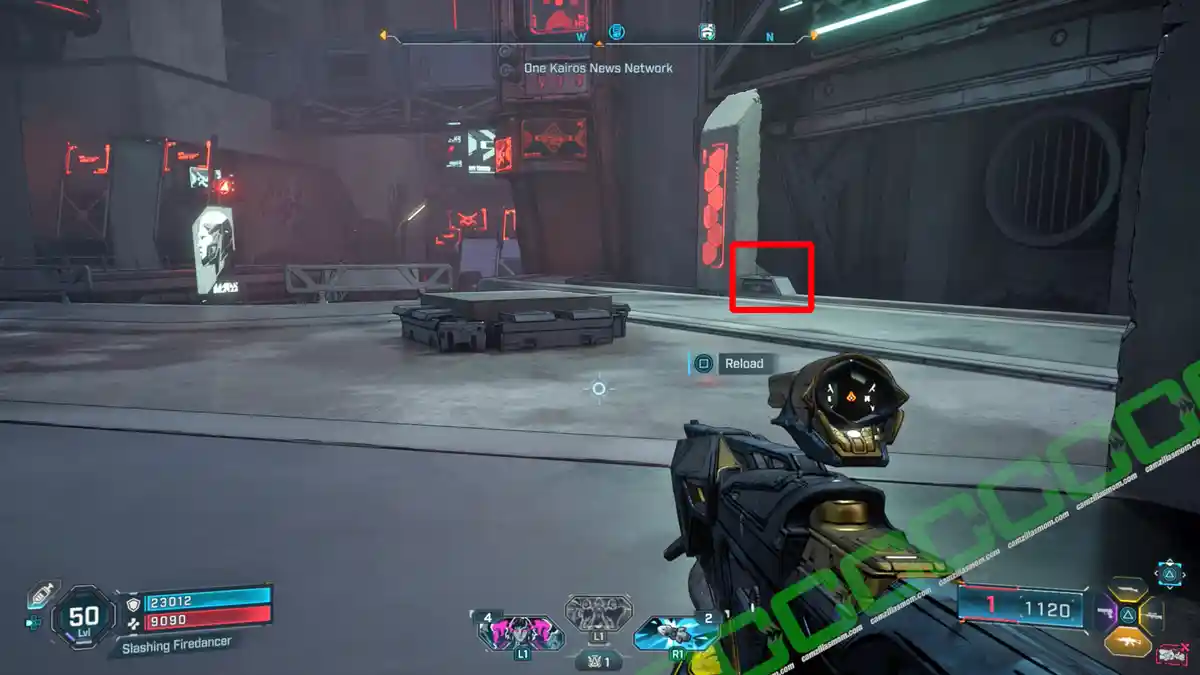
Description:
“Did you think this stuff writes itself?”
2 – DO NOT LISTEN! Solution 1
In the first room of the No-Escape Room Side Mission, there is an ECHO Log at the back of the garbage pile.
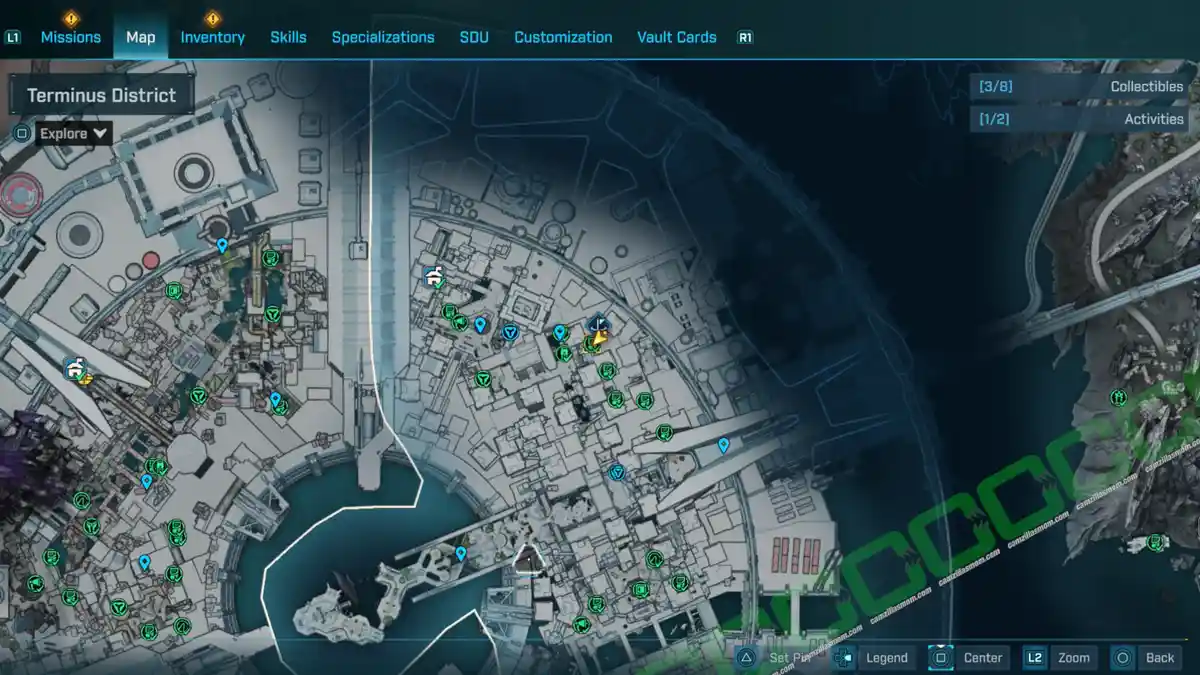
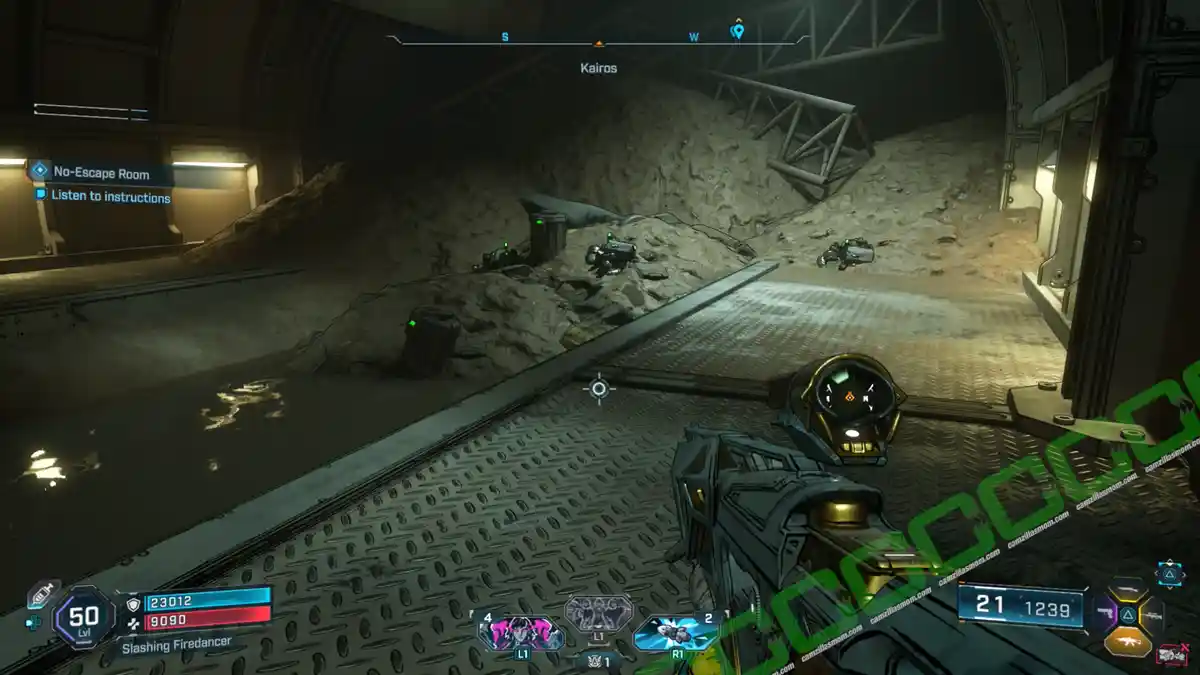
Description:
“Which door?”
3 – DO NOT LISTEN! Solution 2
In room two of the No-Escape Room Side Mission, there is an ECHO Log down in the grinder.
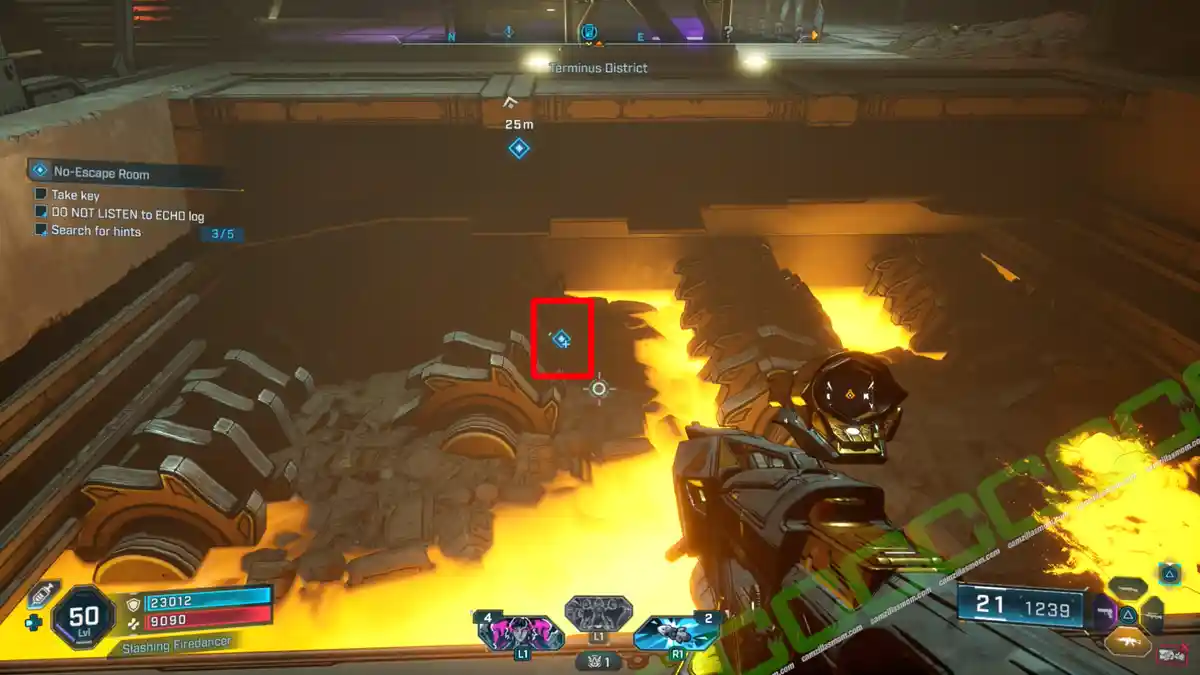
Description:
“What order?”
4 – DO NOT LISTEN! Solution 3
In the third room of the No-Escape Room Side Mission, you need to cross a maze. The correct way would be to follow the carrots on the floor. Instead of going left at the maze entrance, go right to find this ECHO Log.
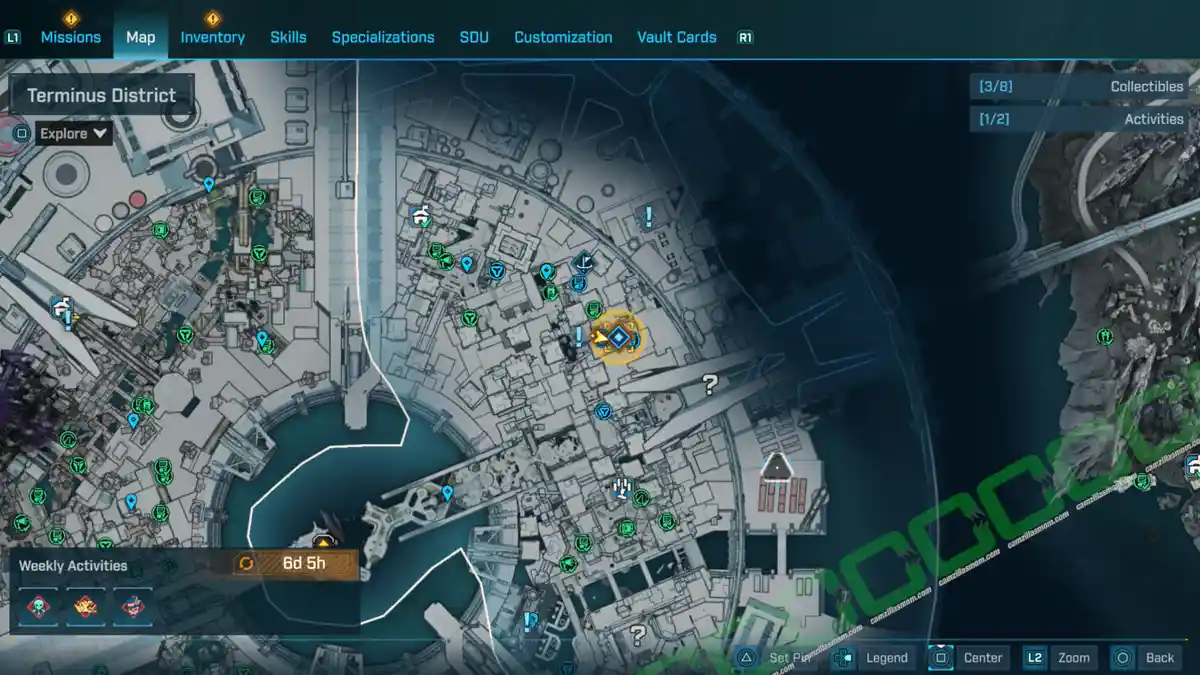
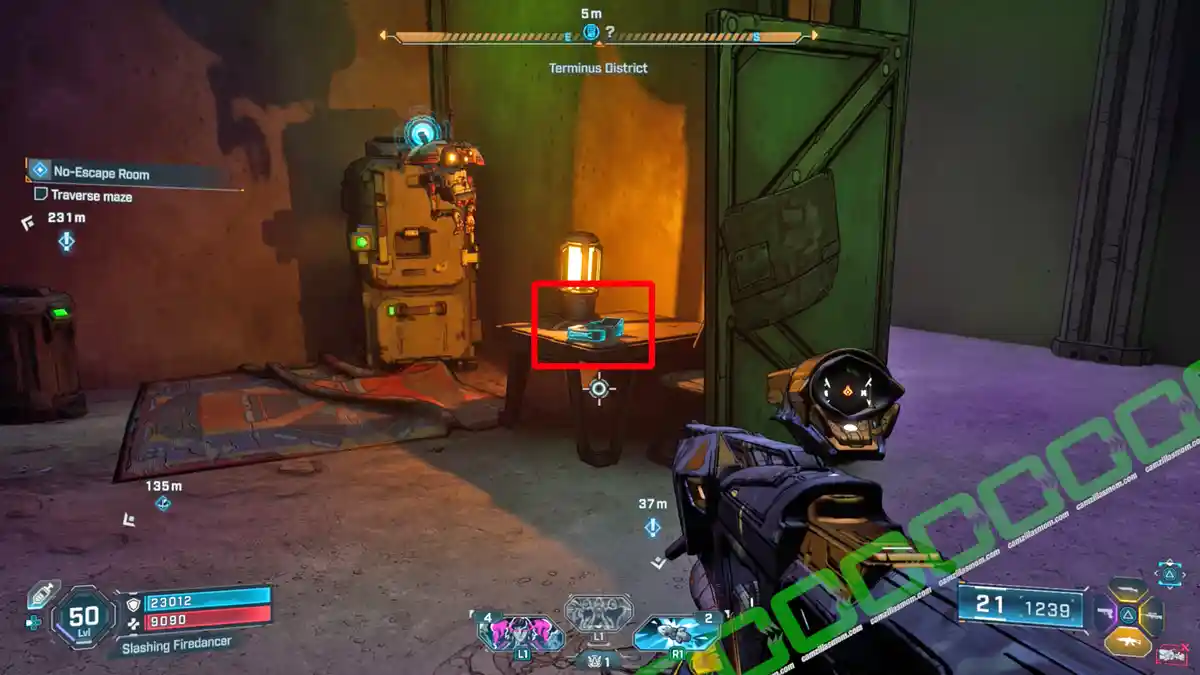
Description:
“What direction?”
5 – No Escapes Means No Escapes
Still in the No-Escape Room Side Mission, follow the carrots through the maze. Halfway, you will find this alcove with an ECHO Log.
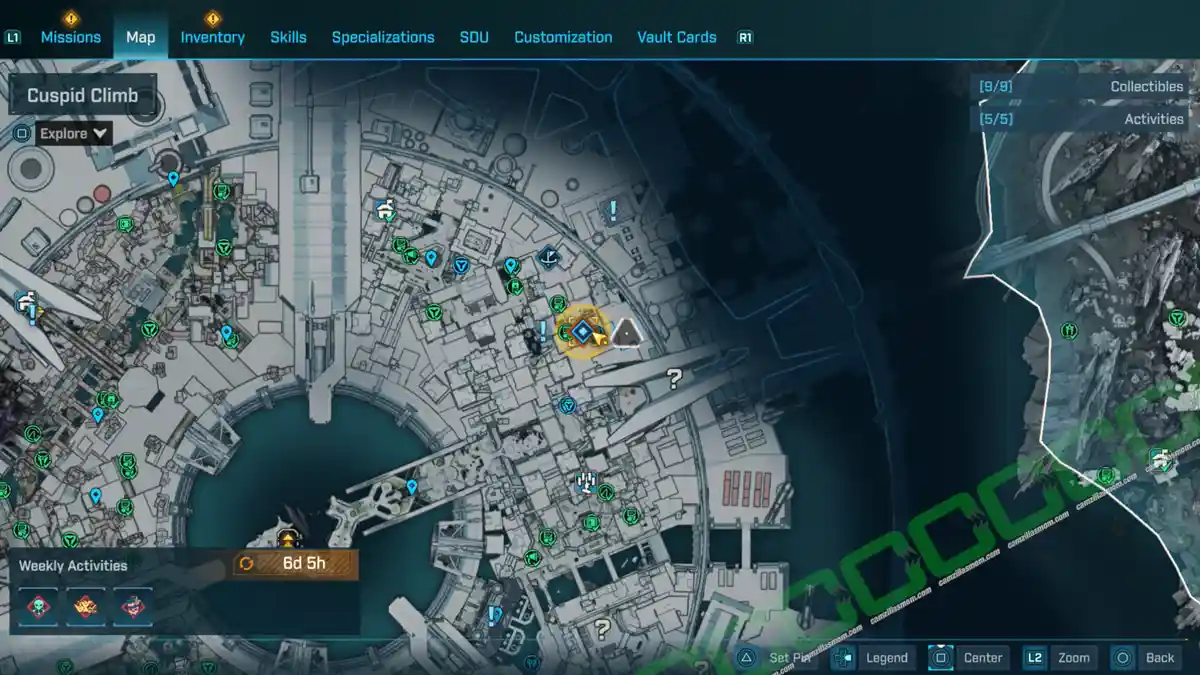
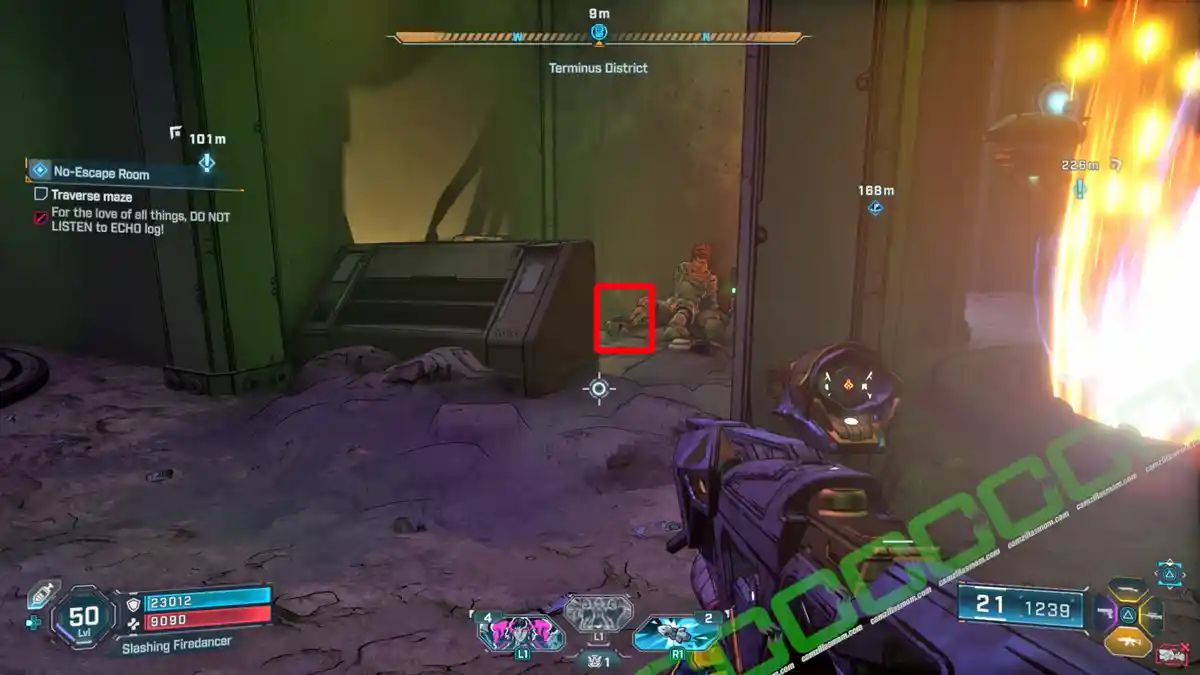
Description:
“Always read the fine print.”
6 – DO NOT LISTEN! Solution 4
Towards the end of the No-Escape Room Side Mission, make your escape after confronting the Smiling Man. In the exit room is another ECHO Log.
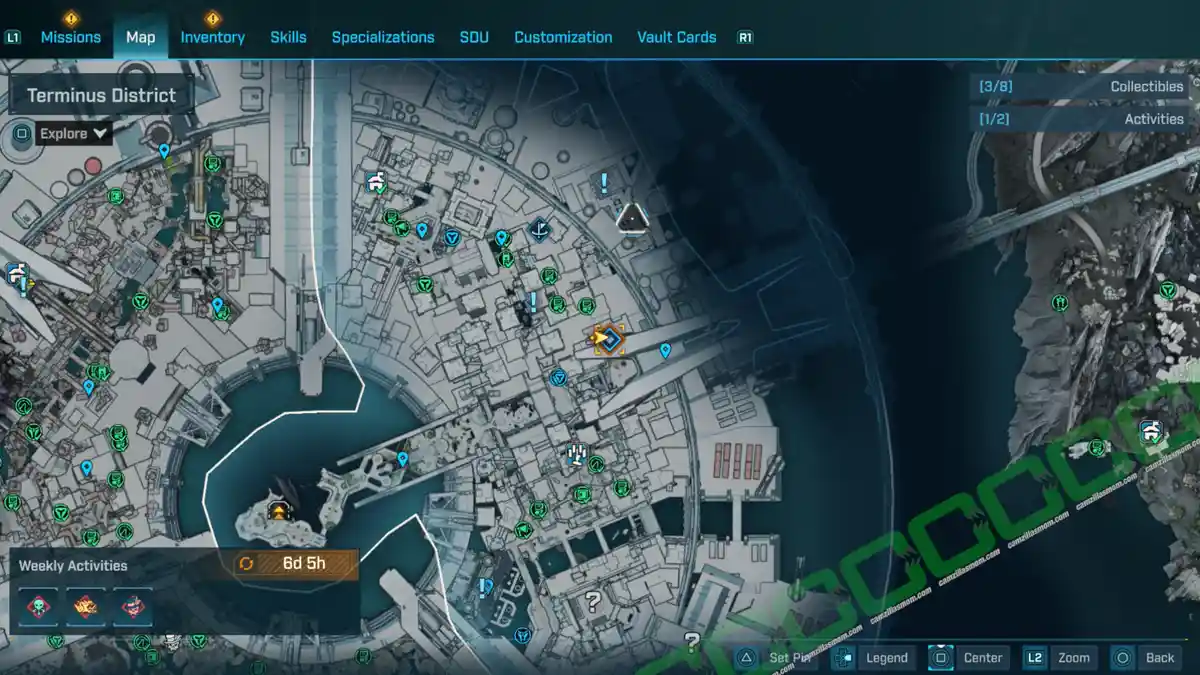
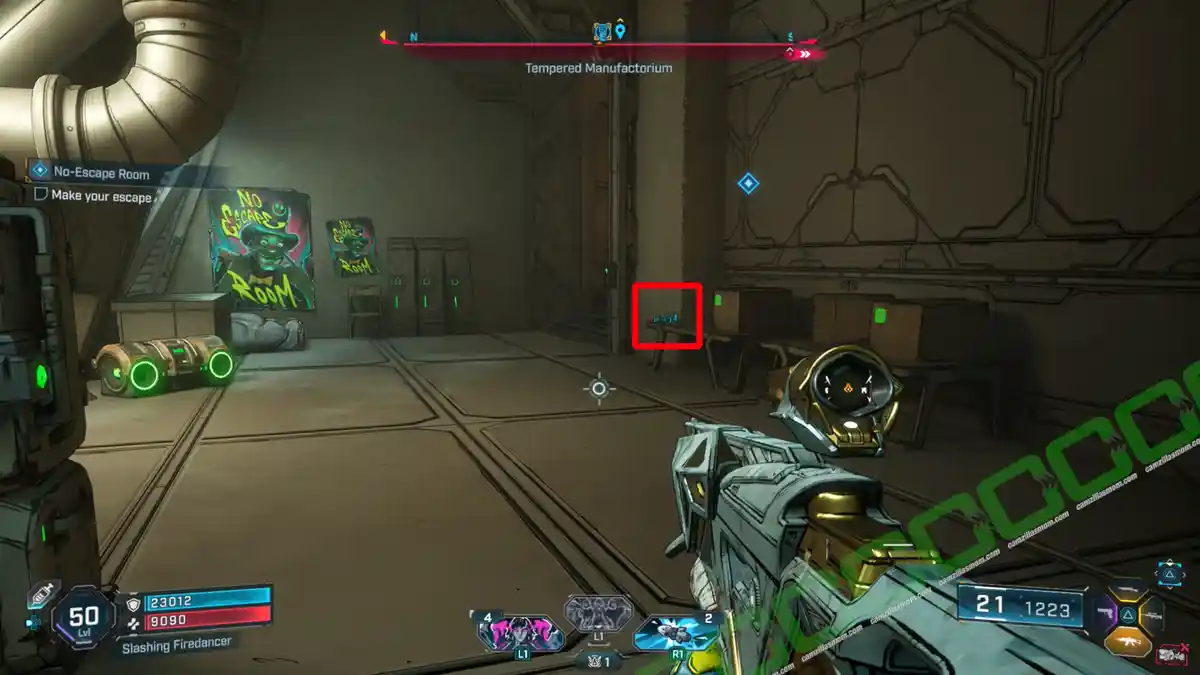
Description:
“Which exit?”
7 – Parting Gifts
This Log is in the same room as the start of the Side Mission: AAA For Effort. Follow the mission to make the mech depart at the end. When the mech is gone, use the nearby lever to open the hatch to get the ECHO Log.
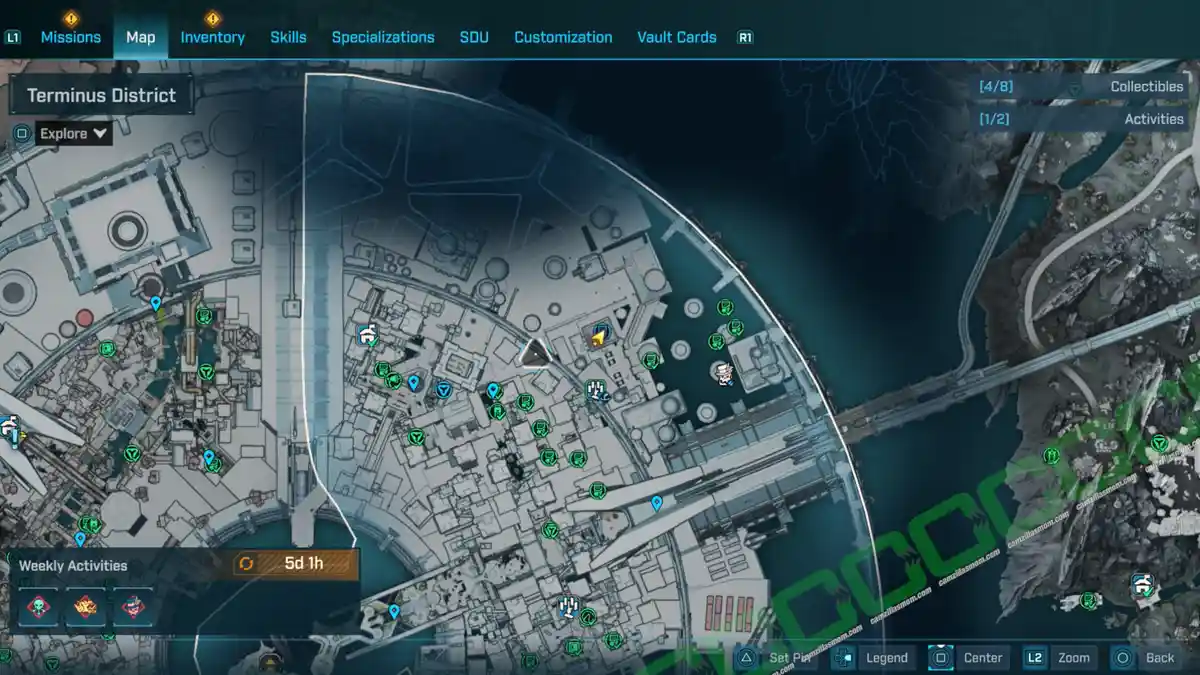
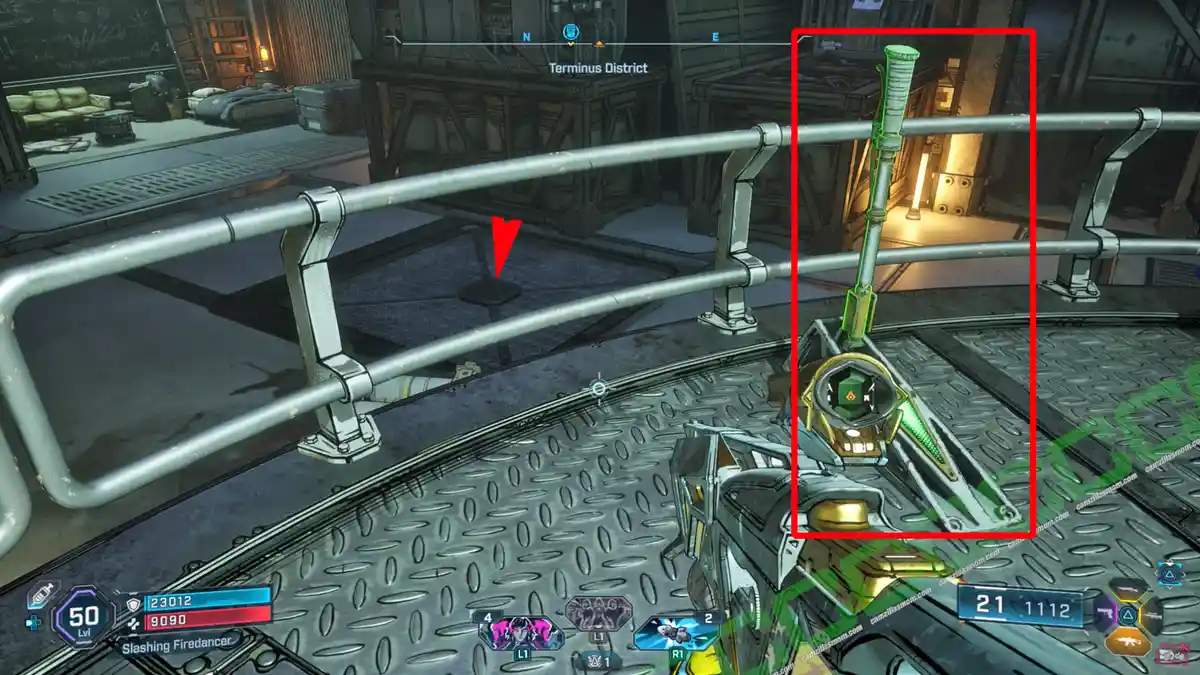
Description:
“One man’s trash…”
8 – PF94_Self-Observation Record 4
Pick up the Side Mission “Below the Surface” and follow the mission until you have to reach the lab and listen to five logs. This is the first log, right after climbing up the ladder from the waterlogged corridor.
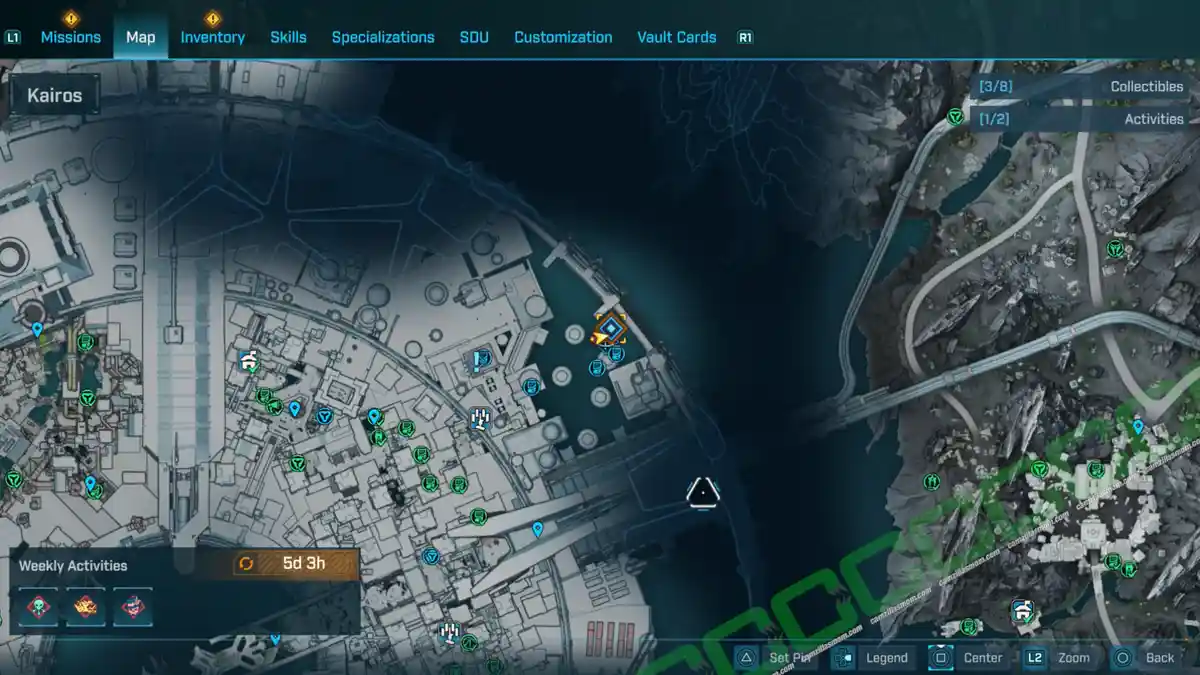
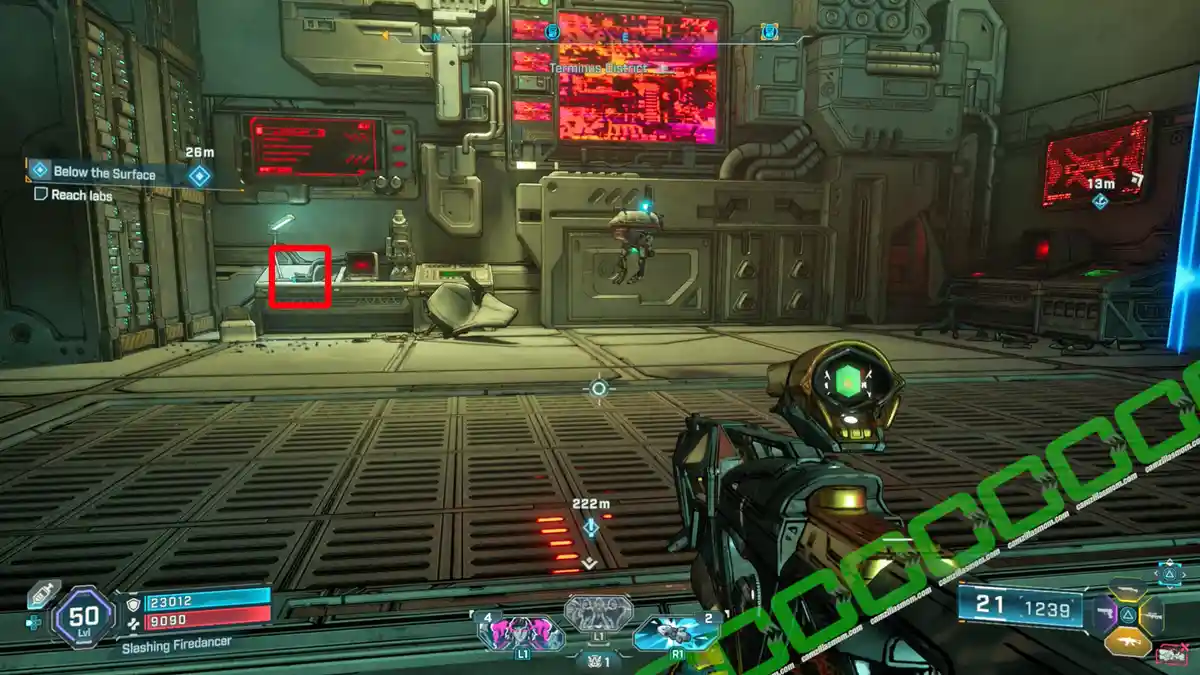
Description:
“Subject experiencing increasing anxiety and paranoia.”
9 – PF94_Self-Observation Record 7
Exit the previous ECHO Log’s room in the Side Mission “Below the Surface”, and follow the corridor, where you can advance by crawling through a ventilation shaft. In this section is a small cafeteria with a restroom. In the cafeteria, you can pull off a vent cover to crawl to the next room, where you will find this ECHO Log.
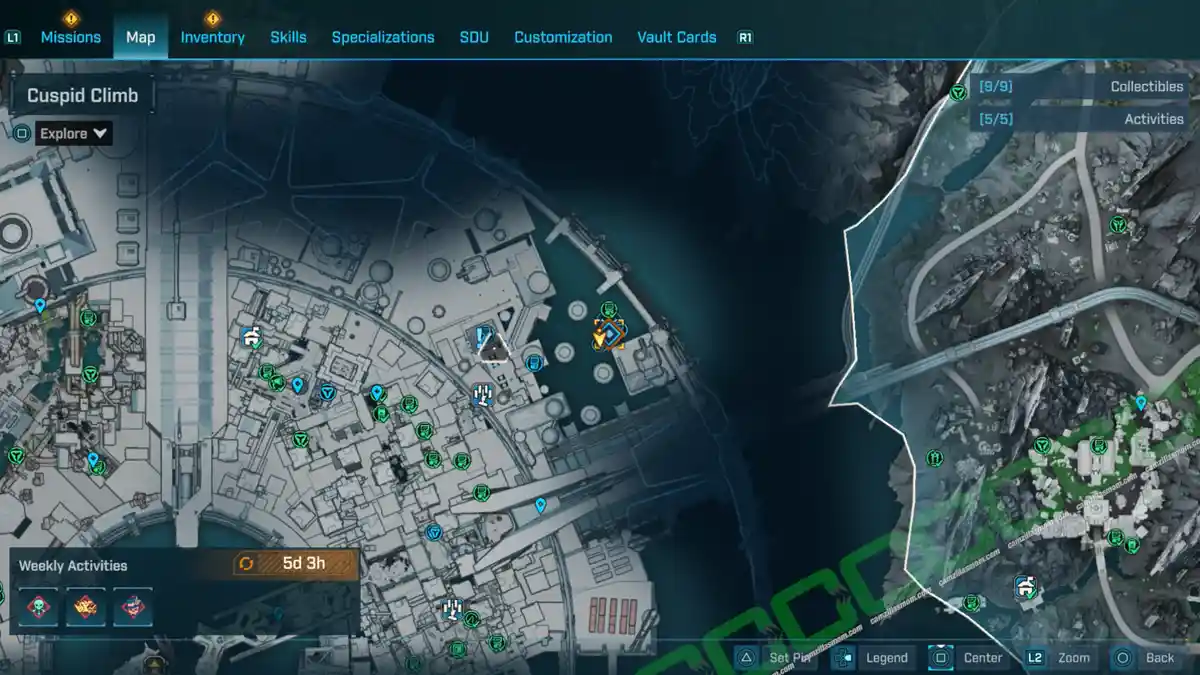
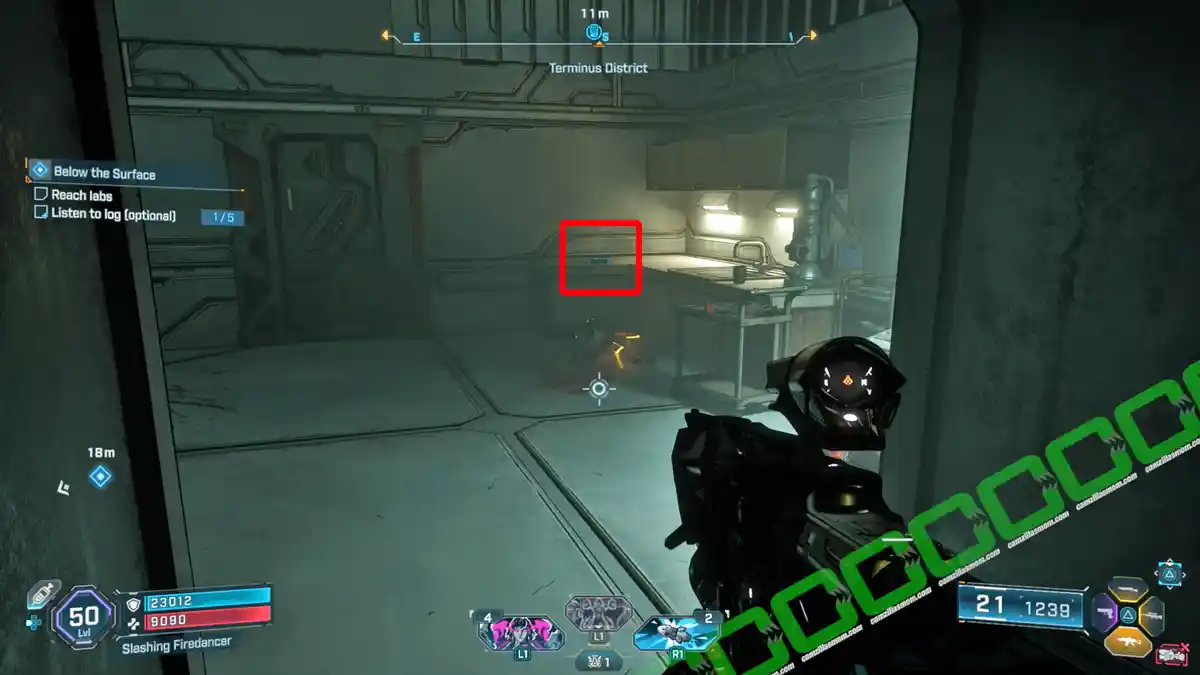
Description:
“Subject experiencing minimal side effects during testing.”
10 – PF94_Self-Observation Record 124
Still in the Side Mission “Below the Surface”, exit the previous ECHO Log’s room and follow the corridor, where you can advance by crawling through a ventilation shaft. In this section is a small cafeteria with a restroom. In the cafeteria, you can pull off a vent cover to crawl to the next room, where you will find this ECHO Log.
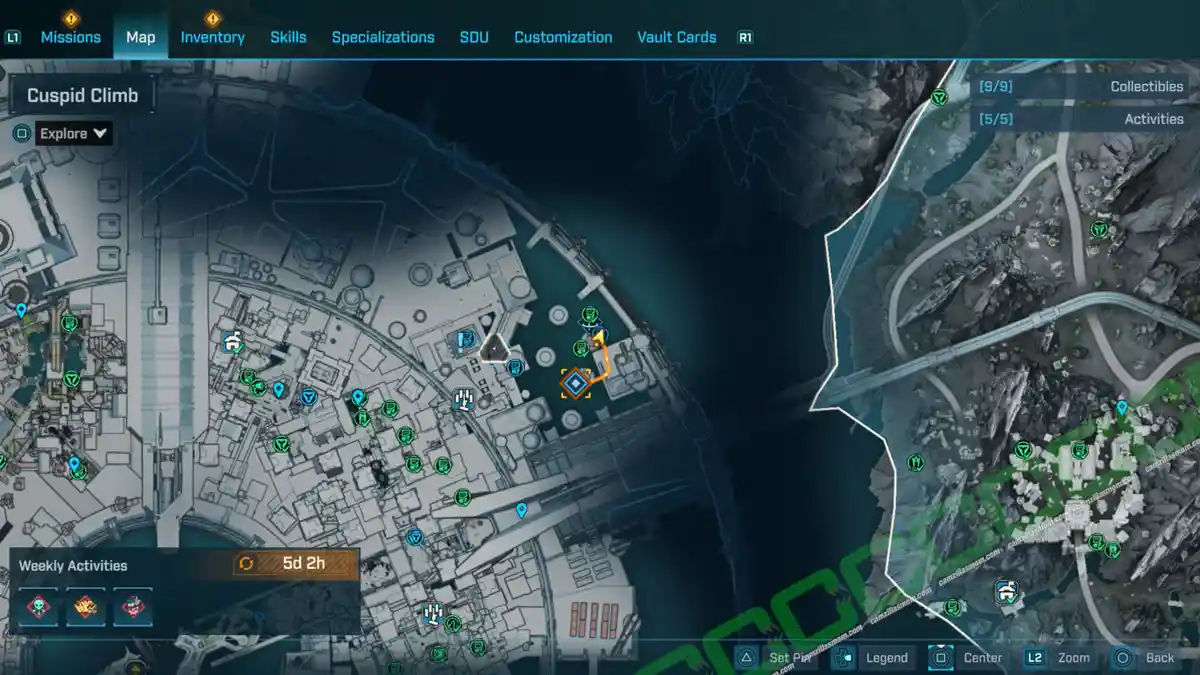
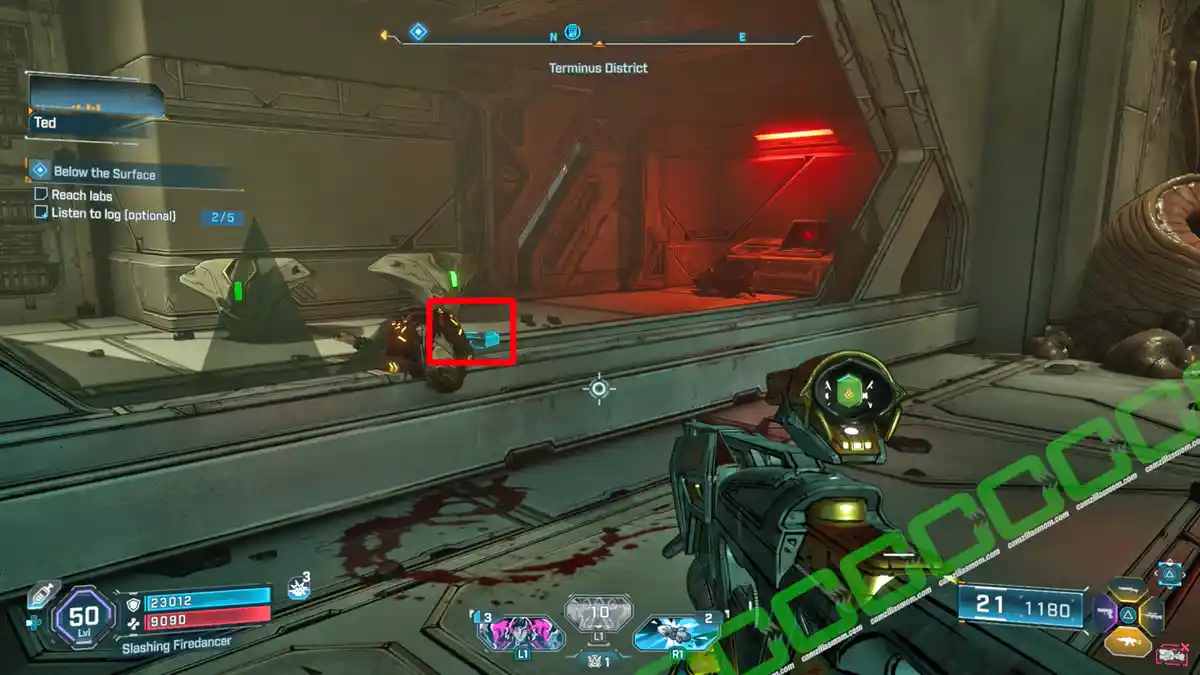
Description:
“Side effects continue to be minimal.”
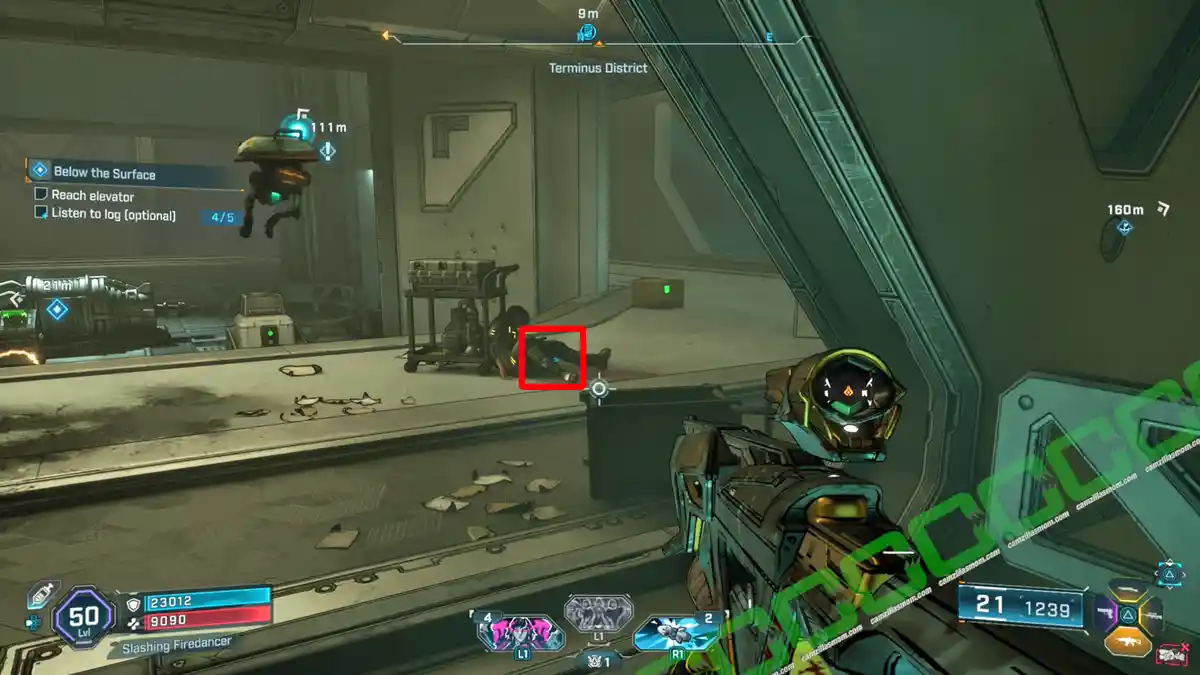
11 – PF94_Observation Log-EX1710
At the end of the Side Mission “Below the Surface”, you will have to defeat CorrupTed. He will drop an ECHO Log, which is not one of the region’s collectibles. After the fight, follow the ground floor corridor to the elevator, where you will find this ECHO Log.
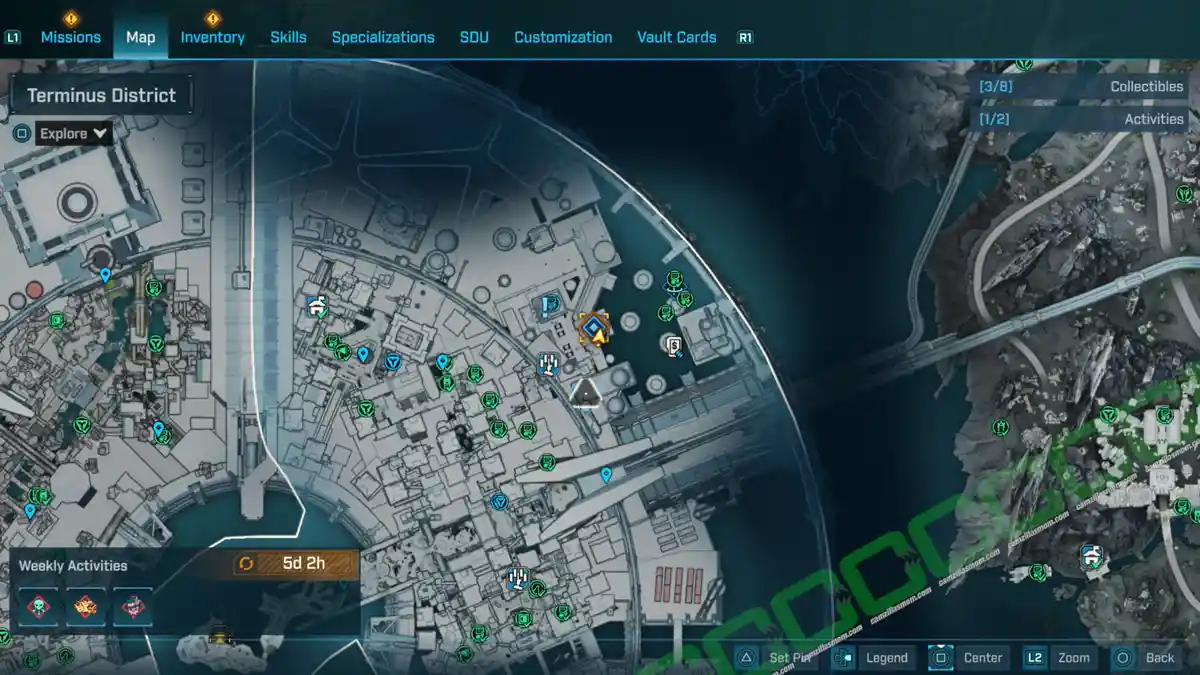
Description:
“Containment Failed, but, overall, the experiment was a success.”
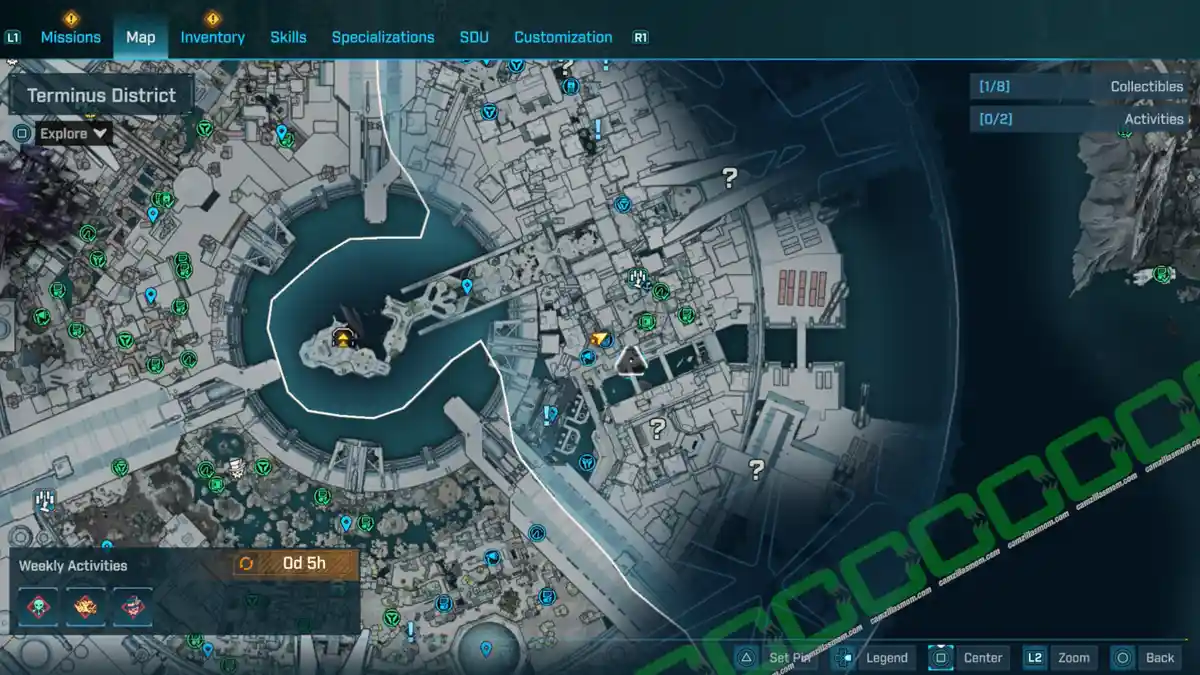
12 – Missing Persons
There is an ECHO Log southeast of the Frantic Scrawl Fast Travel point and west of the radio tower in the area. Check under the staircase.
Description:
“Where the hell did Konnor go?”
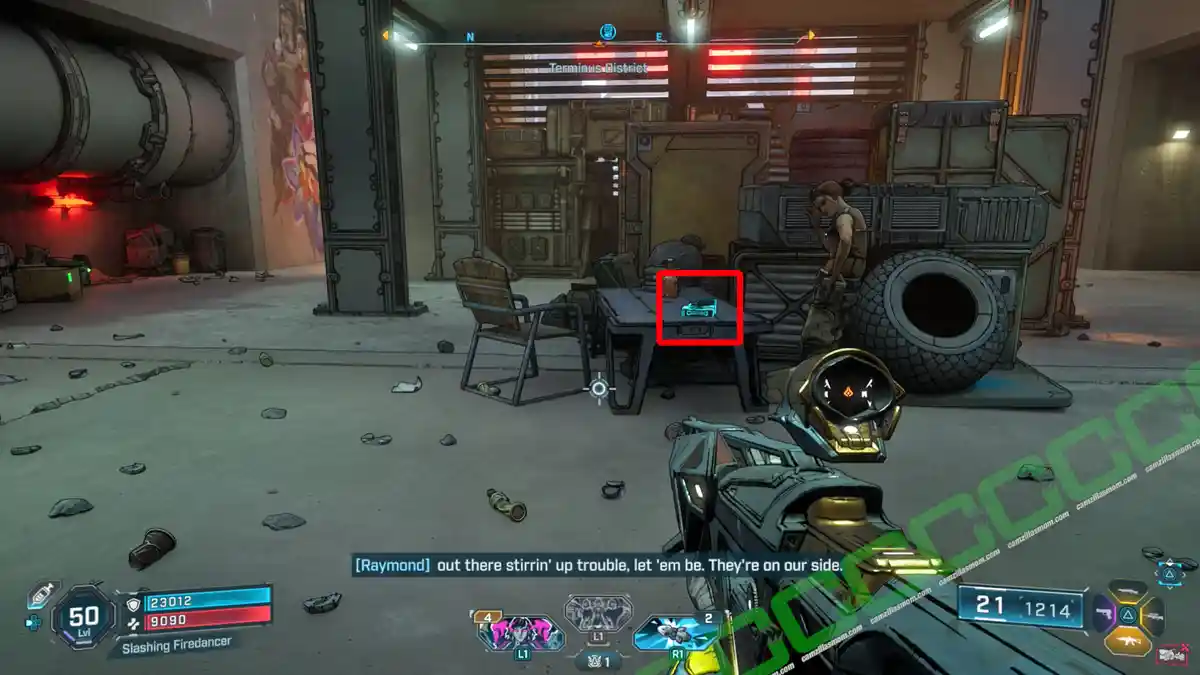
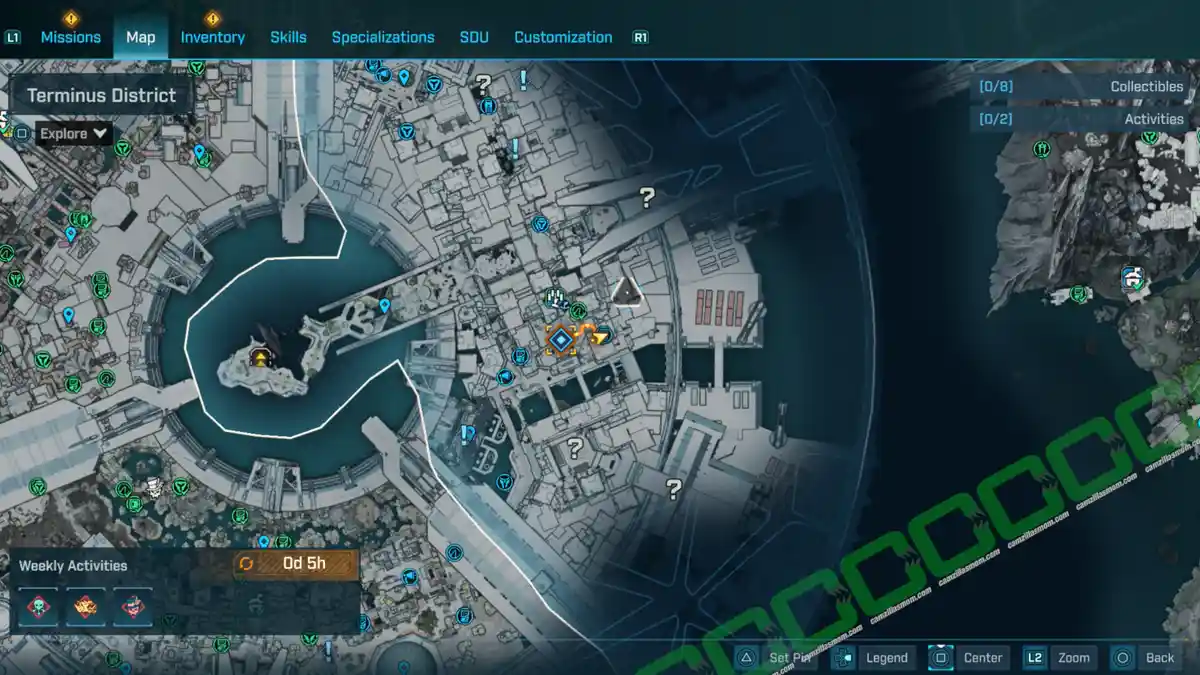
13 – Before the Lockdown
This ECHO Log can be found at a bar near the Frantic Scrawl Fast Travel Point.
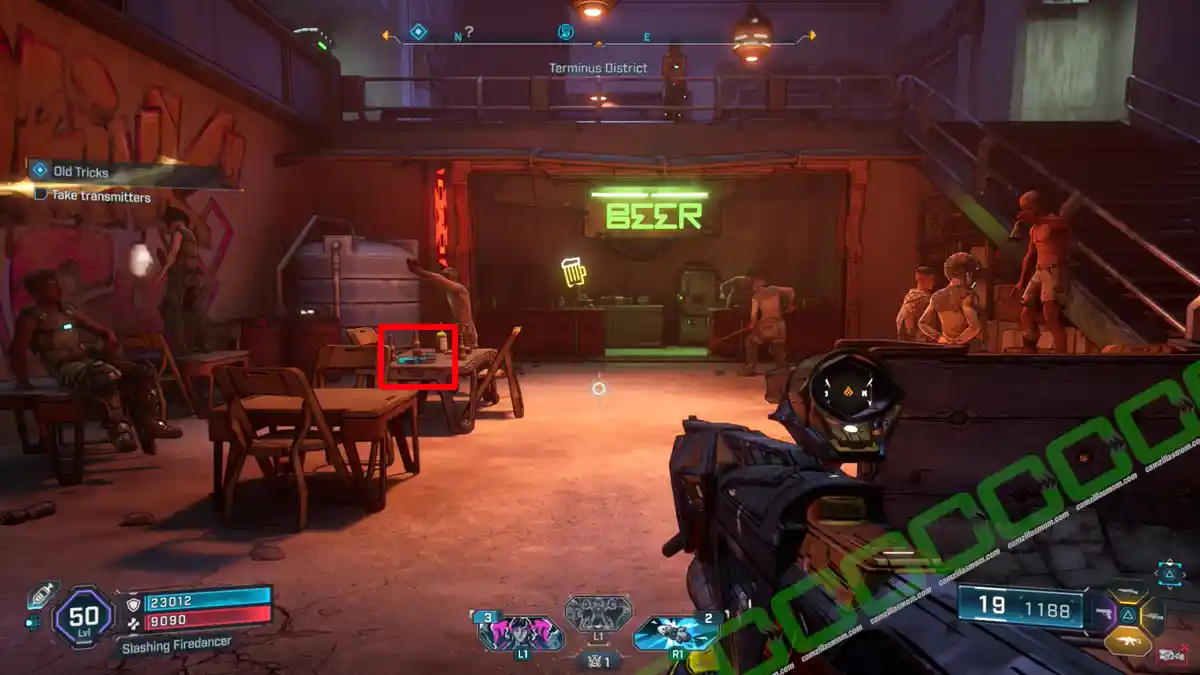
Description:
“It wasn’t always like this.”
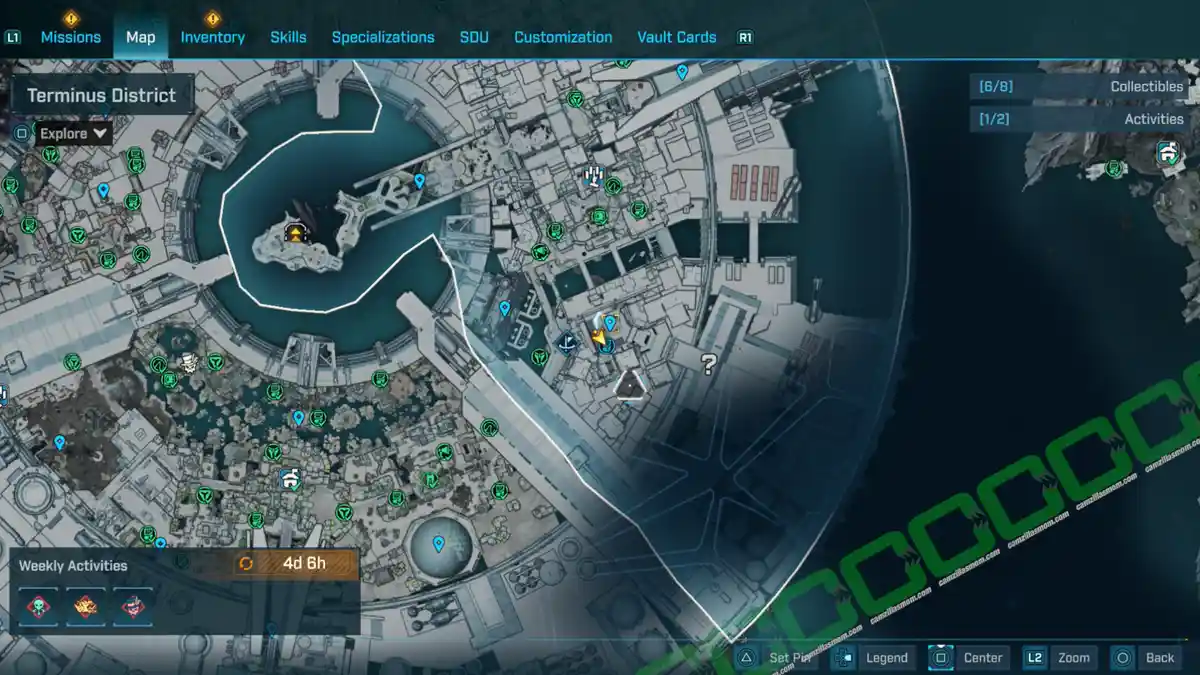
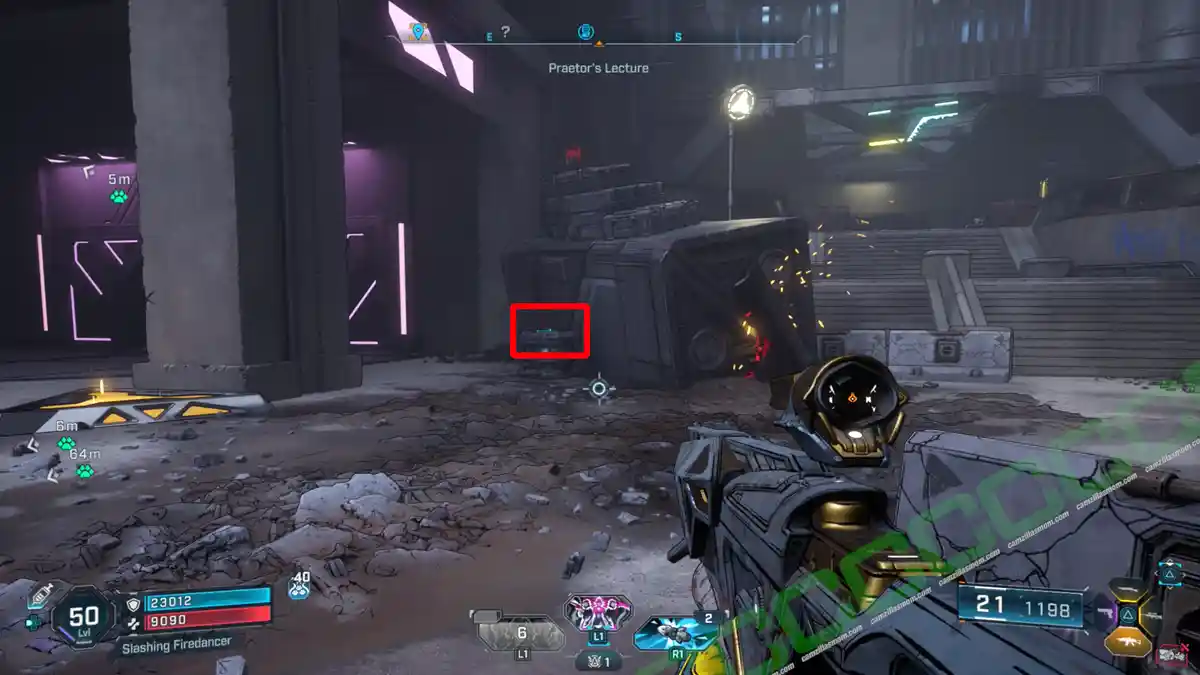
14 – World’s Greatest Overlord
The Log is in the south of the district at the Praetor’s Lecture Point of Interest.
Description:
“Nobody likes a kiss-a*s”
Dead Bolts – 3
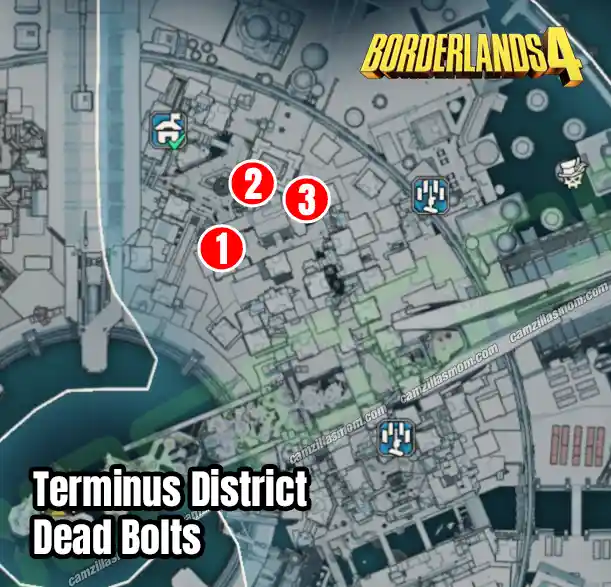
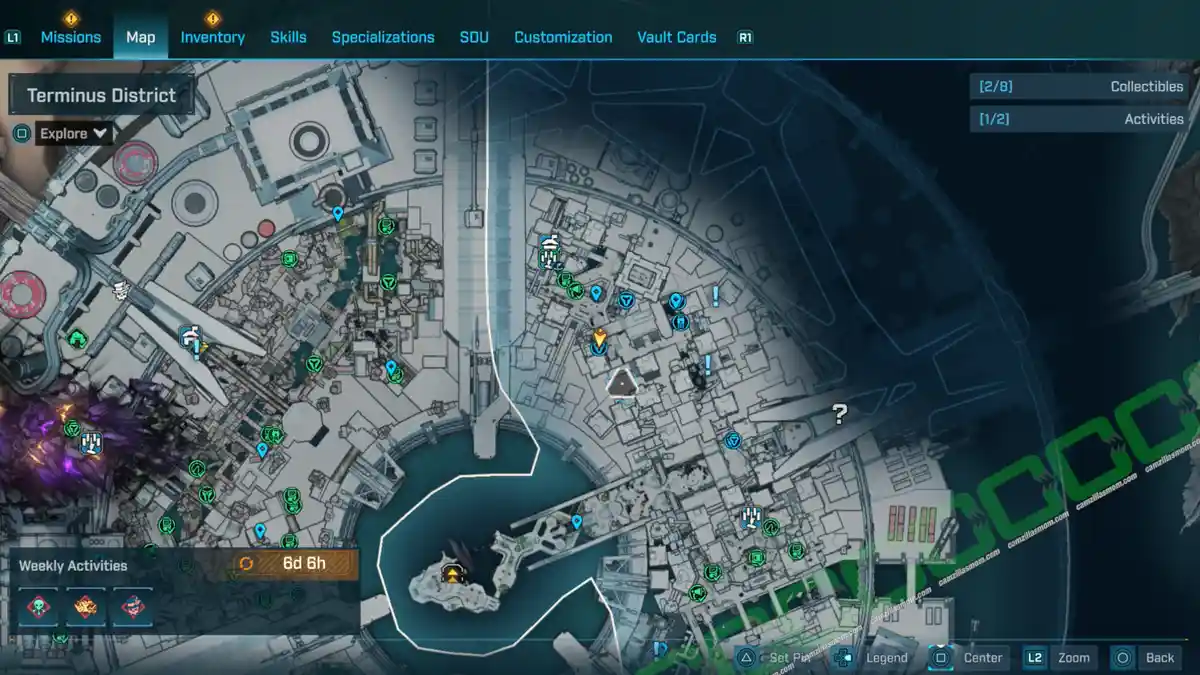
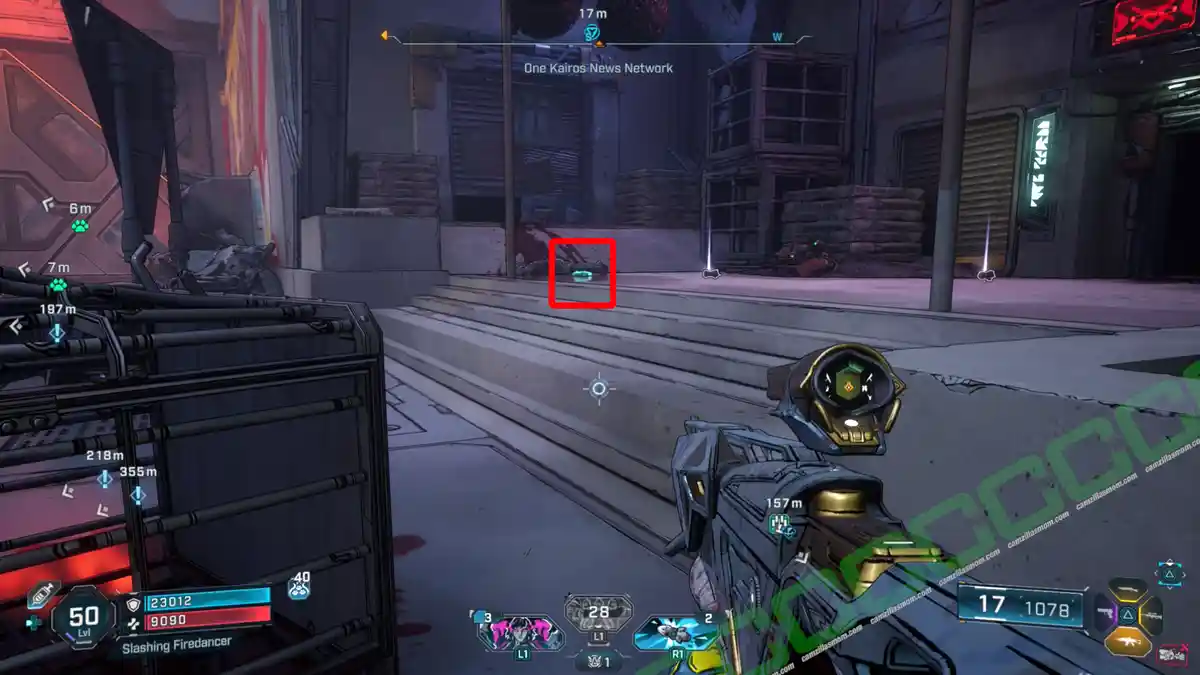
1 – Cold Hearts, Soft Paws
This Dead Bolt is in the center of a mangler’s den south of One Kairos News Network.
Description:
“Ace Kender. Ourea. 571 hours. Offline.”
2 – Selfie Shock
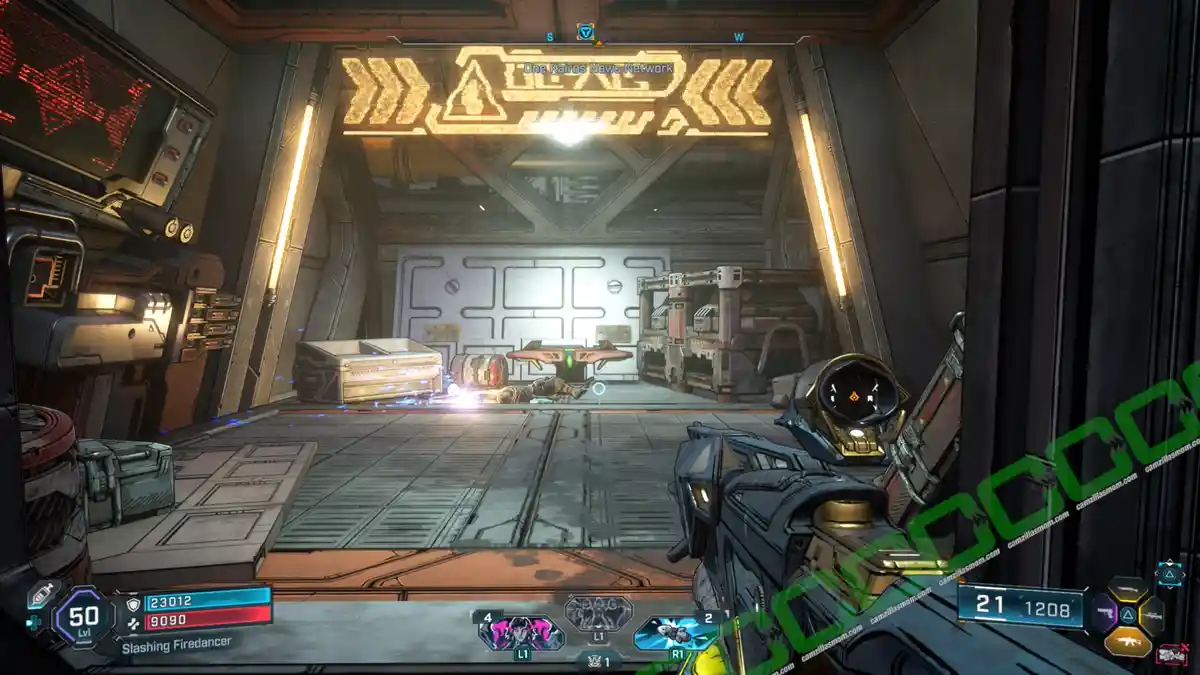
For this Dead Bolt, you first have to activate the power core dispensers all through the city. You will do so during the AAA For Effort Side Mission. Then head to the square room just northeast of the One Kairos News Network marker on the map. The dispenser is at the ground level of this room. Take one and open the door with the deposit in this room.
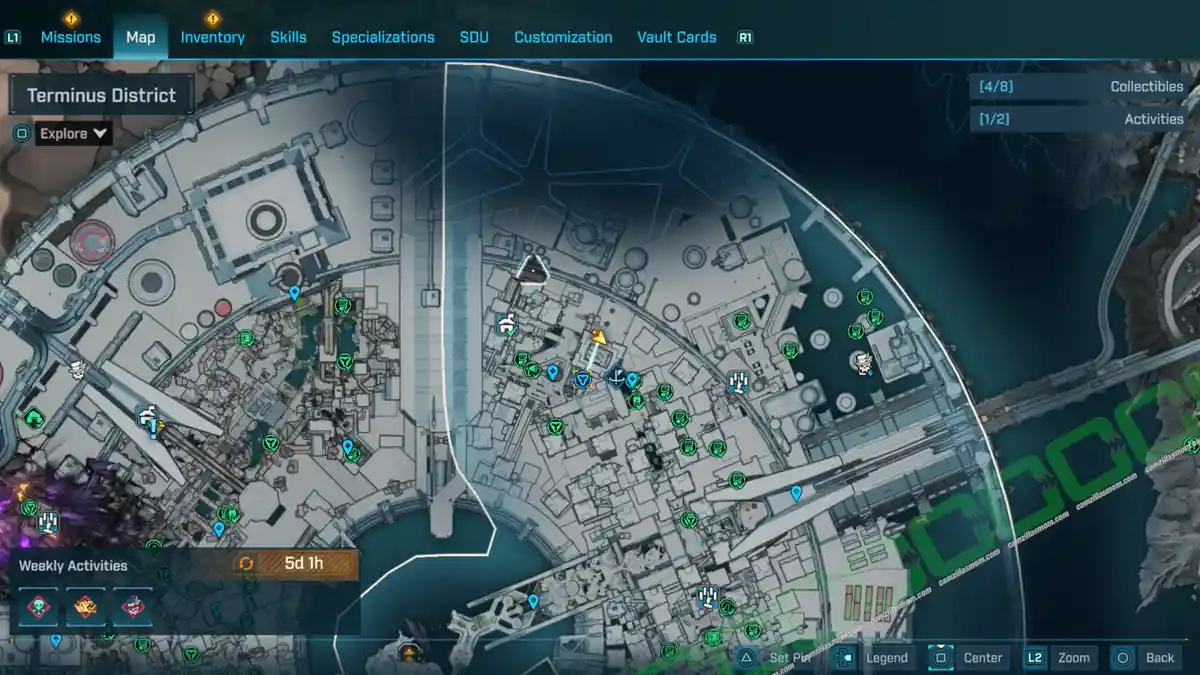
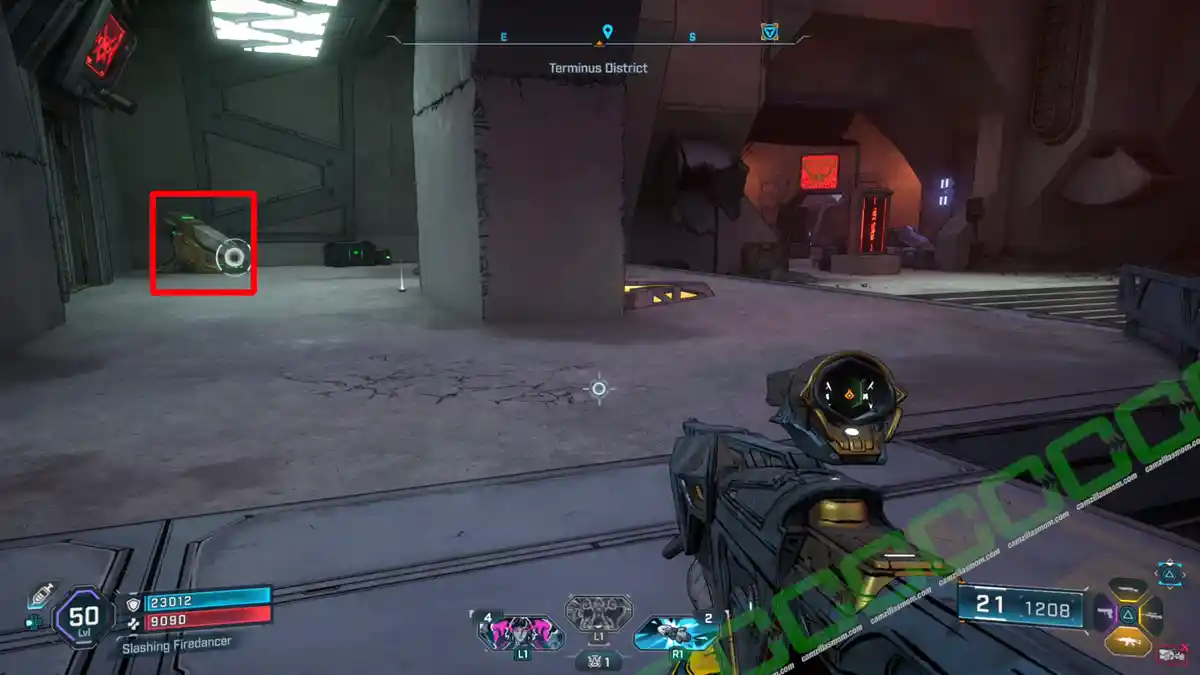
Inside is the Dead Bolt together with a red chest.
Description:
“Clemp James. Artemis. 84,884 hours. Offline.”
3 – Pit Stains
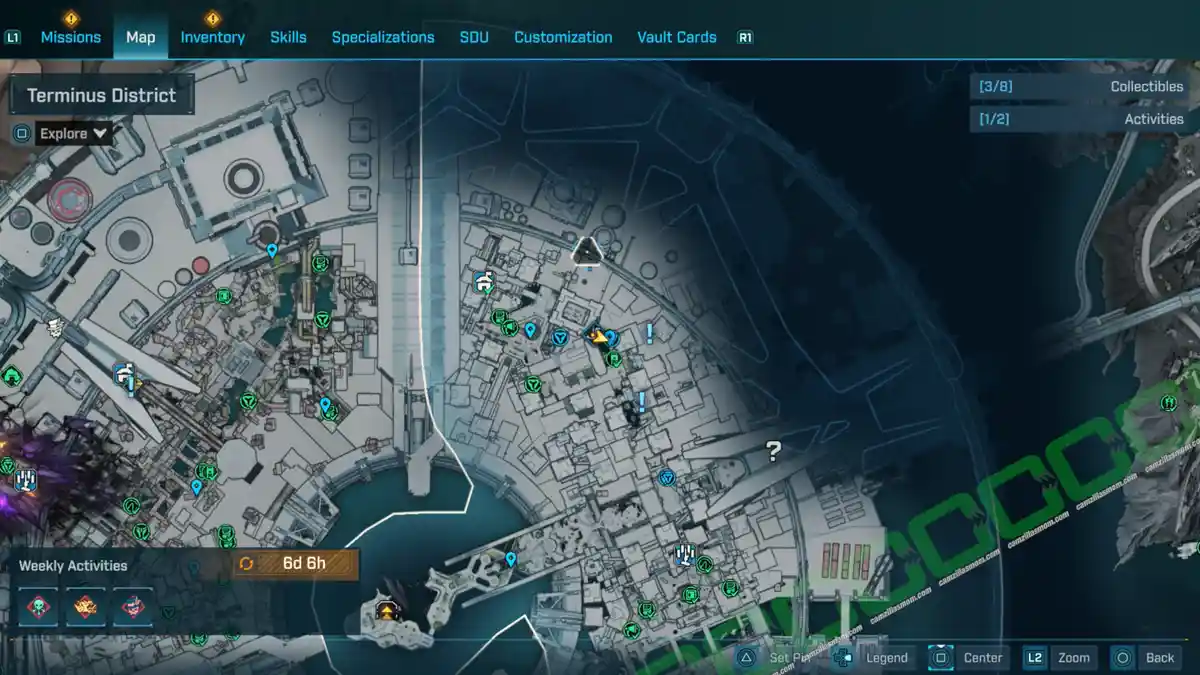
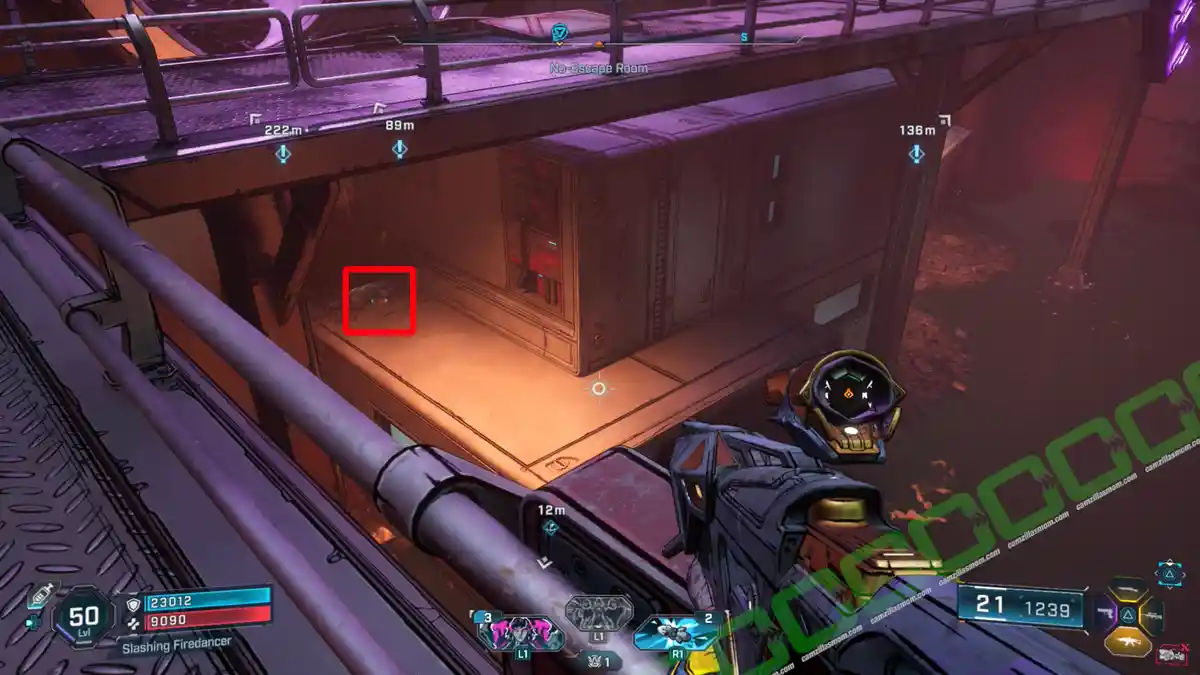
This Dead Bolt is in the same sewer ditch as the Lost Capsule, but higher up on a ledge.
Description:
“Xanthippe Asca. Menoetius. 690 hours. Offline.”
Electi Safe – 1
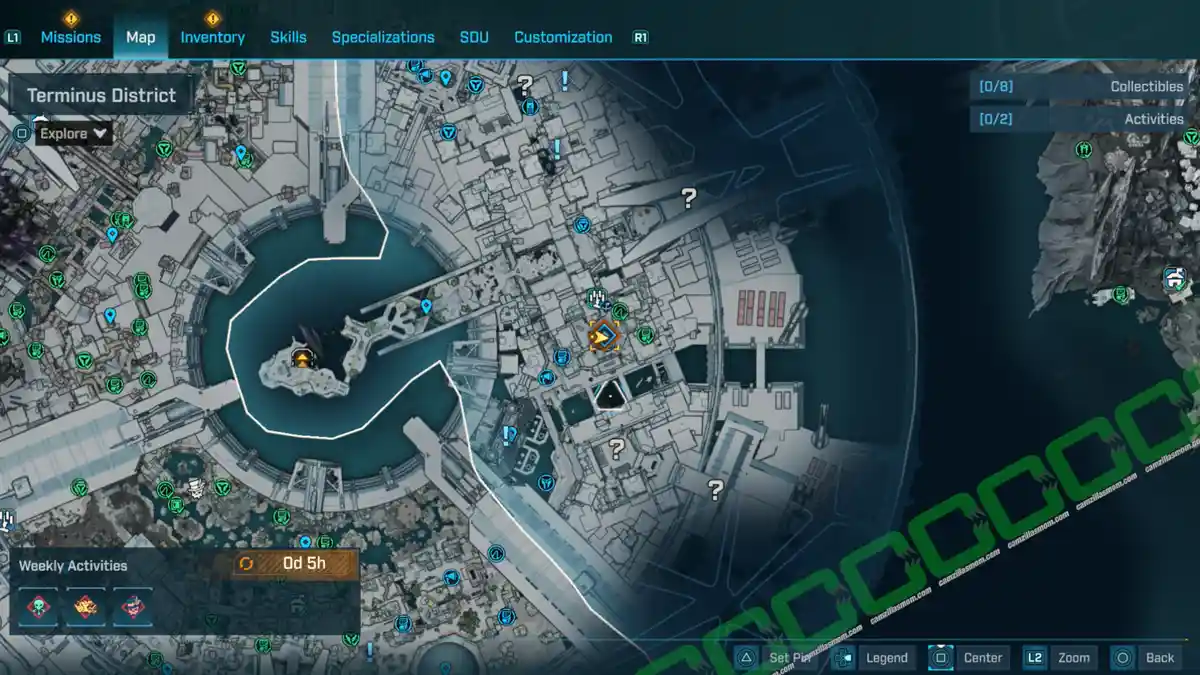
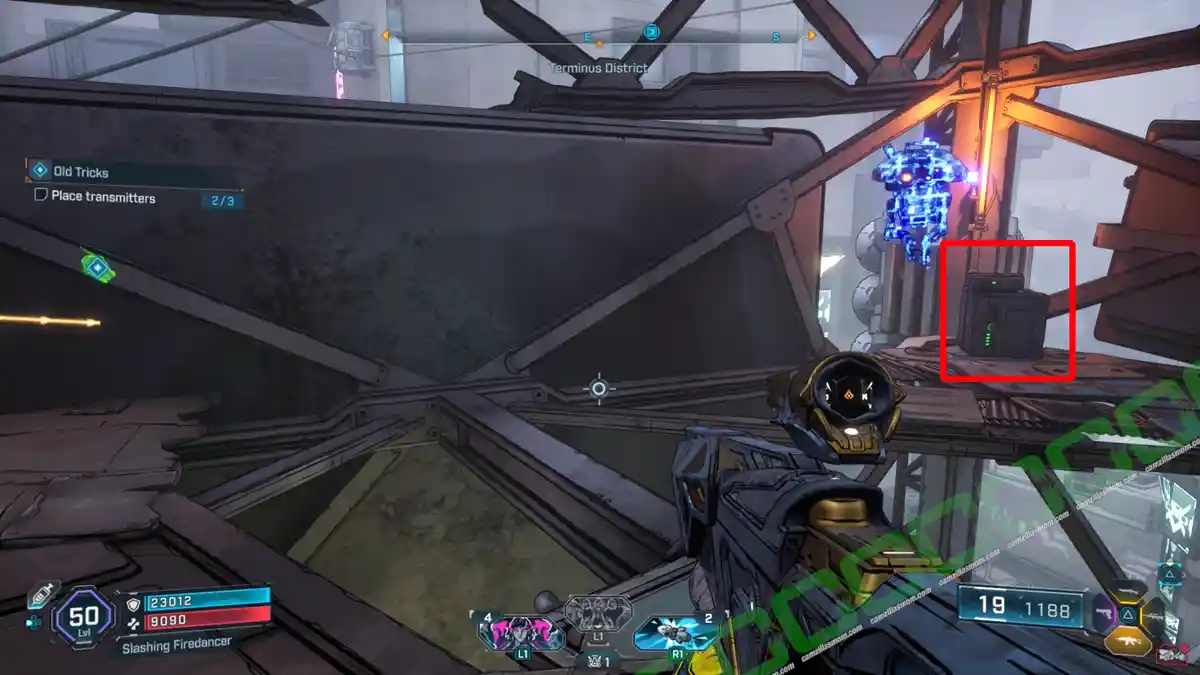
The Electi Safe is on top of the radio tower south of the Frantic Scrawl Fast Travel point. You will get there during the Side Mission: Old Tricks. The safe is on the same level as the highest of the three transmitters.
Lost Capsule – 1
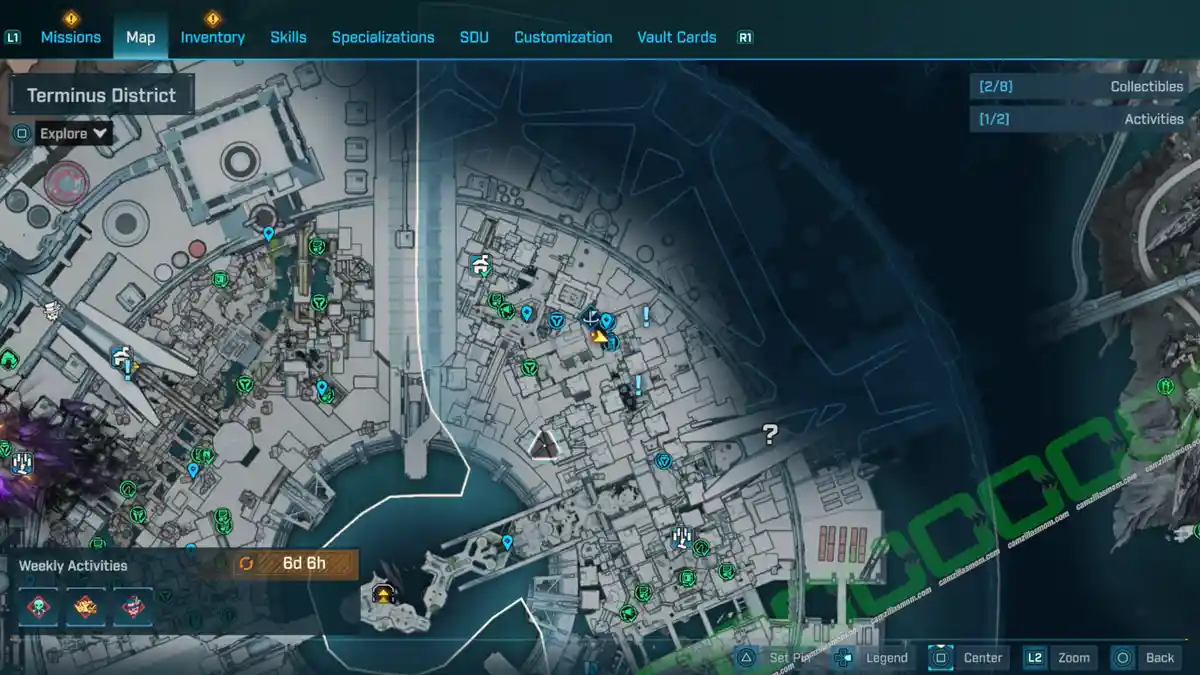
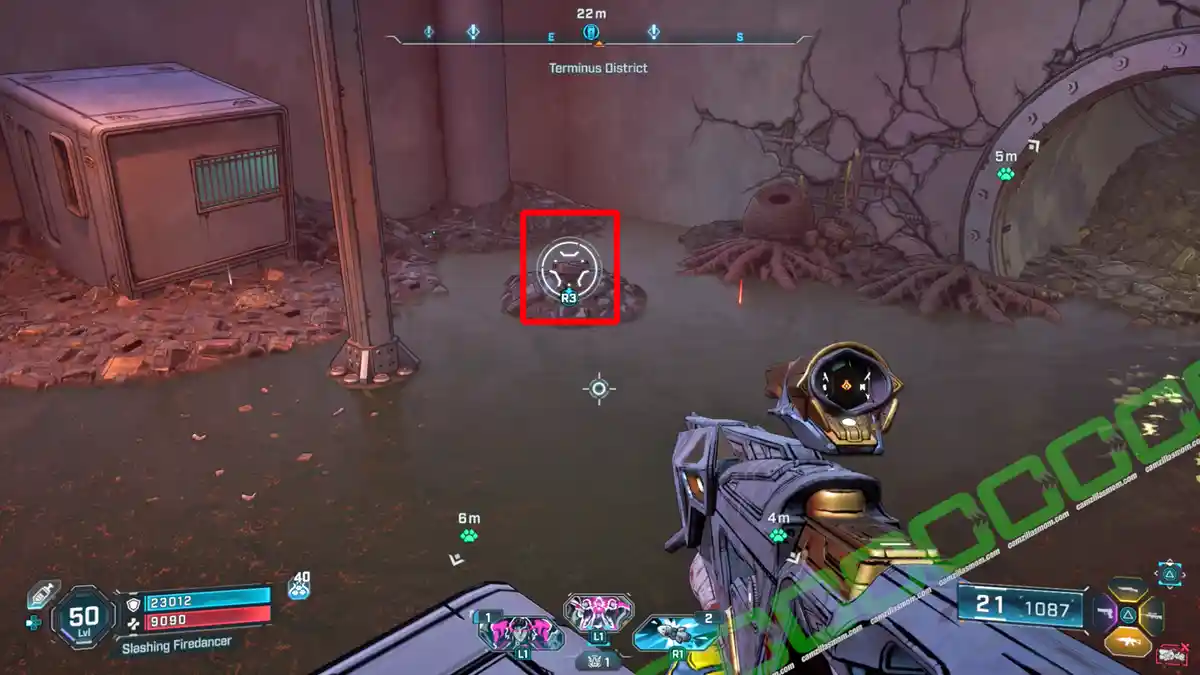
The Lost Capsule is down in the sewer ditch at the No-Escape Room POI. Take it to the Food Court.
Propaganda Speakers – 2

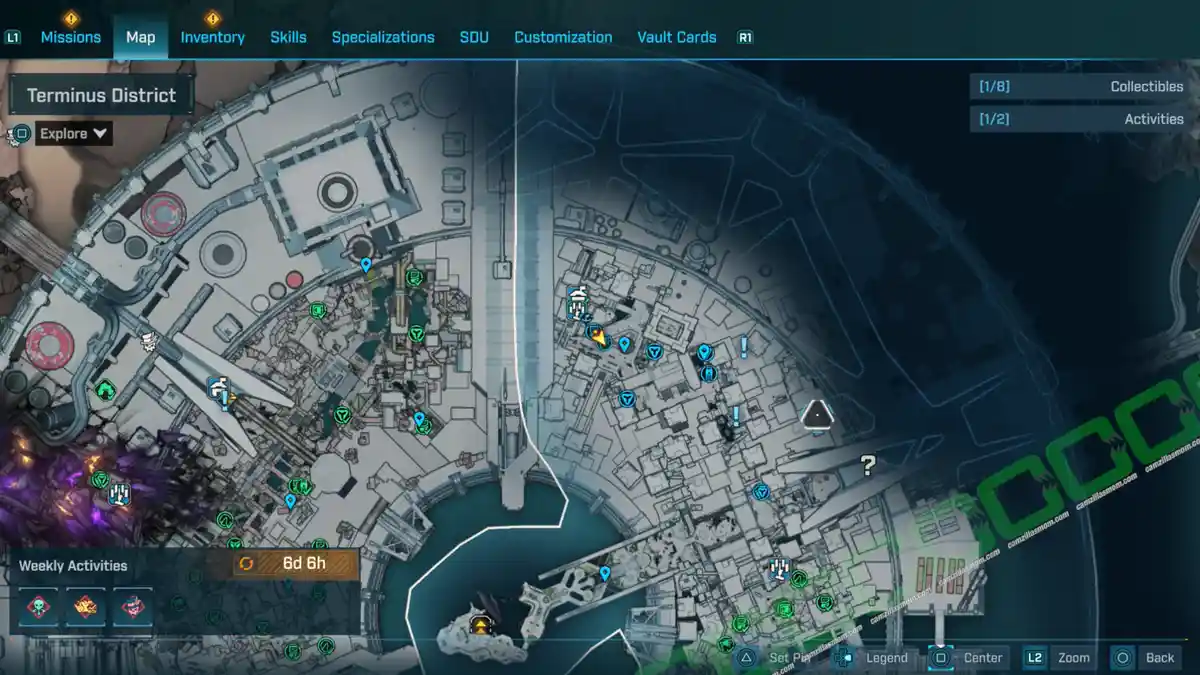
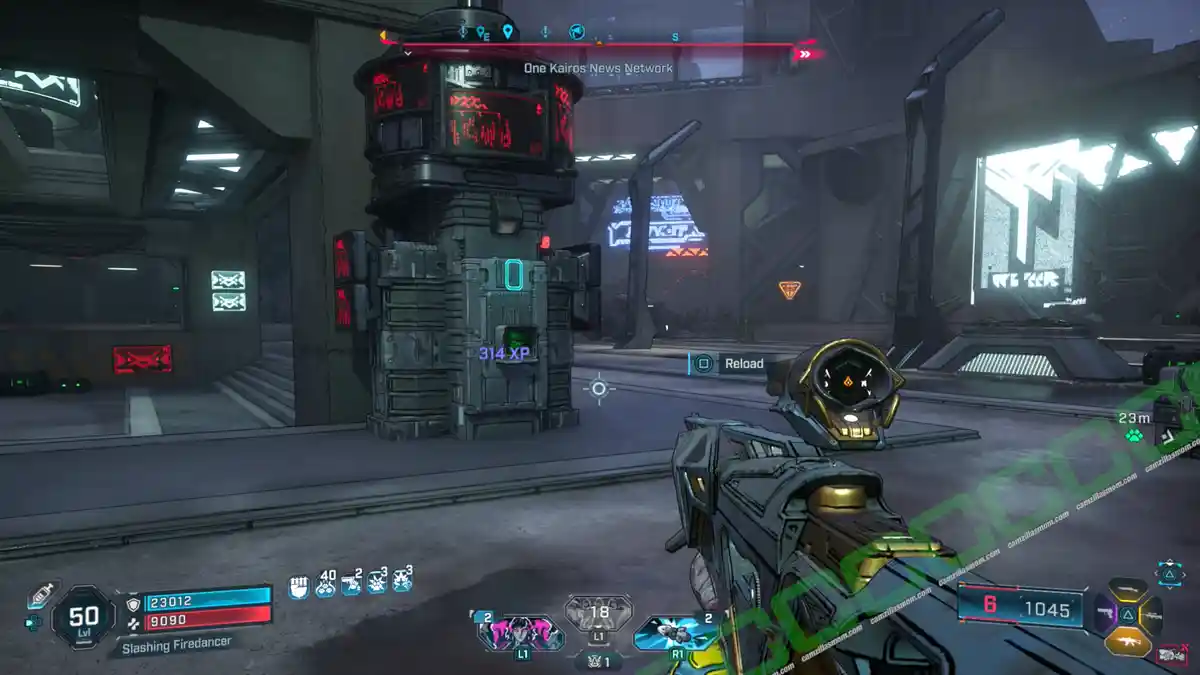
1 – One Kairos News Network
Obviously, there is a Propaganda Speaker at the One Kairos News Network!
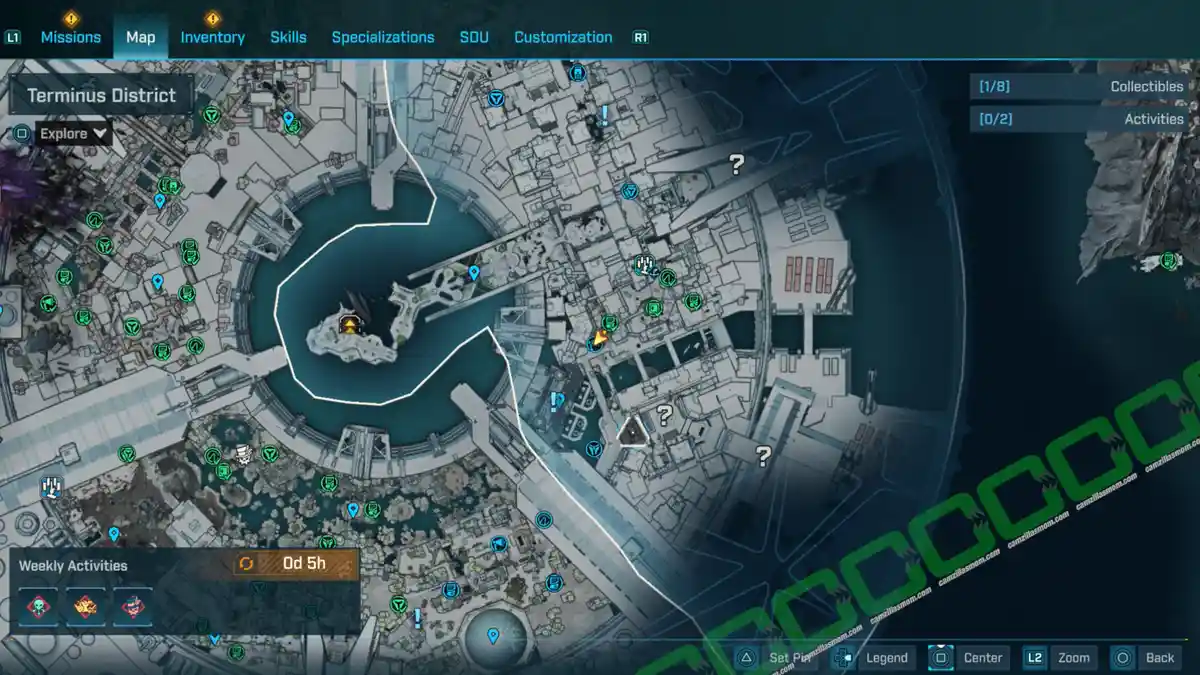
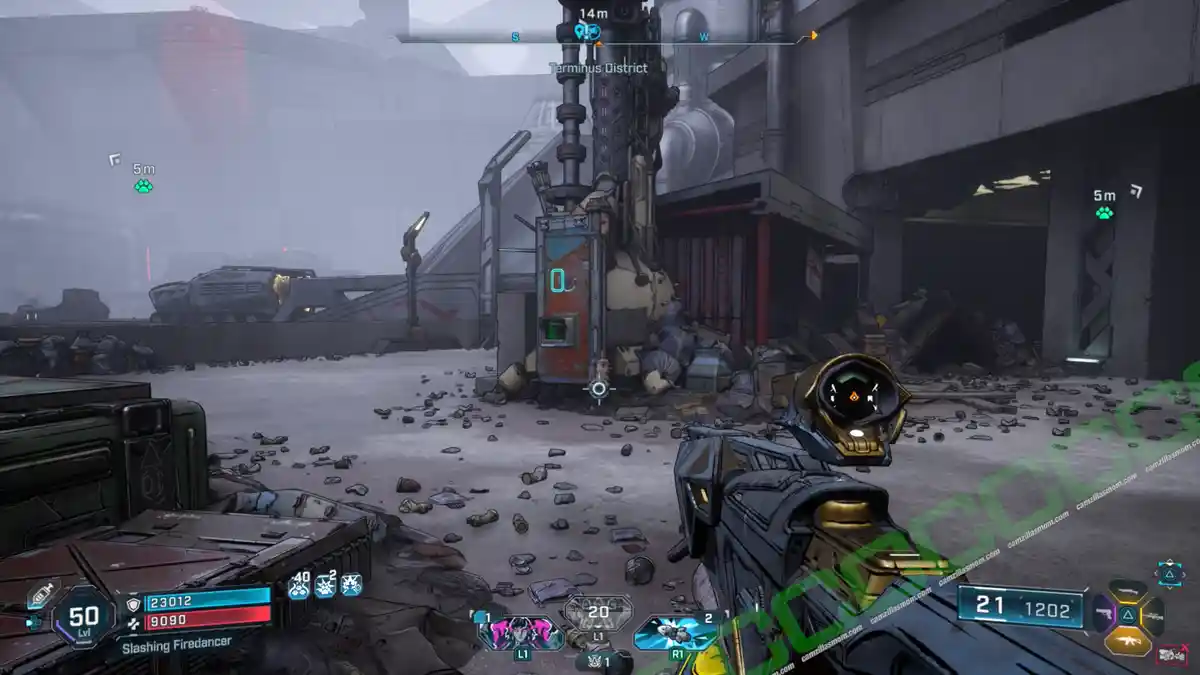
2 – The Dunk
The Propaganda Speaker is northeast of the Dunk POI and southwest of the Frantic Scrawl Fast Travel Station.
Evocarium – 1
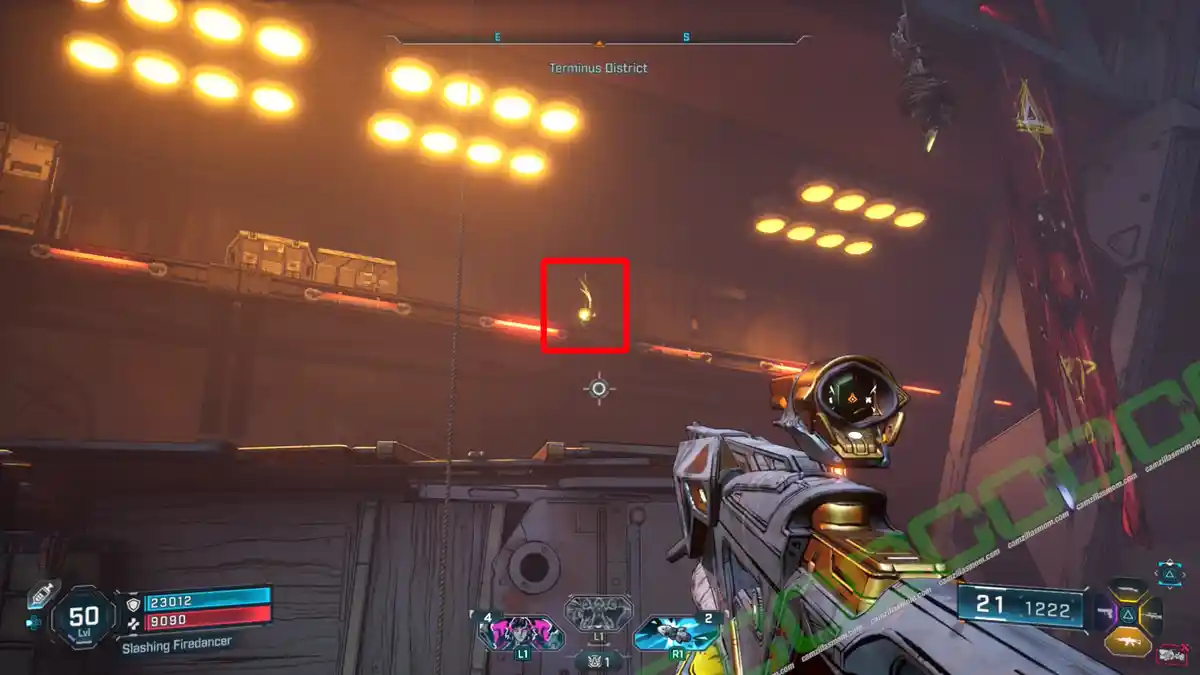
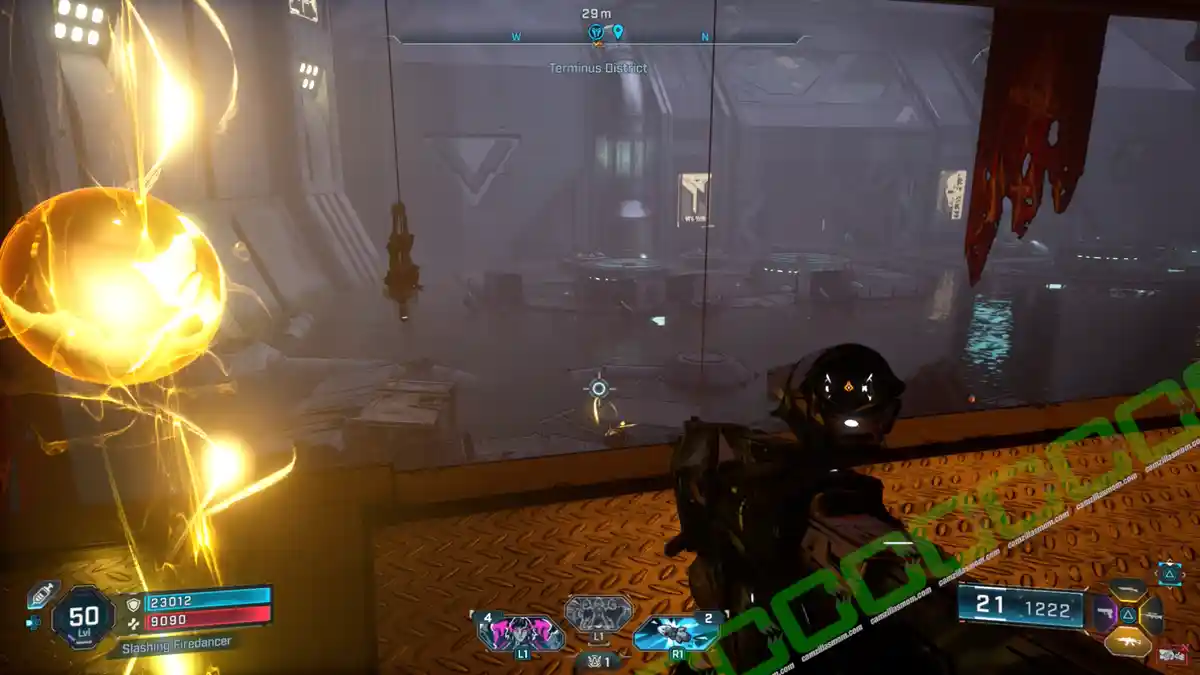
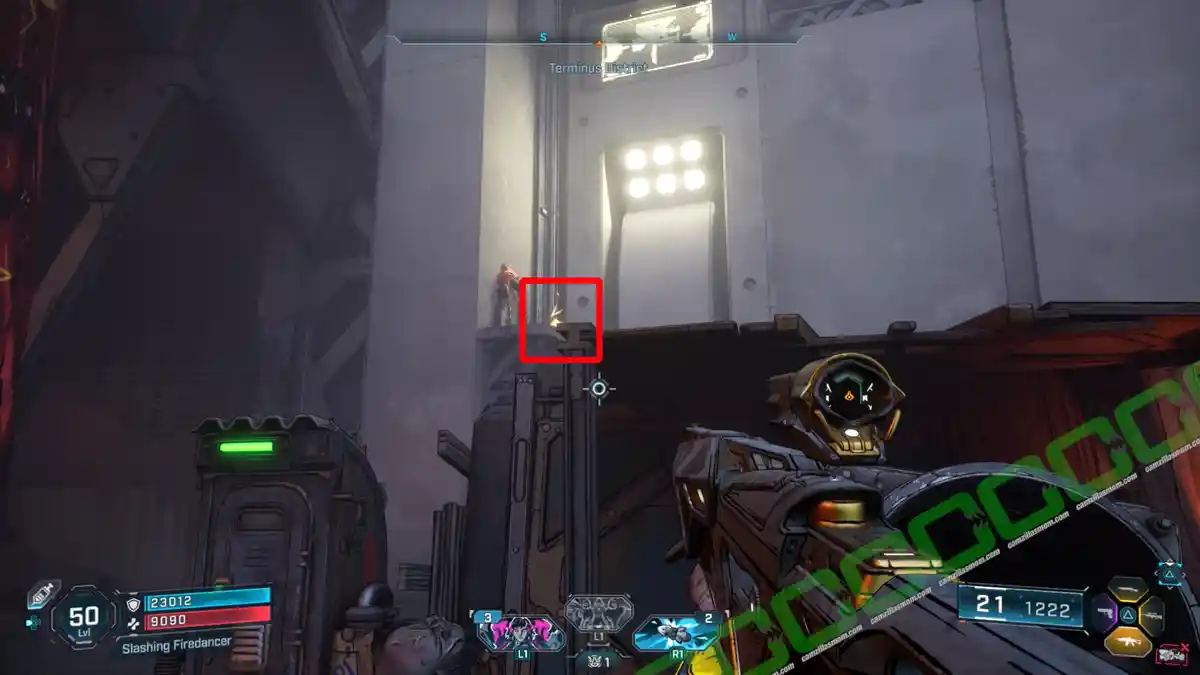
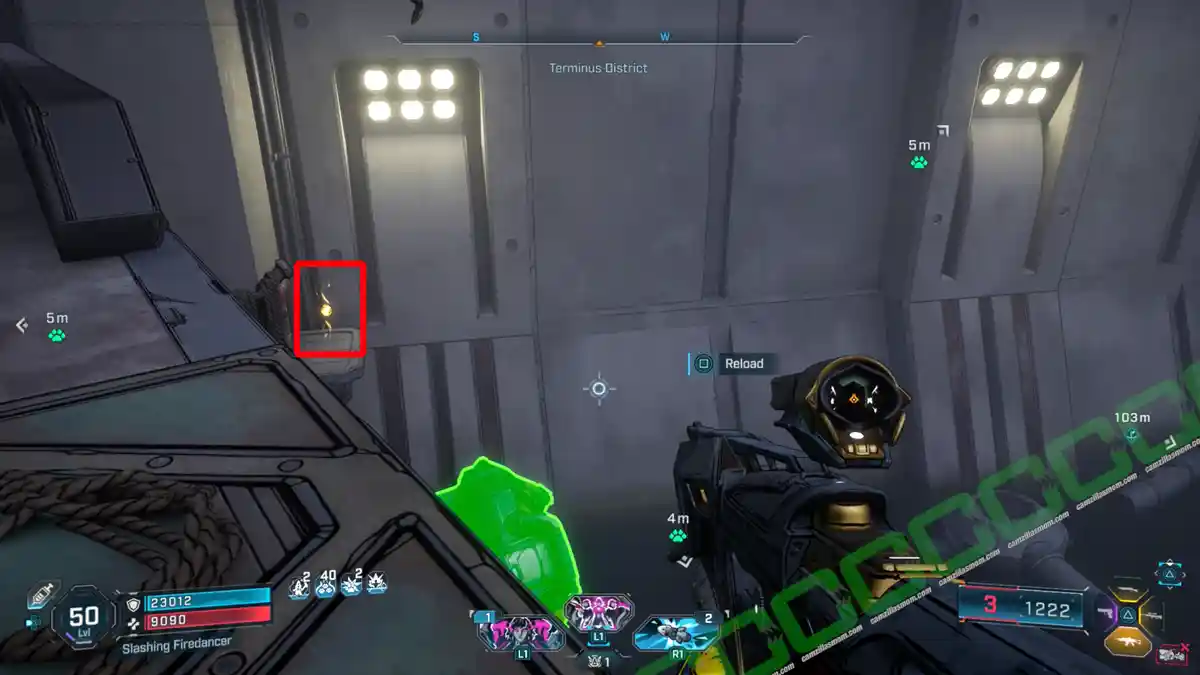
1 – Eridian: Failure
The Evocarium is in the south of the Terminus District, by the water.
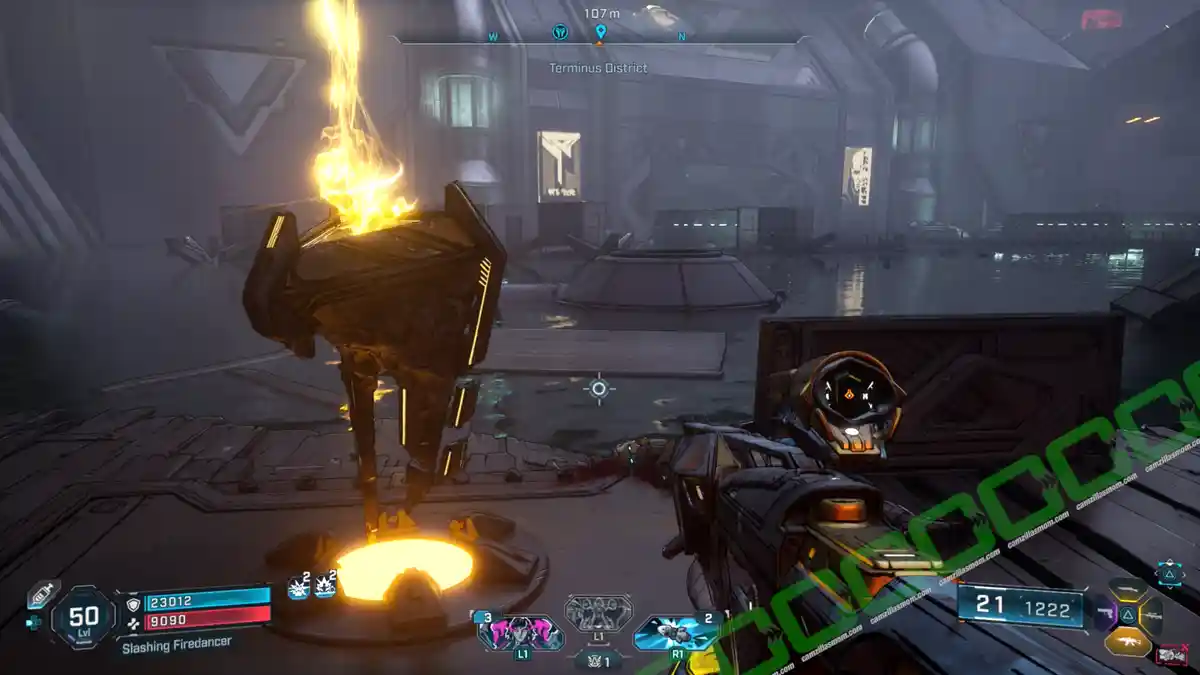
The first orb is on the round island when looking to the northwest.
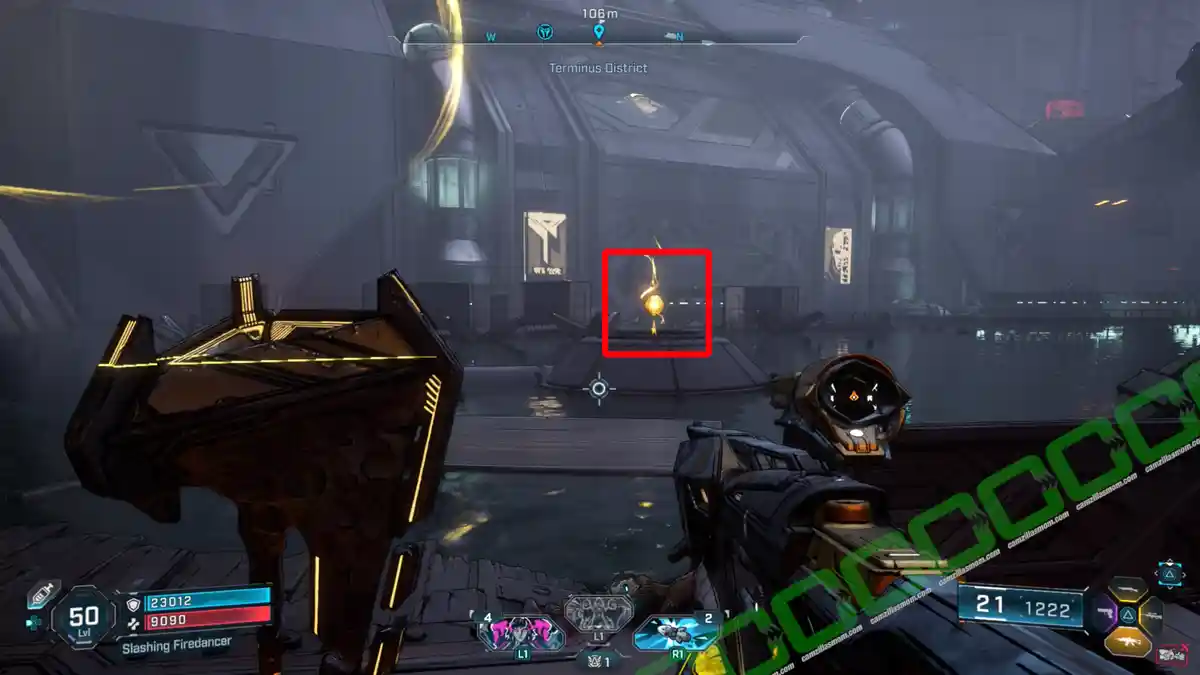
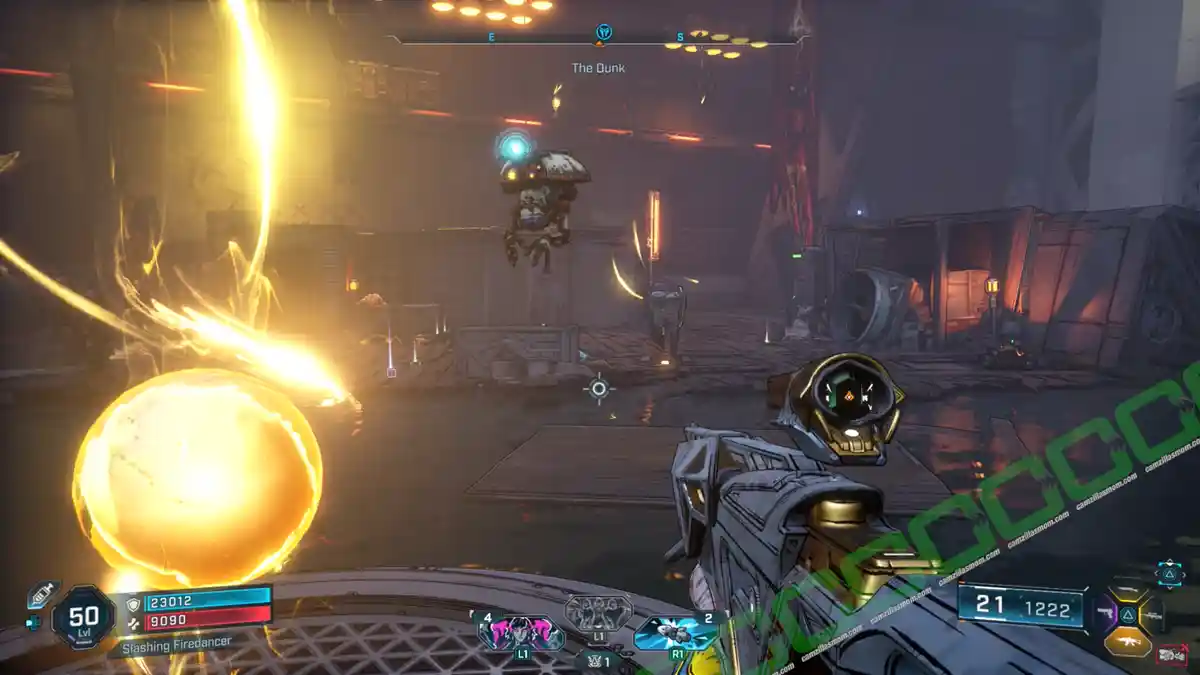
The second one is high up on the platform to the southeast. Use the climbable wall in the southwest to reach it.
The last one is on top of a small platform with a door to the south. There is a grapple point you can use to glide over to get it. Collect all three orbs and return to the Evocarium to receive Eridian: Failure.
-> Also available: Stranded Sister – All 18 Evocariums Revealed
Vault Symbols – 2
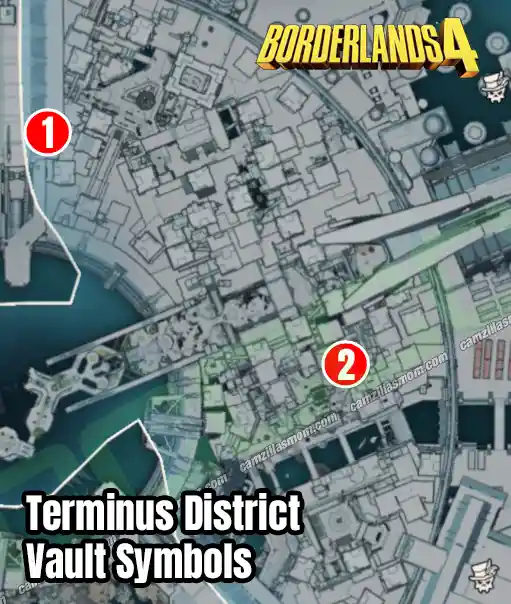
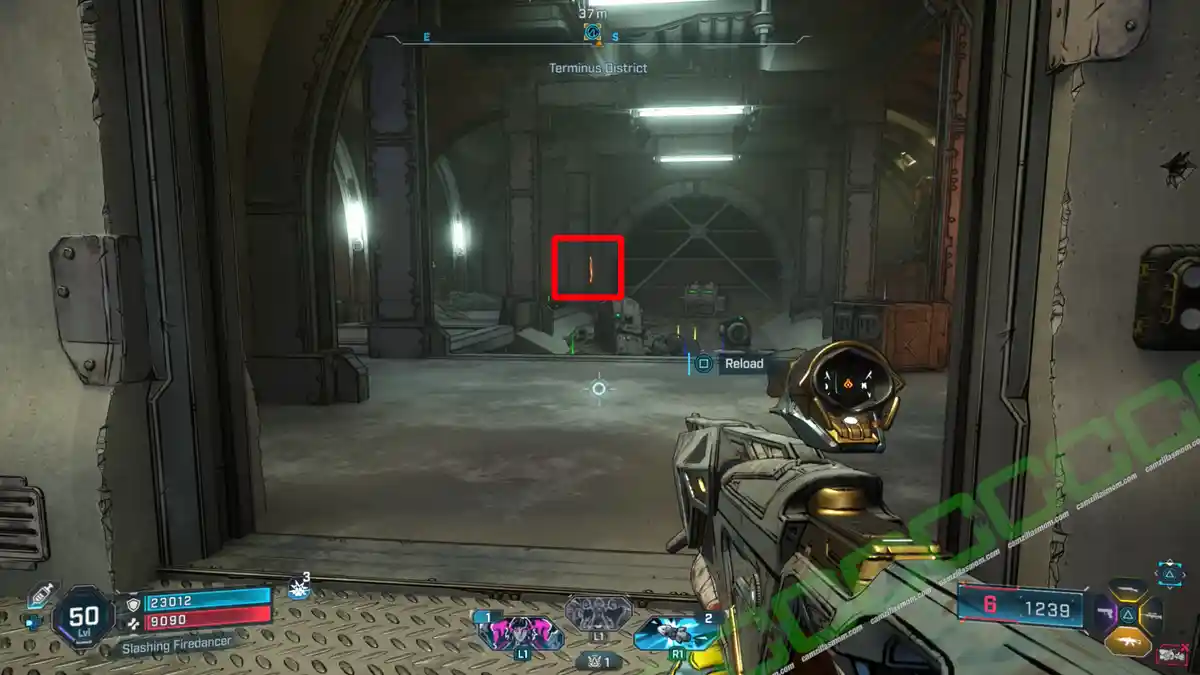
1 – Sewers
Unlock the Sewers in the Old Raymond and Old Lads Side Missions in the Fades District. Then, go to the Safehouse: The Food Court and head to the southwest, towards the main gate that leads to the Fades district. Don’t go through it. Instead, head down into the sewers next to the big gate.
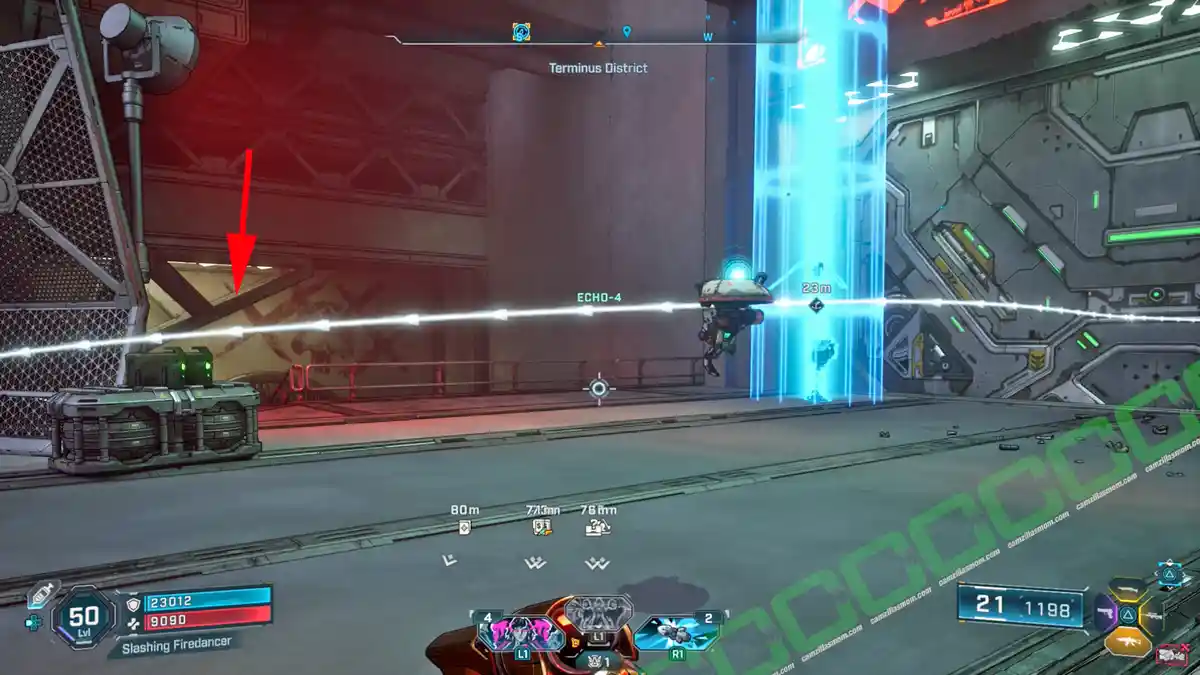
Go through the sewer door into a small room with the Vault Symbol at the back wall.
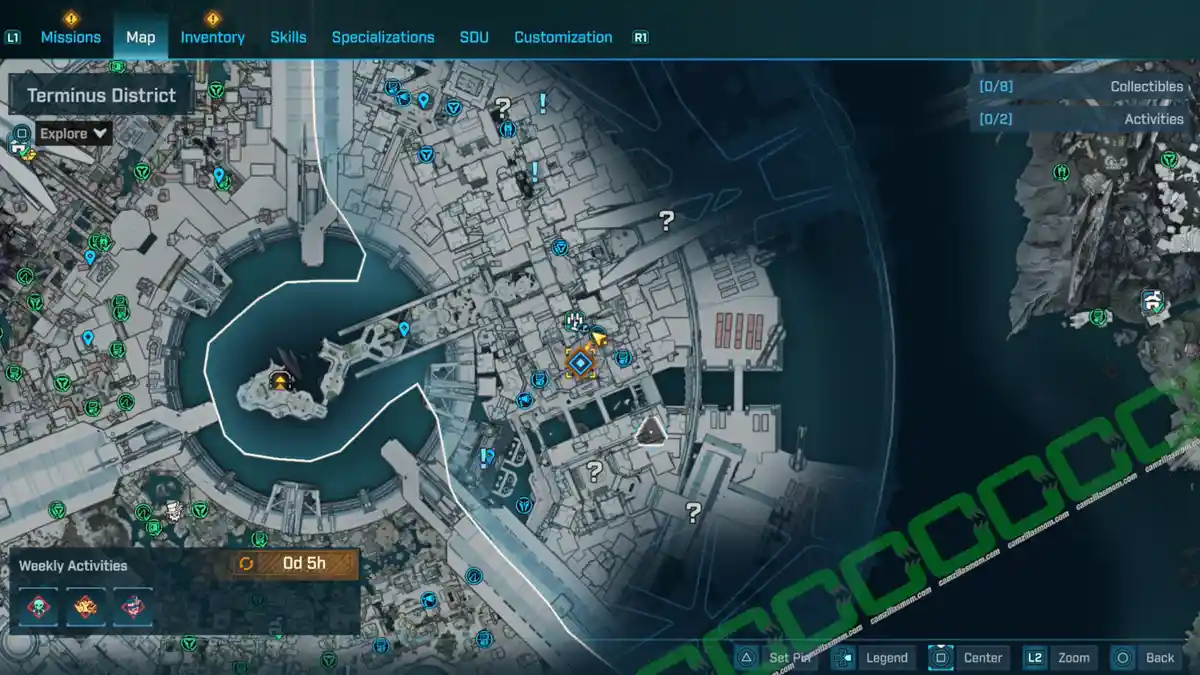
2 – Frantic Scrawl
At the Frantic Scrawl Fast Travel Station, there is a balcony/alcove on the second level with this Vault Symbol.

Activities
Order Bunker: Ironwall Resolve
The bunker is in the southeastern corner of the Terminus District. The locust dispenser is in the big courtyard below. If it is locked, you have to complete the Side Mission “One Gassy Issue” in the Fades District first.

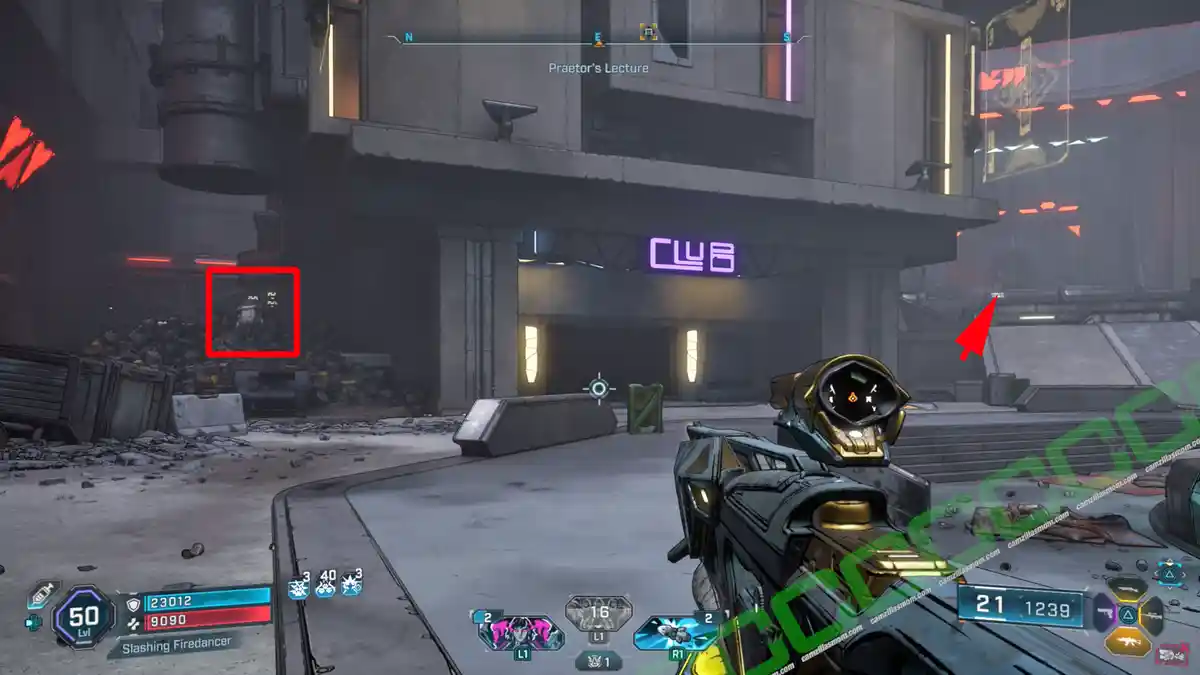
Enter the bunker and follow the path to a forcefield. Shoot the highlighted cubic core in front of it to pass. This will continue like that. The cubic cores are highlighted in the HUD. You need to destroy the left and the right power cores to continue on to the main room with the vending machines. Fight Directive-0.


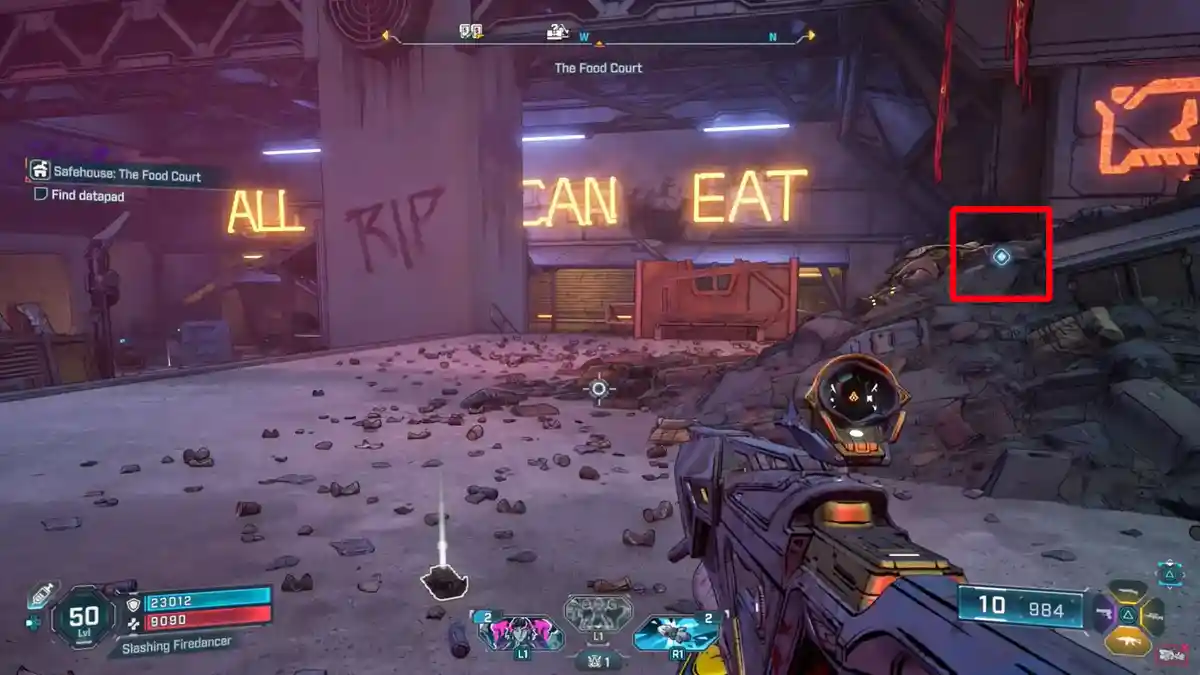
Safehouse: The Food Court
The Food Court is straightforward: The datapad is on the garbage pile. The capture terminal is on the bottom floor, opposite the vending machines.

Side Missions
-> Also Available: All Side Missions in Borderlands 4
No-Escape Room
Side Mission Start:
No-Escape Room POI – A Button
What it is about:
The ultimate escape room challenge.
Side Mission Steps:
-> Listen to instructions: The Point of interest in the center south of the map – Locust Production Facility.
-> Look for hints: There is only one clean door – the yellow one.
-> Reach the next room.
-> Search for hints: 1 – The ECHO Log in the meat grinder. 2 – In the ditch on the other side of the meat grinder. 3 – Ground floor, next to the yellow goo. 4 – Upstairs, by the yellow waterfall. 5 – Upstairs, at the overhead vent cover. Walk to the door on the other side of the room, then look for an overhead vent cover that you can pull open. The order on the ECHO Log says: 2-5-4-1-3 from left to right.
-> Take access card, unlock door.
-> Reach third room.
-> Traverse the maze: Follow the carrots on the floor. Instead of going left, head right first to find another ECHO Log with the solution.
-> Follow the carrots: There is another ECHO Log collectible halfway through the maze at this location.
-> Escape room
-> Power down force field: There is a vent cover that you can pull off. Shoot the mechanism behind it.
-> Confront Smiley Man
-> Make your escape: Through the smaller door. There is another ECHO Log on the other side.
Below the Surface
Side Mission Start:
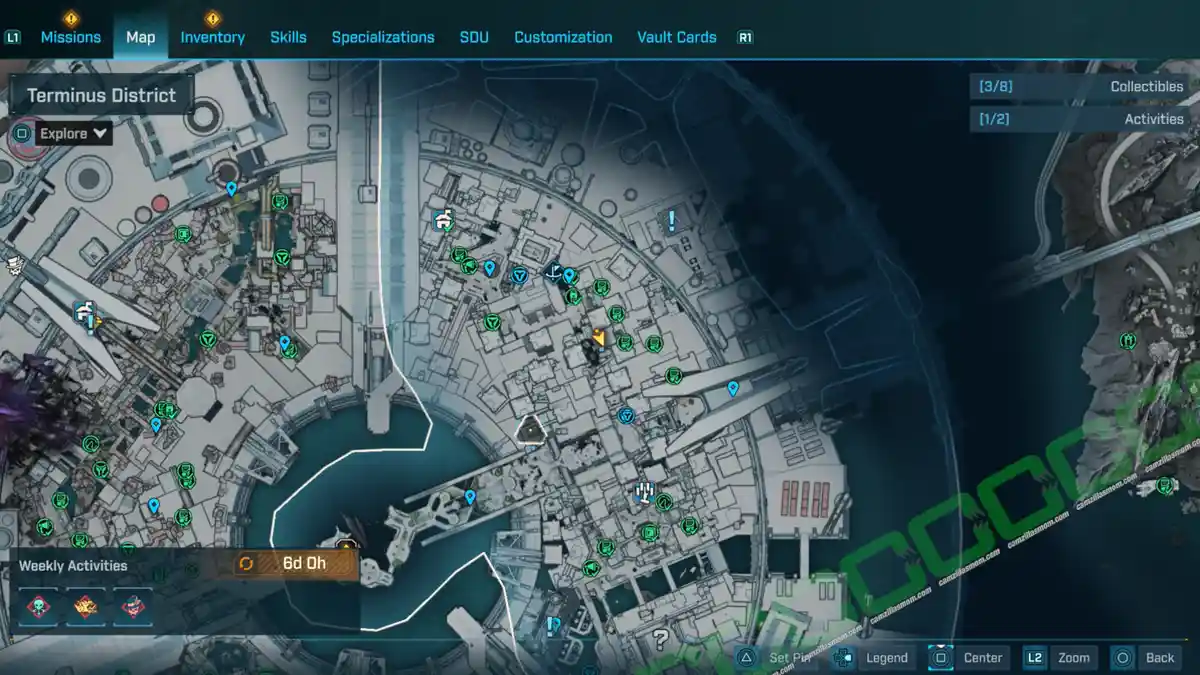
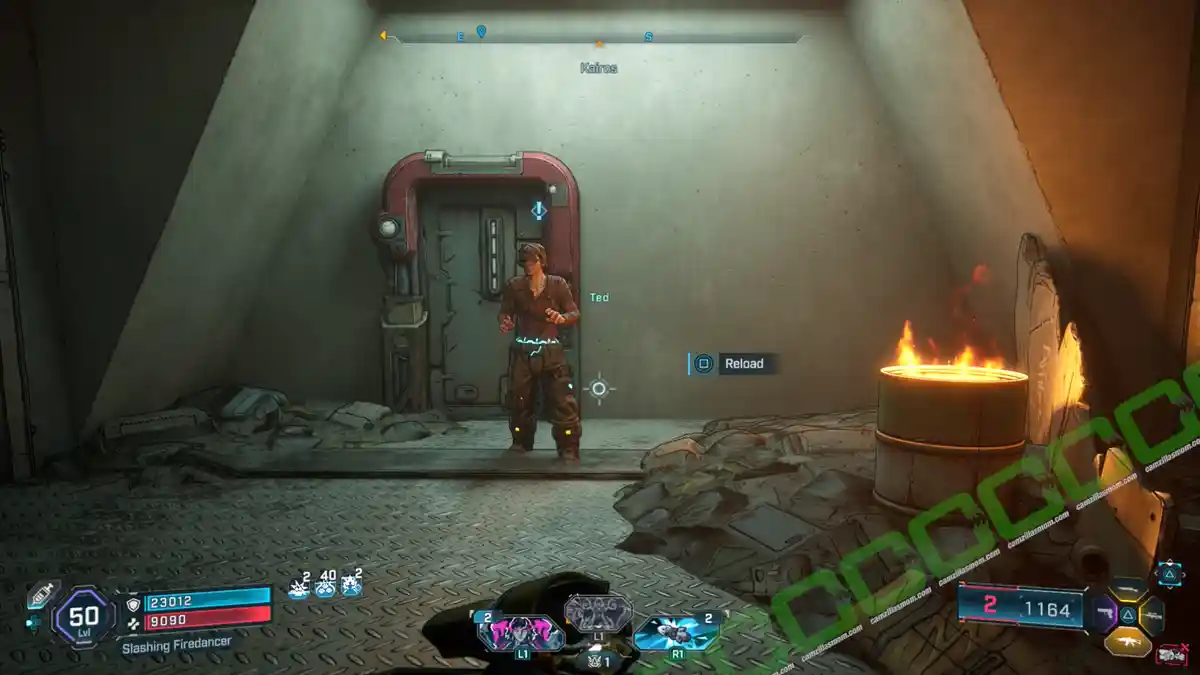
No-Escape Room south – Ted
What it is about:
Help the victim of a mysterious experiment…
Side Mission Steps:
-> Take keycard
-> Use keycard to access lab: Follow the road to the east.

-> Enter lab, use elevator
-> Reach facility’s sub-level access: There is a vent cover in this room that you can pull off. Inside, drop down the only path – an elevator shaft.

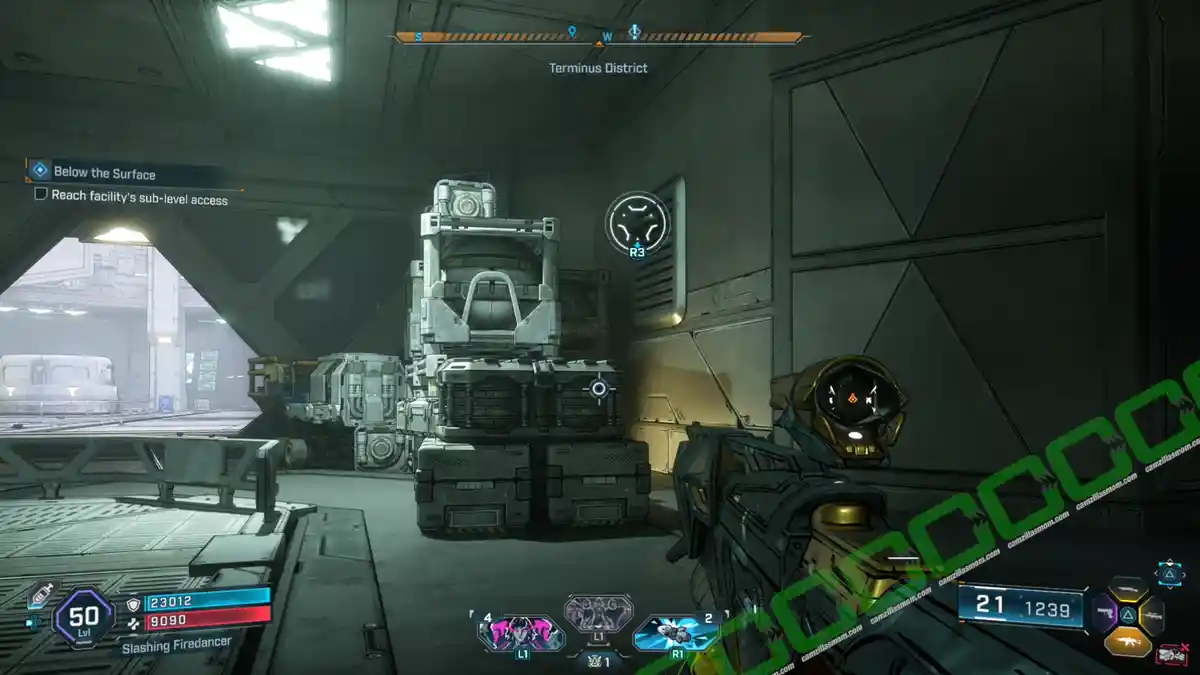
-> Jump down
-> Reach labs – ECHO Log 1: Exit the water at the bottom and follow the corridor to a ladder that you can climb up. Here is the first of five ECHO Log collectibles to listen to as optional mission steps.
-> Reach labs – ECHO Log 2: Exit the room and follow the corridor to a ventilator shaft with a creep jump scare. Find the cantina and the restroom. In the cantina, you can pull off a vent cover to reach the next section. Here is the second ECHO Log.
-> Reach labs – ECHO Log 3: Return to the cafeteria and the first vent you crawled through. In the room with the vent, you can interact with the door to open it. There is a creep behind the door that you have to fight. In this room is the third ECHO Log.
-> Clear creep infestation: Exit the room of the creeps through the only available door. The corridor leads to a room with a vending machine, where you can grapple up into a vent, entering the lab.
-> Reactivate elevator: On the console.
-> Defeat vile experiments: In the same room.
-> Talk to Ted: In the center of the lab.
-> Defeat CorrupTed: He will drop ECHO Log 4. This ECHO Log is the only one of the five that is not a world collectible.
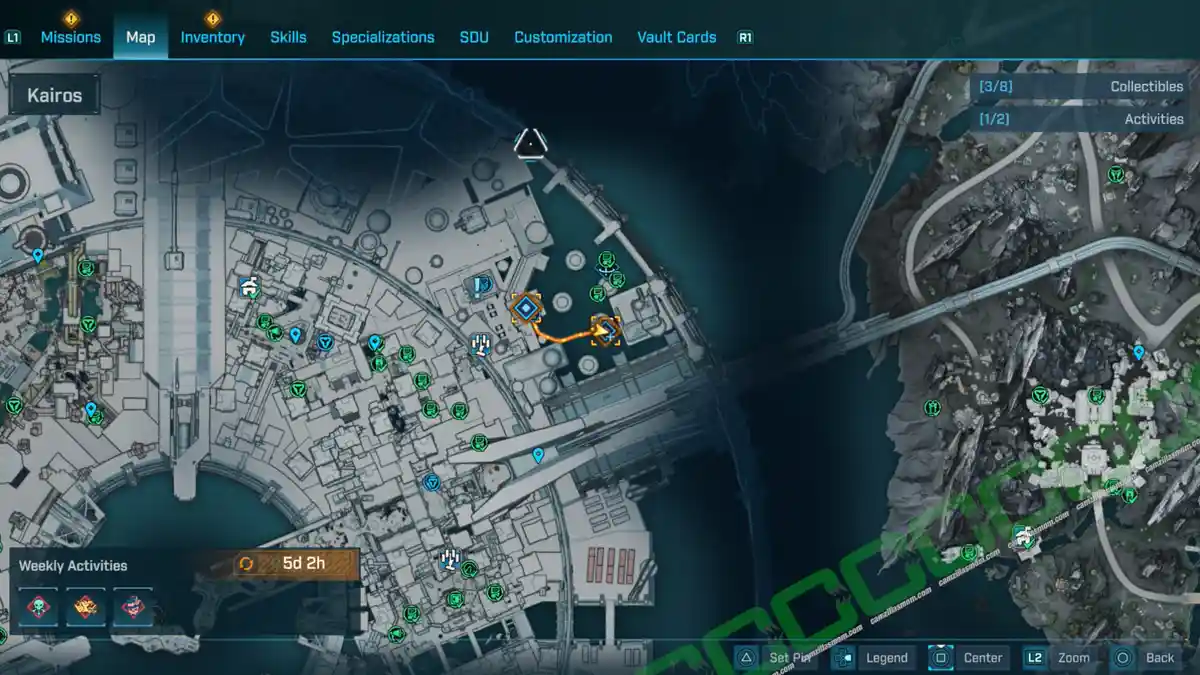

-> Reach elevator, Leave facility: Leave the lab following the ground floor corridor. At the end of it, you’ll find the last of the five ECHO Logs. Then, take the elevator up.
AAA For Effort
Side Mission Start:
Hydrus Sublab – Max Sky via Intercom
Near the endpoint of the previous Side Mission.
What it is about:
Help a space mech in need.
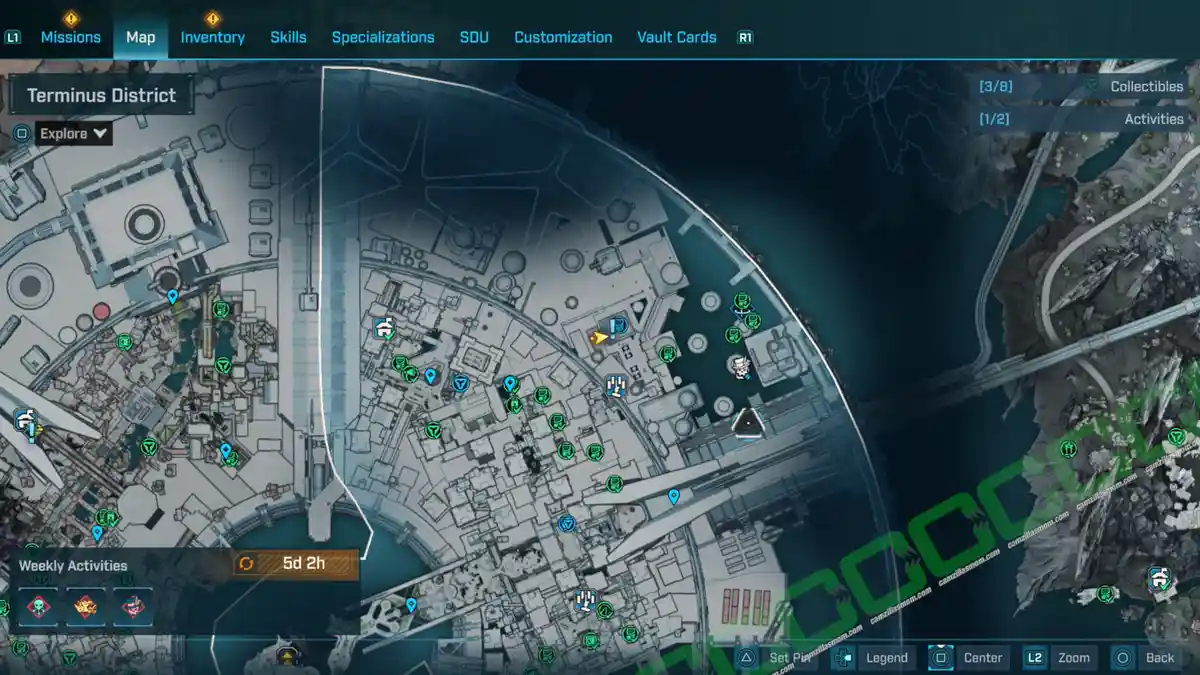
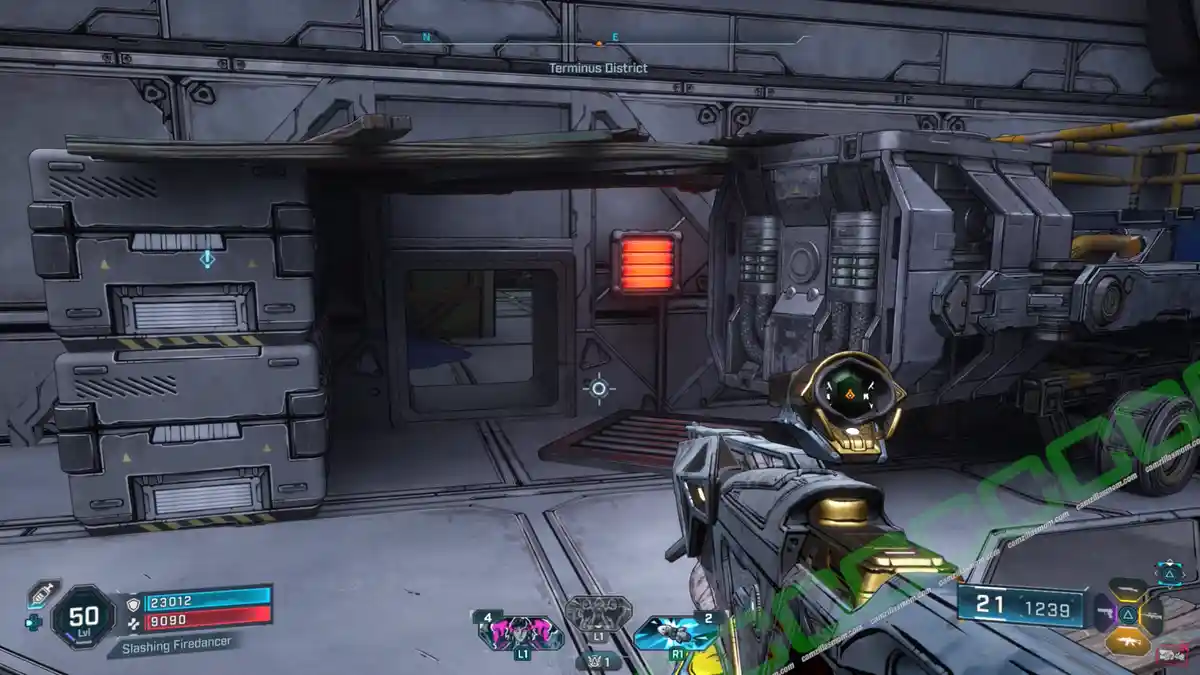
Side Mission Steps:
-> Enter Ordonite smelting plant: At the Tempered Manufactorium POI in the center of the Terminus District map. You will get the passcode for the gate.
-> Enter Ordonite smelting plant: At the Tempered Manufactorium POI in the center of the Terminus District map. You will get the passcode for the gate. It is wrong and you will then be sent out be find various parts in the city. – You won’t have to collect them after all, pfew!
-> Alright, let’s make this easy. The code is 7…
-> Reach control room: Pass through two big rooms, where you can pull off a vent cover at the end to continue on into a cylindrical garbage room with creeps. In here, look for a grapple that takes you through a vent to the next room with a ladder. Climb the ladder and use the metal walls to climb higher. Finally, grapple up and follow the conveyor belt to reach the control room.
-> Activate first power bank: Push the button on the console.
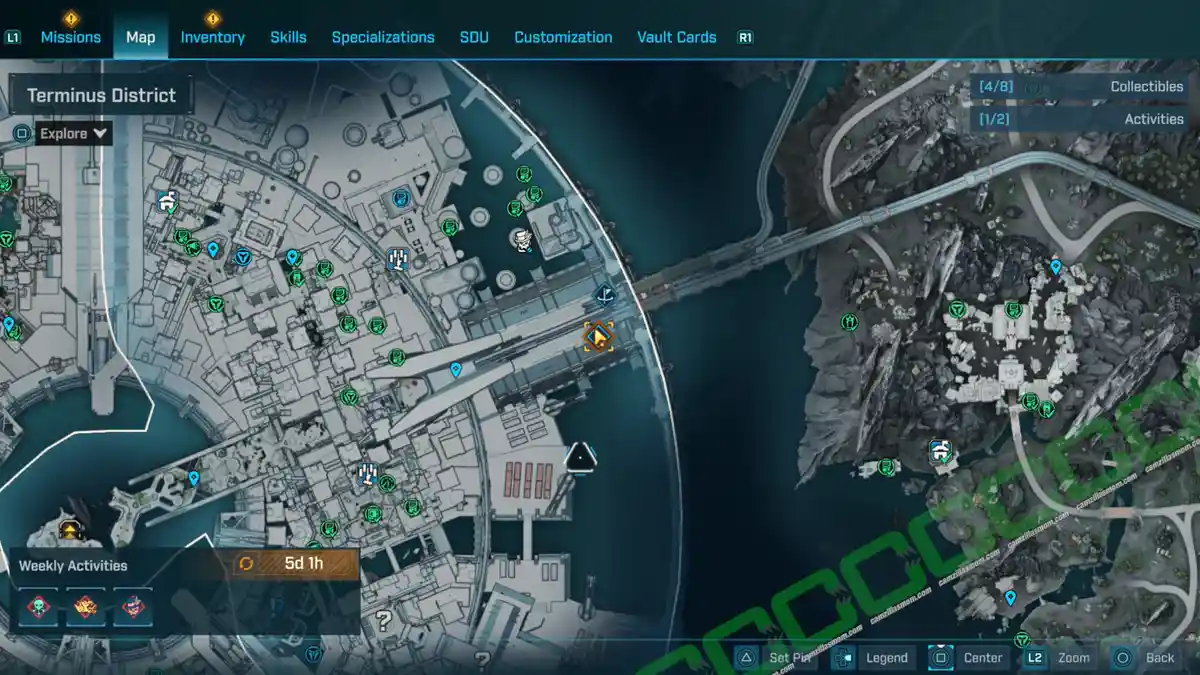

-> Activate second power bank: A second console in the same room.
-> Activate third power bank: Yet another console.
-> Activate ordonate battery dispenser: A console at an elevated position.
-> Return to Max Sky
-> Place Ordonite battery in mech’s back: The dispenser is now working, and you can take one battery out of the dispenser in the same room as the mech. You have to throw it ahead of you, climb up the ladders, and then throw it into the deposit slot at the top.
-> Turn on Ordonite reactor: There is a button on the mech’s backside.
-> Open two thruster covers: Grapple the end of the arms.
-> Open roof: The switch on the console.
Love in the Time of Eridium Poisoning
Side Mission Start:
The Dunk – Brenda
At the location, enter the building through the only open door.
What it is about:
Help save Brenda’s marriage.
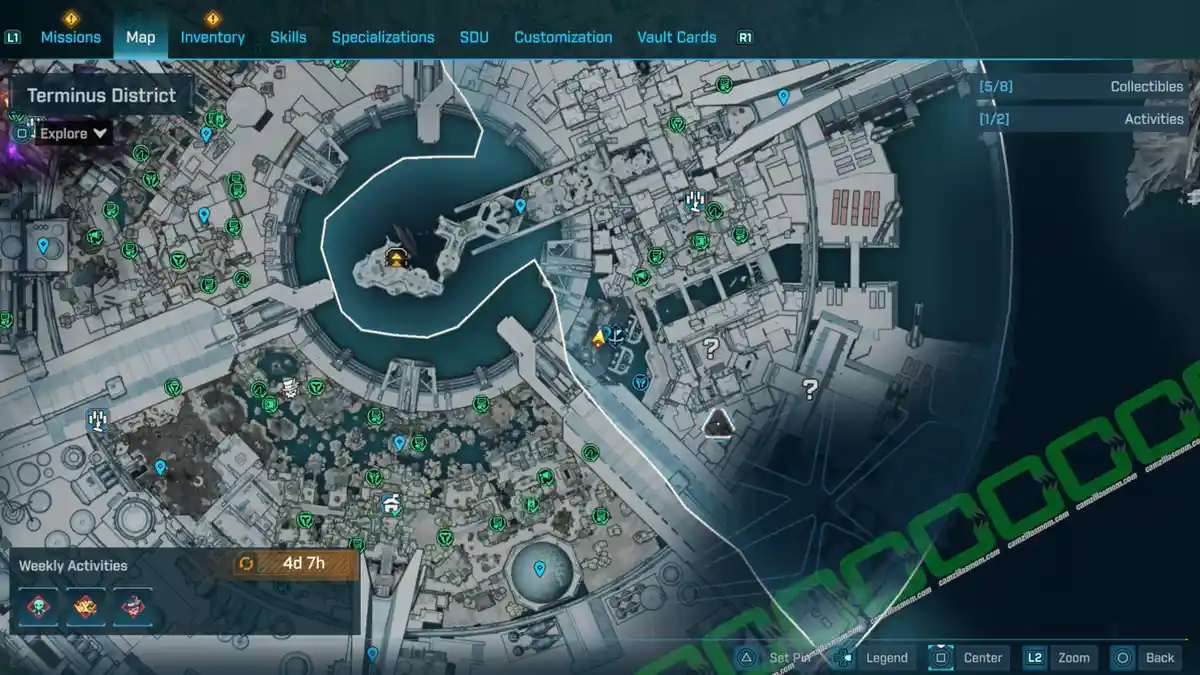

Side Mission Steps:
-> Talk to cooling plant foreman: Exit the building and head upstairs to talk to the intercom.
-> Enter cooling plant, clear out enemies
-> Shut down plant: Pull the lever
-> Prime first pump: This will move the panel with the valves on the wall. Shoot it in the order of the lights. Green! They are always in the same order.


-> Prime second pump: Again, same principle.
-> Clear enemies.
-> Prime third pump: Same again.
-> Shut down plant: The main switch in the center of the room.
-> Join Brenda in reservoir: Return to where Brenda was. The water is now gone and you can climb down the ladder.
-> Defeat Brenda.
-> Defeat Herman
-> Pick up break room key, Pick up ECHO Log: Both dropped. The ECHO Log is a mission Log, not a region collectible.

-> Open Break room: Where you met Brenda the first time.
The Neverending Quarry
Side Mission Start:
Praetor’s Lecture – Red Chest
Open the red chest behind the ECHO Log collectible.
What it is about:
Survive Horatio’s ambush.
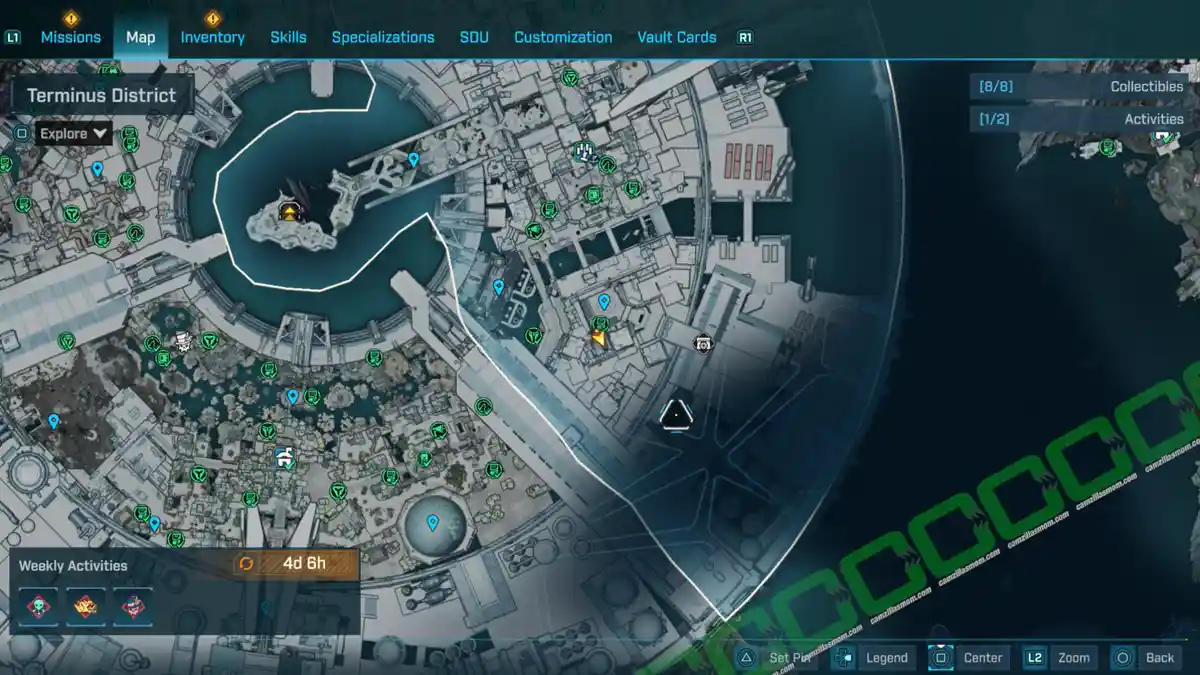

Side Mission Steps:
-> Defeat cunning ambush
A Quarry of Epic Proportions
Side Mission Start:
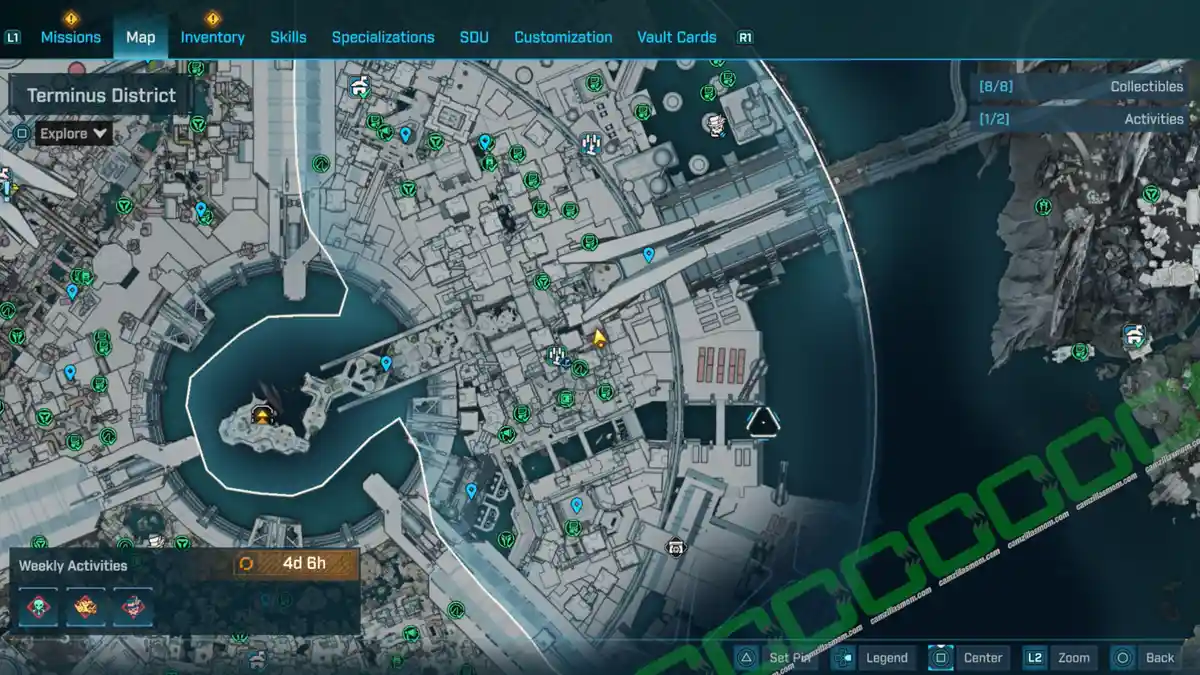
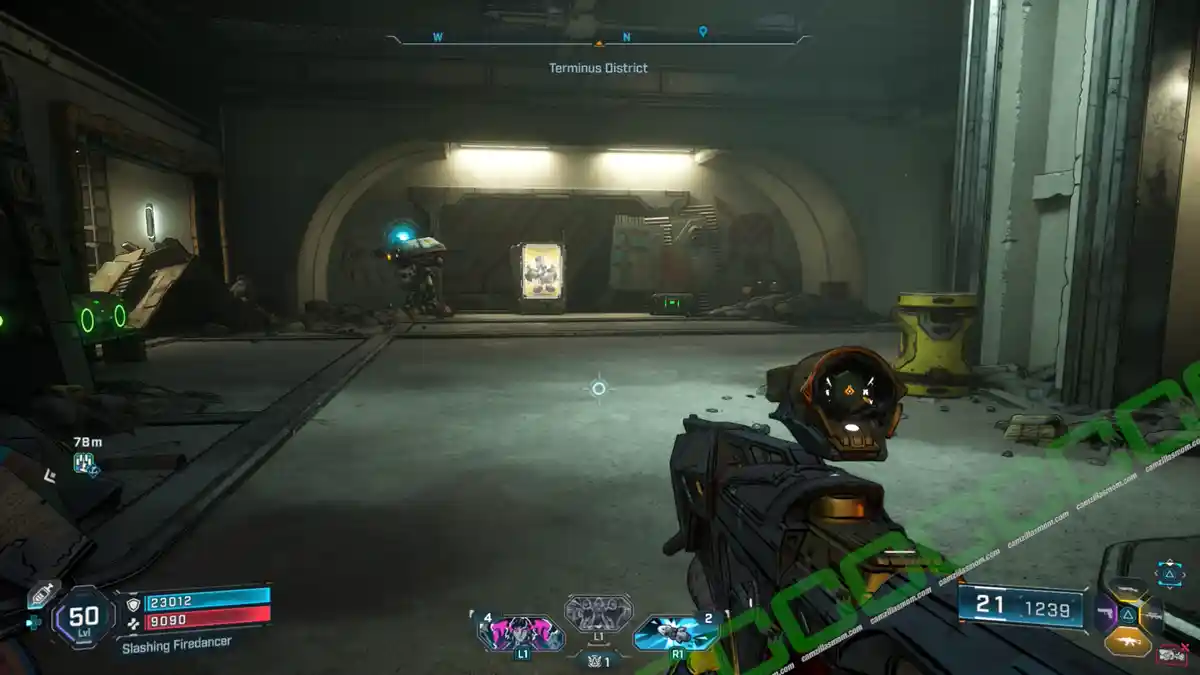
Frantic Scrawl – Vending Machine
Interact with the vending machine.
What it is about:
Survive another ambush.
Side Mission Steps:
-> Defeat genius ambush.
The Final Quarrel
Side Mission Start:
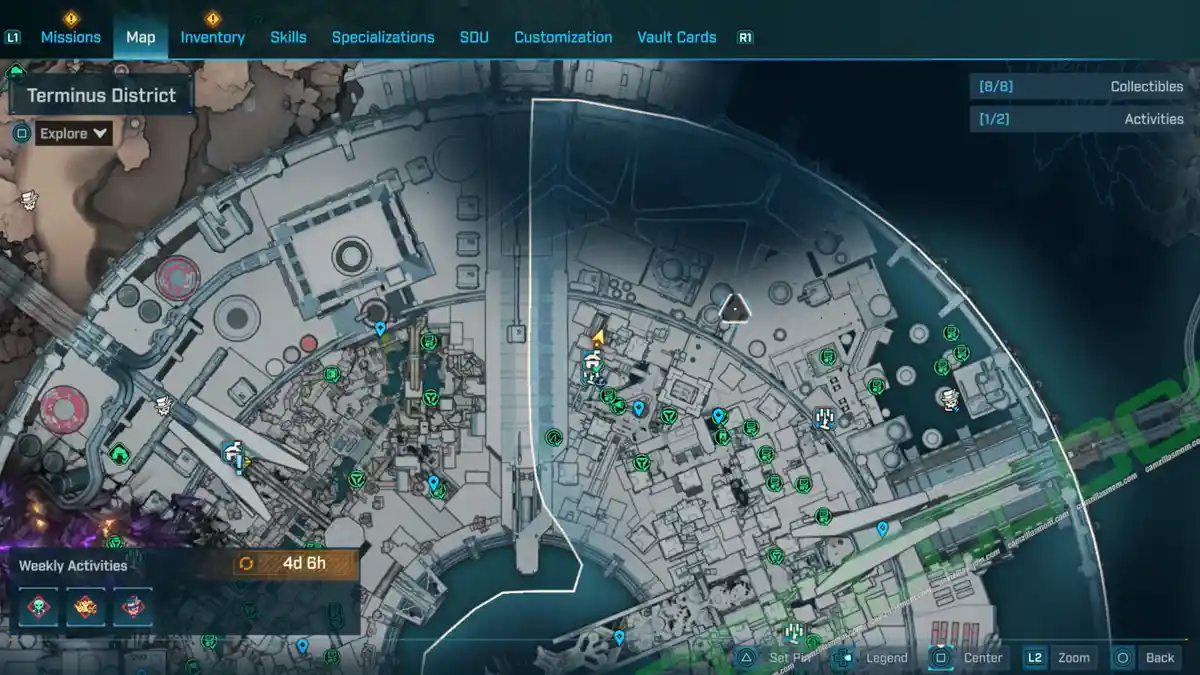
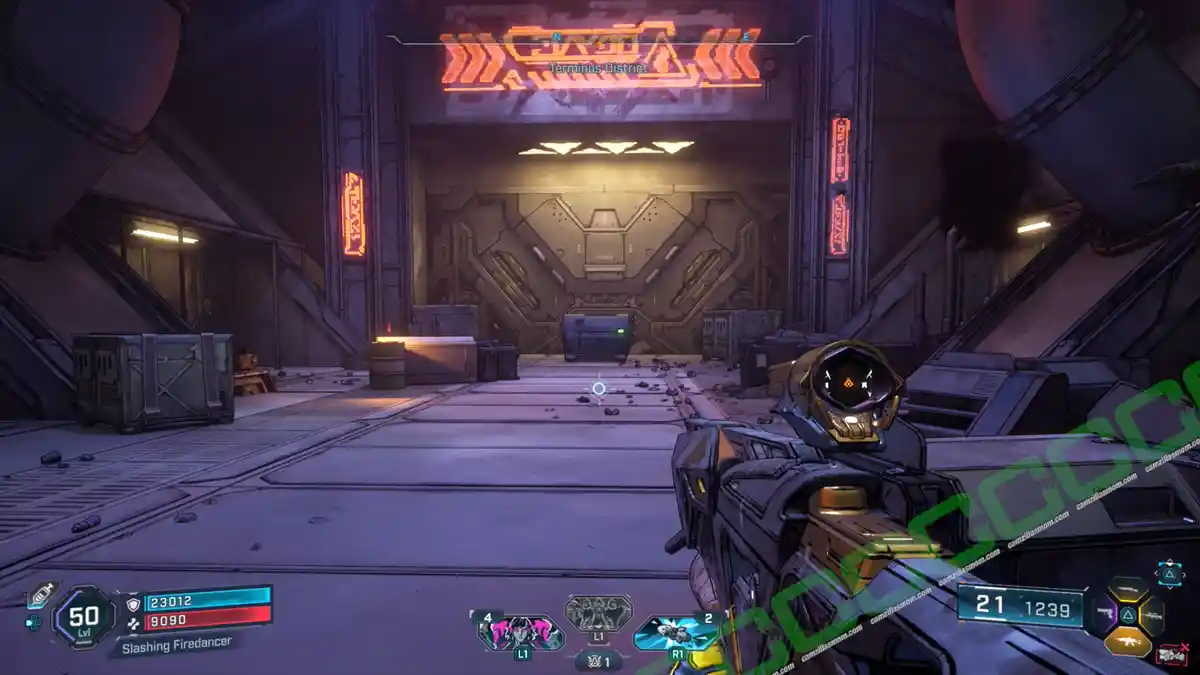
Safehouse: The Food Court – Dumpster
Open the dumpster north of The Food Court
What it is about:
Defeat Horatio.
Side Mission Steps:
-> Defeat ambush mastermind and jerk squad.
Browse All Borderlands 4 Guides
Borderlands 4: Elpis Orbital Shatterfield Collectibles
Snag every ECHO Log and Vault Symbol in Elpis Orbital Shatterfield, Borderlands 4, with this straigh…
Borderlands 4: Fades District Collectibles & Activities
Explore the Fades District in Borderlands 4! This guide covers collectibles, side missions, and acti…
Borderlands 4: Fortress Indomita Collectibles Locations
Hunt down every collectible in Fortress Indomita, Borderlands 4! From Vault Symbols to ECHO Logs, th…
Borderlands 4: Grindstone of the Worthy Collectibles & Activities
Discover all Grindstone of the Worthy's secrets in Borderlands 4. From collectibles to side missions…
Borderlands 4: Heart of the Mountain Collectibles & Activities
Discover every collectible and activity in Borderlands 4's Heart of the Mountain, from ECHO Logs to …
Borderlands 4: Hungering Plain Collectibles & Activities
Explore Borderlands 4's Hungering Plain with this detailed guide. Discover collectibles, complete si…


Borderlands 4
Release: September 12, 2025
Developer: Gearbox Software
Publisher: 2K Games
Official Website: https://borderlands.2k.com/borderlands-4/


