
Explore every corner of the Fades District in Borderlands 4 with this detailed guide. Uncover ECHO Logs, Vault Symbols, and other collectibles, while tackling side missions and activities. With clear maps and step-by-step instructions, this guide is your ultimate companion to mastering this region.
MORE DOMINION GUIDES
Carcadia District
Terminus District
Upper Dominion
-> More Borderlands 4 Guides at the Hub
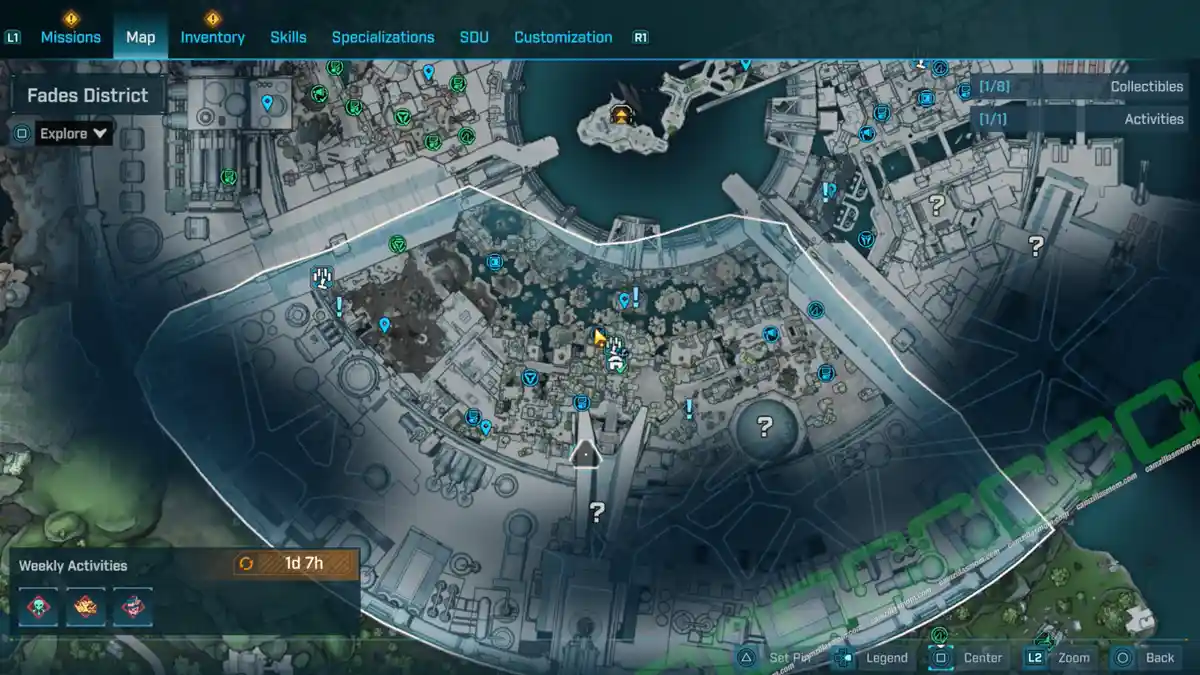
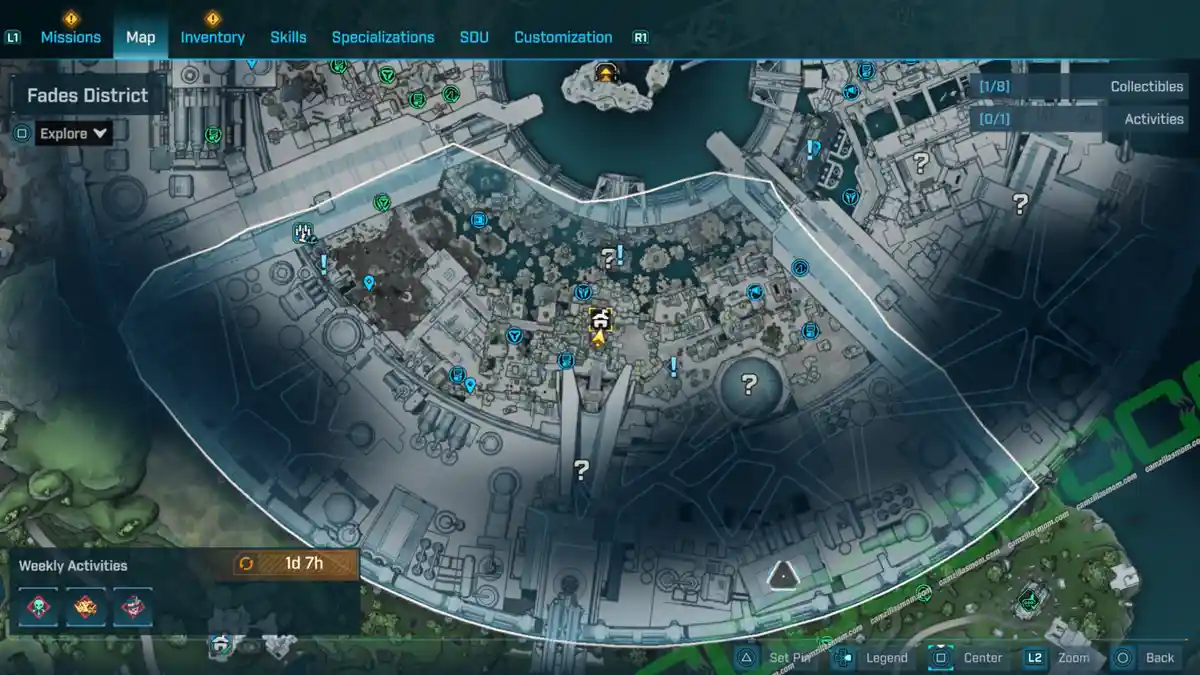
Fades District Overview Map
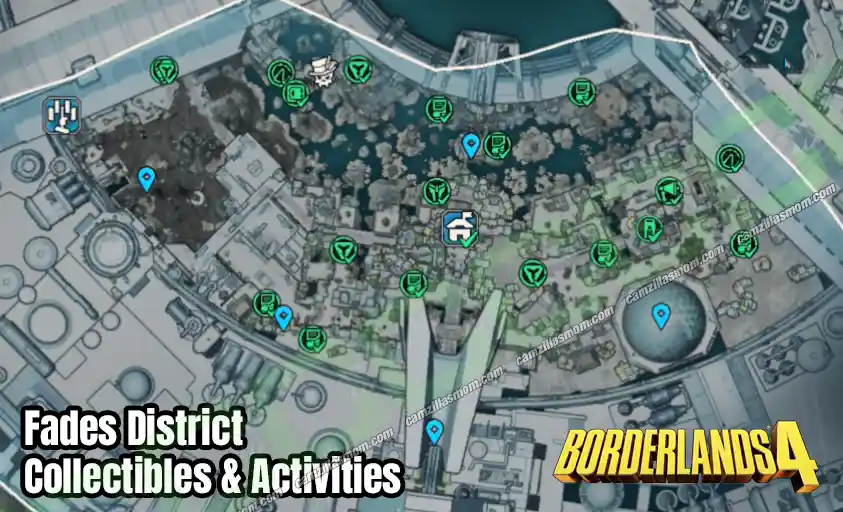
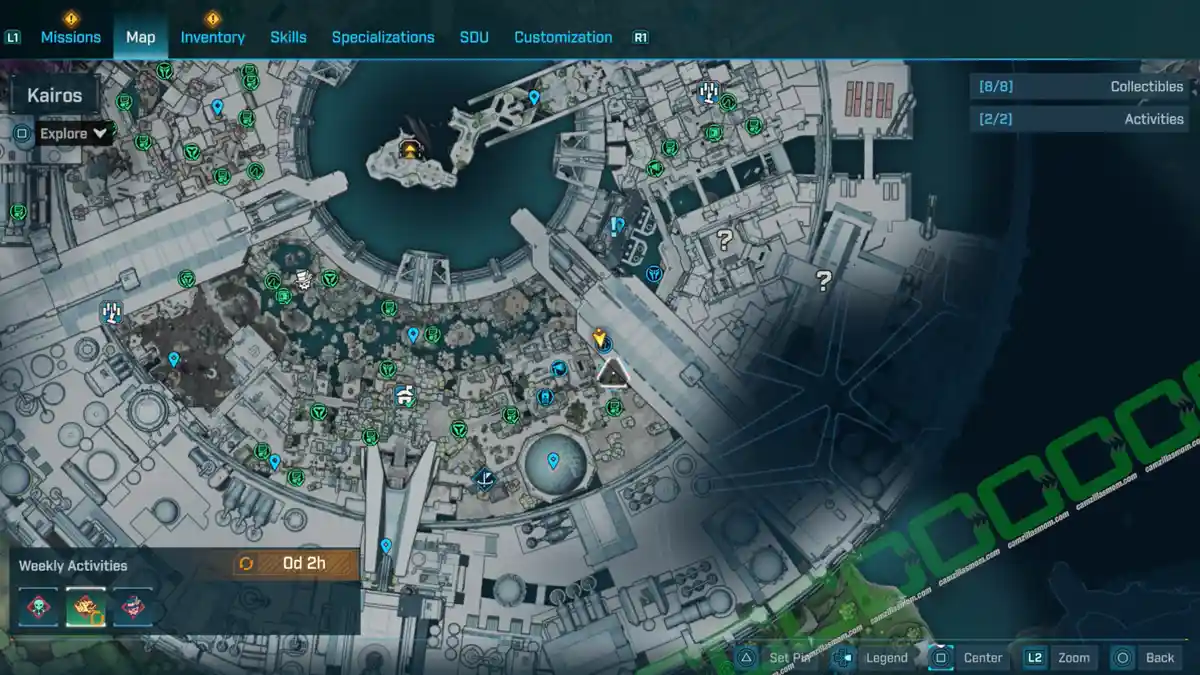
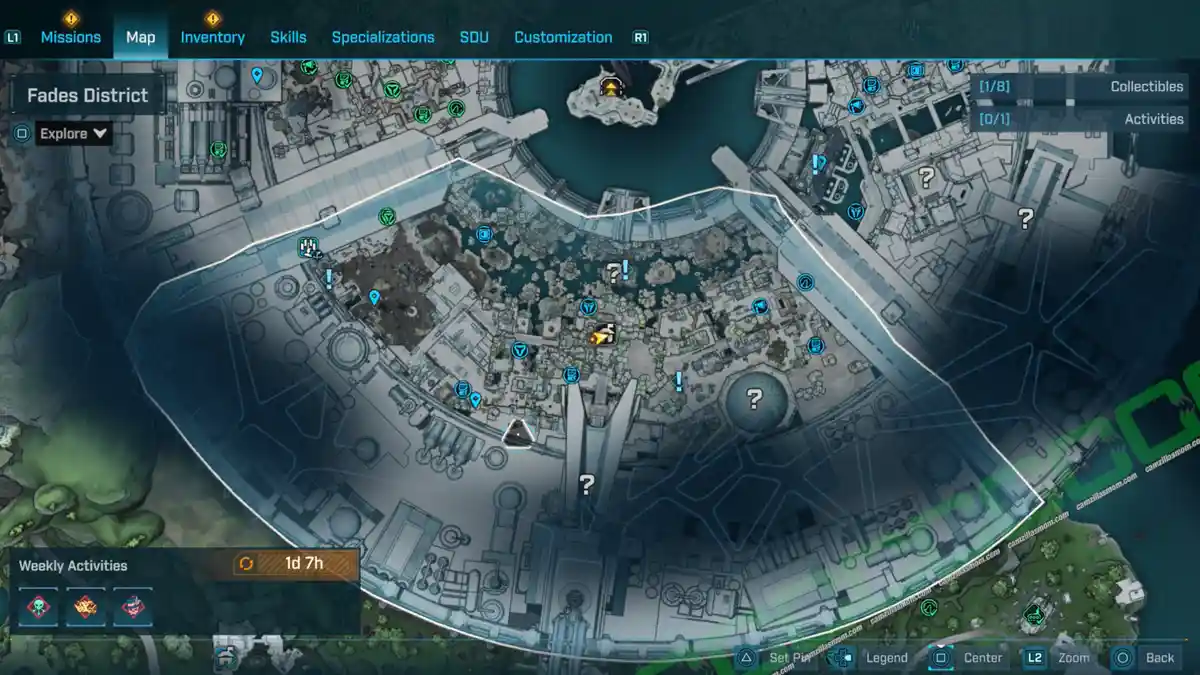
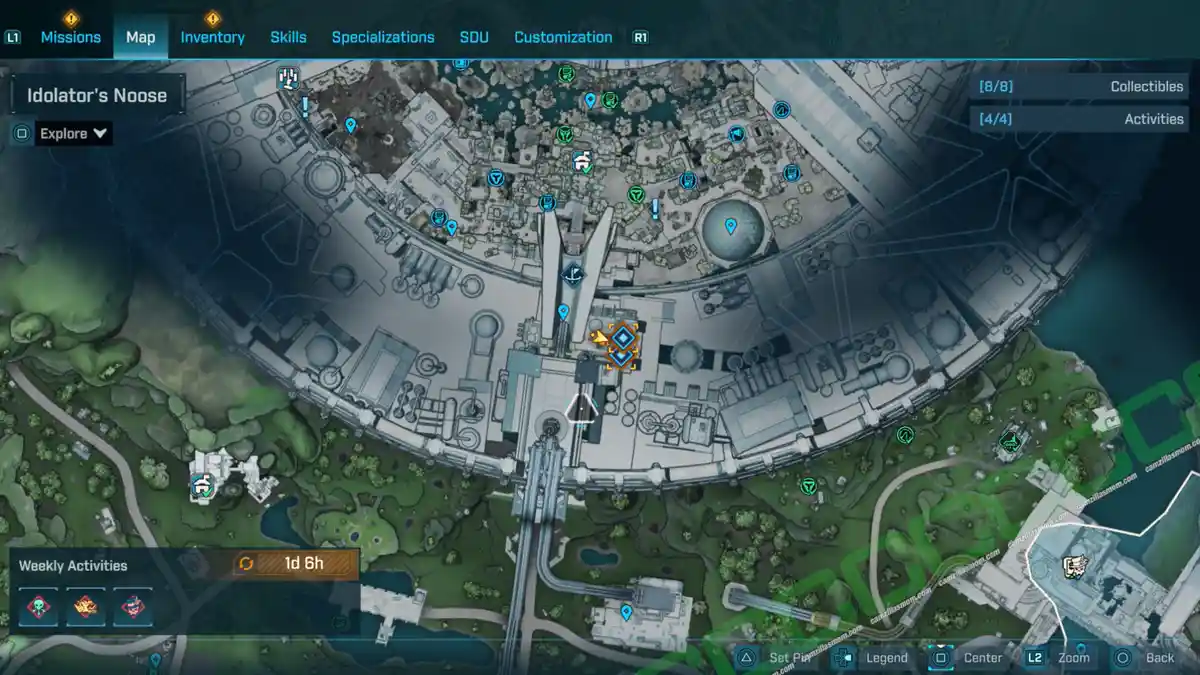
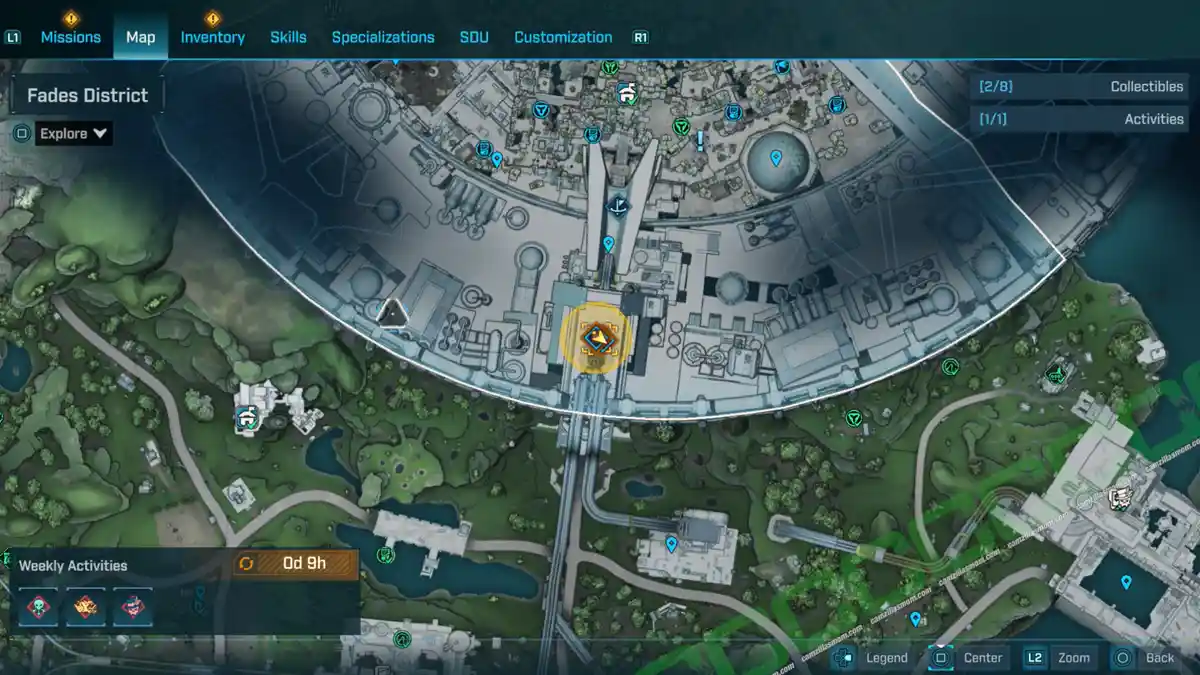
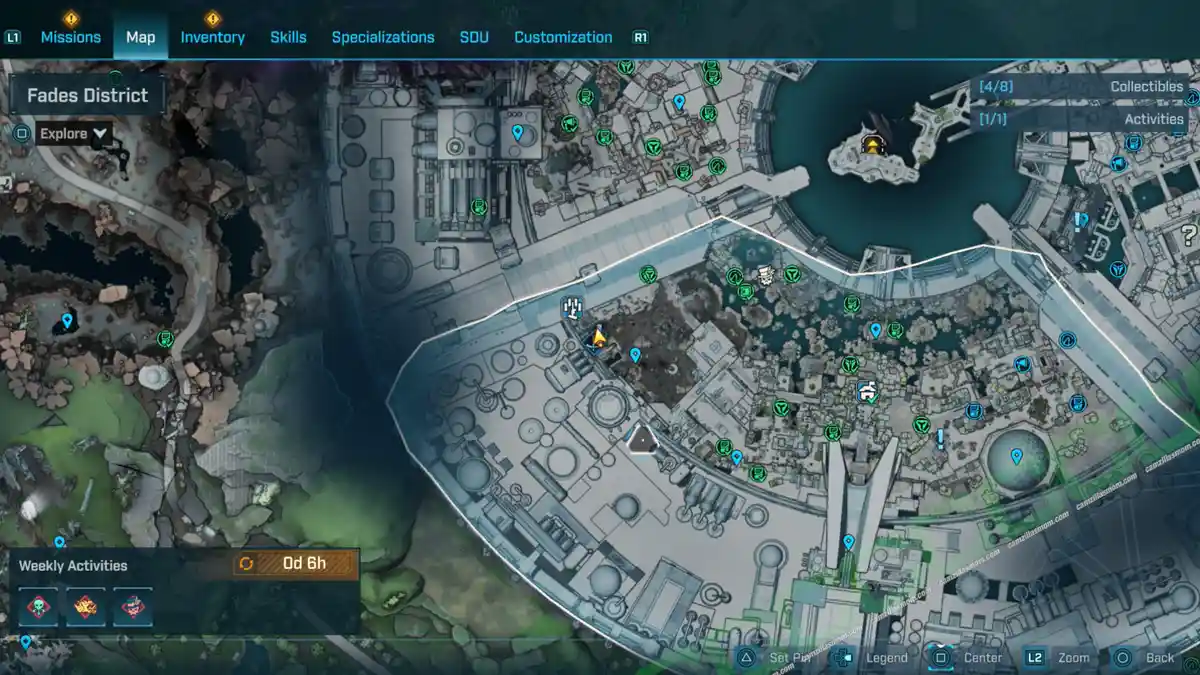
Below is the Fades District Overview Map, which includes all collectibles and activities.
Fades District POI’s
The Fades District has five POIs – Points of Interest – on the map, marked with a blue pin. Below you will find all the POIs highlighted on the map.
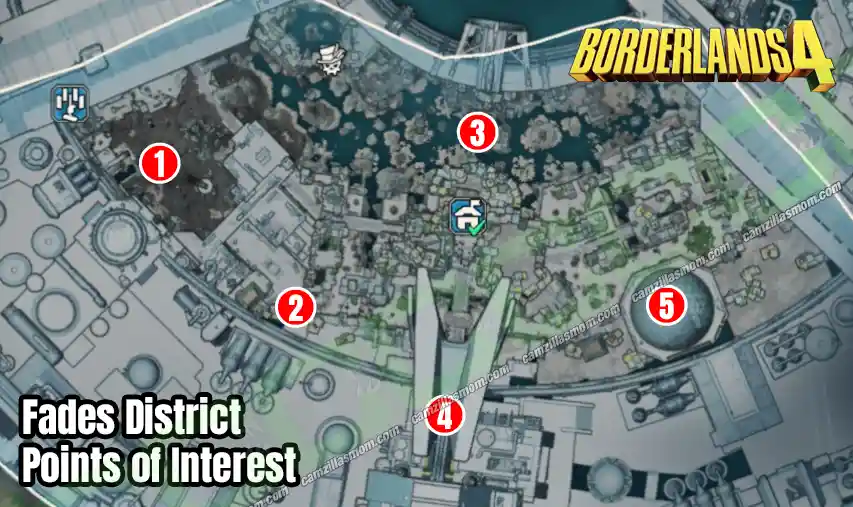
1 – Glory Park
2 – Data Dump Cafe
3 – Lakeside Properties
4 – Locust Production Facility
5 – Darkloam Biosphere
Collectibles
Vault Hunter’s Guide to Kairos – 1
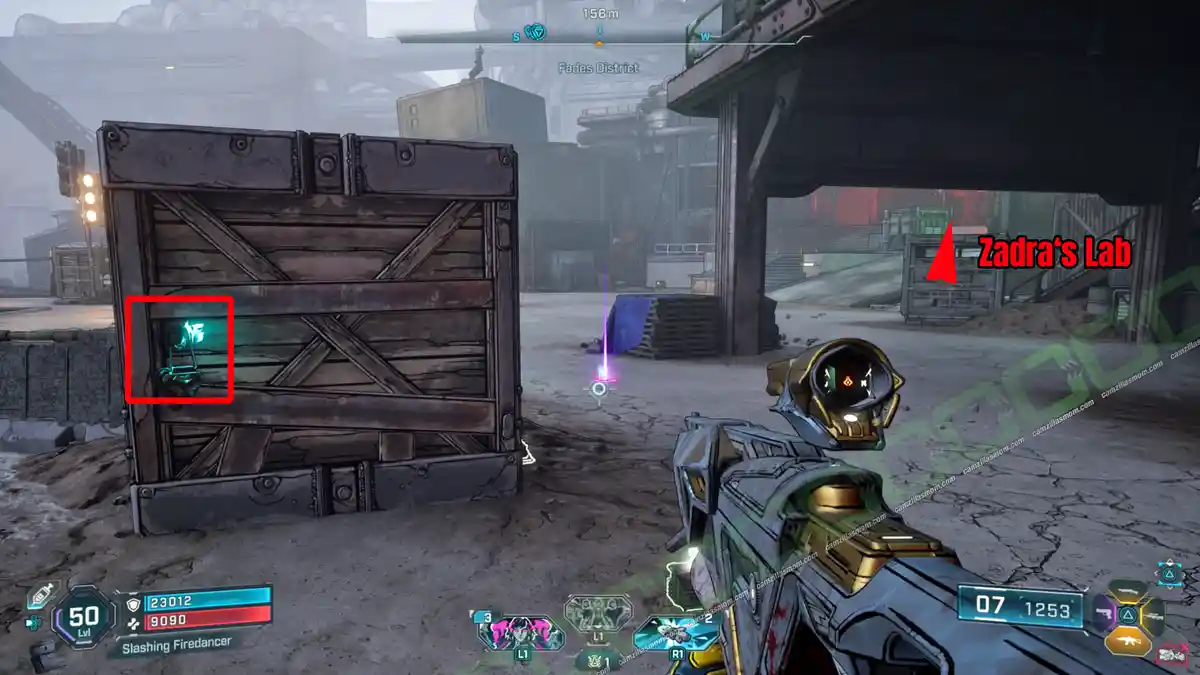
Exit Zadra’s Lab in the west of the Fades District (there is a Fast Travel Station). In the courtyard in front of it, look behind a big wooden box, where the Vault Hunter’s Guide to Kairos: Dominion City is hanging.

Description:
“Arjay tours Dominion City.”
-> Also available: Guided Tour – All 12 Vault Hunter’s Guides
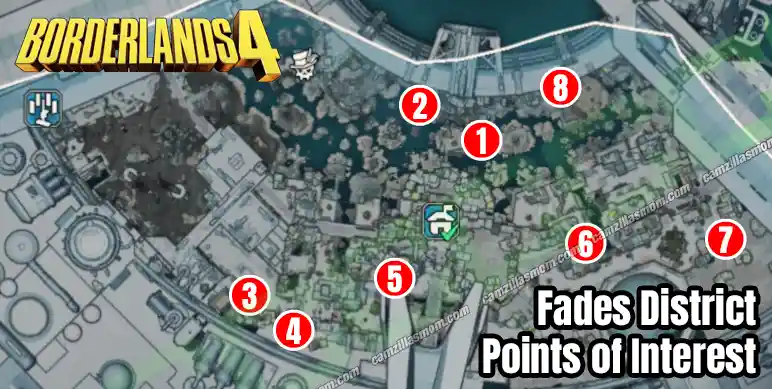
ECHO Logs – 8
-> Also available: Kairos Speaks – All ECHO Logs
1 – Slumdog Beth
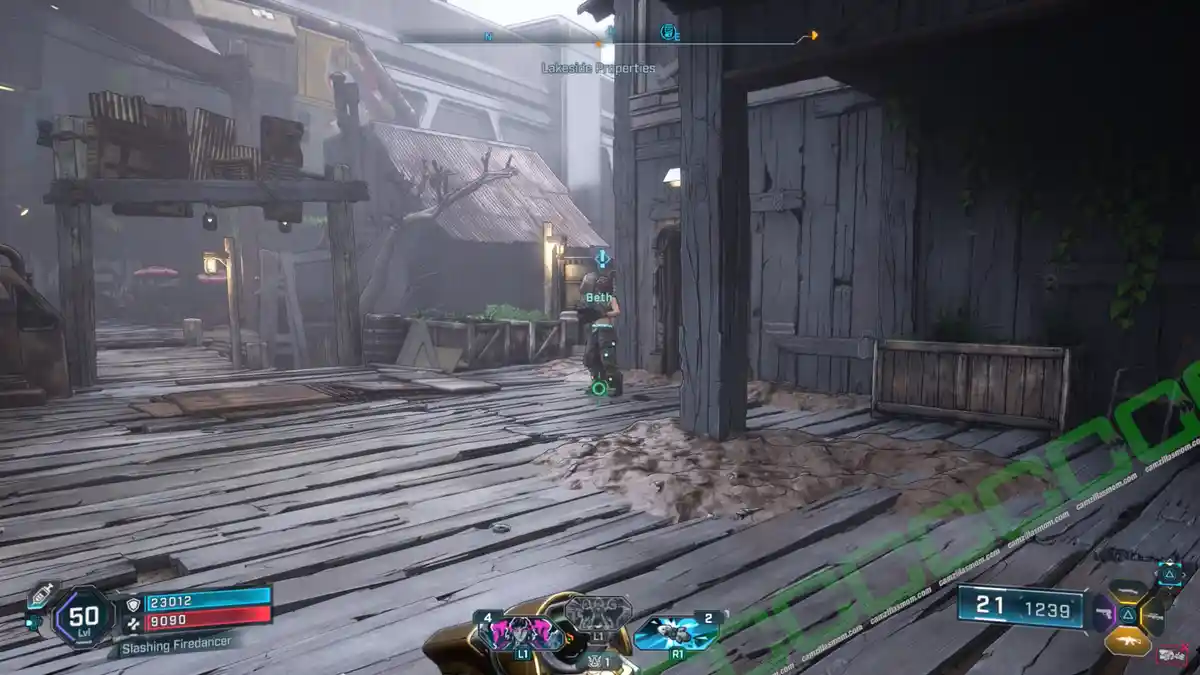
You can find this ECHO Log at Lakeside Properties. Look inside the building behind Beth at the start of the “One Gassy Issue” Side Mission.
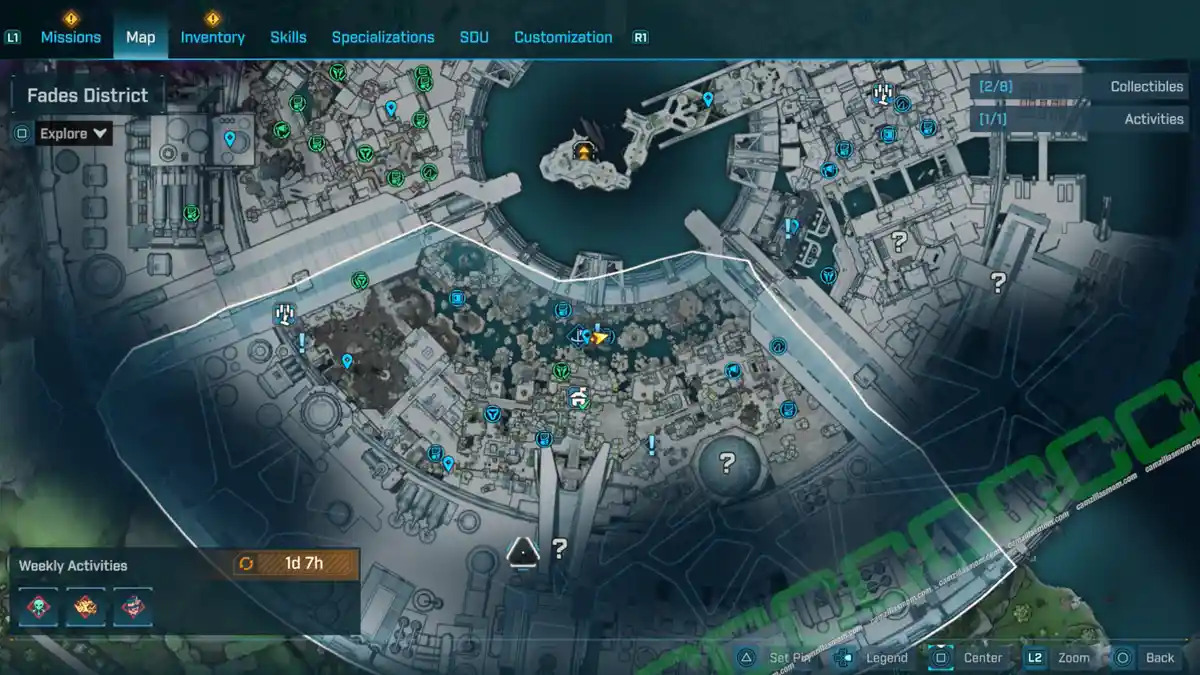
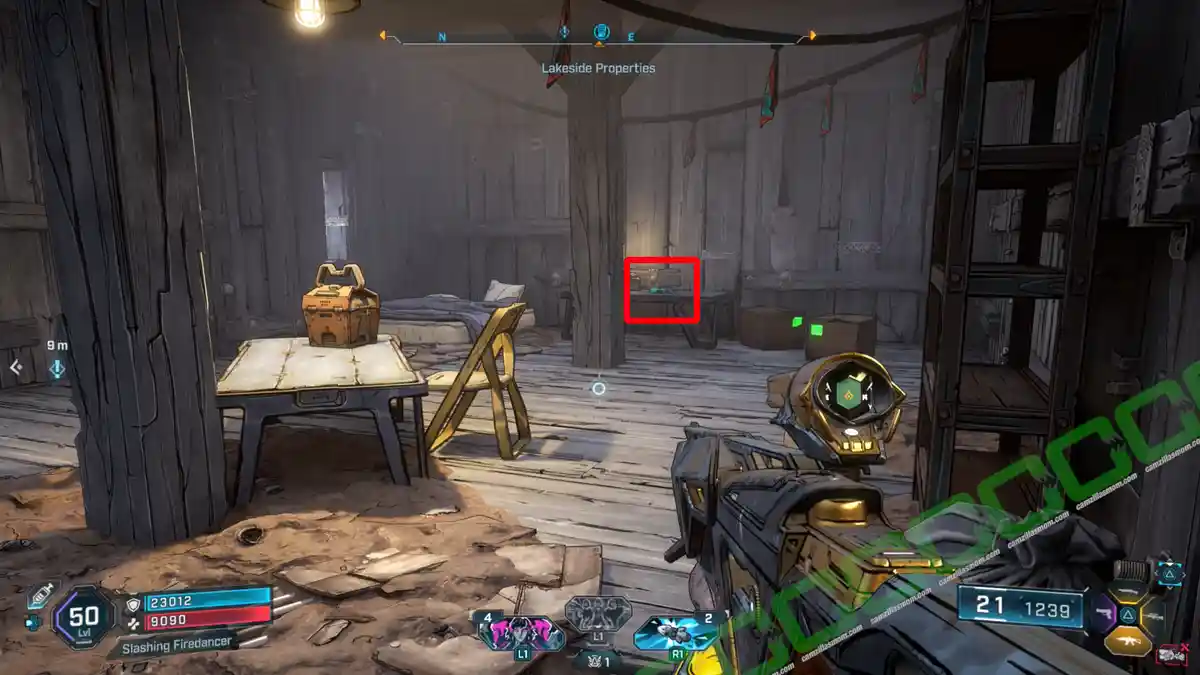
Description:
“Beth and the power of Positivity.”
2 – Poor Kitty?
The second ECHO Log at Lakeside Properties is in a shed to the west.
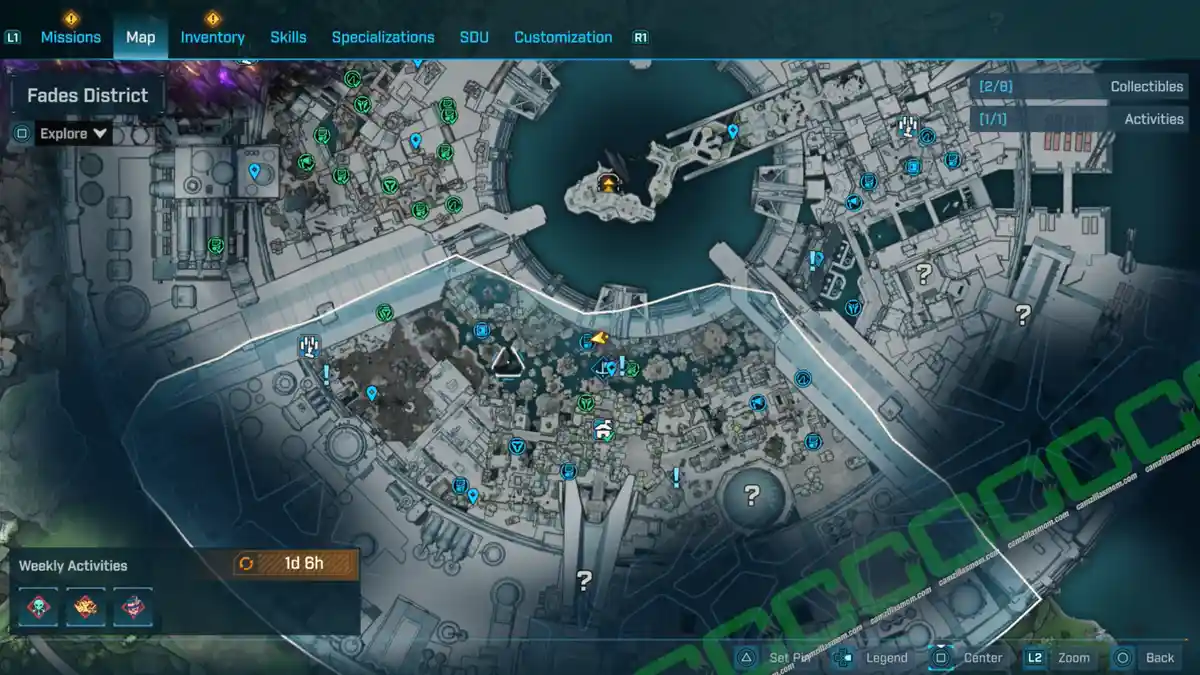
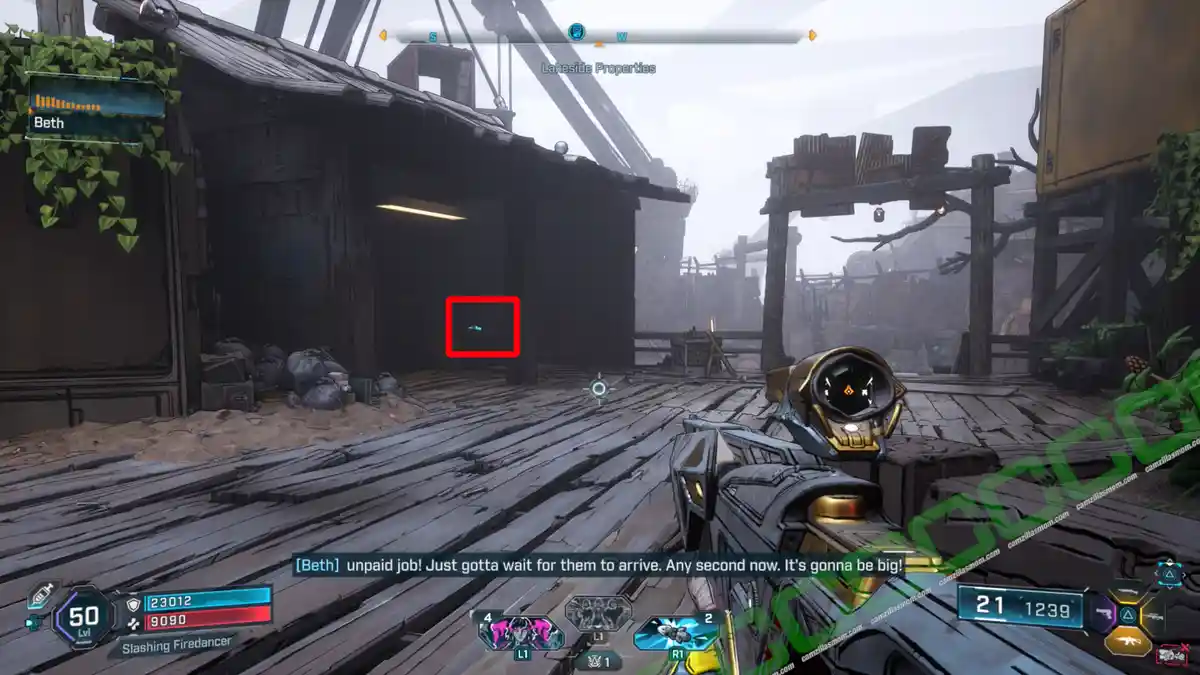
Description:
“And your little cat too.”
3 – The Diary of an Order Peon
The ECHO Log is at the Data Dump Cafe POI between two Order trucks.
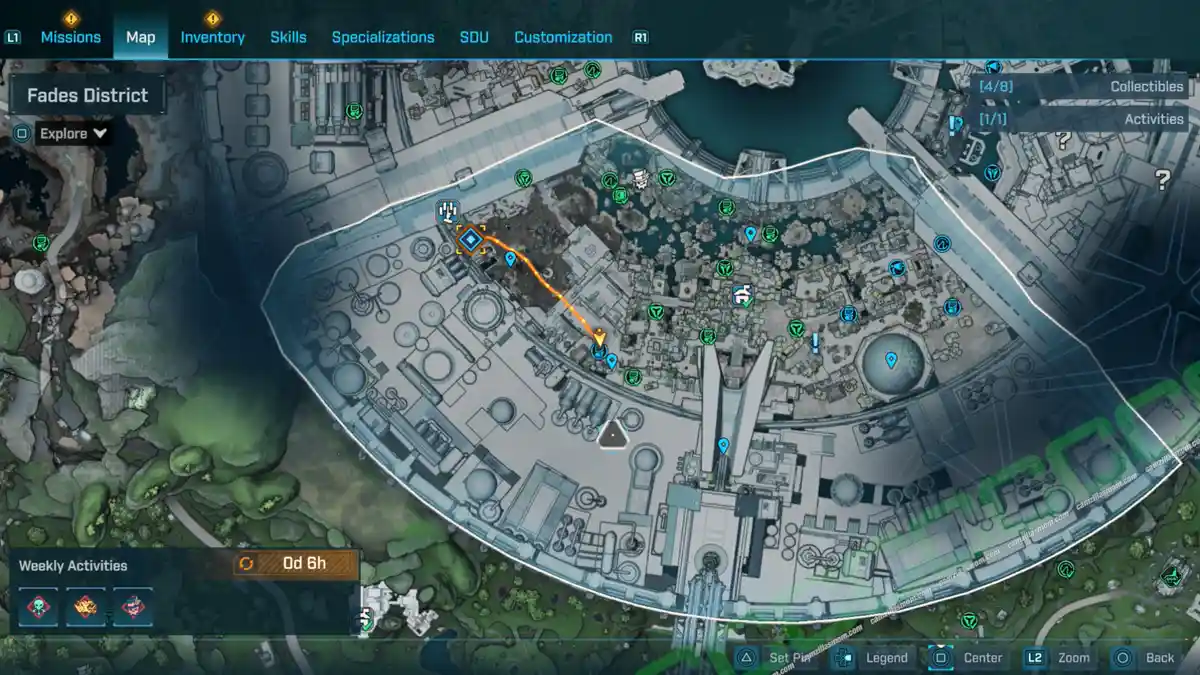
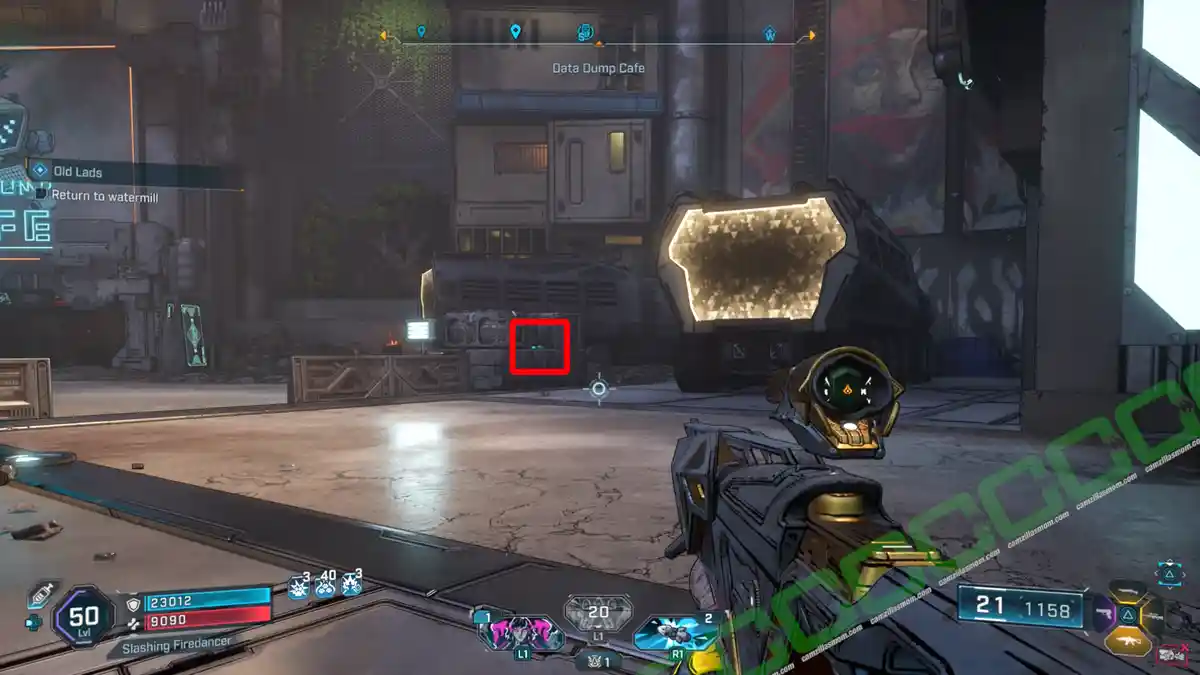
Description:
“On how to get ahead in the Timekeeper’s Order.”
4 – Old Wounds
Follow the Side Mission: Old Lads, until you have to find Padraic. Behind the back door is this ECHO Log.
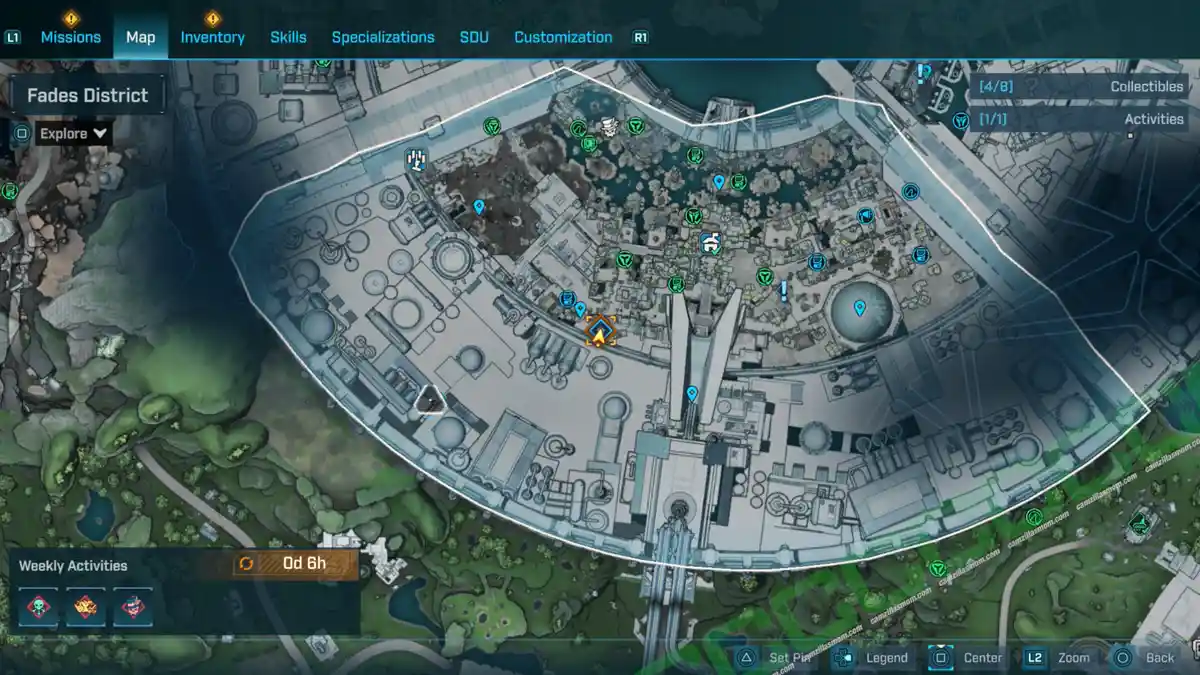
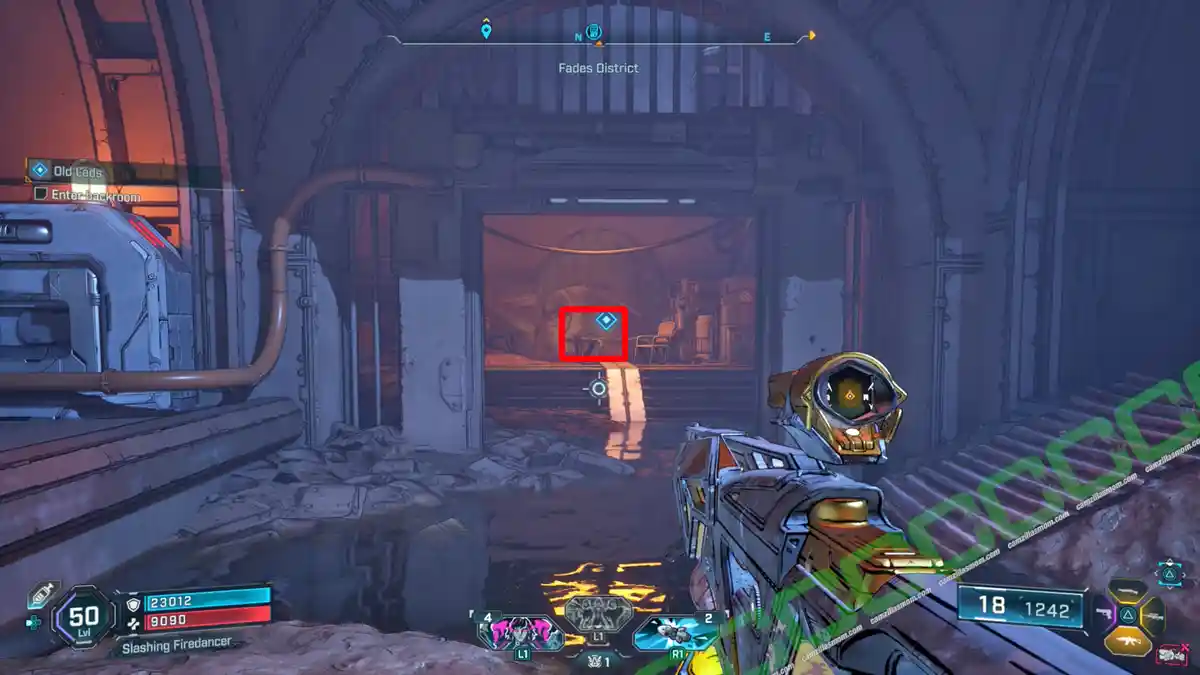
Description:
“The time has come.”
5 – Missing In Action
There is an ECHO Log southwest of the Safehouse lying on top of a bench.
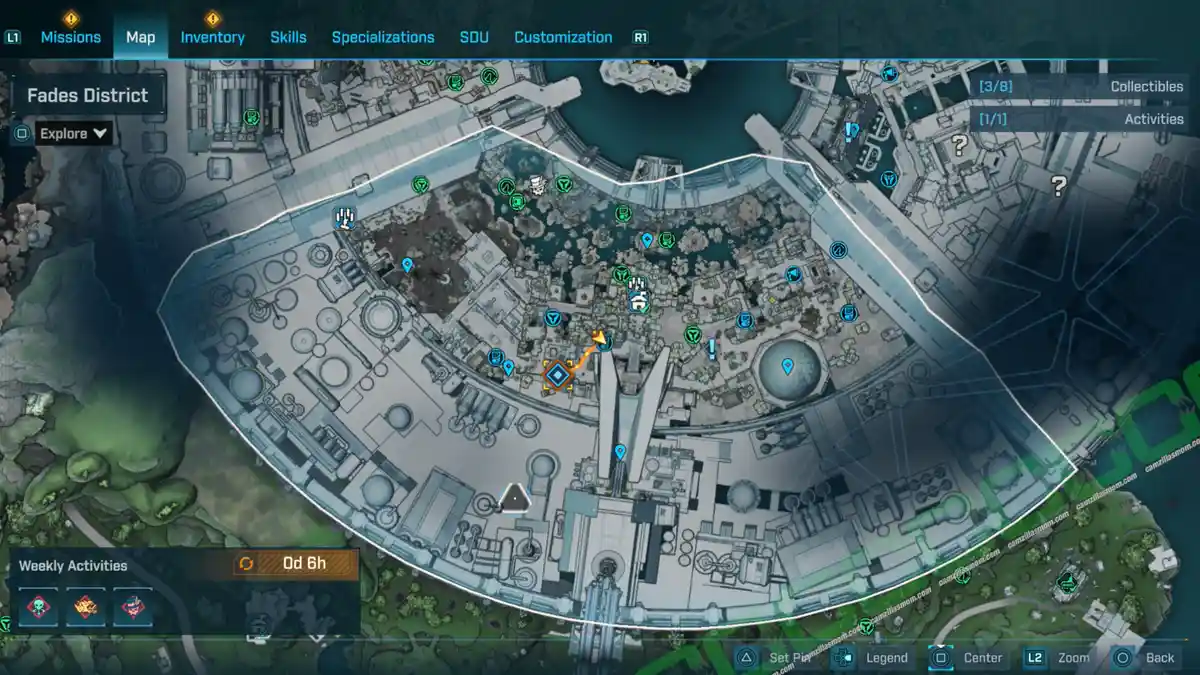
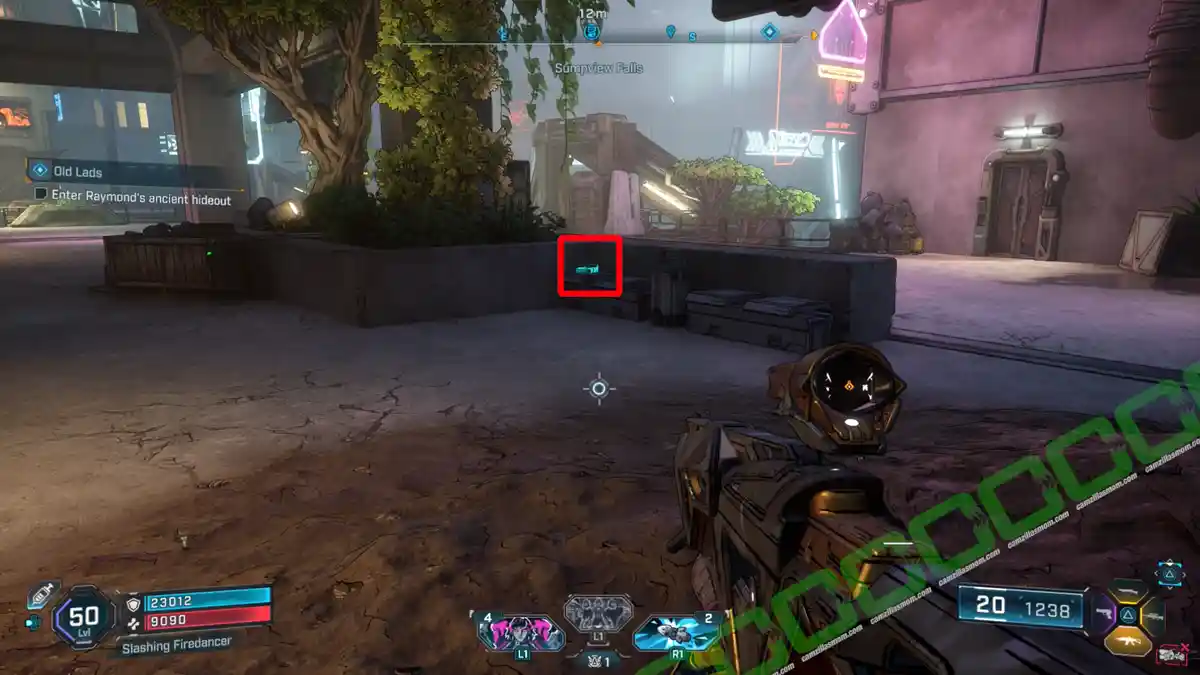
Description:
“And now Rika’s gone, too? Damn..”
6 – Away Message
Look at the bus stop near the Darkloam Biosphere to find this ECHO Log.
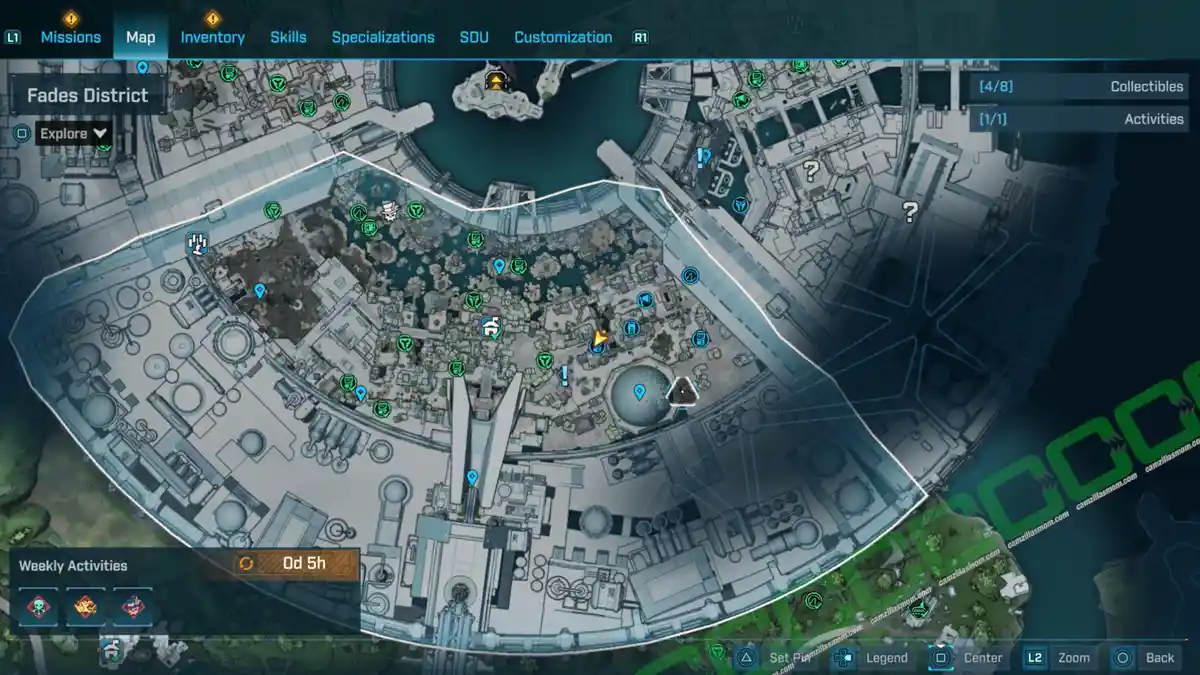
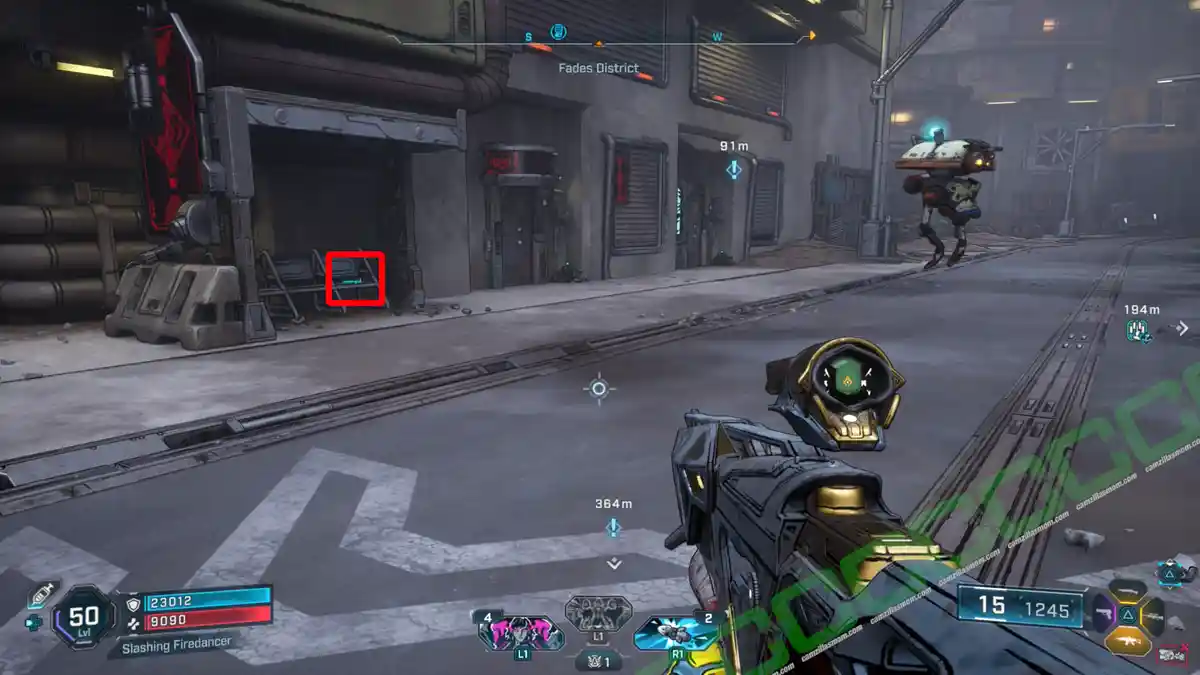
Description:
“It’s just a mannequin with a really nice wig.”
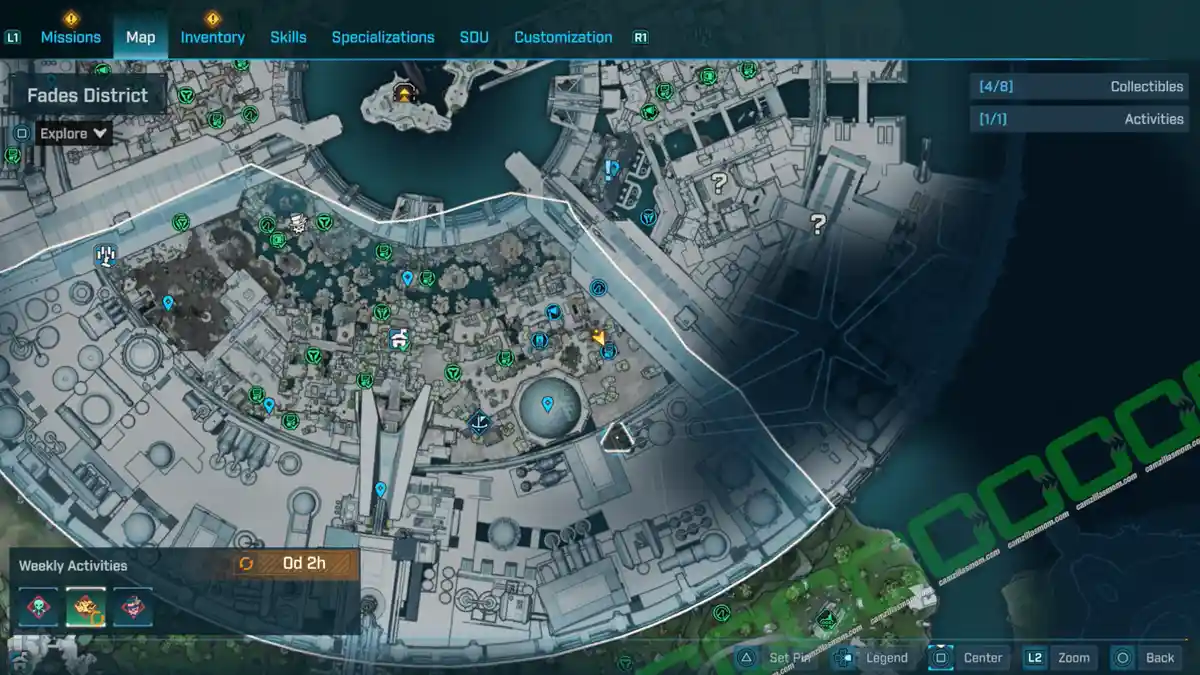
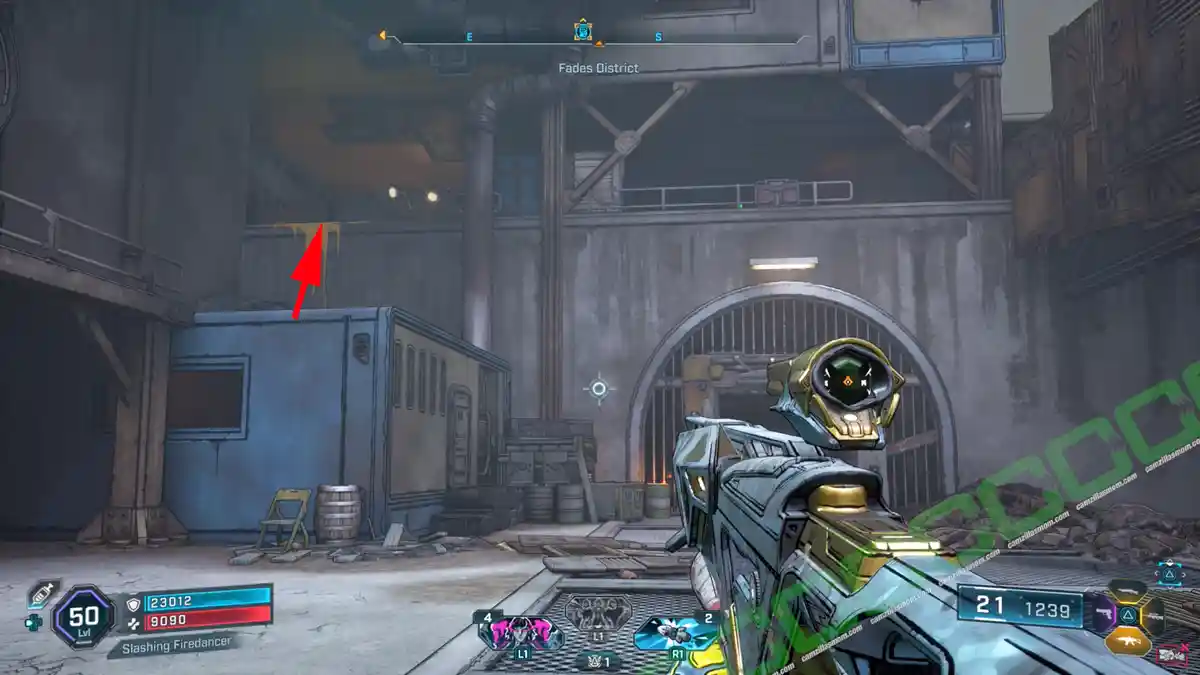
7 – A Moment of Silence
This ECHO Log is east of the Darkloam Biosphere marker on the map. It’s on the couch on the second level.
Description:
“Rafa remembers the fallen.”
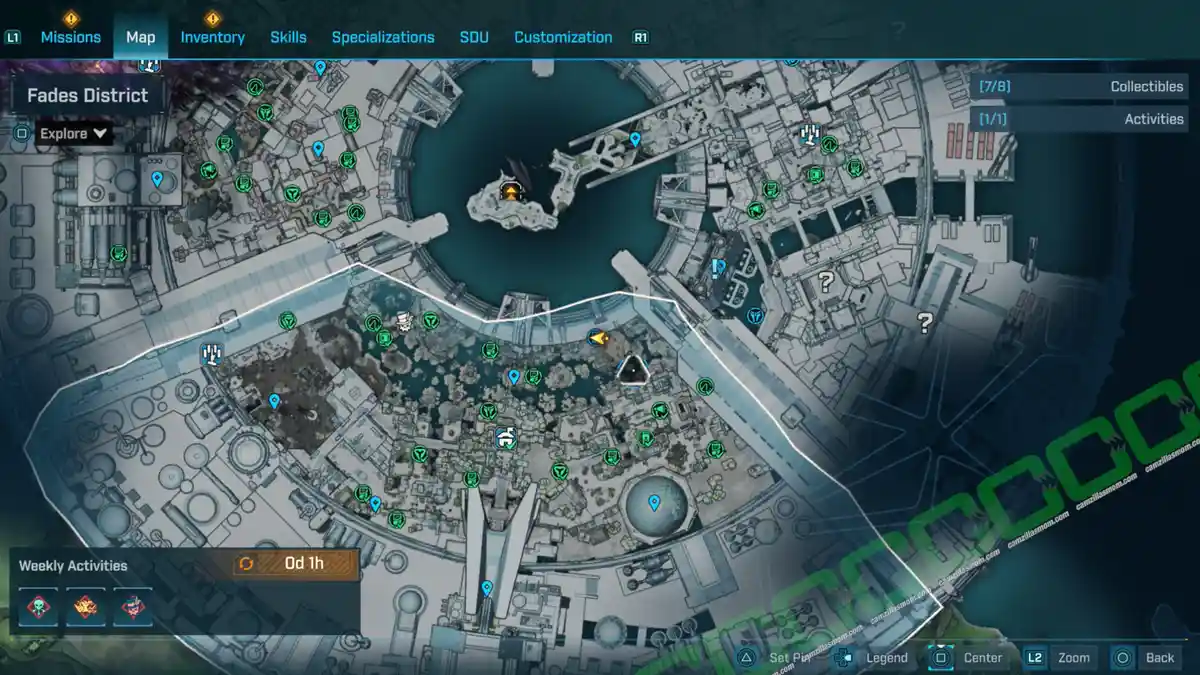
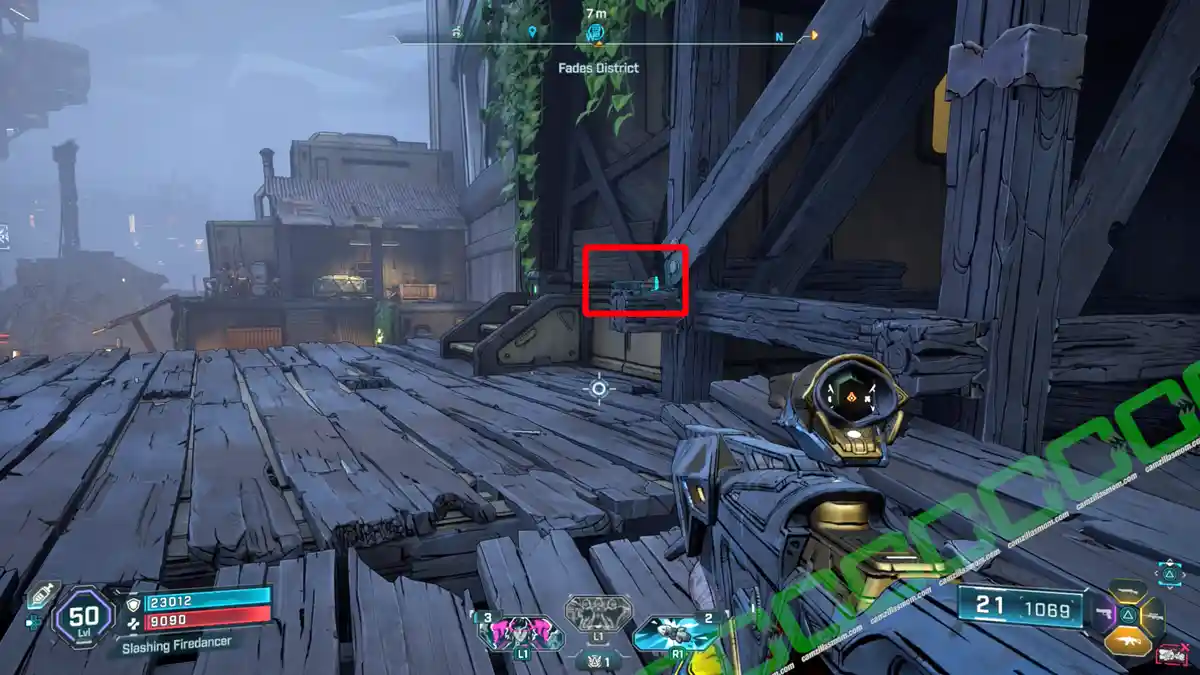
8 – The Tastes of War
For this Log, head to the northwestern map edge and work your way back to the west, where you will find it on a wooden beam.
Description:
“Amon reflects on the sensory cornucopia of battle.”
Dead Bolts – 3
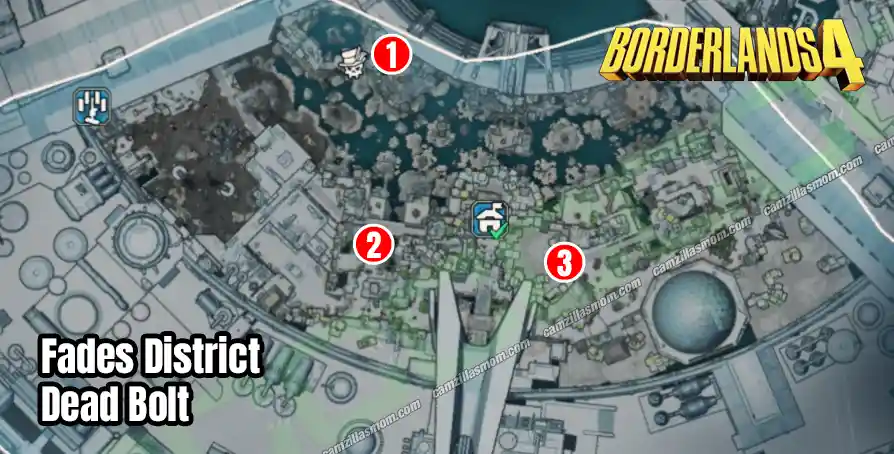
1 – Here Today
There is a ripper camp northwest of the Lakeside Properties POI. At the very back of this camp is a wheelbarrow with the Dead Bolt inside.

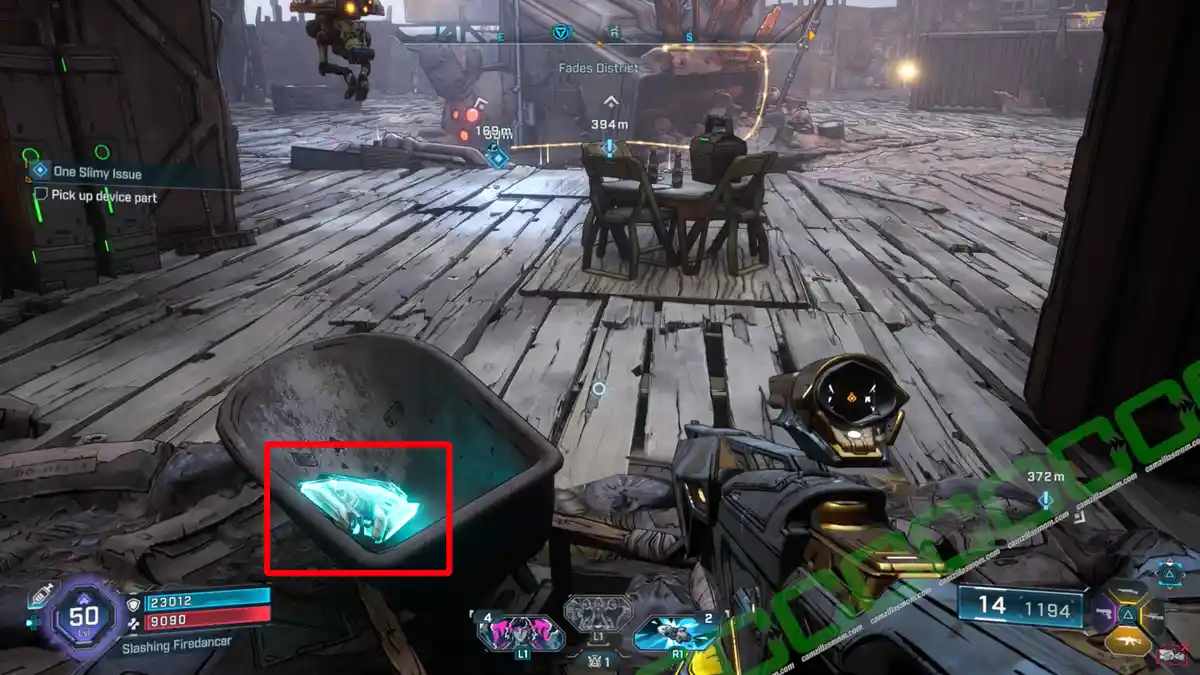
Description:
“Warrik Dill. Demophon. 32,284 hours. Offline.”
2 – Hindsight
This bolt can be found on the floor in between creep nests west of the Safehouse.
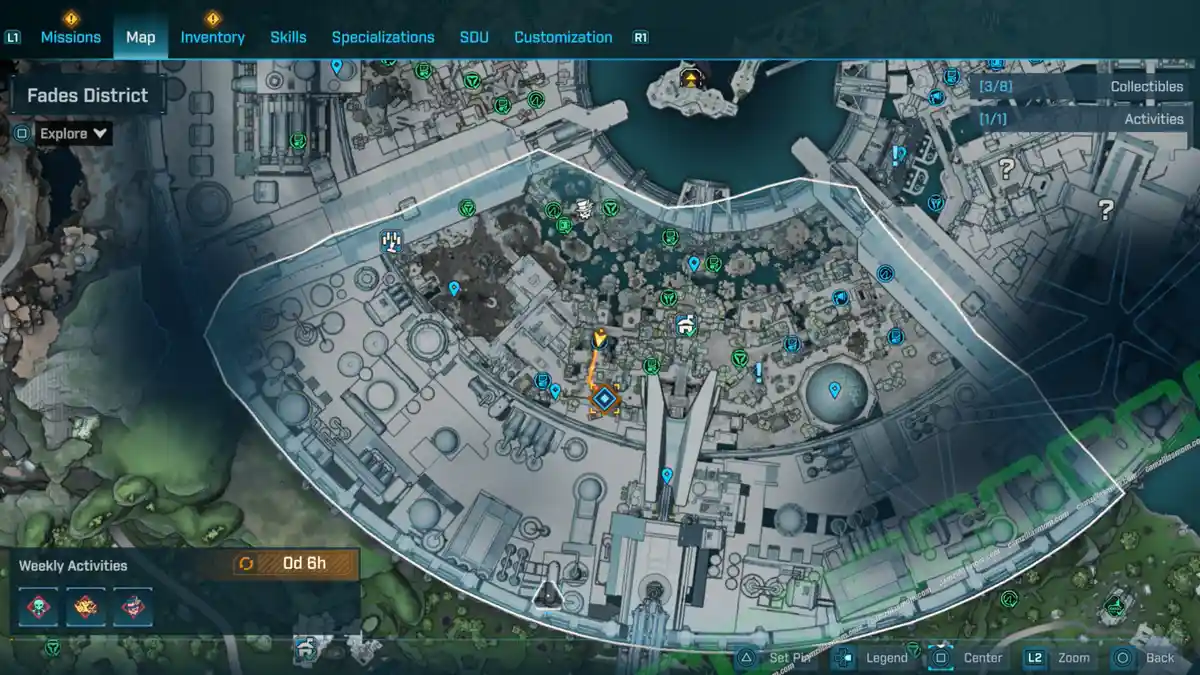
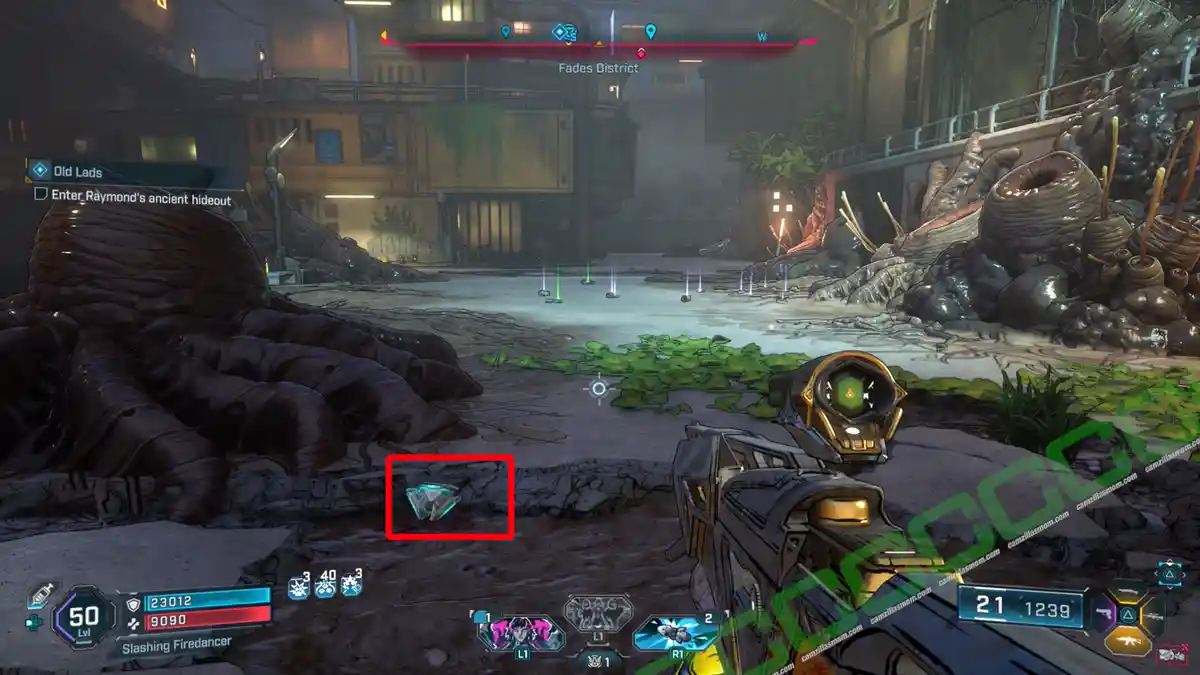
Description:
“Fav Kinder. Nix. 41,172 hours. Offline.”
3 – Student Driver
Head to the Darkloam Biosphere, where you can find a charming village with shops and restaurants – and a crashed truck with this Dead Bolt.
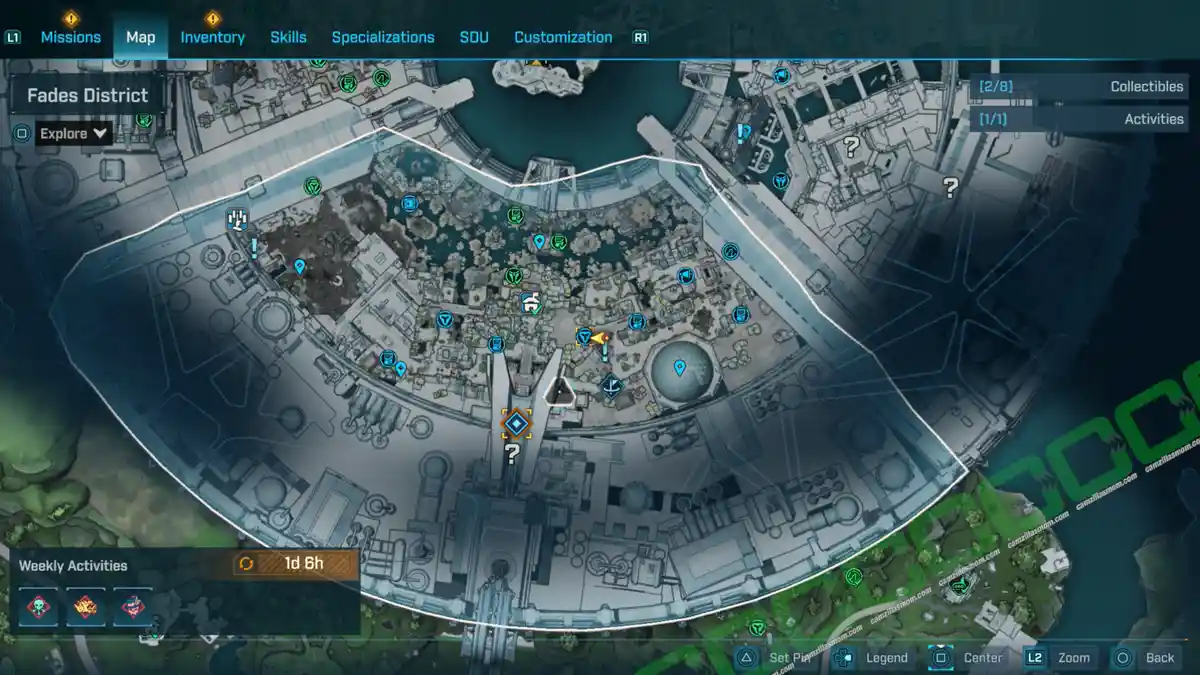
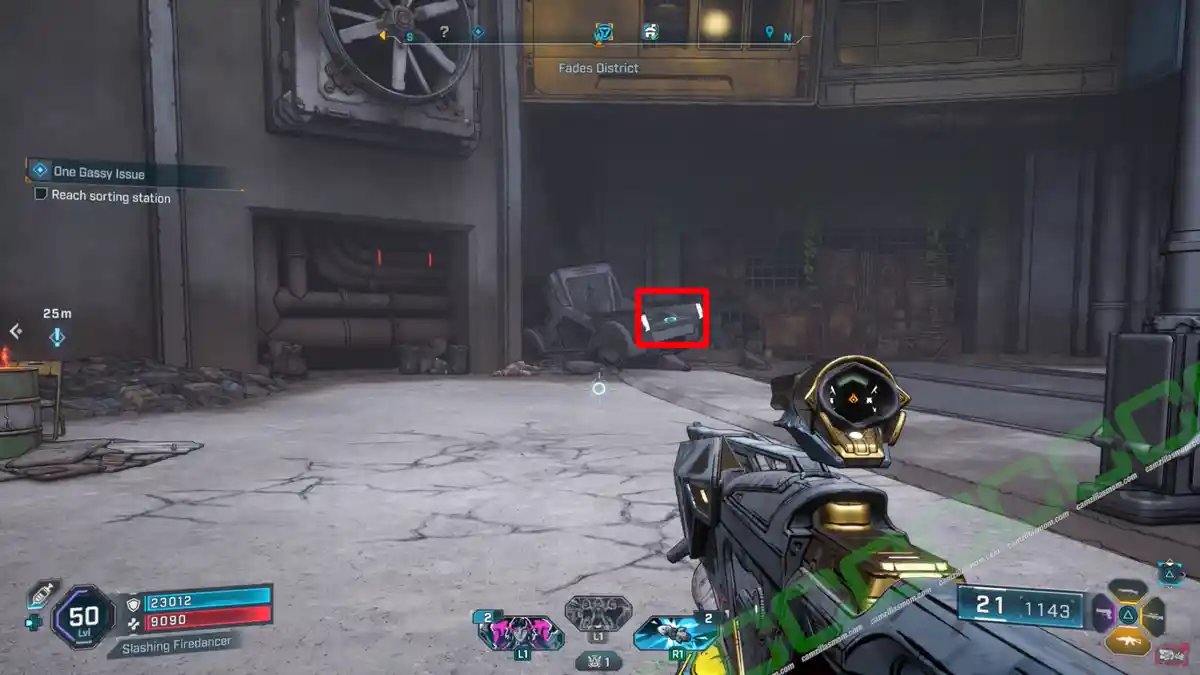
Description:
“Tamarisk Nalls-Solis. Tantalus. 956 hours. Offline.”
Electi Safe – 1
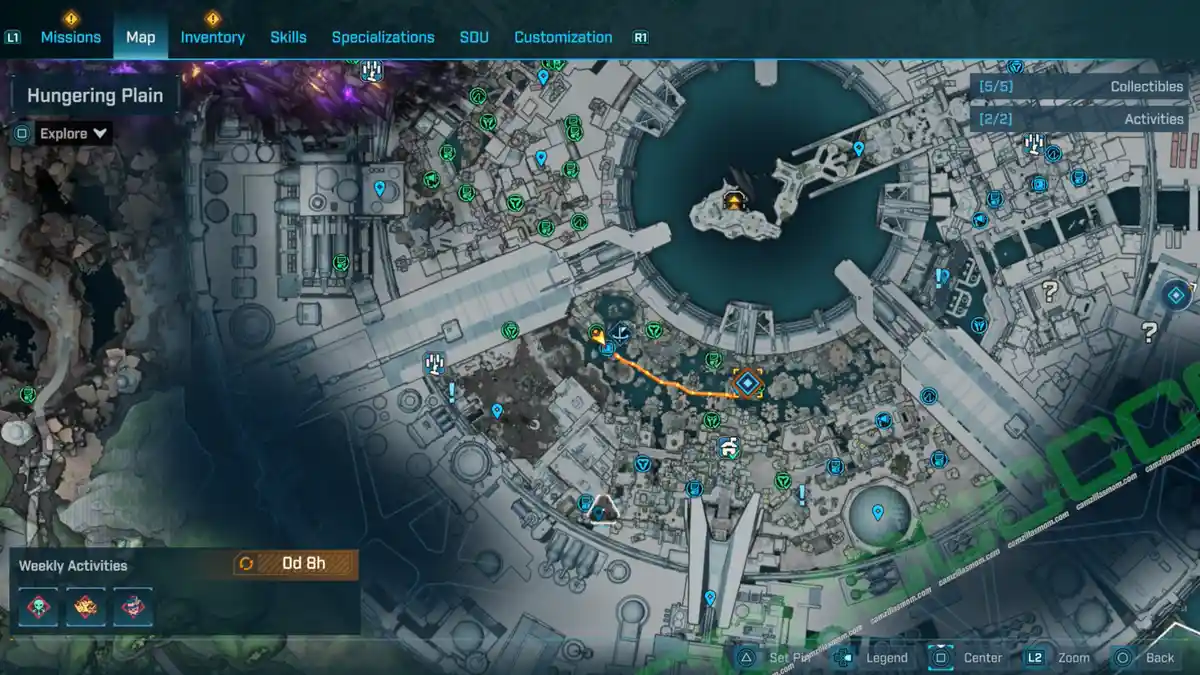
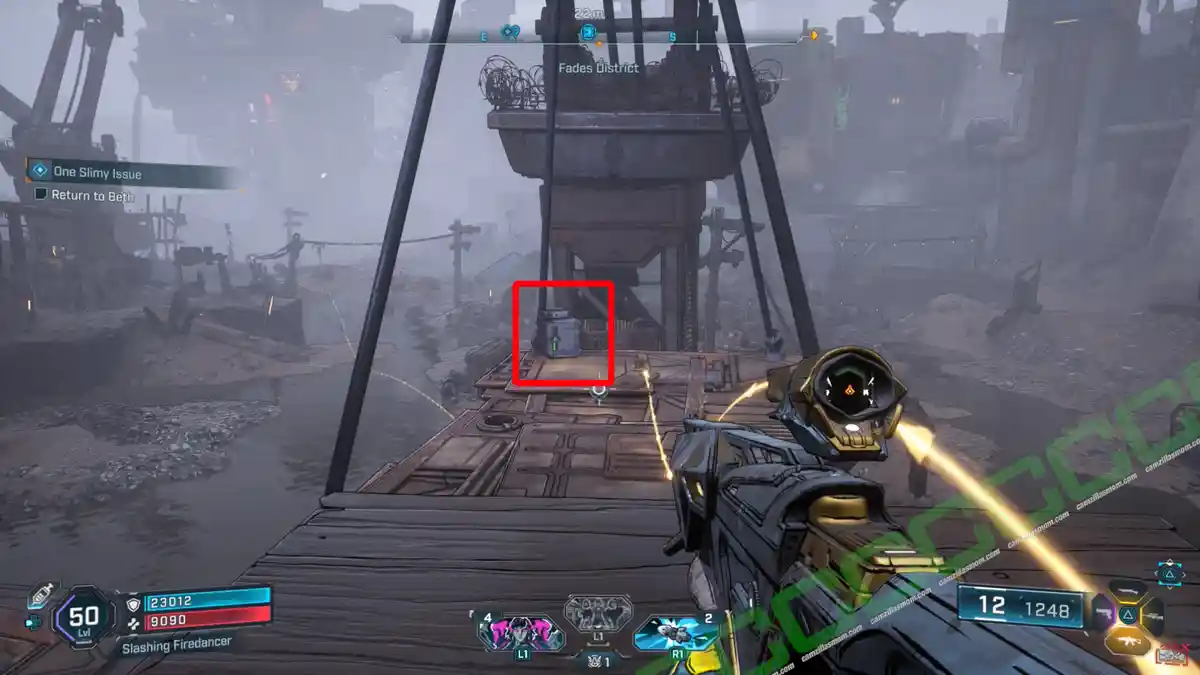
You will get past the Electi Safe during the “One Slimy Issue” Side Mission, after defeating the Omega Thresher.
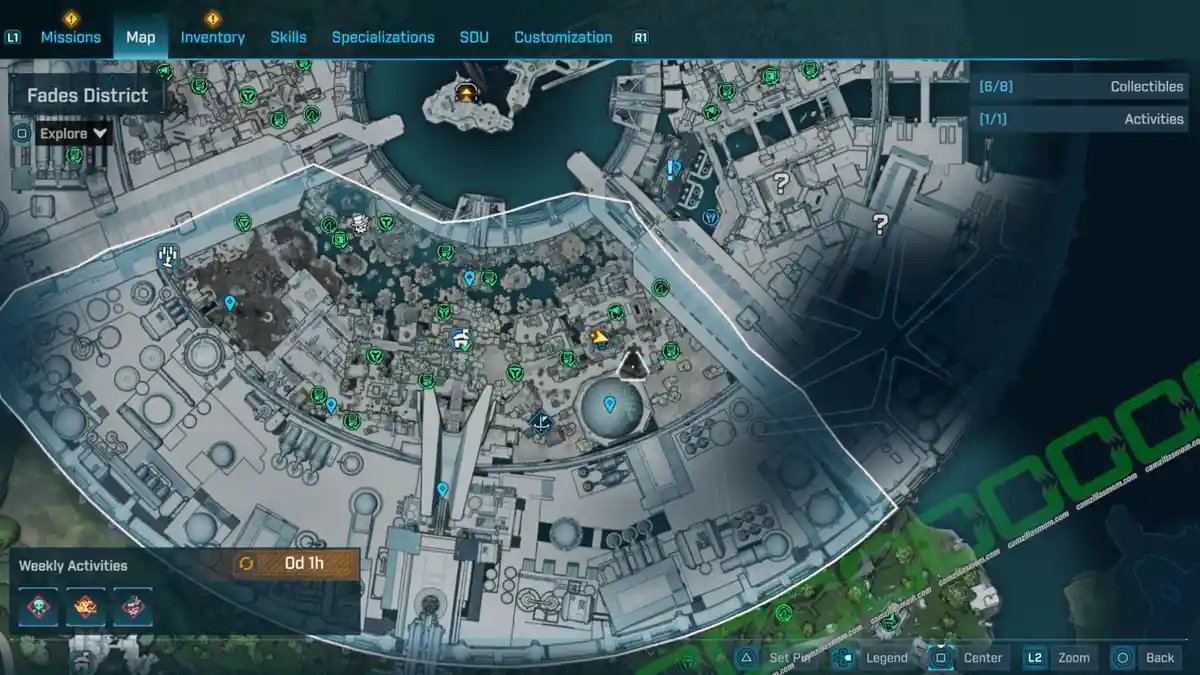
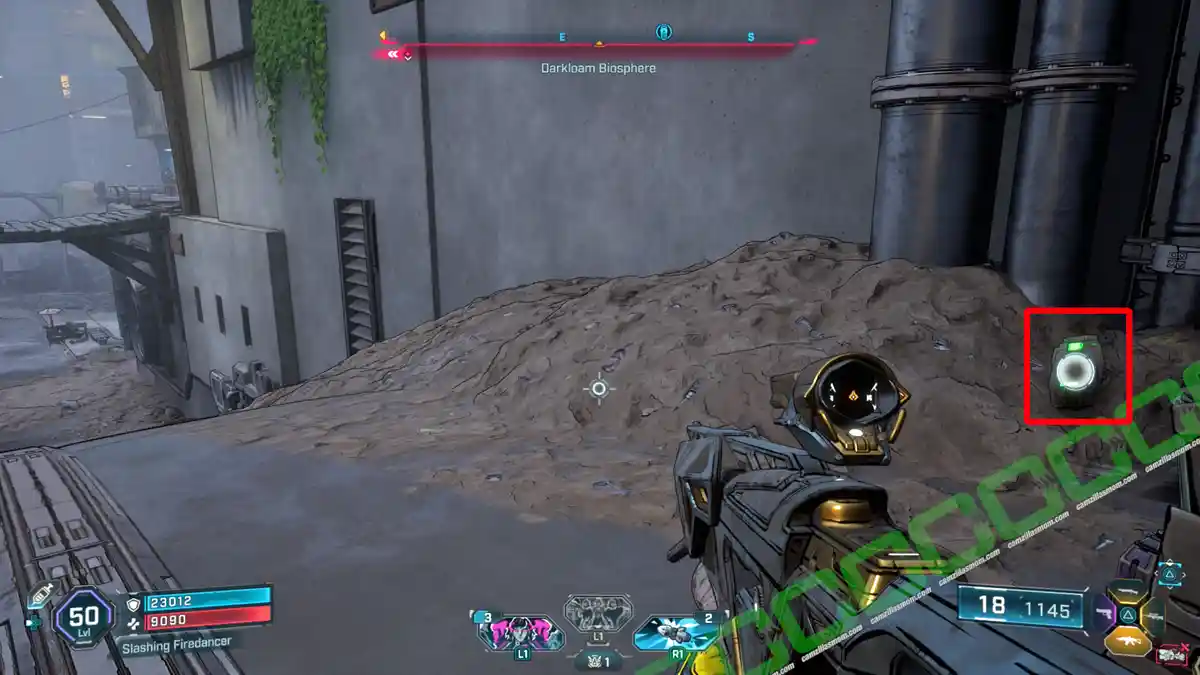
Lost Capsule – 1
The Lost Capsule is in a dead-end north of the Darkloam Biosphere. Take it to the Sumpview Falls Safehouse.
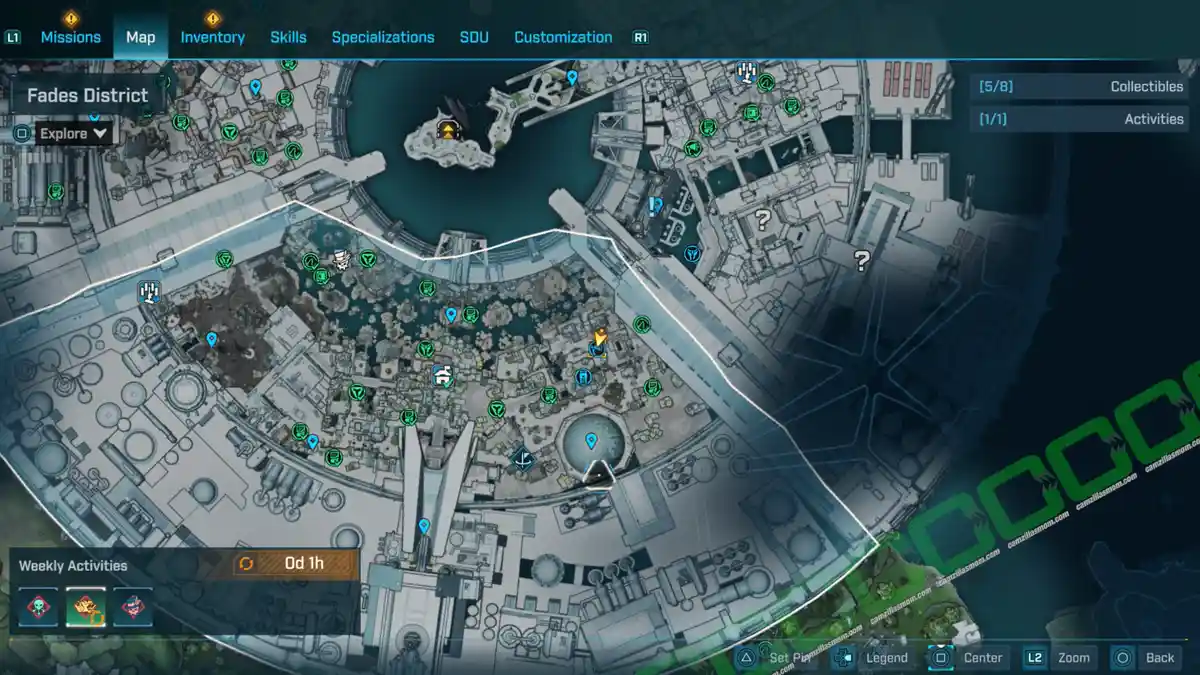
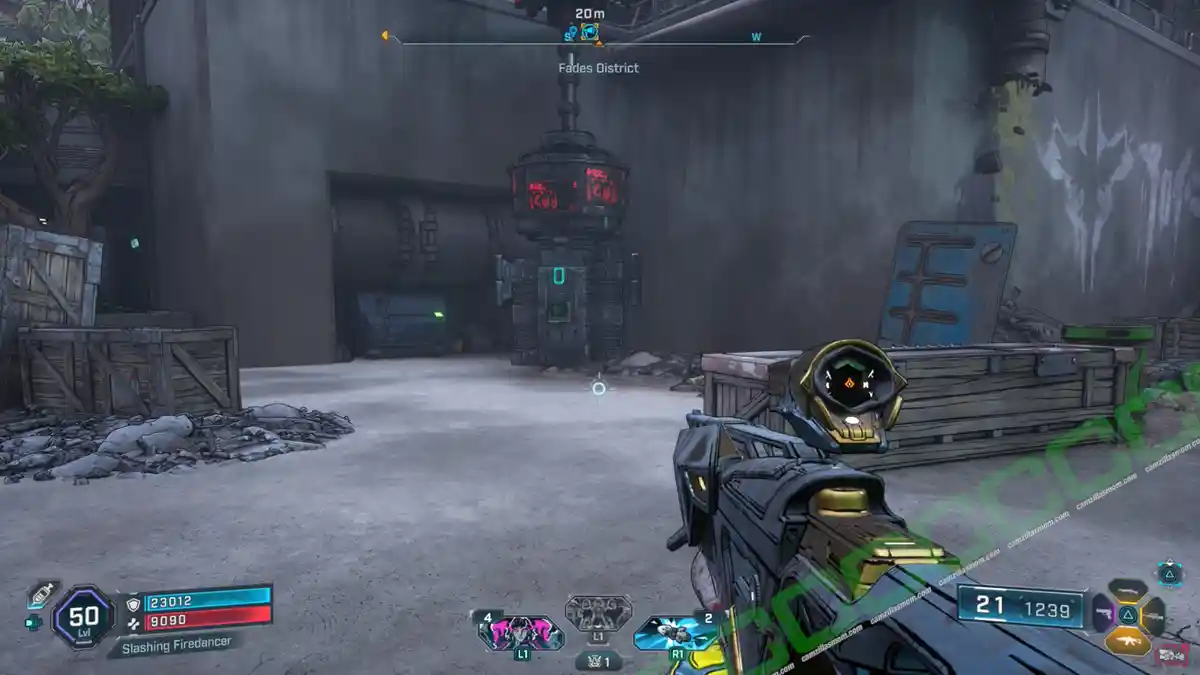
Propaganda Speaker – 1
The Propaganda Speaker is north of the Darkloam Biosphere.
Evocarium – 1
1 – Eridian: Scars
The Evocarium is just northwest of the Safehouse, overlooking the swamp below.

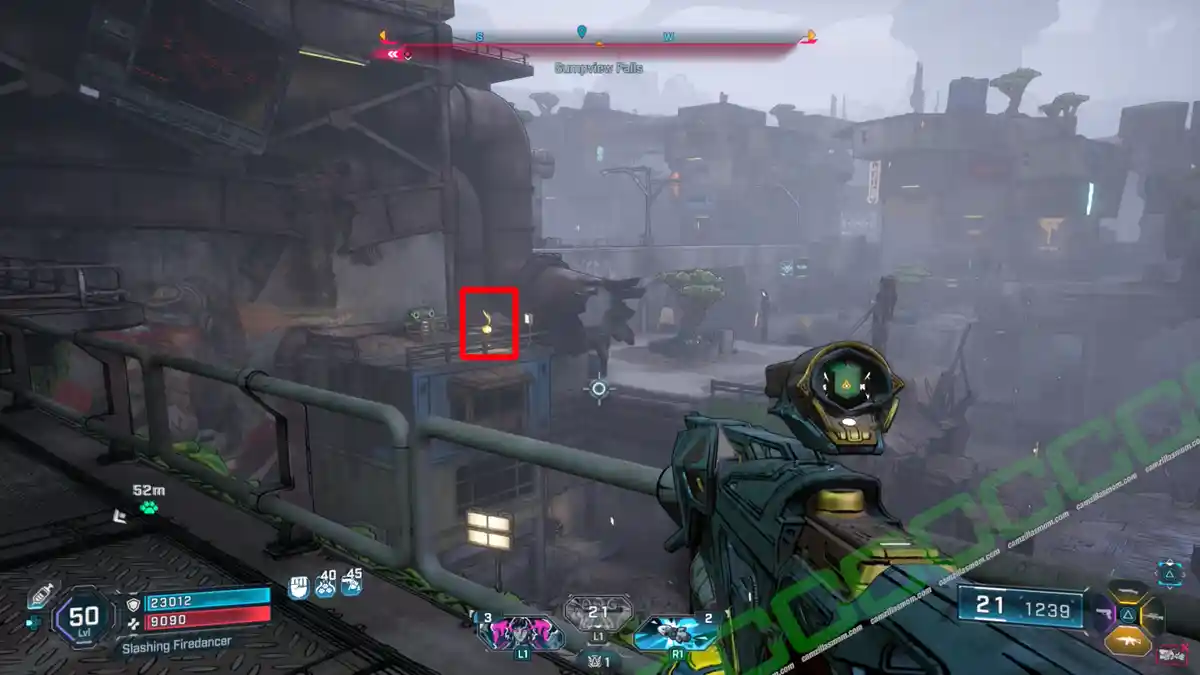
The first orb is on a small terrace with a radio in the southwest.
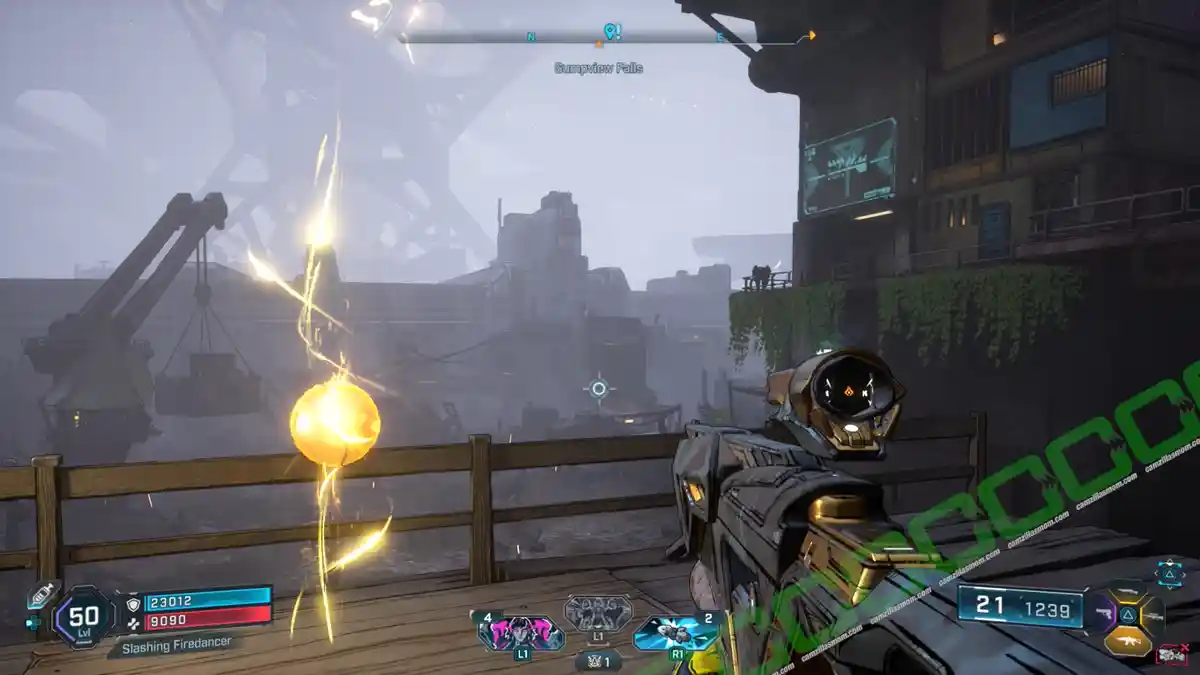
The second orb is in the northwest, on top of the building under the tarp roof. This building has a grapple point that takes you right to where the orb is.

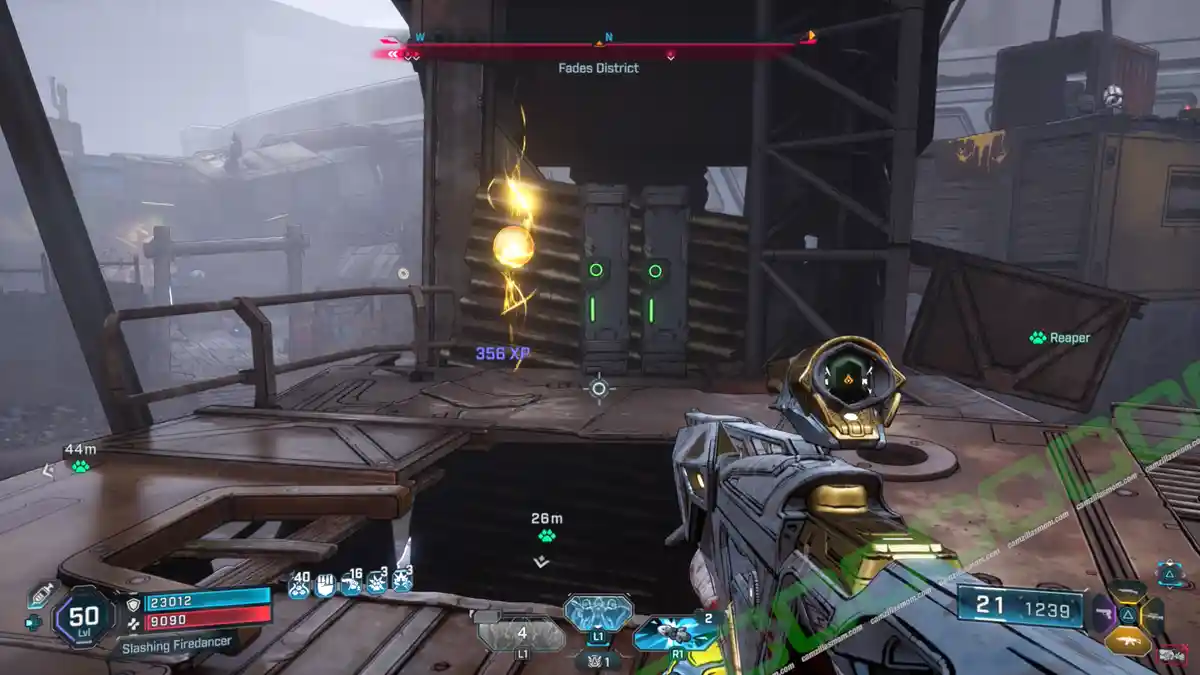
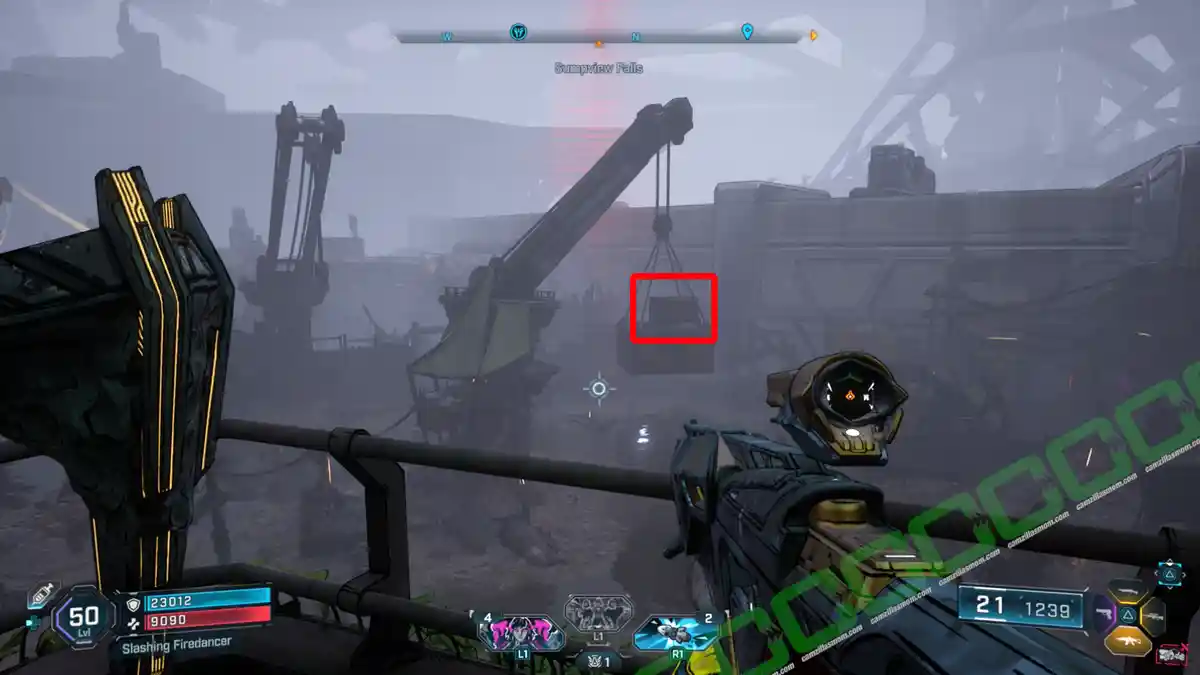
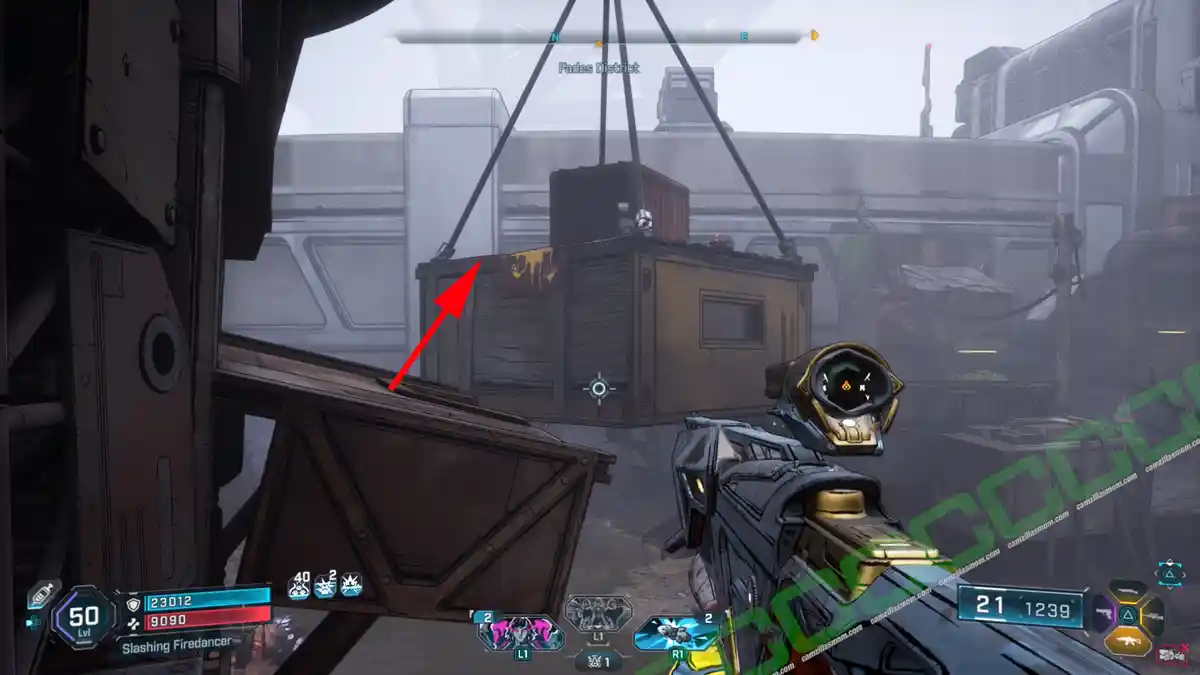
The last one is hanging off the crane in the north. You can access it from the previous orb’s location. Collect all three orbs and return to the Evocarium to receive Eridian: Scars.
-> Also available: Stranded Sister – All 18 Evocariums Revealed
Vault Symbols – 2
1 – One Slimy Issue
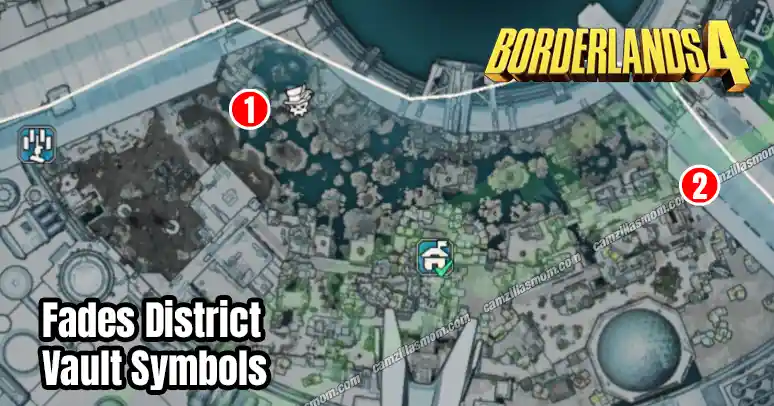
You will get past this Vault Symbol during the “One Slimy Issue” Side Mission, after defeating the Omega Thresher.
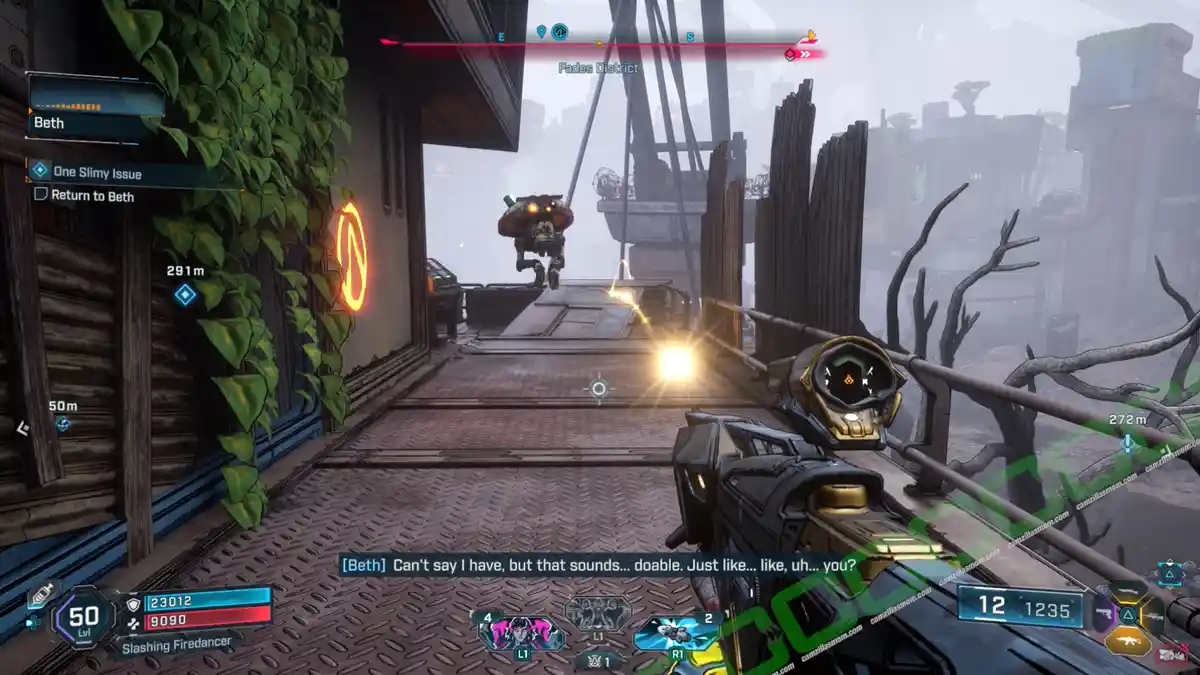
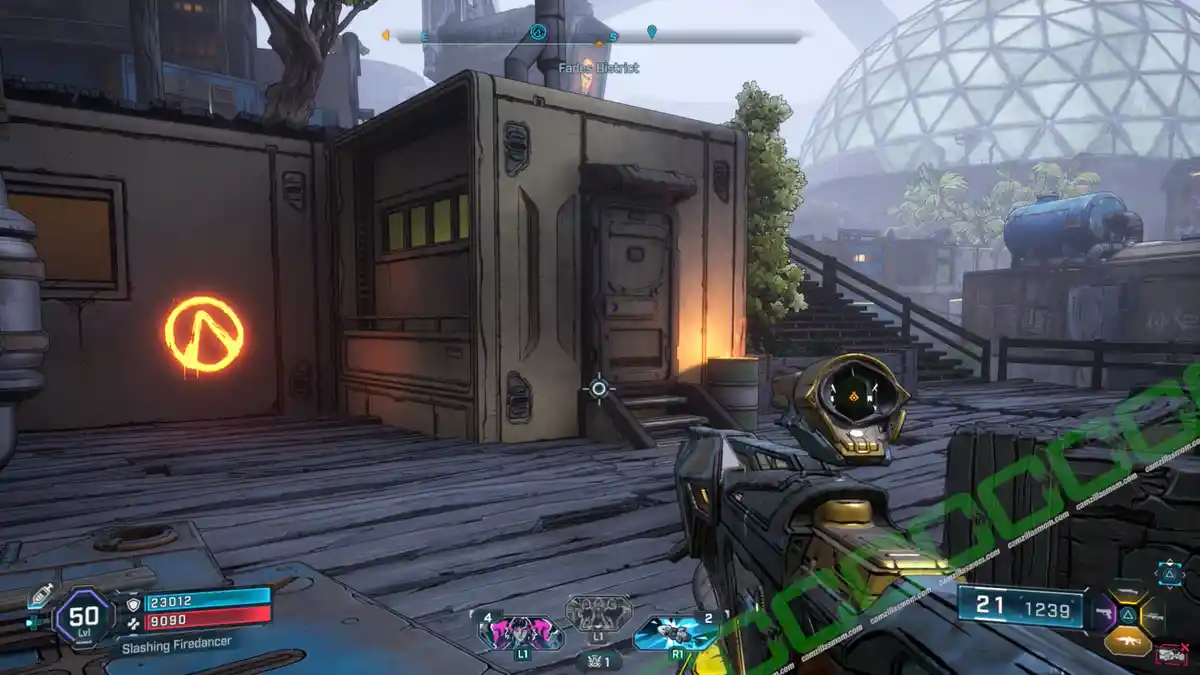
2 – Darkloam Biosphere
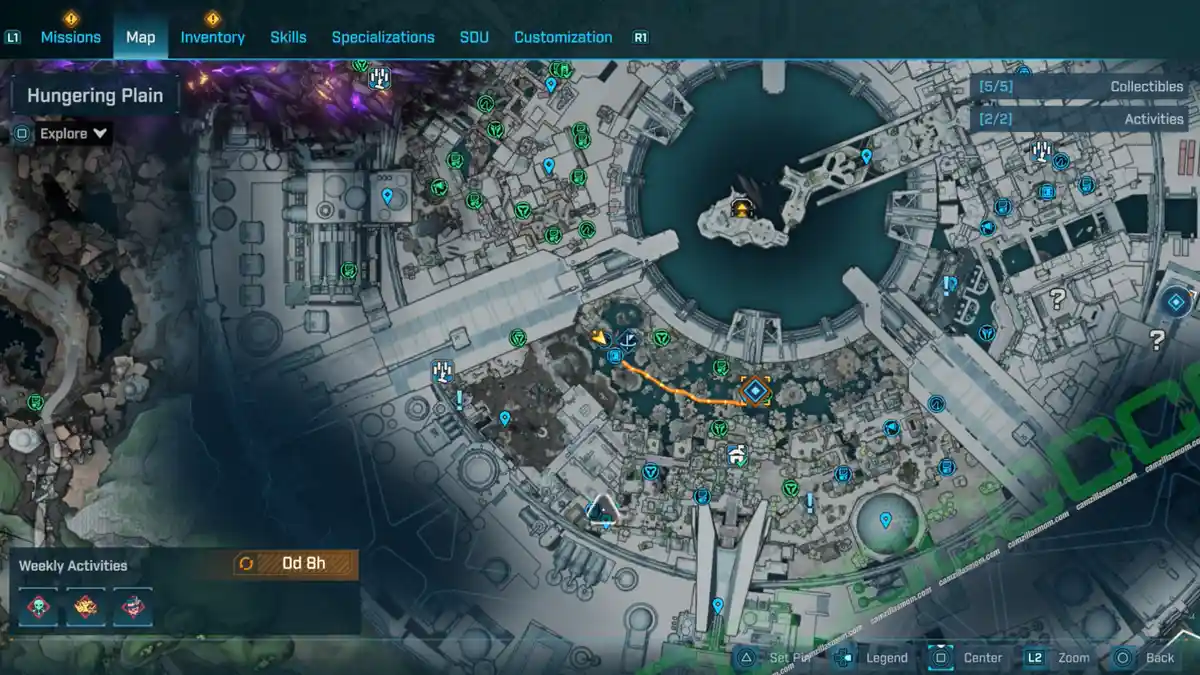
At Darkloam Biosphere, head to the gate that leads to the Terminus District. At the gate, go left and look behind the building for this Vault Symbol.
Activities
Safehouse: Sumpview Falls
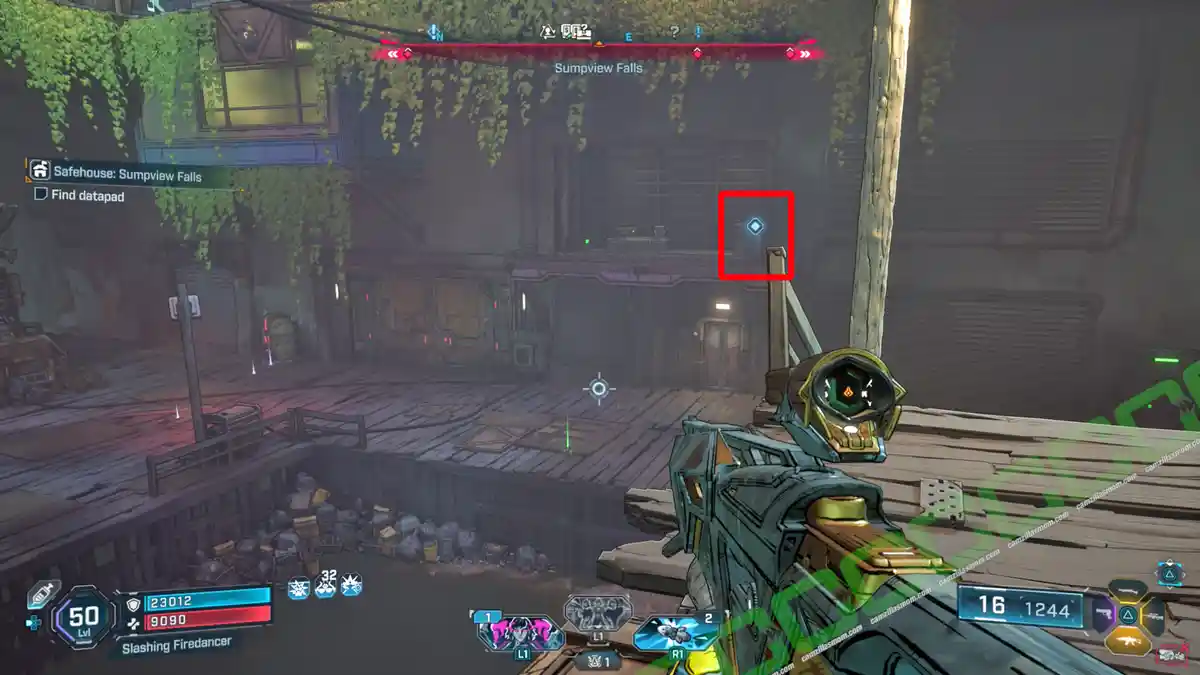
Sumpview Falls lies in the center of the Fades District. It is a courtyard down in a pit with a wooden staircase leading down.
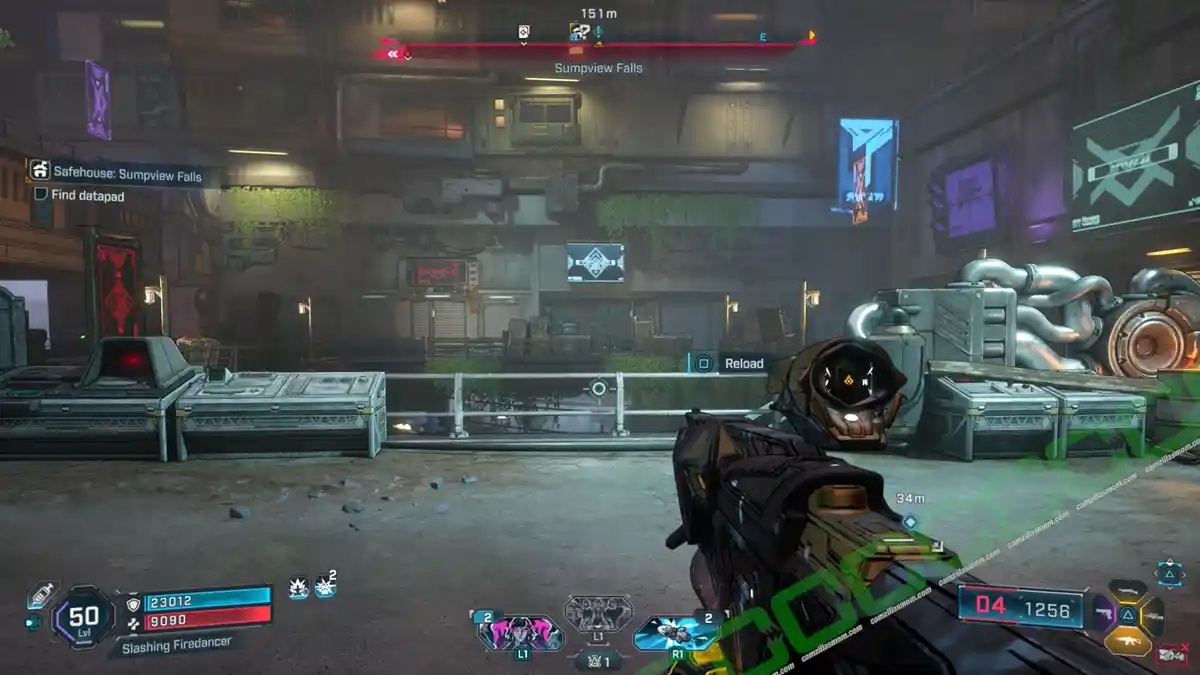
The datapad is on one of the balconies. The capture terminal is on the bottom, facing the square pit and the staircase.
Bobbleheads
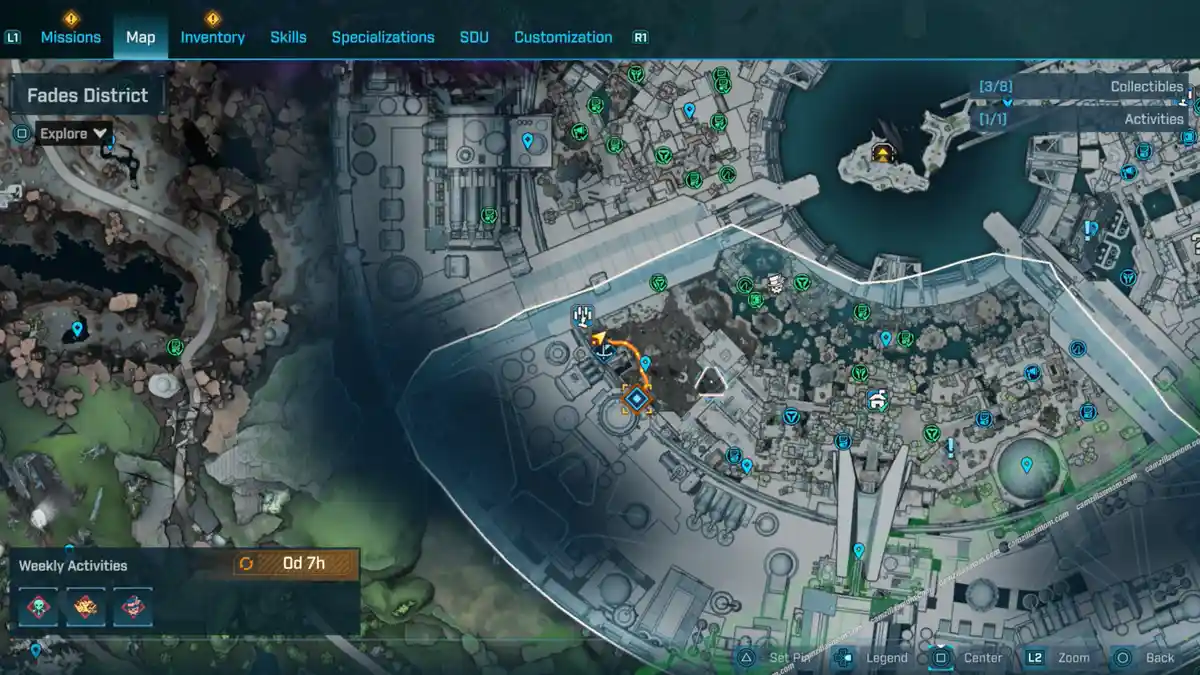
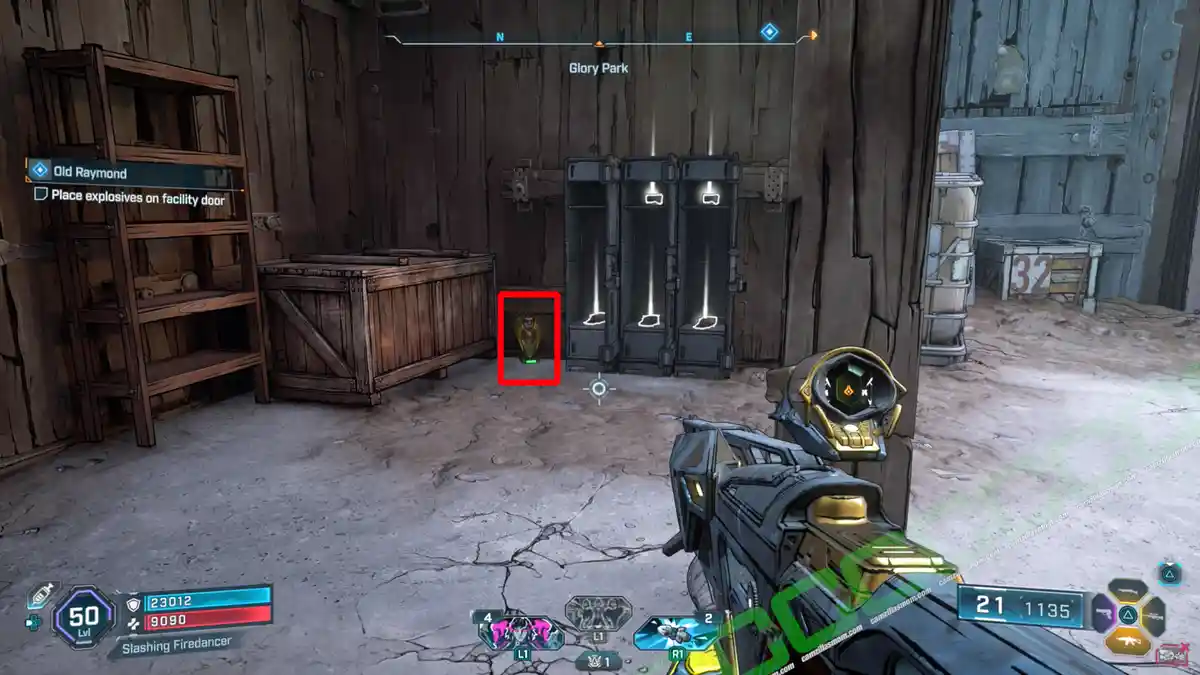
Glory Park
Near Raymond, the Side Mission giver, by the lockers.
Side Missions
-> Also Available: All Side Missions in Borderlands 4
One Gassy Issue
Side Mission Start:
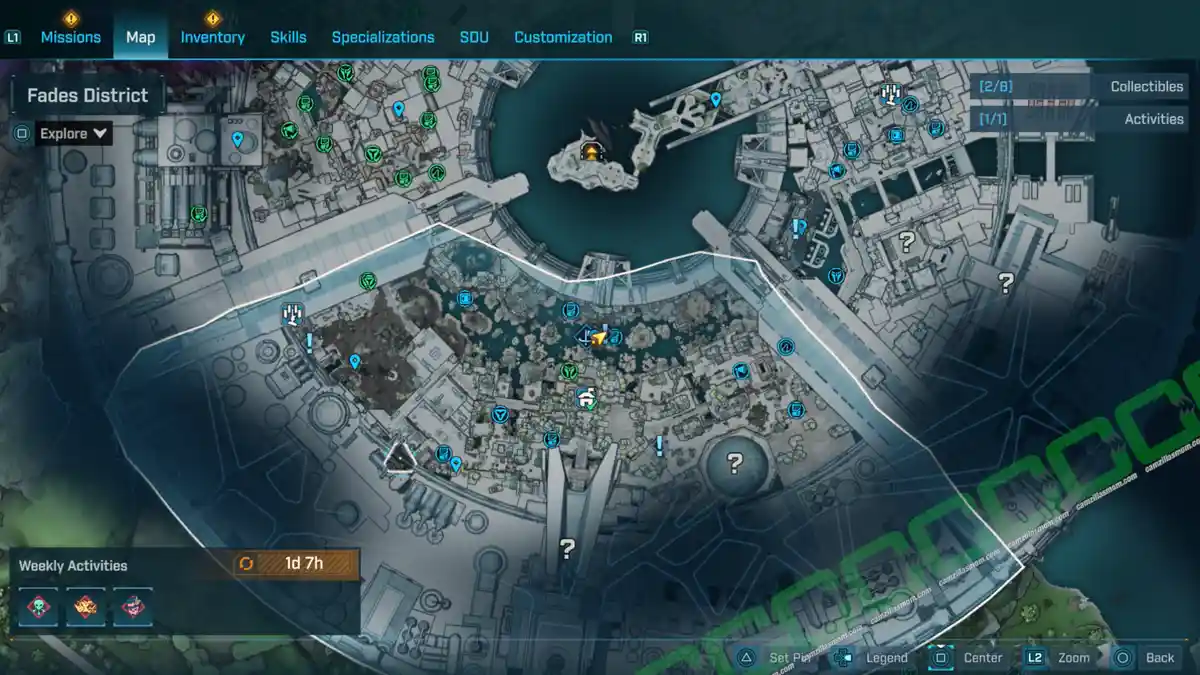
Lake Side Properties – Beth
What it is about:
Give ’em some gas!
Side Mission Steps:
-> Reach sorting station, call elevator: The Point of interest in the center south of the map – Locust Production Facility.
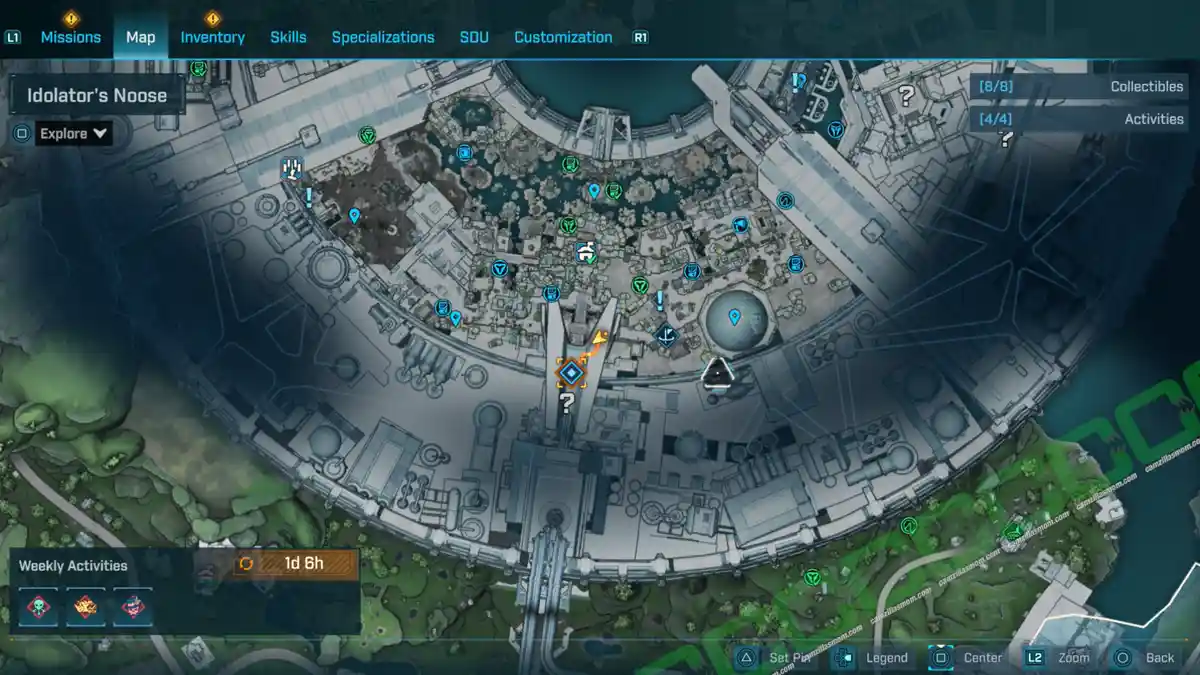
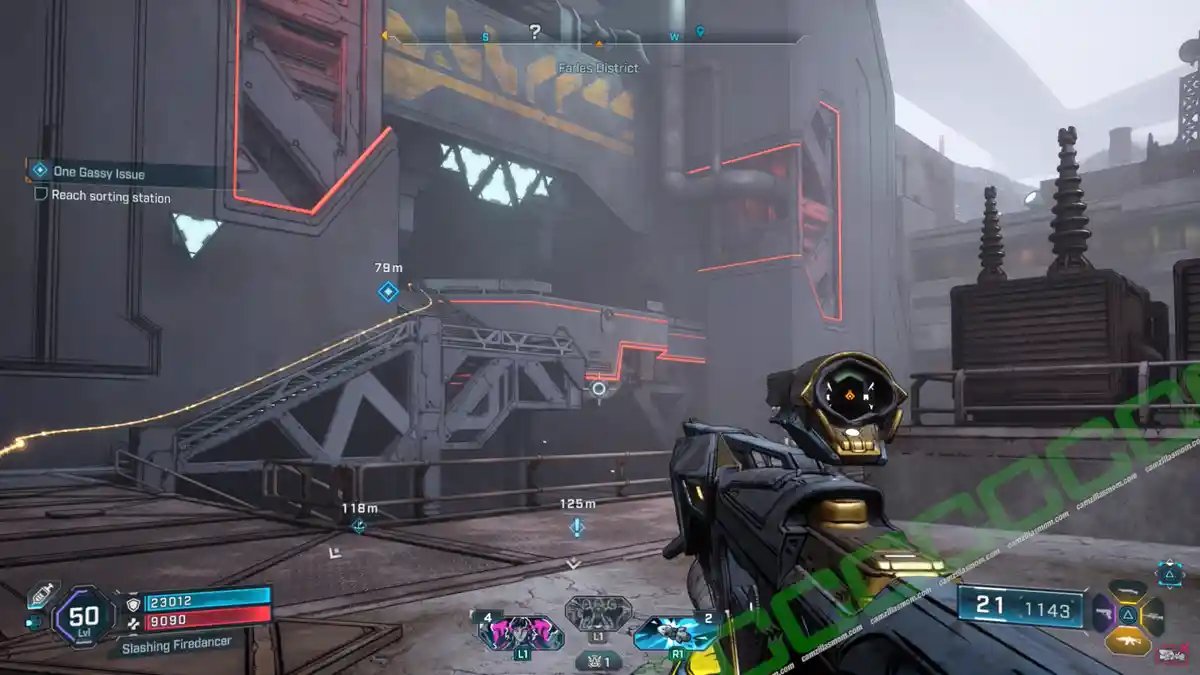
-> Unblock elevator: Grapple the highlighted round object at the bottom of the elevator.
-> Enter sorting station: Grapple up from the elevator platform.
-> Reach Locust gas storage room: Head to the east and pull off the vent cover from the eastern wall. Enter the shaft and follow it to the facility.
-> Defeat Order security.
-> Connect 2 Locust gas engine, activate Locust gas engine: Reach the top of the facility with the two gas engines. To reach them, you can pull the hanging metal frame to where you need to go. Pull the two levers, then interact with the terminal in the center of the room.
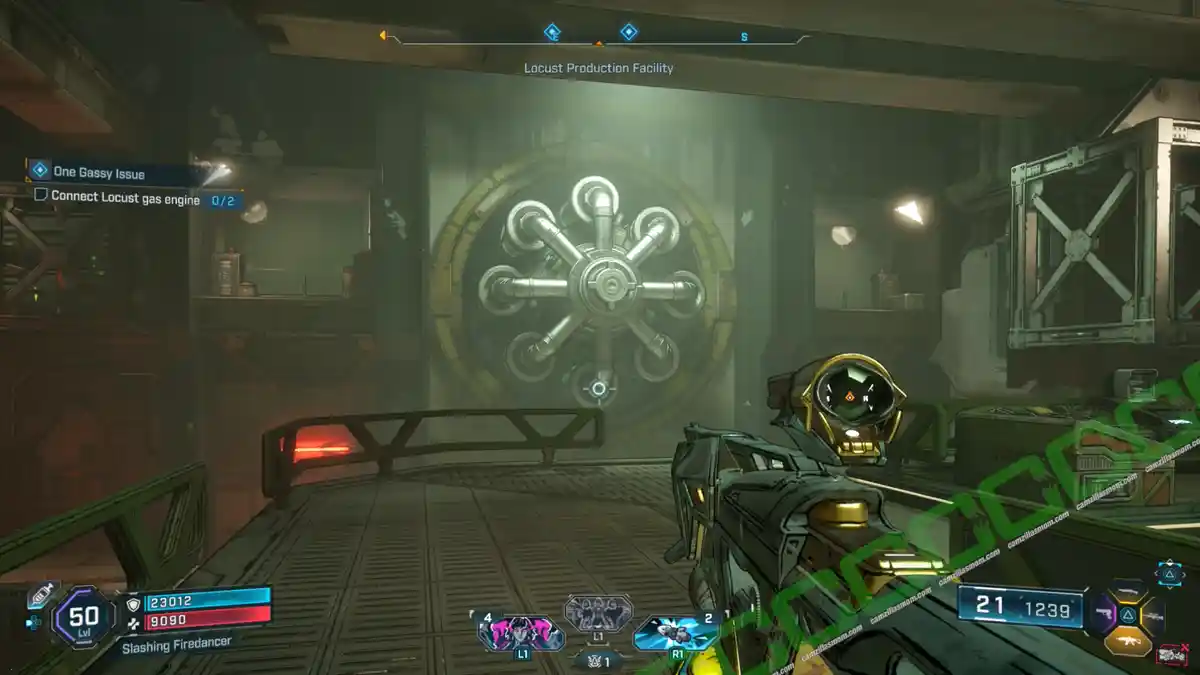
-> Reach sorting station entrance: The Locust dispenser by the bio-armored door is now functional and can be used to destroy the door’s armor.
-> Defeat sorting station security.
-> Reach sorting station command center: Next door.
-> Defeat sorting station security.
-> Disable 2 force fields: Interact with the terminals on both sides of the room.
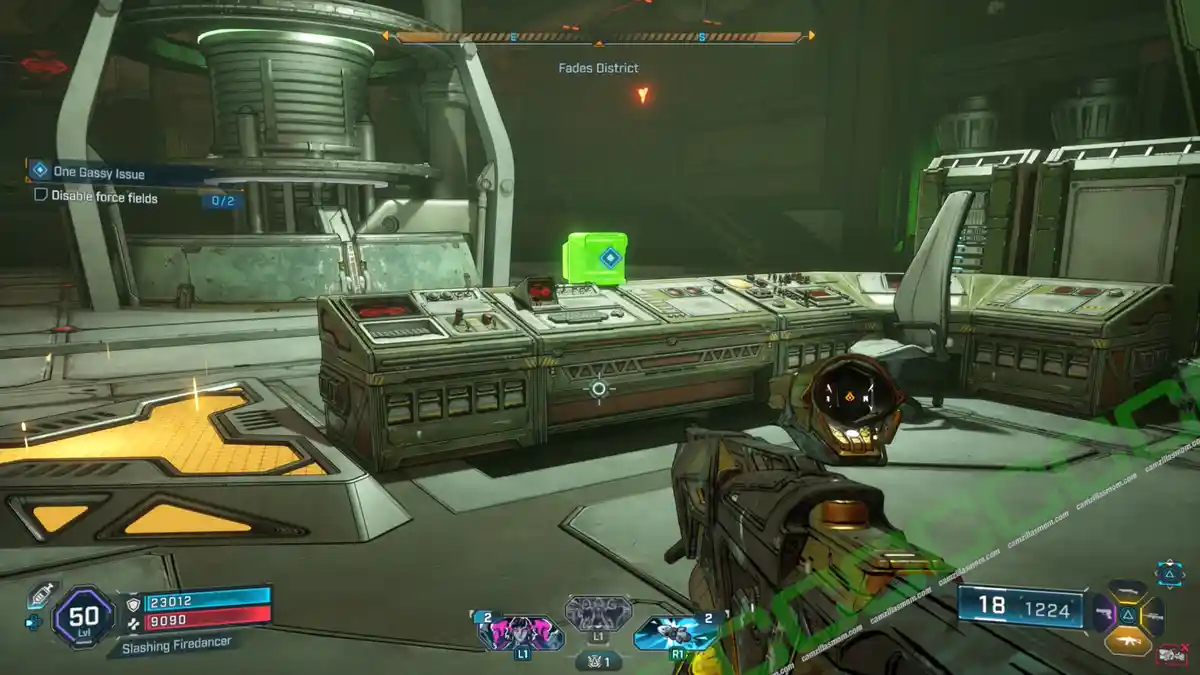
-> Defeat station defender: It is armored. You have to regularly throw a Locust container at it to defeat it.
-> Reroute Locust gas throughout city
One Slimy Issue
Side Mission Start:
Lake Side Properties – Beth
What it is about:
Help Beth with her surveillance system.
Side Mission Steps:
-> Enter Beth’s basement: The entrance is outside, at the back of Beth’s house. It is a Locust shield-protected door. The locust dispenser is a couple of steps to the east at creep island.
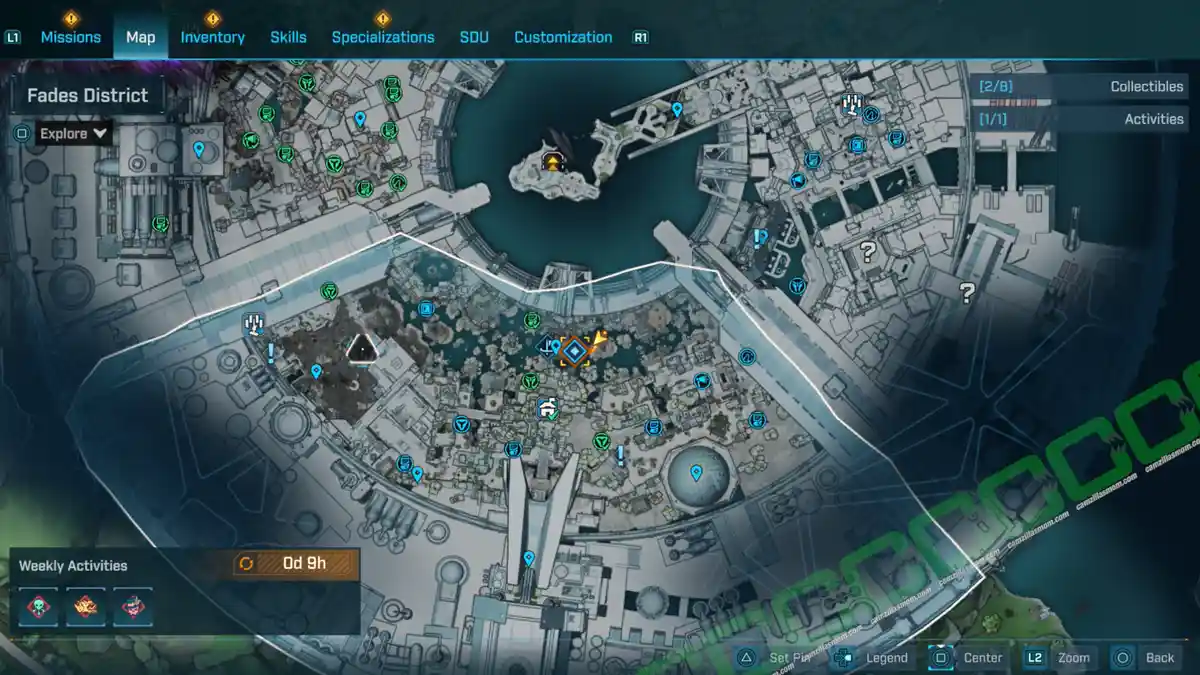
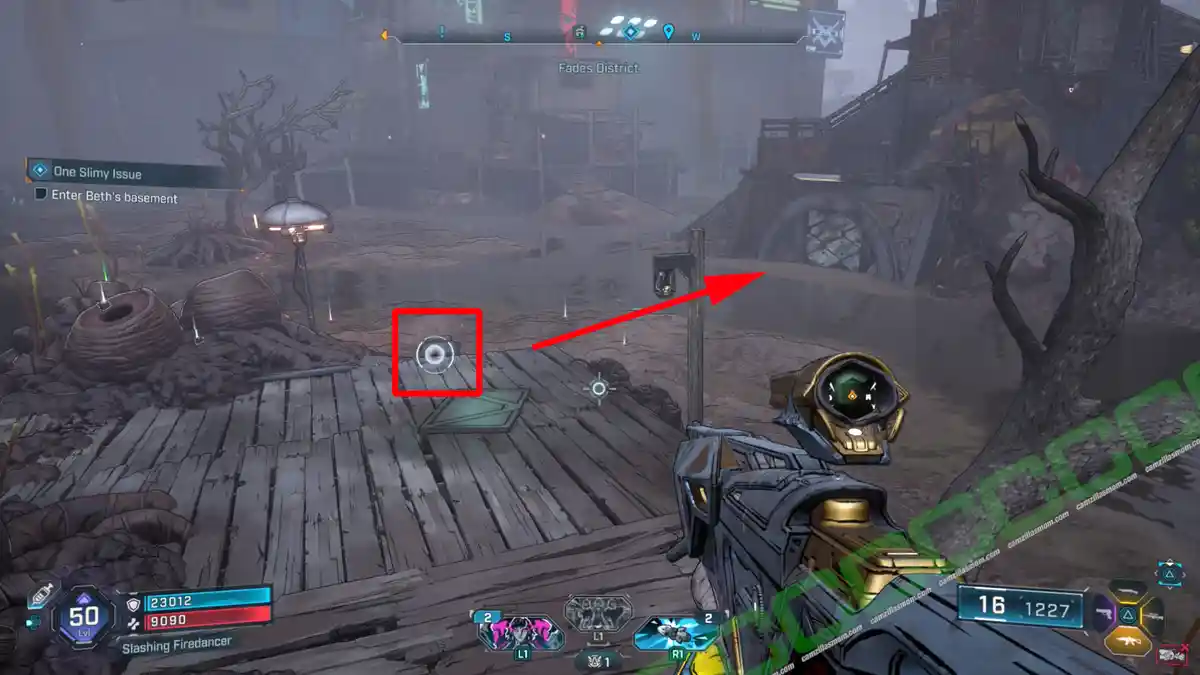
-> Reboot 2 systems: Two levers are locust-protected. There is a dispenser on the ground floor of the basement.
-> Investigate nearby device: Exit the basement and head west to find an antenna.
-> Reach signal’s location: There is a ripper camp in the northwest. Defeat the Scavenger and pick up the device part.
-> Repair monitoring device, defeat Threshers.
-> Aquire spare part: Climb the crane in the north. There is a grapple point on the nearby building that takes you there.
-> Reach second monitoring device: Southwest from the crane.
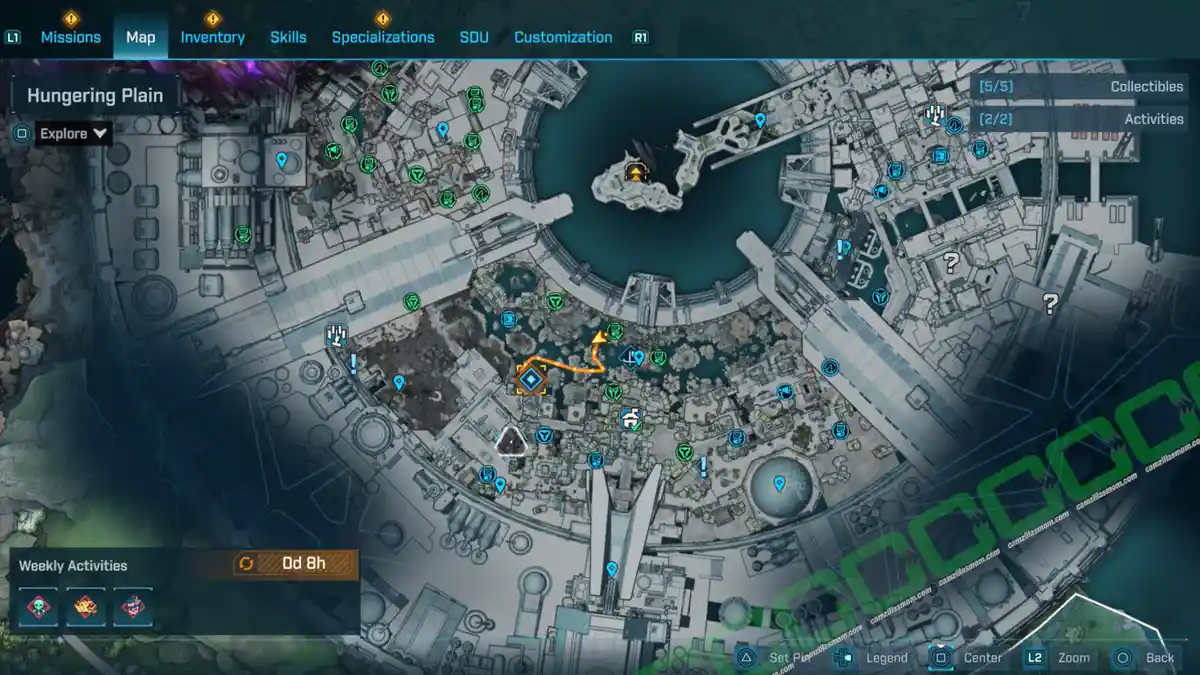
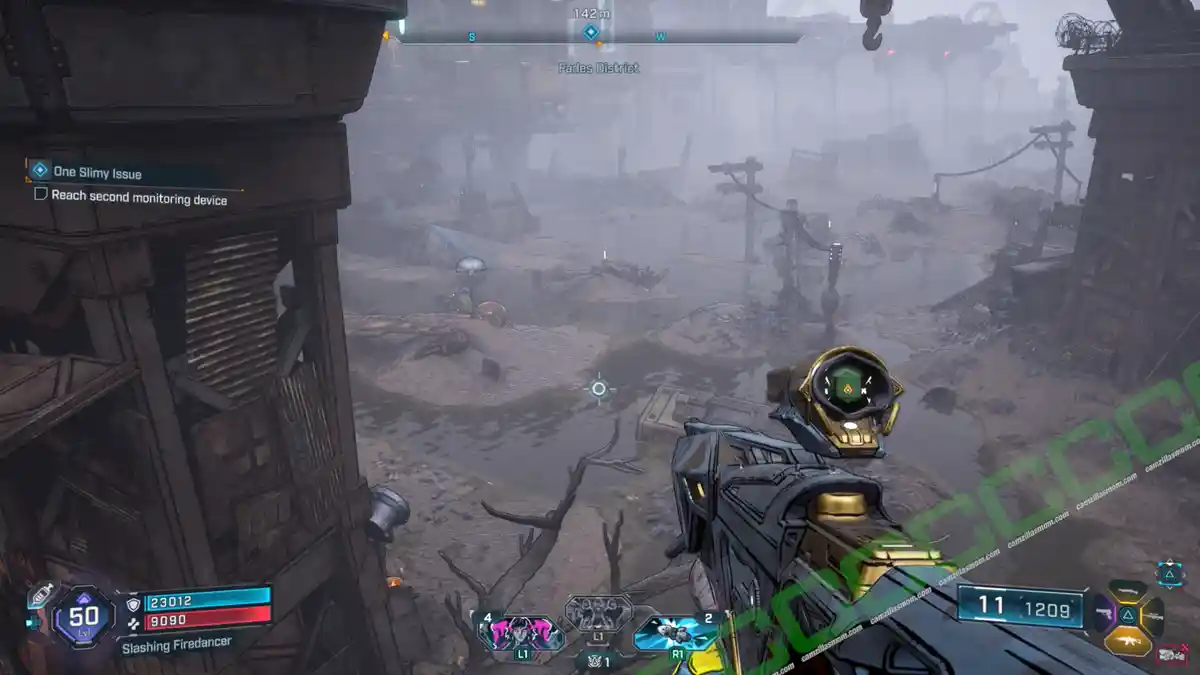
-> Destroy growth on monitoring device
-> Repair monitoring device.
-> Find thresher: In the northwesternmost corner of the Fades District, west of the ripper base, is another base. You have to grapple up to enter it.
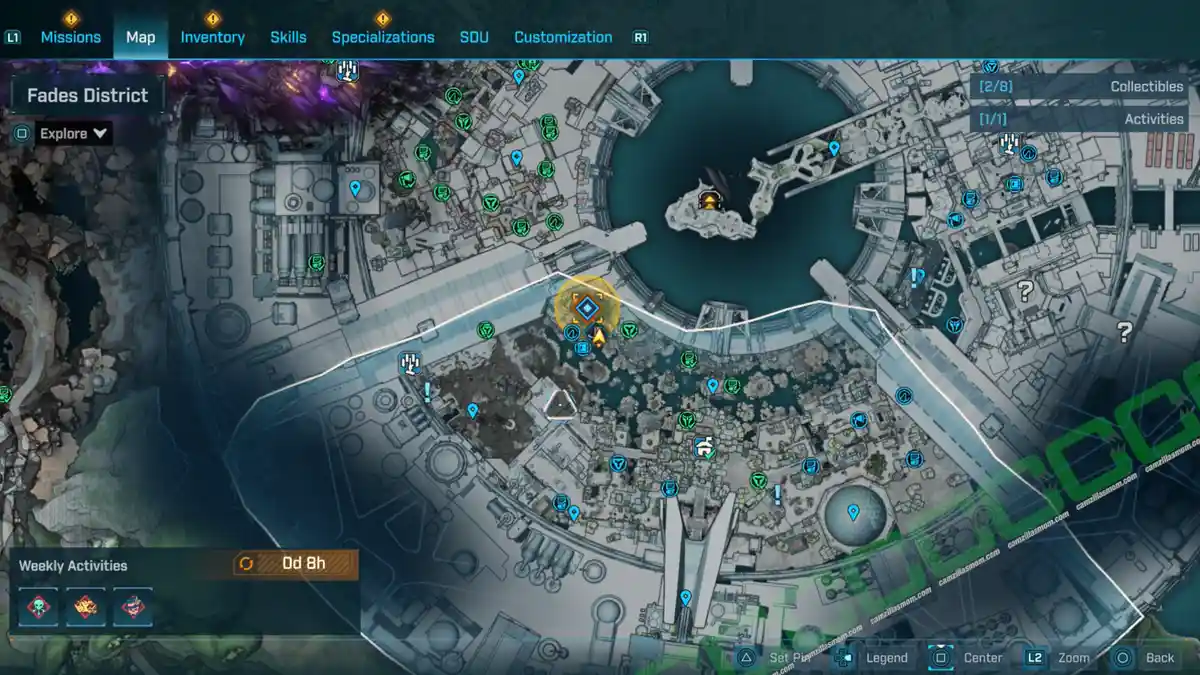
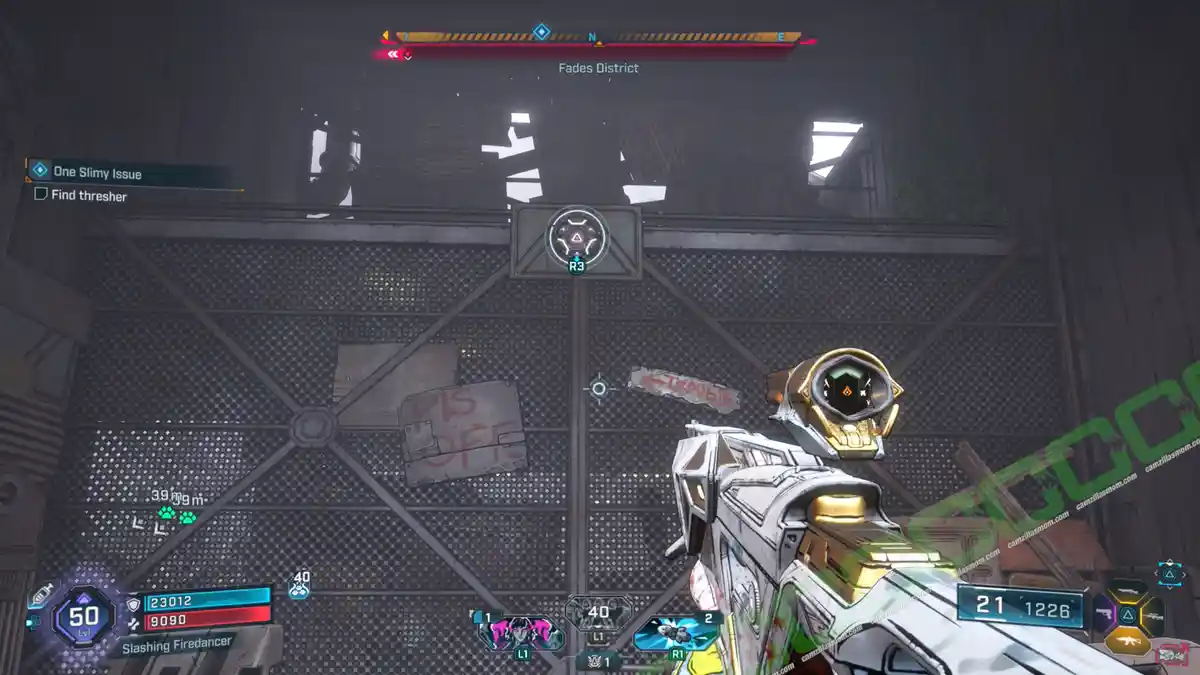
-> Defeat Omega Thresher: It’s covered in bio-shield. There are locust dispensers in this arena.
-> Shoot vomit pile: The green goo on the floor.
-> Return to Beth, talk to Beth.
Old Raymond
Side Mission Start:
Glory Park – Raymond
What it is about:
Help Raymond save his friends.
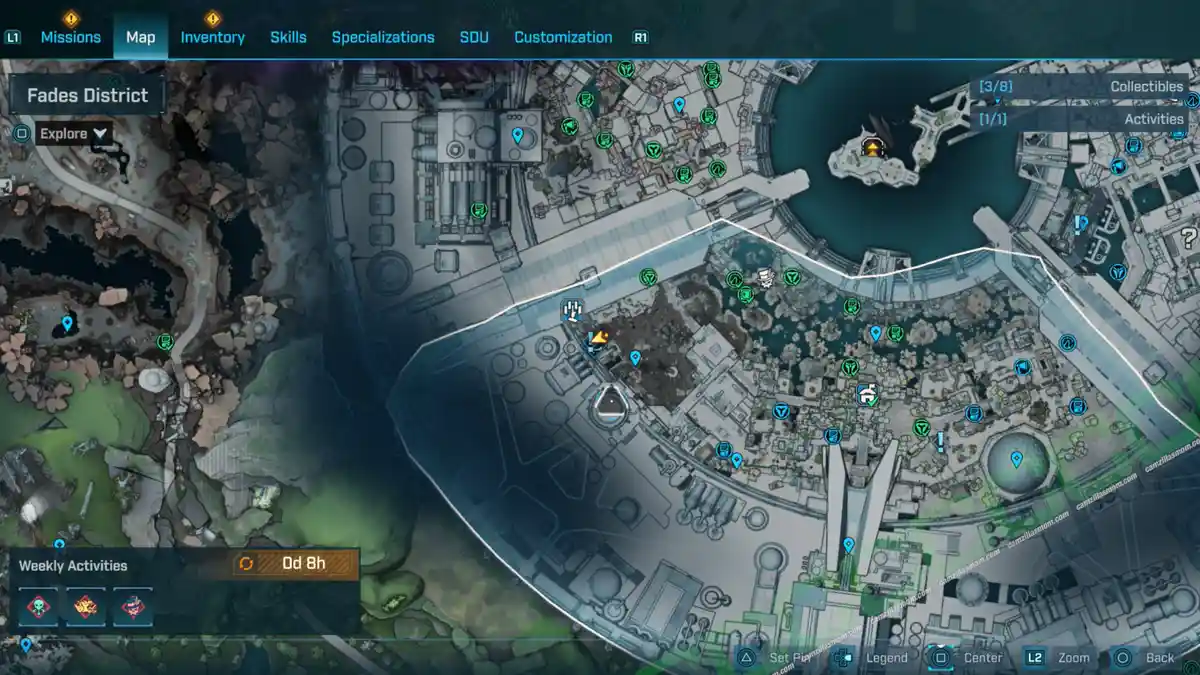
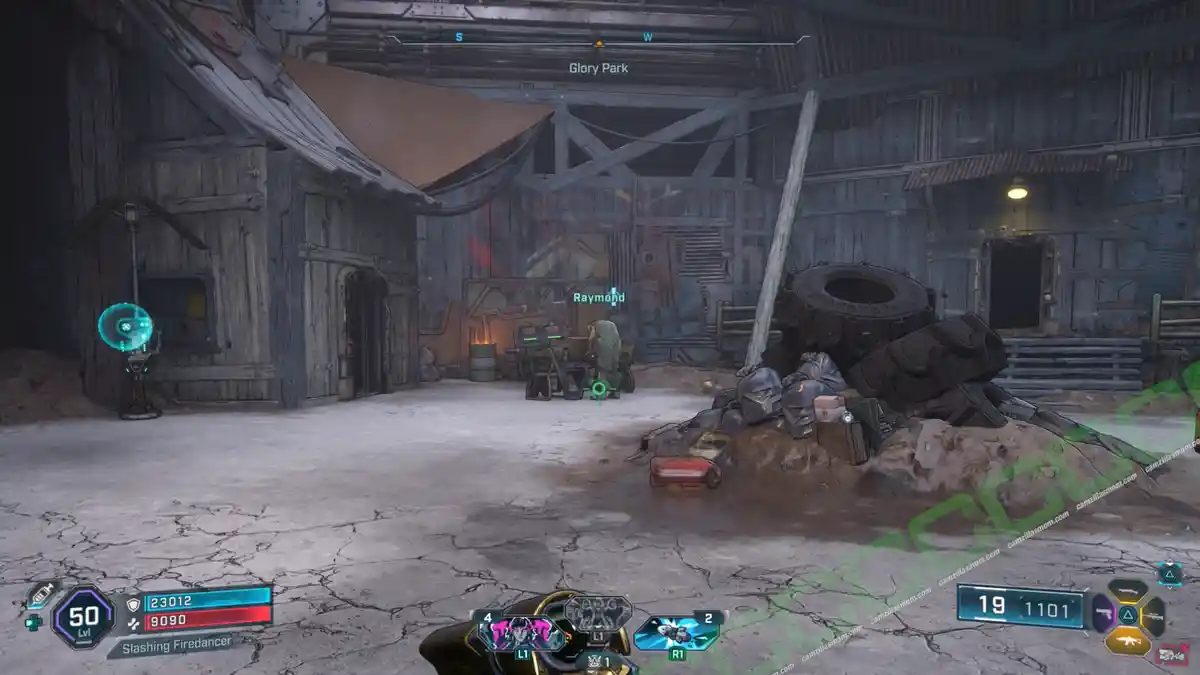
Side Mission Steps:
-> Take explosives: On the table.
-> Place explosives on facility door: Just south of the Glory Park marker on the map.
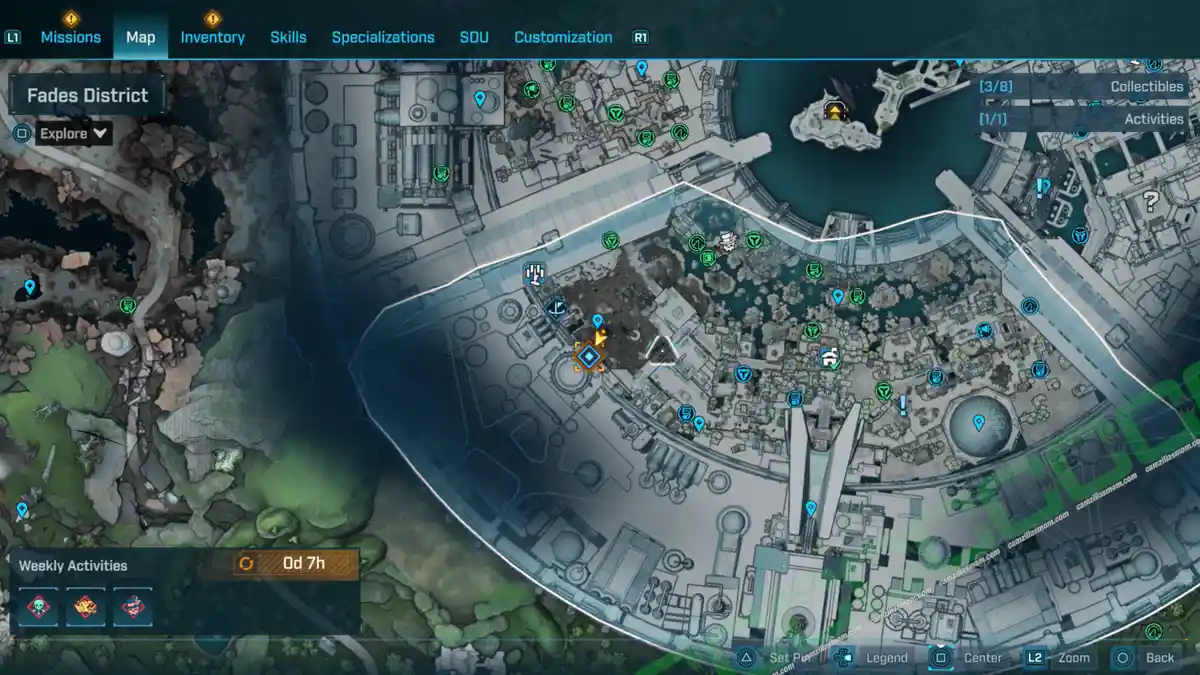
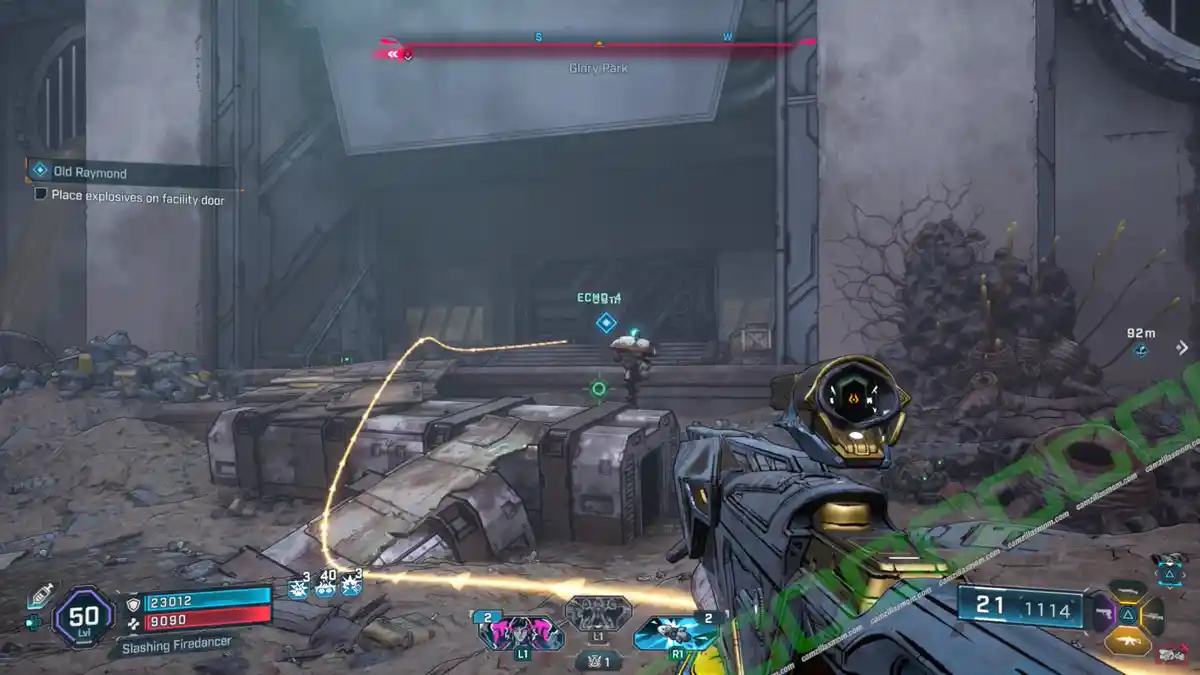
-> Place explosives on facility door, shoot explosives.
-> Reset facility system: On the console inside the facility.
-> Defeat Order ambush.
-> Reach core room: Through the only door, then descend and cross the sewers.
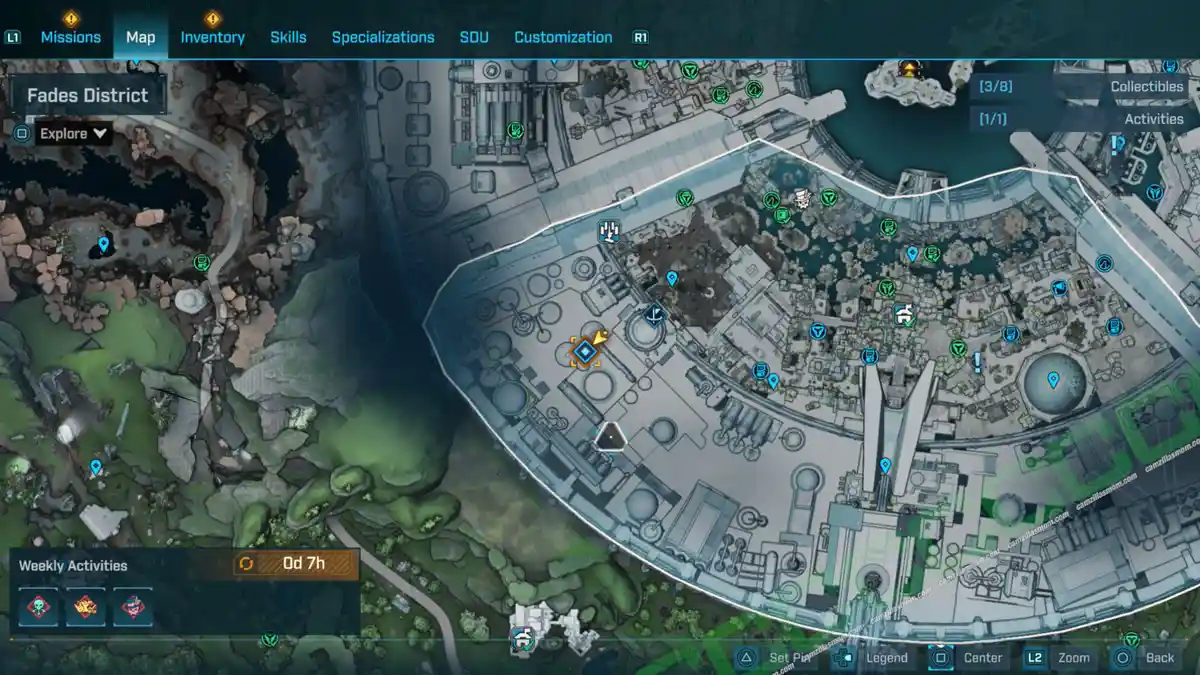
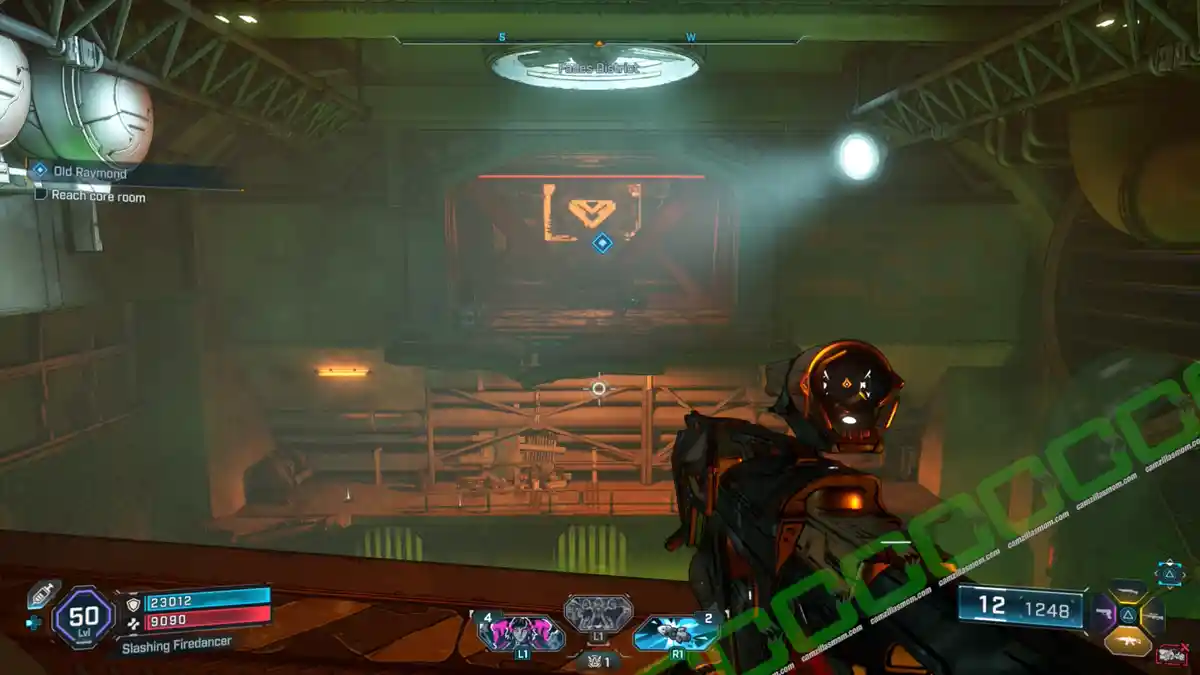
-> Defeat all Order guards.
-> Hack core system: At the console.
-> Defeat Order reinforcements, defeat all enemies.
-> Open sewer gate: Button at the only door.
-> Leave facility.
Old Lads
Side Mission Start:
Has two starting points. I went straight to the sewers.
What it is about:
Dig Raymond’s lads out of the sewers.
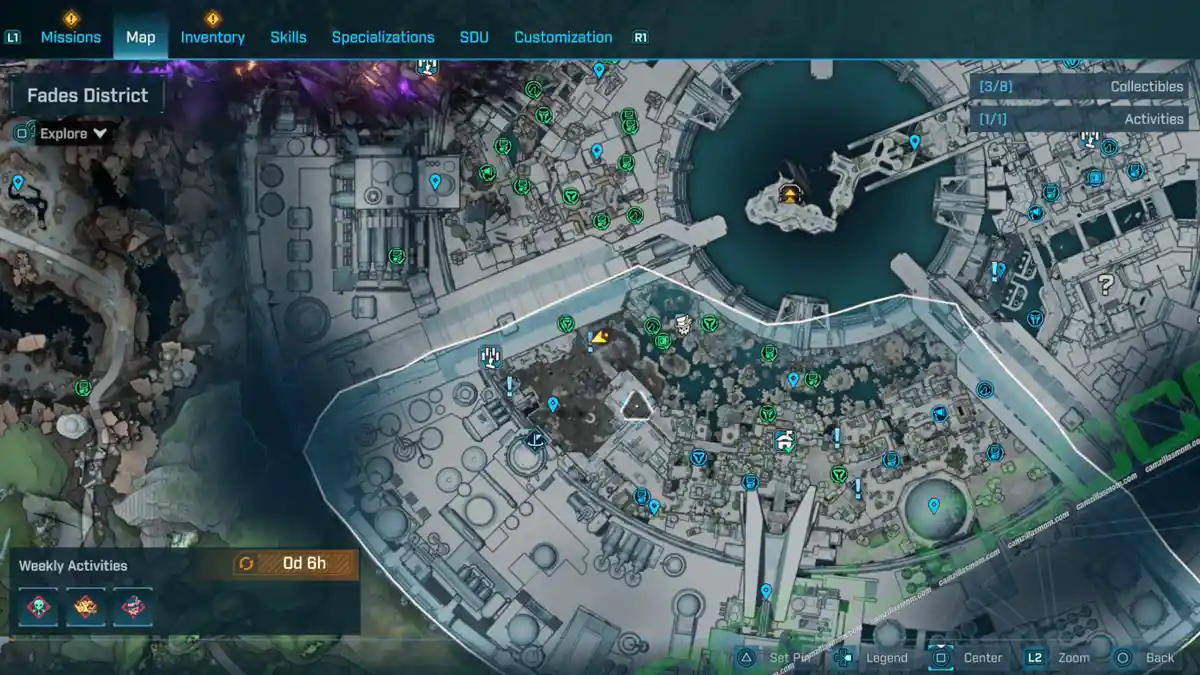
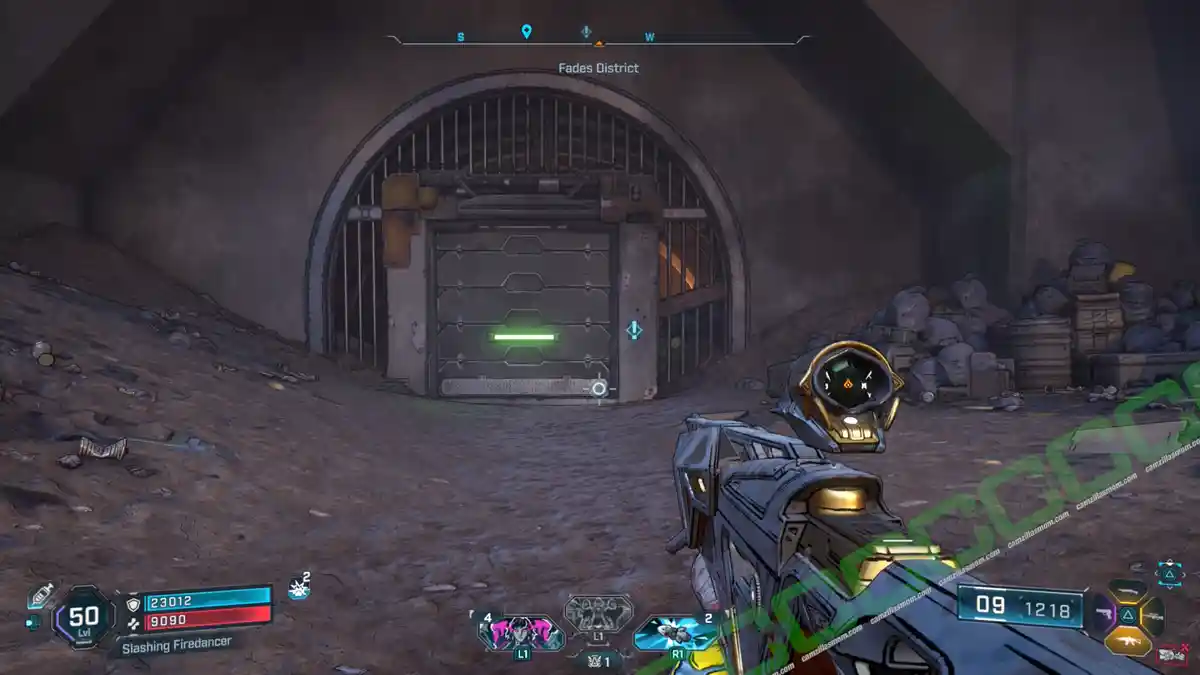
Side Mission Steps:
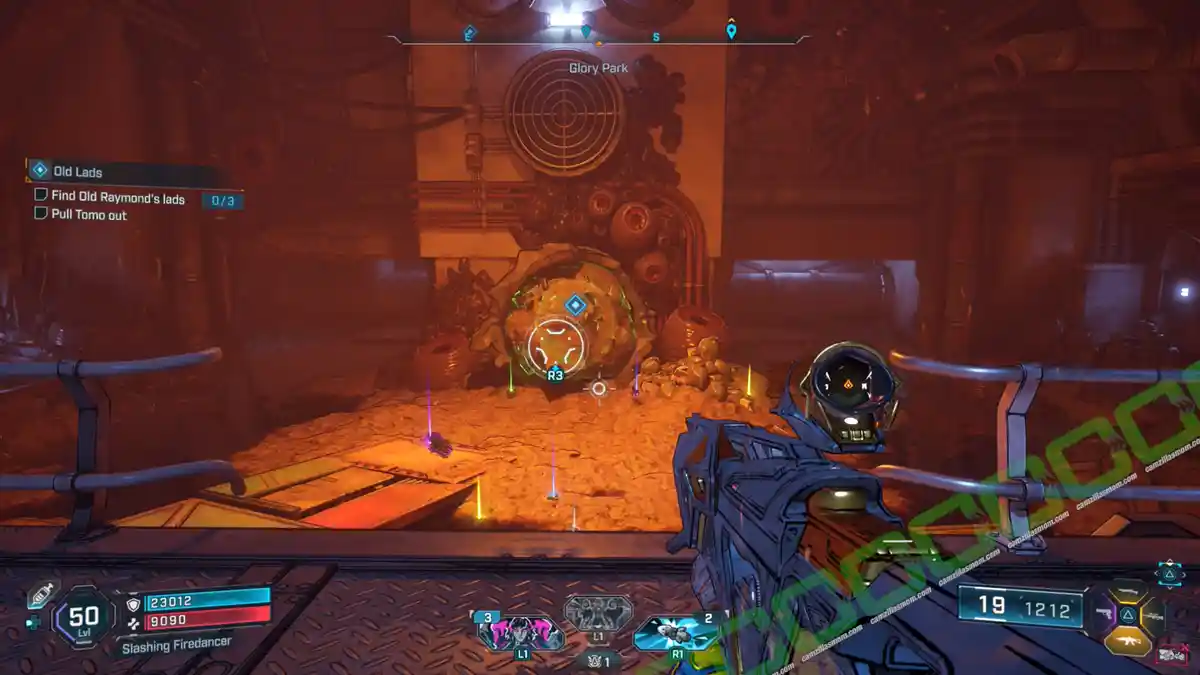
-> Find Old Raymond’s lads – First: For the first, just enter the sewers at the starting point above.
-> Pull Tomo out: Grapple the nest in the center of the room.
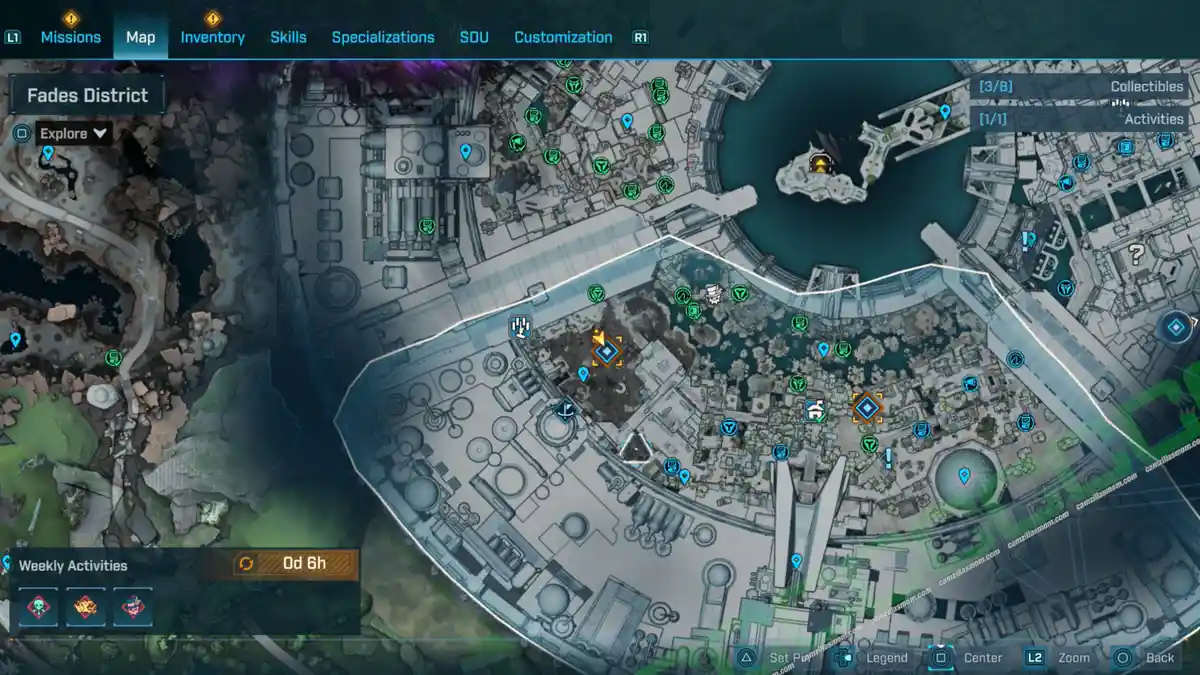
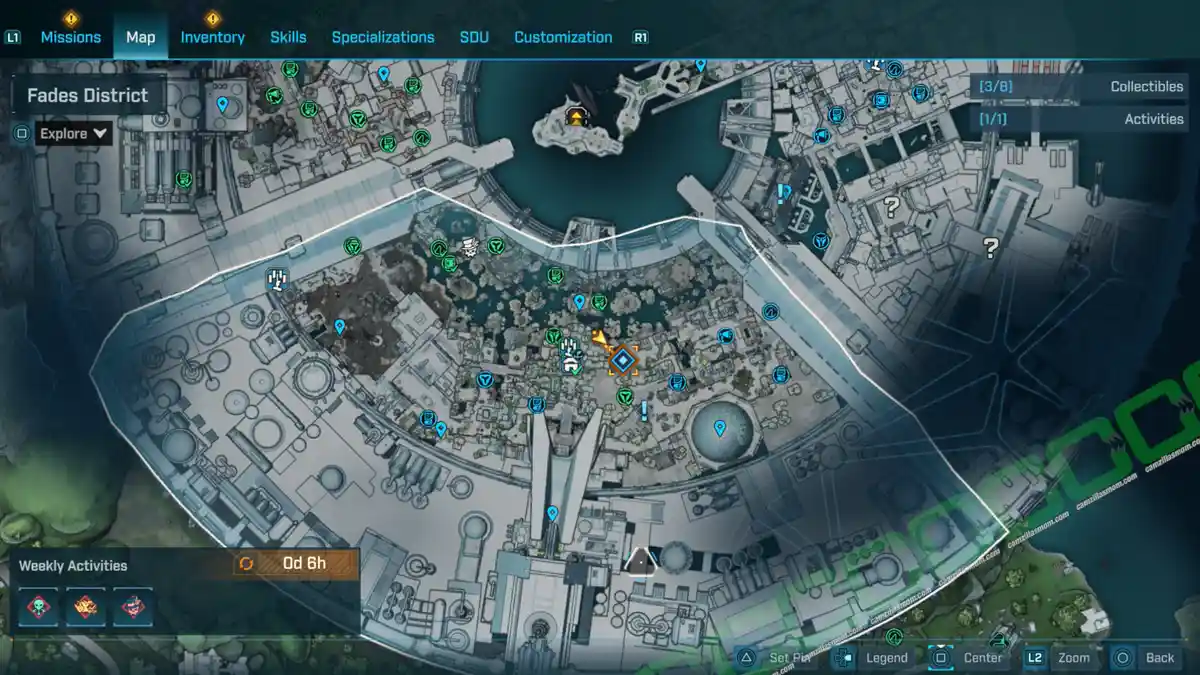
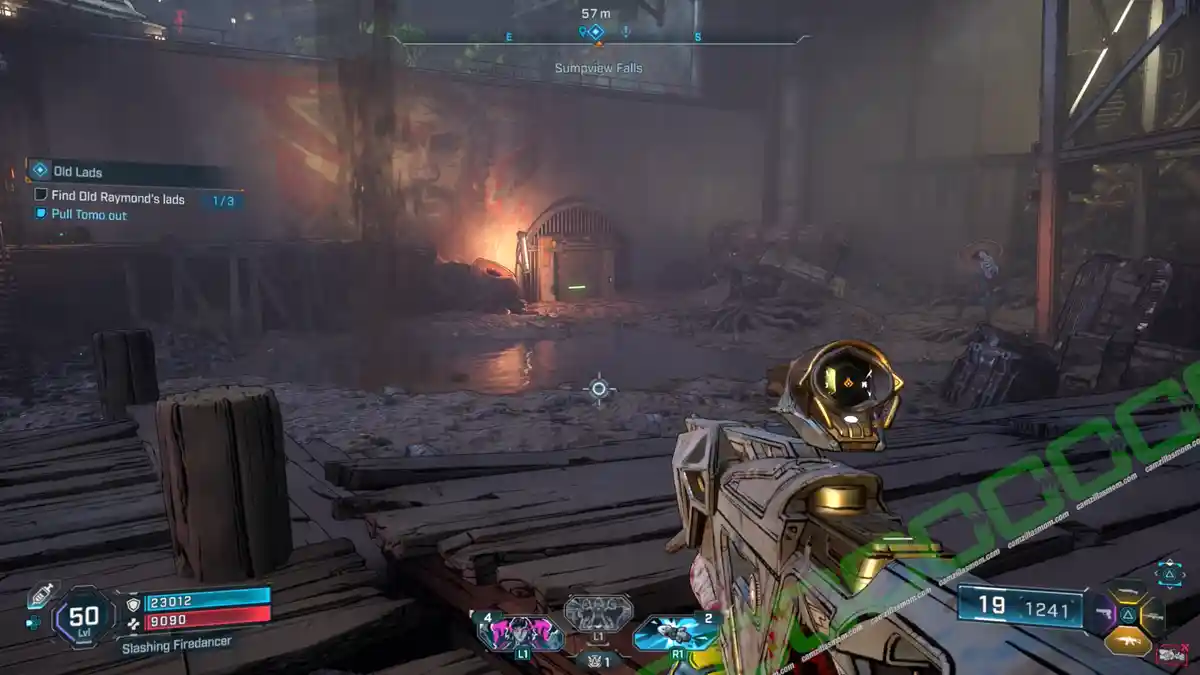
-> Find Old Raymond’s lads – Second: The second lad is trapped east of Safehouse: Sumpview Falls.
-> Defeat Creeps surrounding Orla
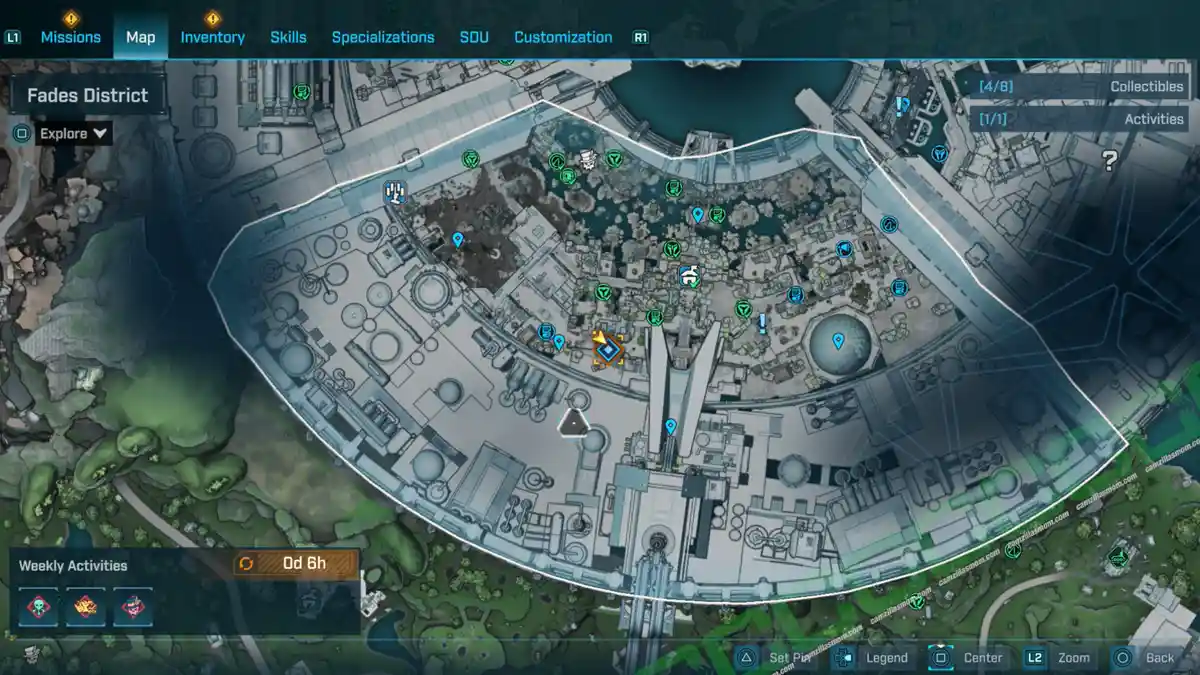
-> Enter Raymond’s ancient hideout: East of the Data Dump Cafe POI. Enter and use the valve. Then, pass through the rotating ventilators, follow the corridor and drop down ito the hideout.
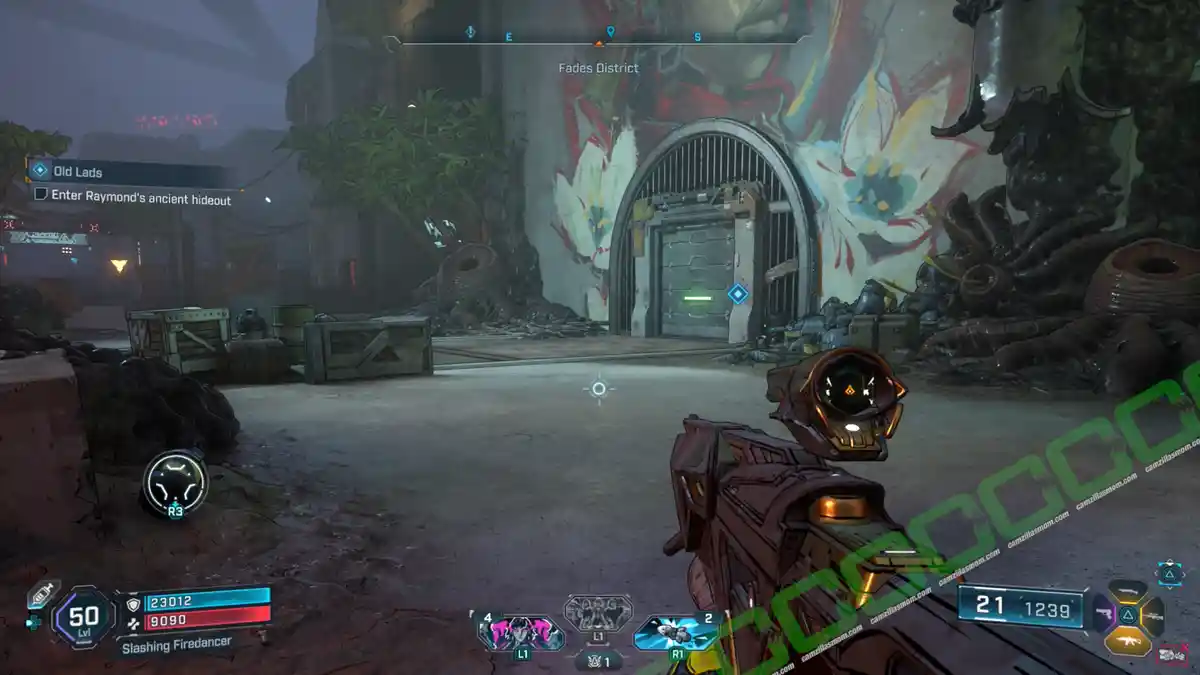
-> Find Padraic: He’s behind the door.
-> Power door: There is a ladder going up to the power supply deposit, but it is blocked by a ventilation cover. On the other side is an open shaft. The power core is behind the slightly annoying rotating ventilator. Pick it up and carry it through the open ventilation shaft to the deposit.
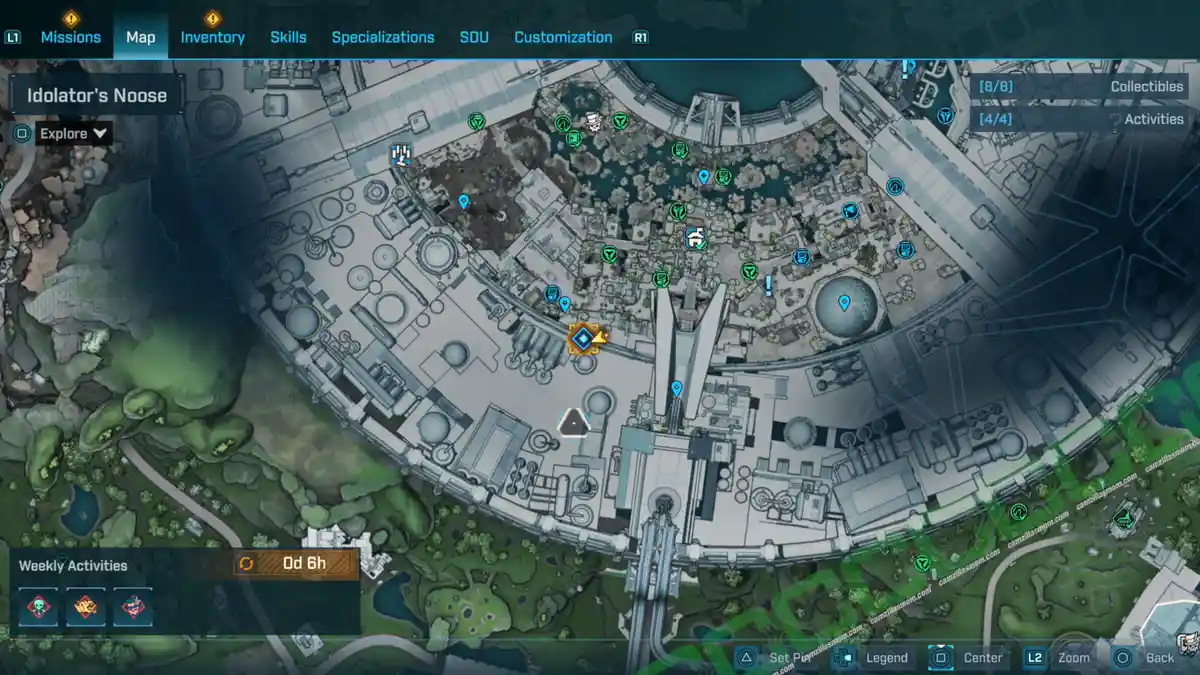
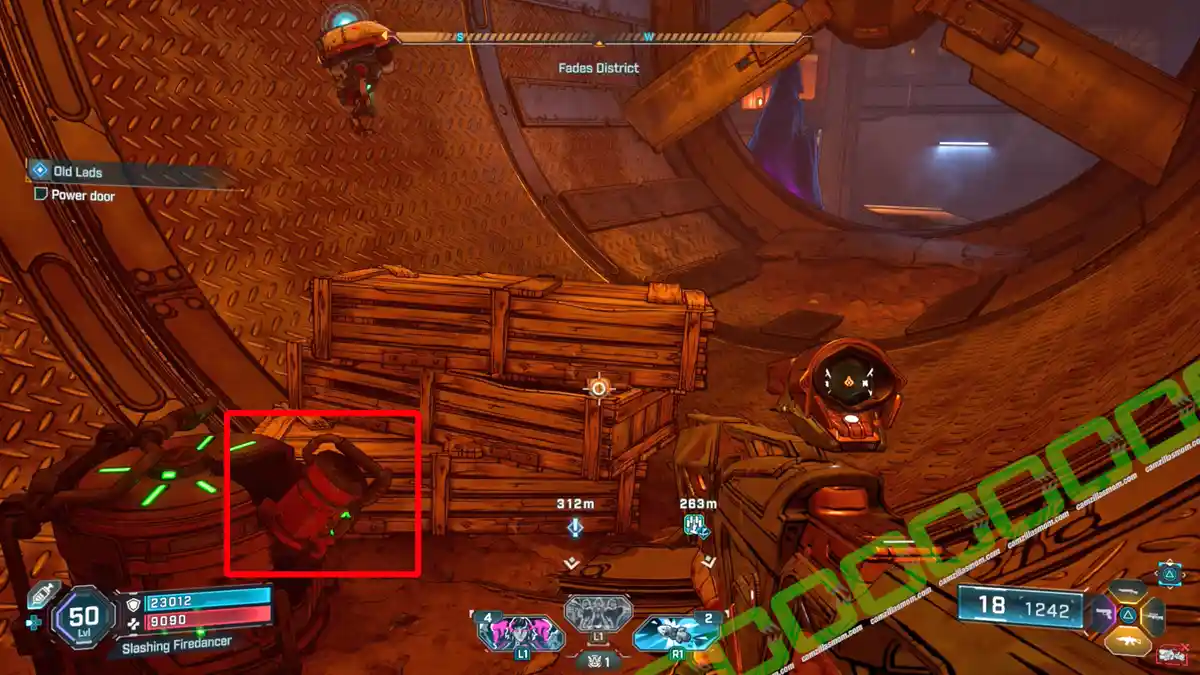
-> Find Padraic: He’s behind the door.
-> Enter backdoor: You can also find an ECHO Log collectible here.
-> Talk to Padraic
-> Leave hideout
-> Return to watermill
-> Defeat Order ambush.
Old Tricks
Side Mission Start:
Glory Park – Raymond
What it is about:
Let’s do some revolutionary work.
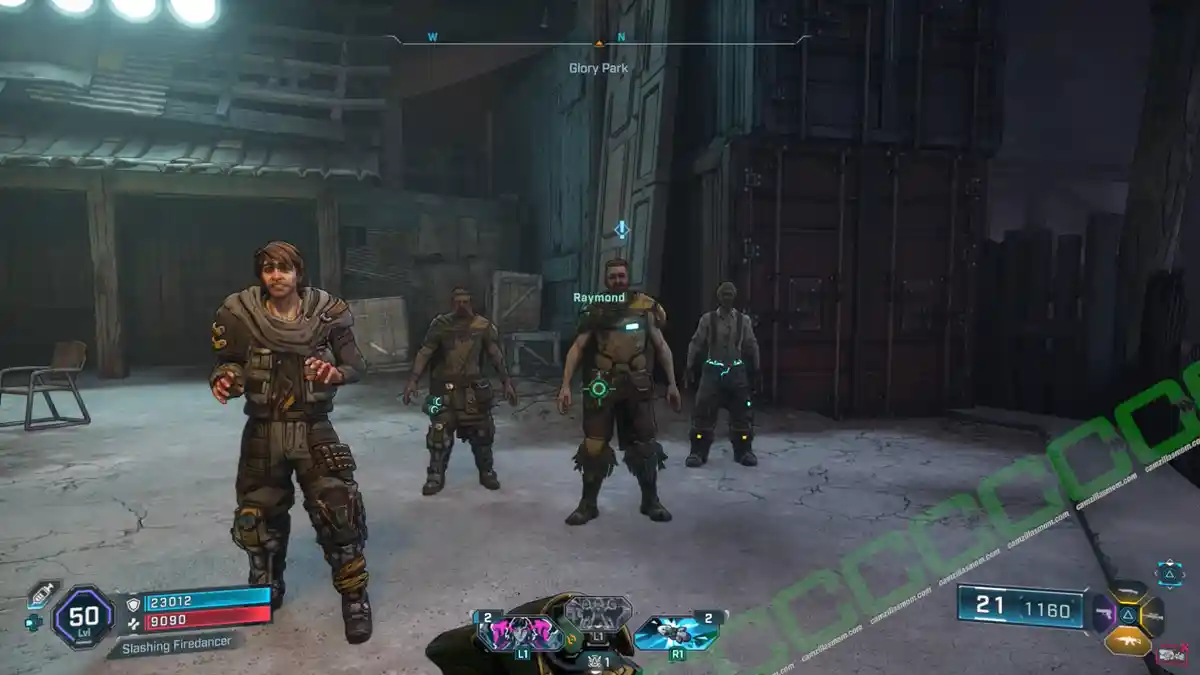
Side Mission Steps:
-> Meet Old Raymond at radio tower: In the Terminus District, near the Frantic Scrawl Fast Travel point.
-> Take transmitters.
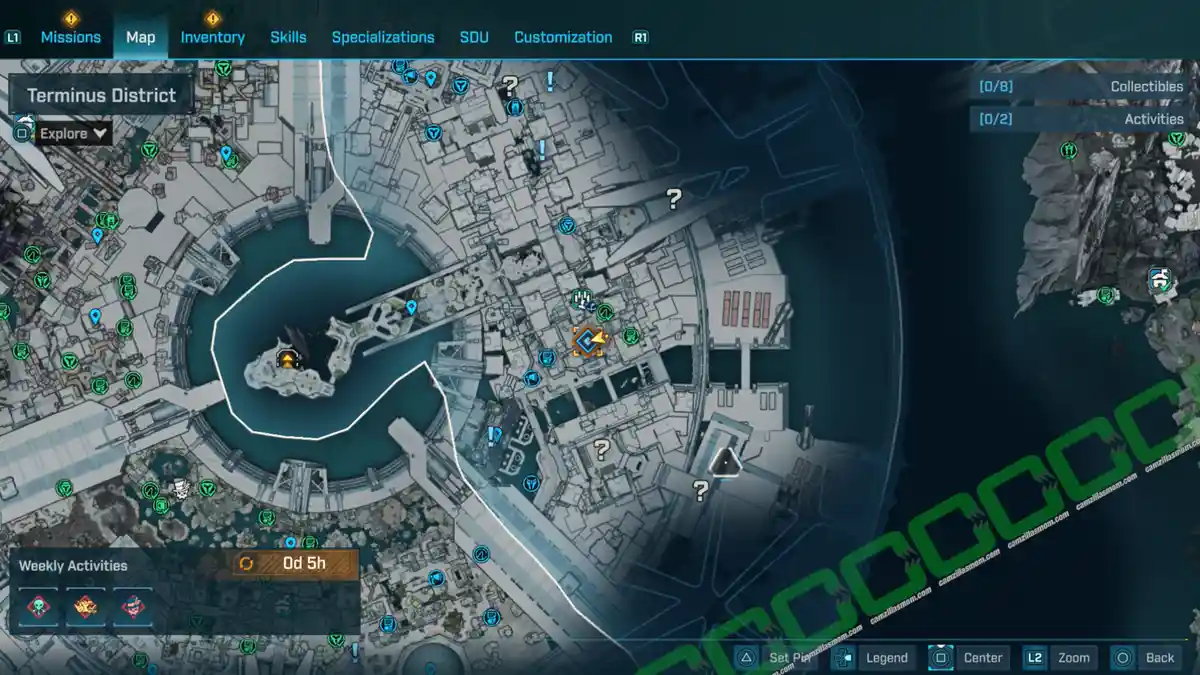
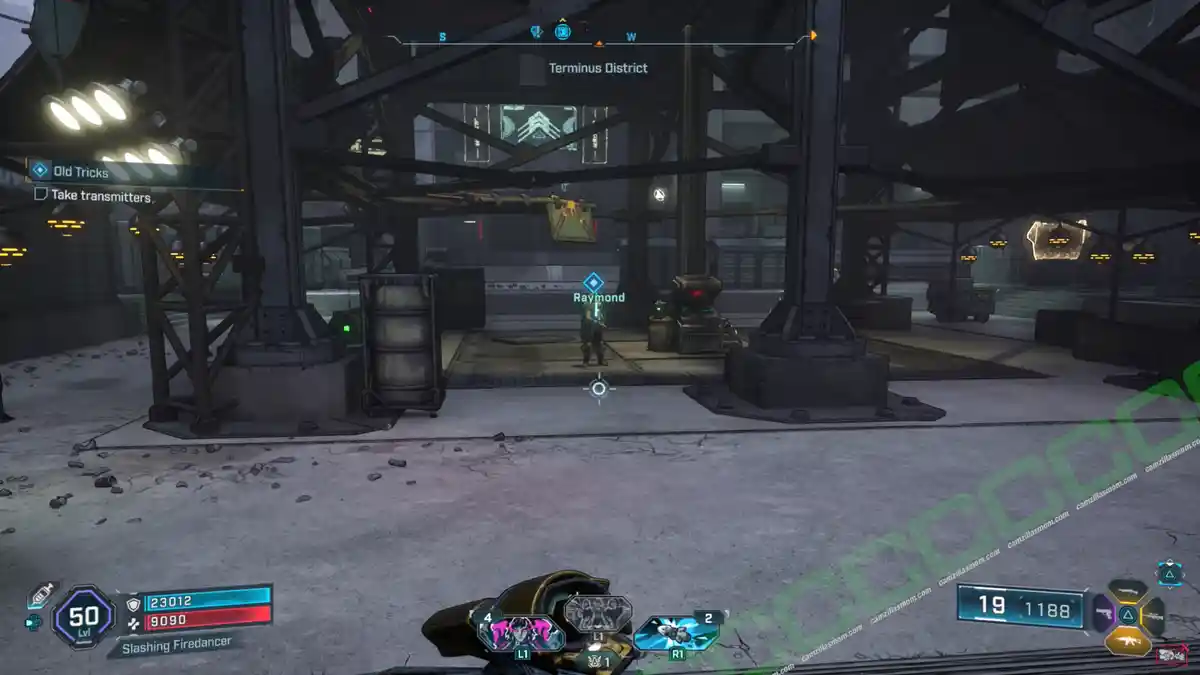
-> Place 3 transmitters: On the tower. Note: There is also an Electi Safe collectible on the same level as the last transmitter location.
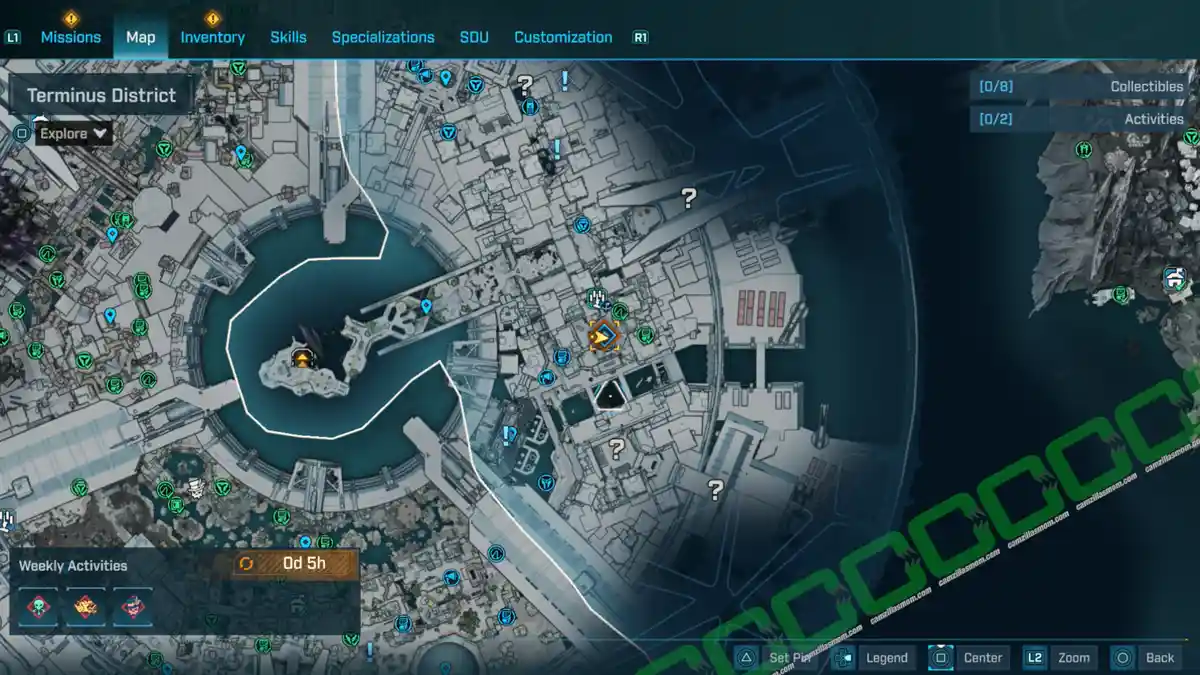
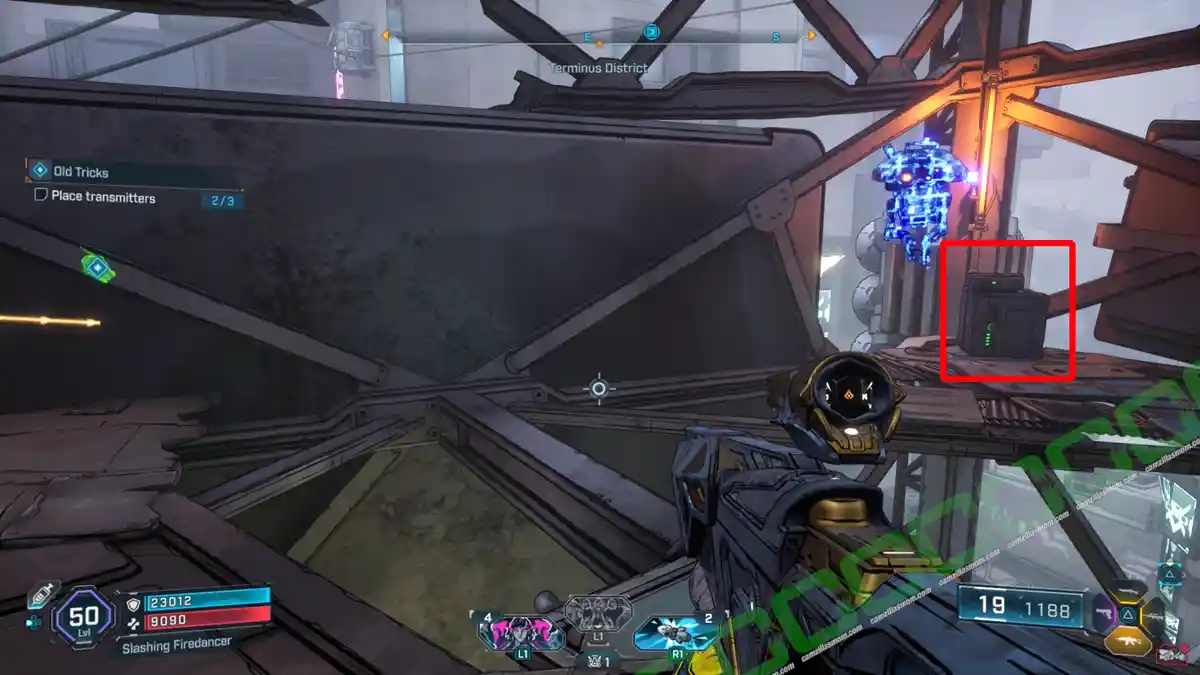
-> Return to Old Raymond
-> Defend Radio Tower
-> Talk to Old Raymond
Bad Seed Pt. 2
Side Mission Start:
Follow-up of Bad Seed in the Carcadia District.
Location: Darkloam Biosphere –
What it is about:
Lysett needs your help again. – This time plant the seed.
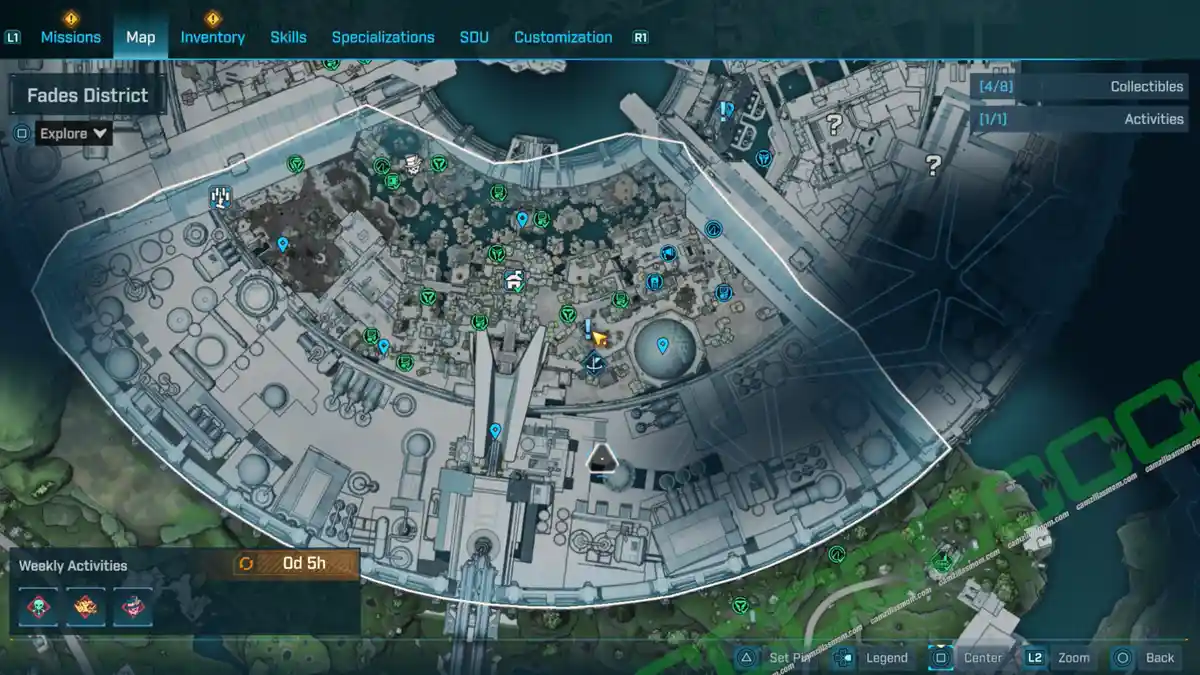
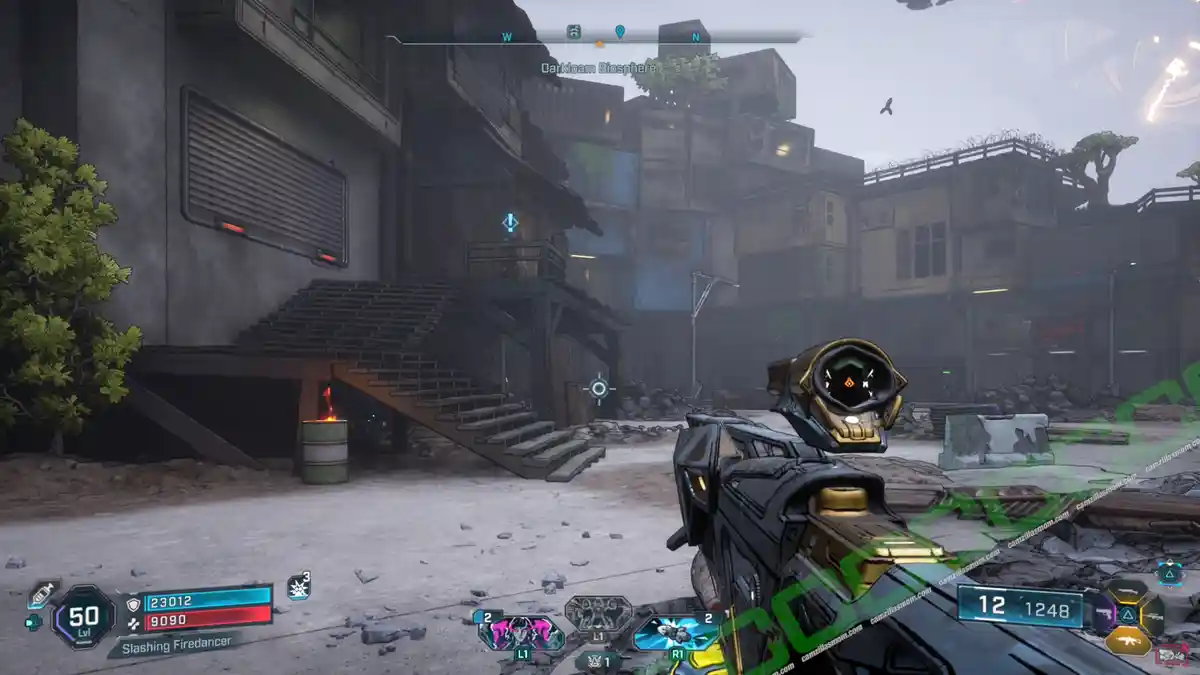
Side Mission Steps:
-> Disrupt propaganda device: Destroy it on a terrace at the other side of the road.
-> Defeat Order troops.
-> Enter Biosphere: The gate that opened at the second attack.
-> Reach fertilizer room: Inside, climb up to the top, go through the break room, and climb the metal wall to get there.
-> Defeat Order Security
-> Put seed in fertilizer.
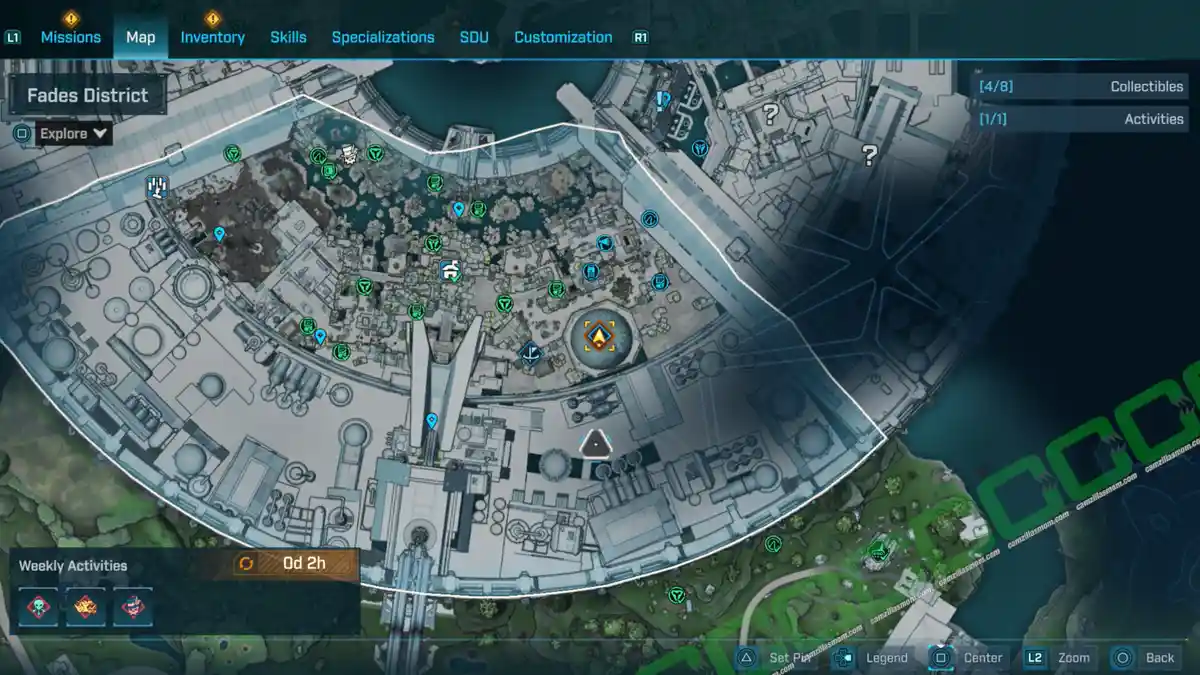
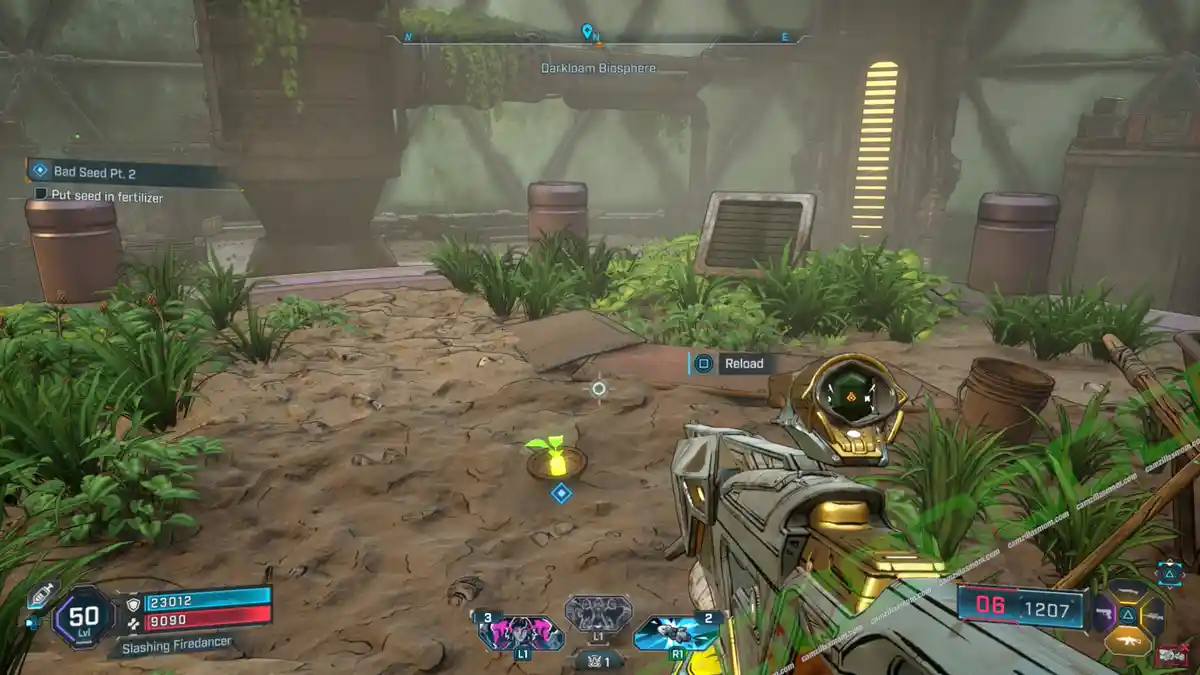
-> Defeat Order troops
-> Fertilize seed: Use the valve in this room.
-> Stop Fertilizer: Now the room will flood with fertilizer, and you have to shoot four valves to stop it. Two valves are on the ground floor, two on the top floor. I was struggling to get to the top. There is a vertical wind canal that you can use to get to the top.
-> Shoot tree fruits: They are highlighted in red, like the valves before.
Browse All Borderlands 4 Guides

All 224 ECHO Logs in Borderlands 4 Revealed
Discover every ECHO Log in Borderlands 4! This guide covers all 224 logs, including mission, general…

All 39 Dead Bolt (ECHO Log) Locations in Borderlands 4
Find all 39 Dead Bolts in Borderlands 4 and complete the "Any Last Words?" challenge with this compr…
Borderlands 4 Kairos Speaks Challenge – All ECHO Logs Revealed
Discover every ECHO Log for the Kairos Speaks Challenge in Borderlands 4. Follow this guide for exac…

Borderlands 4: All 10 Auger Shrine Locations Revealed
Discover all 10 Auger Shrines in Borderlands 4. Follow this guide to complete the challenge and clai…
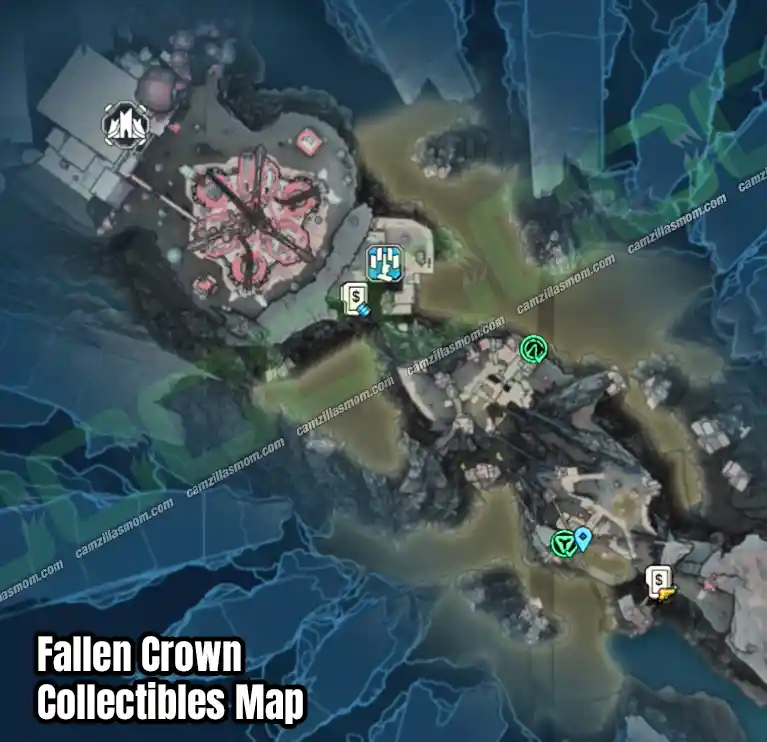
Borderlands 4: All Fallen Crown Collectibles
Snag the Dead Bolt and Vault Symbol in Fallen Crown, Borderlands 4. A quick guide to help you comple…

Borderlands 4: All Upper Dominion Collectibles
Complete Borderlands 4's Upper Dominion with this guide. Locate all ECHO Logs and Vault Symbols effo…


Borderlands 4
Release: September 12, 2025
Developer: Gearbox Software
Publisher: 2K Games
Official Website: https://borderlands.2k.com/borderlands-4/

