
The Barrendale Mesa Secret Zone is the last challenge on the planet, and it’s an electricity puzzle rather than a fight. Buy the Barren Key, power up the retracted bridges in the right order, and the Spark is yours.
Related Mario + Rabbids Guides
It’s an Ill Wind that Blows
Tortured Artist
All Sparks Locations
Mario + Rabbids Sparks of Hope Game Hub
The Entrance
You can buy the Barren Key in the Shop. It costs 11 Planet Coins. You get them by doing Side Quests.
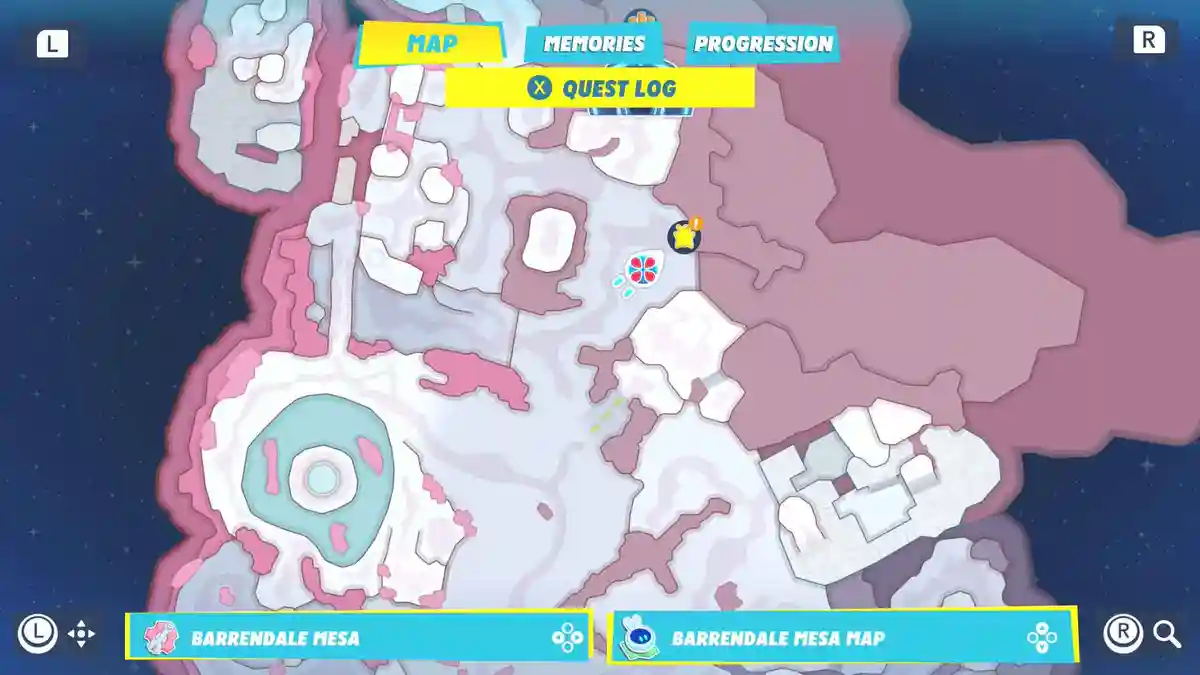
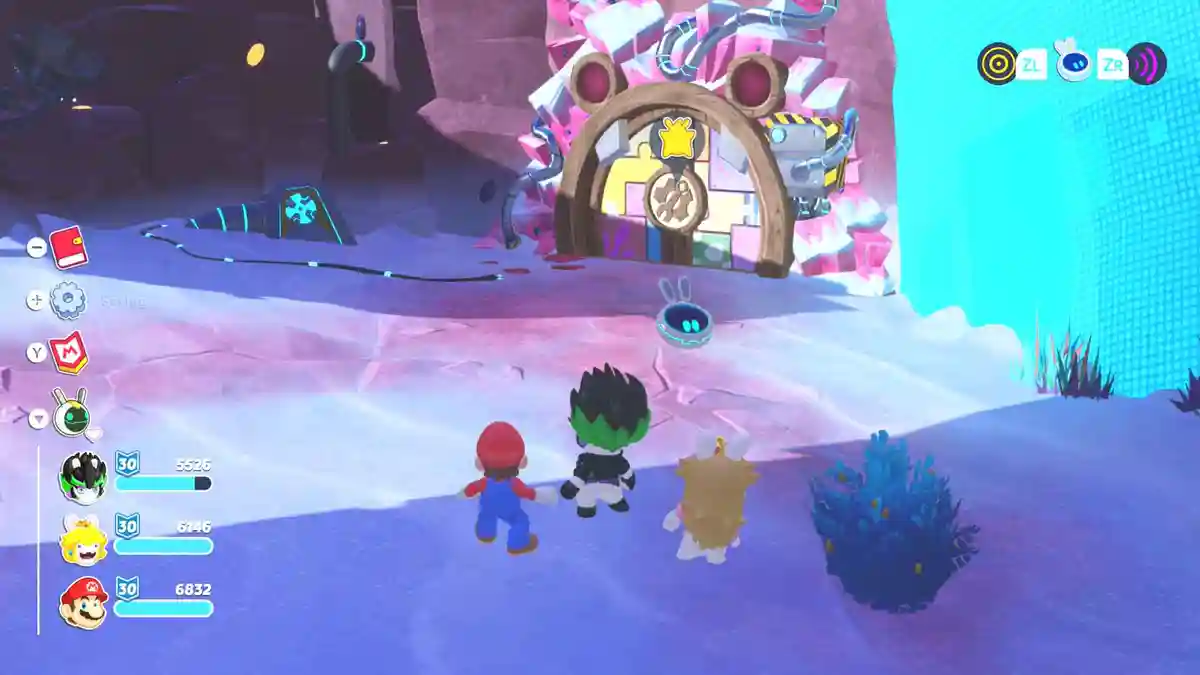
The colourful door is right below the Barrendale Gate.
How to Solve the Secret Zone
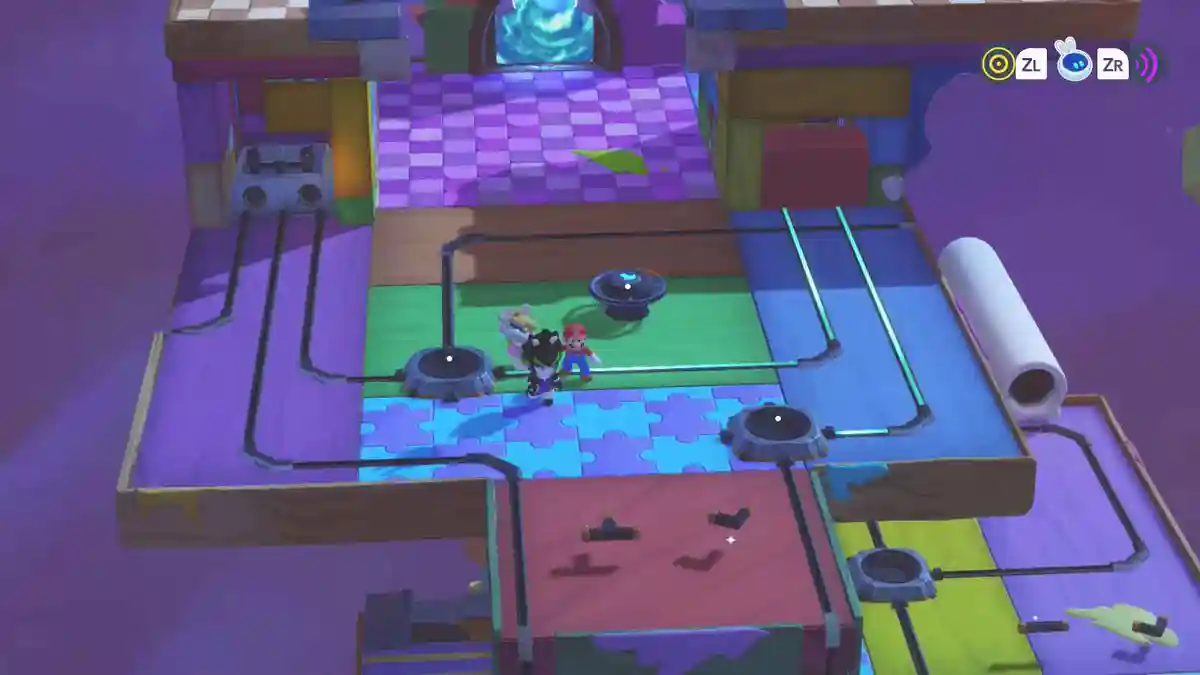
Here at Barrendale Mesa it’s all about electricity. I’ll show you where and how you have to put the parts into the sockets and this Spark is yours in no time! Let’s get familiar with the are first. There is a retracted bridge that needs power to get to the Spark. There are also two parts lying around on this top floor. A “T-Shaped” part and an “Angled” part.
The power flows up here. So, put the “T-Shaped” part into the slot with 3 lines and the “Angled” part into the socket with two lines. Like in the screenshot.
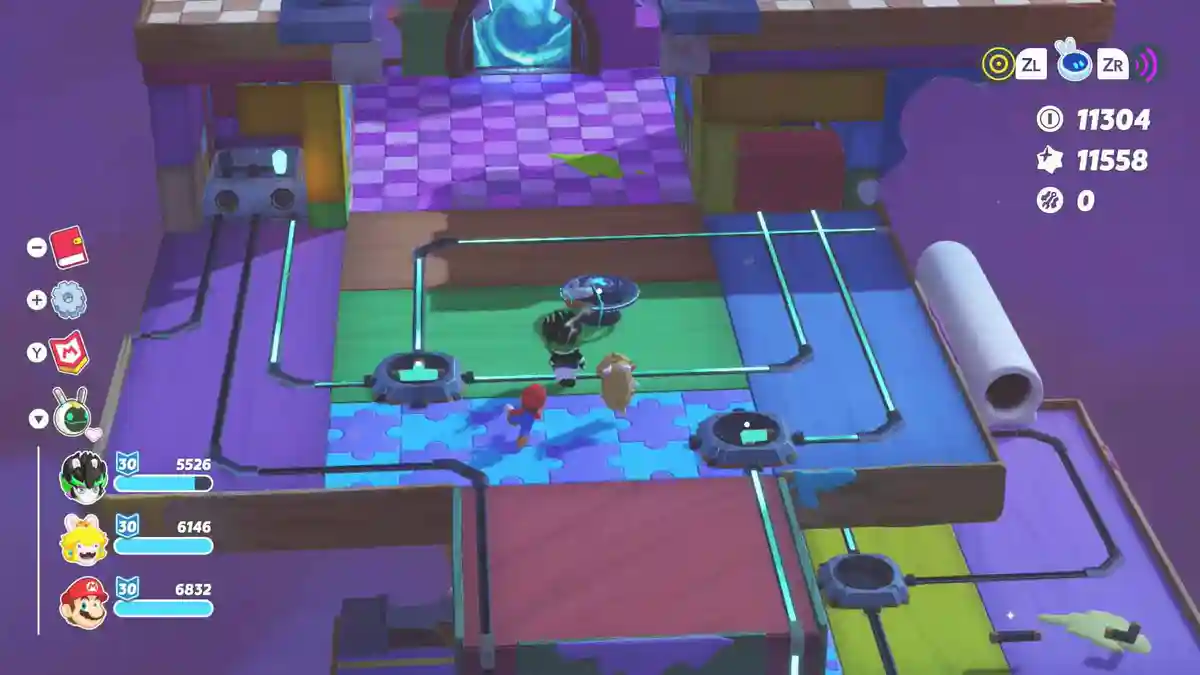
Now take the pipe down. On the middle floor, take the “Angled” part and put it into the slot that is closest to the white pipe. Rotate the part so that the power flows. Like in the screenshot below.
Then take the pipe down to the bottom level. Here is another retractable bridge. We have to power this one first. Put the “T-Shaped” part into the slot with the three lines and rotate it so that the power flows through all three lines. Like in the screenshot below.
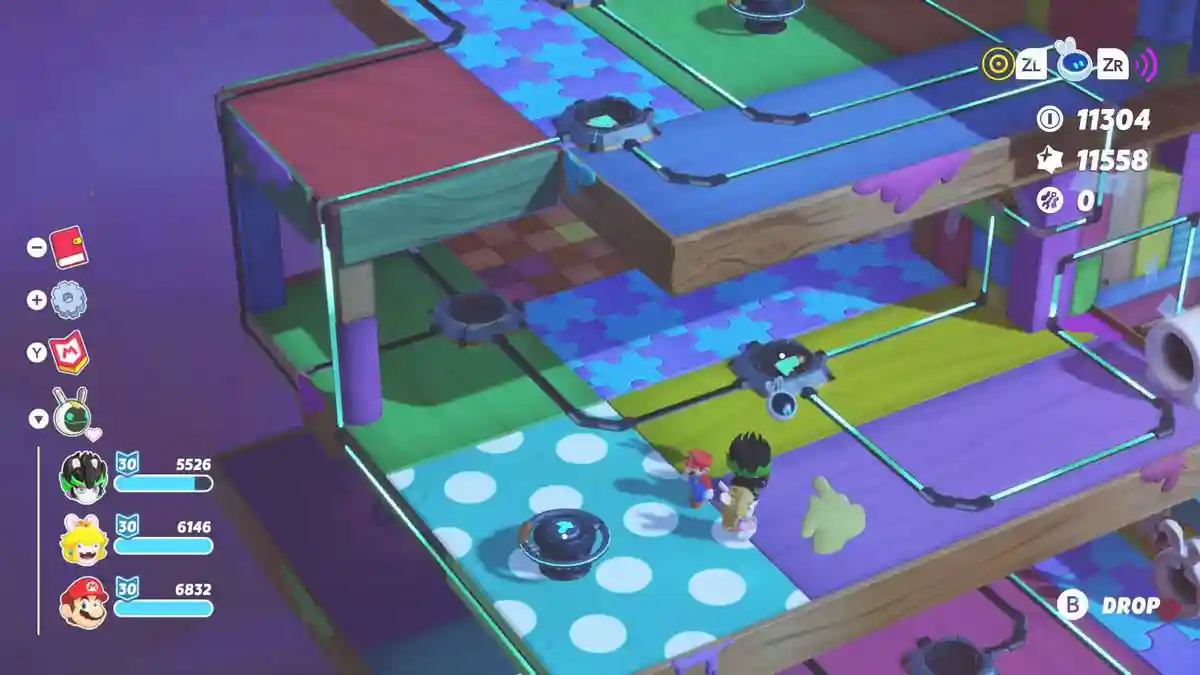
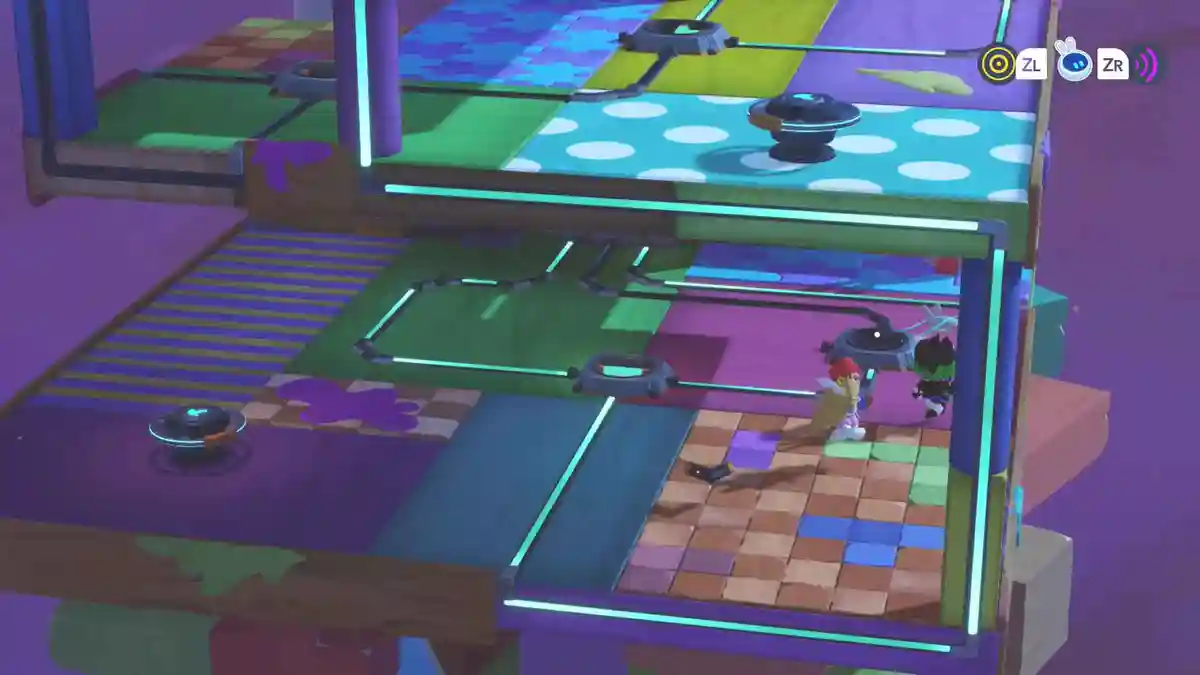
Take the pipe up to the middle floor, pick up the “Straight” part and slide down to the bottom floor with it. Here, you put it into the empty socket and the bridge is active.
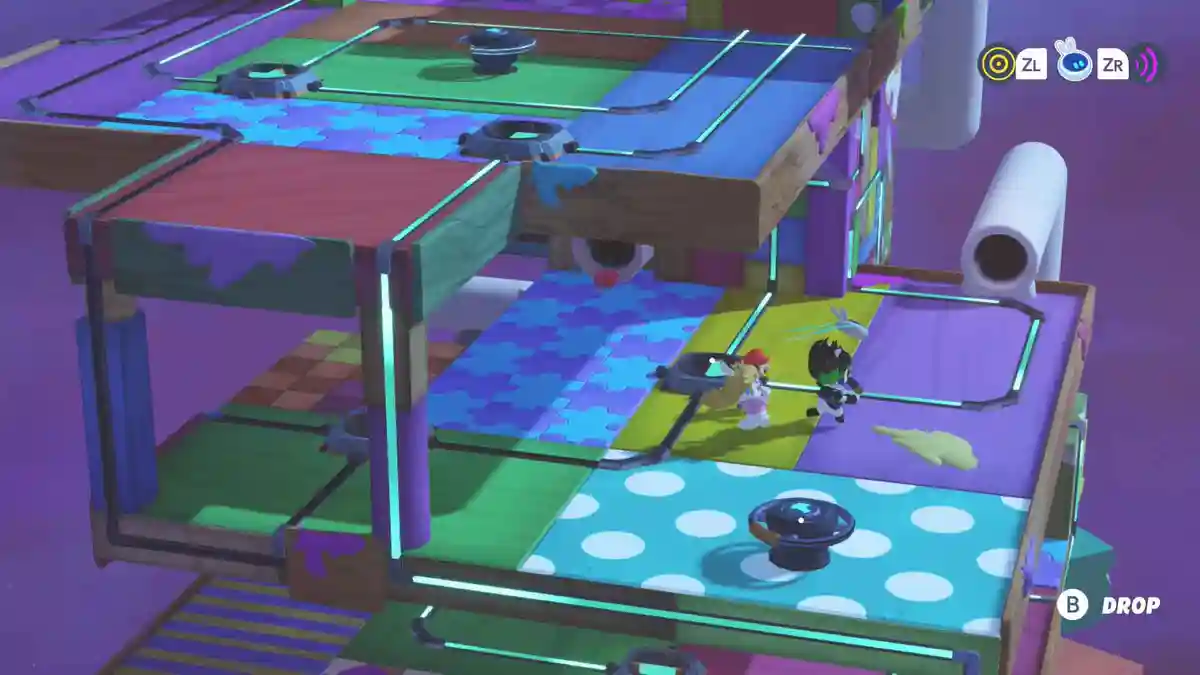
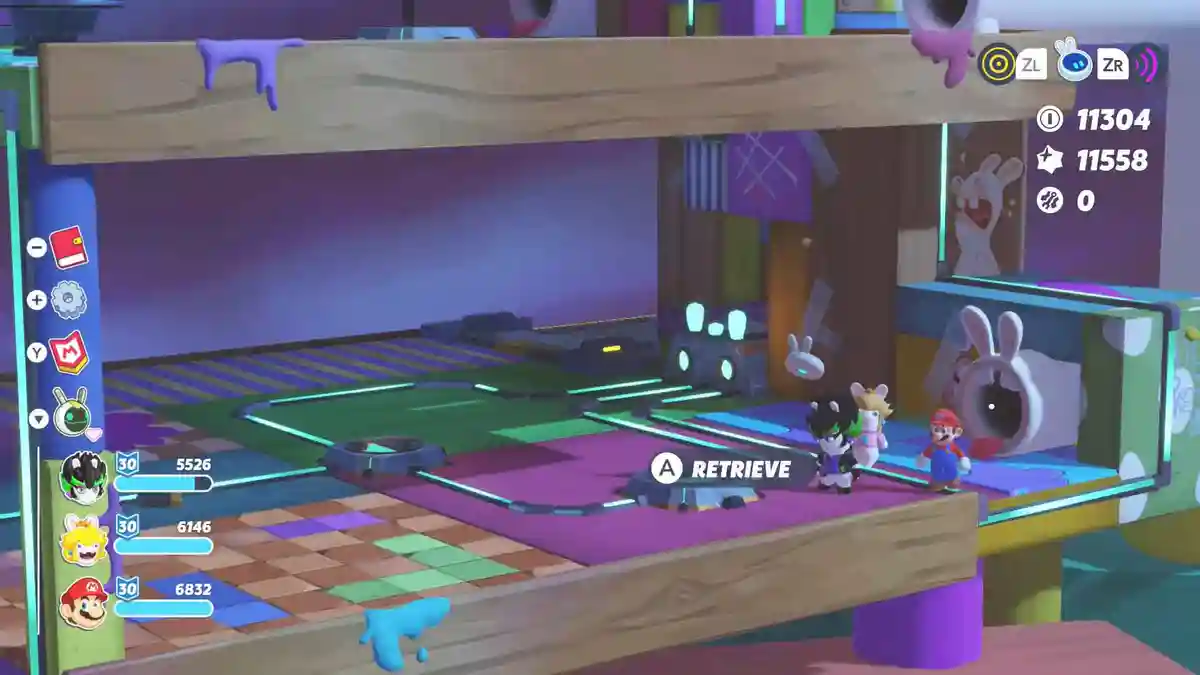
Still on ground floor, pick up the spare “Angled” part, cross the new bridge with it and go up the white pipe. Up there is a socket. Put the “Angled” part inside. Then slide down the pipe again.
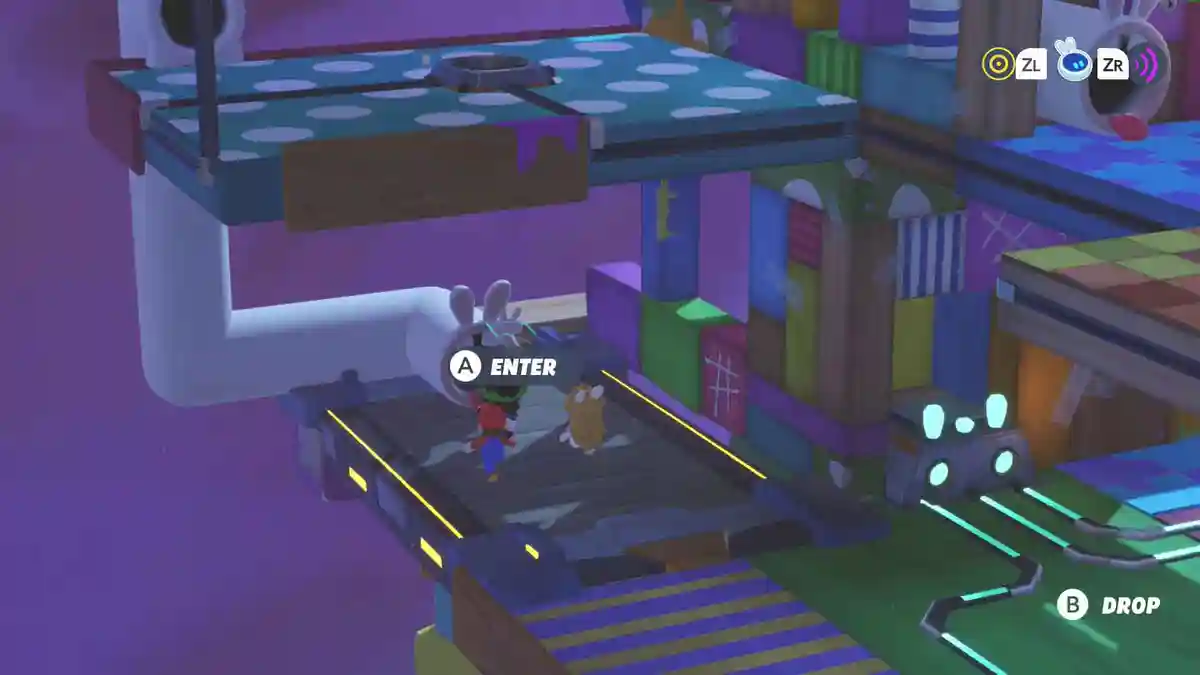
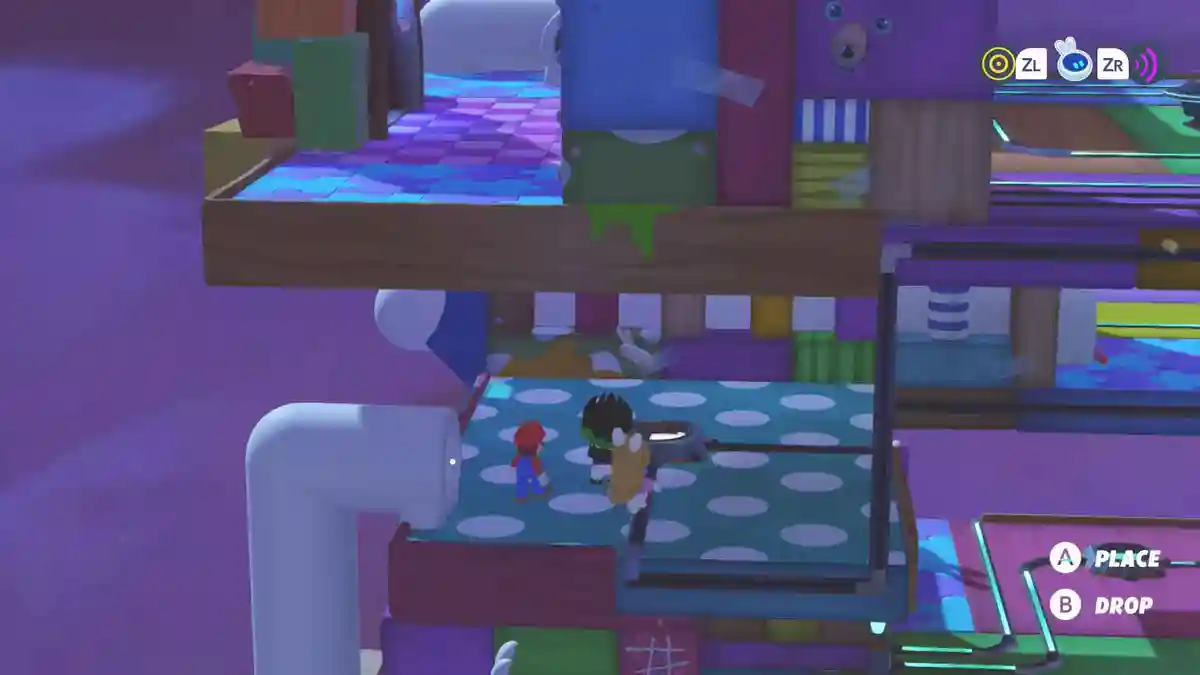
It’s now time to get the power to the top bridge for the Spark! On ground level, take the “T-Shaped” part out of the socket. Go up the pipe to the middle floor and put it into the empty socket with the three lines. Rotate it so that it fits.
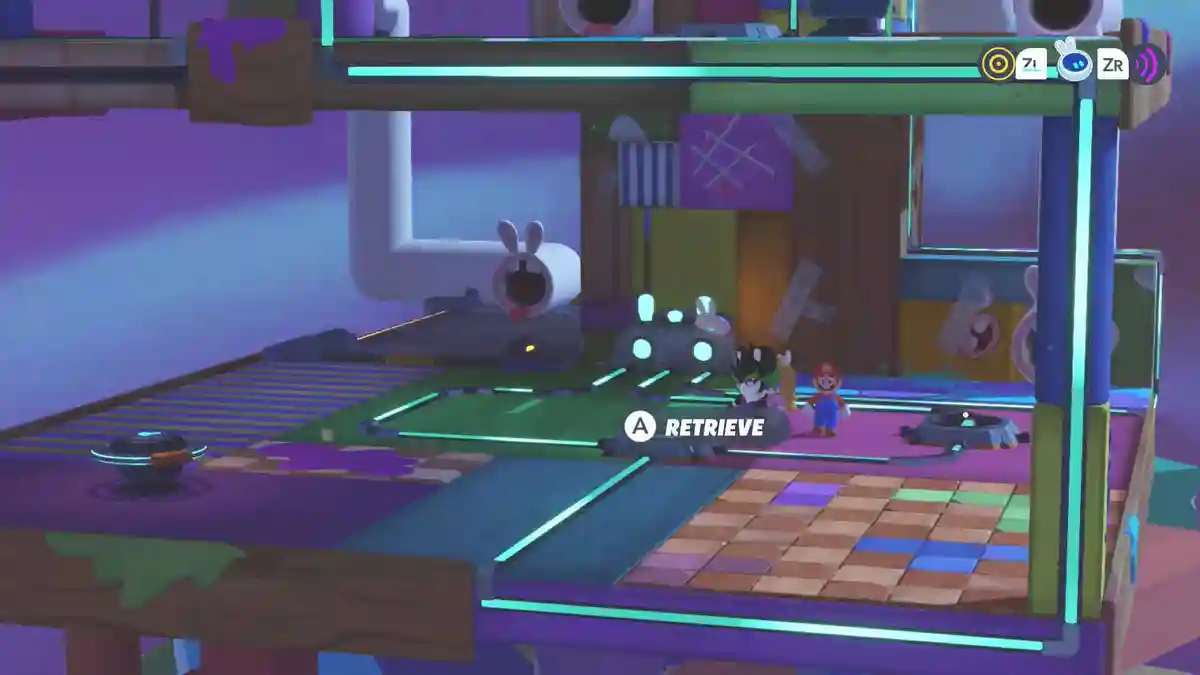
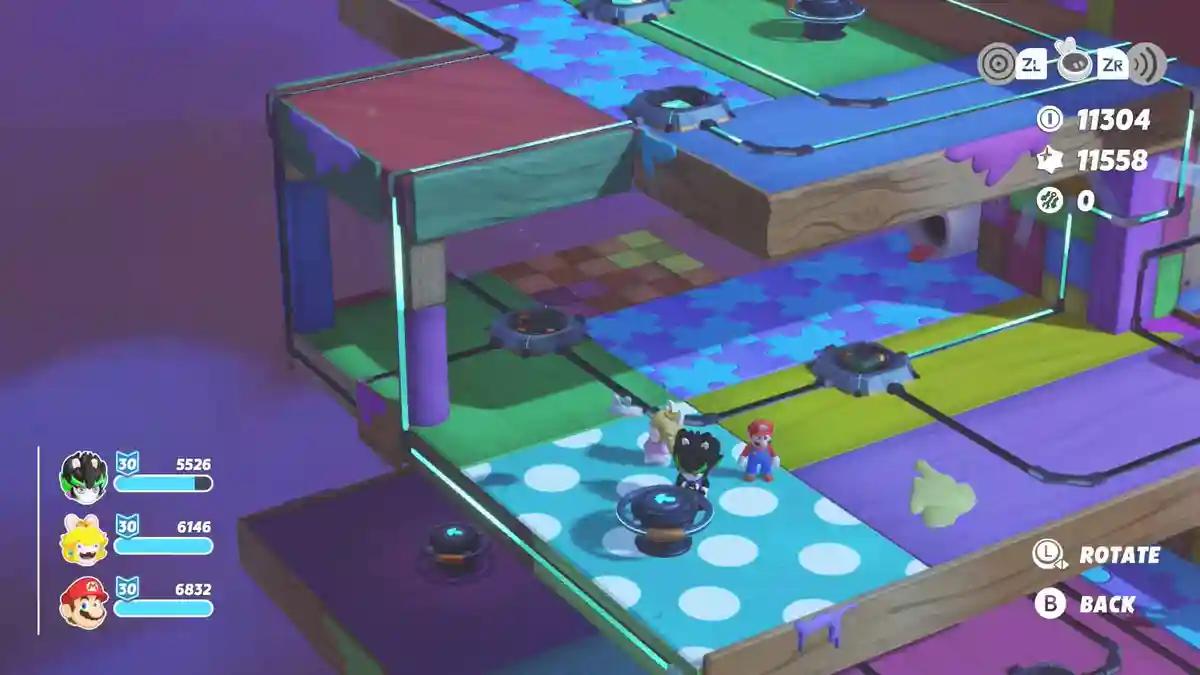
The other socket on the middle floor still has the “Angled” part in it. Take it out and put it aside. Slide down to ground floor and take the “Straight” Part out of the socket. Go up to the middle floor with it and put it into the socket where the “Angled” part was.
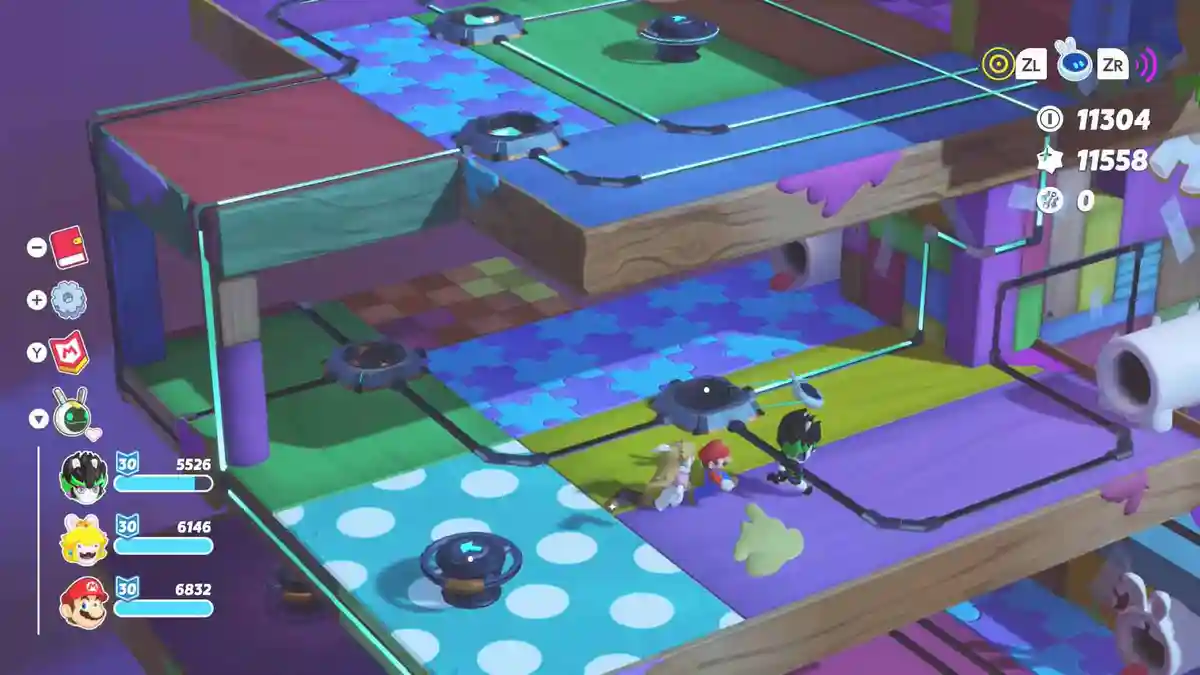
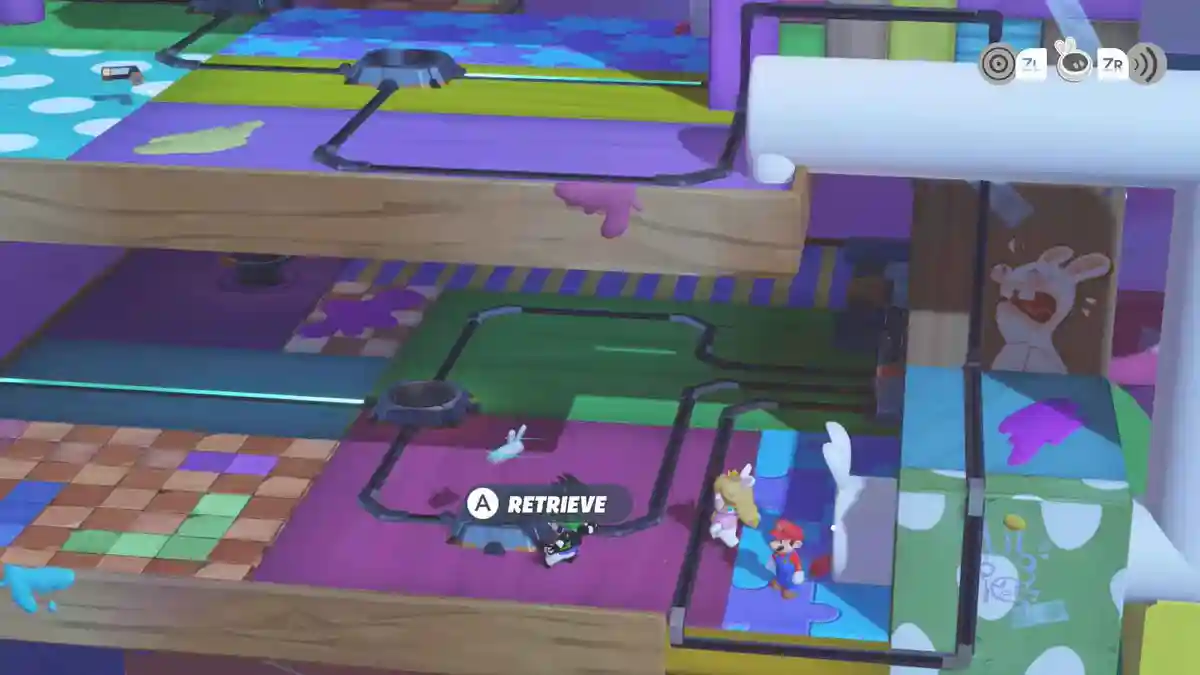
The bridge to the Spark is now powered and you can go up to invite it to your team!
More Sparks of Hope Guides
A Dryad’s Dream Walkthrough – Mario + Rabbids Sparks of Hope
Complete walkthrough for the A Dryad's Dream quest in Mario + Rabbids Sparks of Hope, the follow-up …

All 13 Barrendale Mesa Memories Locations – Sparks of Hope
All 13 Barrendale Mesa memories in Mario + Rabbids Sparks of Hope, from the Ring Stabilizer to the f…
Barrendale Mesa 100% Completion Guide – Sparks of Hope
Every Spark, weapon skin, and the Planet Key location for 100% completion at Barrendale Mesa in Mari…
Barrendale Mesa Quests & Coins – Sparks of Hope
Every Planet Coin location at Barrendale Mesa in Mario + Rabbids Sparks of Hope, plus a complete wal…
Barrendale Mesa Secret Zone Walkthrough – Sparks of Hope
How to solve the Barrendale Mesa Secret Zone in Mario + Rabbids Sparks of Hope, from buying the Barr…
Bury the Hatchet Walkthrough – Mario + Rabbids Sparks of Hope
Step-by-step guide to the Bury the Hatchet side quest in Mario + Rabbids Sparks of Hope. Track down …


About Mario + Rabbids – Sparks of Hope
Release: October 20th, 2022
Developer: Ubisoft Milan and Paris
Publisher: Ubisoft
Official Website: https://www.ubisoft.com/en-gb/game/mario-rabbids/sparks-of-hope