Unknown 9 Awakening has 257 collectibles across 12 chapters, sorted into Collectibles, Scribings and Documents in the Collection menu. This guide lists every one in menu order with its chapter and screenshots, so you can track down the last few for Master Collector and Eagle Eyes. For a pickup route, use the chapter guides below.
Related Guides:
Chapter 1: Richat Structure – 12 Collectibles
Chapter 2: Chamiri – 29 Collectibles
Chapter 3: Suknasari Forest – 21 Collectibles
Chapter 4: The Morning Star I – 8 Collectibles
Chapter 5: Chamatkari Mandir – 31 Collectibles
Chapter 6: The Morning Star II – 4 Collectibles
Chapter 7: Quinta Matos – 41 Collectibles
Chapter 8: The Morning Star III – 11 Collectibles
Chapter 9: Anatolia – 31 Collectibles
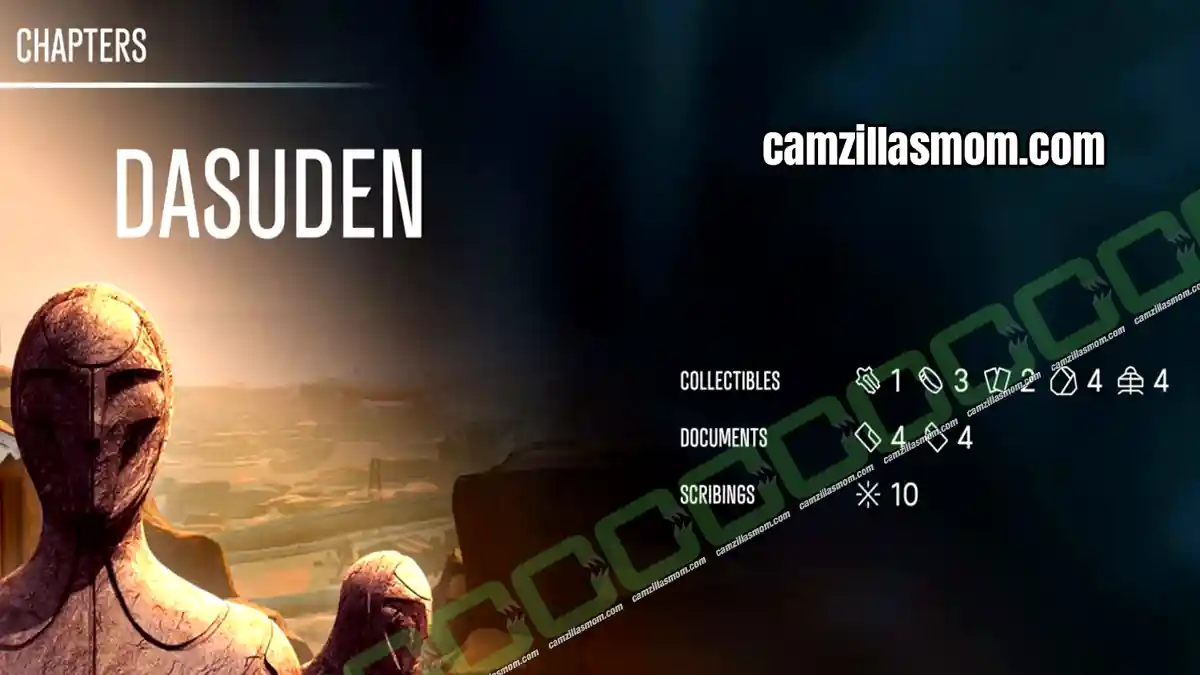
Chapter 11: Dasuden – 32 Collectibles
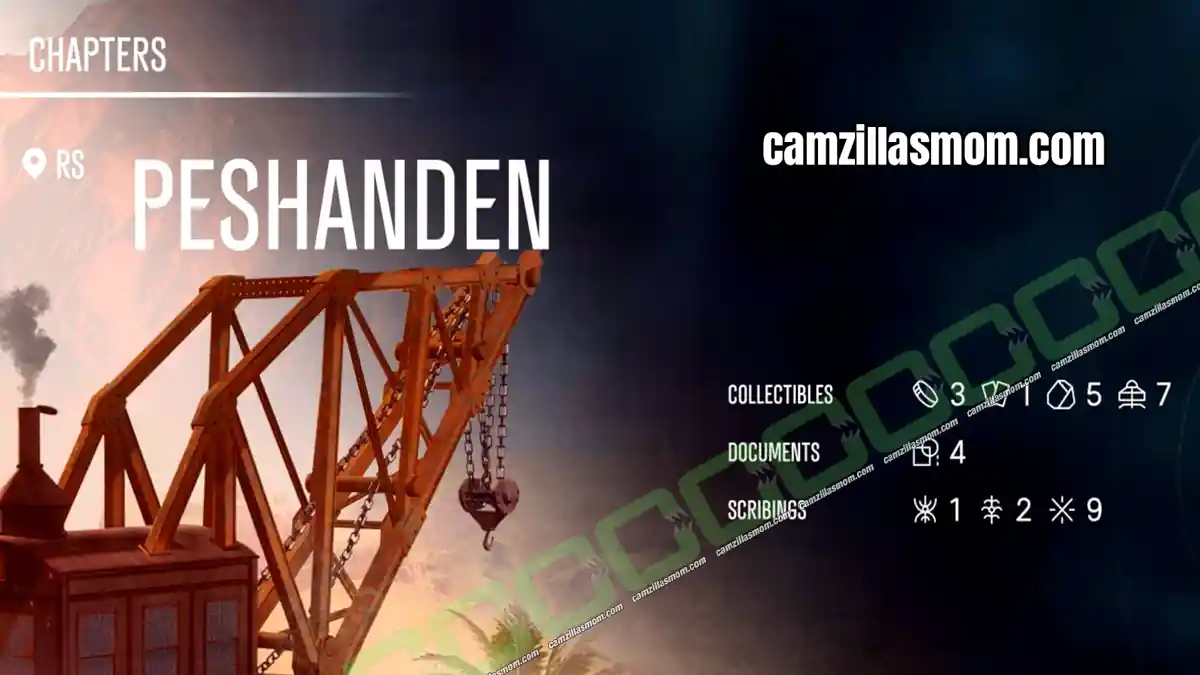
Chapter 12: Peshanden – 32 Collectibles
Chapter 13: Reithden – 5 Collectibles
More Unknown 9 Awakening Guides
All 257 Collectibles in Unknown 9 Awakening by Type
- Collectible Achievements
Skilled Collector, Master Collector, Eagle Eyes, Tracing The Path - Artifacts – 10 collectibles
Collectibles, found in Chapters 1, 3, 5, 7, 8, 9, 11 and 13 - Lys Coins – 24 collectibles
Collectibles, found in Chapters 1, 2, 3, 4, 5, 6, 7, 9, 11 and 12 - Ascension Cards – 10 collectibles
Collectibles, found in Chapters 1, 2, 3, 5, 6, 7, 11 and 12 - Sahin Tiles – 24 collectibles
Collectibles, found in Chapters 7, 8, 9, 11, 12 and 13 - Extractors – 55 collectibles
Collectibles, found in Chapters 1, 2, 3, 4, 5, 6, 7, 8, 9, 11 and 12 - Tree of Life – 7 collectibles
Scribings, found in Chapters 2, 5, 7, 8, 9 and 12 - The Three Bodies – 7 collectibles
Scribings, found in Chapters 1, 3, 5, 7, 8, 9 and 12 - Anomalies – 70 collectibles
Scribings, found in Chapters 1, 2, 3, 4, 5, 7, 9, 11 and 12 - Letters – 12 collectibles
Documents, found in Chapters 1, 2 and 7 - Dossiers – 12 collectibles
Documents, found in Chapters 3, 4, 6, 7, 8 and 11 - Memos – 15 collectibles
Documents, found in Chapters 4, 5, 7 and 11 - Diagrams – 11 collectibles
Documents, found in Chapters 4, 7, 8 and 12
Total: 257 collectibles – 123 Collectibles, 84 Scribings, 50 Documents
Collectible Achievements
Skilled Collector: find 50% of the Collection menu. Extractors do not count.
Master Collector: complete the Collection menu, all 202 entries without the Extractors.
Eagle Eyes: destroy all 55 Extractors.
Tracing The Path: find all 24 Sahin Tiles.
Missed something? Use Chapter Select to replay only the chapter you need. Chapter 10, the last Morning Star visit, has no new collectibles. Everything on the airship is in Chapters 4, 6 and 8. Tree of Life 7 is the only one that needs two chapters, see the Tree of Life section.
Artifacts – Collectibles
All 10 Artifacts in menu order. They count toward Master Collector.
Runic Battery
1 of 10 Artifacts – Chapter 1: Richat Structure
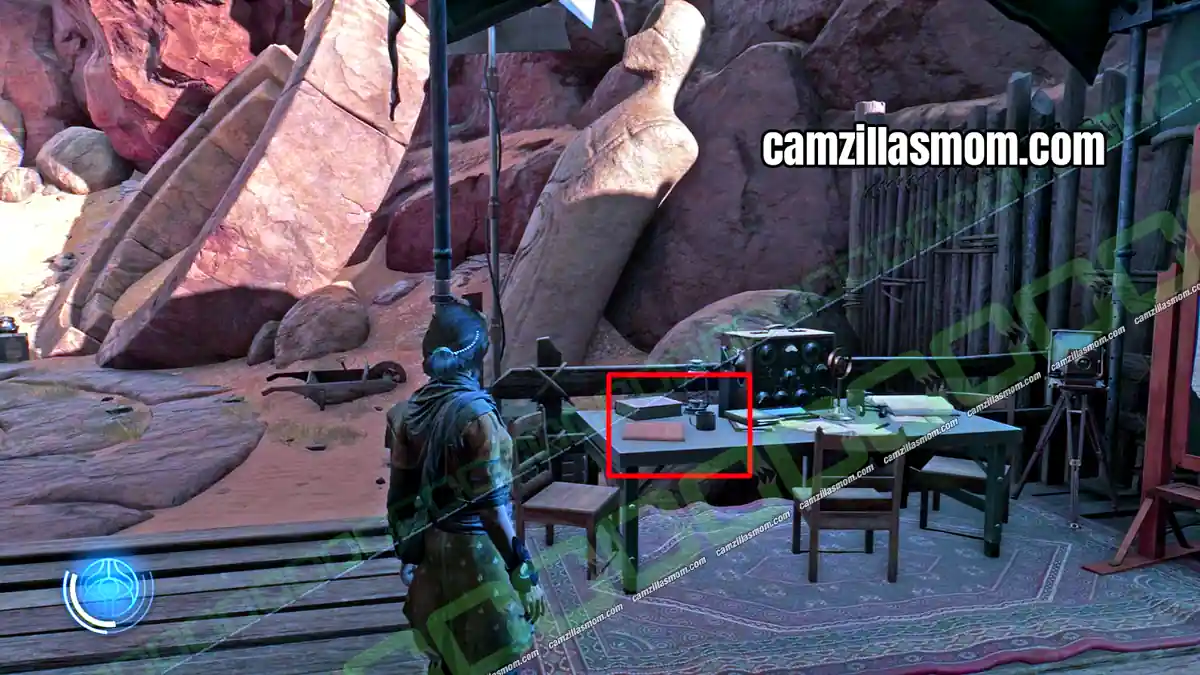
At the start of the game, Haroona follows Reika into a Scrapper camp where the game teaches you combat. After the fight, search the tables for the Runic Battery.
Stones of Xi’an
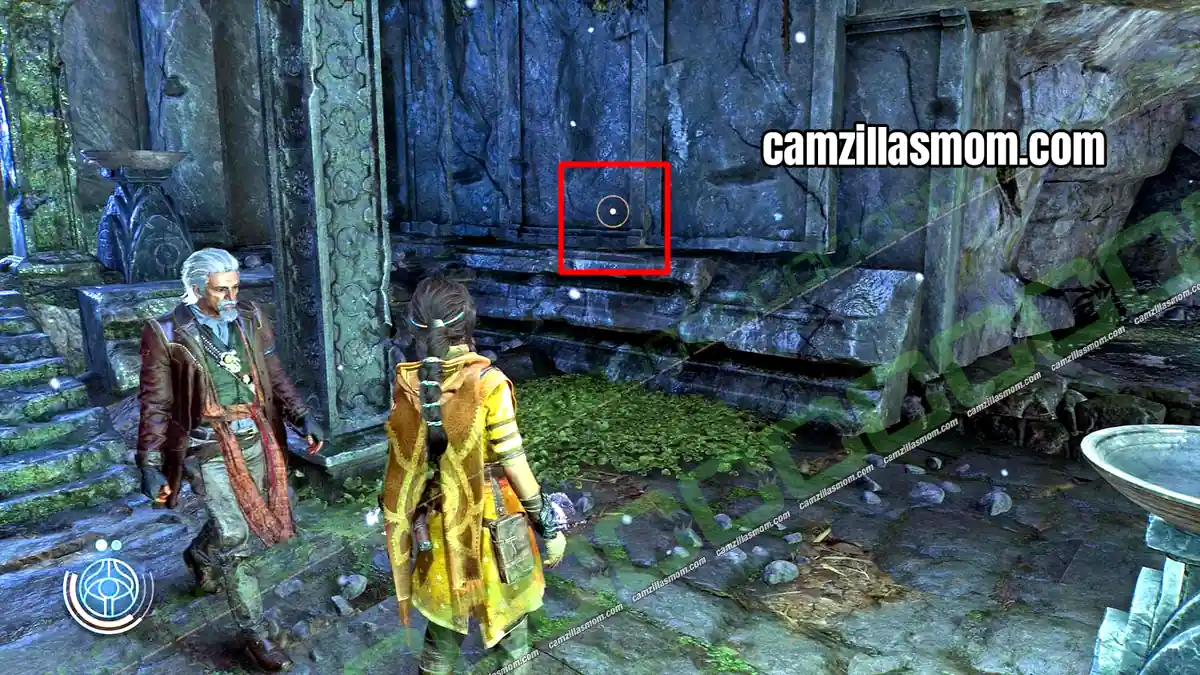
2 of 10 Artifacts – Chapter 3: Suknasari Forest
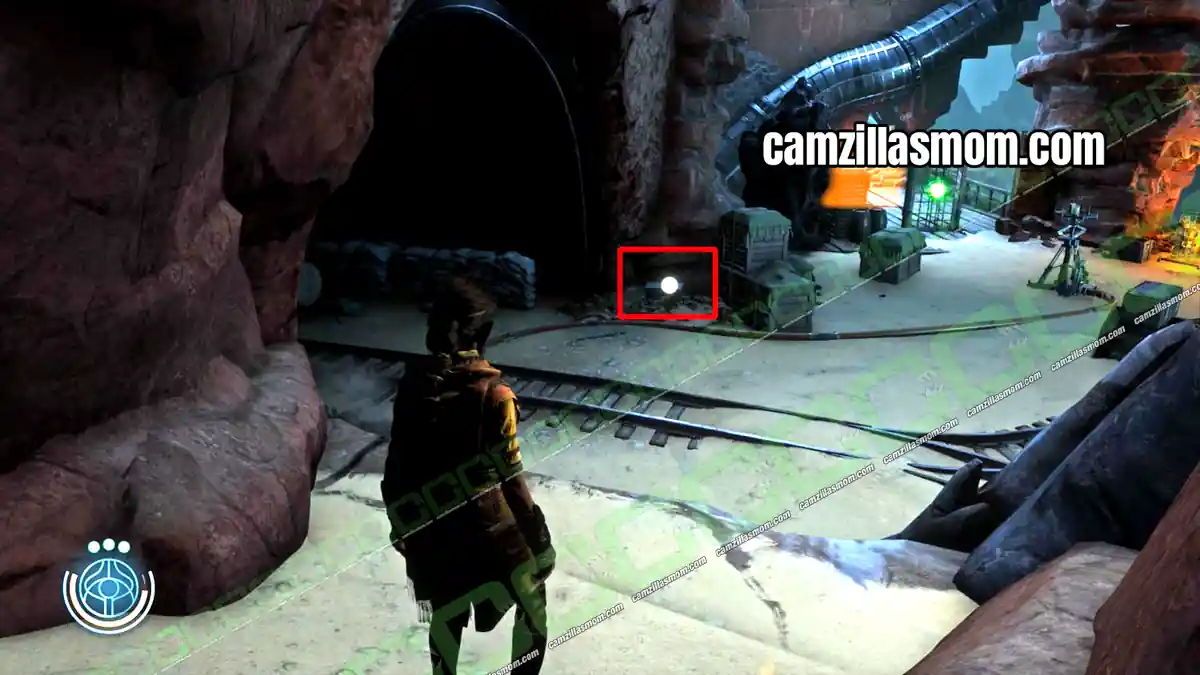
In the Sahin Table room, where Haroona aligns the beams in the Fold, the Artifact sits to the left of the destructible wall. The scan shows nothing, but you can spot a small white dot.
Paleolithic Flute
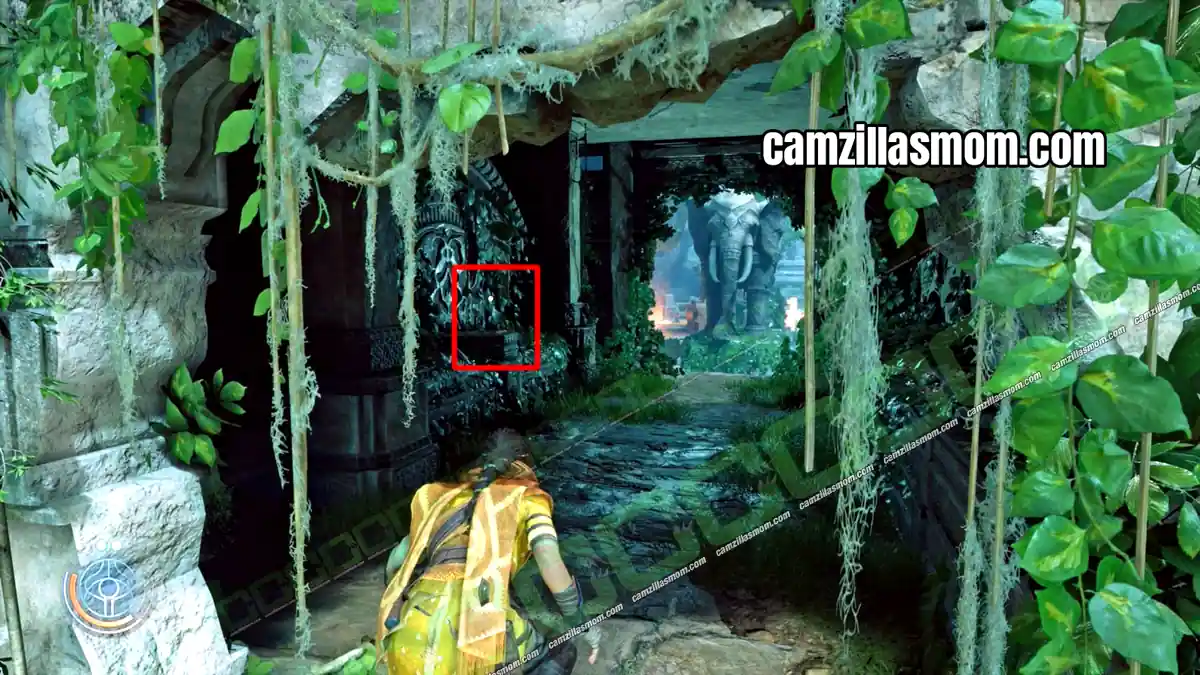
3 of 10 Artifacts – Chapter 5: Chamatkari Mandir
Right before you drop into the hostile area with the elephant statues at the end of the chapter, the Artifact is on your left.
Gold Cape of the Three Bodies
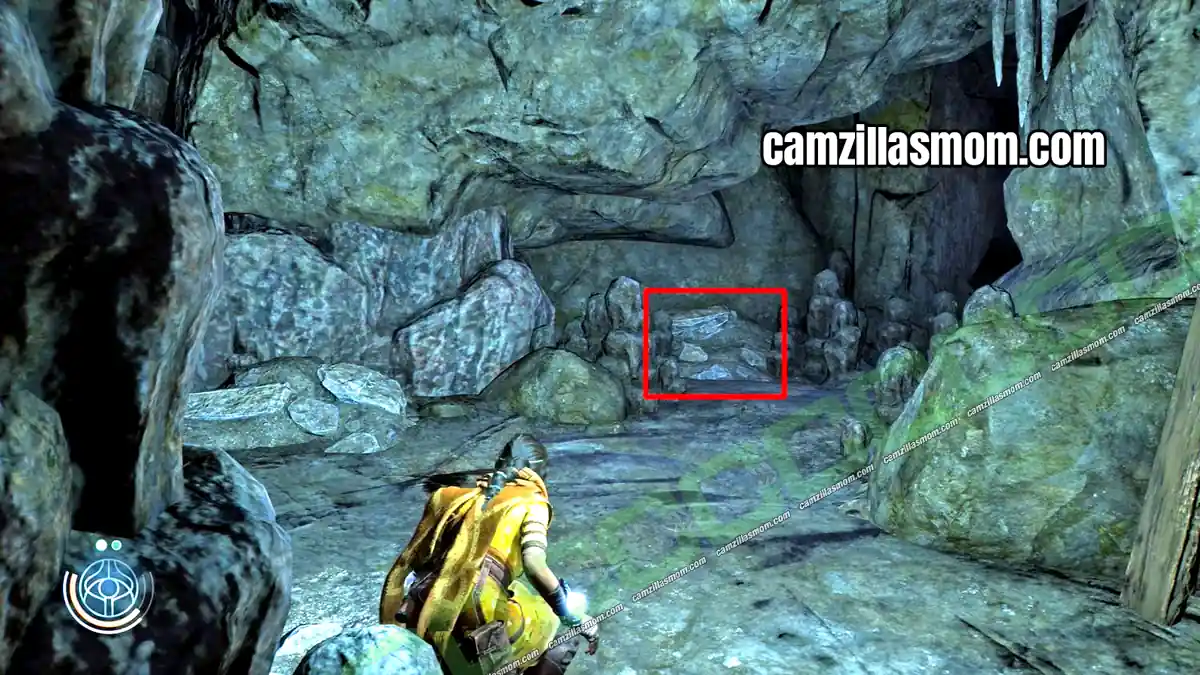
4 of 10 Artifacts – Chapter 7: Quinta Matos
After you sneak past the Doctor and his men, climb the wooden wall where Luther jokes about his age. Follow the path down into the cave and turn left straight away. The Artifact is in a small side cave.
Game of PR
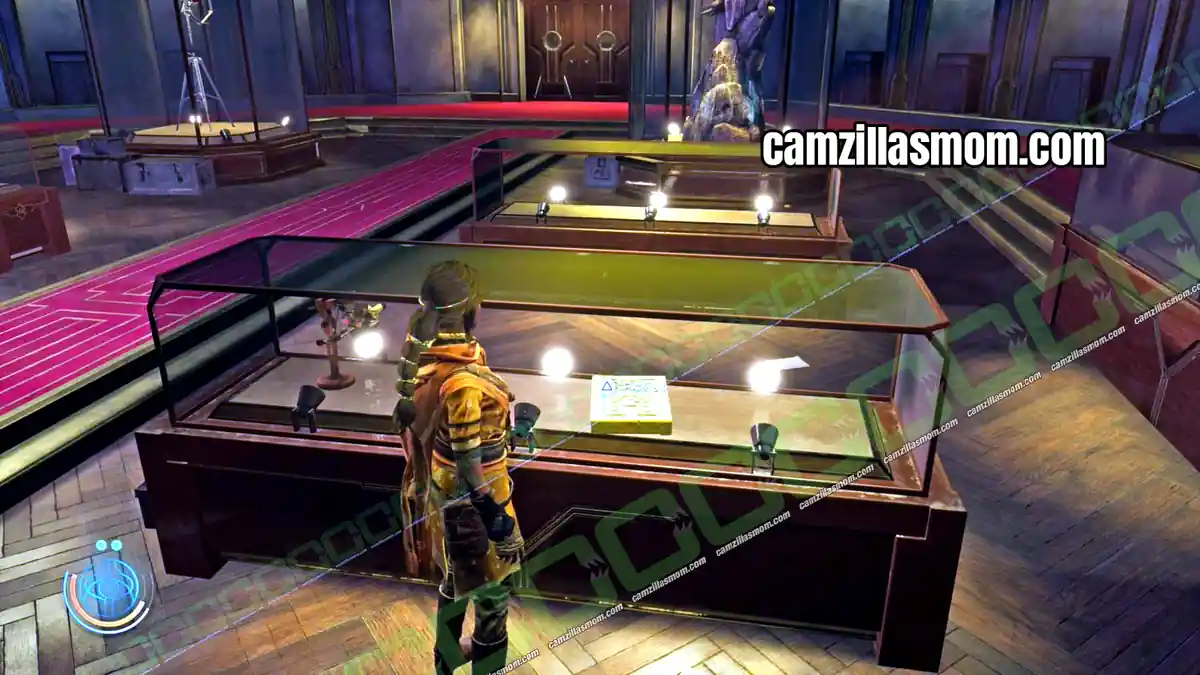
5 of 10 Artifacts – Chapter 8: The Morning Star III
After you rewire the antennas, go to the control room and open the displays. Game of PR is in the museum.
Machina Stellaris
6 of 10 Artifacts – Chapter 8: The Morning Star III
Interact with the display behind the desk in Vincent’s office to open the secret room. Machina Stellaris is inside.
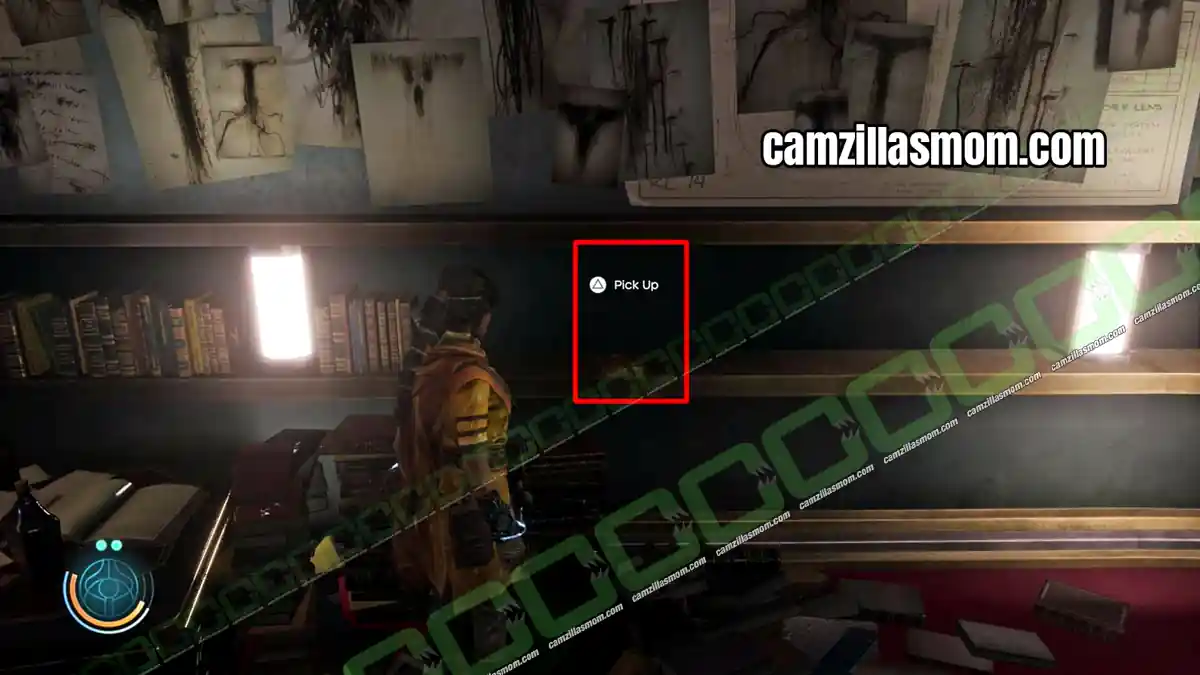
Bust of Carthage
7 of 10 Artifacts – Chapter 9: Anatolia
After you defeat the first Gearhead and his men, the cave ahead is barred. Squeeze through the gap next to it into a room with an alcove. The Bust of Carthage is there, next to Coin 15.
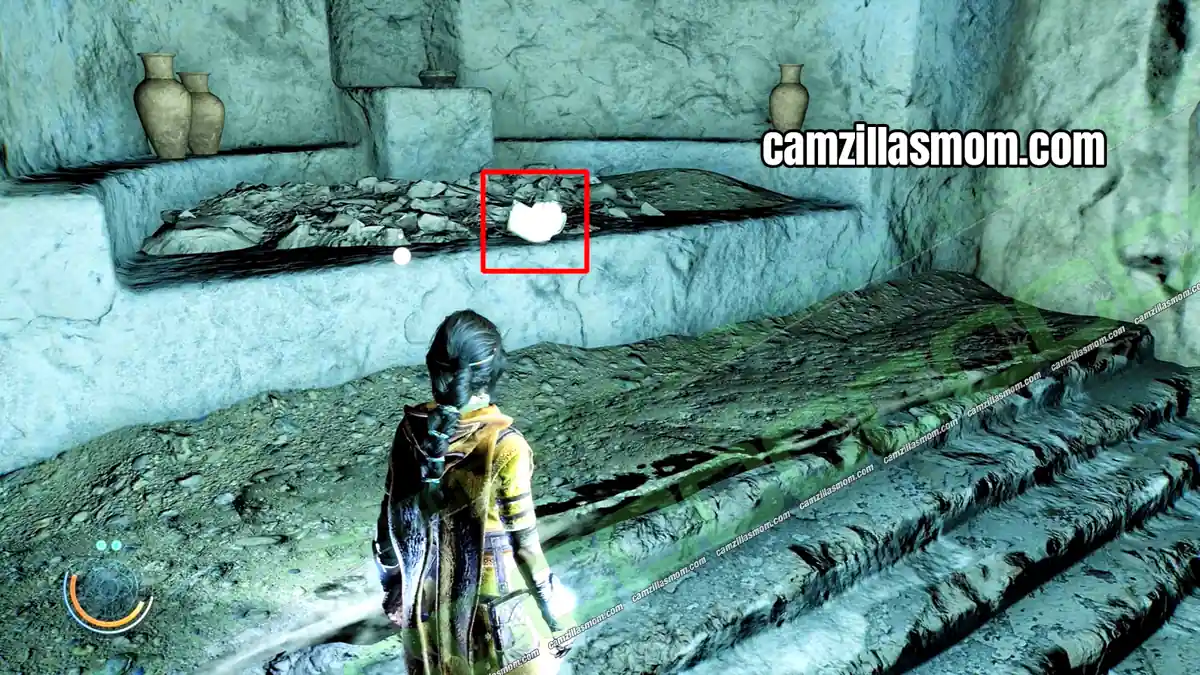
Outlier Idol
8 of 10 Artifacts – Chapter 9: Anatolia
In the room with the stalagmites you feel a Scribing nearby. Continue into the large round room, then into the next area and take the stairs on your right. Drop down at the end of the path to pick up the Outlier Idol.
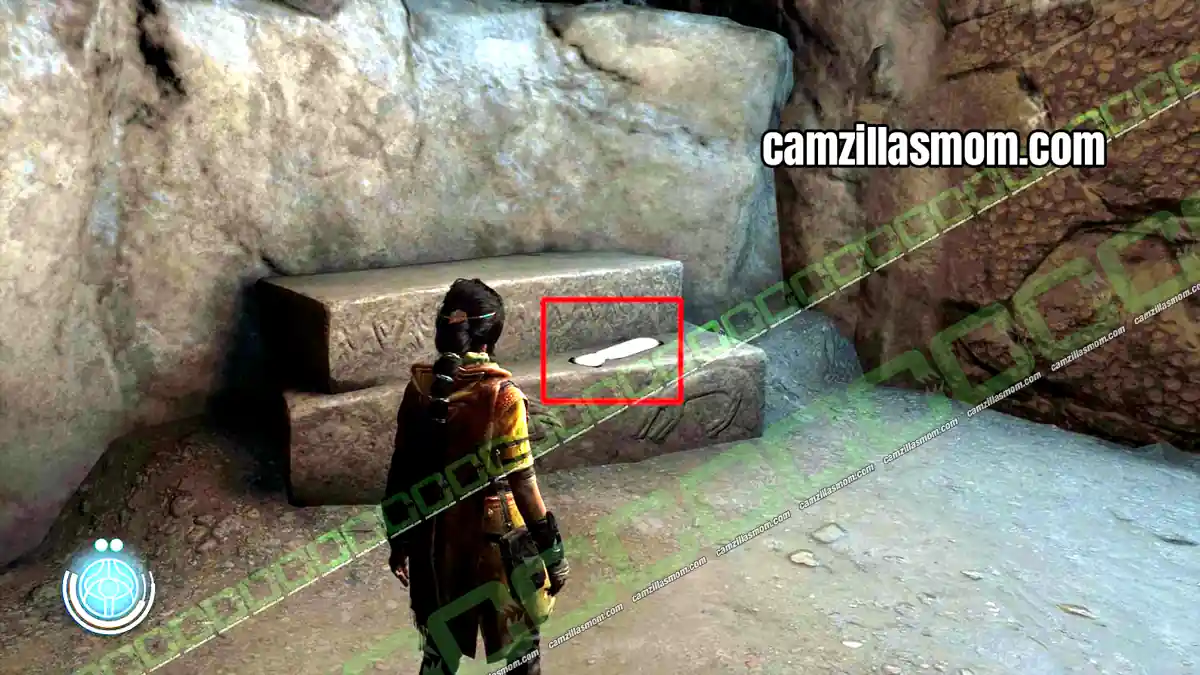
Tumbaga Mushroom Shaman
9 of 10 Artifacts – Chapter 11: Dasuden
After the first green gate, the next camp gets called to the mine. Haroona points out a broken statue in the middle. The Artifact lies on the table on that platform.
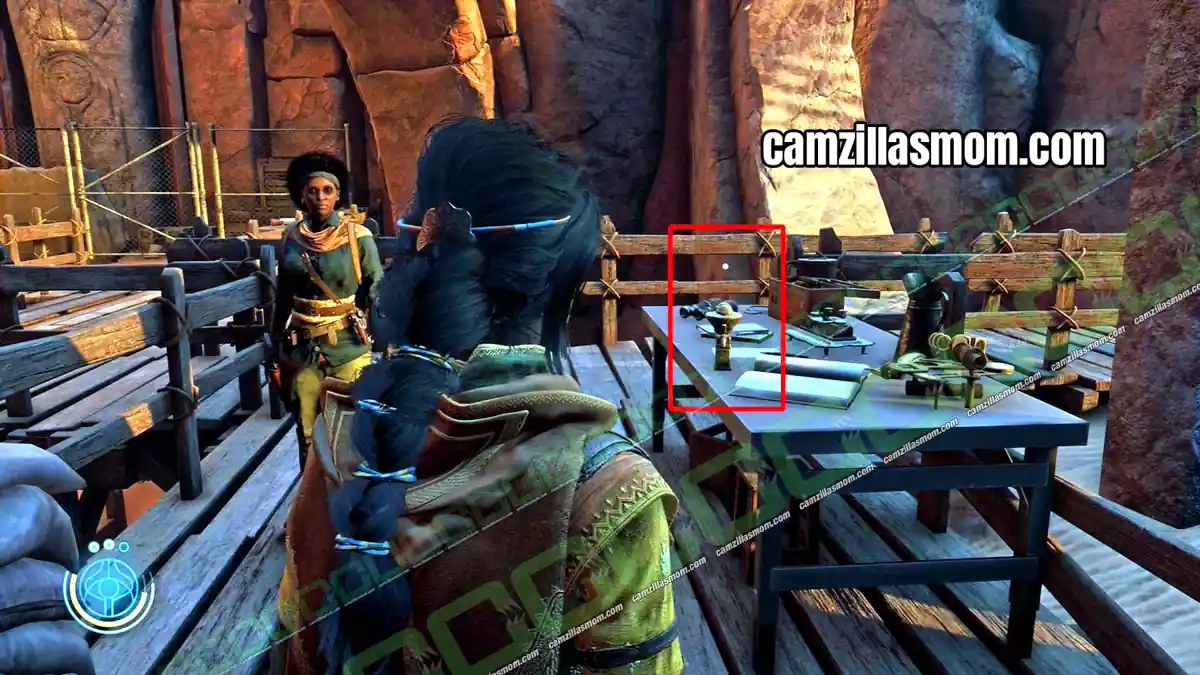
Divining Liver
10 of 10 Artifacts – Chapter 13: Reithden
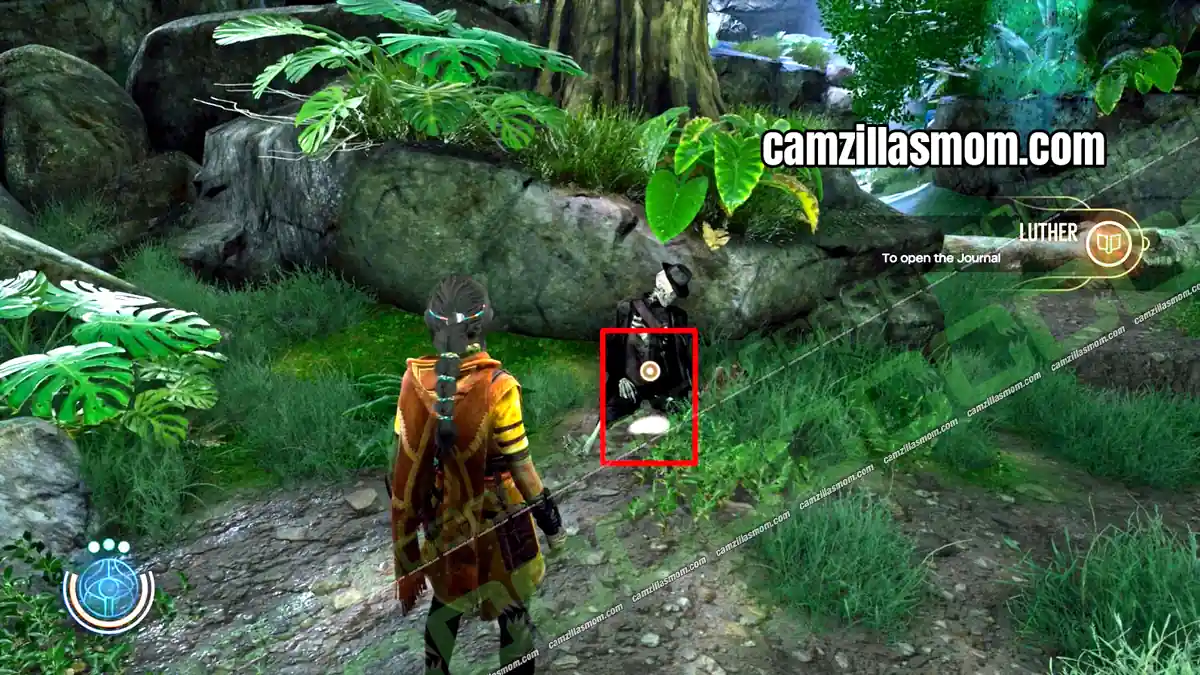
Right at the start of the chapter, check the skeleton on the floor. It holds the Divining Liver.
Lys Coins – Collectibles
All 24 Lys Coins, also called Leap Year Society coins, in menu order.
Coin 1
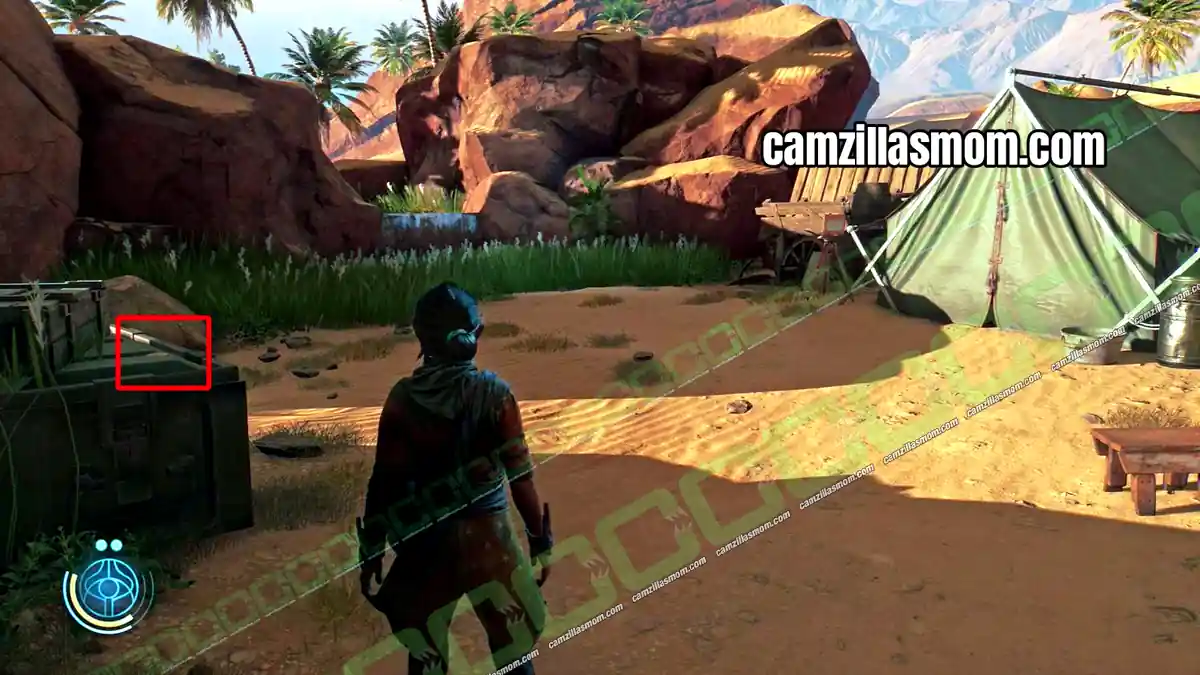
1 of 24 Lys Coins – Chapter 1: Richat Structure
After the camp where Haroona learns to Crush explosive canisters, help Reika up the wall to a small camp with a single tent. The coin lies on one of the crates.
Coin 2
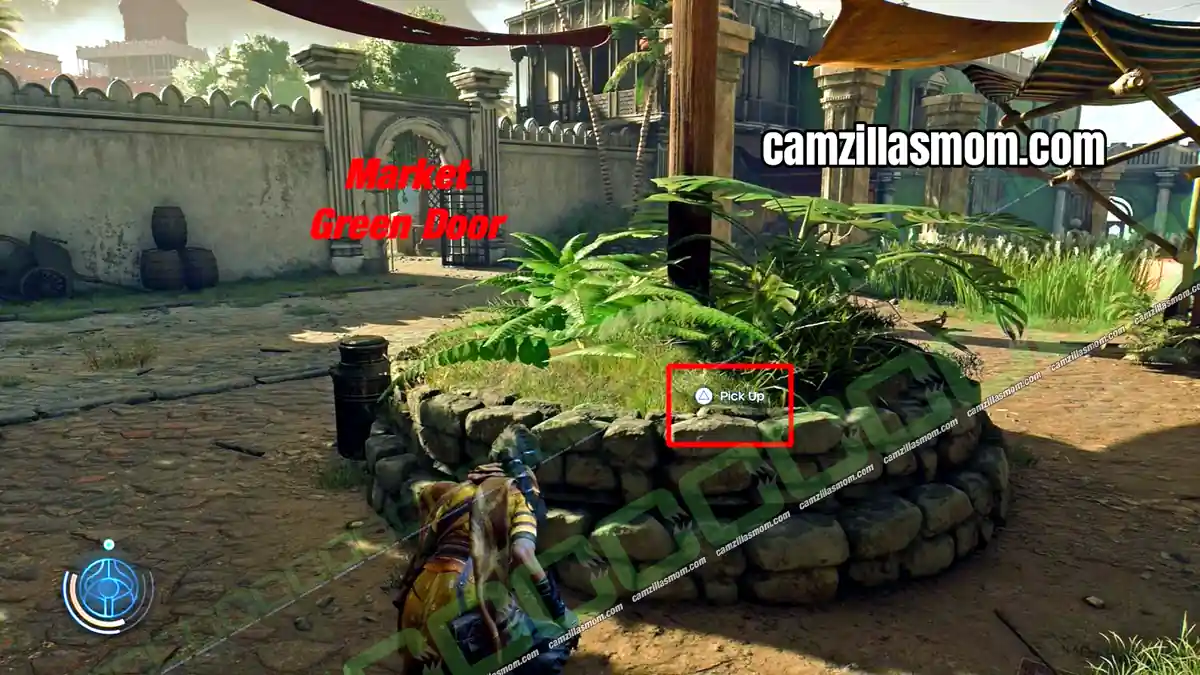
2 of 24 Lys Coins – Chapter 2: Chamiri
After you clear the market, go through the green door at the far end into a garden courtyard. Check the low stone walls for the coin.
Coin 3
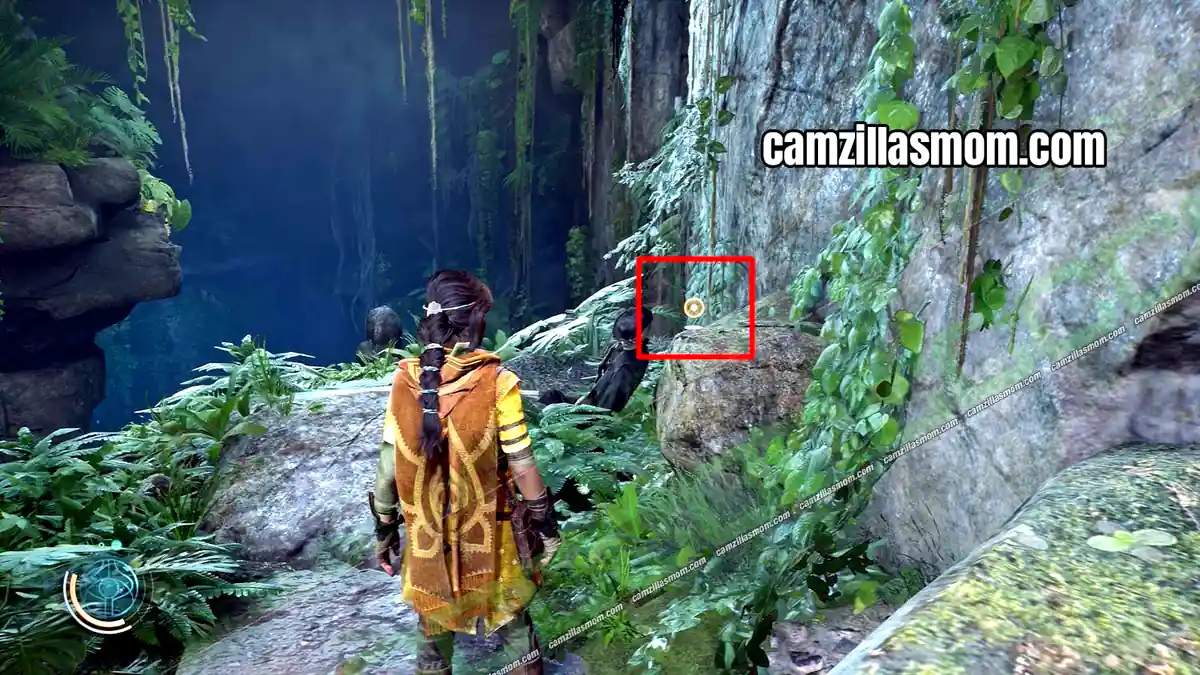
3 of 24 Lys Coins – Chapter 3: Suknasari Forest
After the Sahin Table room, climb down the vines and topple a tree to cross. The story path goes right, but turn left to find the coin next to a skeleton.
Coin 4
4 of 24 Lys Coins – Chapter 4: The Morning Star I
Check the tables at the bar on the Morning Star.
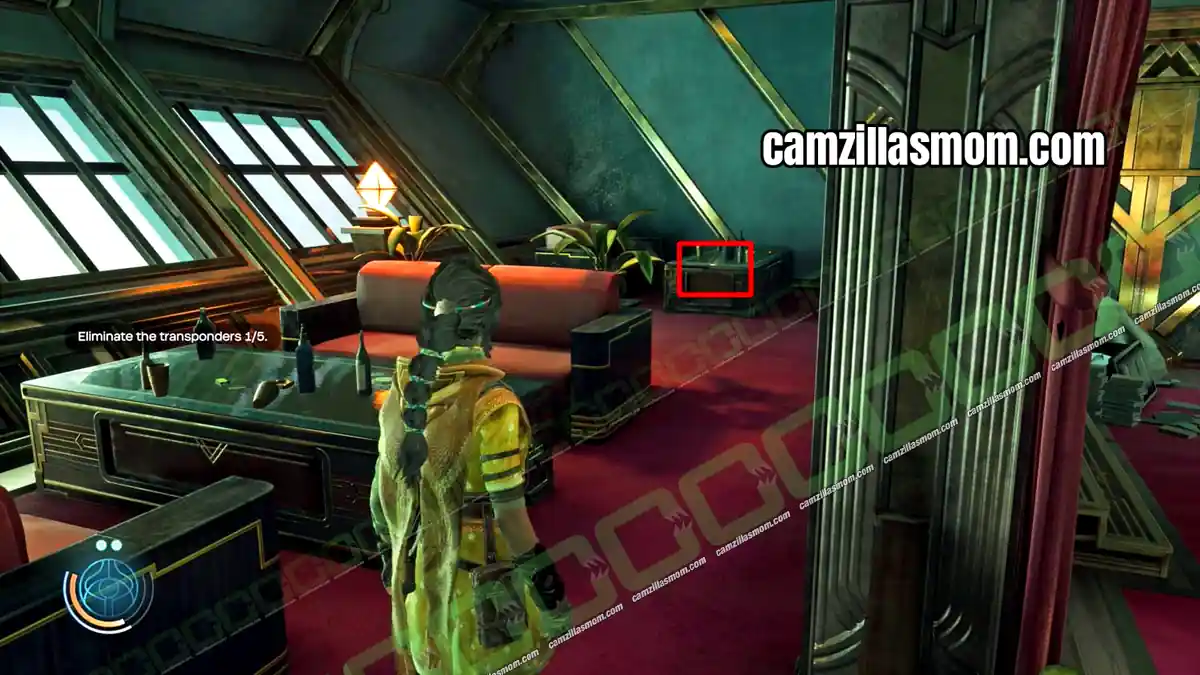
Coin 5
5 of 24 Lys Coins – Chapter 4: The Morning Star I
In the Crew Quarters, the coin lies on a wooden box in one of the bedrooms.
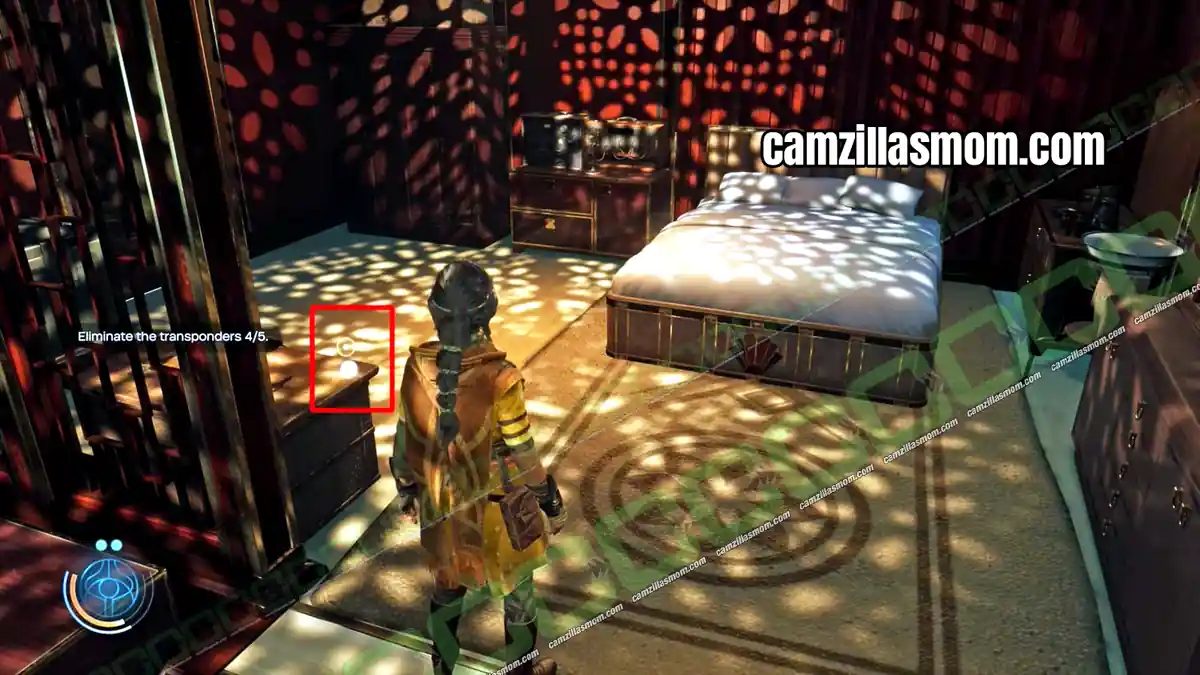
Coin 6
6 of 24 Lys Coins – Chapter 5: Chamatkari Mandir
In the camp with the two elephant statues, enter the large tent on the right. The coin is on the table.
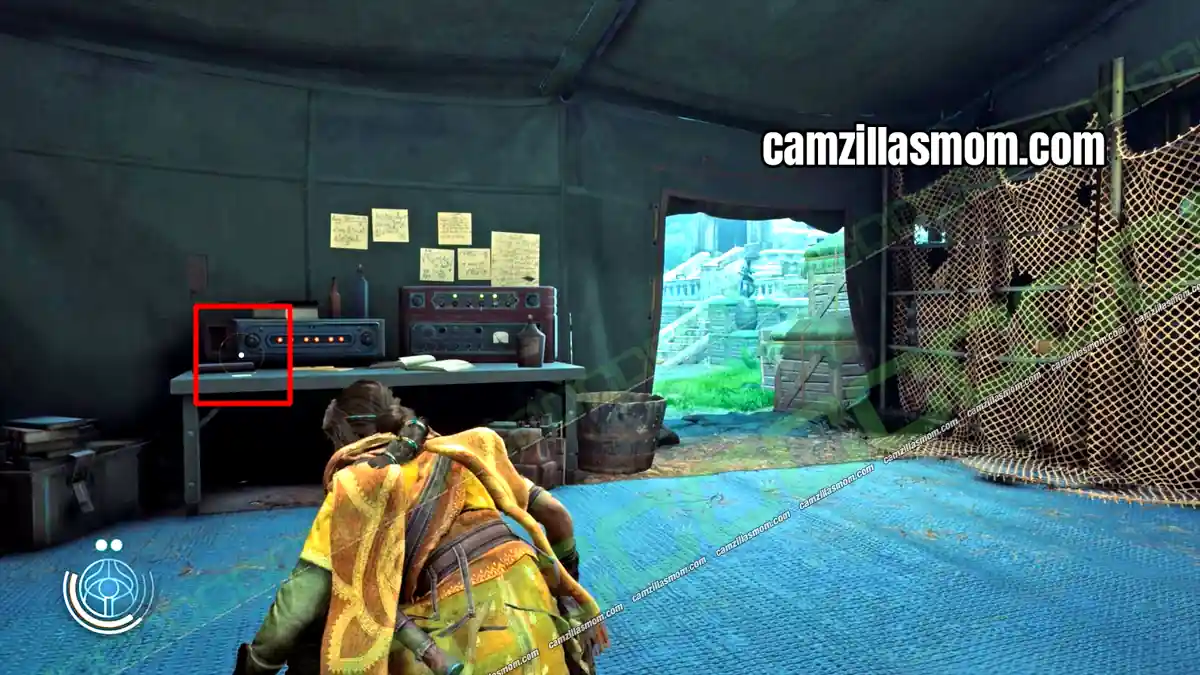
Coin 7
7 of 24 Lys Coins – Chapter 6: The Morning Star II
Buchra opens the office behind the bar. The coin is on the coffee table.
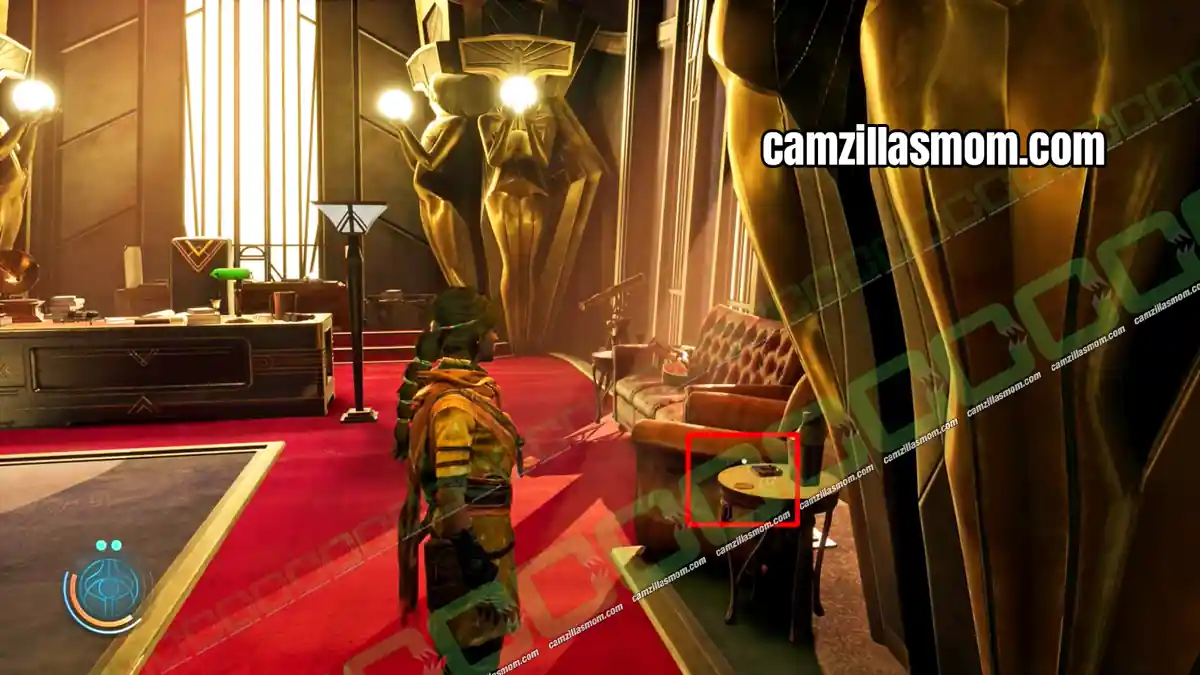
Coin 8
8 of 24 Lys Coins – Chapter 7: Quinta Matos
On the second floor of the mansion, go into the bedroom with the bathroom. The coin is under the bathroom mirror.
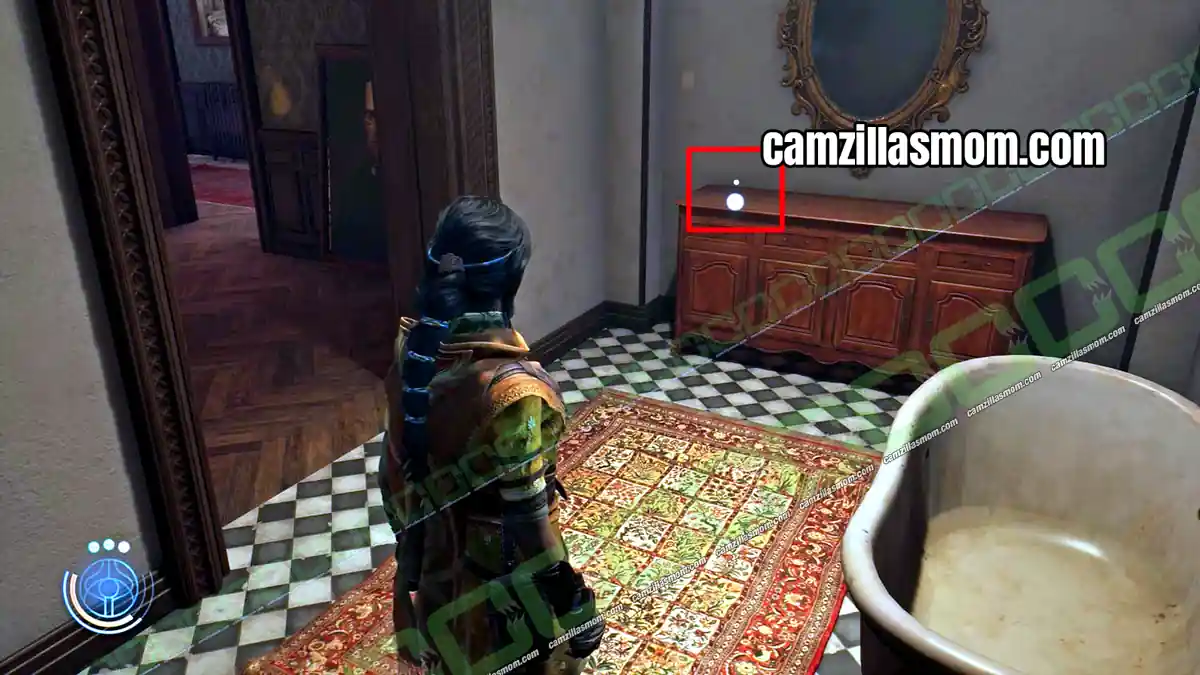
Coin 9
9 of 24 Lys Coins – Chapter 7: Quinta Matos
Leave the greenhouse through the red door. Before you go through the next red door, take the stairs up to the statue and pick up Coin 9.
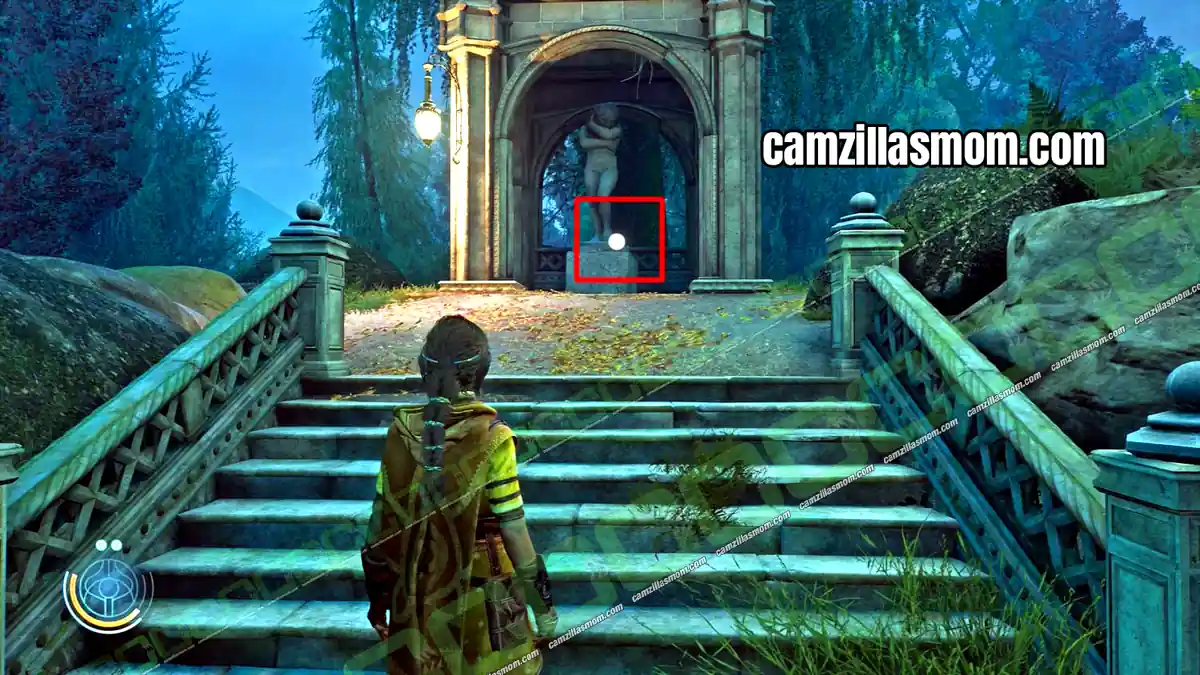
Coin 10
10 of 24 Lys Coins – Chapter 7: Quinta Matos
At the bottom of the winding staircase, the coin lies on the table.
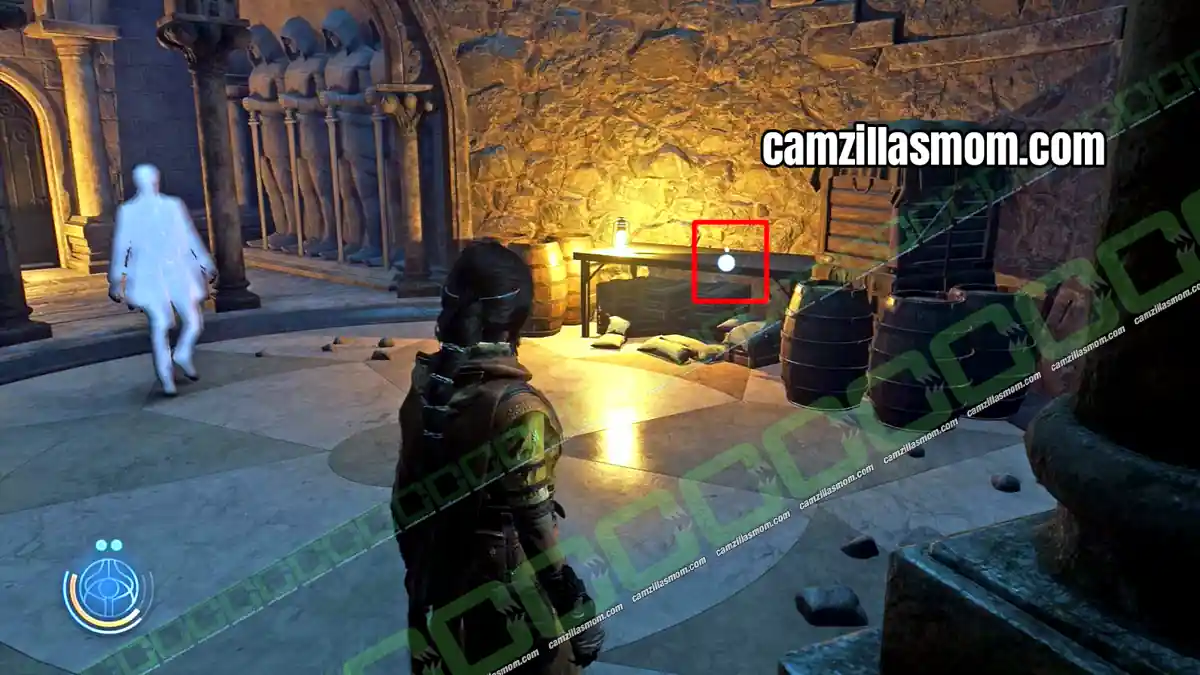
Coin 11
11 of 24 Lys Coins – Chapter 9: Anatolia
In the first hostile area with the forcefield dome, check next to the forcefield controls.
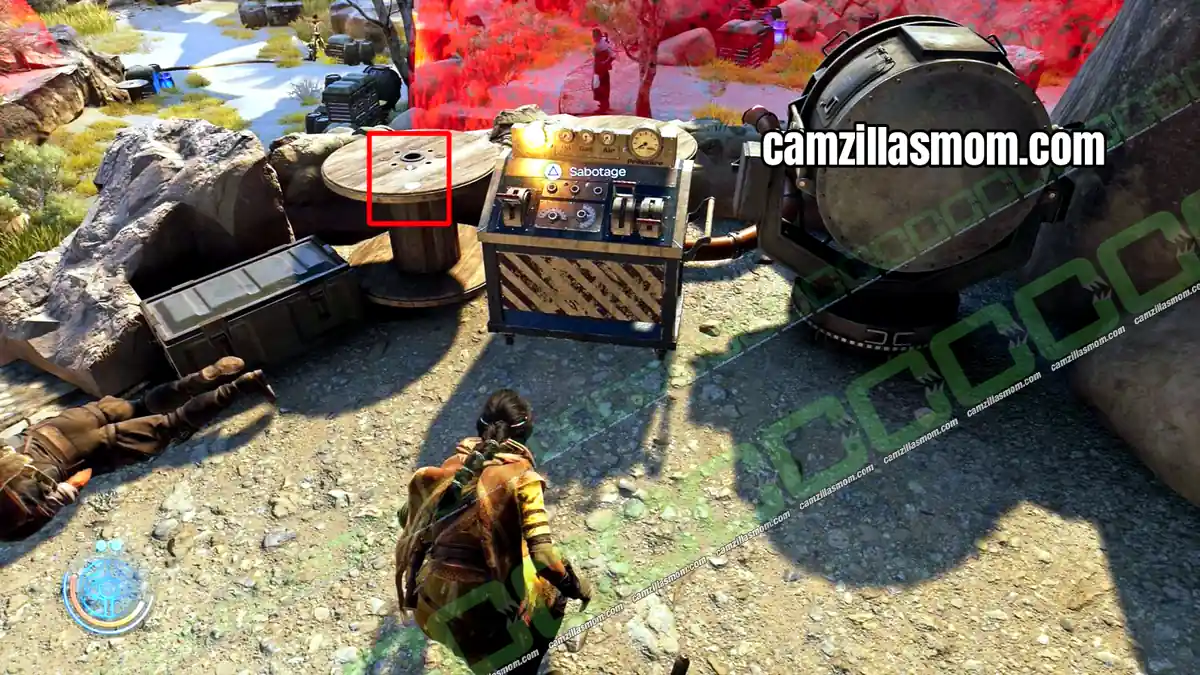
Coin 12
12 of 24 Lys Coins – Chapter 9: Anatolia
Right after you cross the bridge, go into the small cave. The coin is inside.
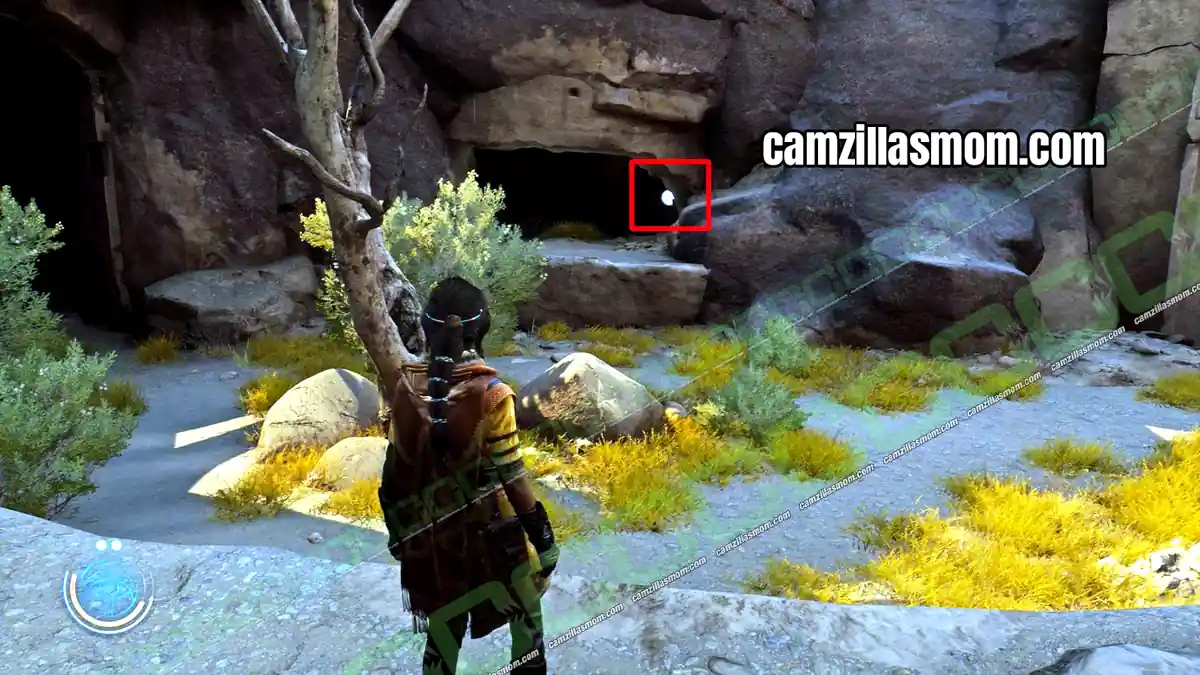
Coin 13
13 of 24 Lys Coins – Chapter 9: Anatolia
In the next hostile area, where Luther gets ambushed, follow the long corridor in the mountain on your left. The coin is at the end.
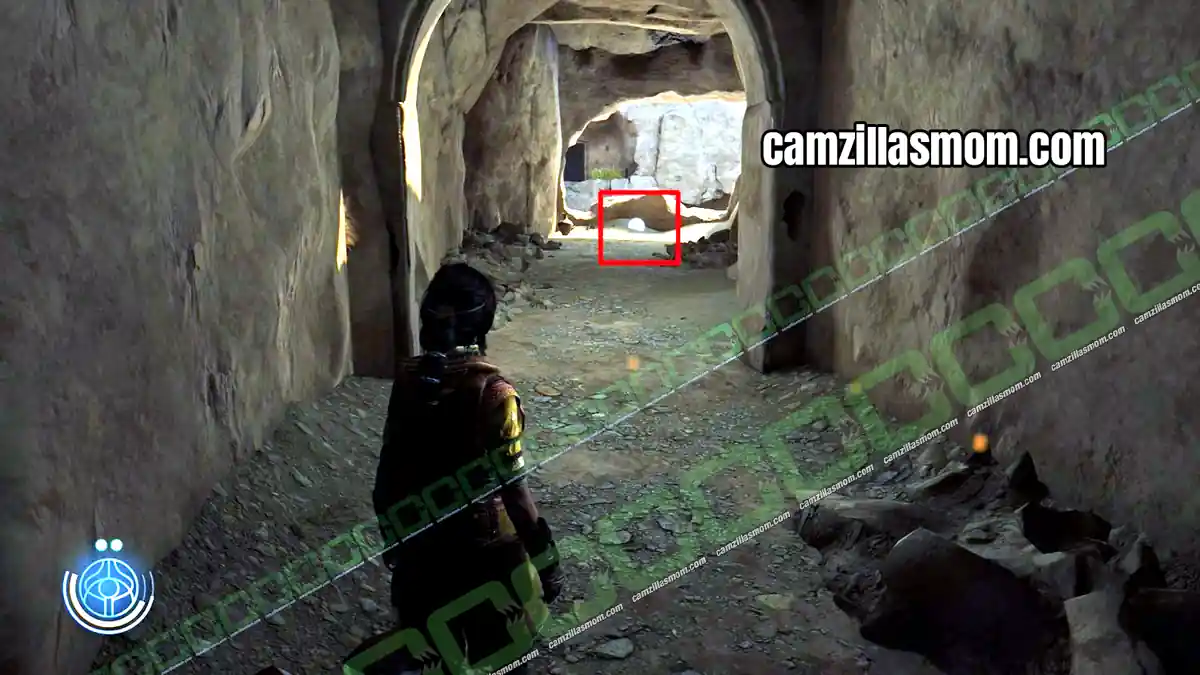
Coin 14
14 of 24 Lys Coins – Chapter 9: Anatolia
After you meet up with Luther again, go through the red door. The coin is in an alcove on the other side.
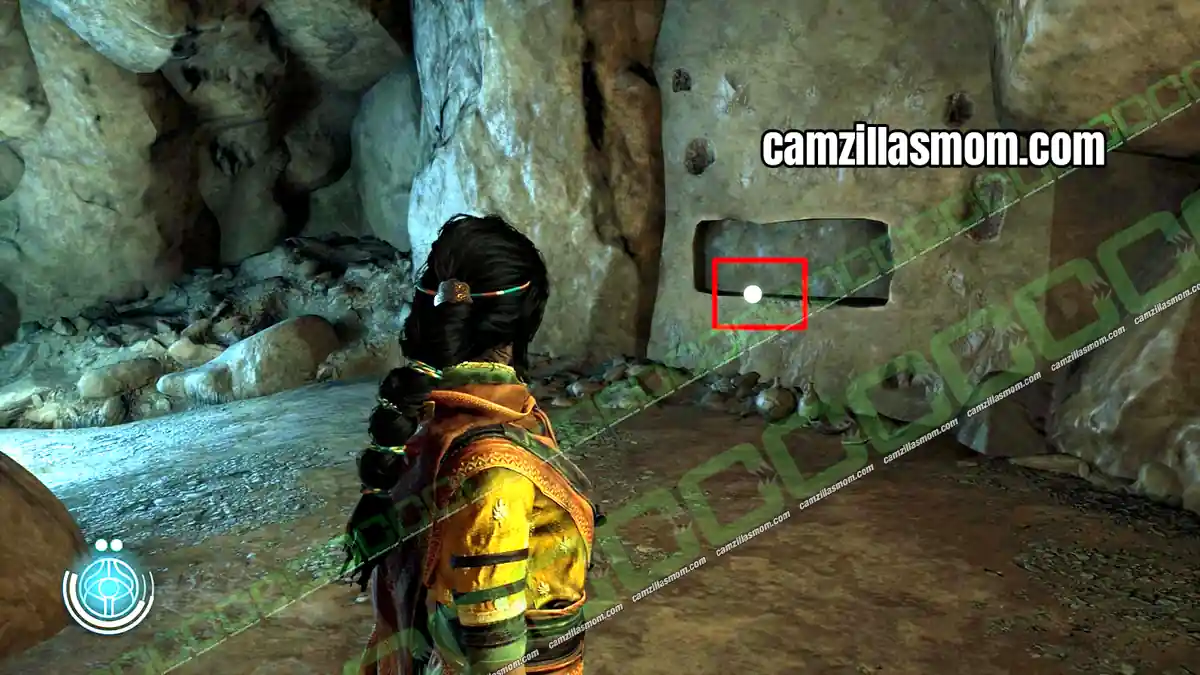
Coin 15
15 of 24 Lys Coins – Chapter 9: Anatolia
After the Gearhead fight, the main path through the cave is blocked. Squeeze through the gap in the rock wall. The coin is in a small alcove next to the Bust of Carthage Artifact.
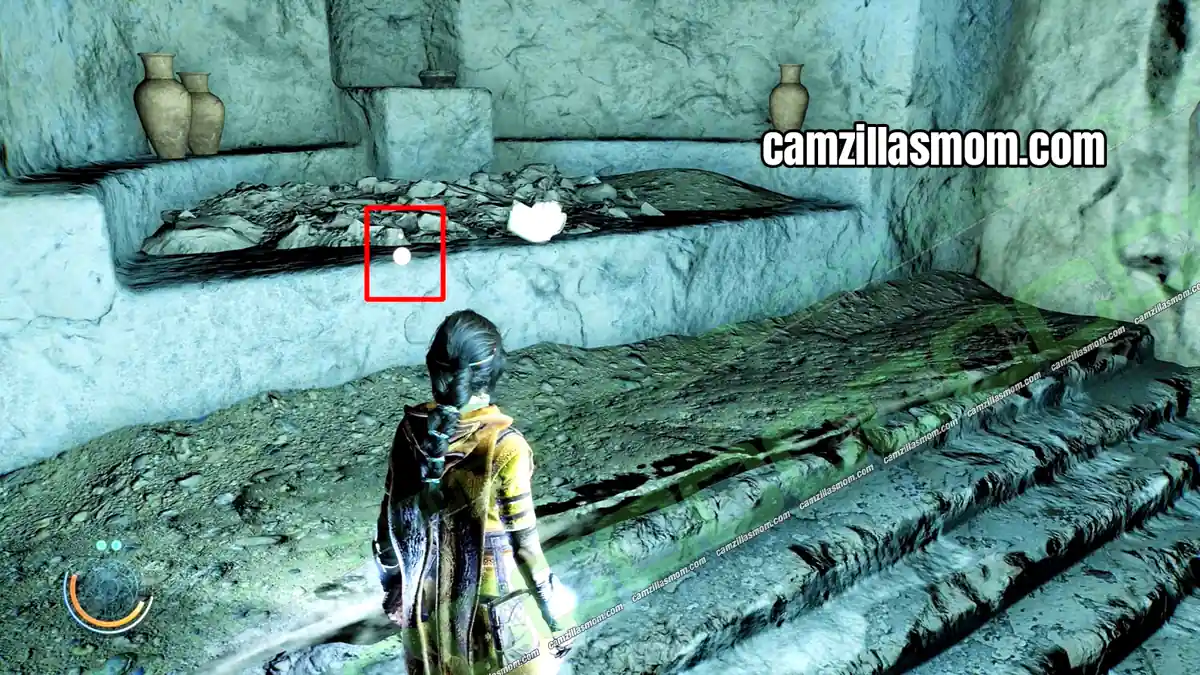
Coin 16
16 of 24 Lys Coins – Chapter 9: Anatolia
In the next hostile area, the coin is inside a room carved out of the stone.
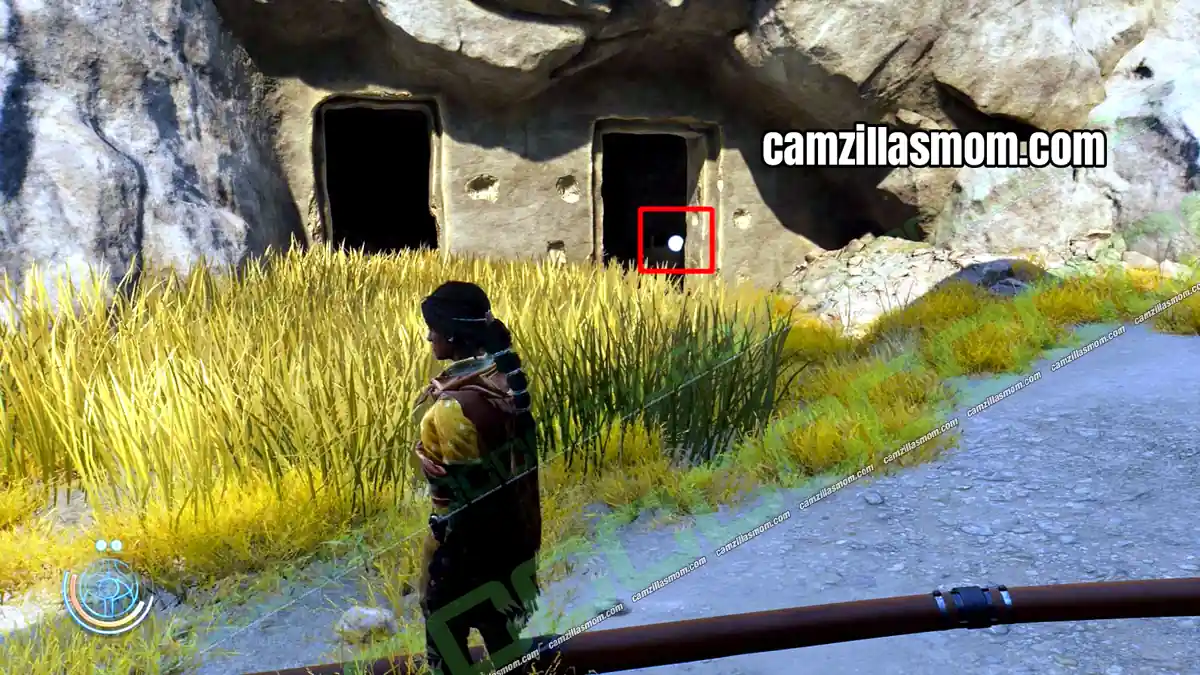
Coin 17
17 of 24 Lys Coins – Chapter 9: Anatolia
After the stalagmite room, you reach a large round room with a stone table in the middle. The coin is on the table.
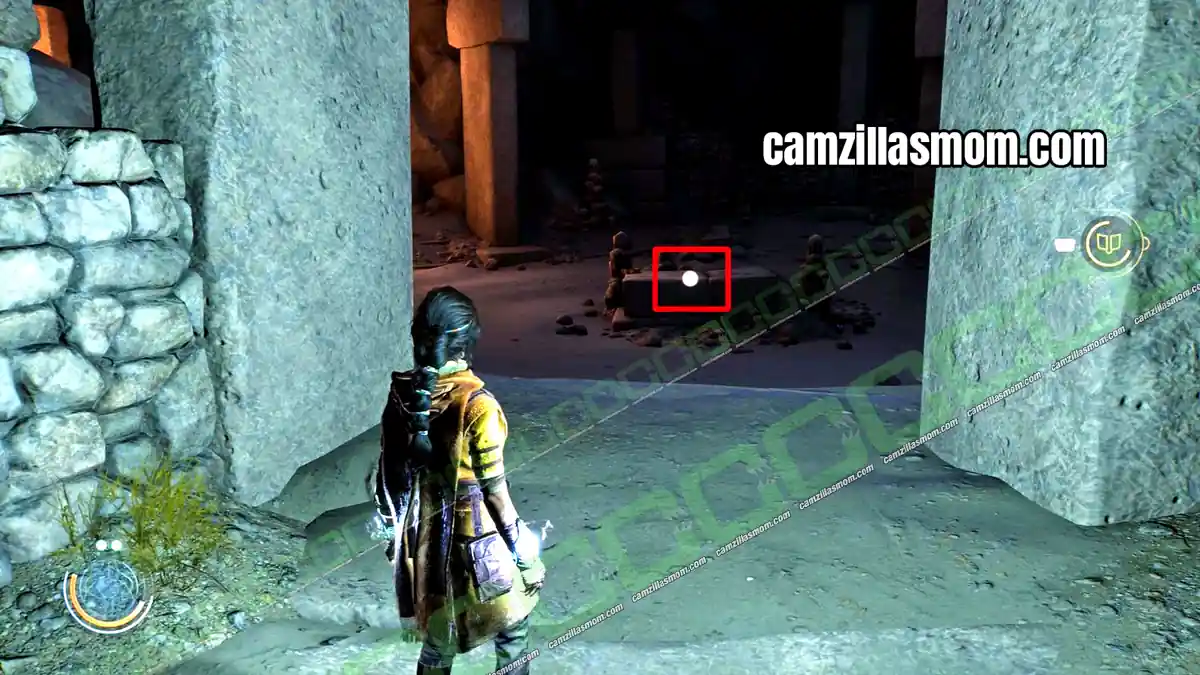
Coin 18
18 of 24 Lys Coins – Chapter 9: Anatolia
In the next area, the last Anatolia coin lies on the ground near a closed door.
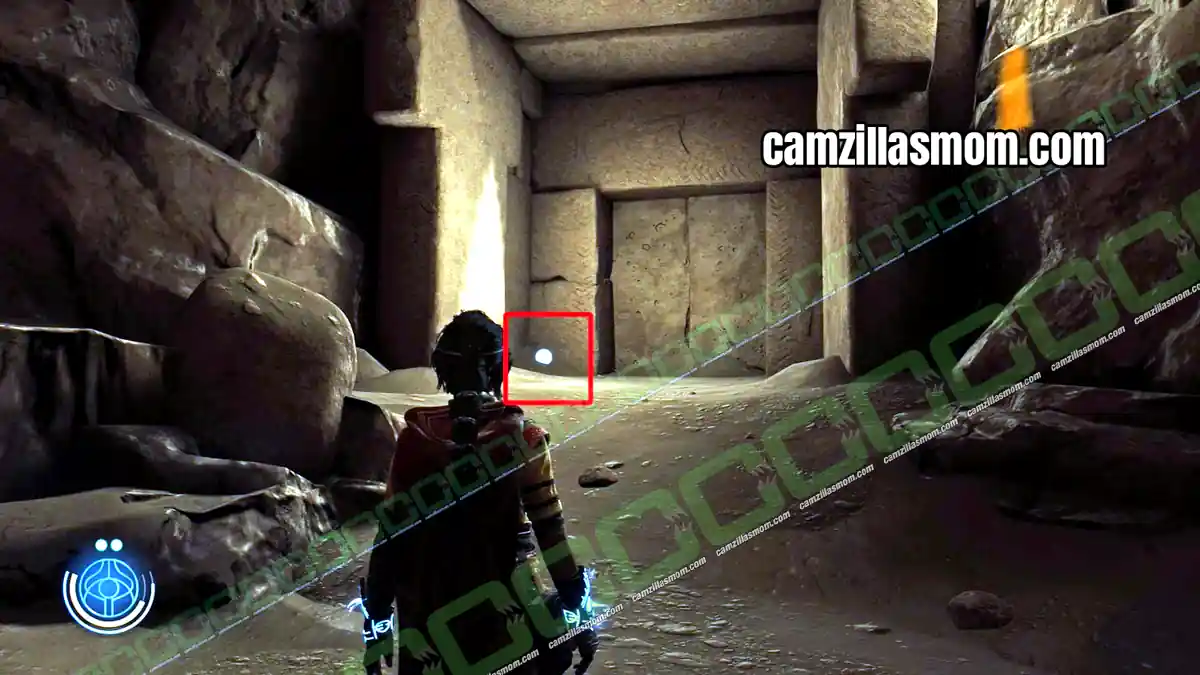
Coin 19
19 of 24 Lys Coins – Chapter 11: Dasuden
At the start of the chapter you enter a cave with Buchra. Before the first red door, check the skeleton for the coin.
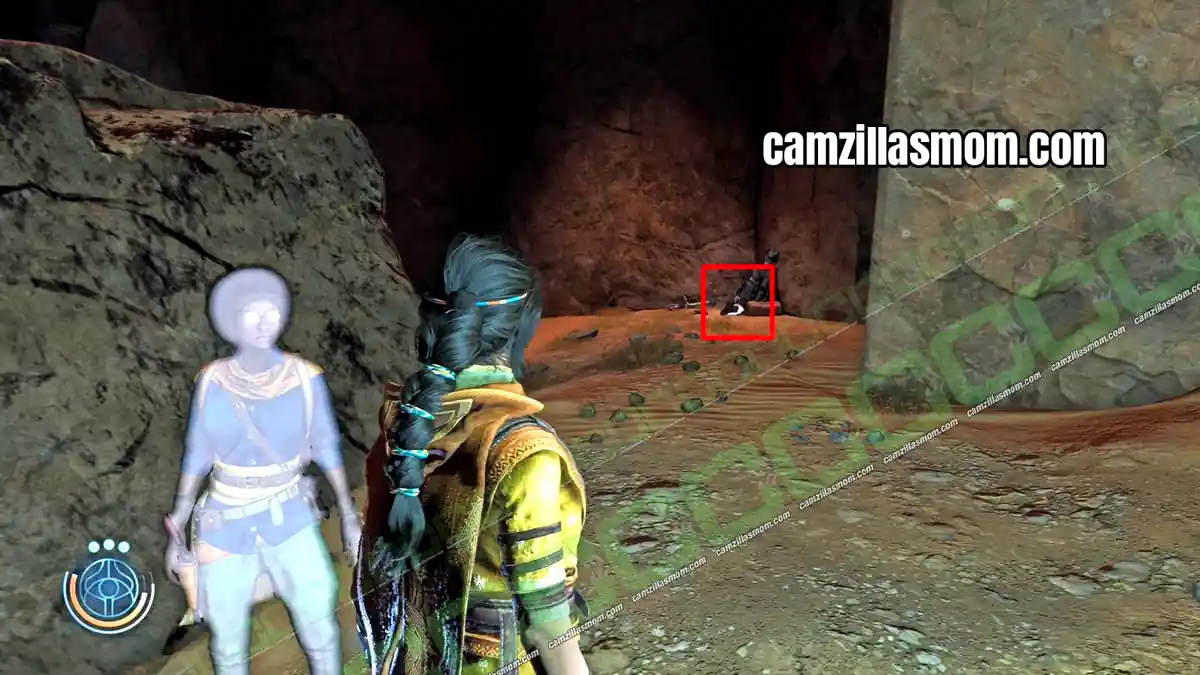
Coin 20
20 of 24 Lys Coins – Chapter 11: Dasuden
After you move the crane, you reach a large building with mining carts and fight a wave of enemies while Buchra looks for a way out. After the fight, the locked office opens. The coin is on the desk.
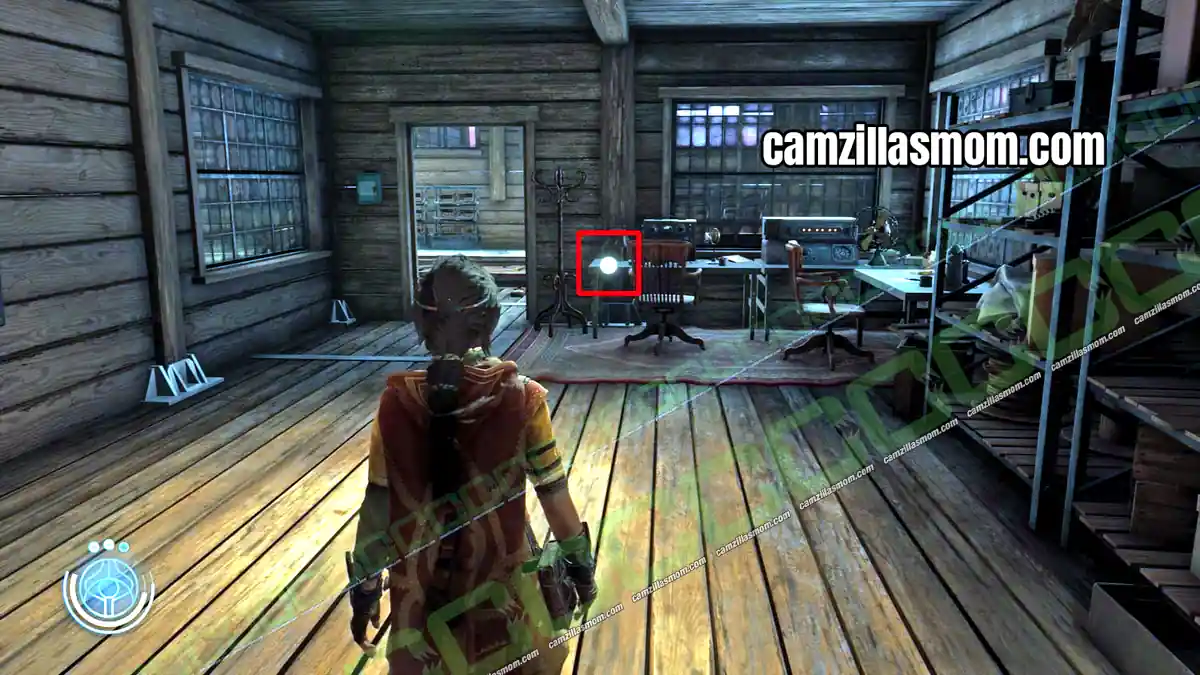
Coin 21
21 of 24 Lys Coins – Chapter 11: Dasuden
After you rescue Buchra, climb the wall and squeeze through the gap into a new hostile area. The coin lies on the boxes right where you come out.
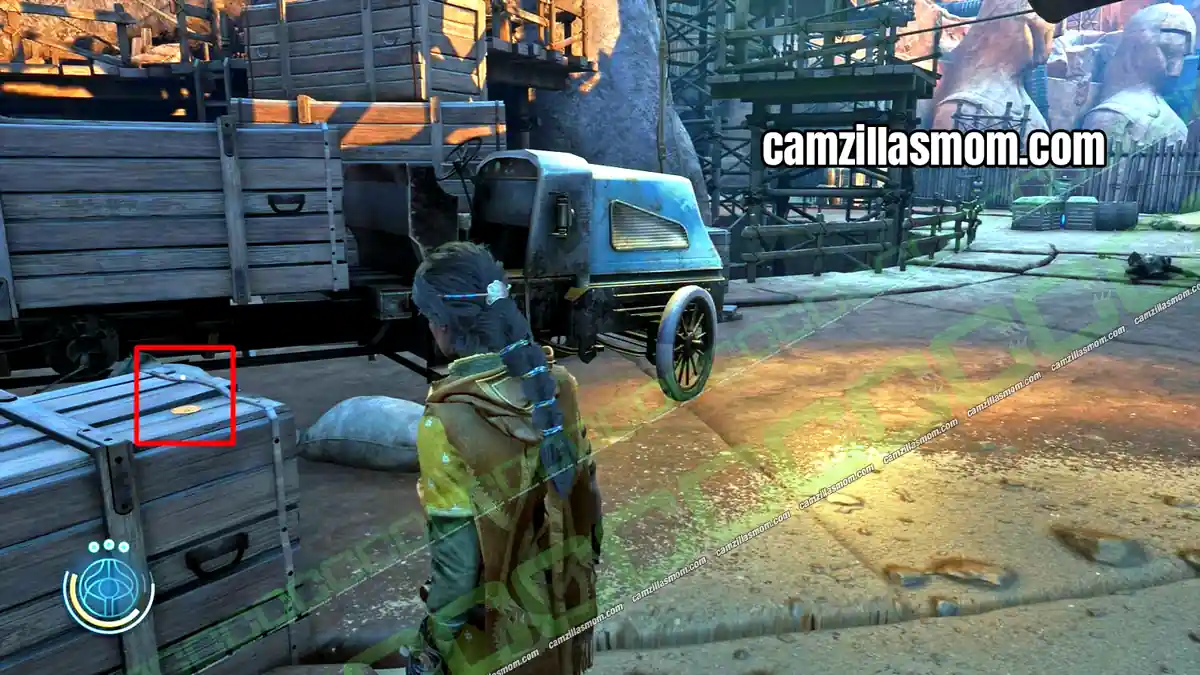
Coin 22
22 of 24 Lys Coins – Chapter 12: Peshanden
After the second Sahin Gate, clear the area. The coin is on the table at the back.
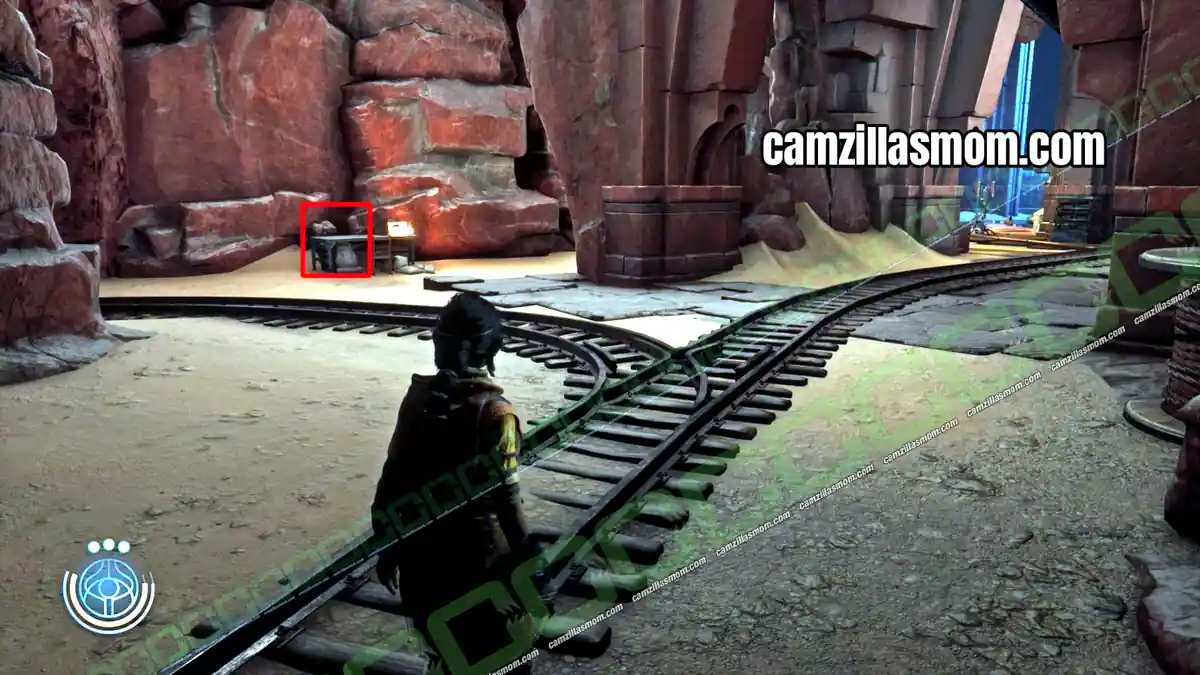
Coin 23
23 of 24 Lys Coins – Chapter 12: Peshanden
After the cutscene where Haroona beats the Gearhead, you are in a dark corridor leading to the blue beam. Turn around and go left to find the coin.
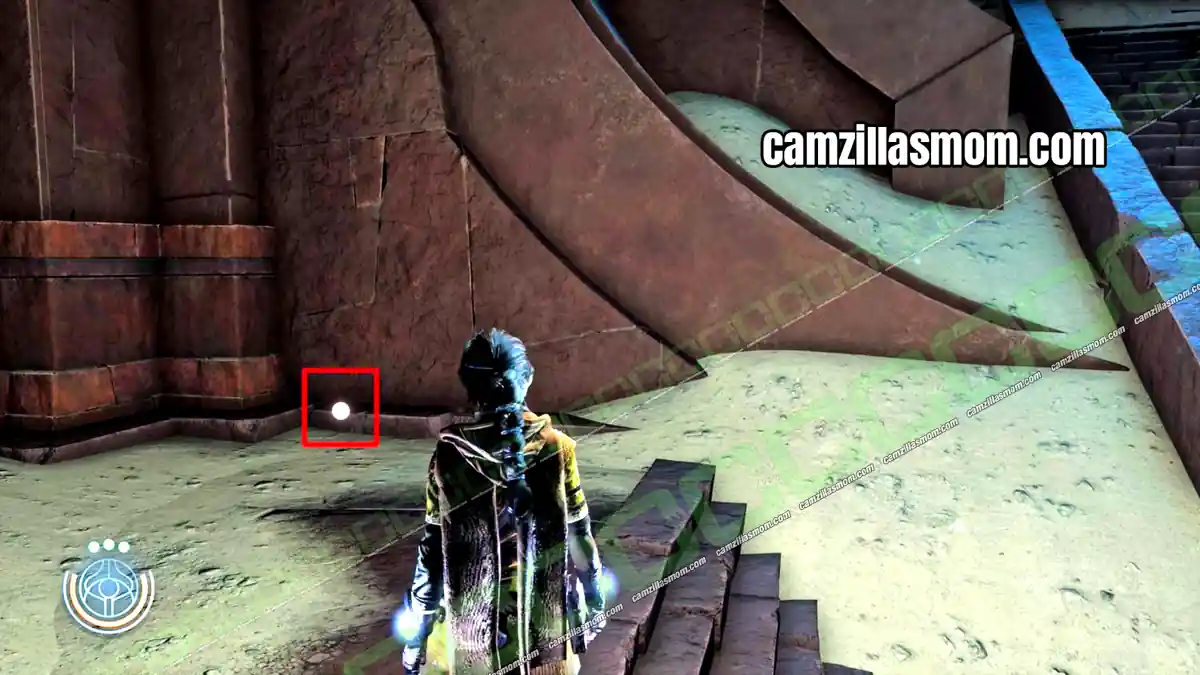
Coin 24
24 of 24 Lys Coins – Chapter 12: Peshanden
In the large hostile camp, the last coin lies on a small box near the green gate.
Ascension Cards – Collectibles
All 10 Ascension Cards in menu order. Two pairs of cards show up in the opposite order to the menu, the notes below tell you which.
Scrutinize Human Limits
1 of 10 Ascension Cards – Chapter 1: Richat Structure
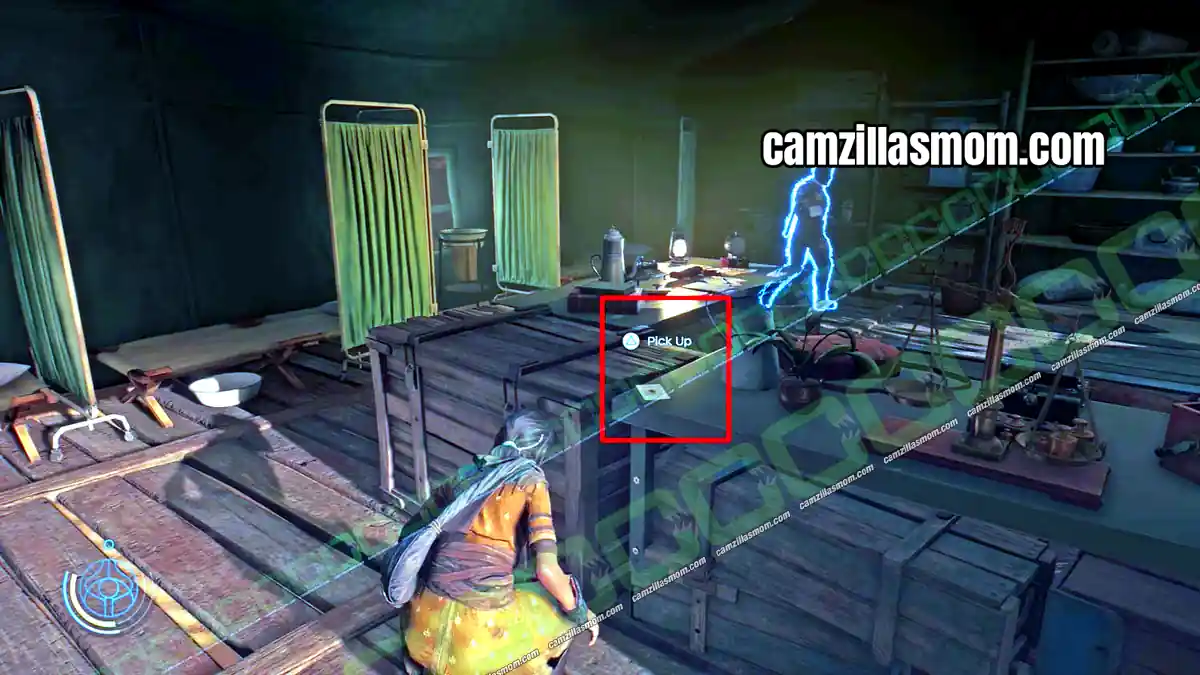
Go past the first Echo of the game to the next camp. The card is in the medical tent.
Define Allies & Enemies
2 of 10 Ascension Cards – Chapter 2: Chamiri
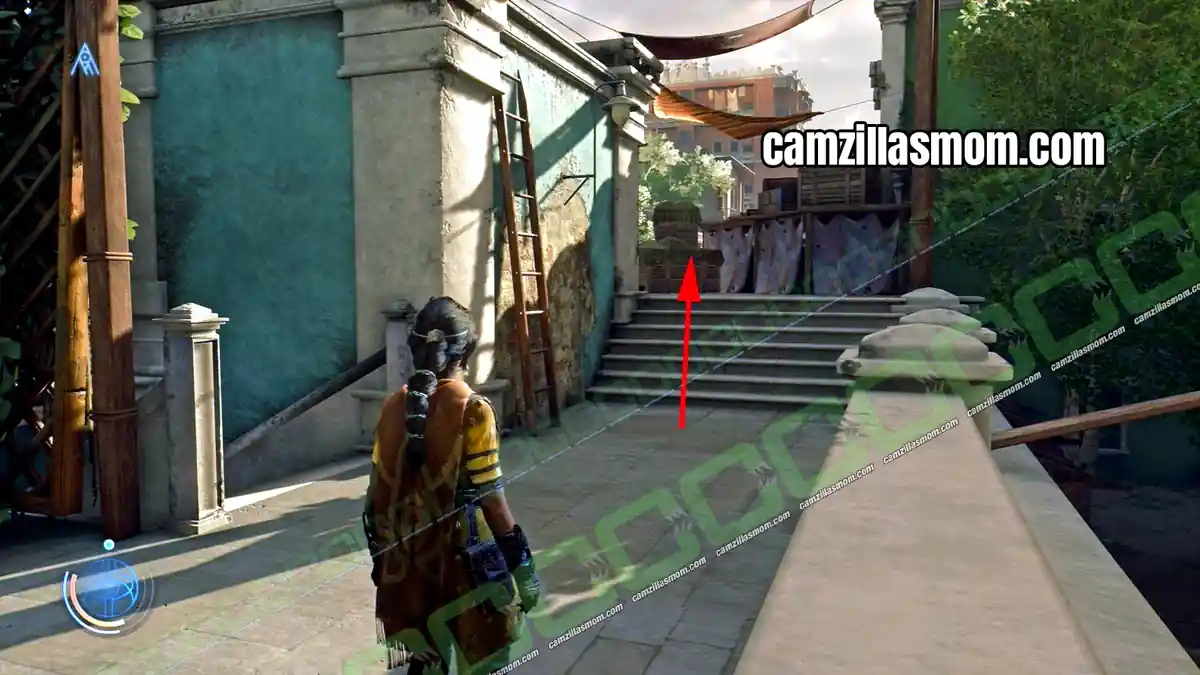
When Haroona points out the lighthouse, go through the next green door to the hostile area with guards on the rooftop. Defeat them, jump to the next building and climb the vines.
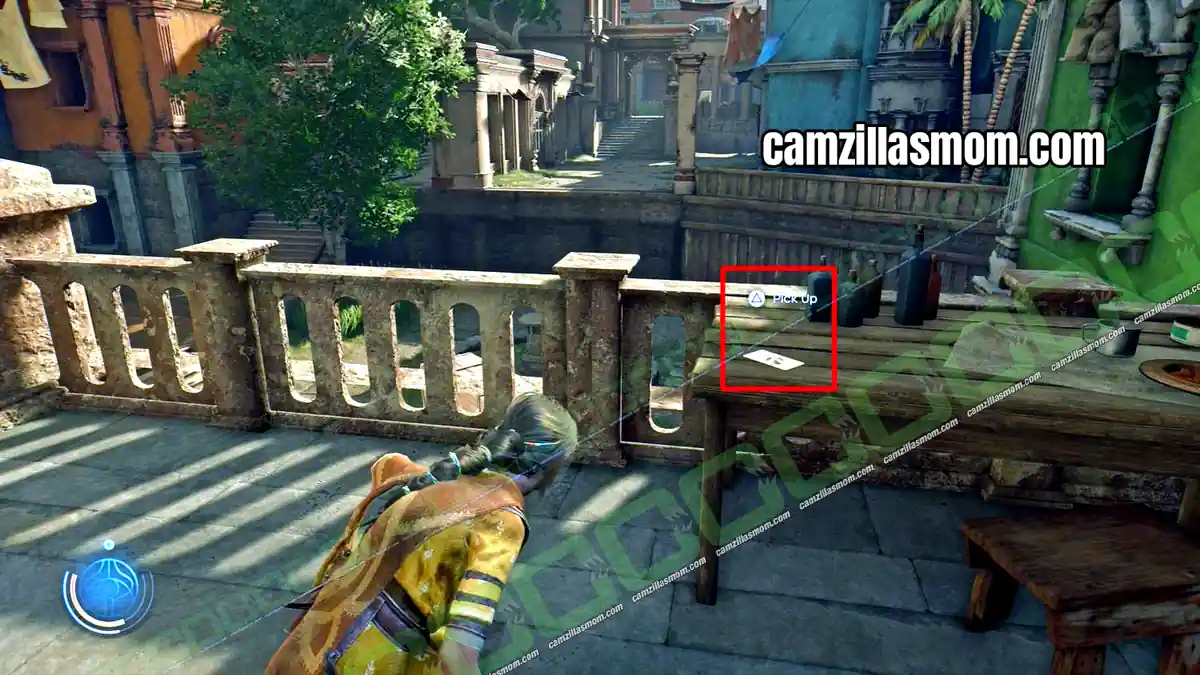
On the roof, follow the path to the back and break the boxes in your way. The card is on a table overlooking the area where Haroona mentioned the lighthouse.
Force a Fight and Fail
3 of 10 Ascension Cards – Chapter 3: Suknasari Forest
In the area where you learn Ripple, defeat the hostiles and search the bridge. The card lies on a wooden box.
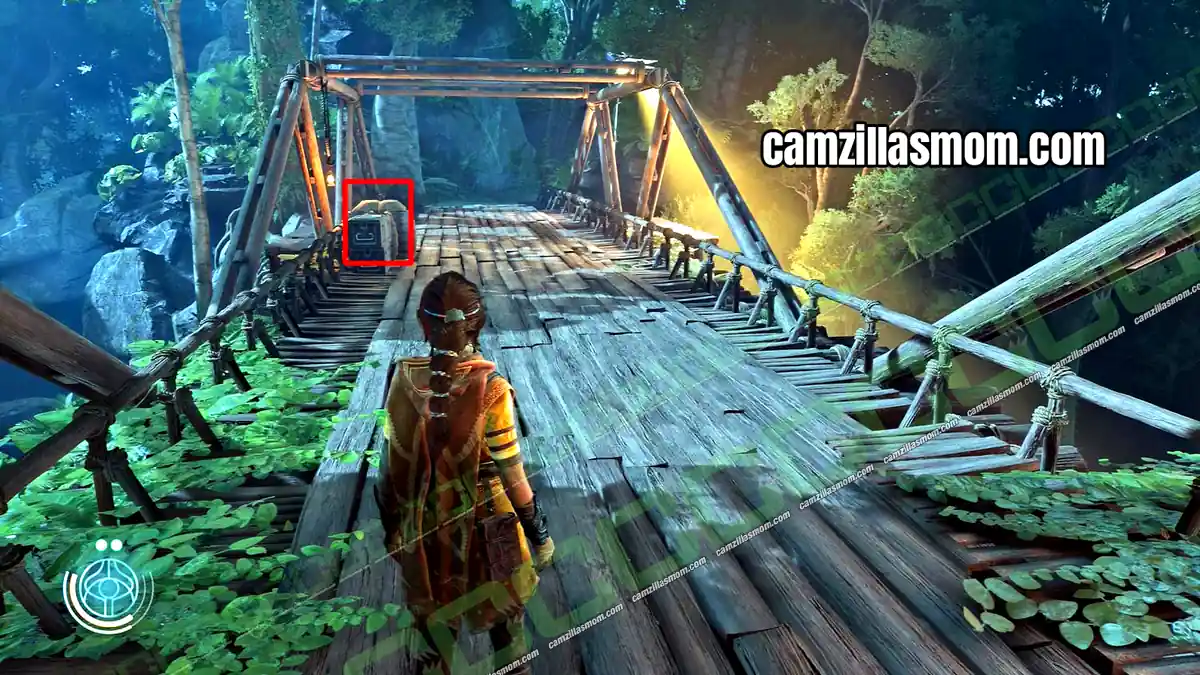
Burn Down Your Temple
4 of 10 Ascension Cards – Chapter 5: Chamatkari Mandir
After the blocked bridge, you reach a camp with a forcefield. The card is on top of a table.
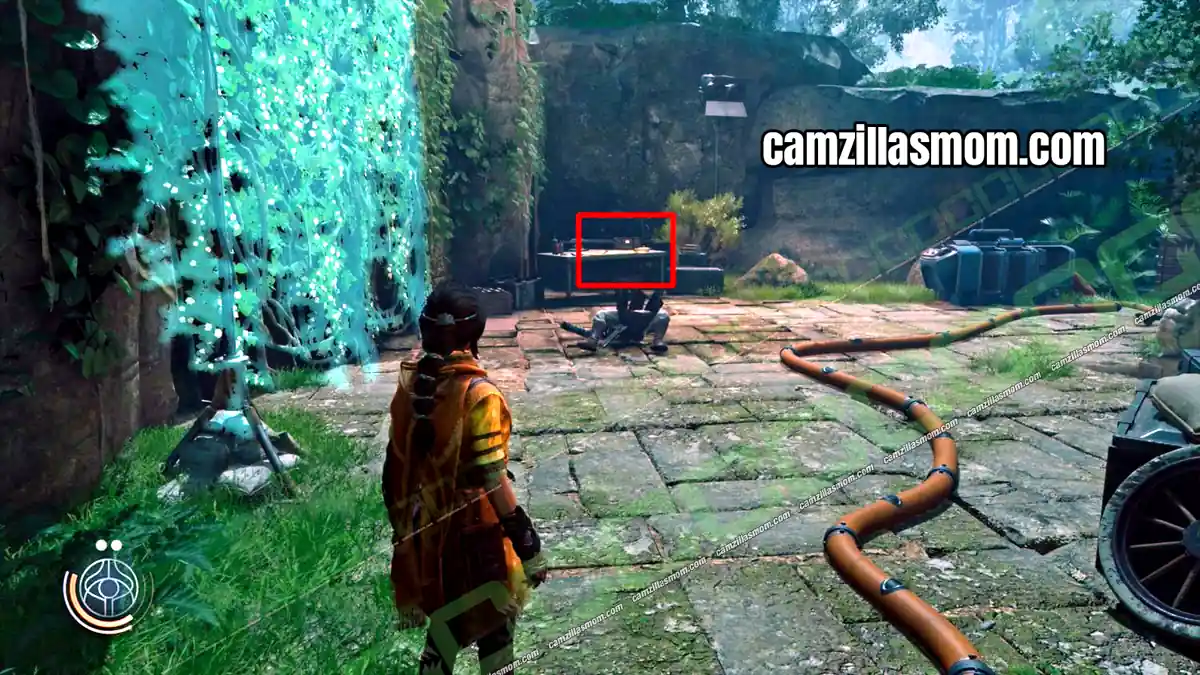
Ascension
5 of 10 Ascension Cards – Chapter 6: The Morning Star II
Buchra opens the office behind the bar. The card is on the table.
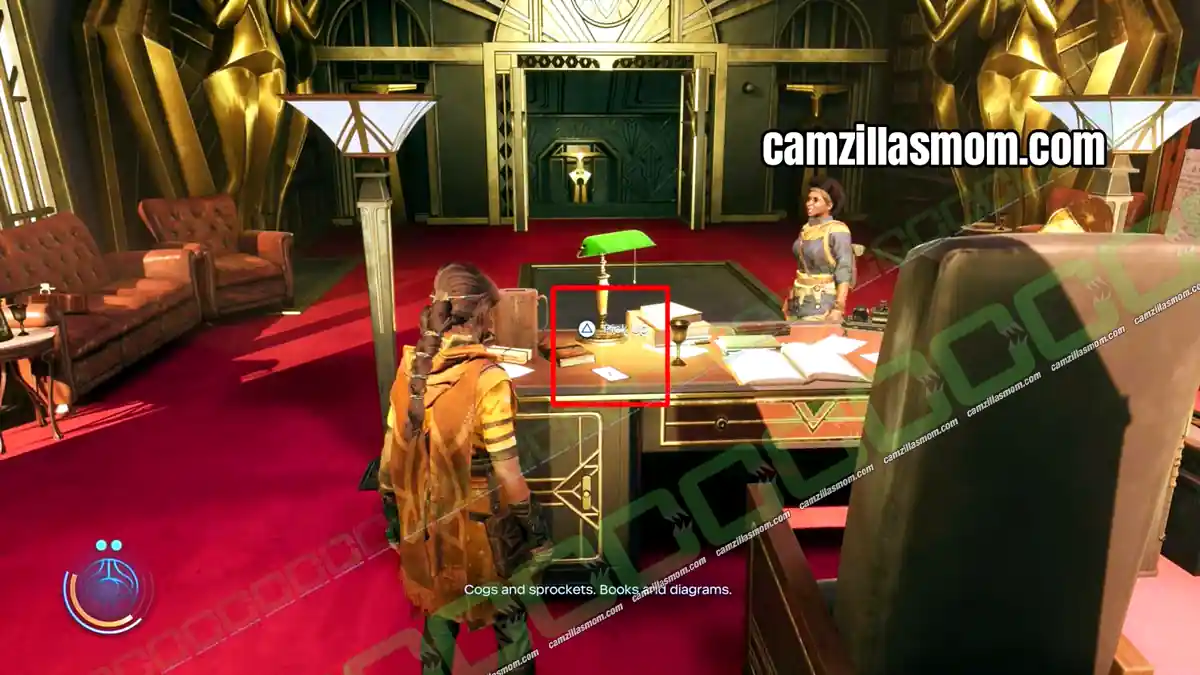
Dive Deeper
6 of 10 Ascension Cards – Chapter 7: Quinta Matos
The card is in the greenhouse. You find it after Become an Instrument of Purpose, even though the menu lists it first.
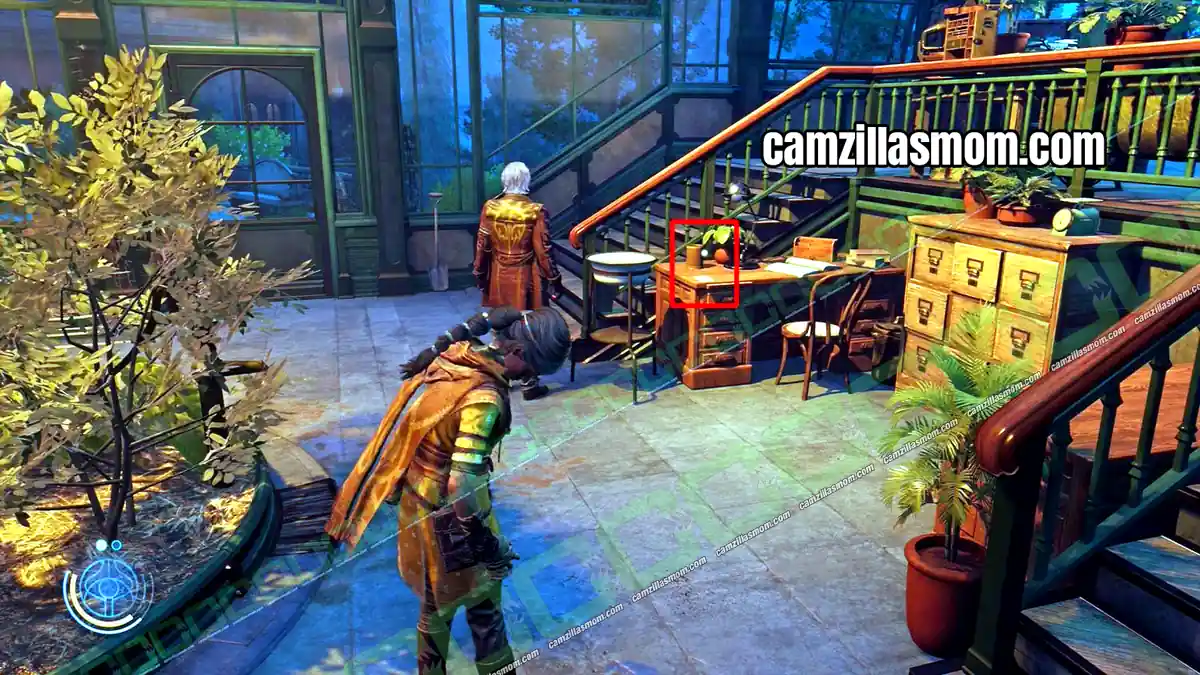
Become an Instrument of Purpose
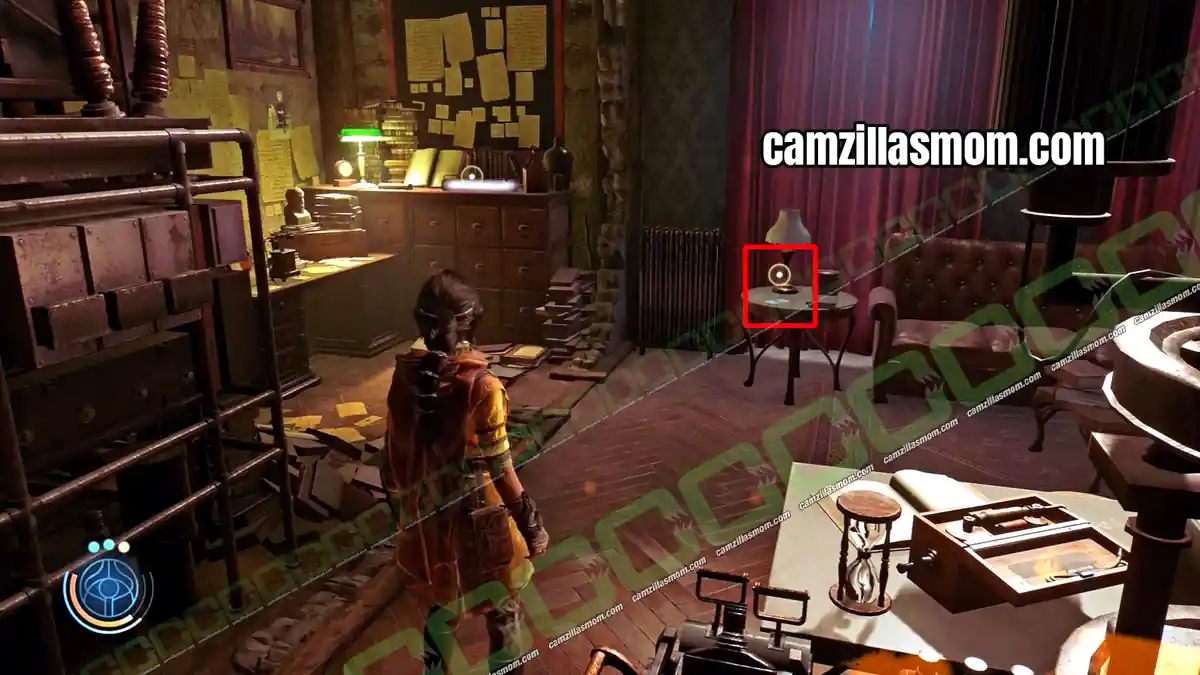
7 of 10 Ascension Cards – Chapter 7: Quinta Matos
The card is on a coffee table in the mansion workshop. You pick this one up before Dive Deeper.
Forge Your Path
8 of 10 Ascension Cards – Chapter 11: Dasuden
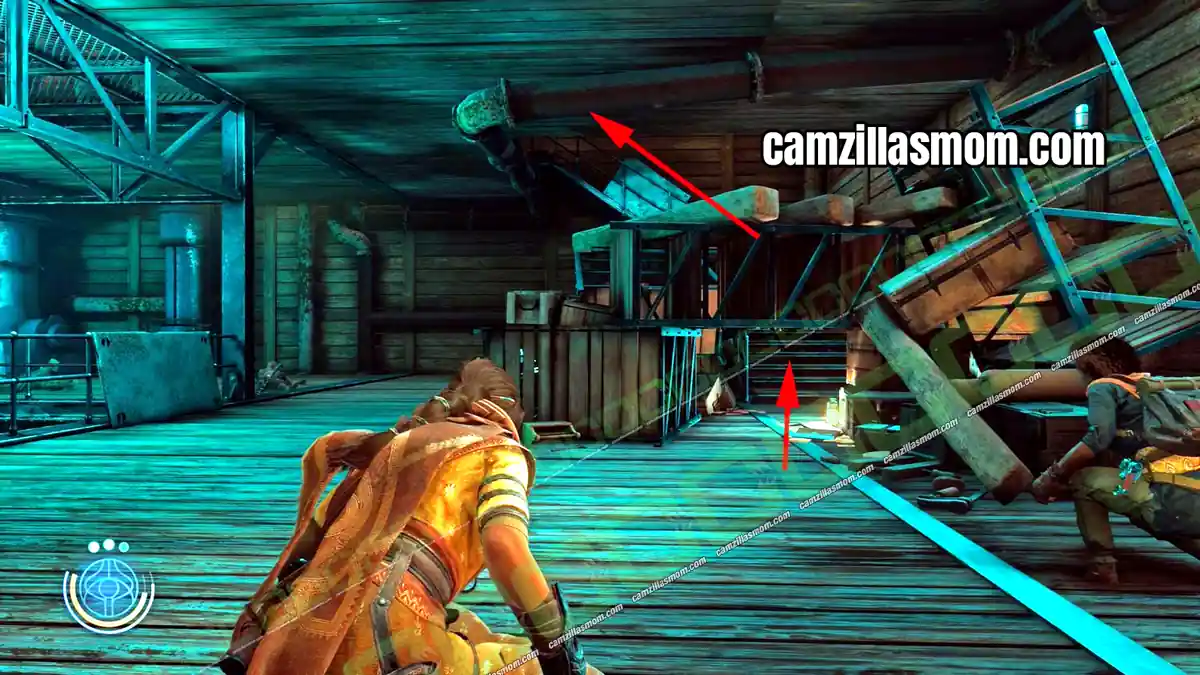
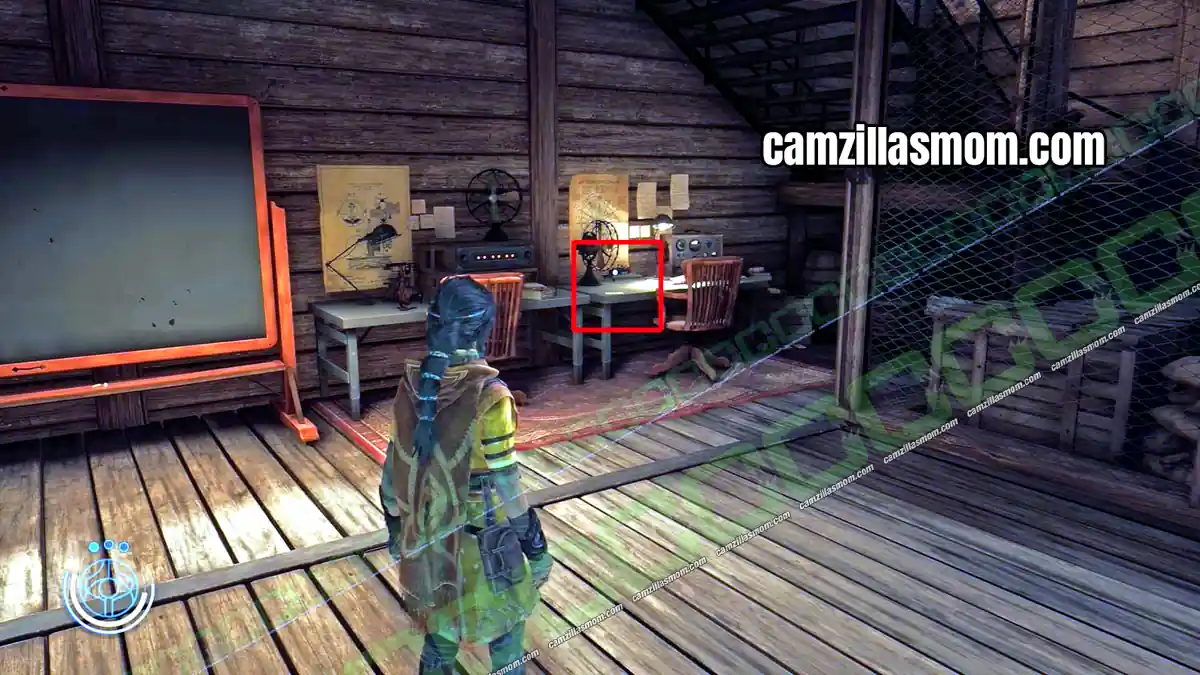
After you move the crane, enter the large building. In the engine room with Extractor 47, crawl through the gap on the right and go upstairs. The card is on a desk.
The menu lists this card before Envision with Shocking Clarity, but you find Envision first.
Envision with Shocking Clarity
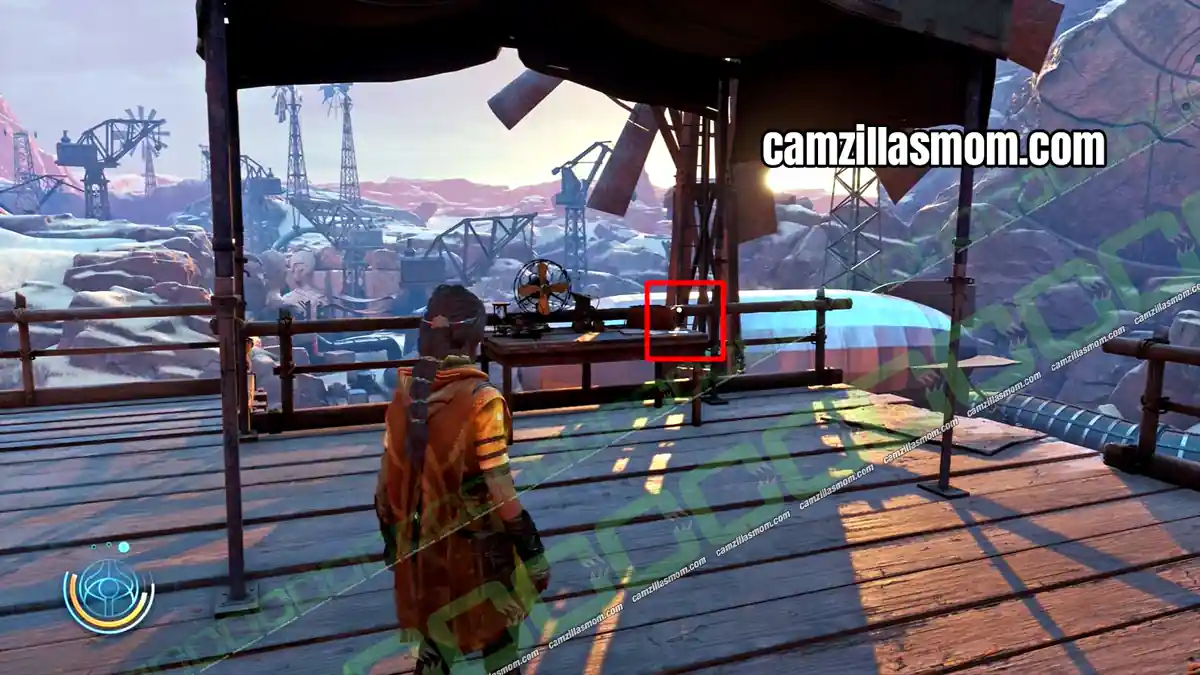
9 of 10 Ascension Cards – Chapter 11: Dasuden
In the crane camp where Luther causes trouble again, search the highest part of the camp for the card. You pick this one up before Forge Your Path.
Embrace the Shadow
10 of 10 Ascension Cards – Chapter 12: Peshanden
After you split from Buchra, go through the open fourth Sahin Door and the green-lit doorway into the largest hostile area of the chapter. The card is on a wooden box at the far end.
Sahin Tiles – Collectibles
All 24 Sahin Tiles in menu order. Find every tile for the Tracing The Path achievement.
Sahin Tile 1
1 of 24 Sahin Tiles – Chapter 7: Quinta Matos
Take the winding staircase down into the caves and defeat the hostiles. Break the boxes around the wooden structure to get into the small room inside. Sahin Tile 1 is there with Anomaly 37.
Sahin Tile 2
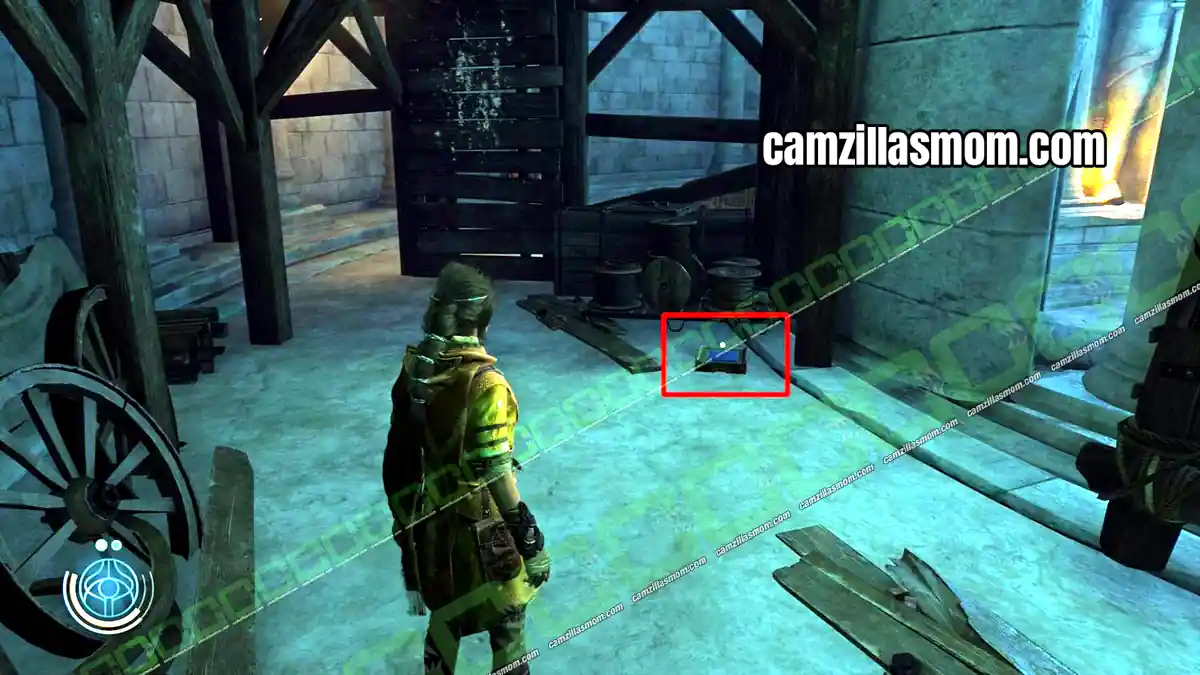
2 of 24 Sahin Tiles – Chapter 7: Quinta Matos
After the scene where you see the Doctor below you, look back at the plank you just crossed. The tile is in the left corner.
Sahin Tile 3
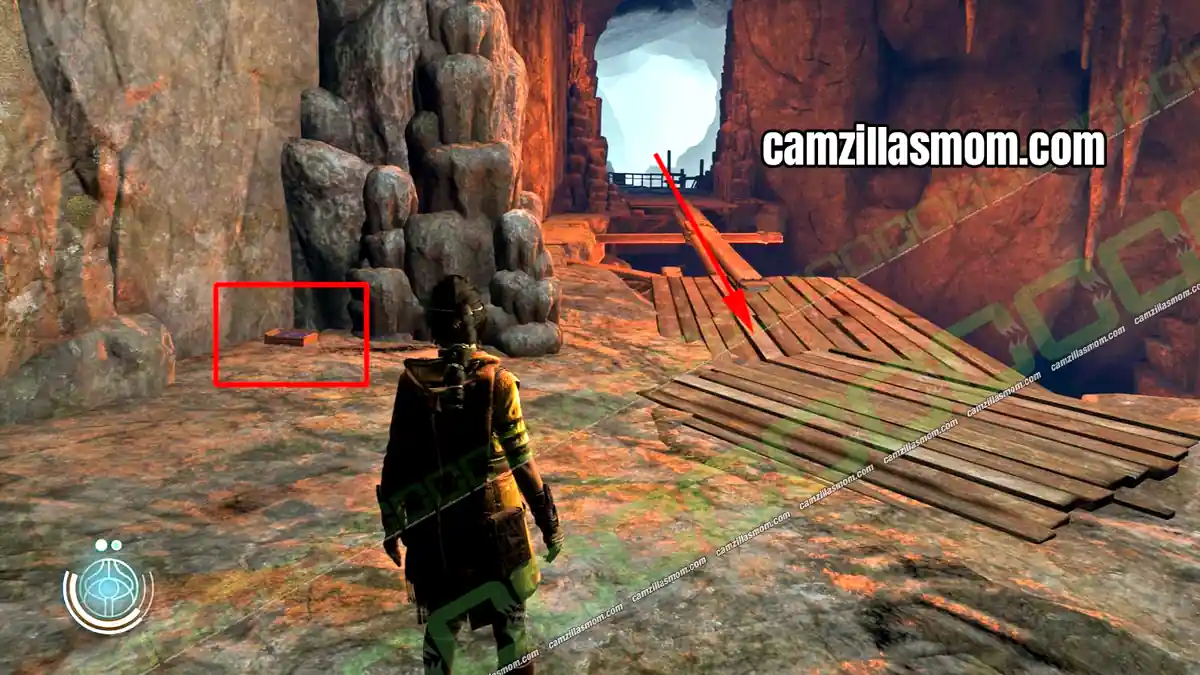
3 of 24 Sahin Tiles – Chapter 7: Quinta Matos
Climb the wooden wall and follow the path into a large cave. The tile lies on the floor.
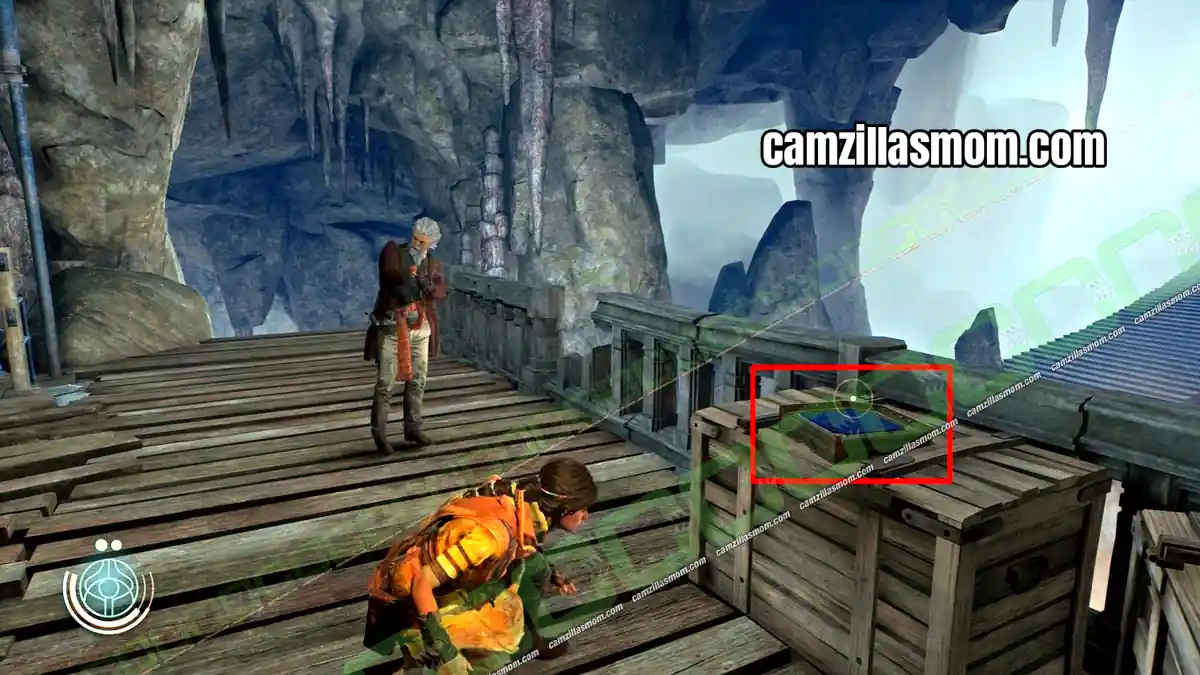
Sahin Tile 4
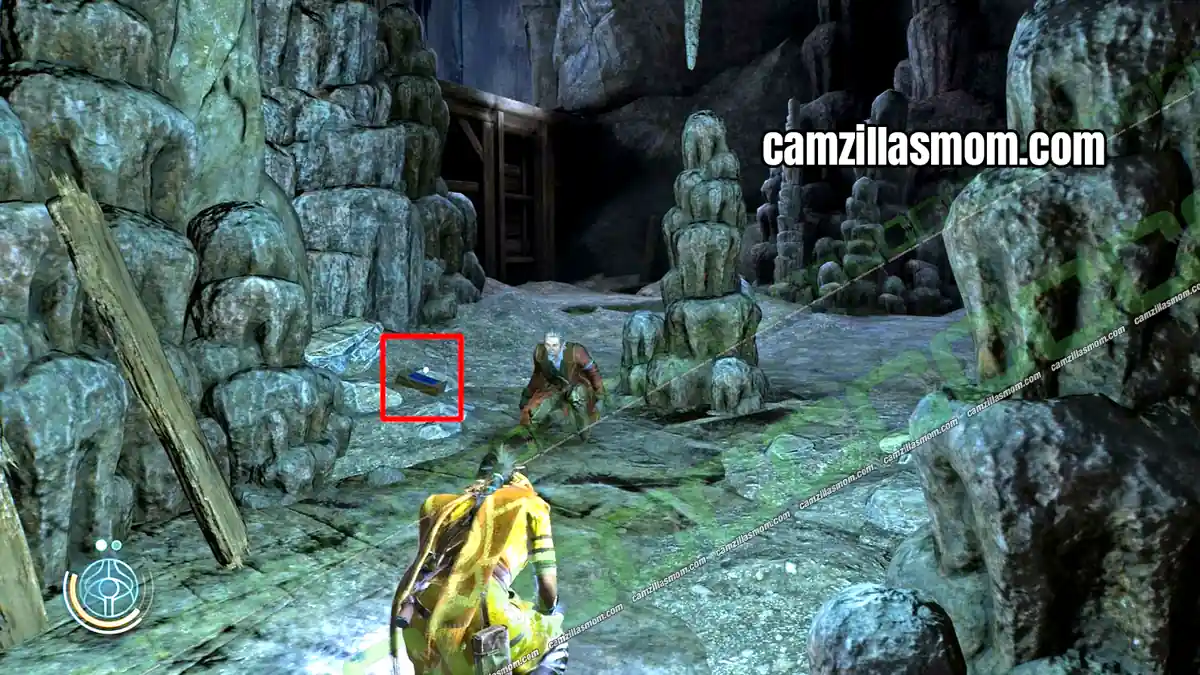
4 of 24 Sahin Tiles – Chapter 7: Quinta Matos
Climb the next wooden wall up to the lookout point. The last Quinta Matos tile is up there.
Sahin Tile 5
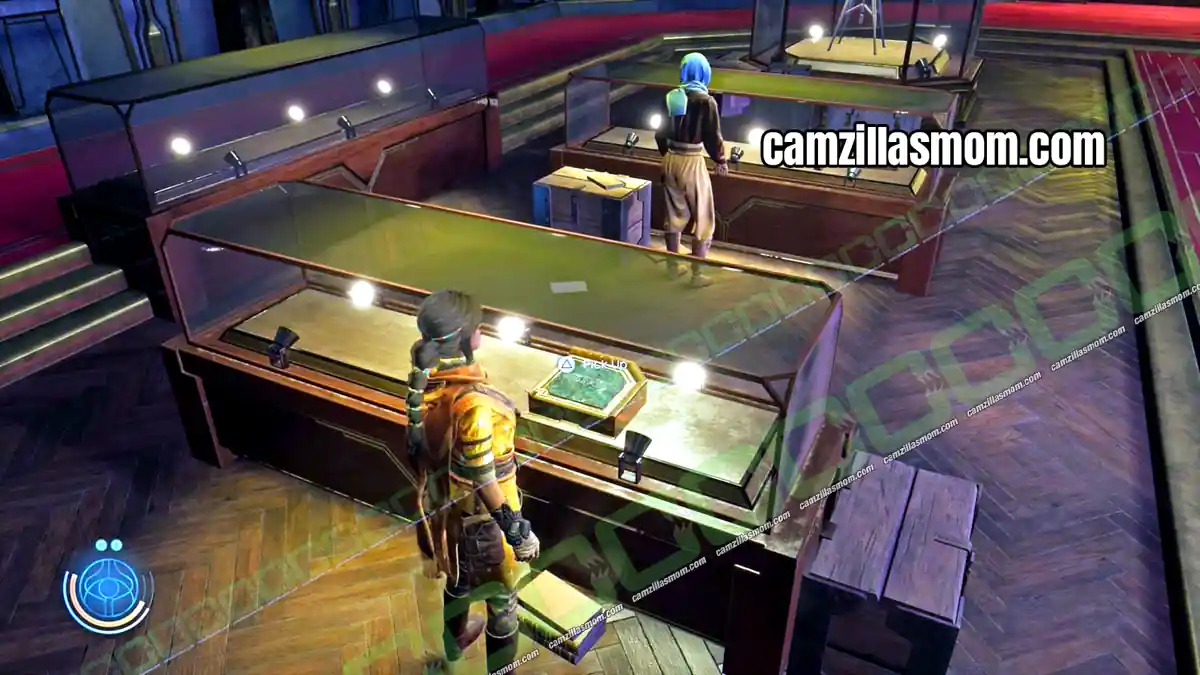
5 of 24 Sahin Tiles – Chapter 8: The Morning Star III
After you rewire the antennas, go to the control room and open the displays. The tile is in the museum.
Sahin Tile 6
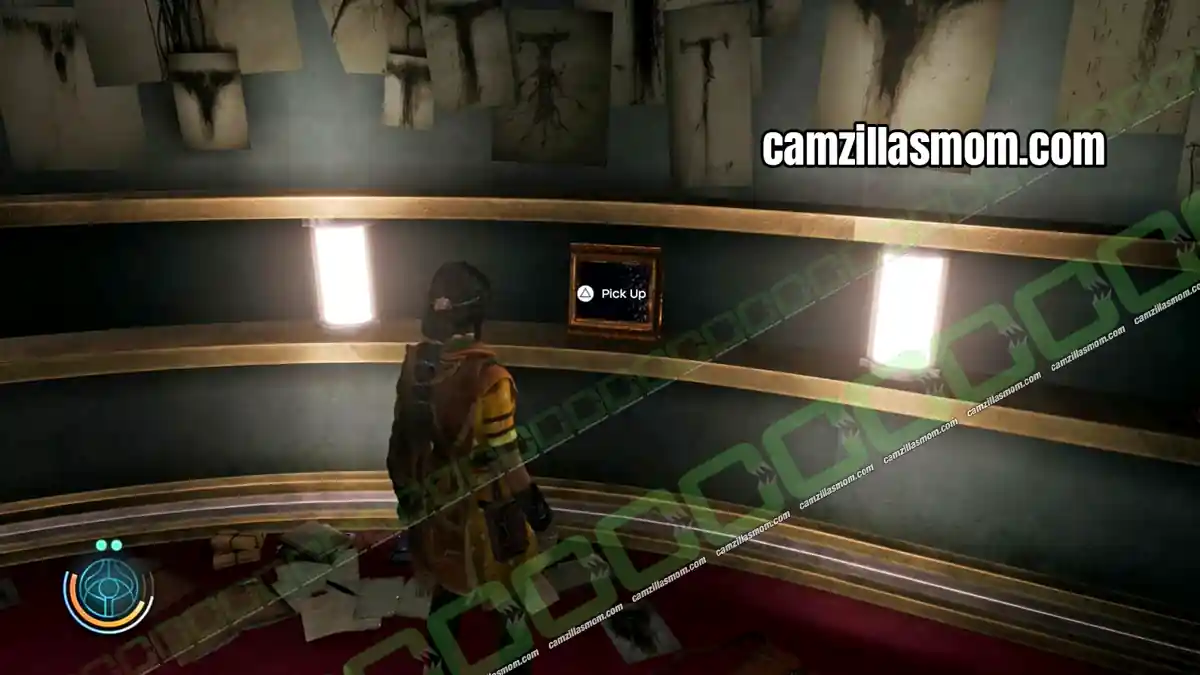
6 of 24 Sahin Tiles – Chapter 8: The Morning Star III
Interact with the display behind the desk in Vincent’s office to open the secret room. The tile is inside.
Sahin Tile 7
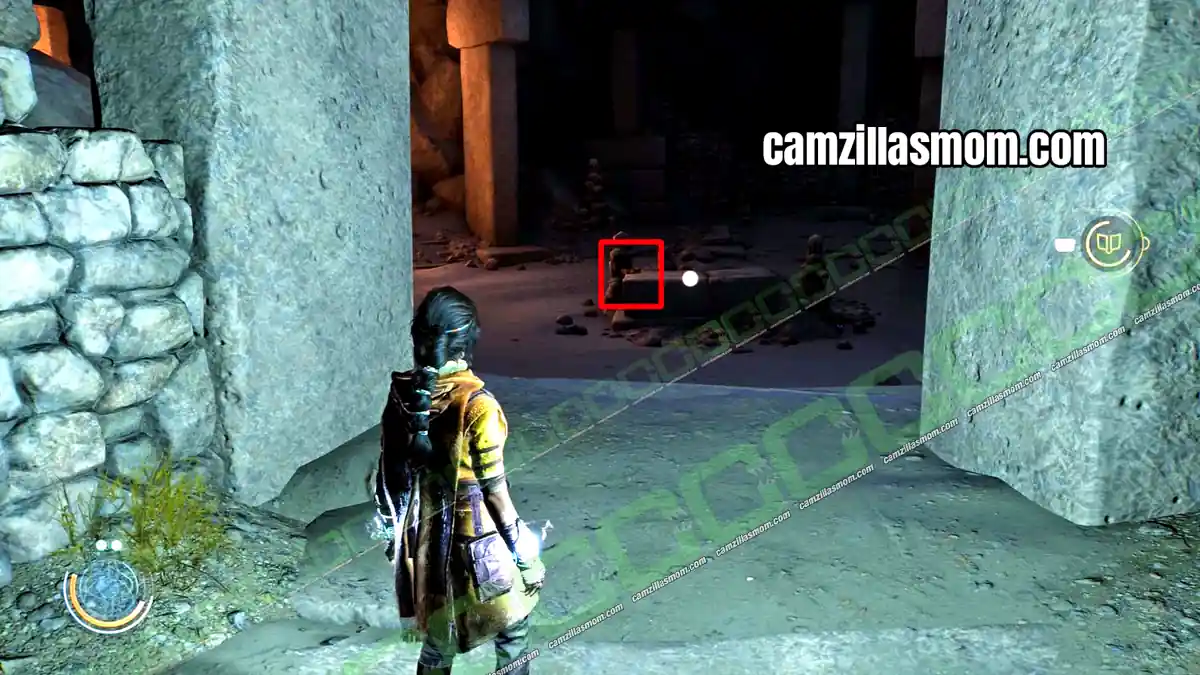
7 of 24 Sahin Tiles – Chapter 9: Anatolia
The stalagmite cave leads into a large round room. The tile is on the stone table in the middle, next to Coin 17.
Sahin Tile 8
8 of 24 Sahin Tiles – Chapter 9: Anatolia
In the next room with the stone door and the climbable wall, break the destructible wall. The tile is inside with Anomaly 45.
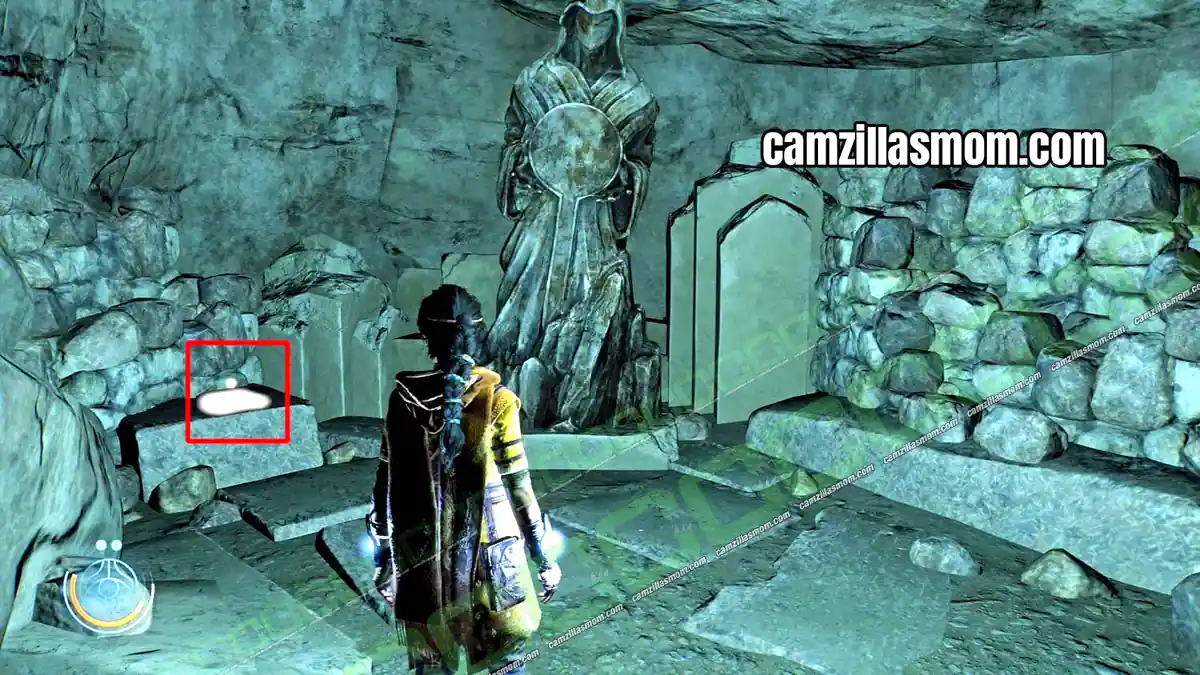
Sahin Tile 9
9 of 24 Sahin Tiles – Chapter 9: Anatolia
Go back to the stone door room and climb the wall. At the end of the path, drop down, then climb again to Anomaly 46. Break the wall, cross the round room and turn right at the end. The tile is in the next room on the left.
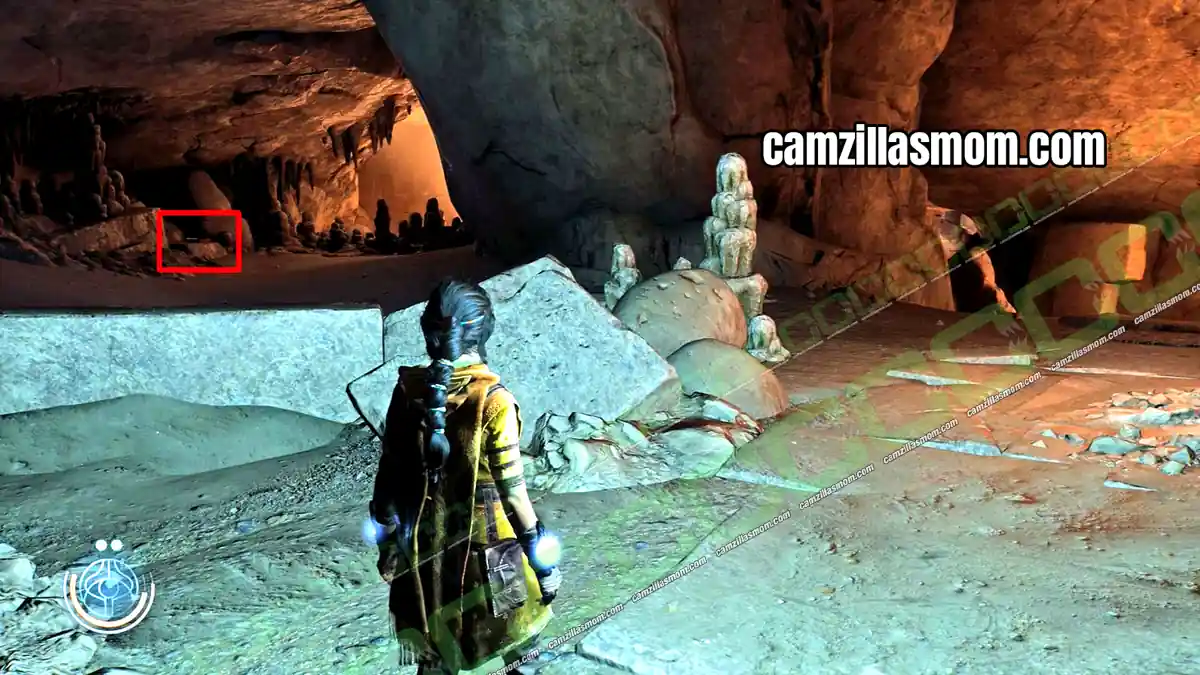
Sahin Tile 10
10 of 24 Sahin Tiles – Chapter 9: Anatolia
Follow the path down and break the stone wall into the room with the round window. The tile lies in the rubble below the window.
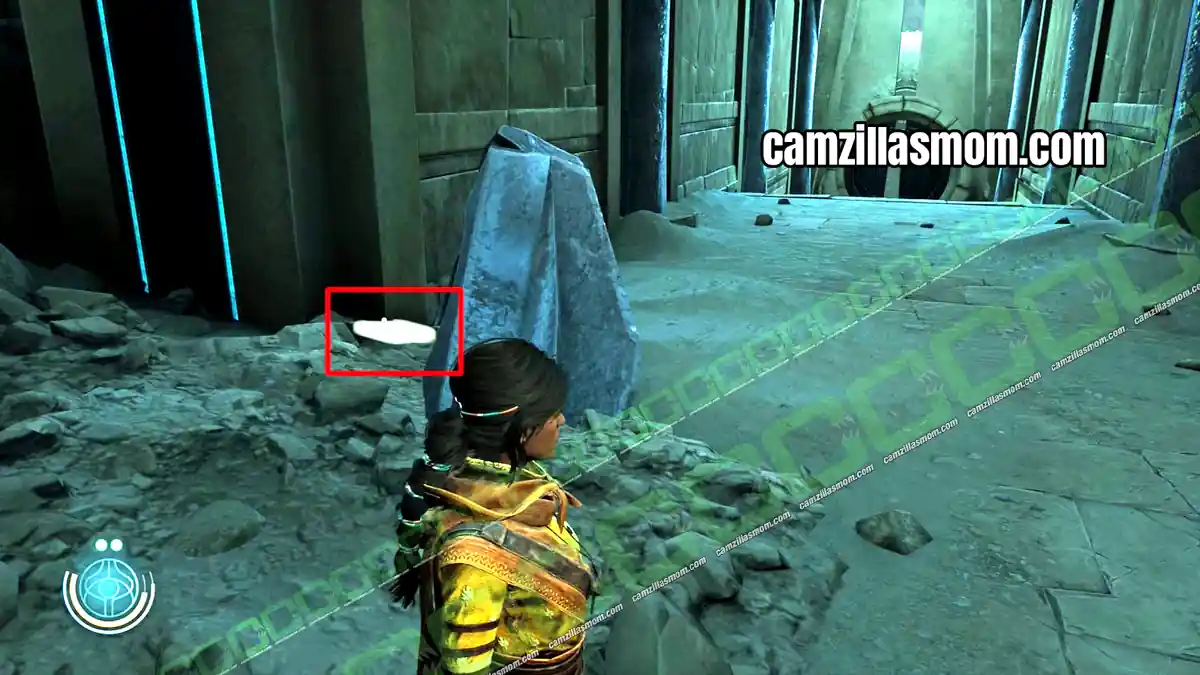
Sahin Tile 11
11 of 24 Sahin Tiles – Chapter 9: Anatolia
After the Unknown 9 vision and the fight, leave the round room through the collapsed passage. The last Anatolia tile is on the left, just after the round room.
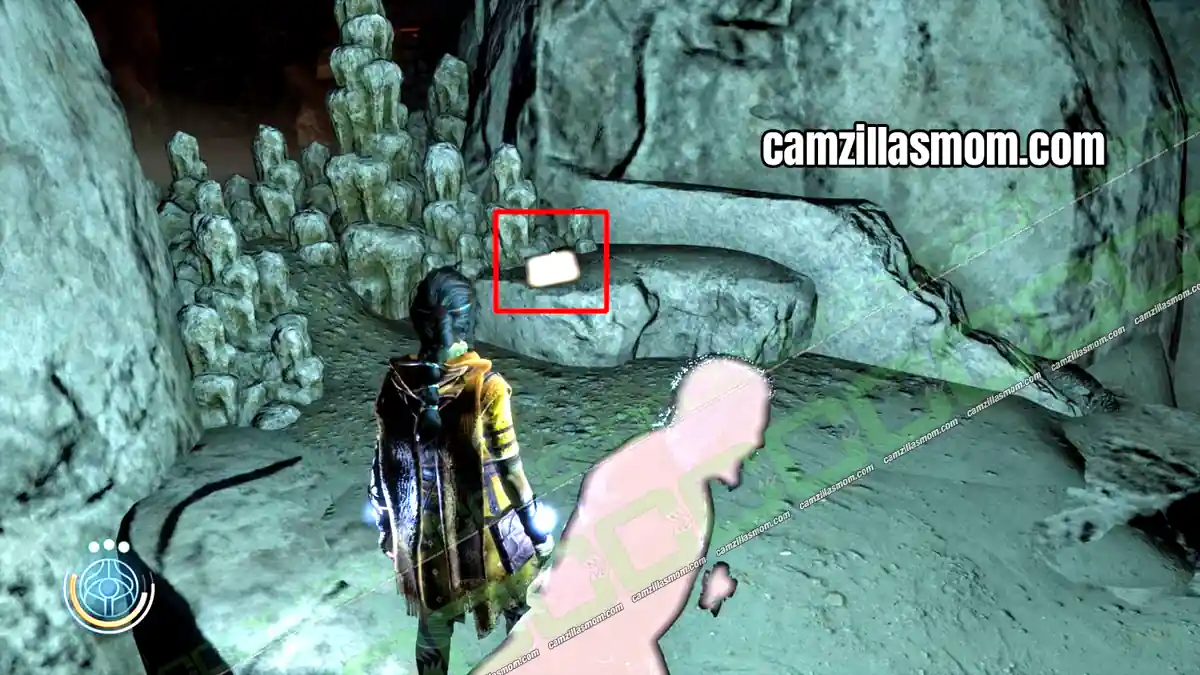
Sahin Tile 12
12 of 24 Sahin Tiles – Chapter 11: Dasuden
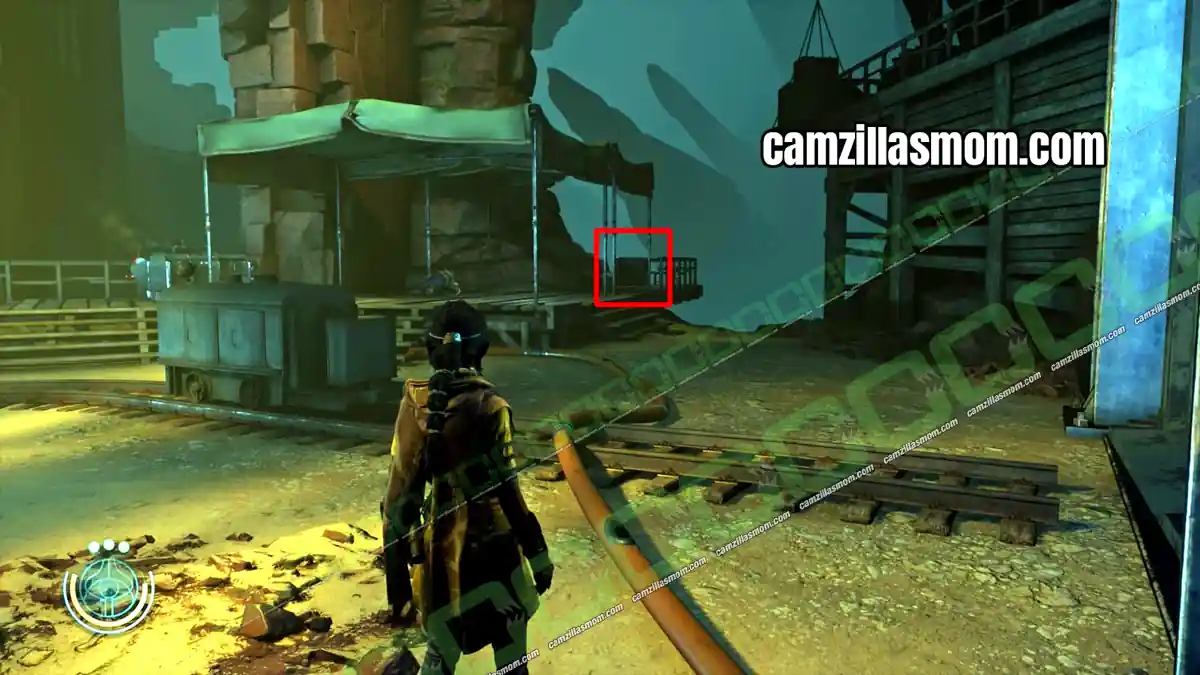
At the start of the chapter, lift Luther over the stone wall and go on with Buchra. Where the first cave corridor splits, go straight ahead to the tile.
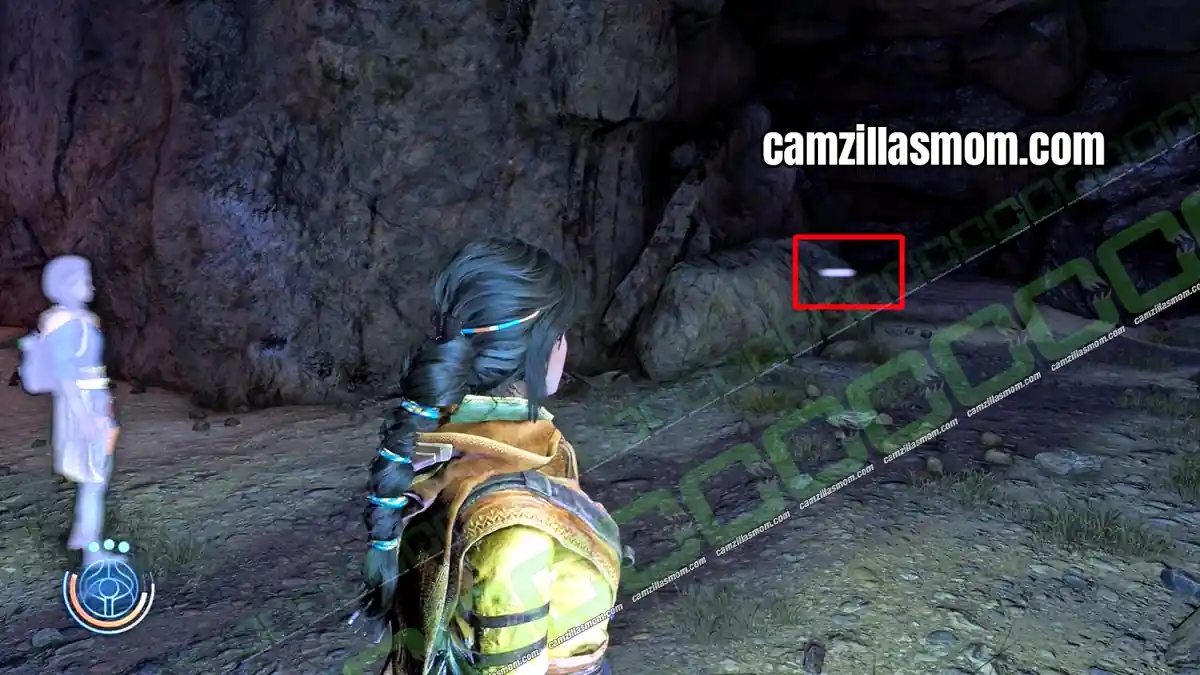
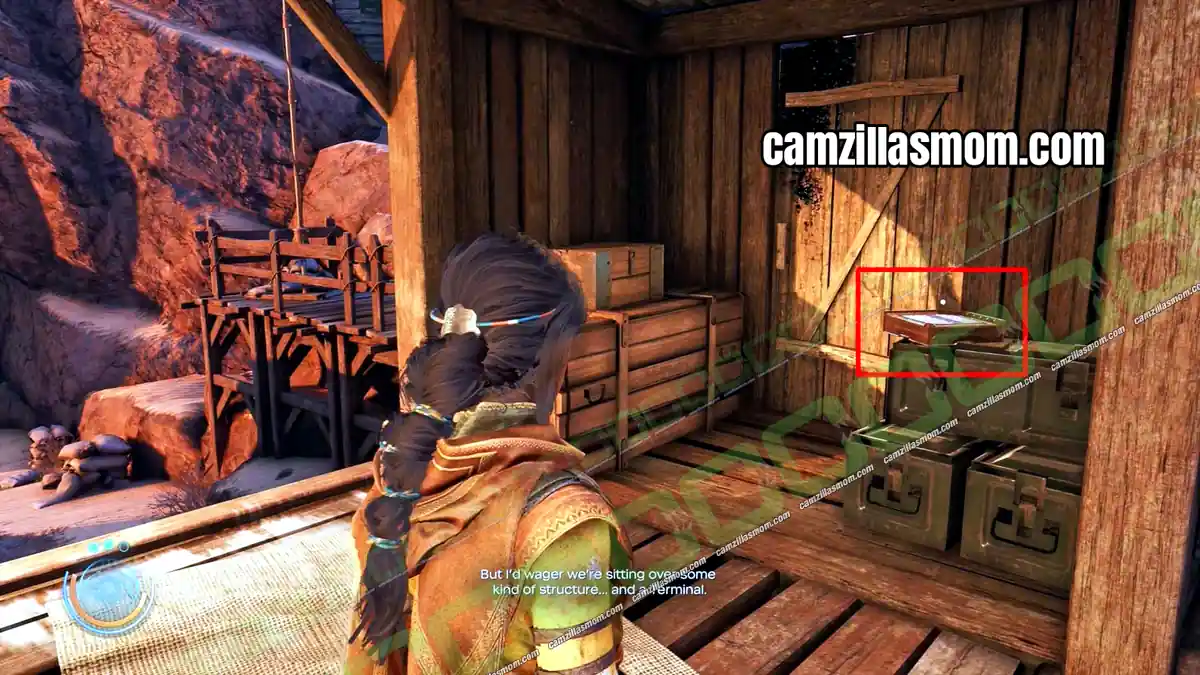
Sahin Tile 13
13 of 24 Sahin Tiles – Chapter 11: Dasuden
After the first green gate, check the small storage area on your right.
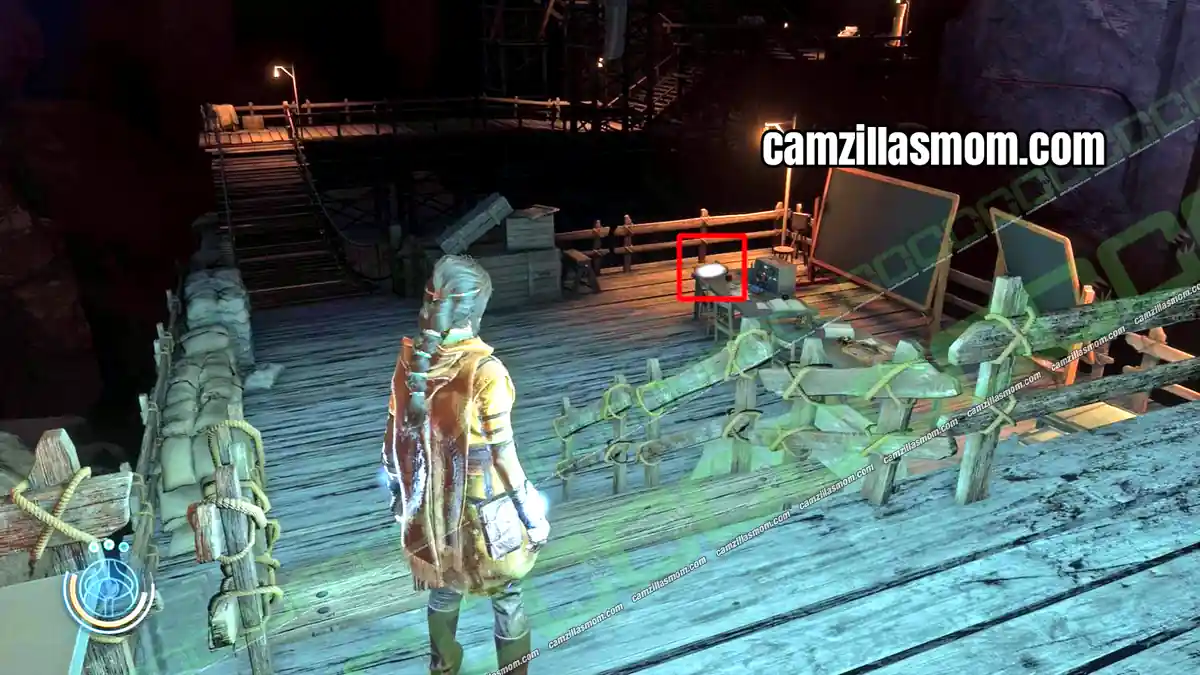
Sahin Tile 14
14 of 24 Sahin Tiles – Chapter 11: Dasuden
Past the large building with the train tracks, you reach an office area on wooden platforms. The tile is next to a pinboard.
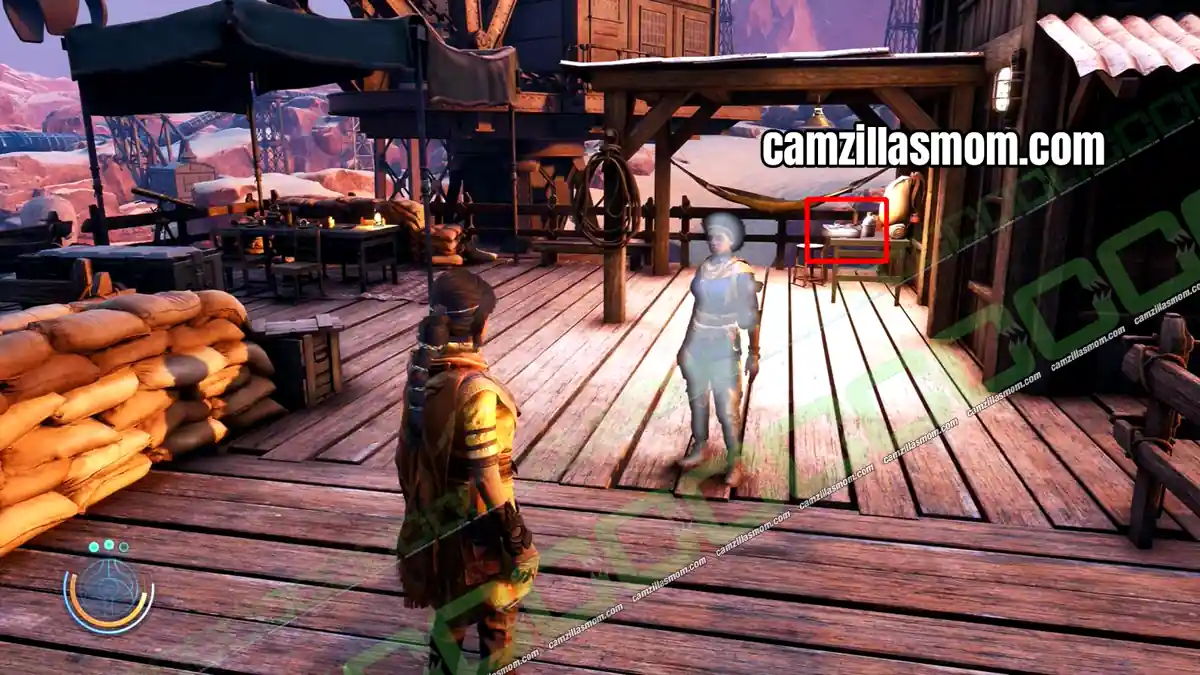
Sahin Tile 15
15 of 24 Sahin Tiles – Chapter 11: Dasuden
Leave the cave and meet Luther at the far end. Before you follow him down, take the stairs up. The tile is on one of the tables on the platform.
Sahin Tile 16
16 of 24 Sahin Tiles – Chapter 12: Peshanden
At the start of the chapter, defeat the enemies at the top of the winding staircase and help Buchra through the red door. At the bottom of the next staircase, crouch through the opening in the wall to the tile.
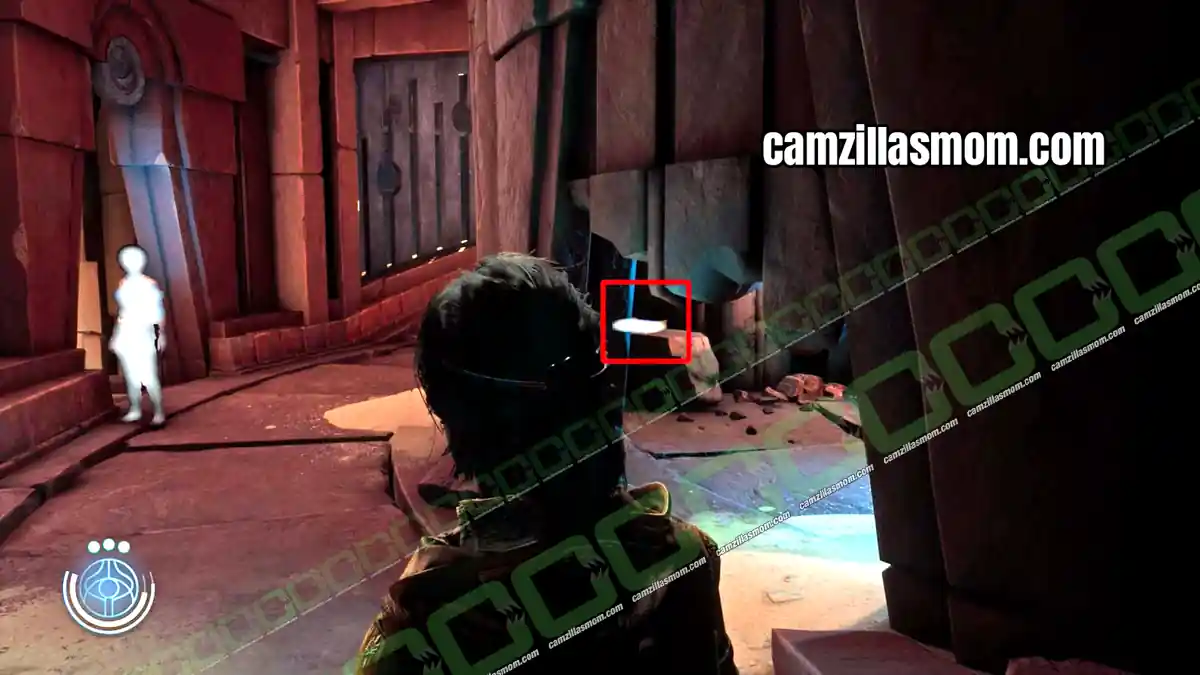
Sahin Tile 17
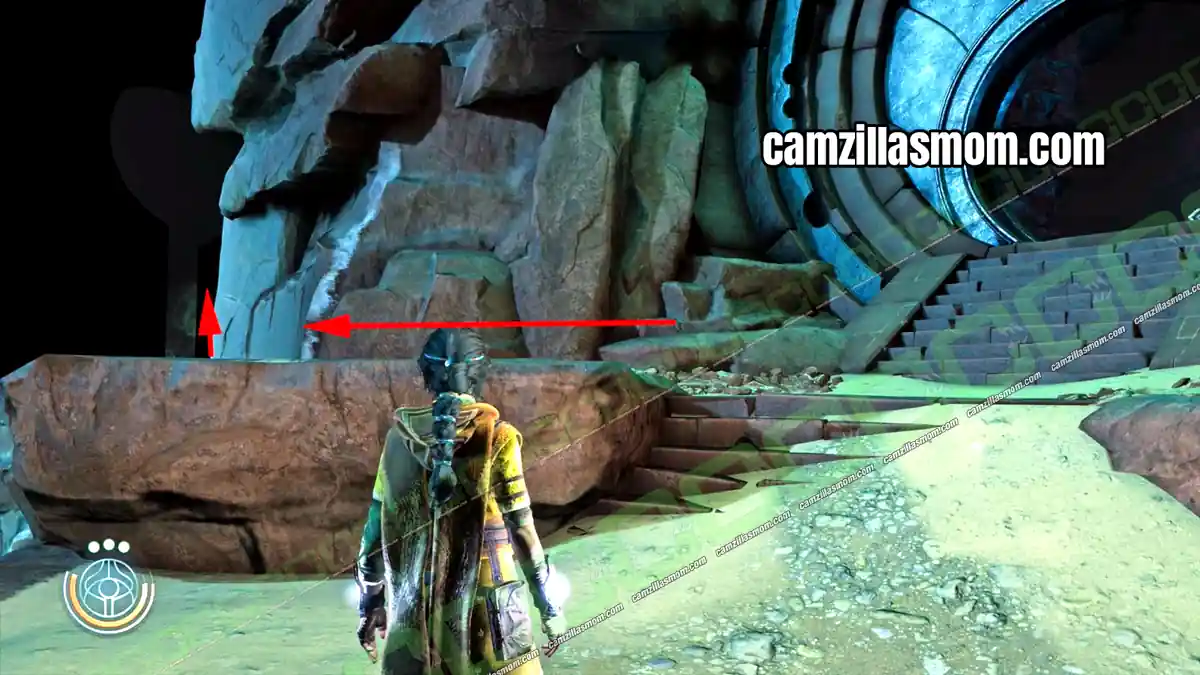
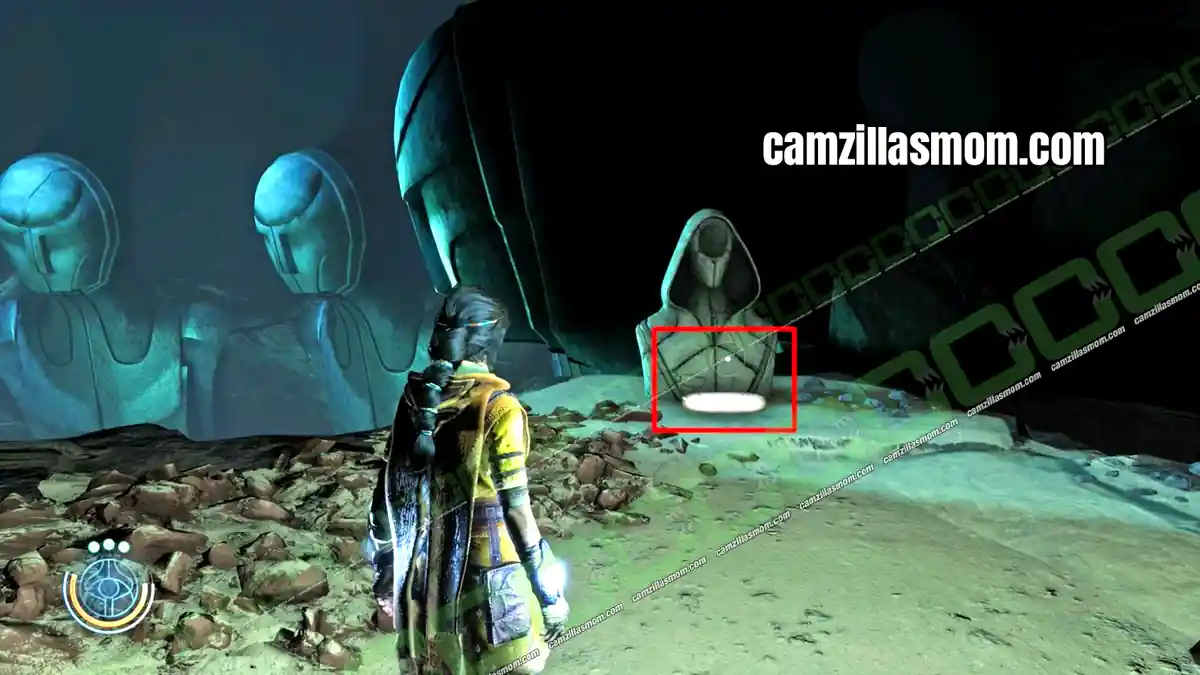
17 of 24 Sahin Tiles – Chapter 12: Peshanden
After Reika’s first Echo, climb down the long wall. The blue beam is on your left. Before you go through the open round door, take the passage on the left to the tile.
Sahin Tile 18
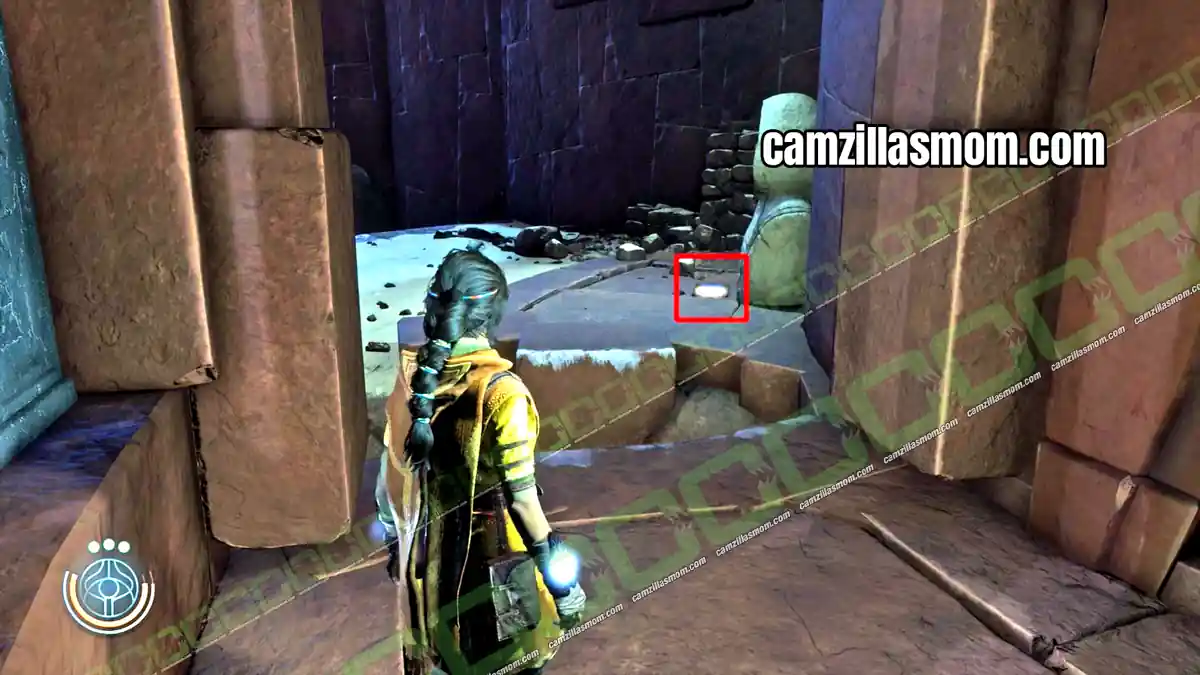
18 of 24 Sahin Tiles – Chapter 12: Peshanden
Go through the door into the room with the large ball. Take the path down below the ball to the tile.
Sahin Tile 19
19 of 24 Sahin Tiles – Chapter 12: Peshanden
In the next hostile area with a red dome, the tile lies on the floor of the collapsed passage.
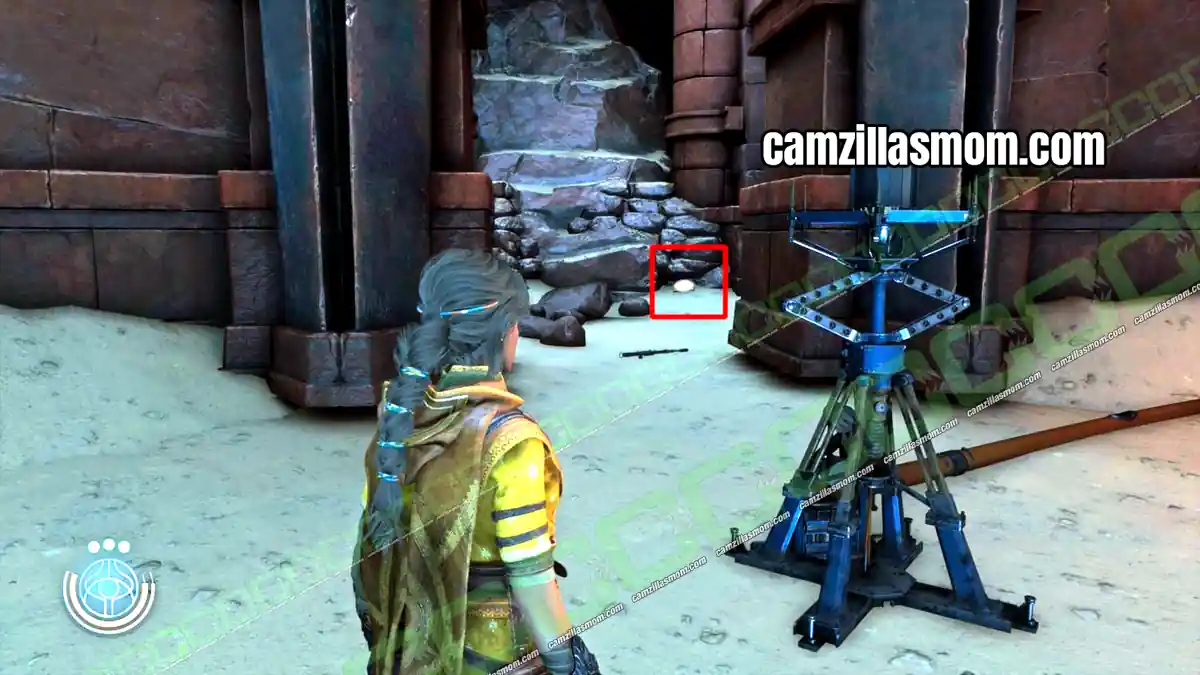
Sahin Tile 20
20 of 24 Sahin Tiles – Chapter 12: Peshanden
After the Gearhead cutscene, the corridor leads to the room with the blue beam. Break the wall inside and follow the passage to the tile at the end.
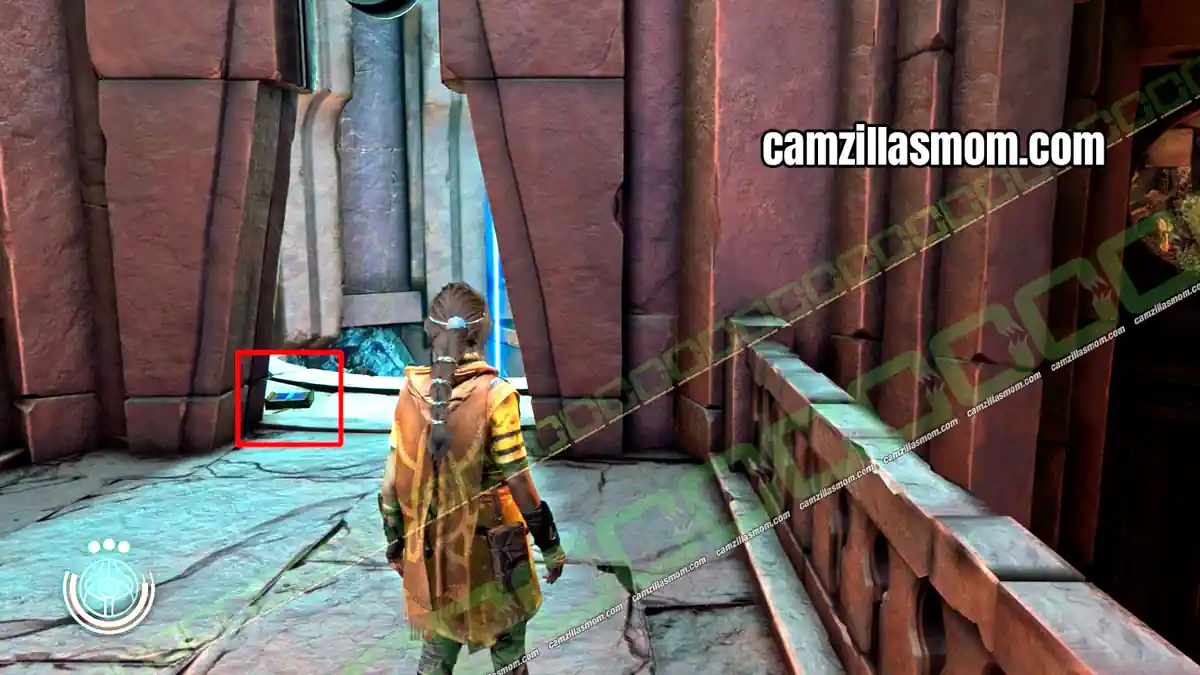
Sahin Tile 21
21 of 24 Sahin Tiles – Chapter 13: Reithden
When you reach the Reithden ruins, the first tile lies on a carved stone along the path.
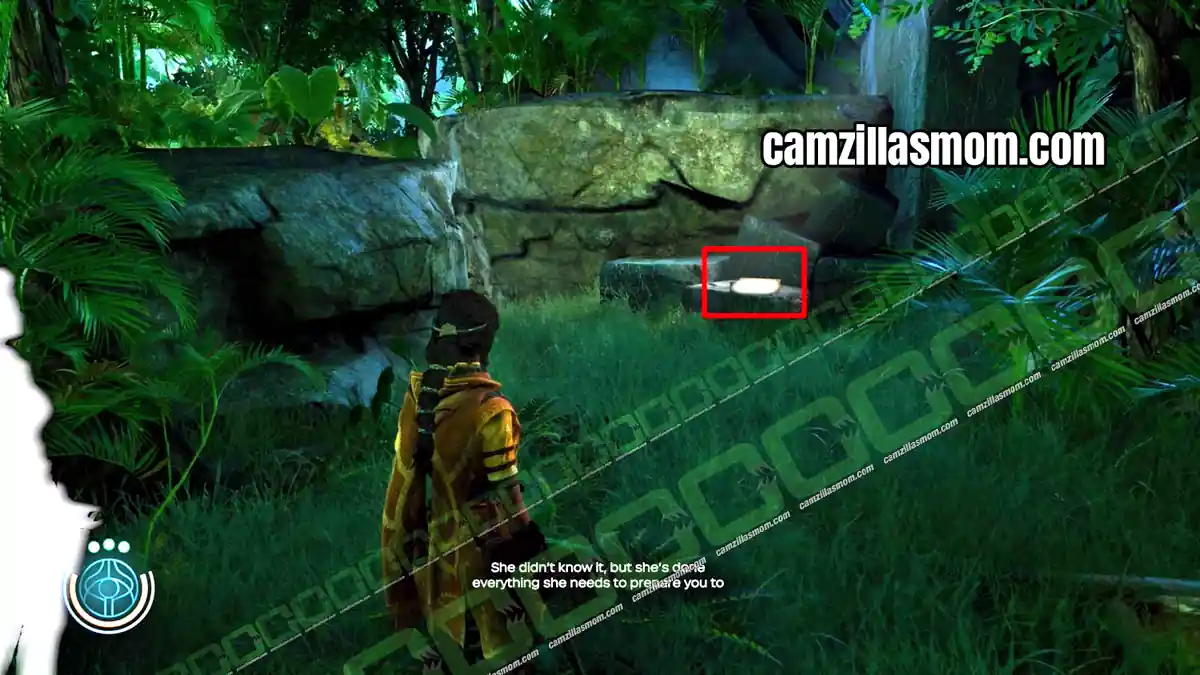
Sahin Tile 22
22 of 24 Sahin Tiles – Chapter 13: Reithden
Before you climb the vines on the far side of the river, check the cave on the left.
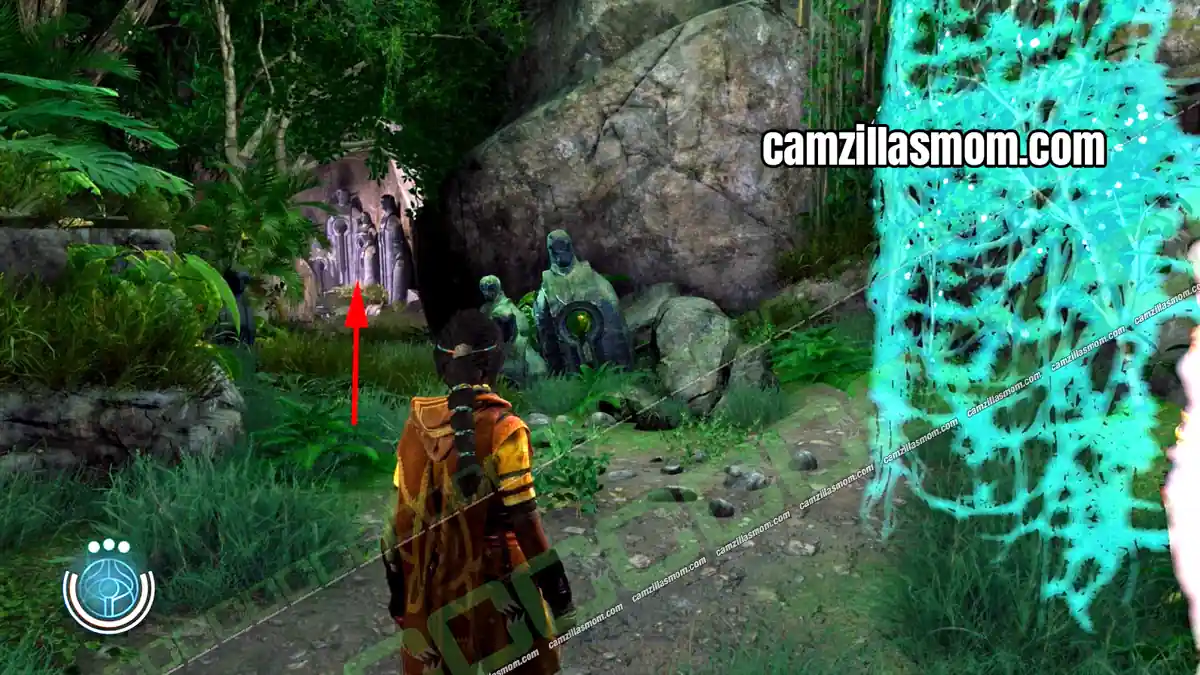
Sahin Tile 23
23 of 24 Sahin Tiles – Chapter 13: Reithden
Search the ruins at the top of the vines.
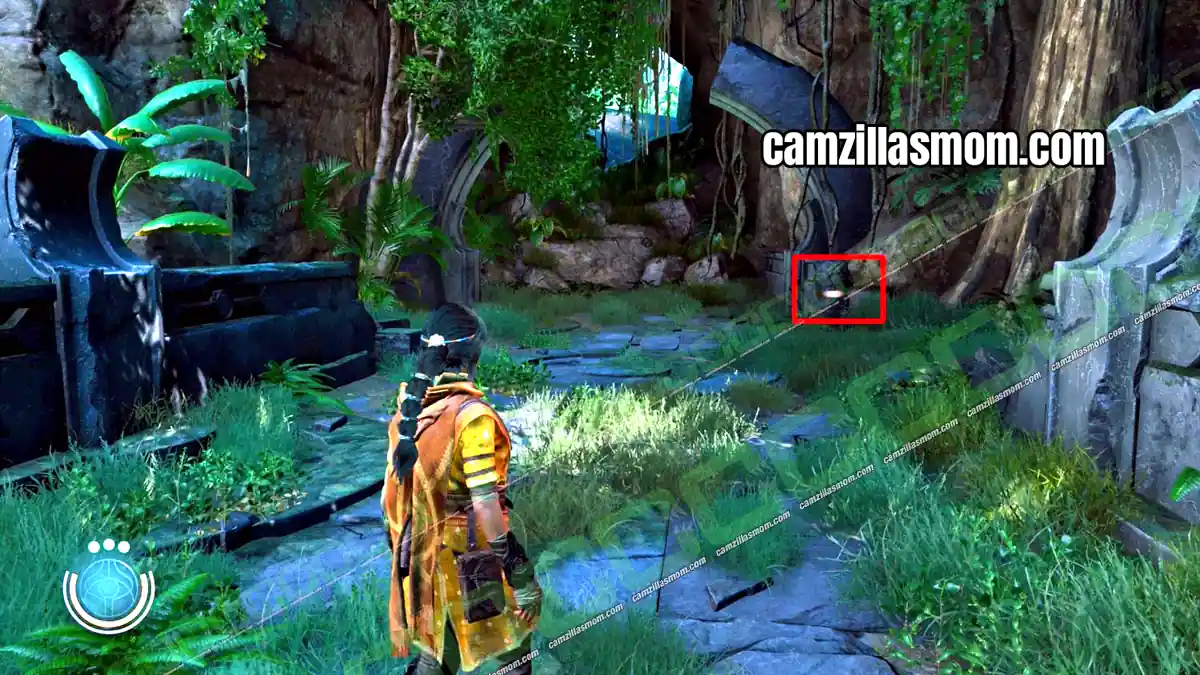
Sahin Tile 24
24 of 24 Sahin Tiles – Chapter 13: Reithden
Go through the Sahin Gate. At the broken bridge, climb down the vines and follow the path below. Keep checking your right side on the way up. The last tile is in a cave with statues.
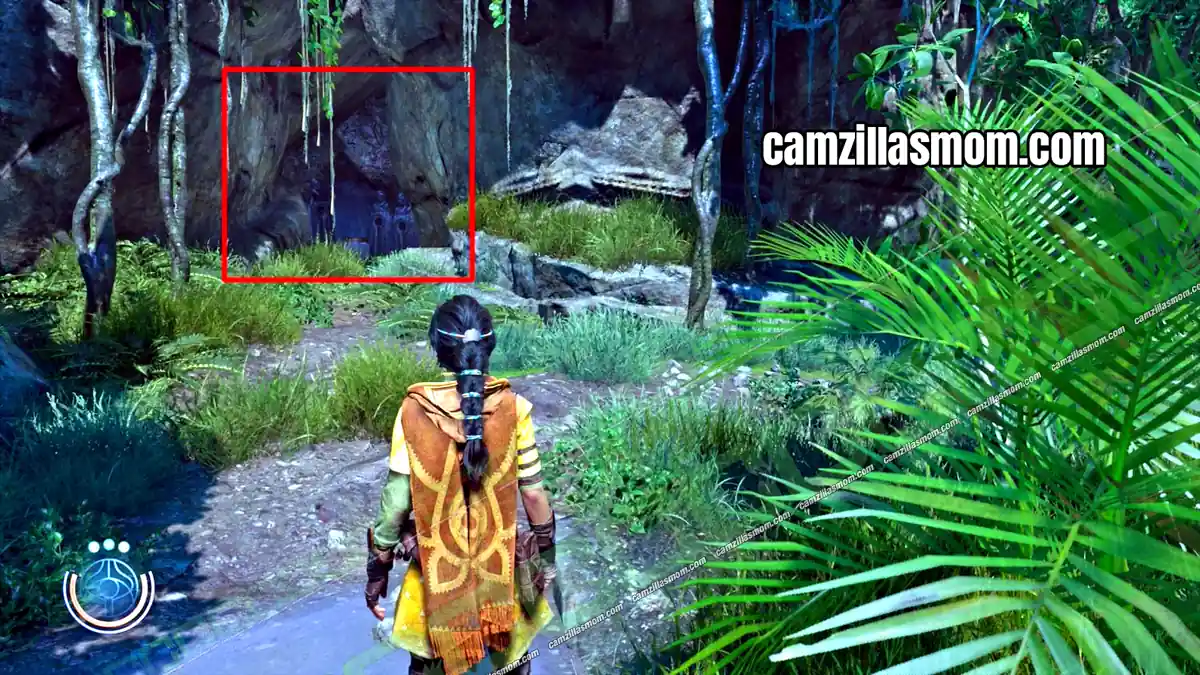
Extractors – Collectibles
All 55 Extractors in menu order. Destroy all of them for Eagle Eyes. Extractors do not count toward Master Collector.
Extractor 1
1 of 55 Extractors – Chapter 1: Richat Structure
In the camp where you learn to Crush explosive canisters, Extractor 1 is one of the things you can Crush.
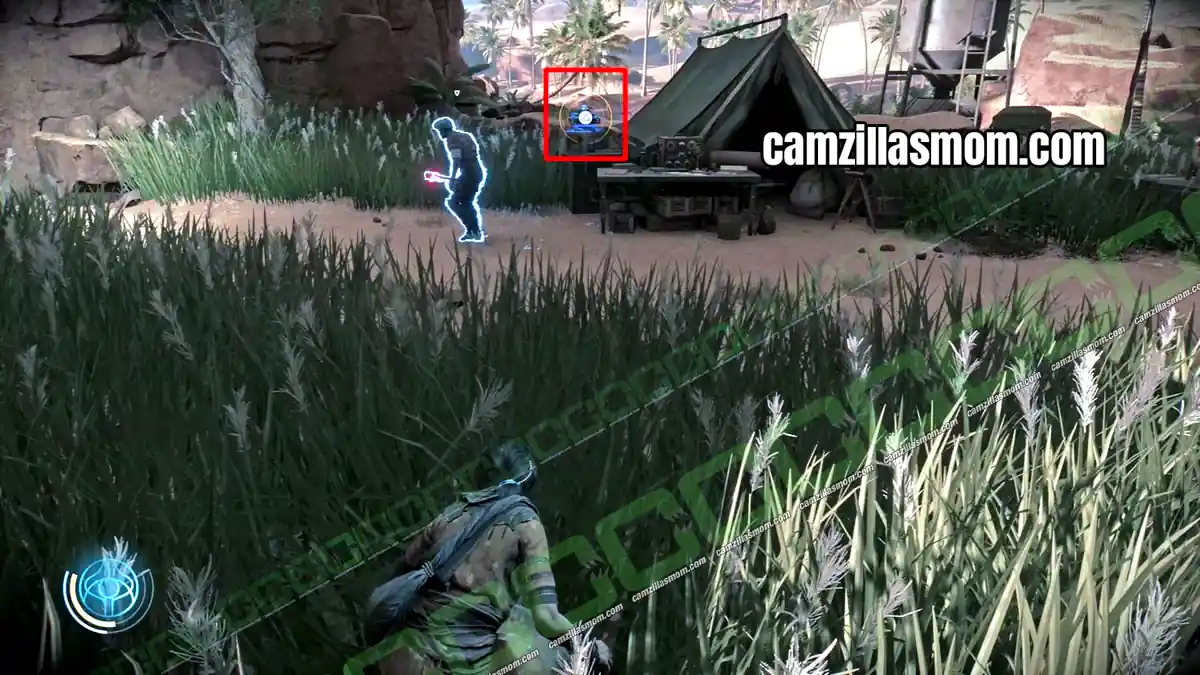
Extractor 2
2 of 55 Extractors – Chapter 1: Richat Structure
In the camp with the red energy barrier, the Extractor is inside one of the tents.
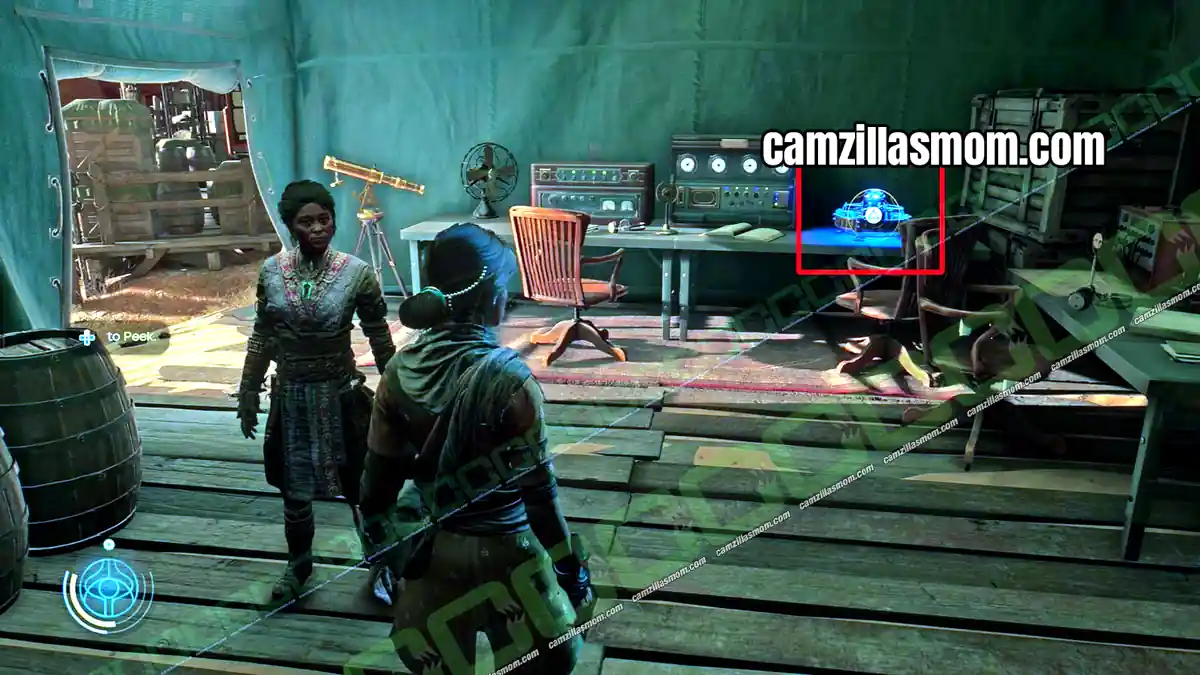
Extractor 3
3 of 55 Extractors – Chapter 2: Chamiri
Right outside the bar where you arrive.
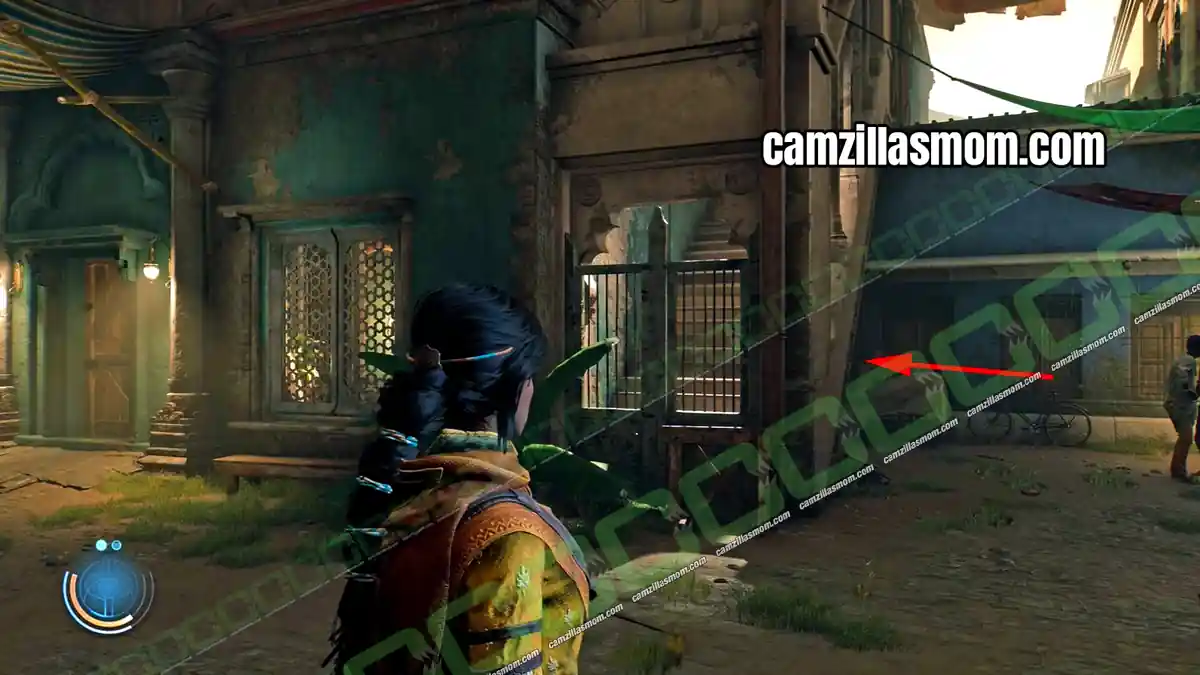
Extractor 4
4 of 55 Extractors – Chapter 2: Chamiri
Go through the first green gate, turn right and take the stairs down into the alley.
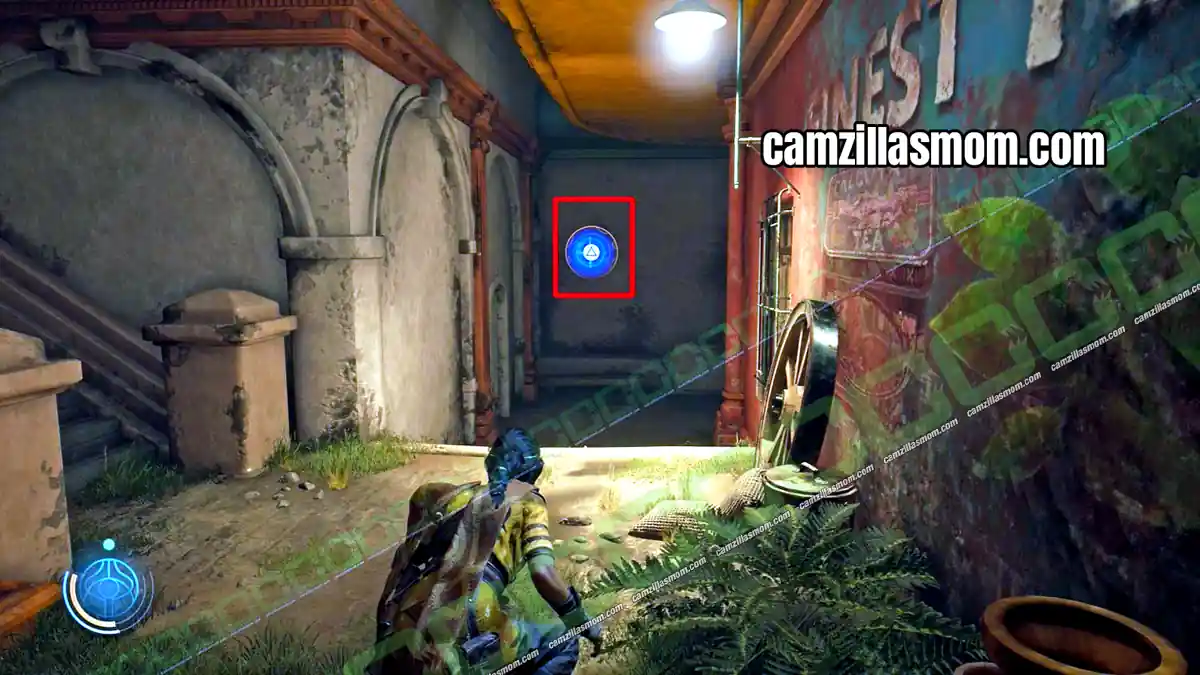
Extractor 5
5 of 55 Extractors – Chapter 2: Chamiri
Go back to the first green gate and head for the staircase going up. The Extractor is in the alley below it.
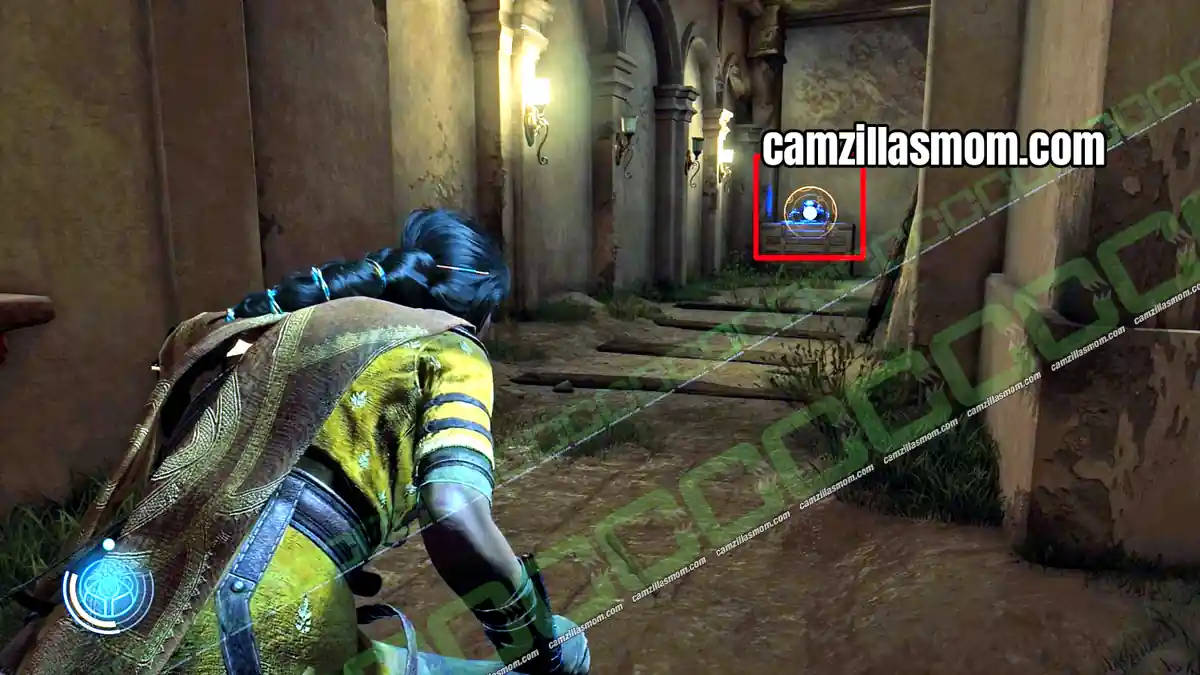
Extractor 6
6 of 55 Extractors – Chapter 2: Chamiri
In the first secured area on your way to the docks, the Extractor hangs below a balcony, just outside the area you can reach. Walk up close and destroy it.
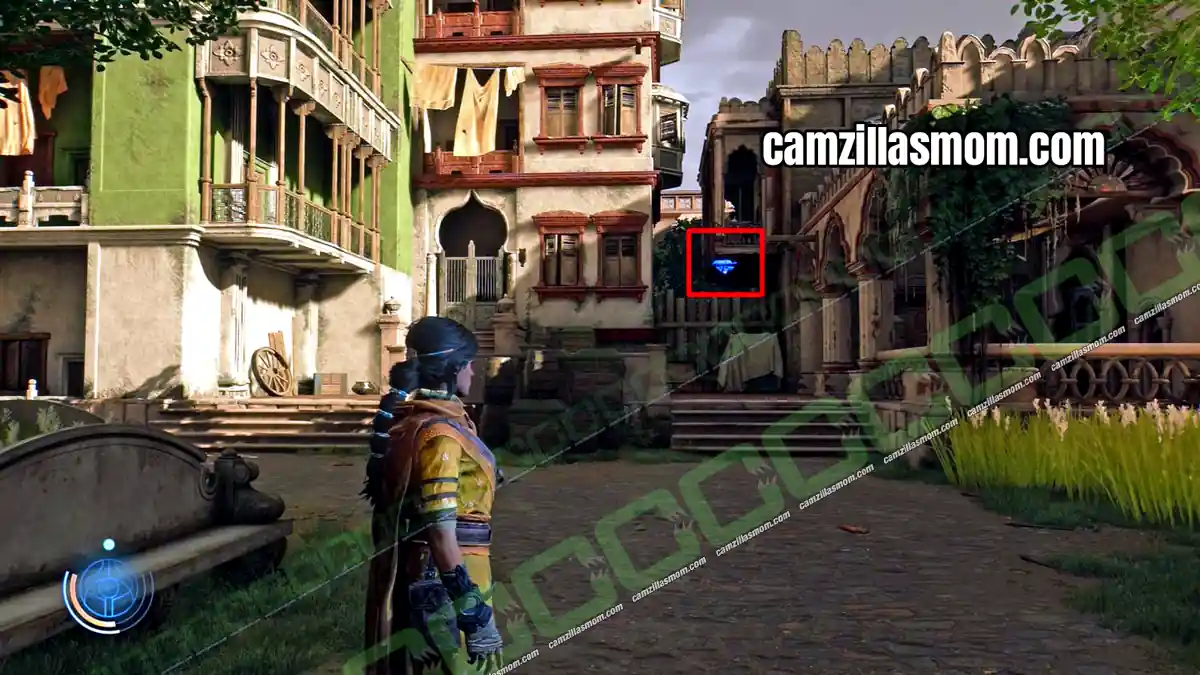
Extractor 7
7 of 55 Extractors – Chapter 2: Chamiri
After the second green gate, follow the path until you have tall grass on your right and a guarded area on your left. The Extractor is in the dead-end alley, with Anomaly 3.
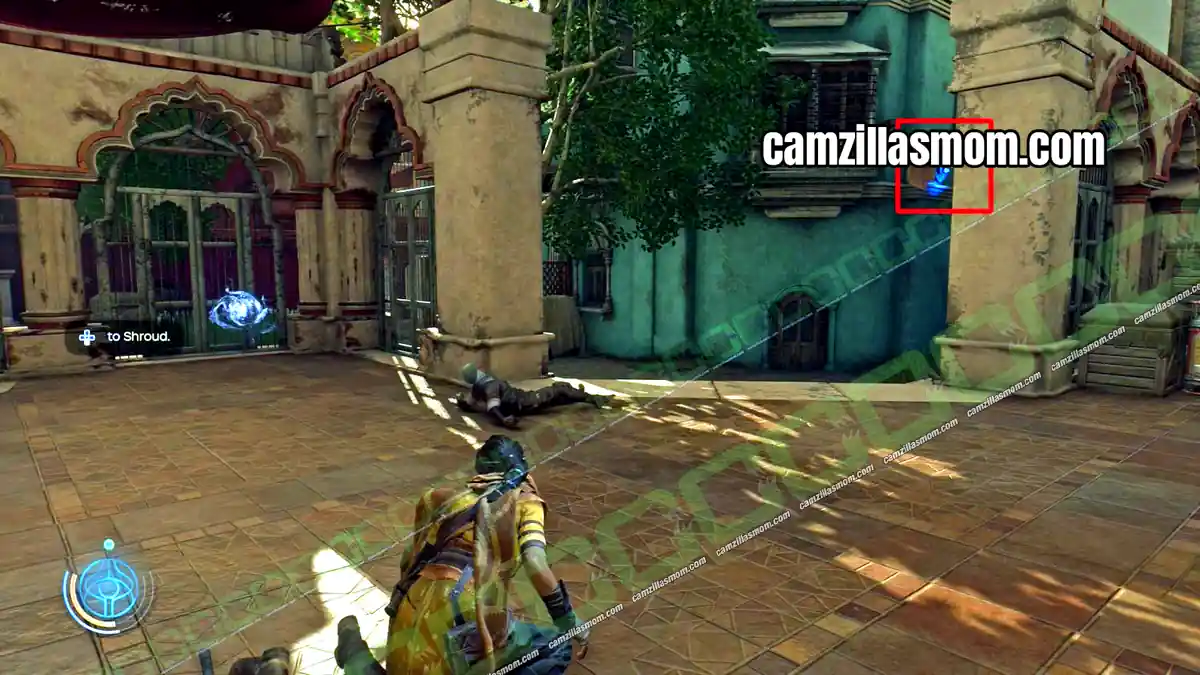
Extractor 8
8 of 55 Extractors – Chapter 2: Chamiri
Where Haroona points out the lighthouse, look over the wooden railing into the alley below. You can see Extractor 8 down there.
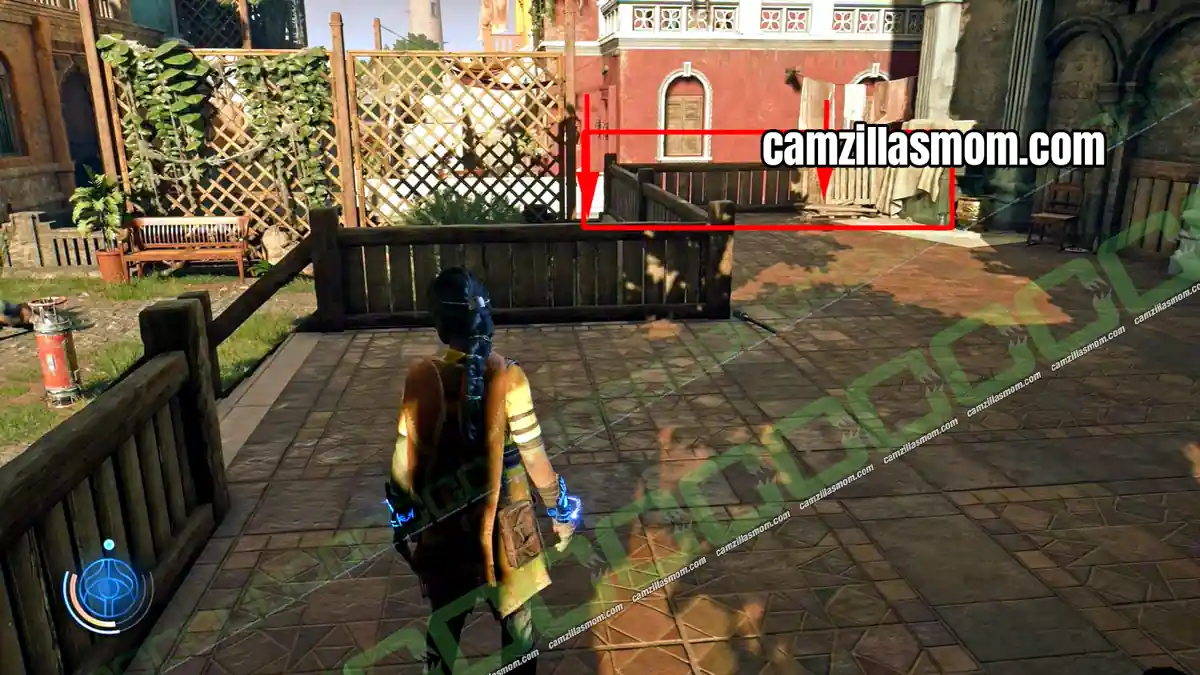
Extractor 9
9 of 55 Extractors – Chapter 2: Chamiri
Go through the fourth green gate into a storage area and cross the plank. Jump over the greenhouse. You can see the Extractor through the window. Break the wall to the right of the window to reach it.
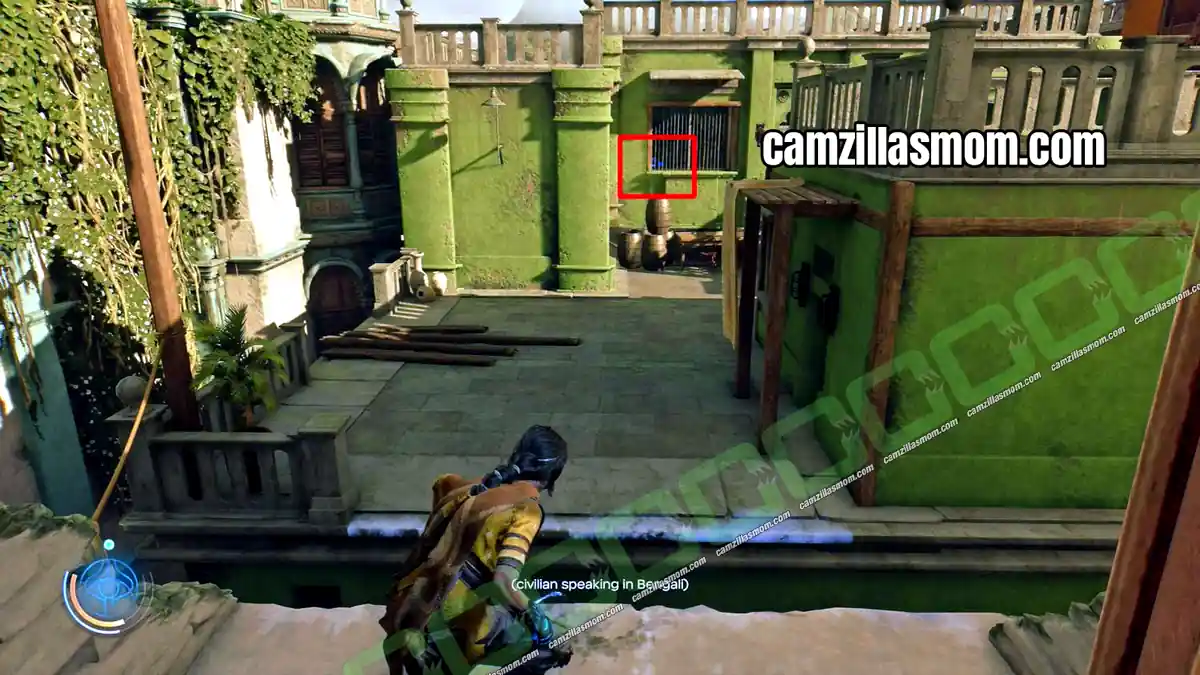
Extractor 10
10 of 55 Extractors – Chapter 2: Chamiri
From the Extractor 9 spot, jump onto the vines and climb the building on the left, then turn right.
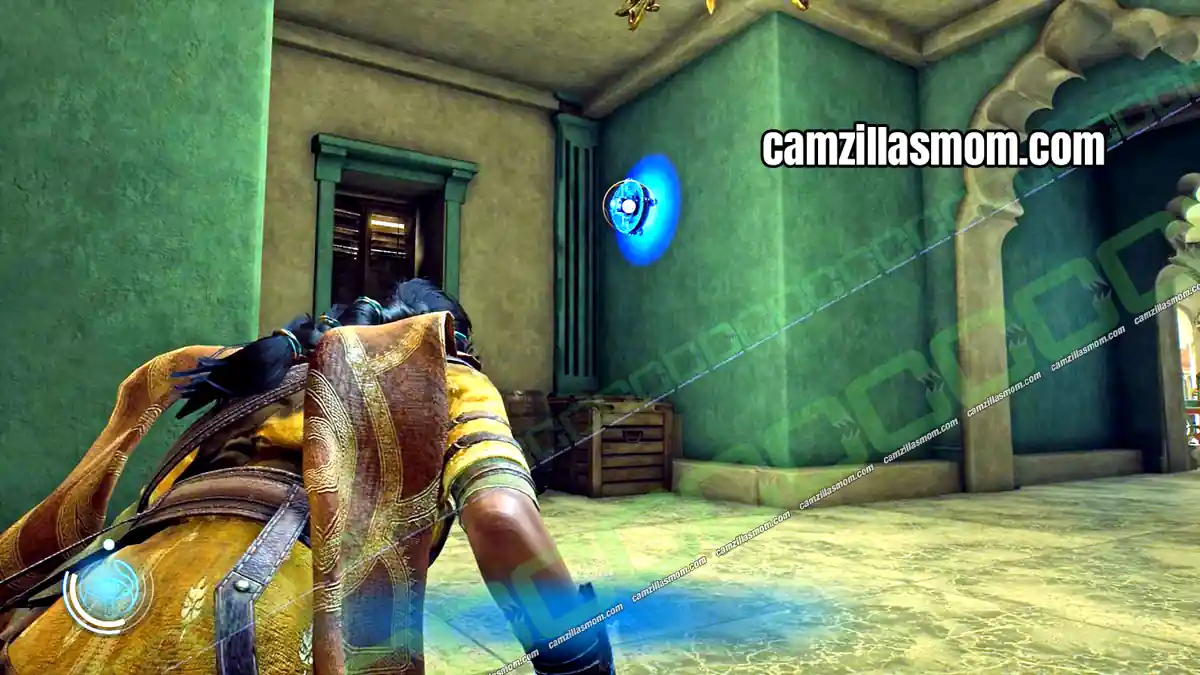
Extractor 11
11 of 55 Extractors – Chapter 2: Chamiri
Jump over to the rooftop with the hostiles and drop down to the terrace below. The Extractor is around the corner.
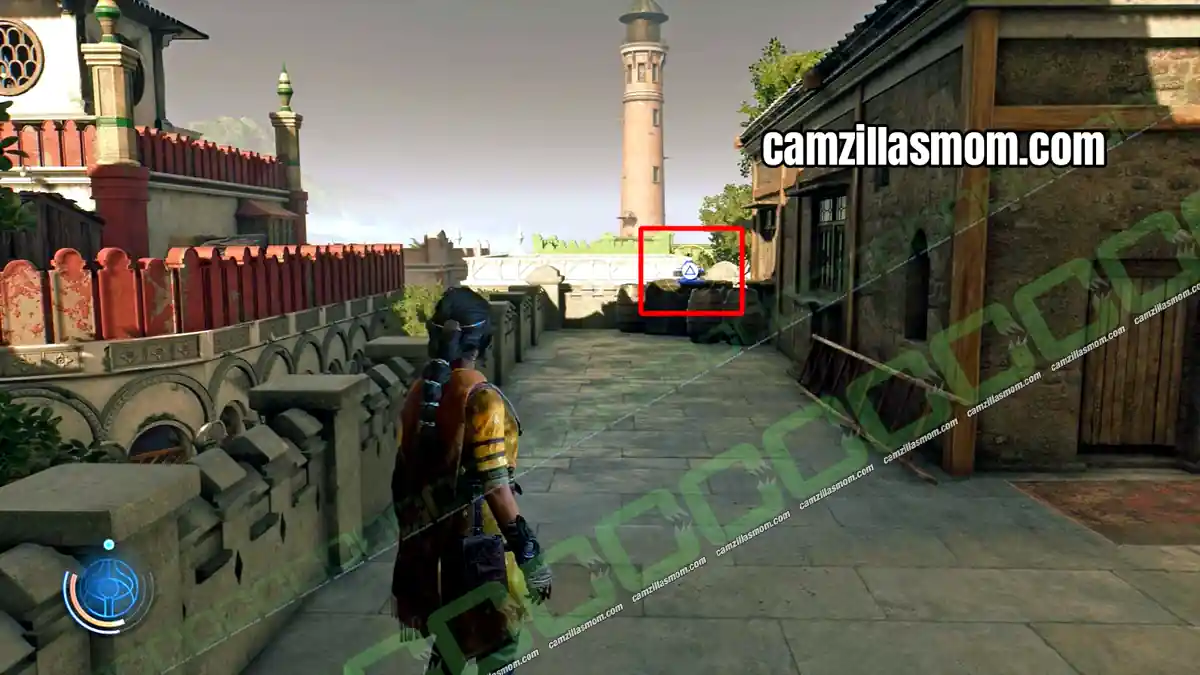
Extractor 12
12 of 55 Extractors – Chapter 2: Chamiri
Jump to the next building and climb the vines to the roof. Take the stairs down into the room with Extractor 12.
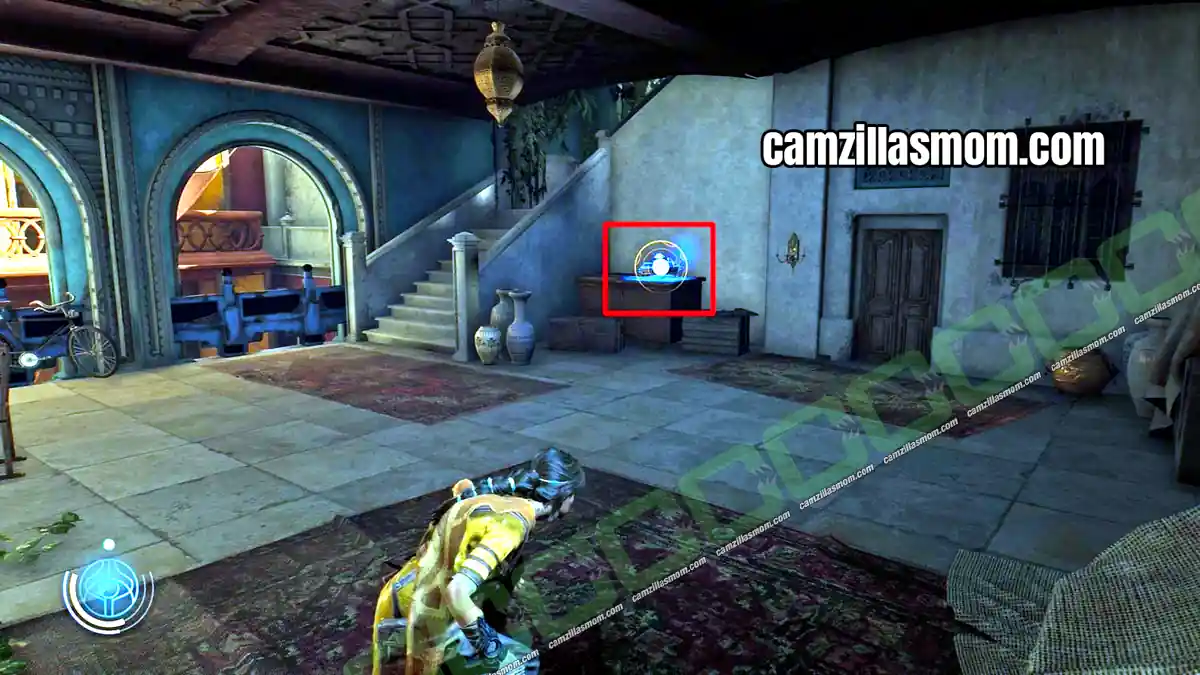
Extractor 13
13 of 55 Extractors – Chapter 2: Chamiri
Go back up and cross the wooden plank to the next building. Climb up and break the boxes on the balcony of the wine-red building. Go around to the other side and drop down to Extractor 13.
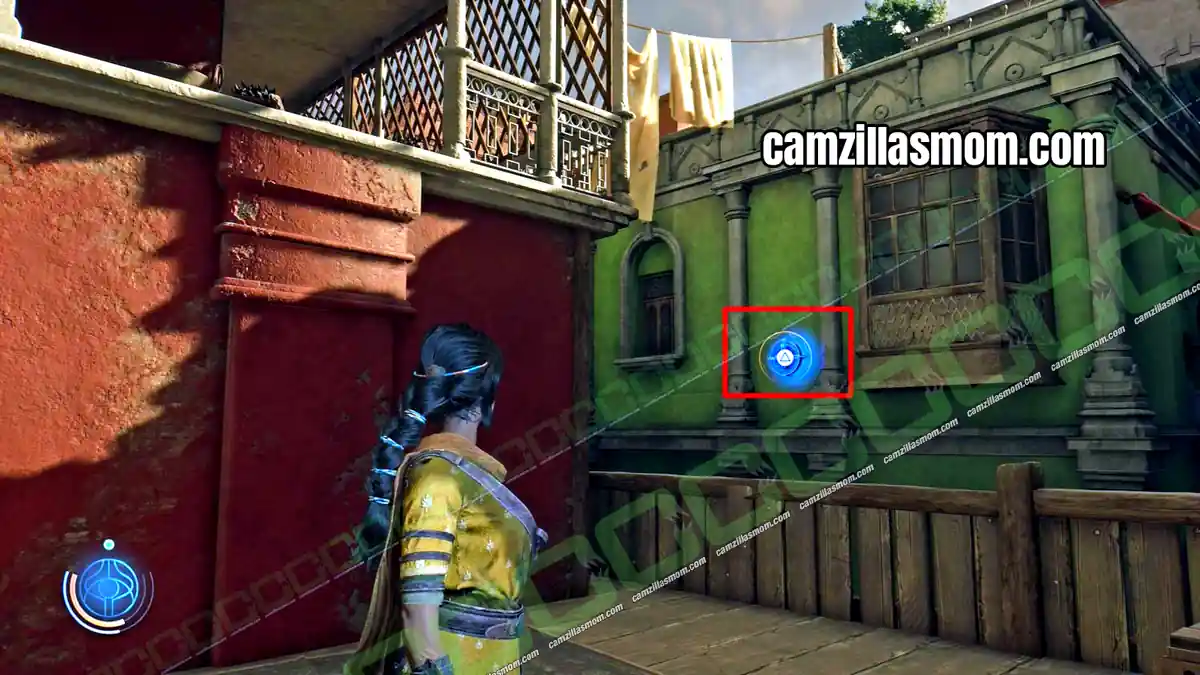
Extractor 14
14 of 55 Extractors – Chapter 2: Chamiri
After the cutscene where Haroona breaks through the floor, go through the green gate. Turn left at once and smash the barrels, then crouch through the gap to the Extractor.
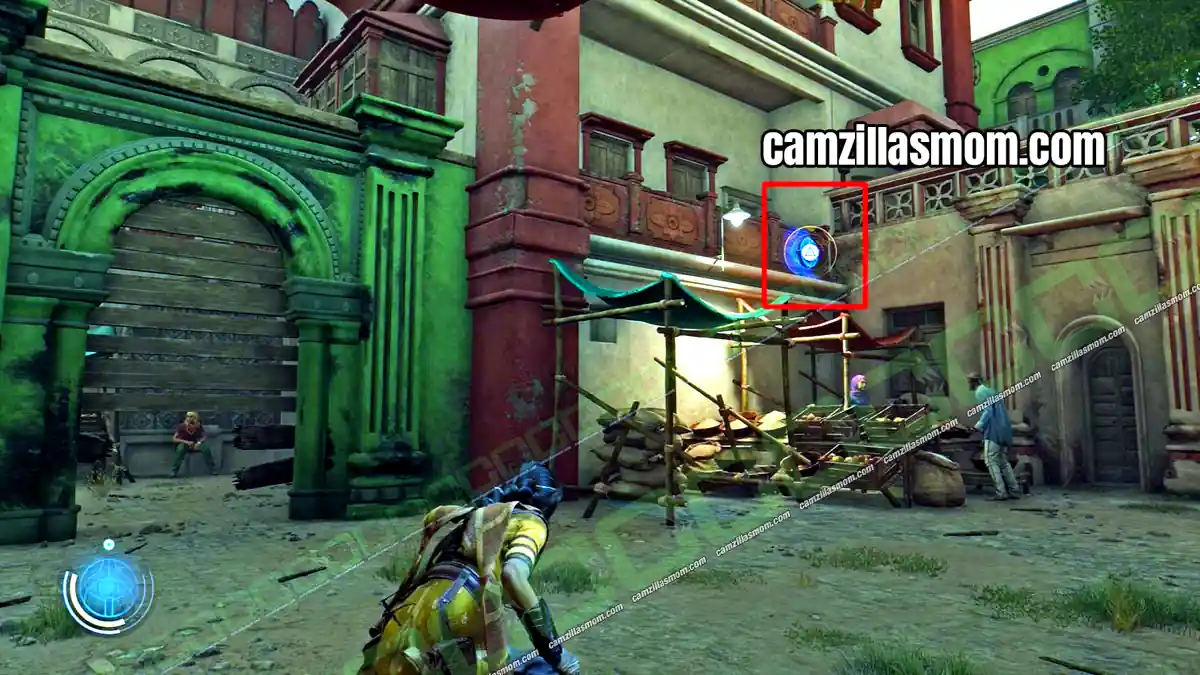
Extractor 15
15 of 55 Extractors – Chapter 2: Chamiri
Go back to the green door and climb the vines up to the market. From there you can see the sixth green gate and the Extractor next to it.
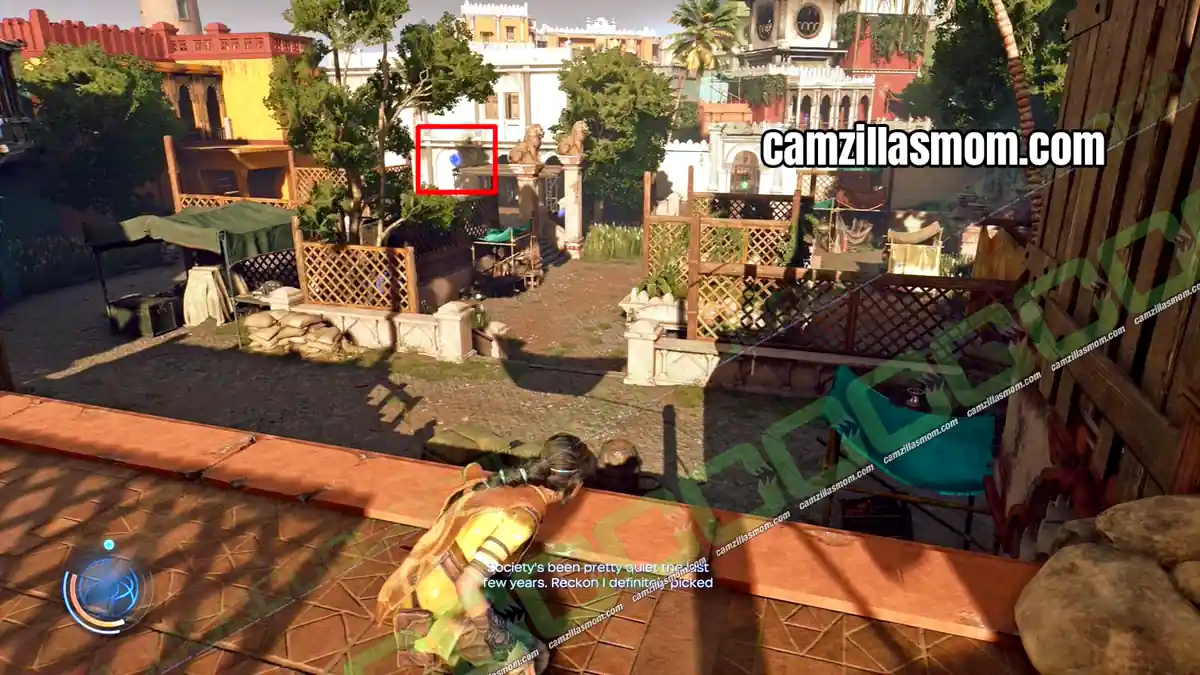
Extractor 16
16 of 55 Extractors – Chapter 2: Chamiri
At the docks, walk through the busy market to the iron gates at the far end and look back. The Extractor is there.
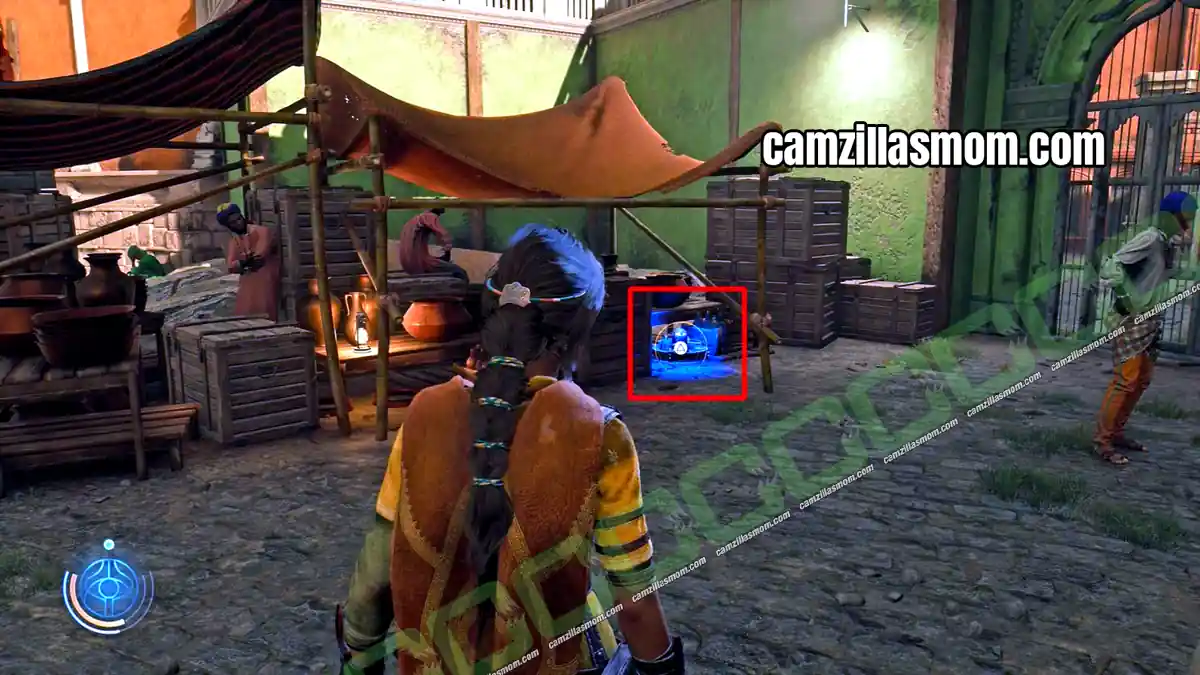
Extractor 17
17 of 55 Extractors – Chapter 2: Chamiri
In the hostile area at the docks, drop into the tall grass and look back where you came from. The Extractor hangs above the water.
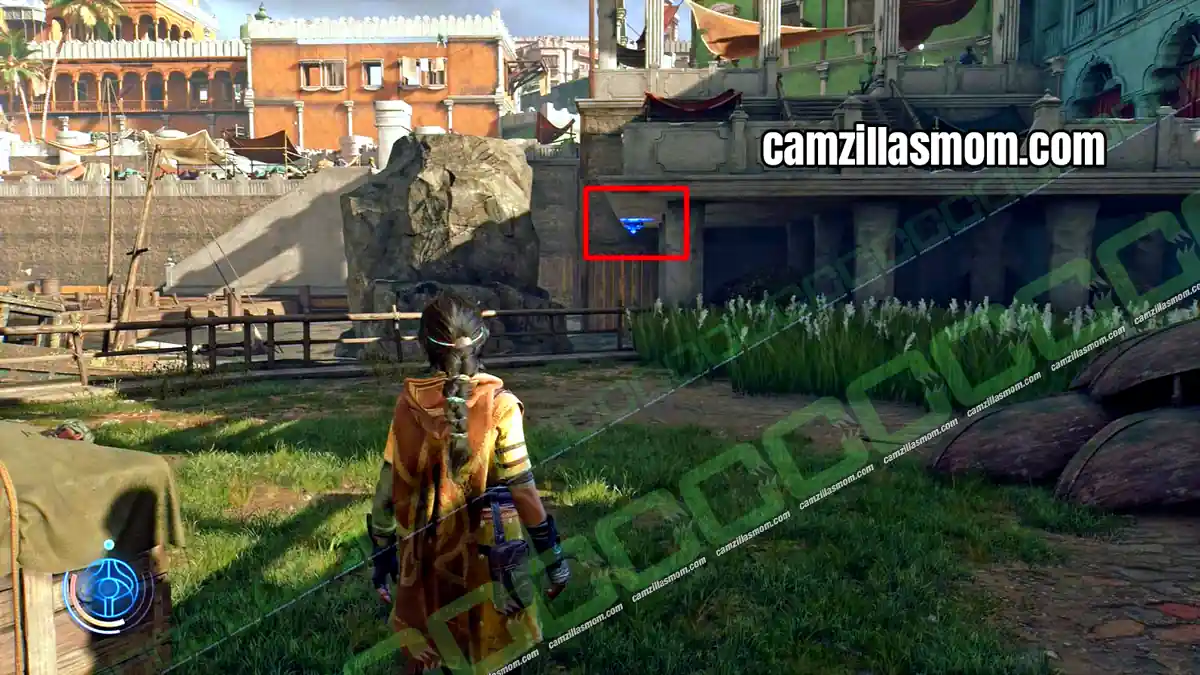
Extractor 18
18 of 55 Extractors – Chapter 2: Chamiri
In the same area, go to the upper floor. The Extractor is at the end of the corridor.
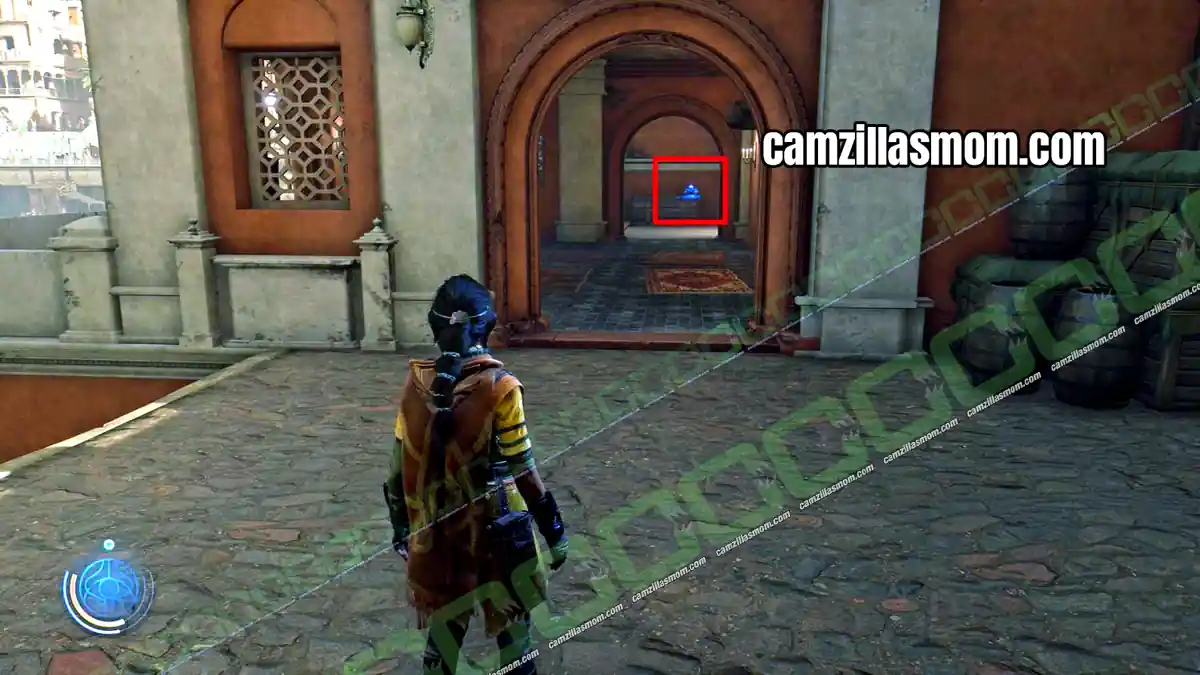
Extractor 19
19 of 55 Extractors – Chapter 2: Chamiri
In the last area at the docks, before Haroona leaves Chamiri, break the barrels at the back. The Extractor is on one of the boats.
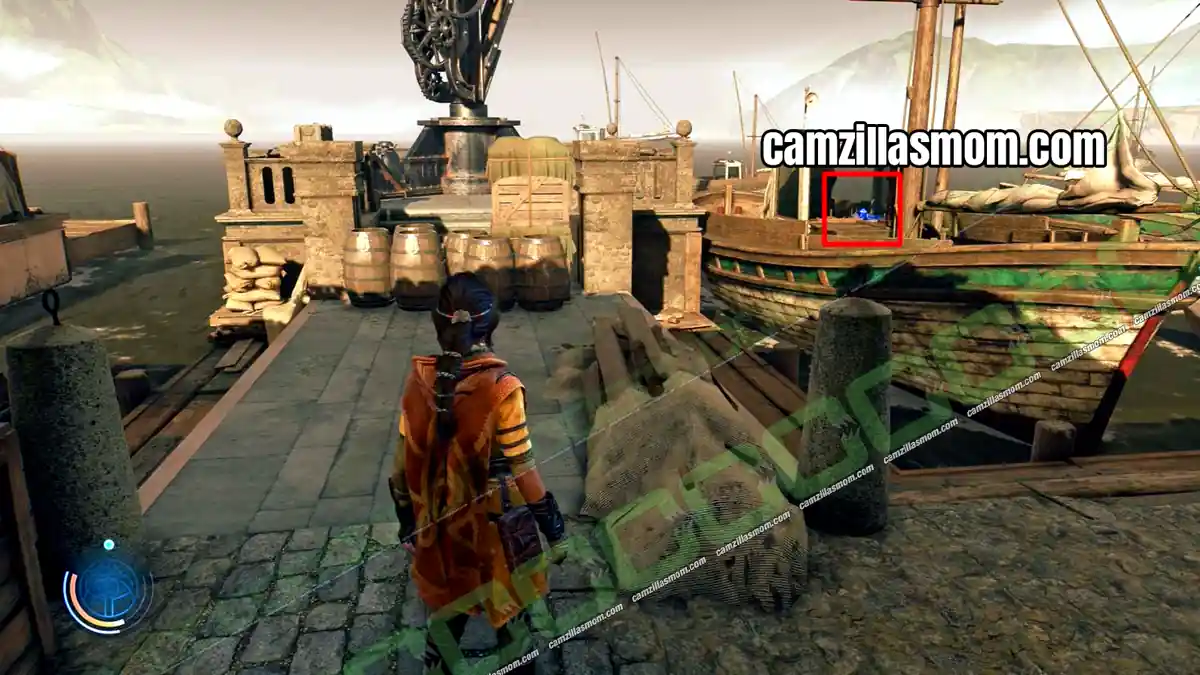
Extractor 20
20 of 55 Extractors – Chapter 3: Suknasari Forest
At the first hostile area, disable the alarm and go uphill to the area with several huts. The Extractor is on one of the houses.
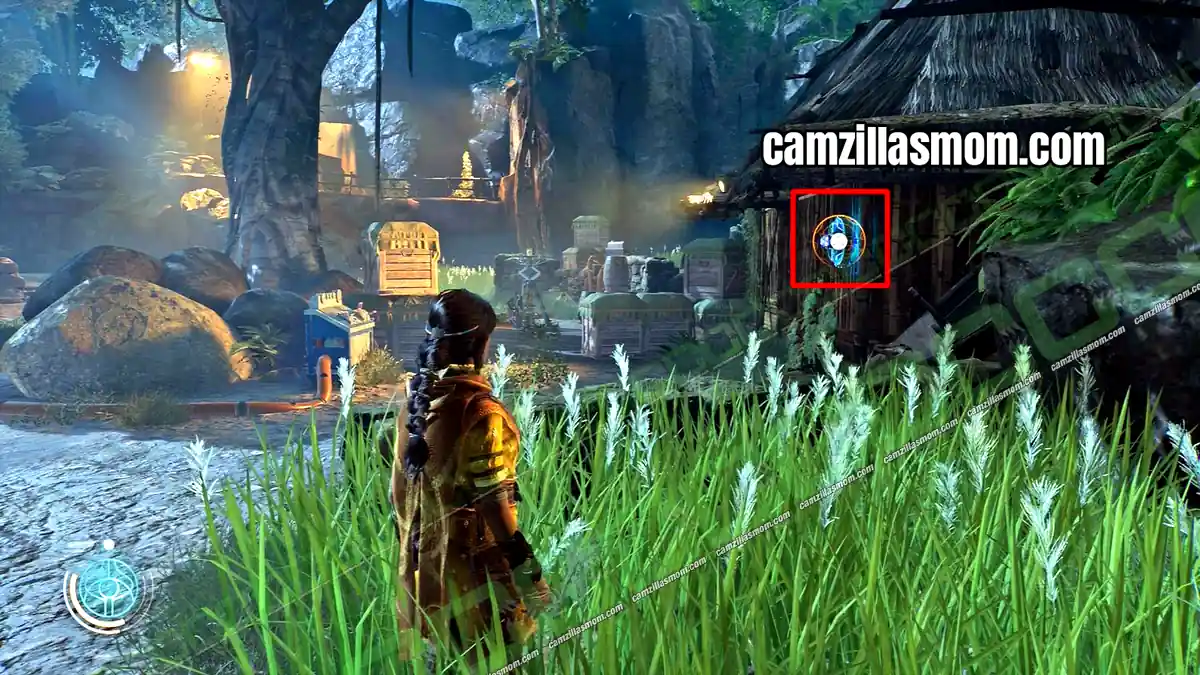
Extractor 21
21 of 55 Extractors – Chapter 3: Suknasari Forest
Inside the house where you meet Luther.
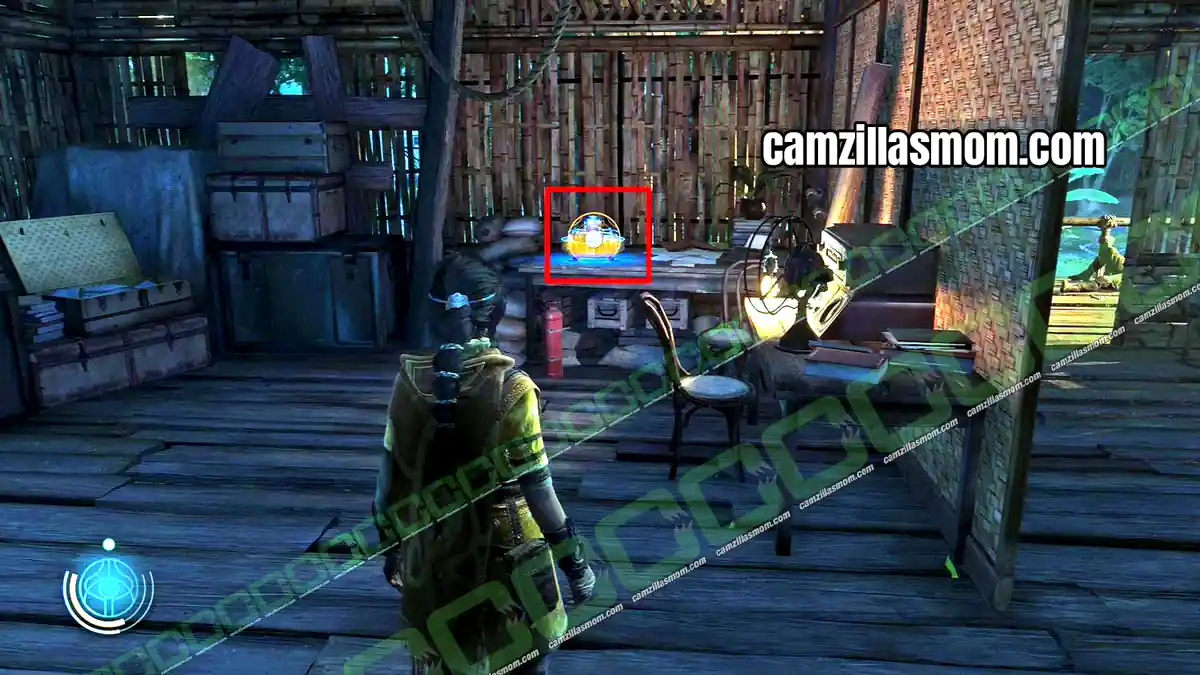
Extractor 22
22 of 55 Extractors – Chapter 3: Suknasari Forest
In the hostile camp, before you enter the cave with Luther, climb the wall to the right of the house with The Three Bodies 2. Keep climbing the vines to the very top. The Extractor is in the cave up there.
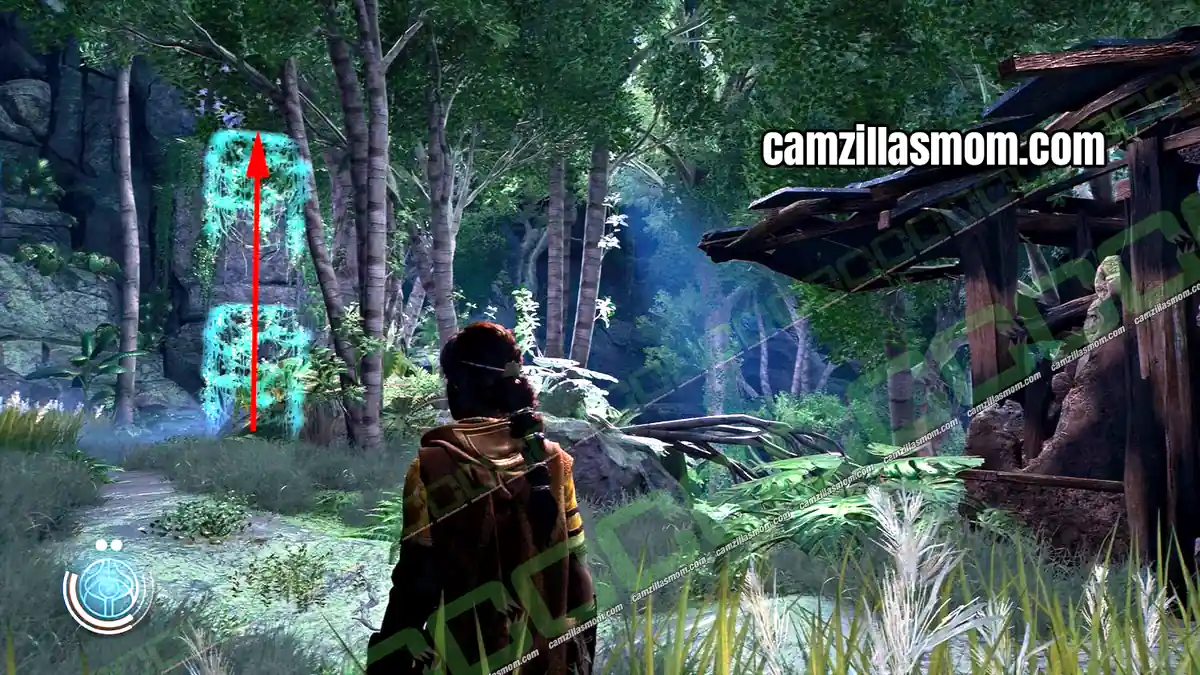
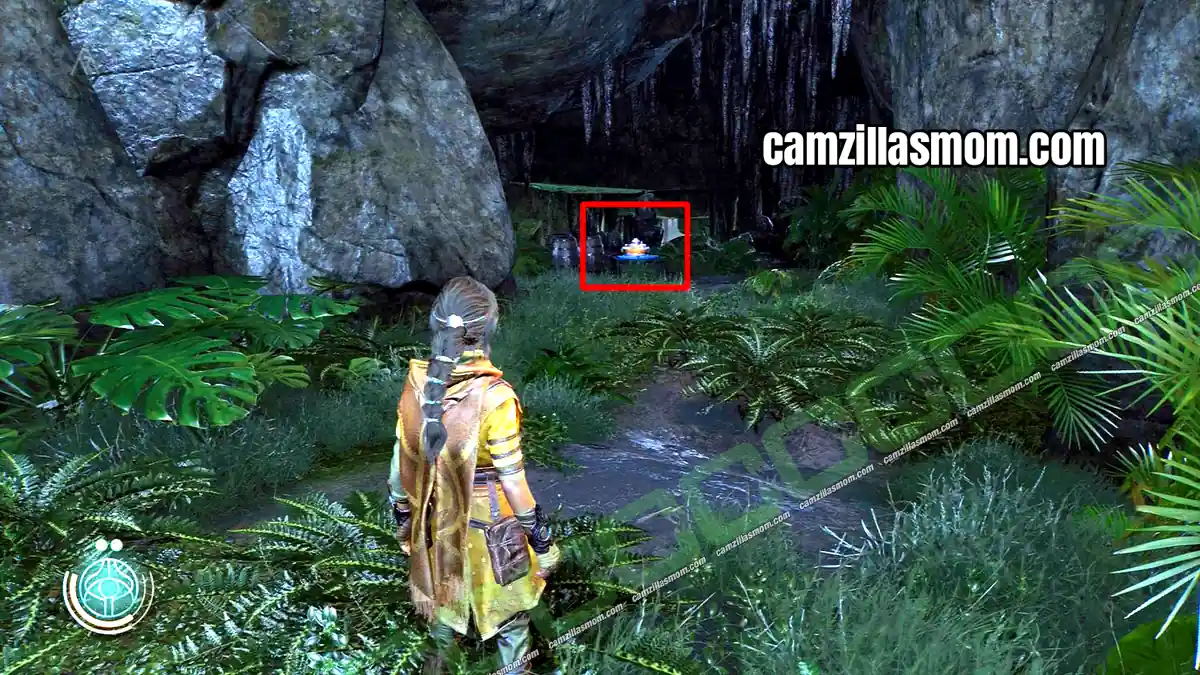
Extractor 23
23 of 55 Extractors – Chapter 3: Suknasari Forest
Just before the Morning Star, you reach a camp with a single tent. Break the barricade to the left of the tent to find the Extractor behind it.
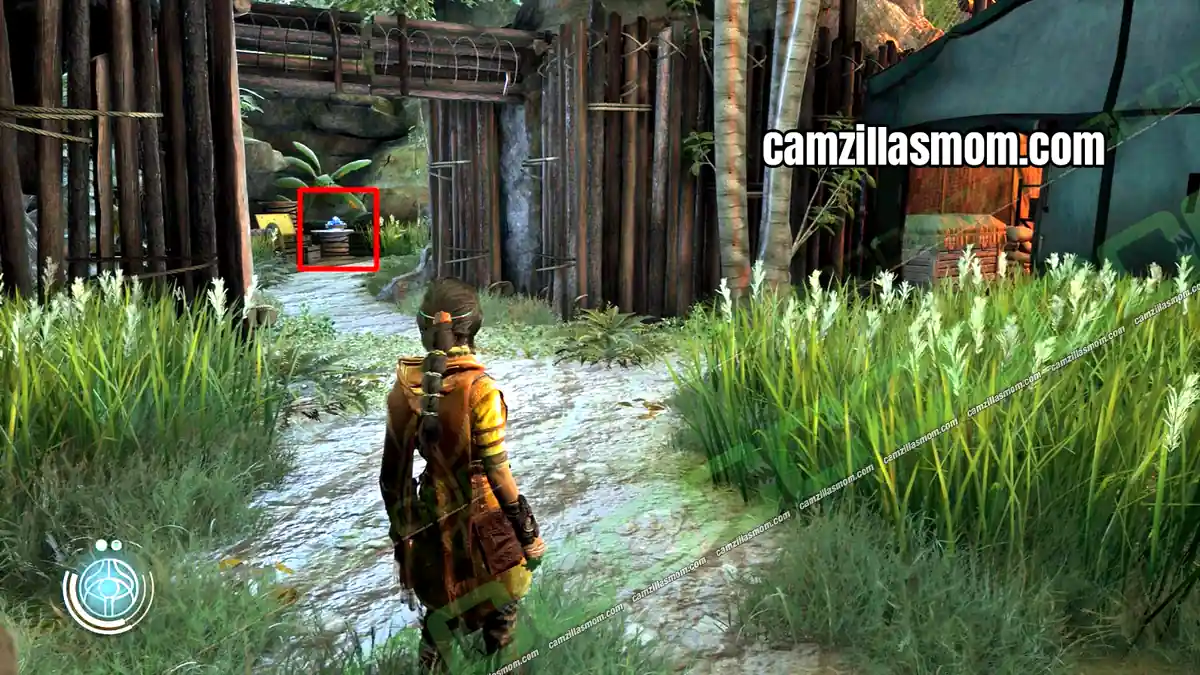
Extractor 24
24 of 55 Extractors – Chapter 3: Suknasari Forest
At the Morning Star, the Extractor is on the side of a house.
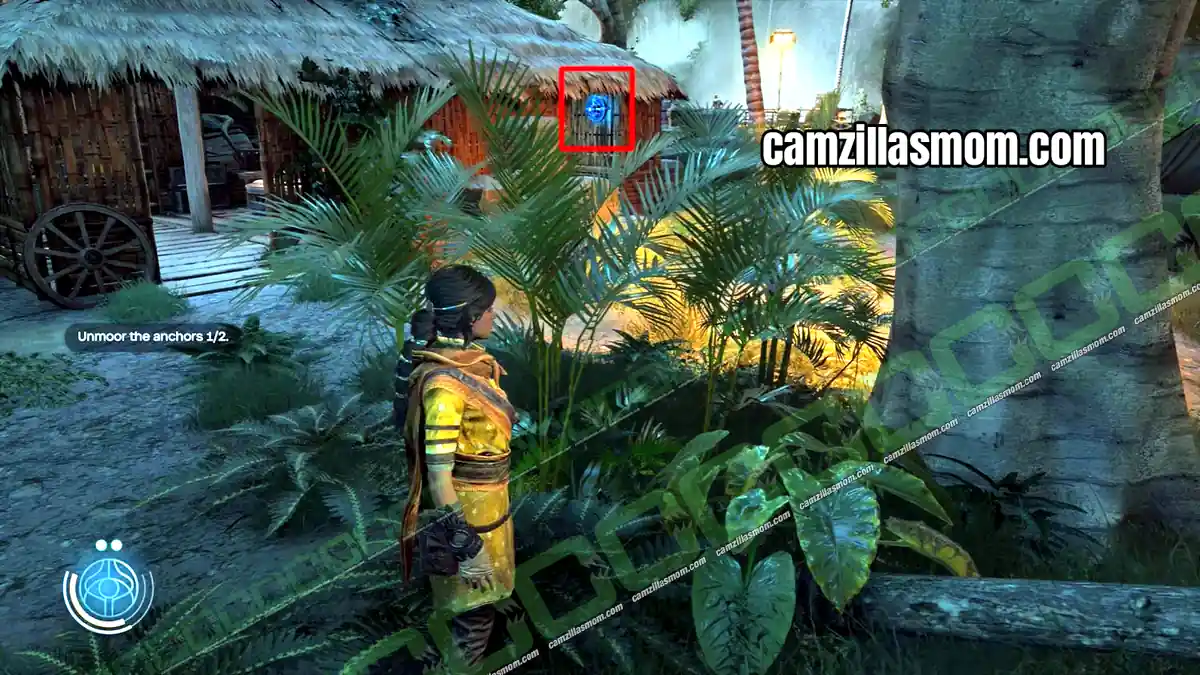
Extractor 25
25 of 55 Extractors – Chapter 4: The Morning Star I
On the outside wall of the Morning Star bar.
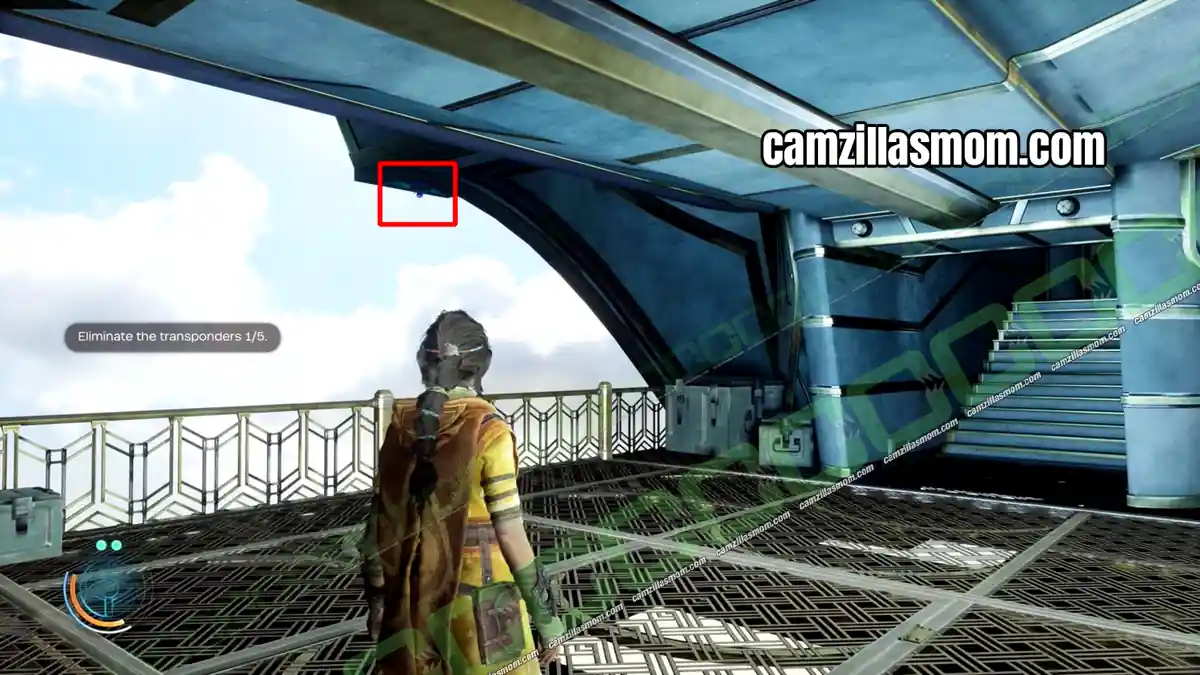
Extractor 26
26 of 55 Extractors – Chapter 5: Chamatkari Mandir
Before you cross the rope bridge into the village, check the hut at the top of the hill on your right.
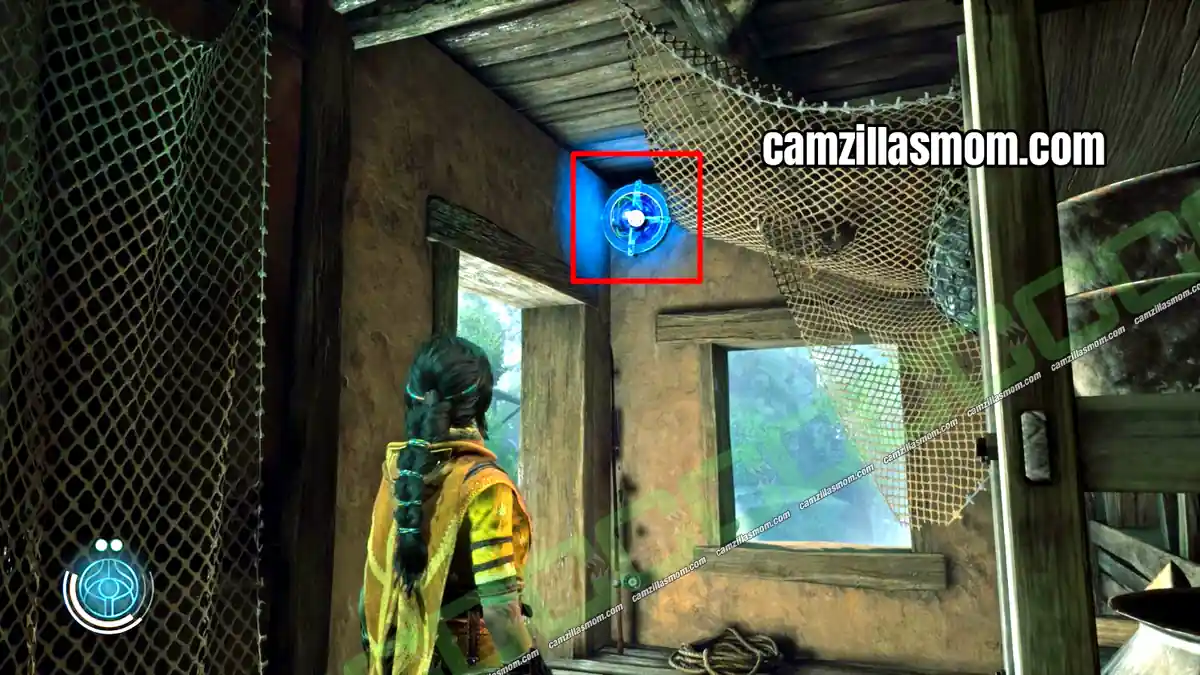
Extractor 27
27 of 55 Extractors – Chapter 5: Chamatkari Mandir
On a balcony at the highest point of the village.
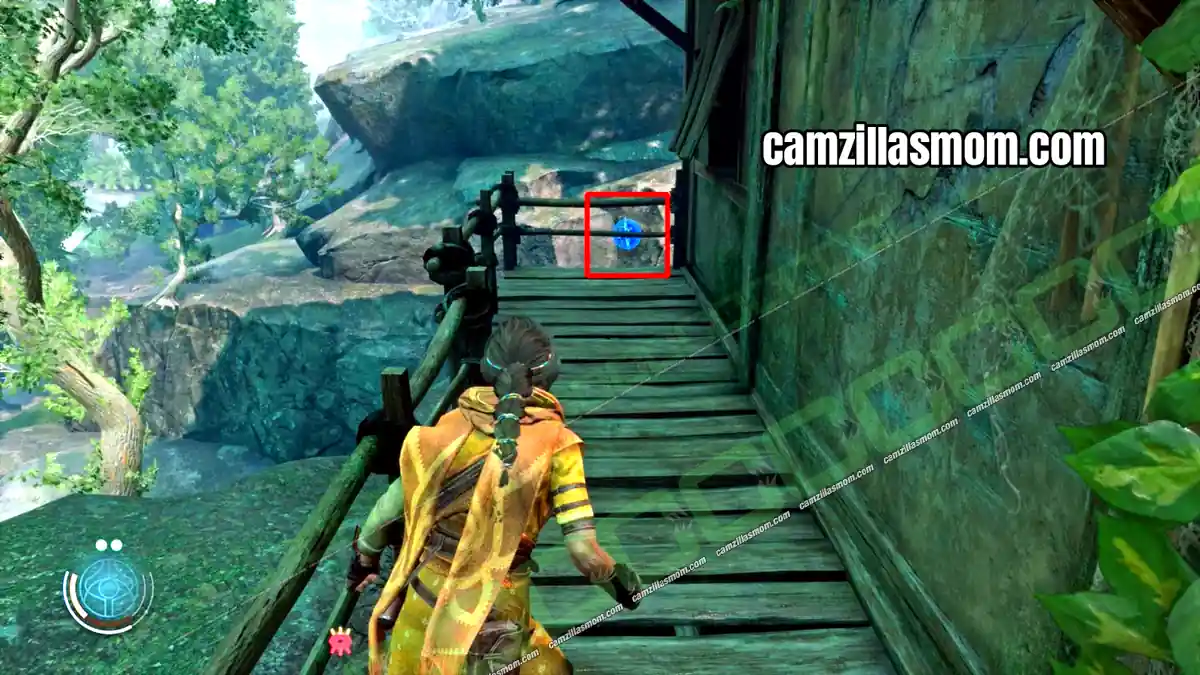
Extractor 28
28 of 55 Extractors – Chapter 5: Chamatkari Mandir
Leave the village with Haroona’s friend. After Haroona gets the amulet and her new Umbric ability, the Extractor is on the outside of the next house.
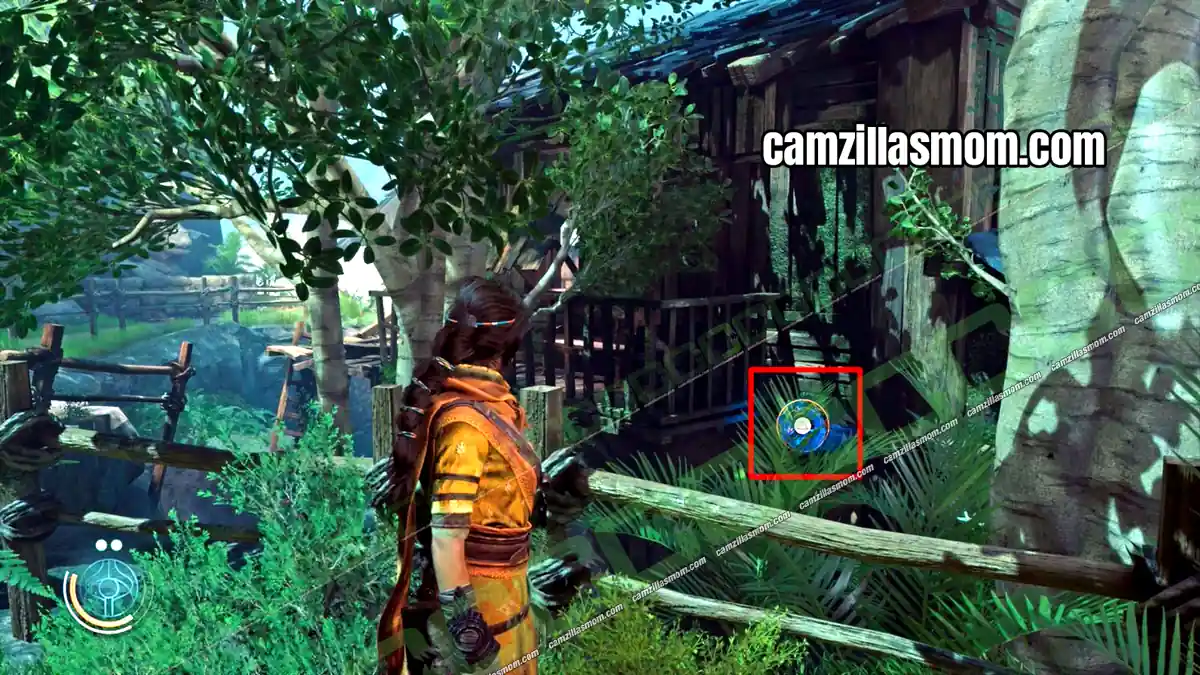
Extractor 29
29 of 55 Extractors – Chapter 5: Chamatkari Mandir
Defeat the next hostiles with your new ability and go through the red door. Climb onto the balcony of the house on your left. The Extractor is on the roof of the house next to it.
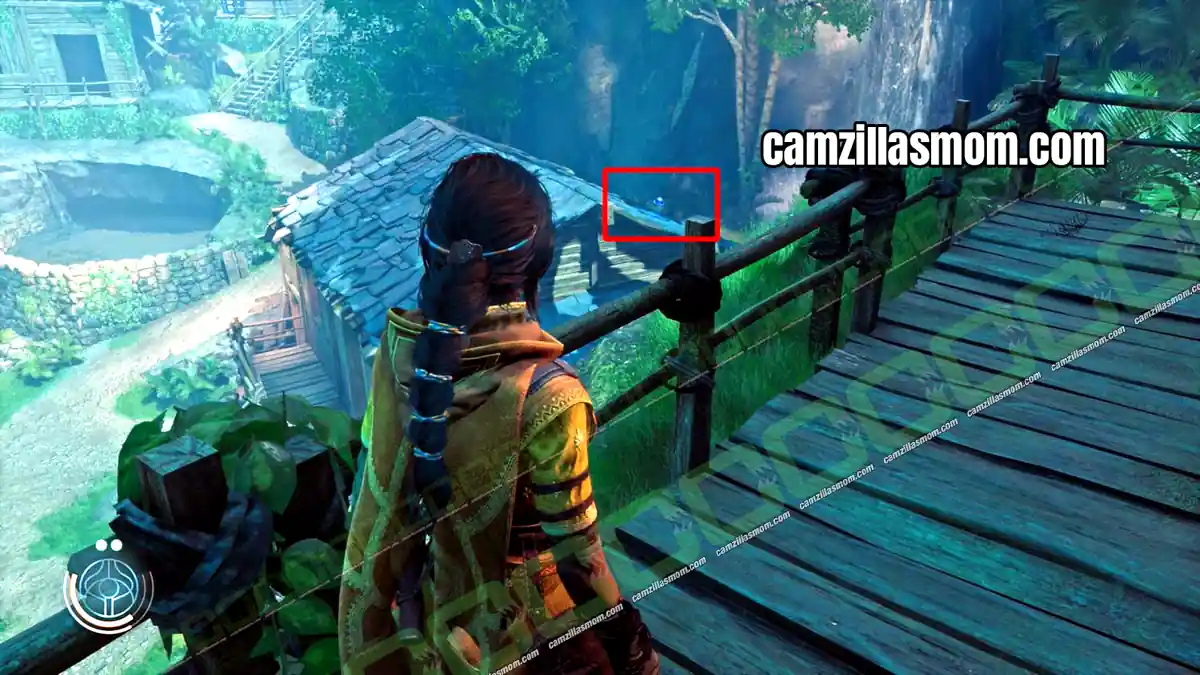
Extractor 30
30 of 55 Extractors – Chapter 5: Chamatkari Mandir
Leave the burning village through the red door and look left right away. The Extractor is on the mountainside. You can destroy it from below.
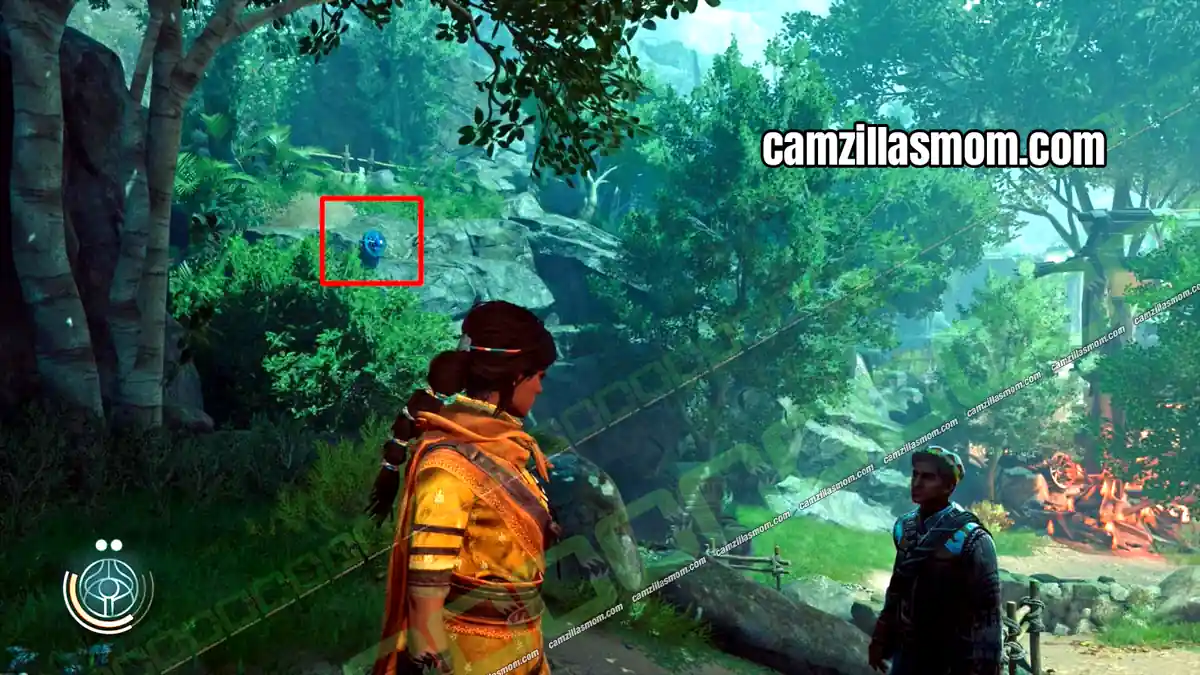
Extractor 31
31 of 55 Extractors – Chapter 5: Chamatkari Mandir
At the bottom of the hill stands a half-destroyed building you climb to reach the hostiles. At the top, walk around the building on the balcony to the Extractor.
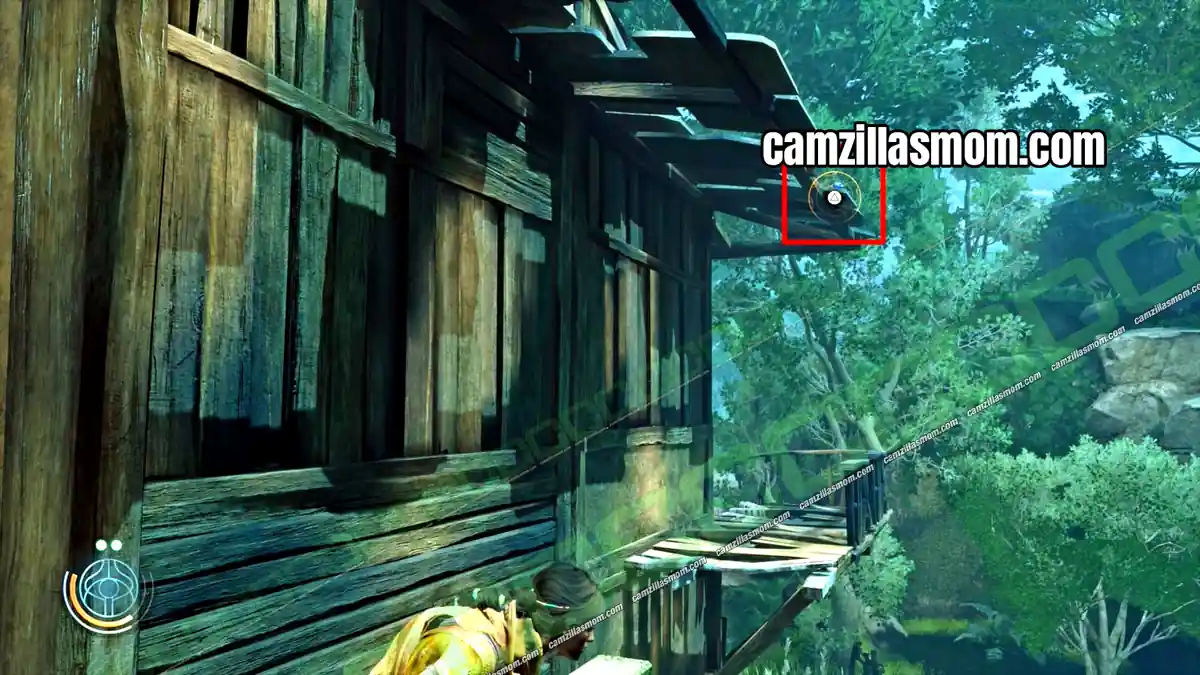
Extractor 32
32 of 55 Extractors – Chapter 5: Chamatkari Mandir
Climb the wall out of this hostile area. You can see Vincent further up the hill. Climb down the vines to the river, walk under the bridge and look up. The Extractor is on the bridge.
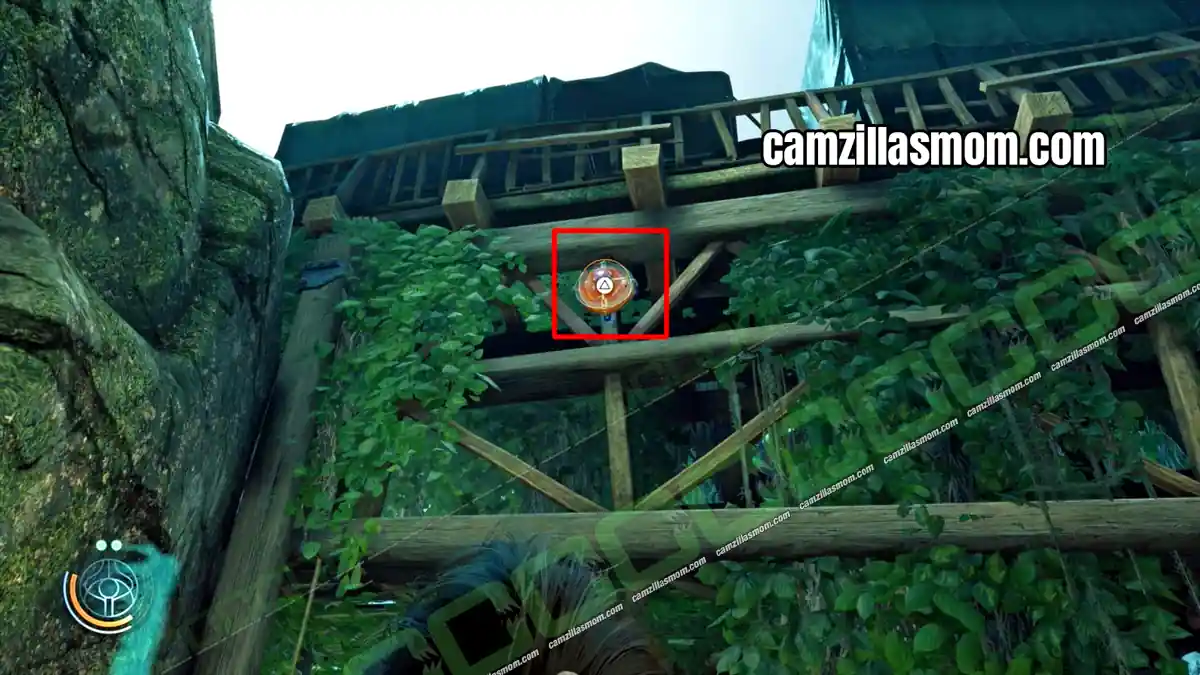
Extractor 33
33 of 55 Extractors – Chapter 5: Chamatkari Mandir
Climb the vines up to the camp with the forcefield and clear it. Climb the next vines and look over the stone railing to spot the Extractor.
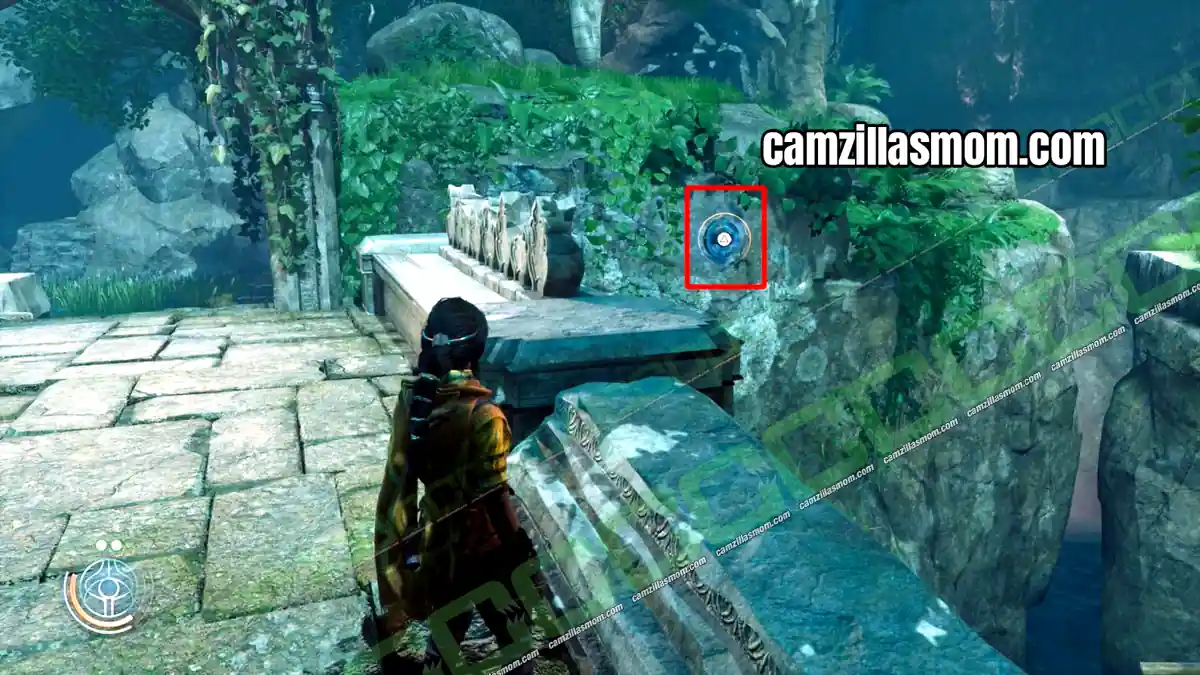
Extractor 34
34 of 55 Extractors – Chapter 5: Chamatkari Mandir
After Haroona gets her Journal back, climb the wall and the vines up to the ruins. Break the wall and climb the next vines. Look out of the window at the top. The Extractor is on the other side, and you can destroy it from the ledge nearby.
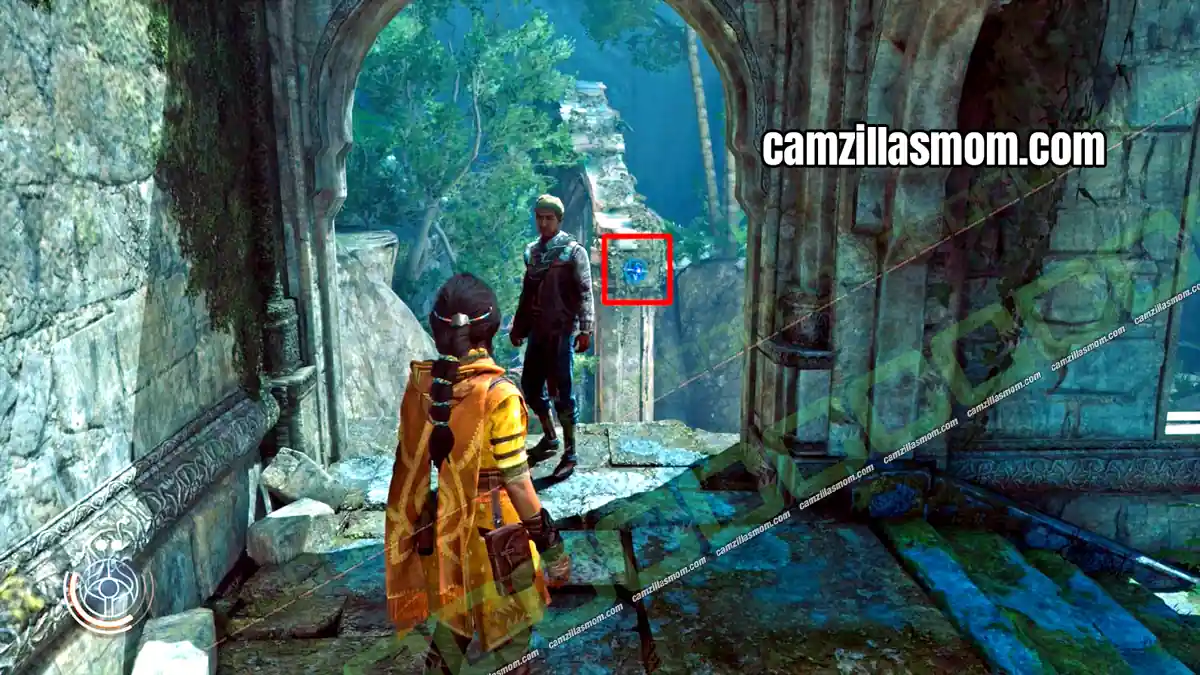
Extractor 35
35 of 55 Extractors – Chapter 5: Chamatkari Mandir
The last Chamatkari Mandir Extractor is at the foot of one of the elephant statues in the large hostile area near the end.
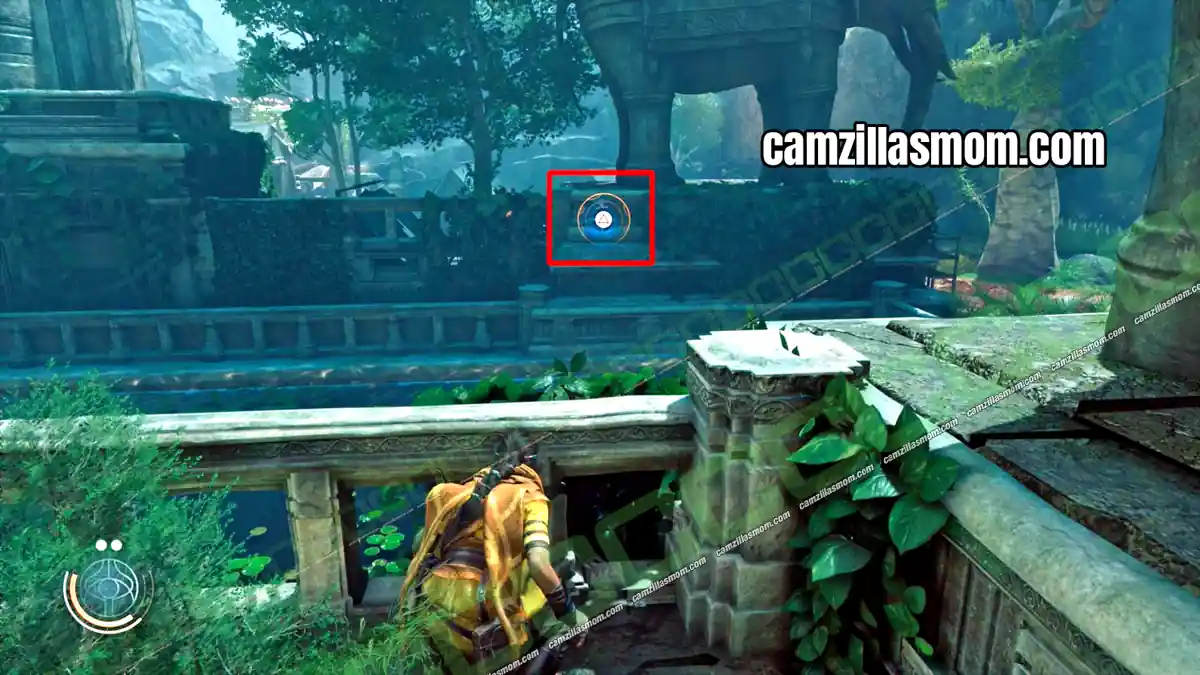
Extractor 36
36 of 55 Extractors – Chapter 6: The Morning Star II
Buchra opens the office behind the bar. The Extractor is inside, above the office door.
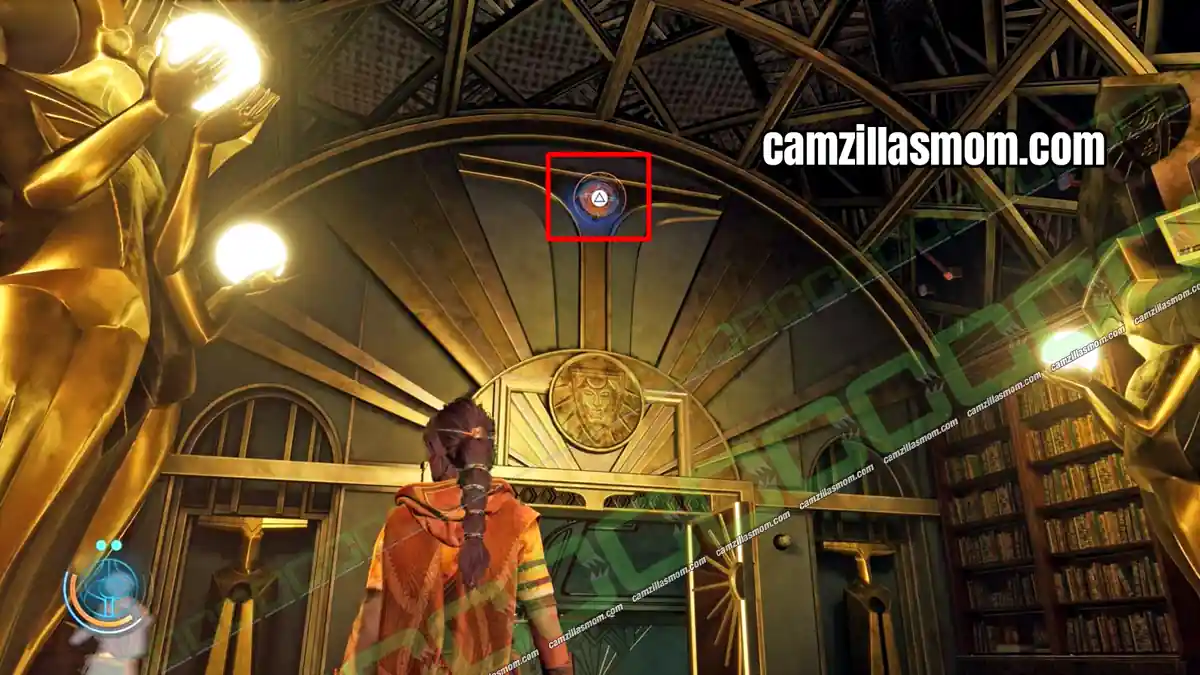
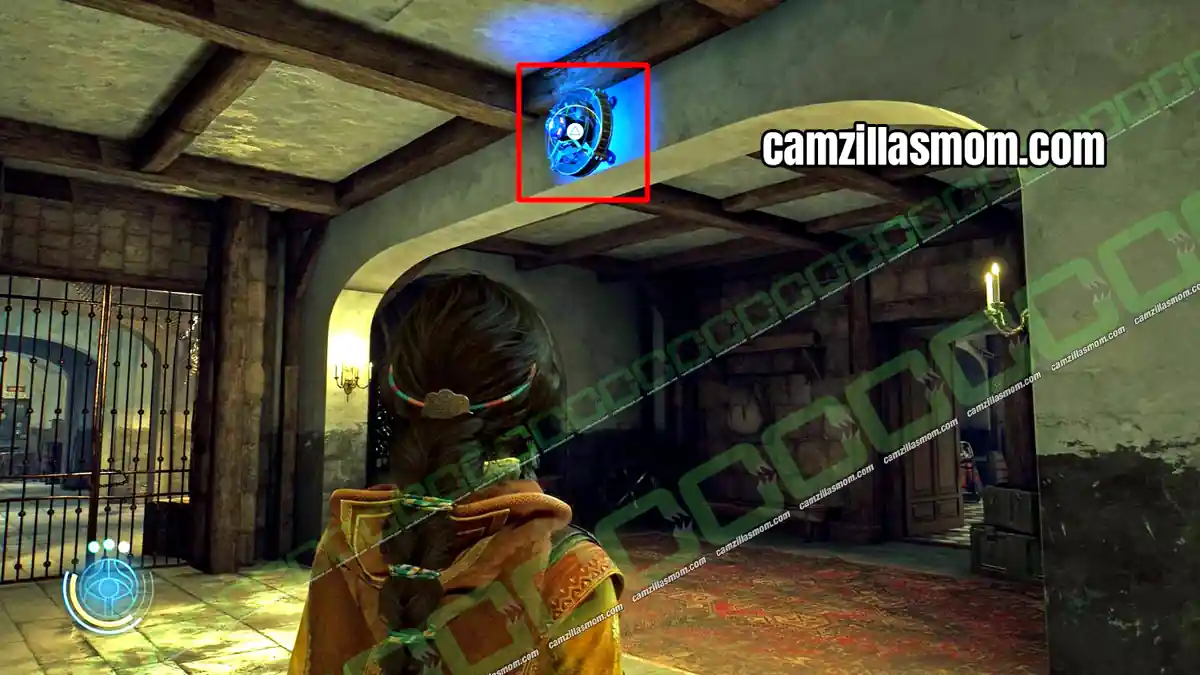
Extractor 37
37 of 55 Extractors – Chapter 7: Quinta Matos
In the basement kitchen, check the back first for an Anomaly. On your way back, the Extractor hangs in the corridor.
Extractor 38
38 of 55 Extractors – Chapter 7: Quinta Matos
On the ground floor of the mansion, in the room with the fireplace, the pool table and the green couch.
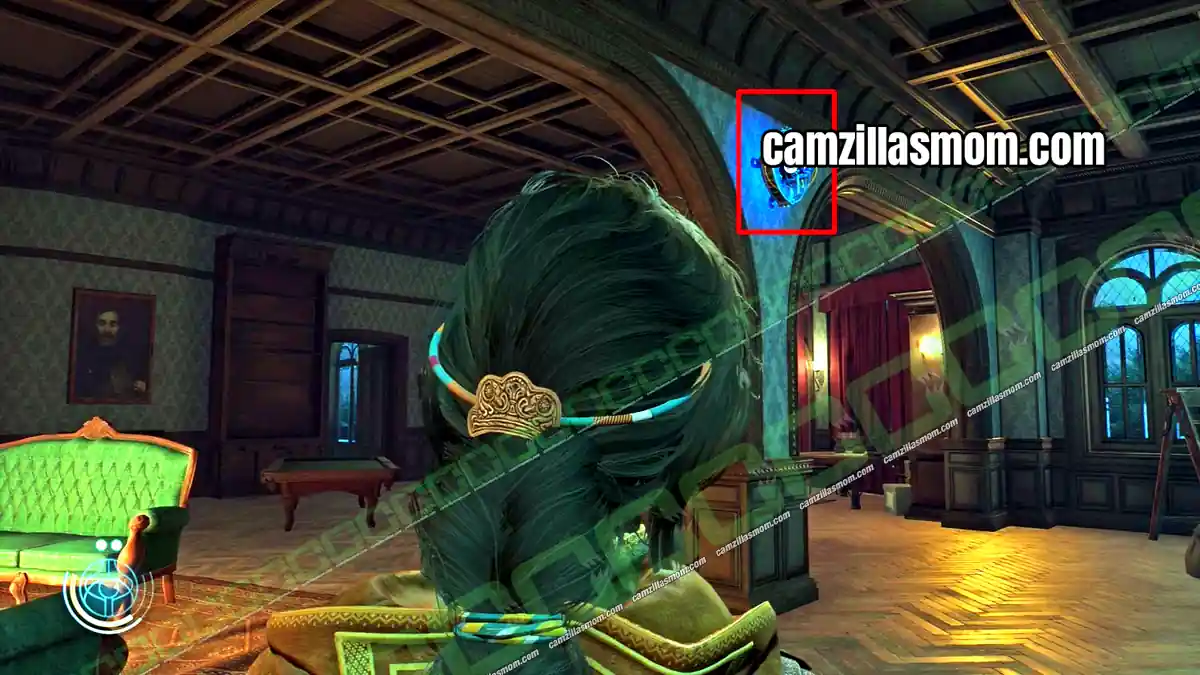
Extractor 39
39 of 55 Extractors – Chapter 7: Quinta Matos
Leave the greenhouse through the red door. You can see a house across the water on your right. Follow Luther to the underpass, then climb the vines on the right up to the house. The Extractor is on the outside wall.
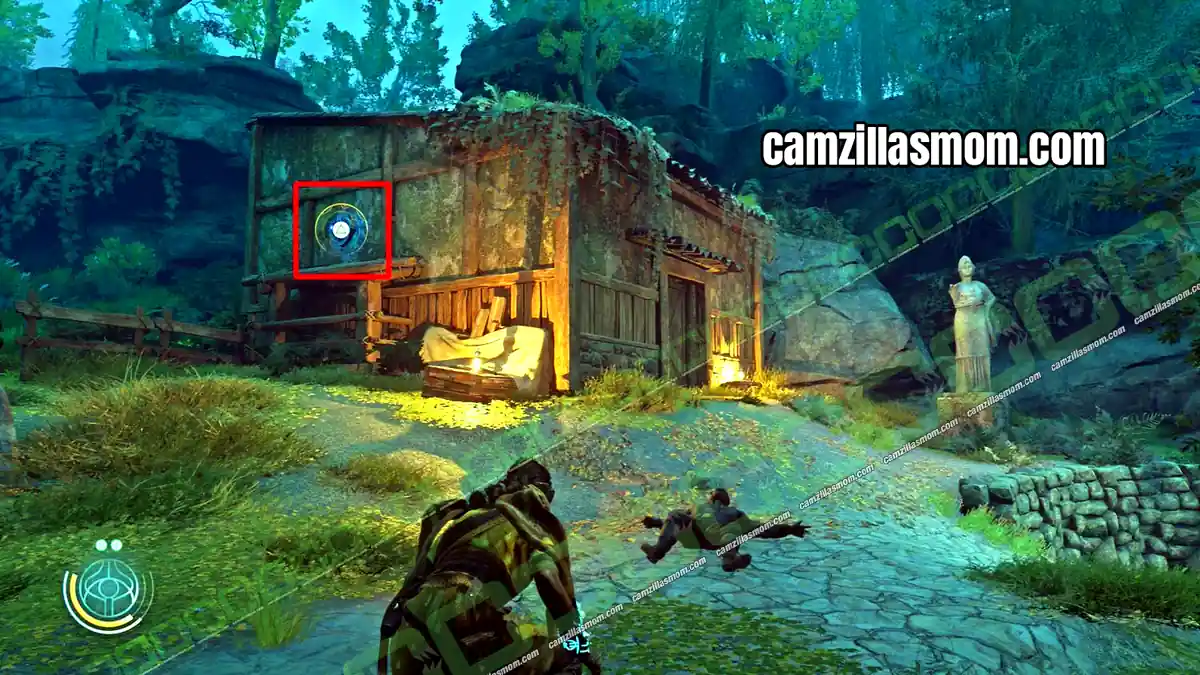
Extractor 40
40 of 55 Extractors – Chapter 7: Quinta Matos
The last Quinta Matos Extractor is in the large hostile camp in the catacombs and caves below the bridge.
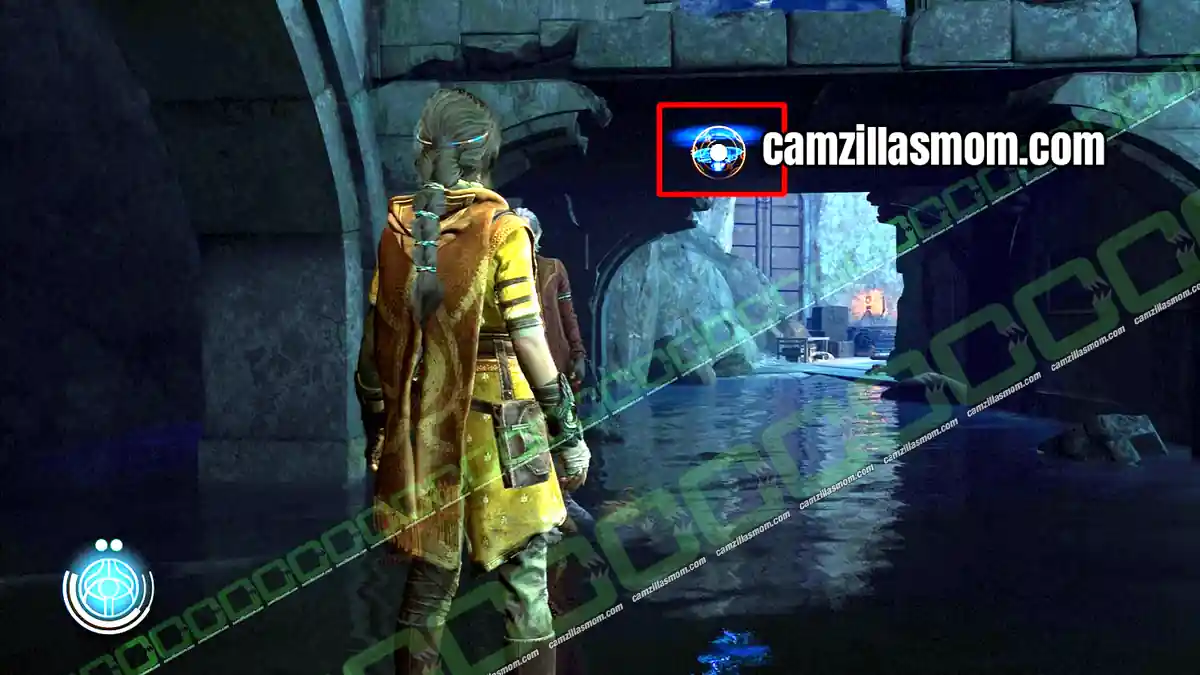
Extractor 41
41 of 55 Extractors – Chapter 8: The Morning Star III
After you rewire the antennas outside, go back in. The Extractor is right above you.
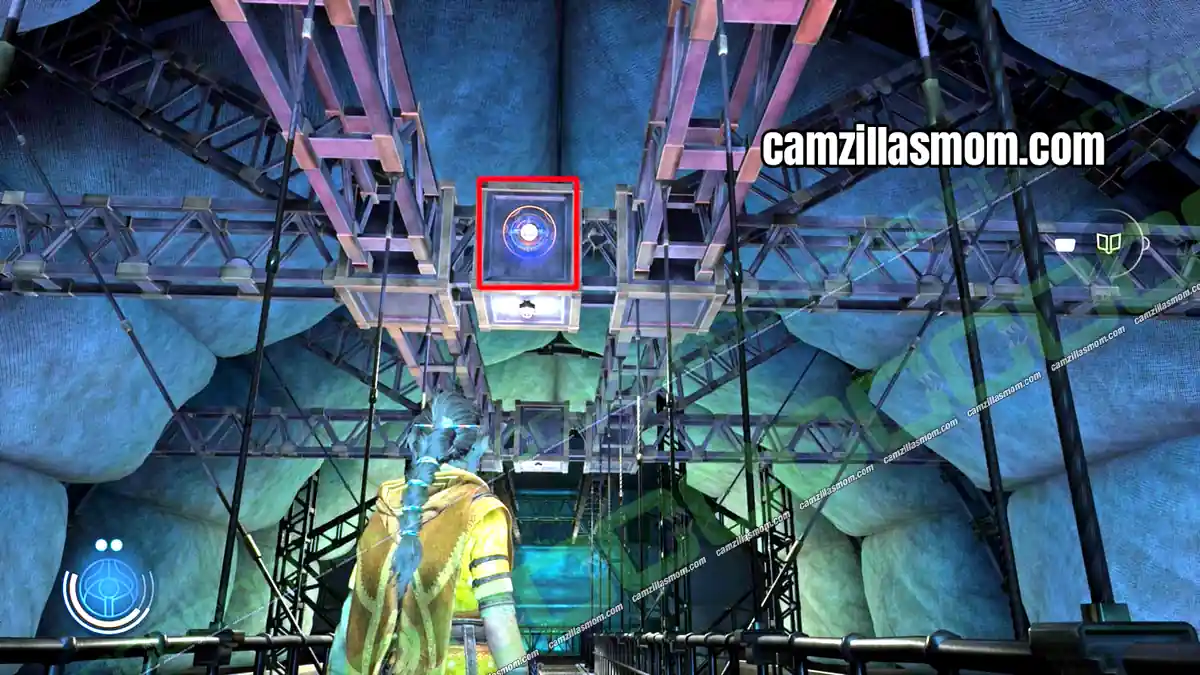
Extractor 42
42 of 55 Extractors – Chapter 8: The Morning Star III
Go down the stairs. The Extractor is near the control room.
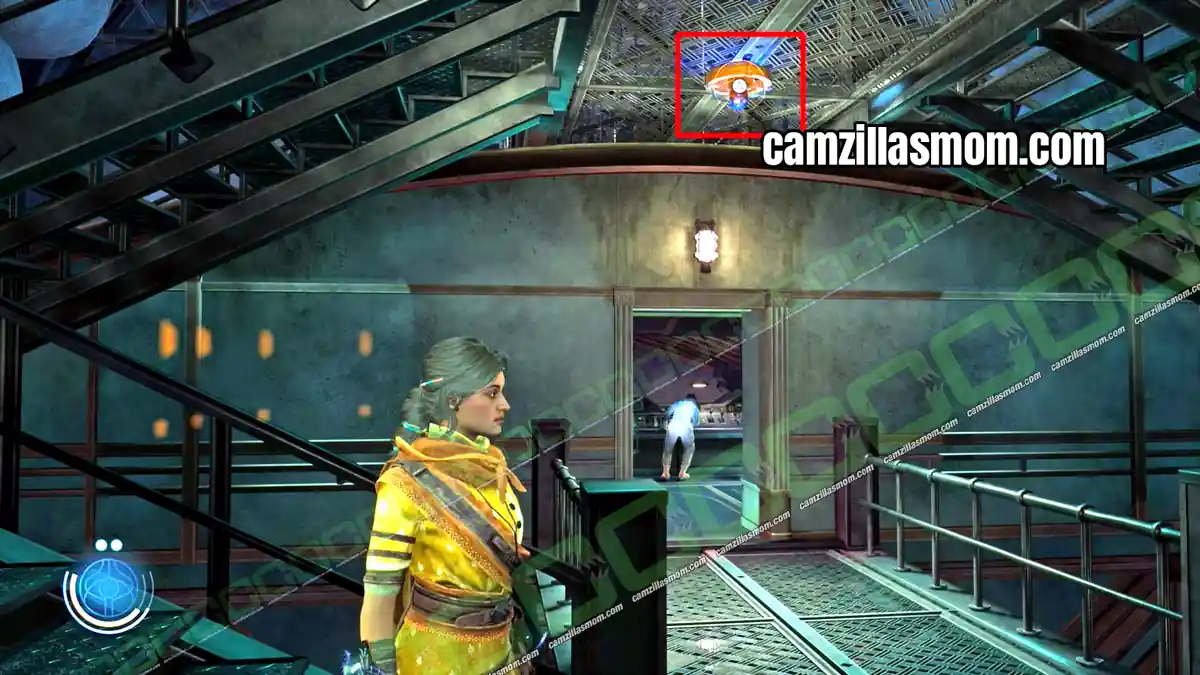
Extractor 43
43 of 55 Extractors – Chapter 9: Anatolia
After you cross the bridge, look up. The Extractor is on the gate.
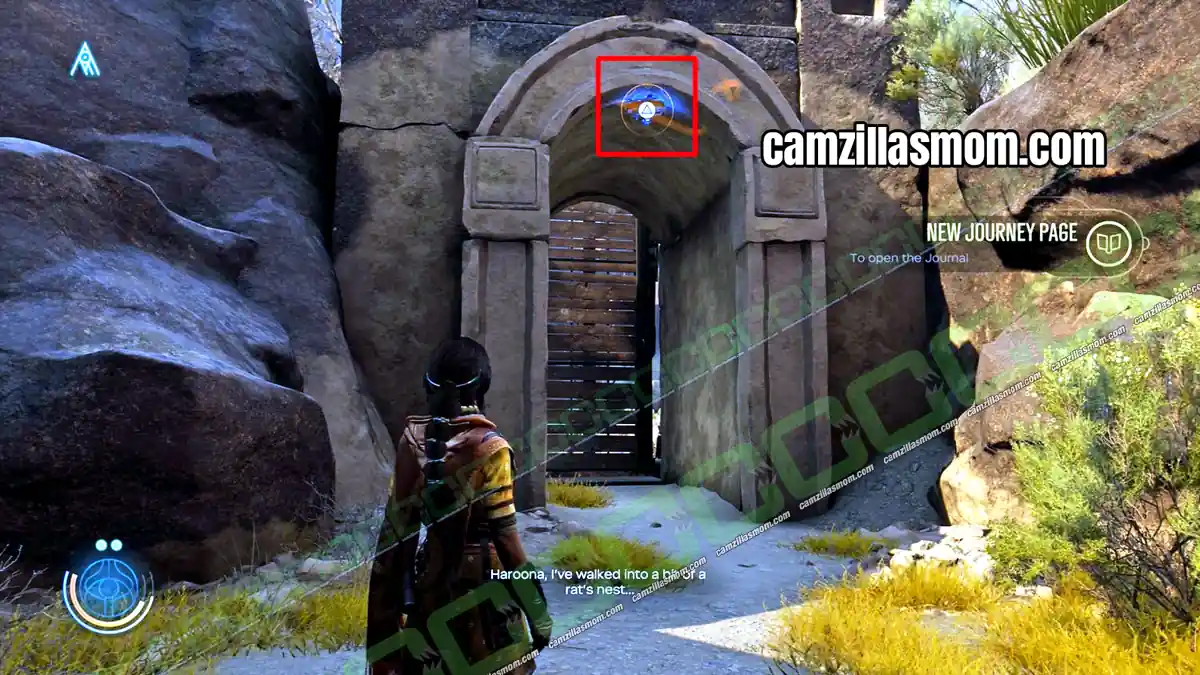
Extractor 44
44 of 55 Extractors – Chapter 9: Anatolia
In the next area, where Luther gets ambushed, the Extractor hangs at the entrance of a side cave. Anomaly 42 is further inside.
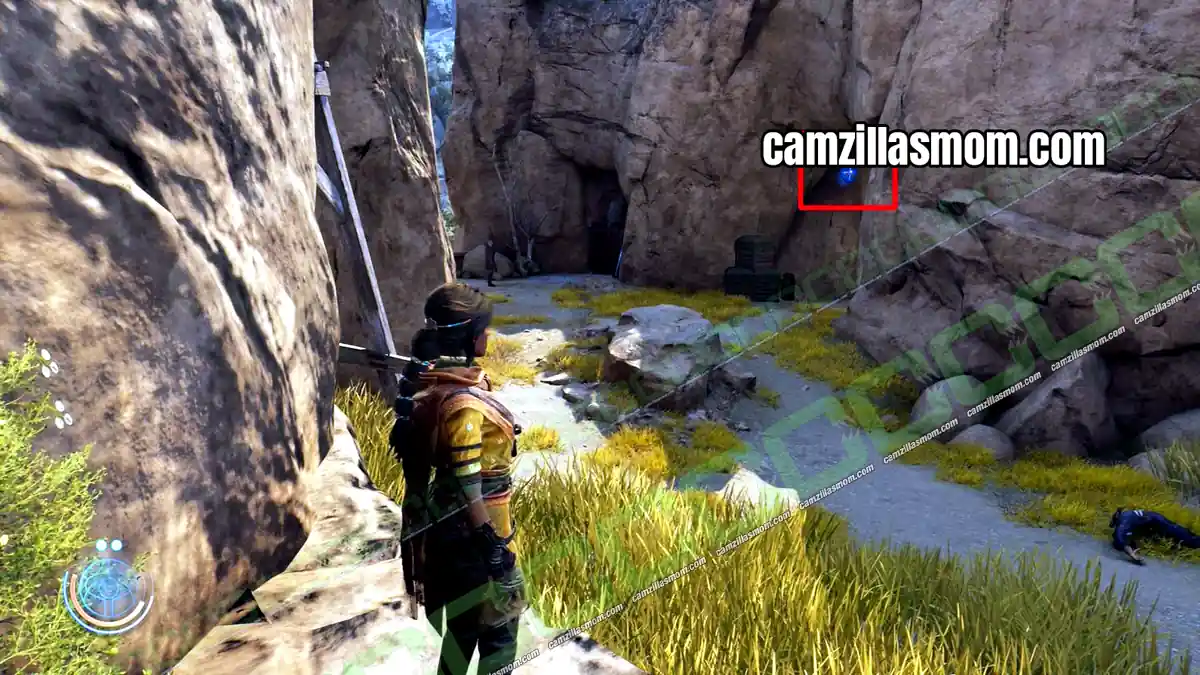
Extractor 45
45 of 55 Extractors – Chapter 11: Dasuden
Before the first red door, look up. Stand right below the Extractor to destroy it.
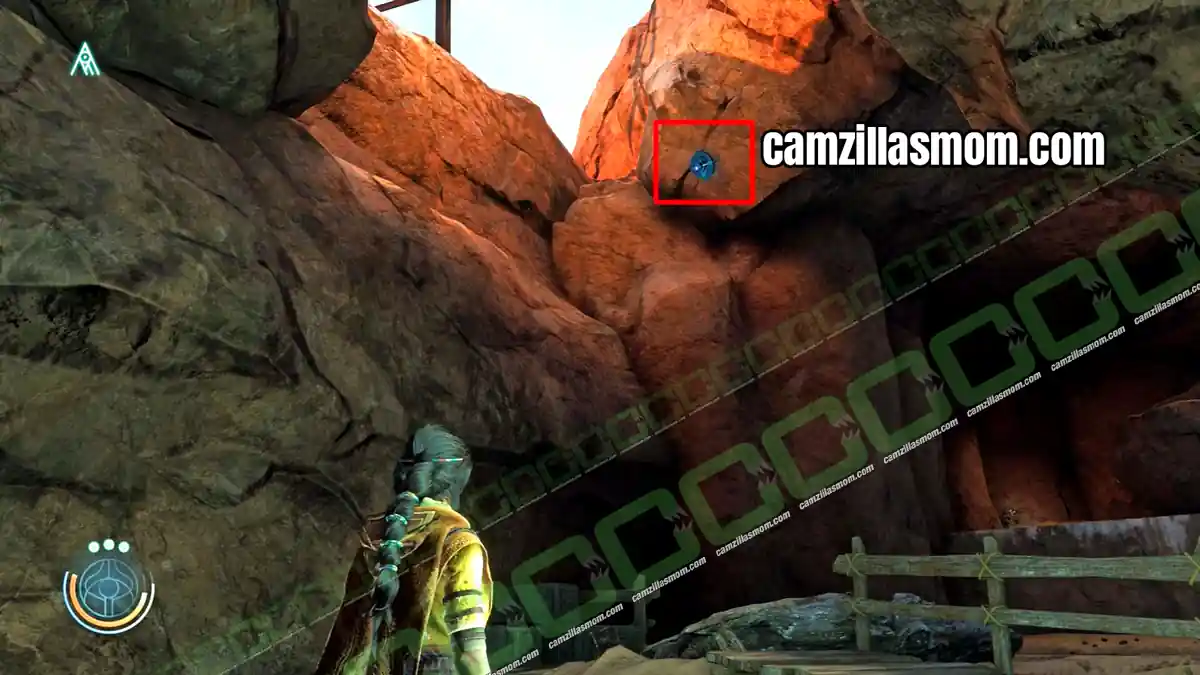
Extractor 46
46 of 55 Extractors – Chapter 11: Dasuden
Go through the red door into the enemy camp. The Extractor is on the tallest building.
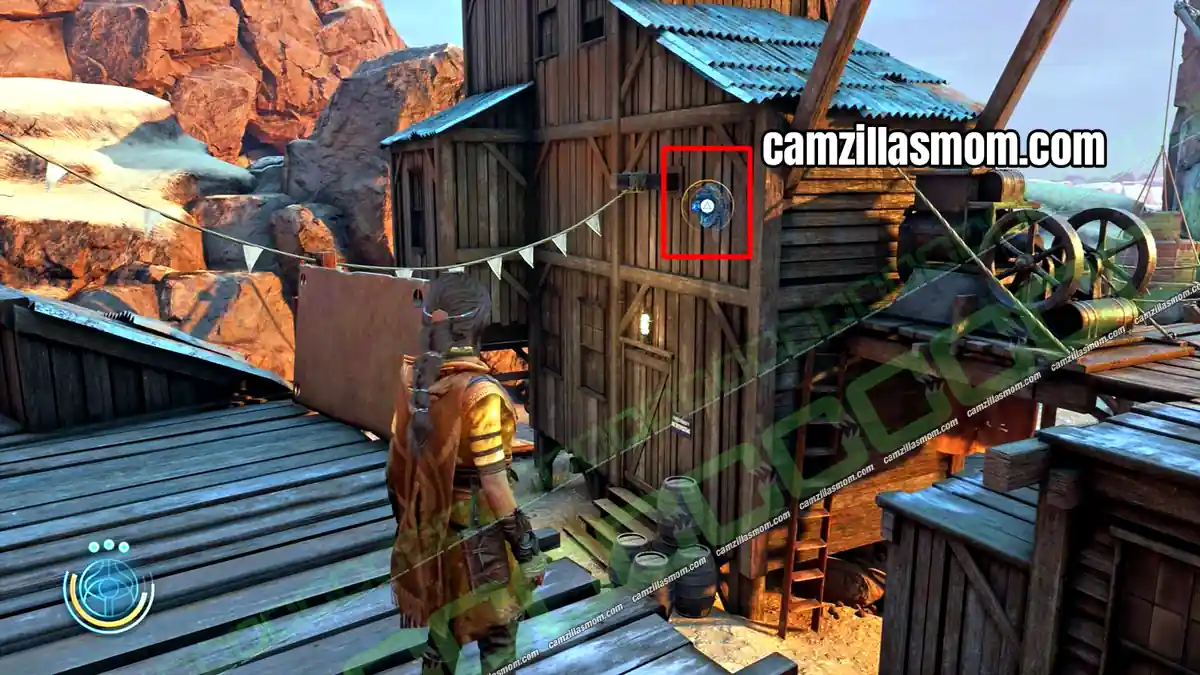
Extractor 47
47 of 55 Extractors – Chapter 11: Dasuden
After you move the crane, continue to the next camp. Extractor 47 is in the engine room of the large building.
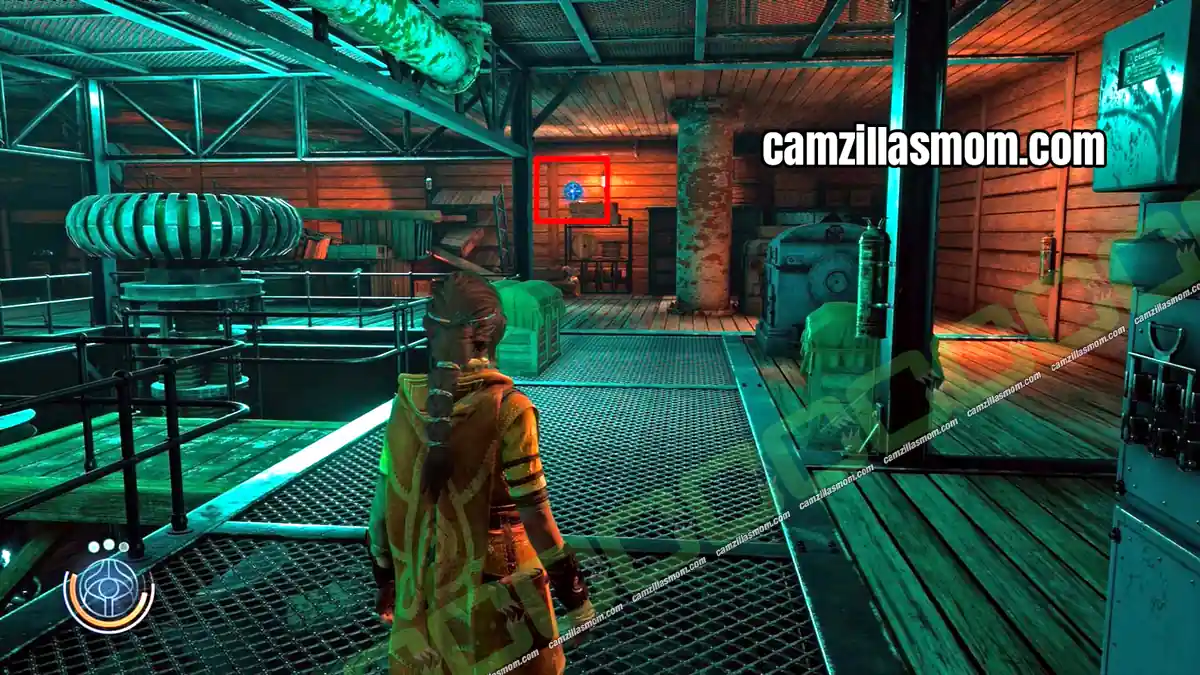
Extractor 48
48 of 55 Extractors – Chapter 11: Dasuden
In the hostile area after Buchra’s rescue, the last Dasuden Extractor is next to the red door.
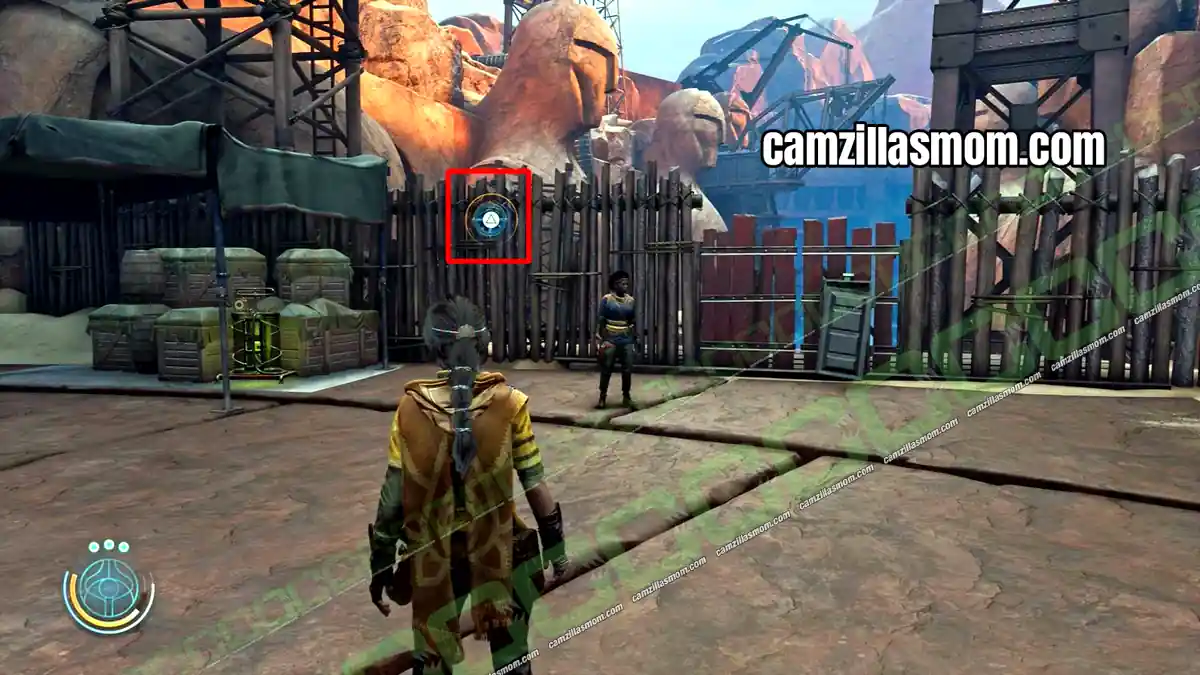
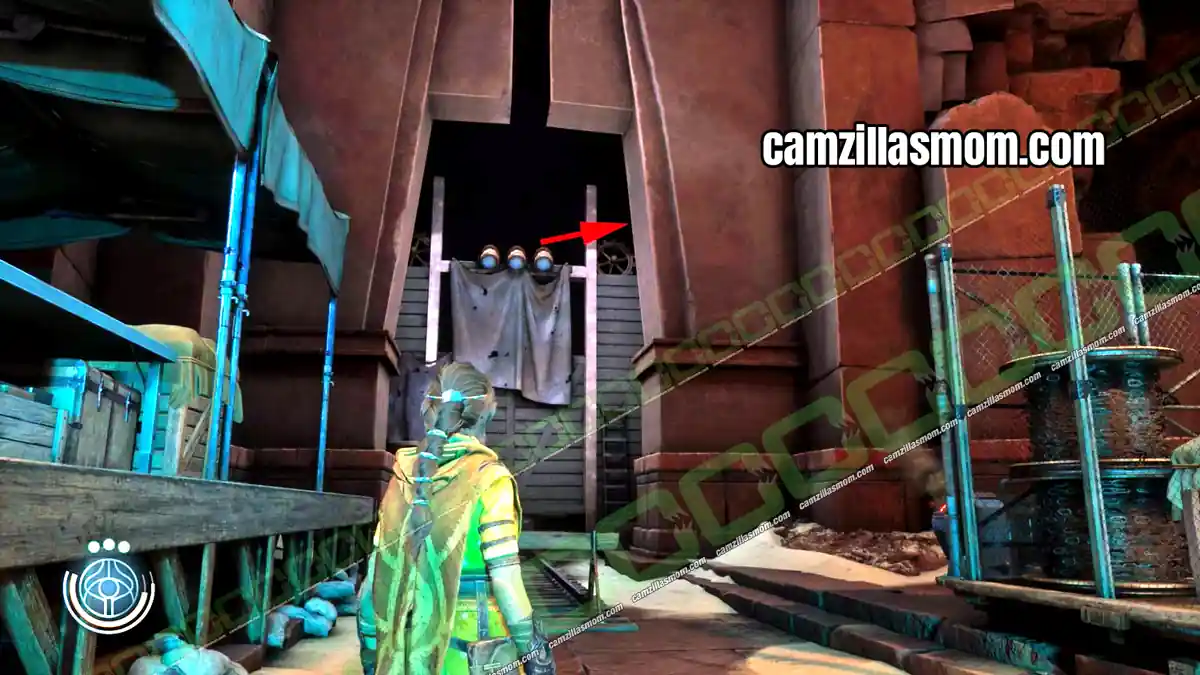
Extractor 49
49 of 55 Extractors – Chapter 12: Peshanden
In the first room of the chapter, clear the hostiles below. Follow the train tracks back to the dead end and look up at the wall on the other side.
Extractor 50
50 of 55 Extractors – Chapter 12: Peshanden
After the first Sahin Gate, cross the long bridge and look underneath it.
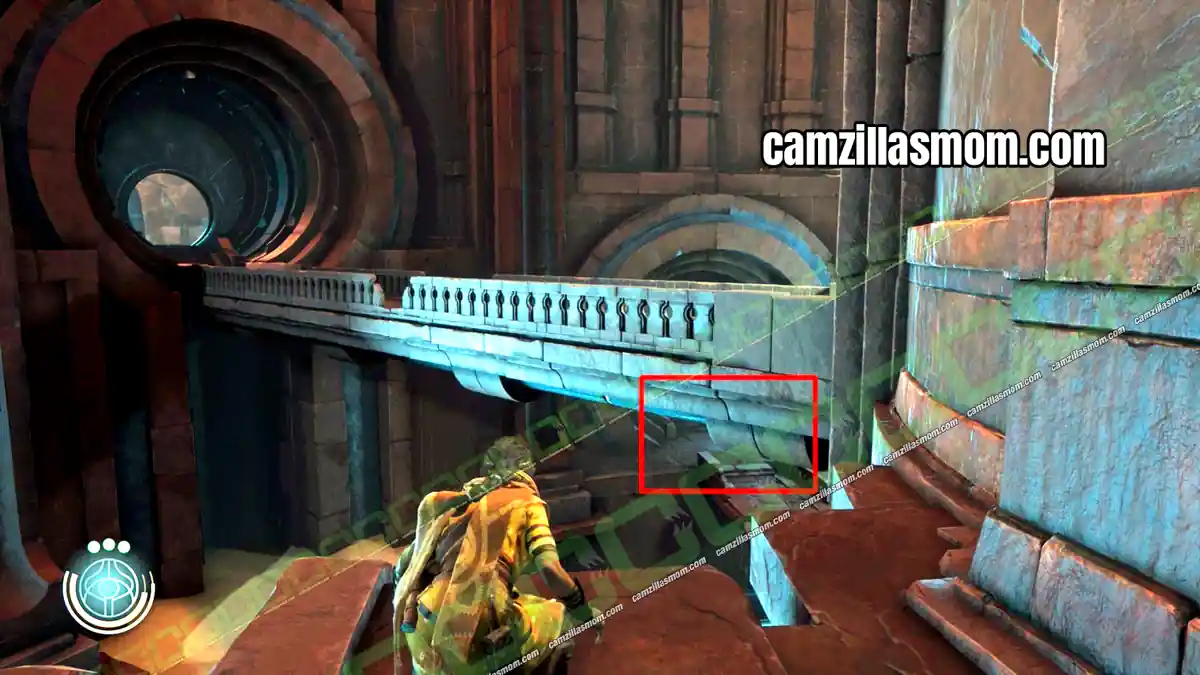
Extractor 51
51 of 55 Extractors – Chapter 12: Peshanden
After the third Sahin Gate, drop into the hostile area and follow the tracks to the left. The Extractor is at the foot of a crane.
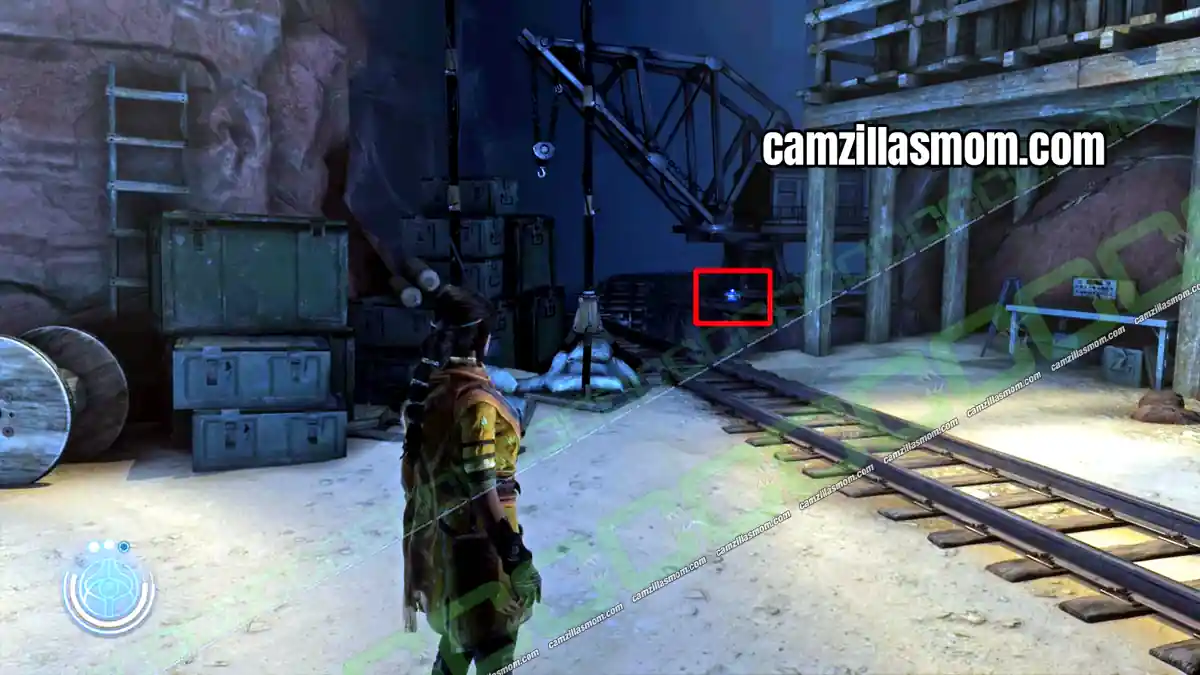
Extractor 52
52 of 55 Extractors – Chapter 12: Peshanden
After Haroona splits from Buchra, continue to the next hostile area. Look over the railing as you get there.
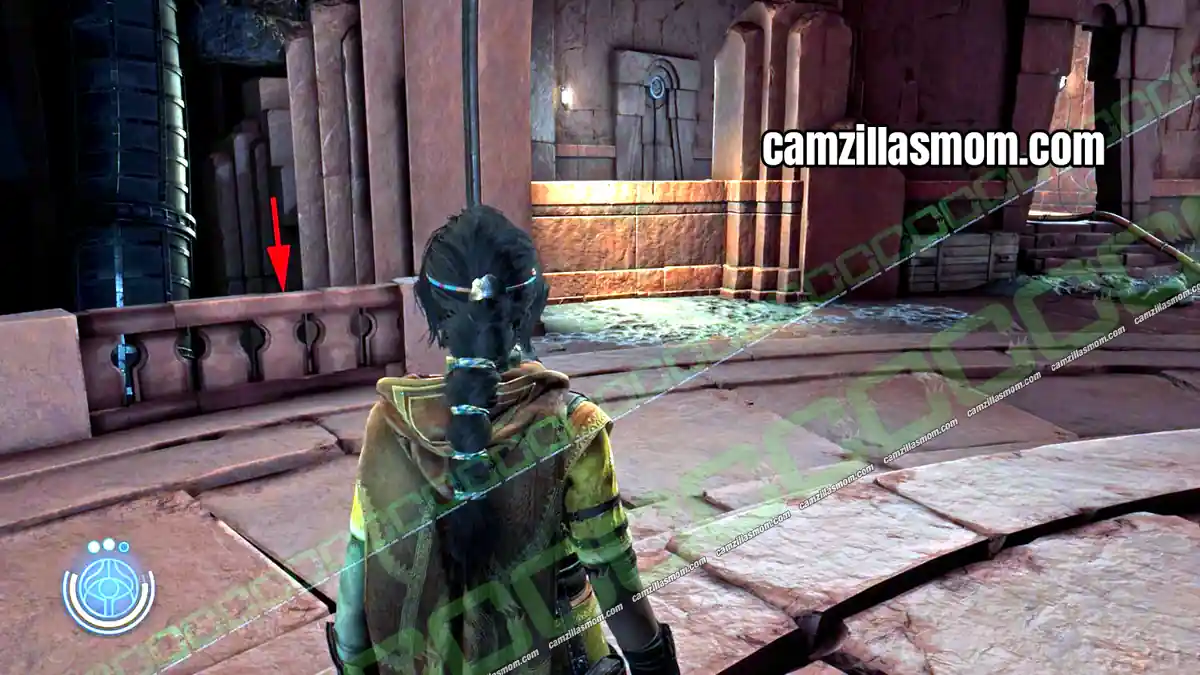
Extractor 53
53 of 55 Extractors – Chapter 12: Peshanden
Go through the green-lit door into the largest hostile camp of the chapter. Look down from the wooden bridge.
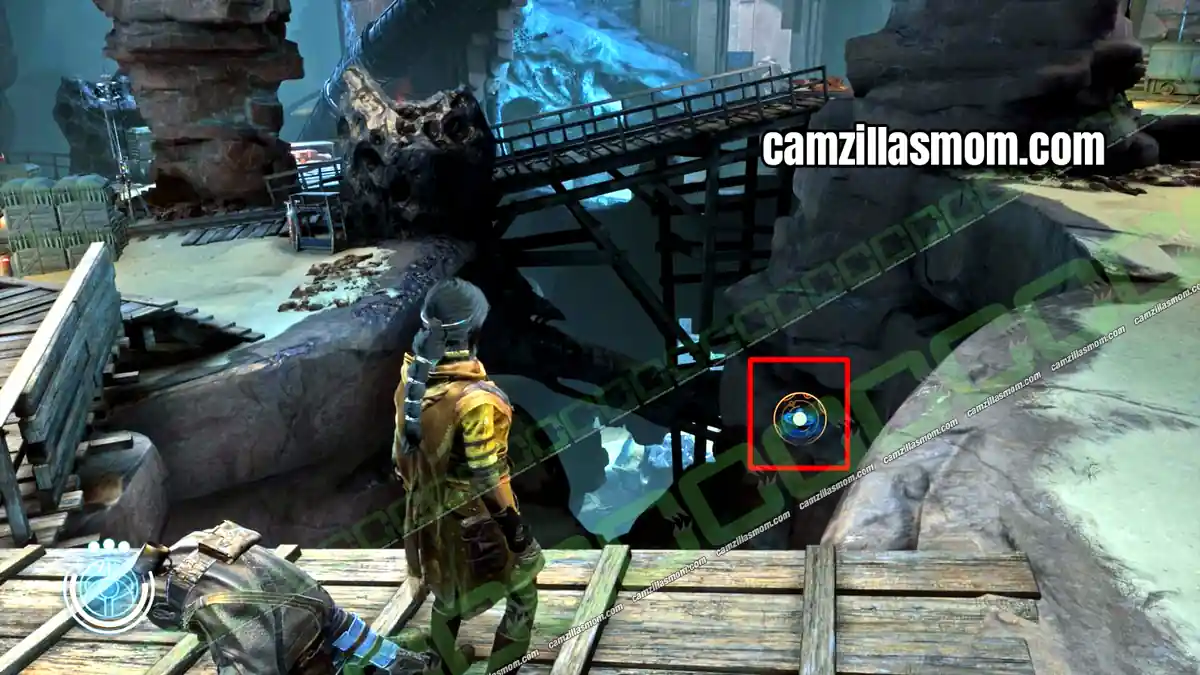
Extractor 54
54 of 55 Extractors – Chapter 12: Peshanden
After you meet Buchra again, she lowers Haroona onto a wooden platform deep in the cave. The Extractor is right there.
Extractor 55
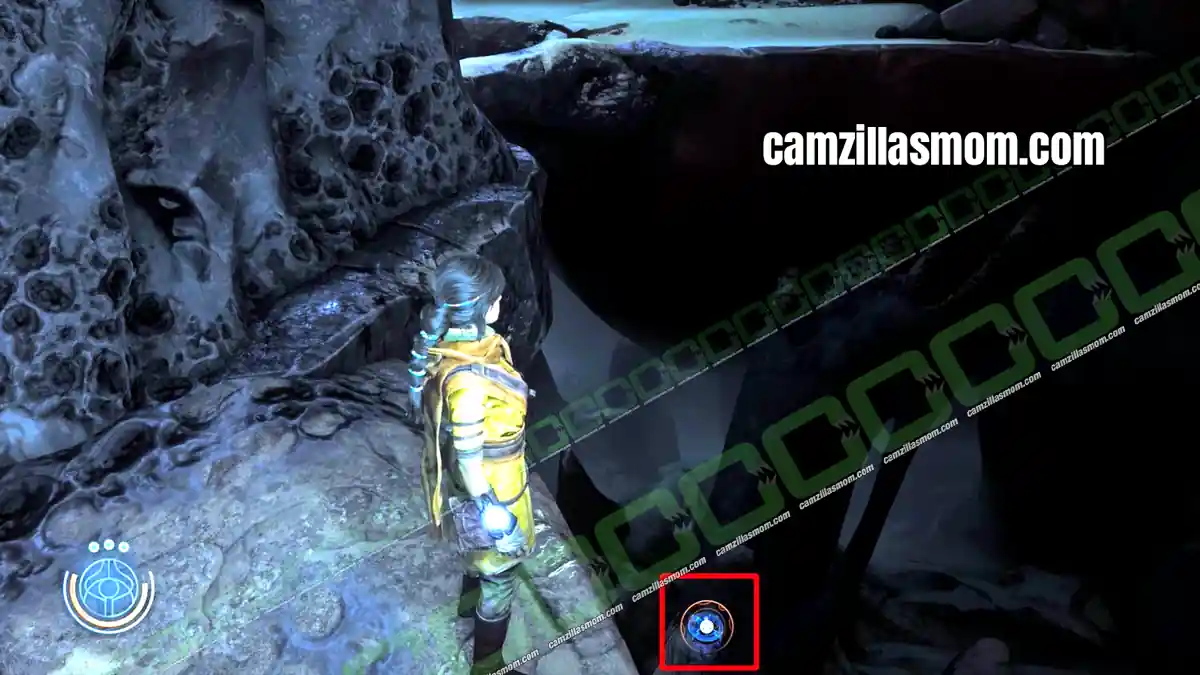
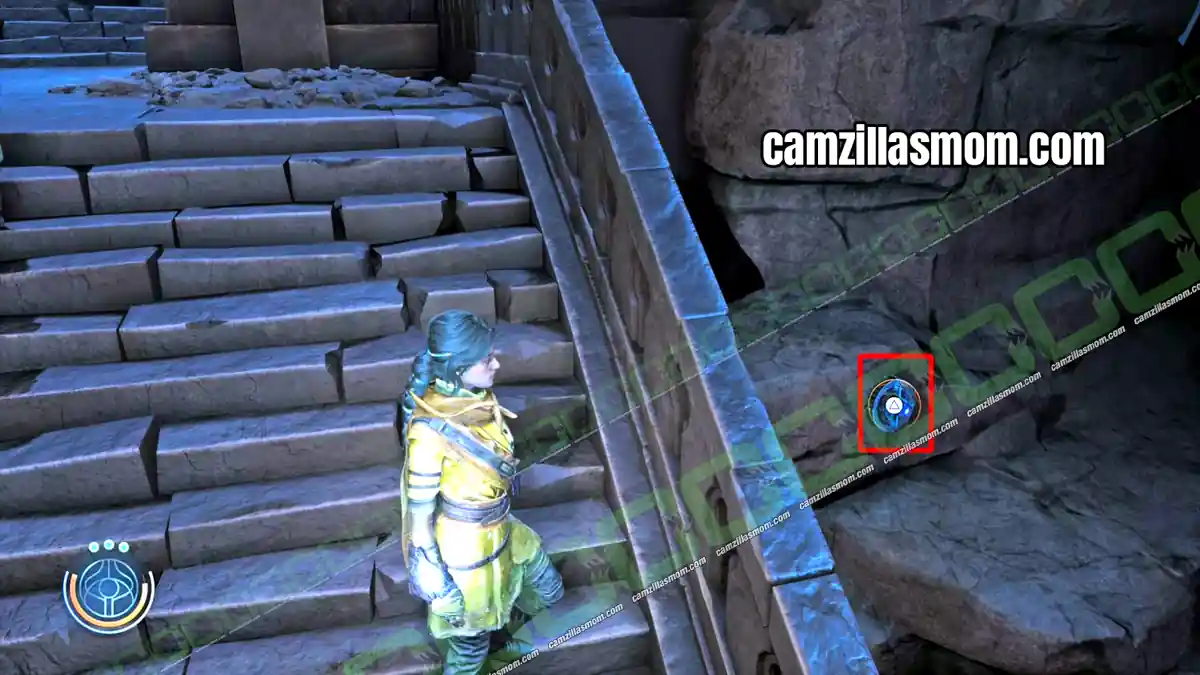
55 of 55 Extractors – Chapter 12: Peshanden
In the large camp with the two red domes, open the Sahin Gate. After the Gearhead attack, Buchra meets up with Haroona. Take the stairs all the way down and look left for the last Extractor.
Tree of Life – Scribings
All 7 Tree of Life Scribings in menu order. Peek into the Fold to see most of them.
Tree of Life 1
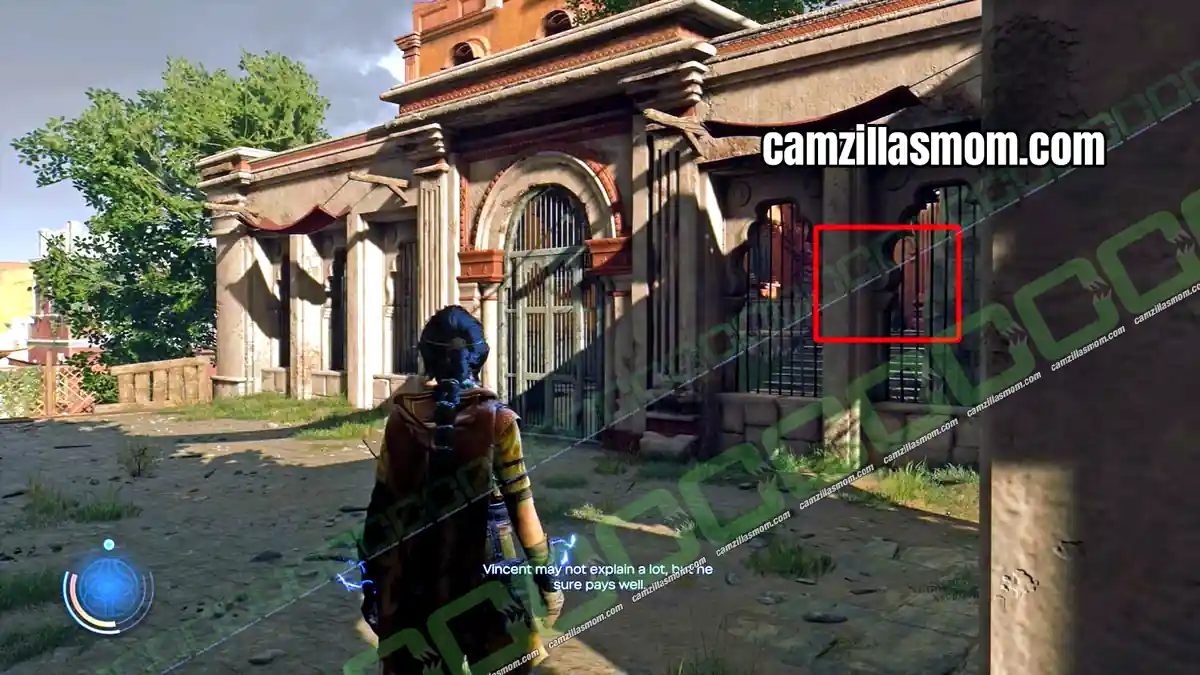
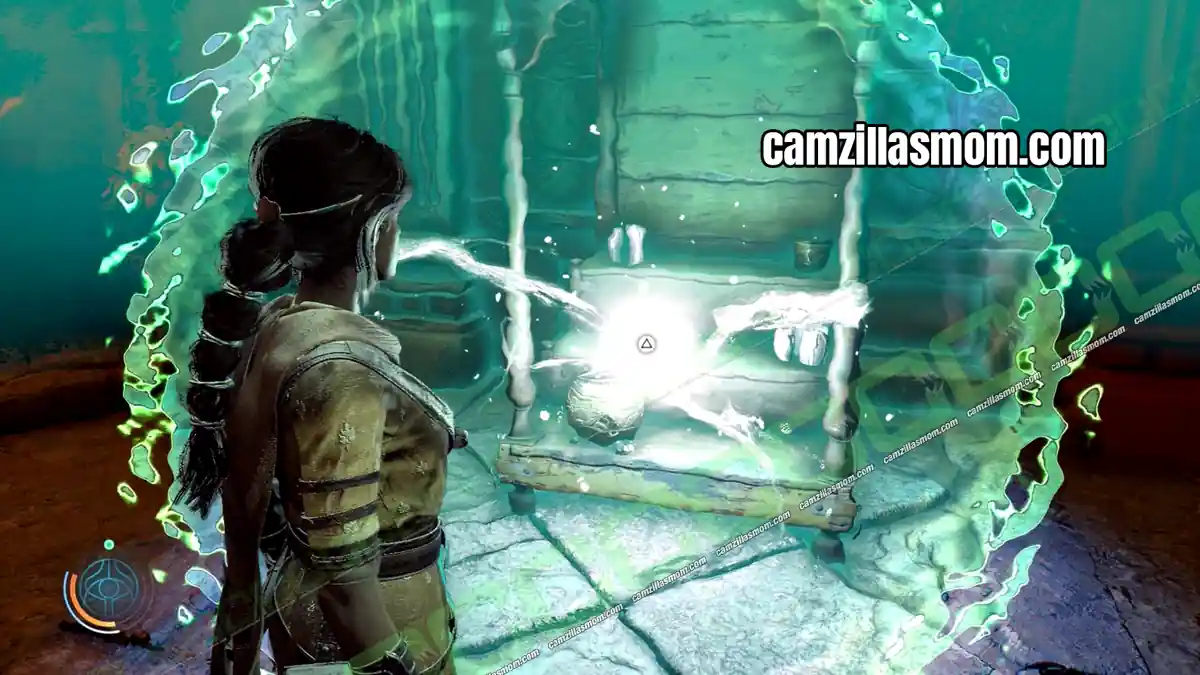
1 of 7 Tree of Life – Chapter 2: Chamiri
Where Haroona points out the lighthouse, there is a fenced area on the right. Reach it through the guarded area below. Peek into the Fold to spot the pickup in front of a shelf.
Tree of Life 2
2 of 7 Tree of Life – Chapter 5: Chamatkari Mandir
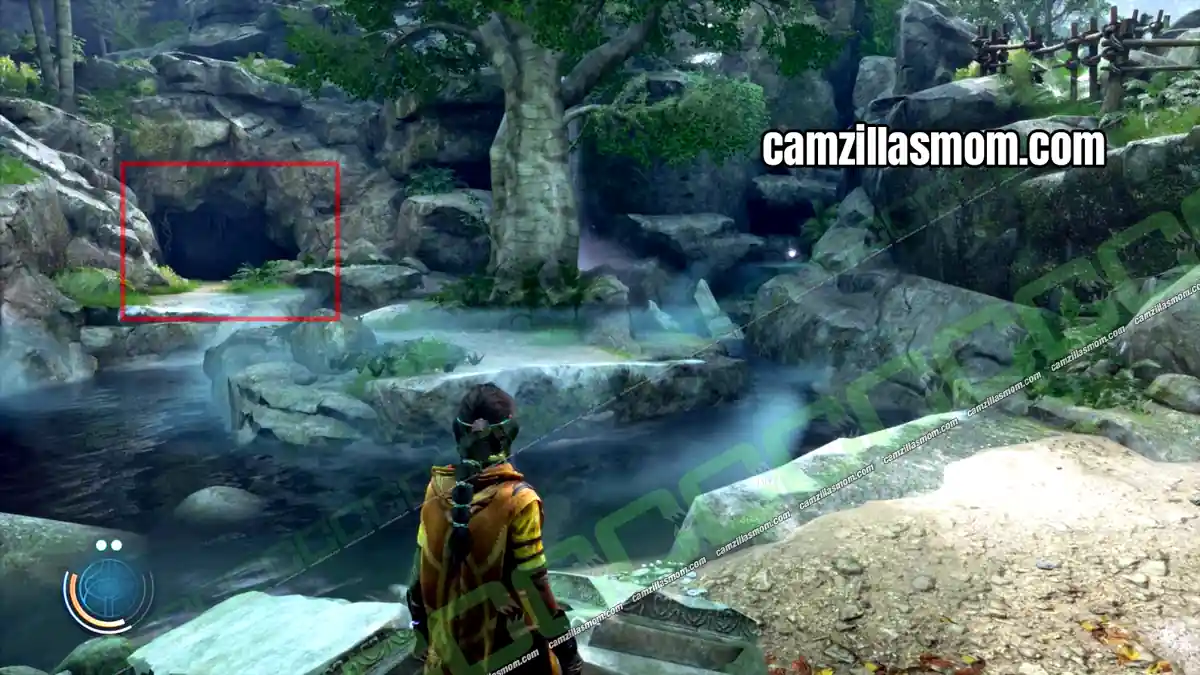
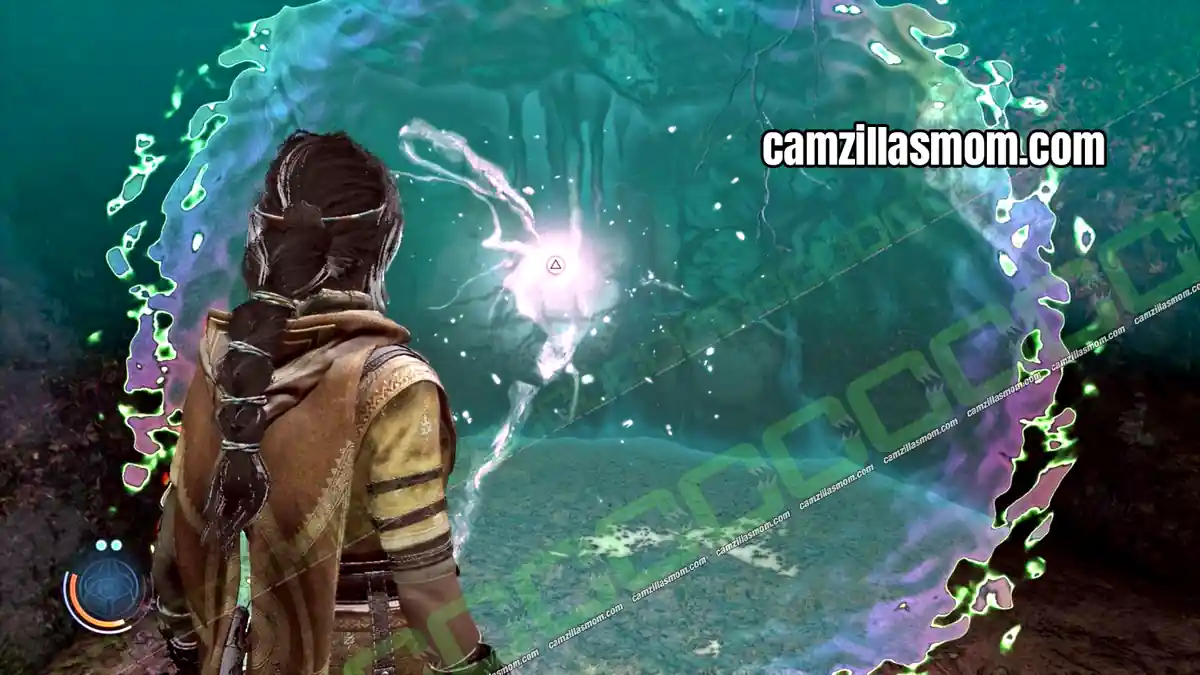
Before you reach Haroona’s village, look for a small island in a pond. Jump over. The Tree of Life is in the cave.
Tree of Life 3
3 of 7 Tree of Life – Chapter 7: Quinta Matos
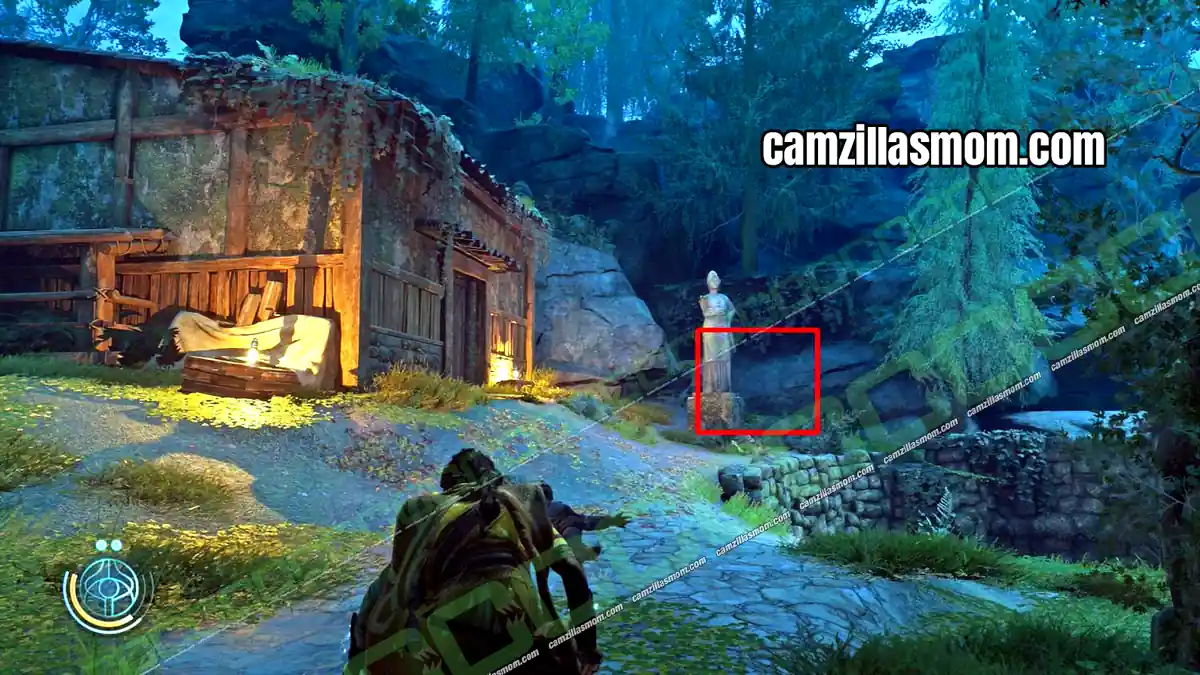
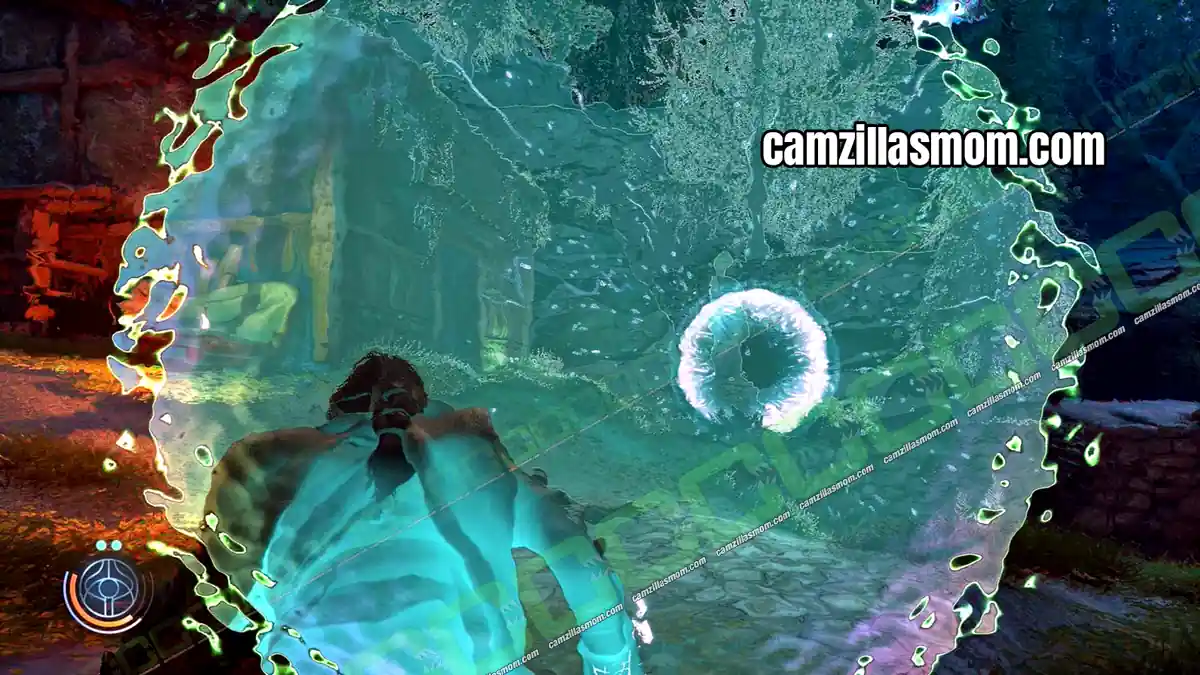
Leave the greenhouse through the red door. A guarded house is on your right. Follow Luther through the tunnel, then turn right and climb the vines. The Tree of Life is outside the house, next to a statue.
Tree of Life 4
4 of 7 Tree of Life – Chapter 8: The Morning Star III
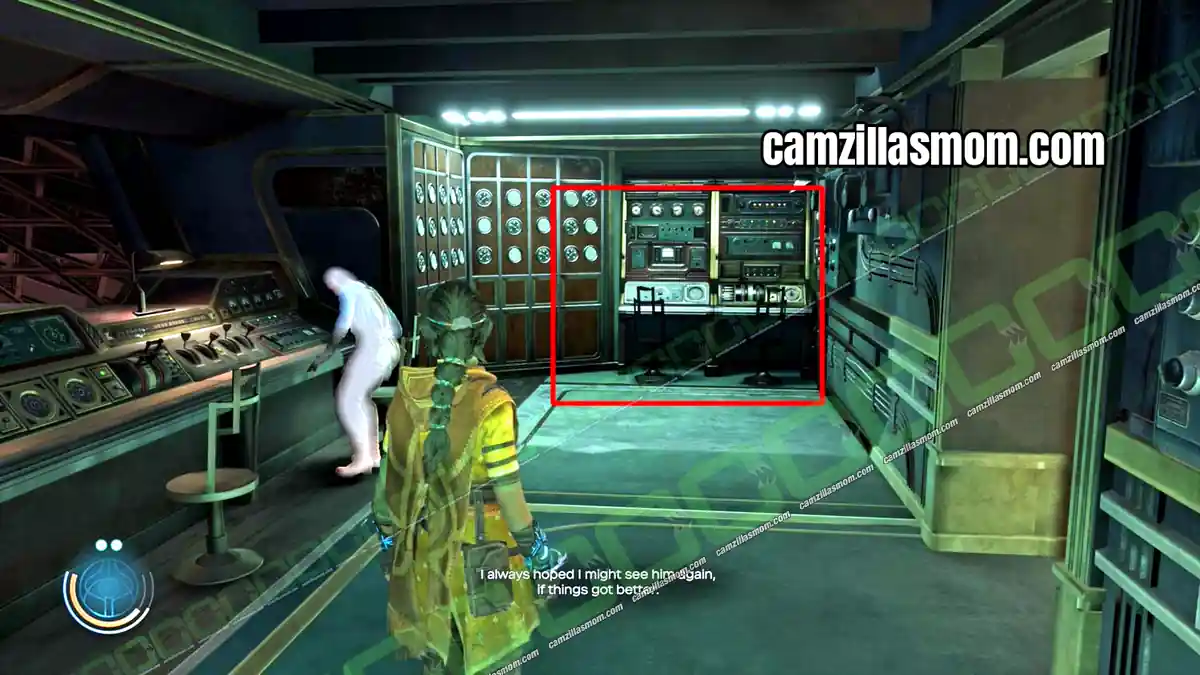
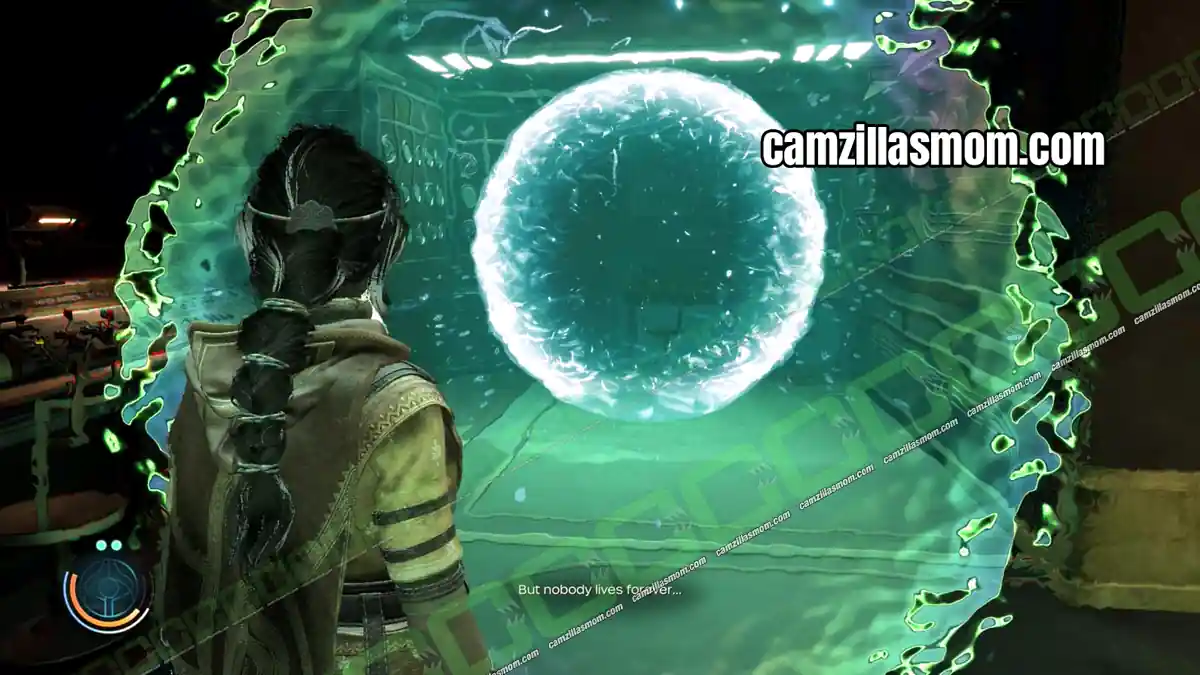
After you rewire the antennas, go back in and down to the control room. Peek into the Fold to find it.
Tree of Life 5
5 of 7 Tree of Life – Chapter 9: Anatolia
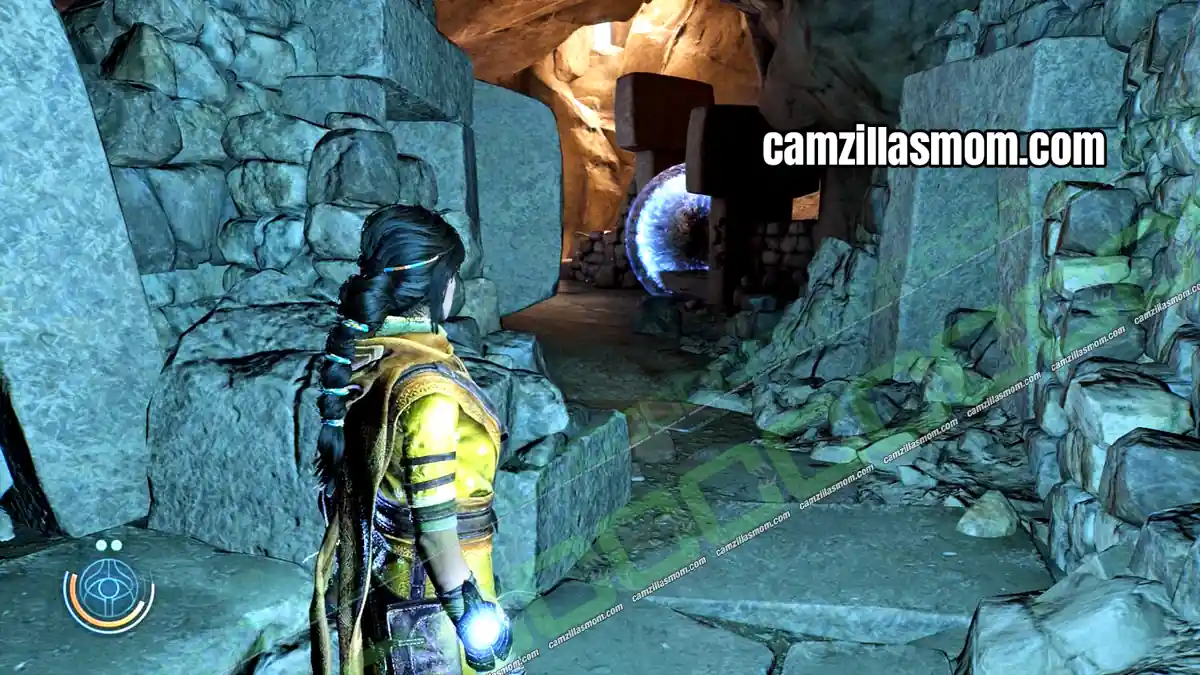
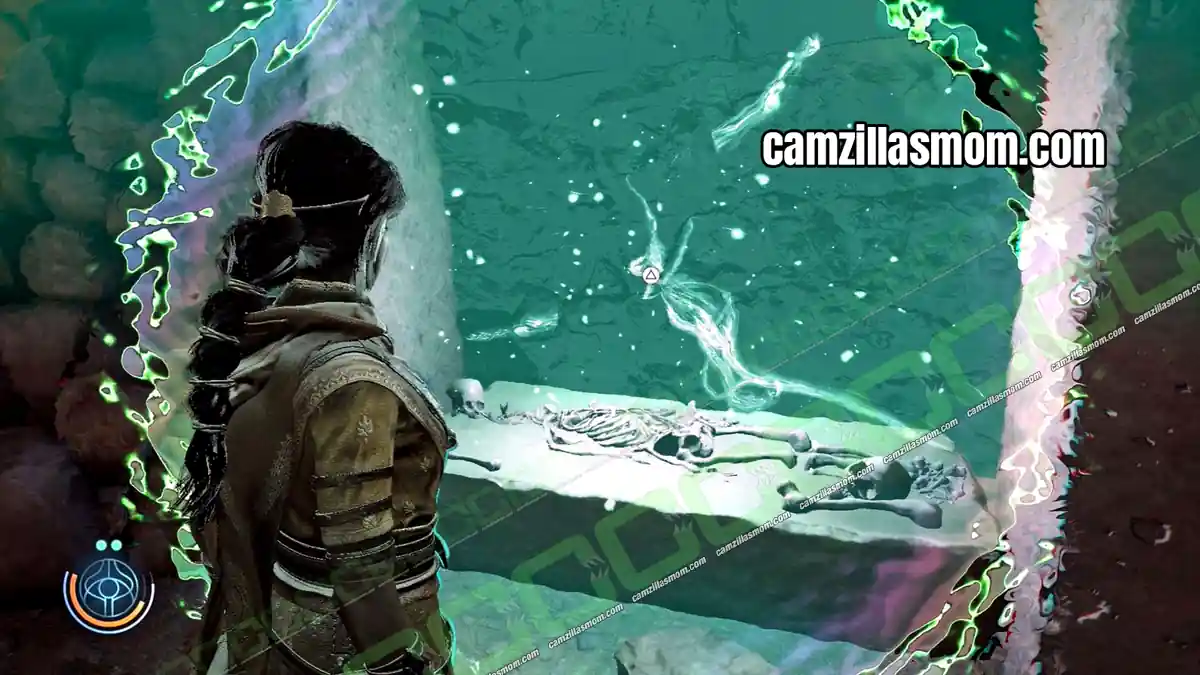
Follow the story to the cave room with a closed stone door and a climbable wall. Peek into the Fold to see the Tree of Life above the stone door. Climb the wall and follow the path up, keeping the tree in sight.
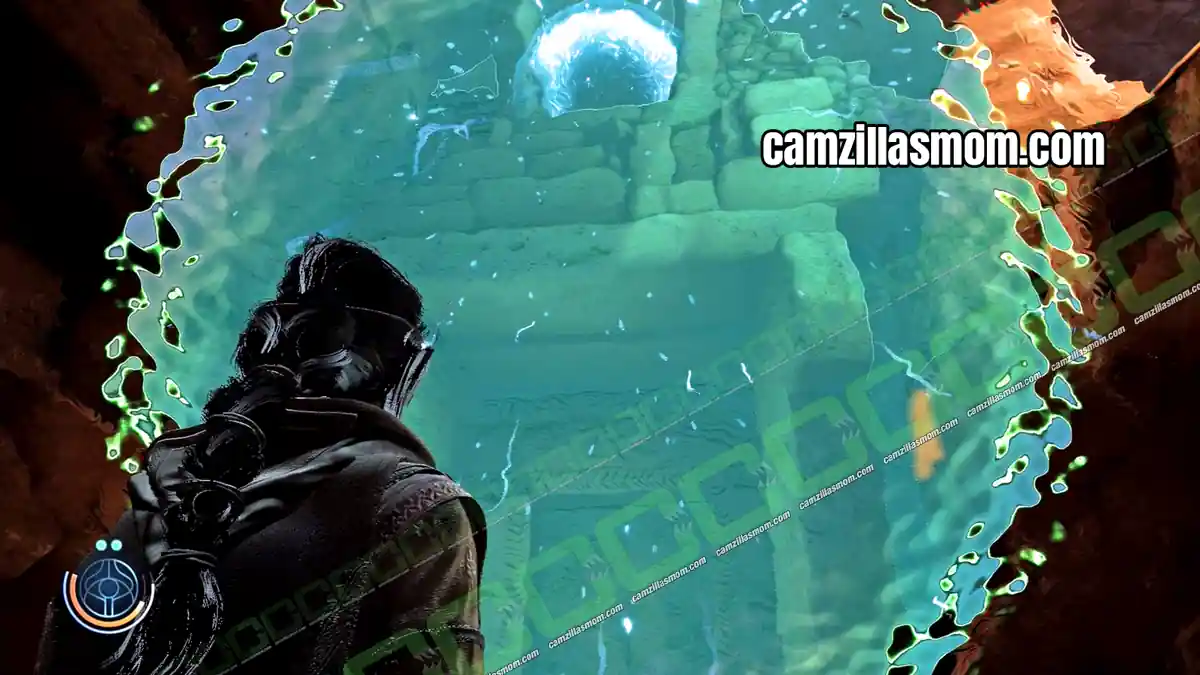
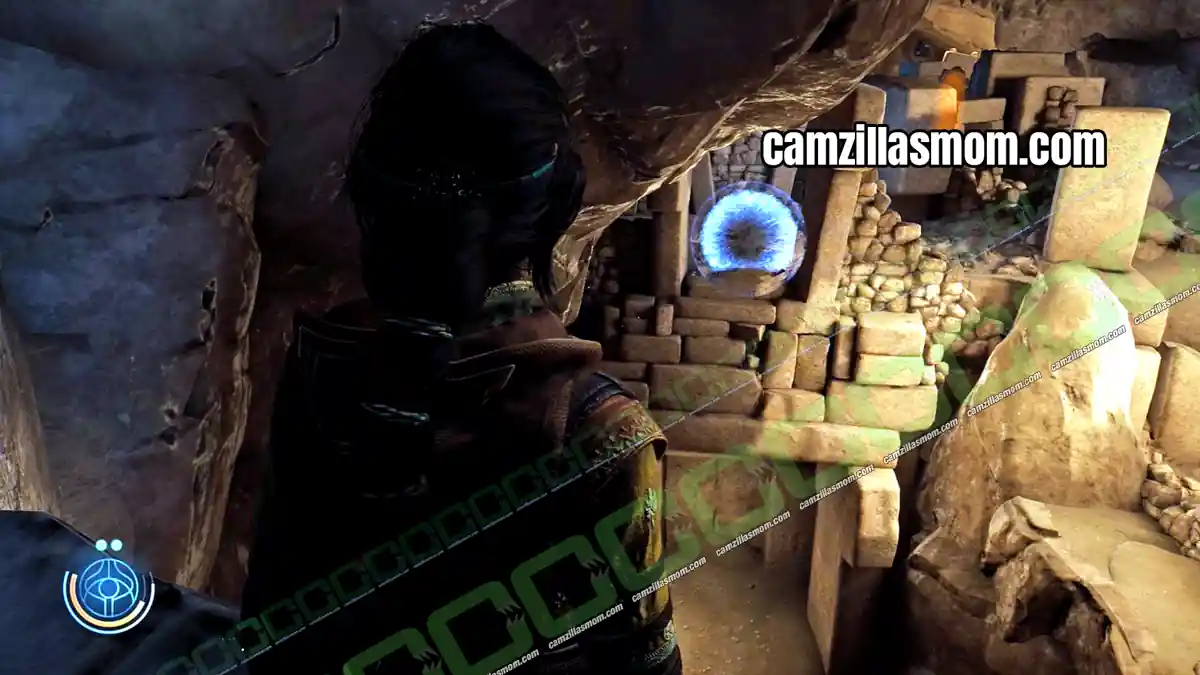
Balance along the stone wall across the large room, then turn left. The Tree of Life is next to a skeleton.
Tree of Life 6
6 of 7 Tree of Life – Chapter 12: Peshanden
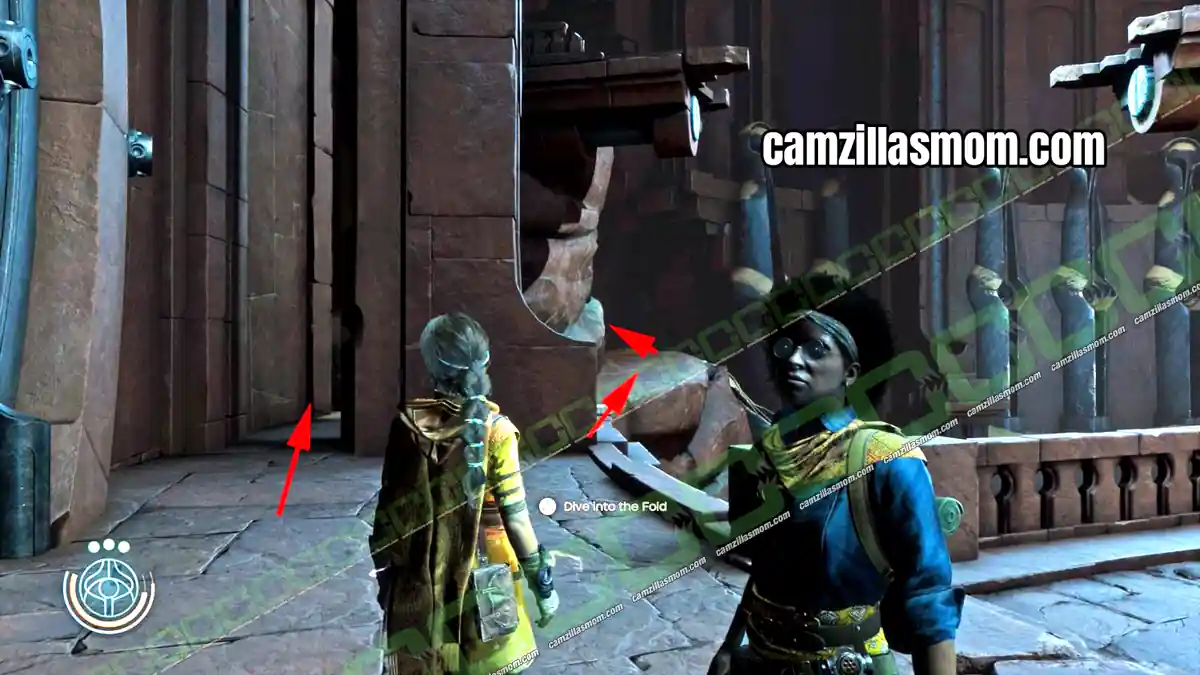
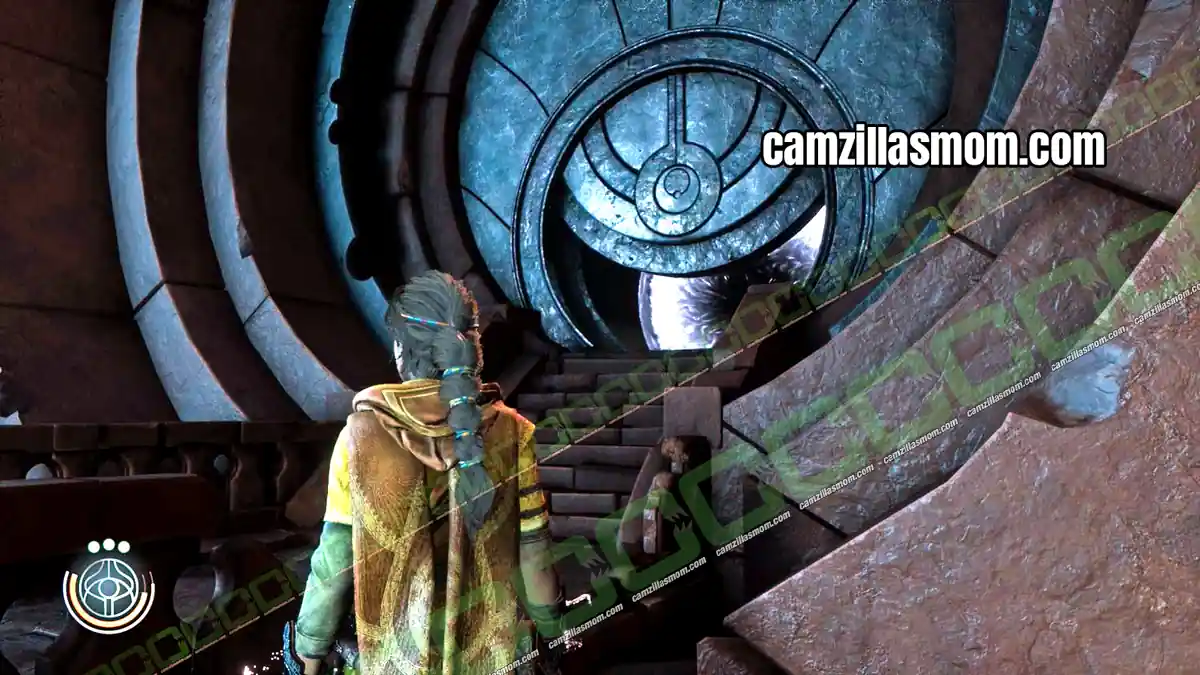
Do not open the second Sahin Gate yet. Go right and climb the wall to Tree of Life 6.
Tree of Life 7
7 of 7 Tree of Life – Chapter 12: Peshanden
Tree of Life 7 needs a bridge in the Deep Fold first. Use Chapter Select to replay the Deep Fold in Chapter 7: Quinta Matos.
Play the sequence with the character speaking an Unknown Language. When you see another Haroona on your right, build the bridge between the two. You can quit after that, no need to finish the chapter. Then replay Chapter 12: Peshanden.
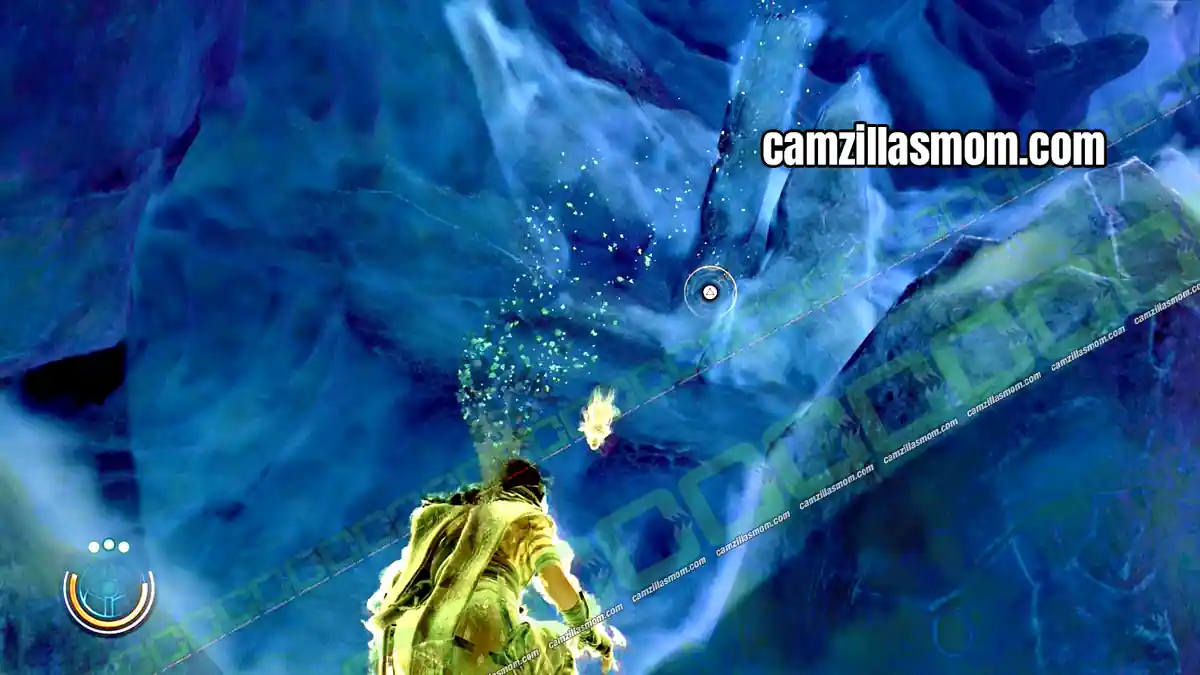
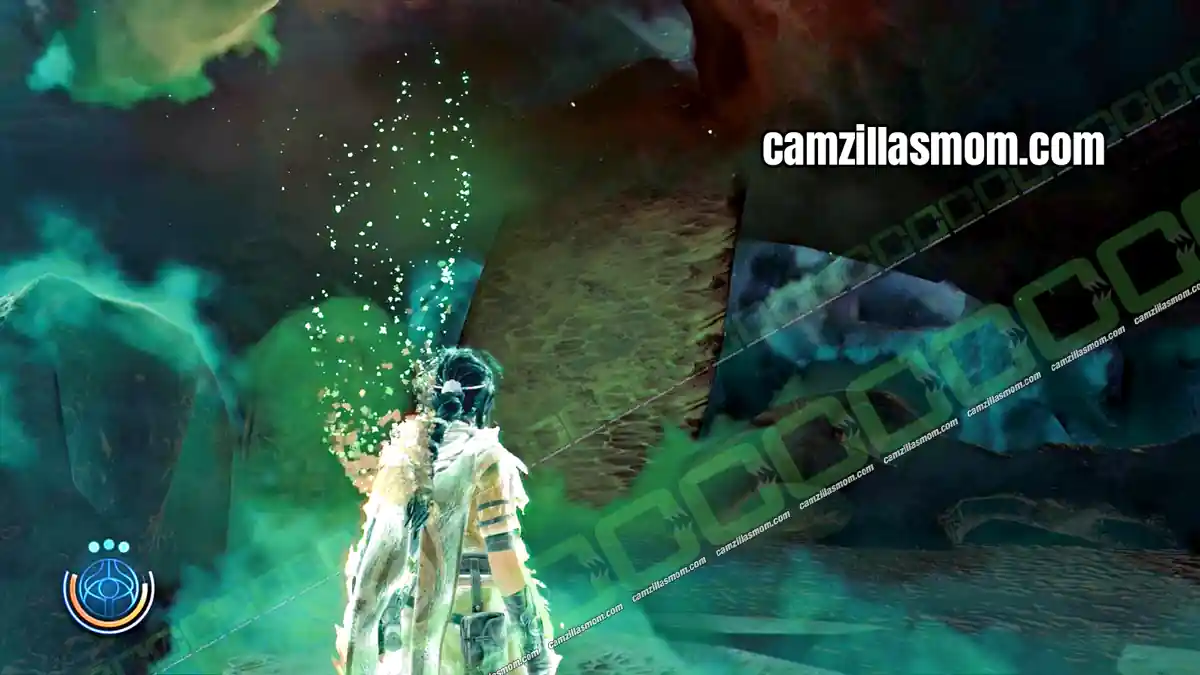
In the Peshanden Deep Fold, leave the purple section and go right in the open area with several Haroonas. Another Haroona arrives and builds the bridge. The Tree of Life is at the top of it.
The Three Bodies – Scribings
All 7 The Three Bodies Scribings in menu order. Number 6 comes before number 5 in the story.
The Three Bodies 1
1 of 7 The Three Bodies – Chapter 1: Richat Structure
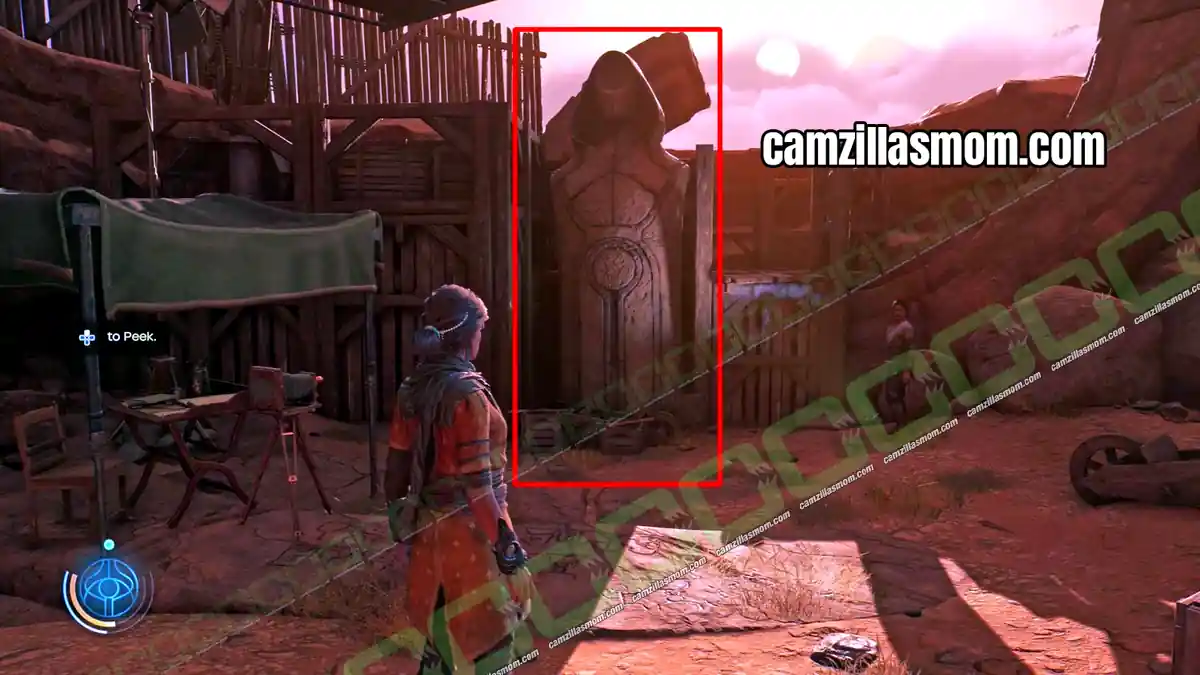
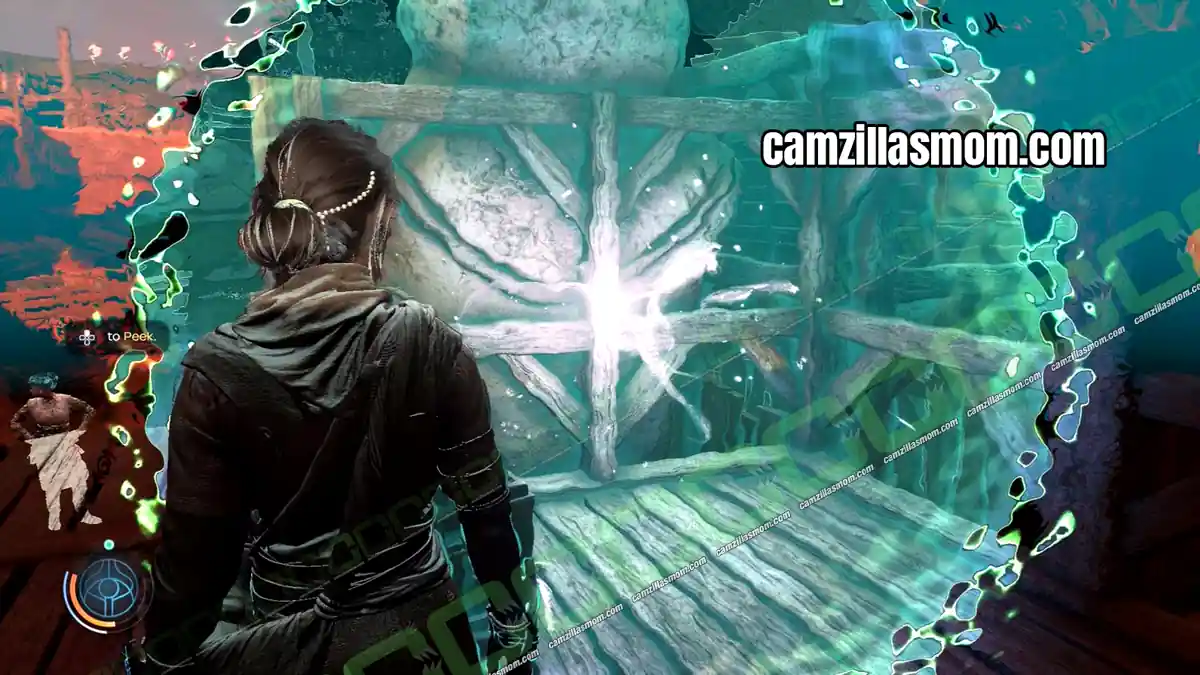
In the camp with the red energy barrier, Reika tells Haroona to Peek into the Fold and follow the glow. It leads down to an excavation site with a large statue. Peek into the Fold behind the statue to pick it up.
The Three Bodies 2
2 of 7 The Three Bodies – Chapter 3: Suknasari Forest
Before you touch the red wall to follow Luther into the cave, Peek into the Fold and look at the run-down house on the hill.
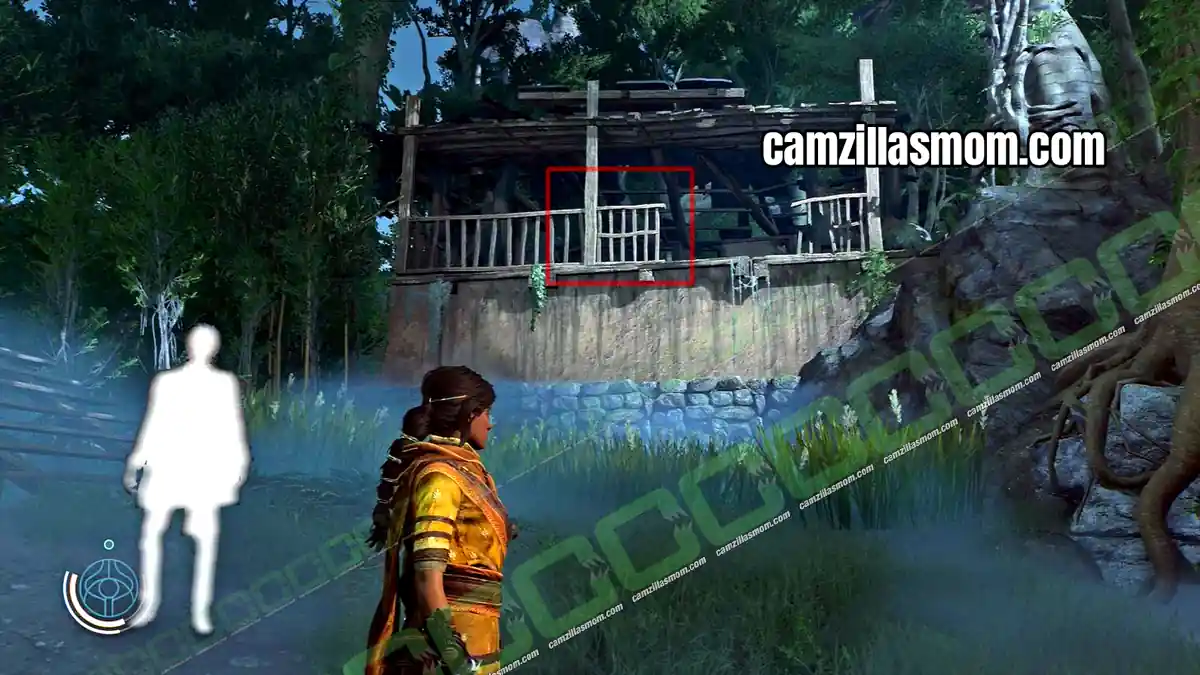
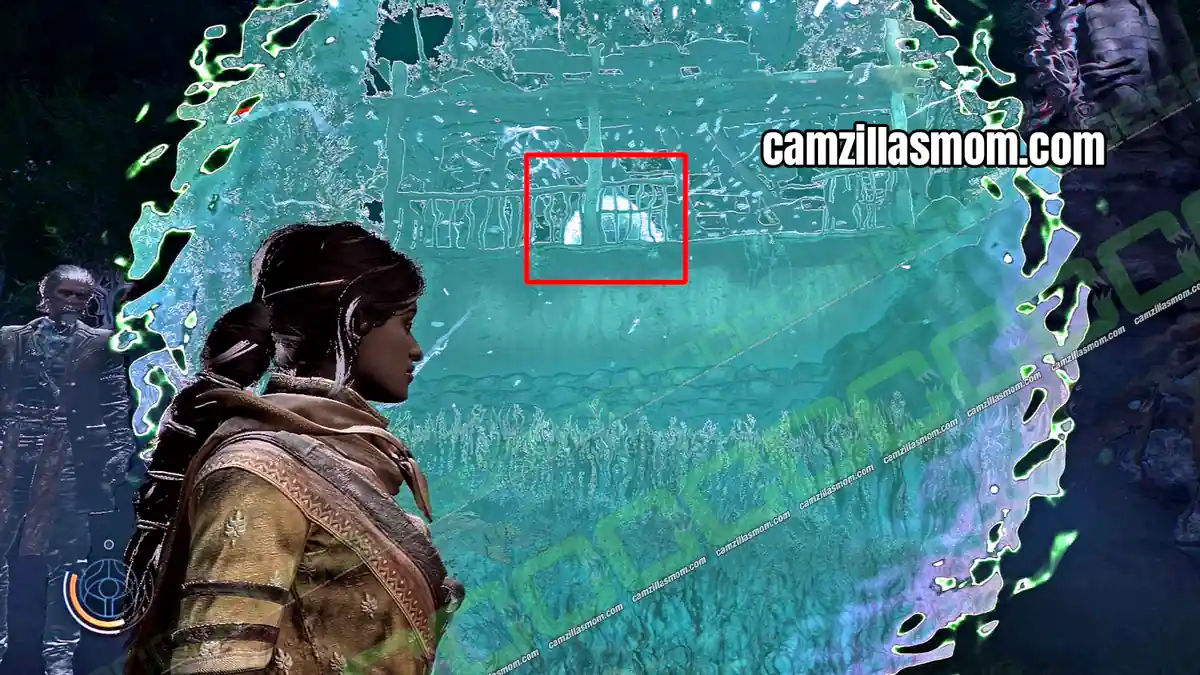
Take the path to the right of the house and climb in. The pickup is next to the railing.
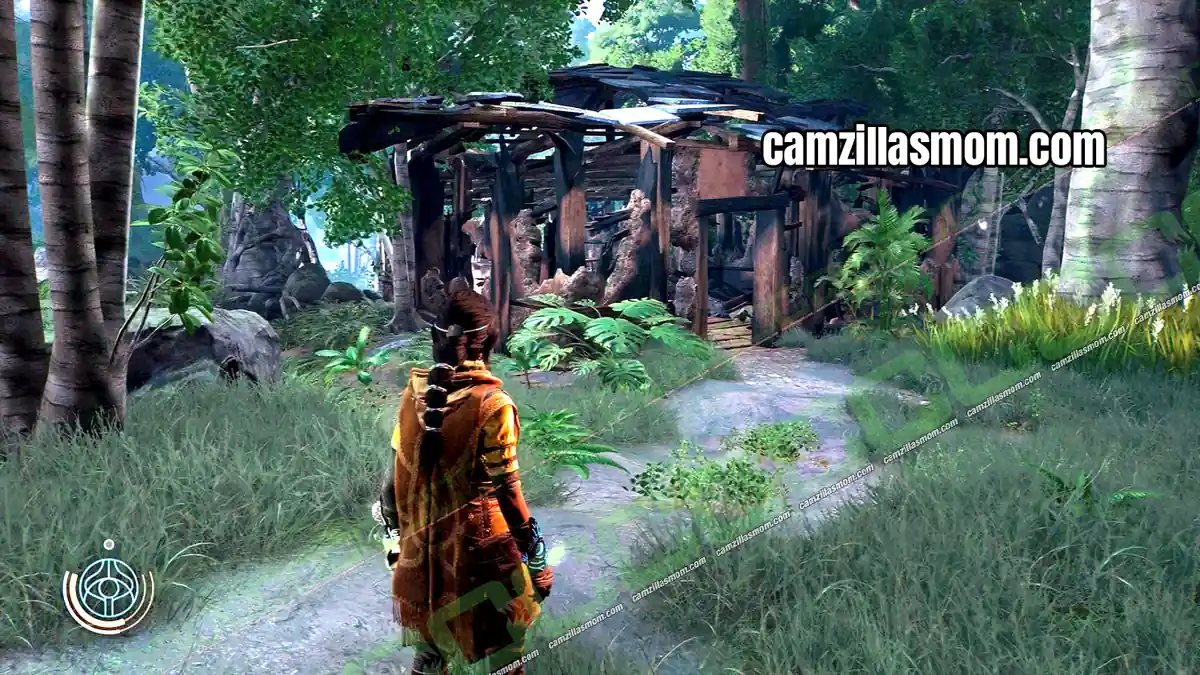
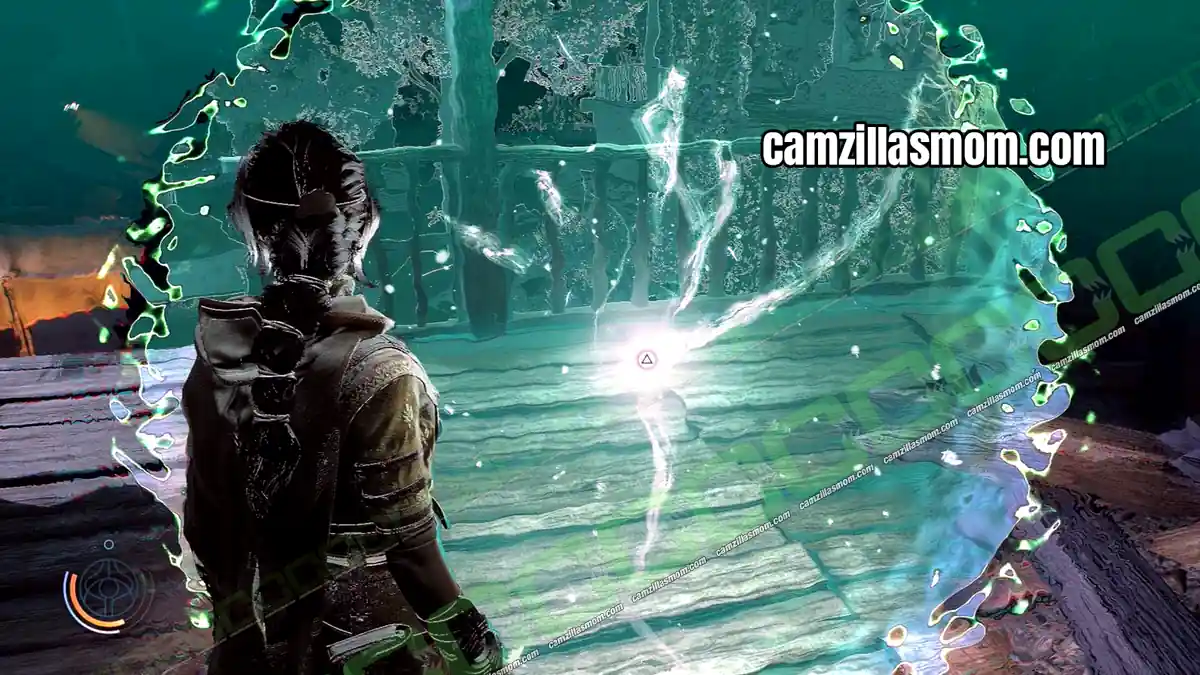
The Three Bodies 3
3 of 7 The Three Bodies – Chapter 5: Chamatkari Mandir
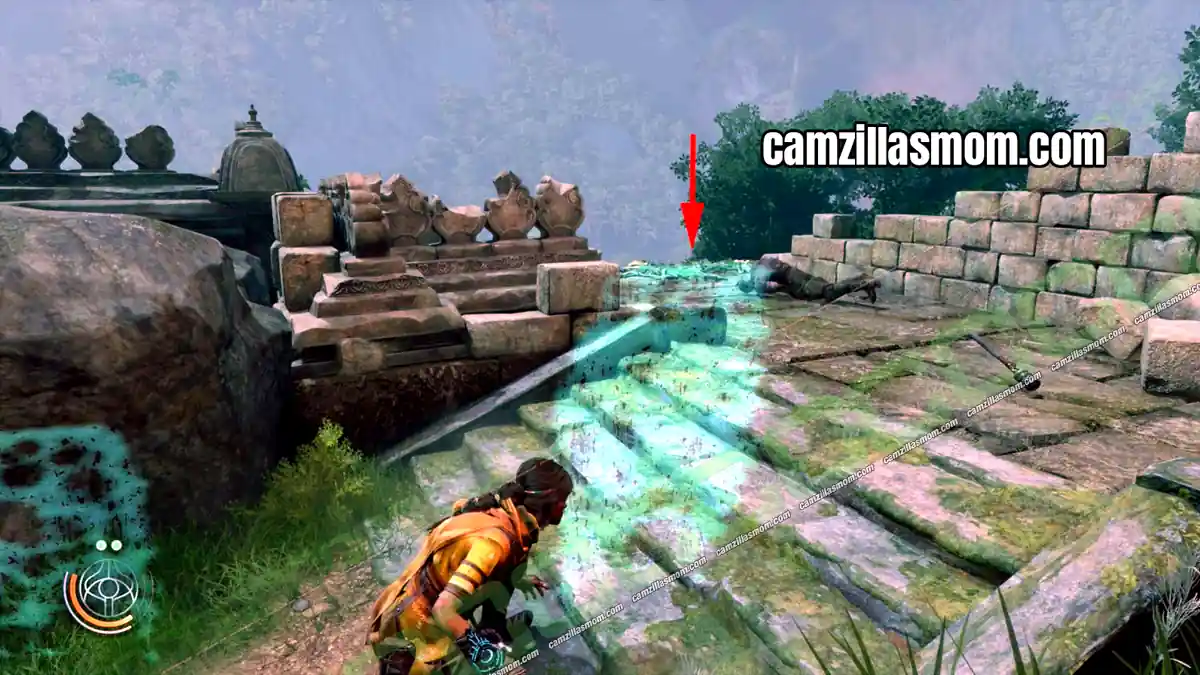
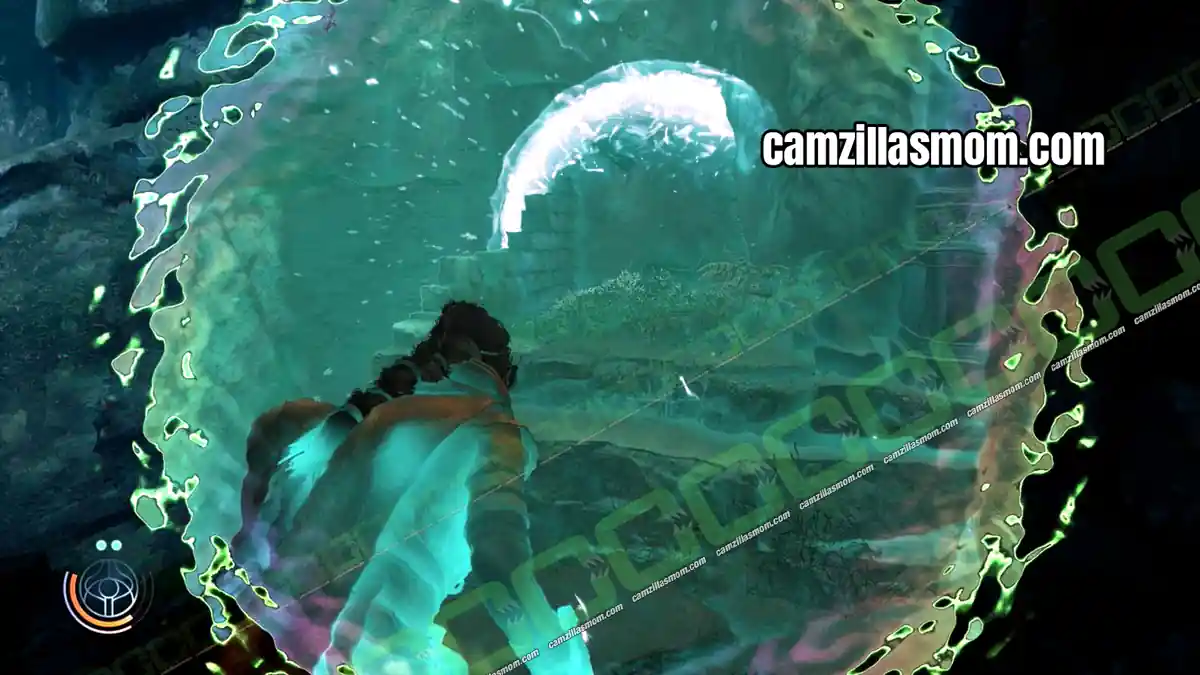
After Azra leaves, keep climbing to the hostile area with a forcefield. Climb down the vines to the bottom. The Three Bodies 3 is next to the waterfall.
The Three Bodies 4
4 of 7 The Three Bodies – Chapter 7: Quinta Matos
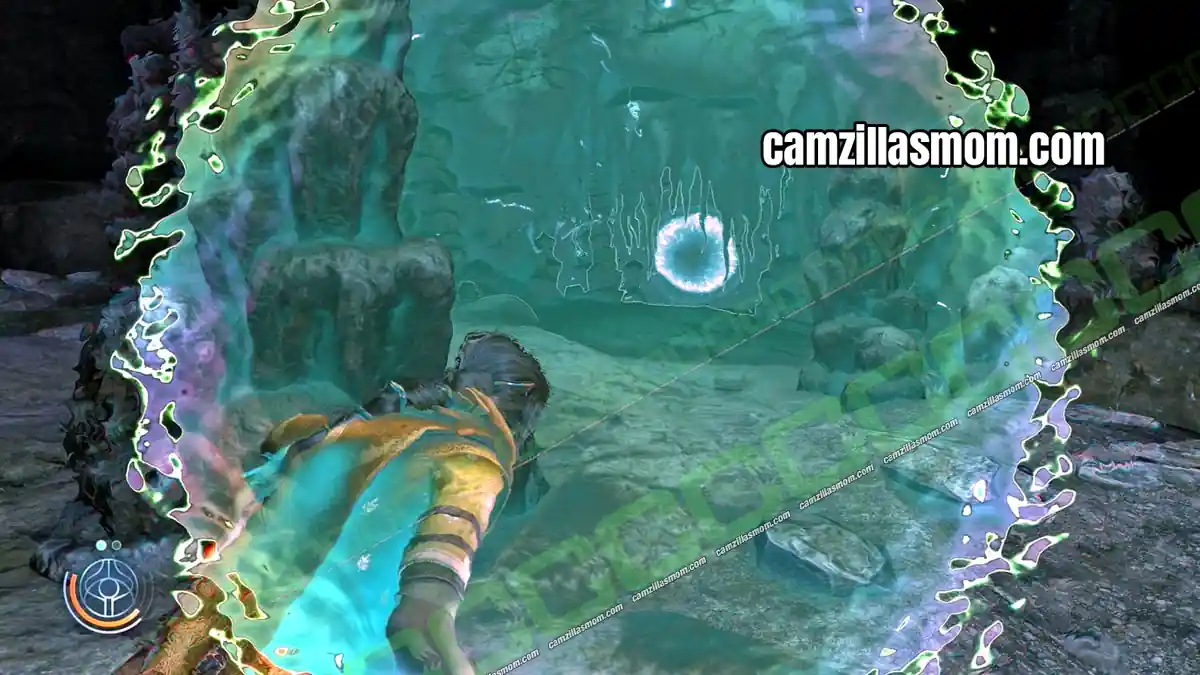
Before the last large hostile area, Luther says he is getting old. Peek into the Fold here to find The Three Bodies 4.
The Three Bodies 5
5 of 7 The Three Bodies – Chapter 9: Anatolia
The menu lists this as number 5, but you pick it up after The Three Bodies 6 from Chapter 8.
In the stalagmite cave you feel the vibration. In the large round room, Peek into the Fold to see the Scribing on your left, but keep going into the next area and take the stairs on your right.
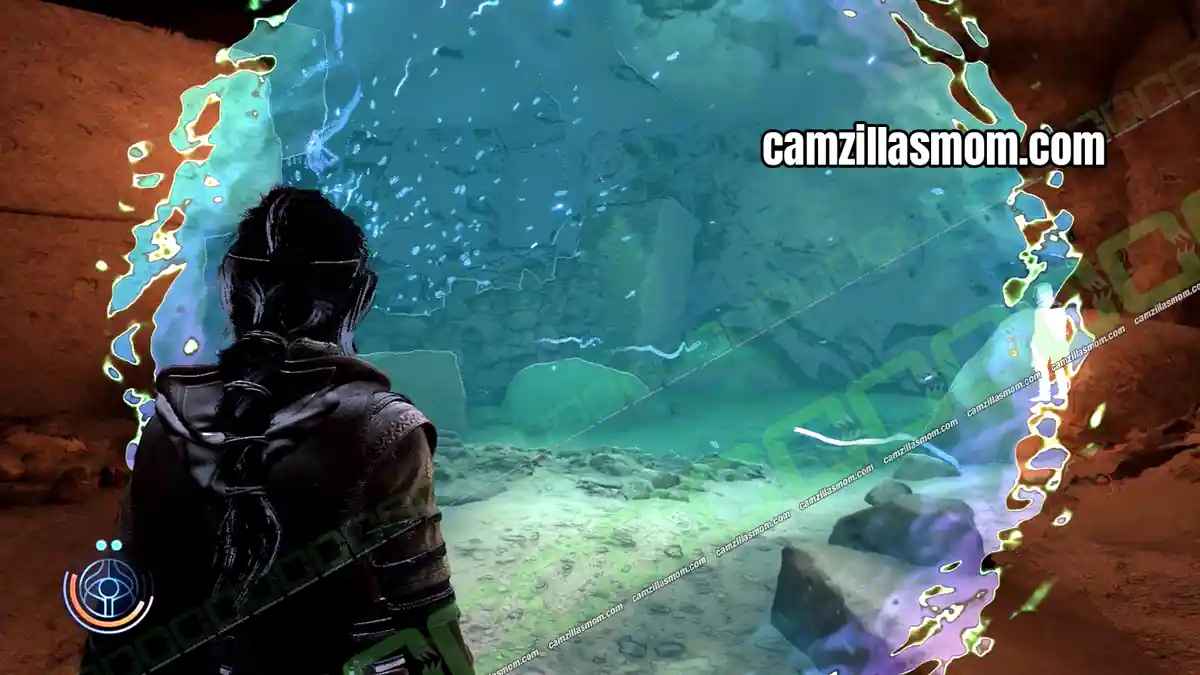
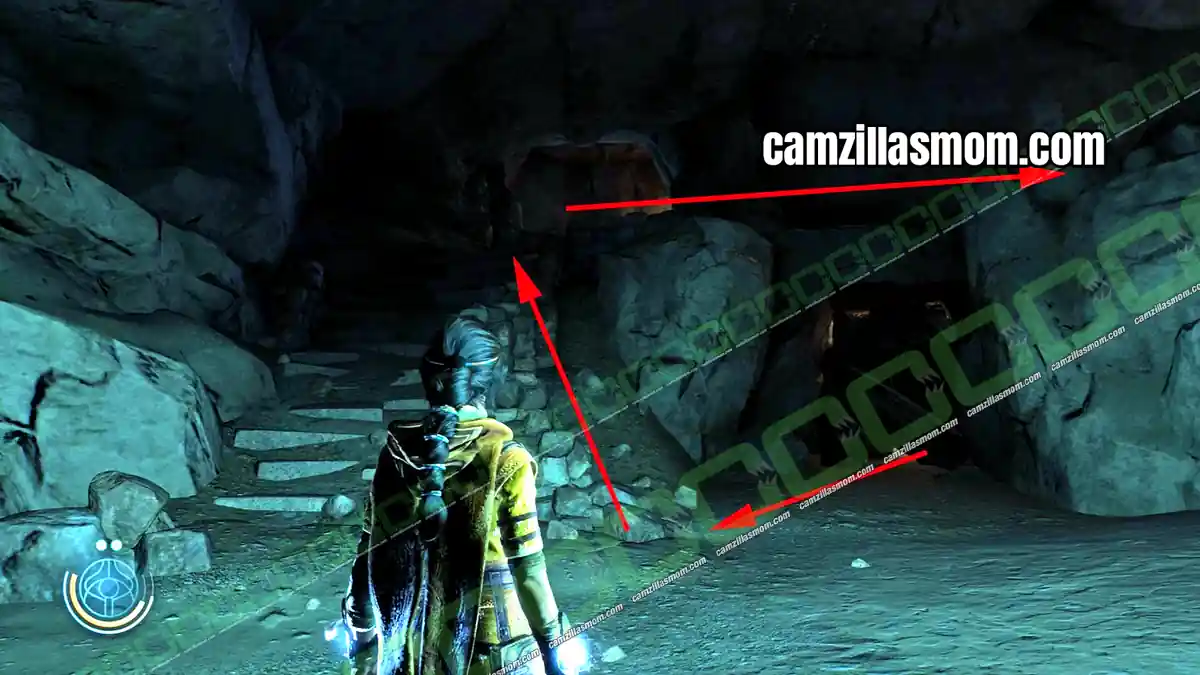
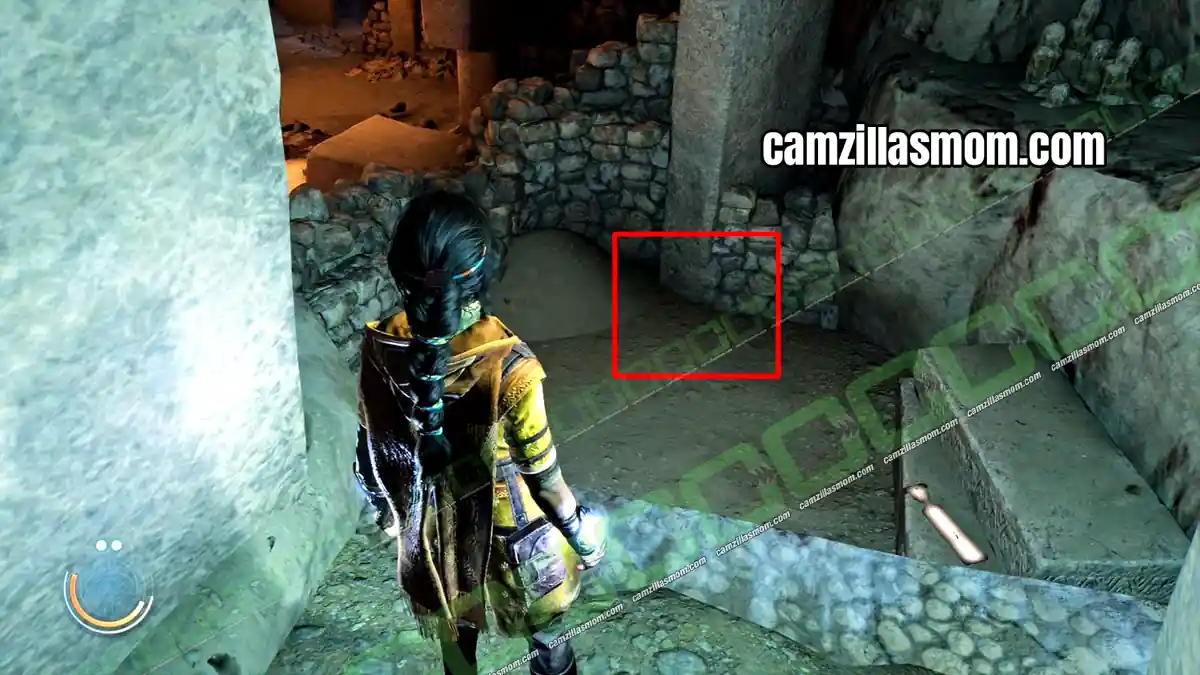
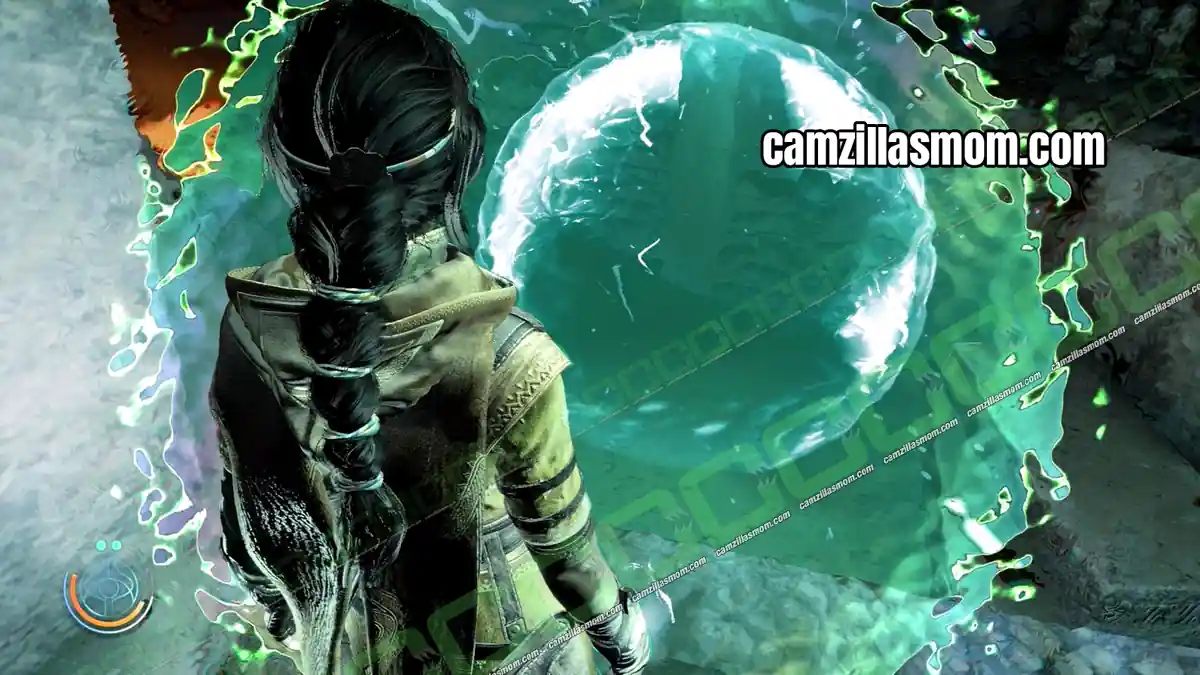
Follow the path until you see the Scribing below you, then drop down to pick it up.
The Three Bodies 6
6 of 7 The Three Bodies – Chapter 8: The Morning Star III
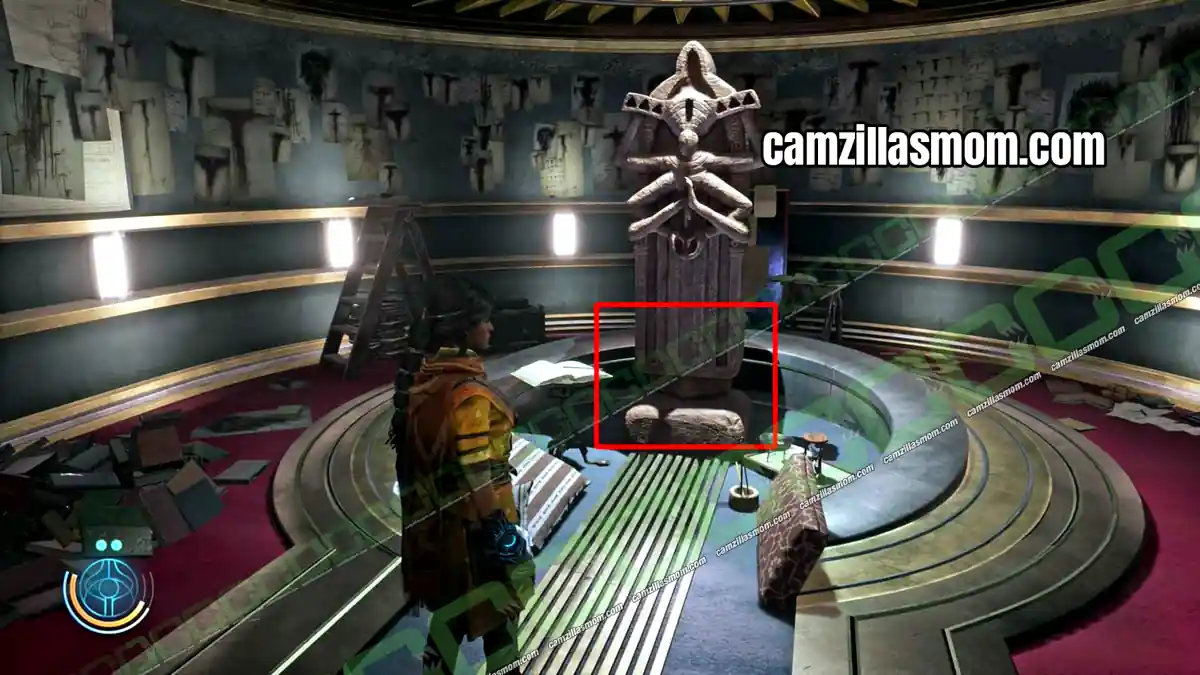
The menu lists this as number 6, but you find it before The Three Bodies 5. Interact with the display behind the desk in Vincent’s office to open the secret room. It is inside.
The Three Bodies 7
7 of 7 The Three Bodies – Chapter 12: Peshanden
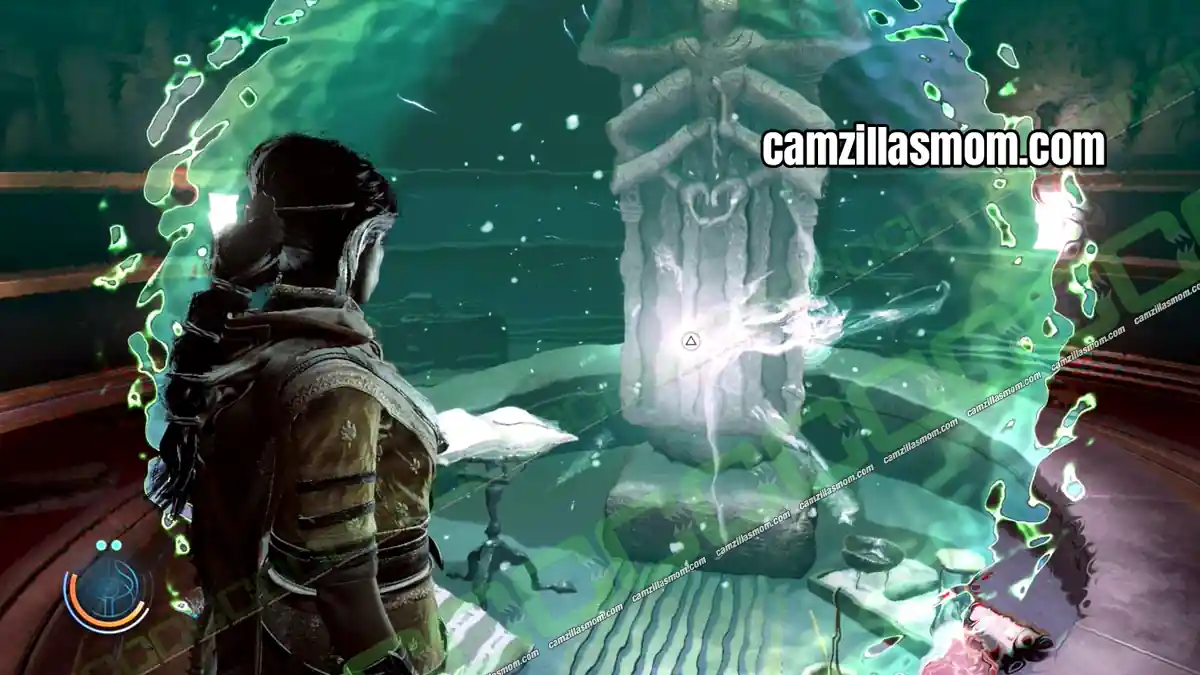
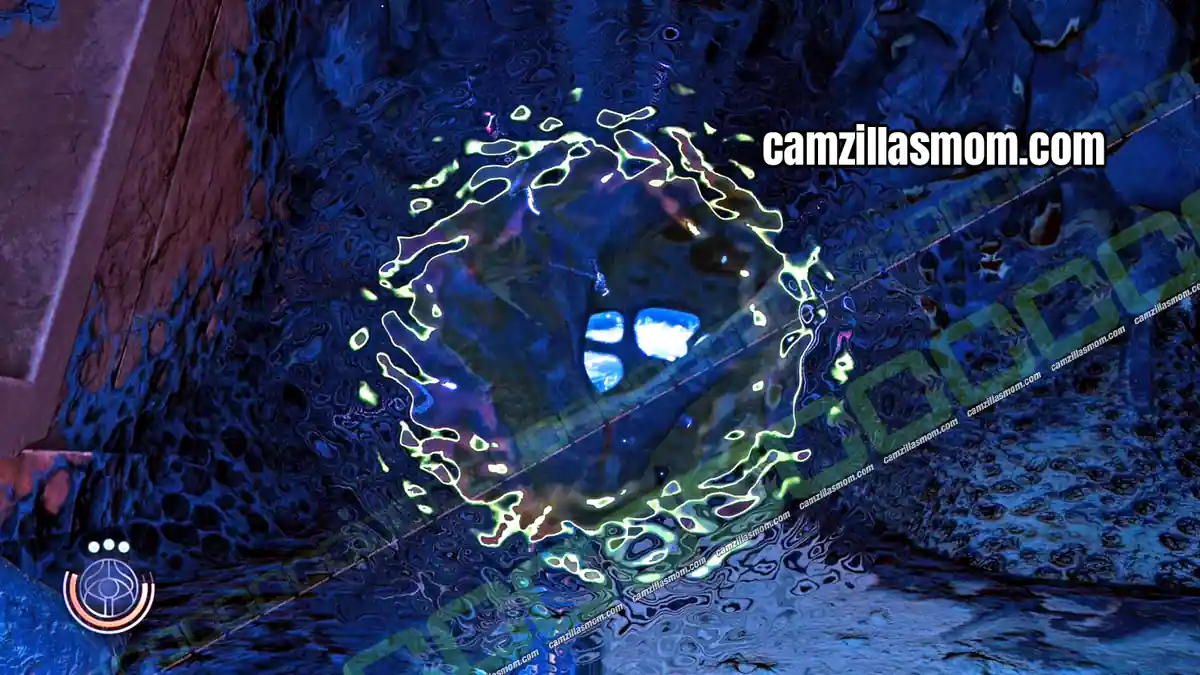
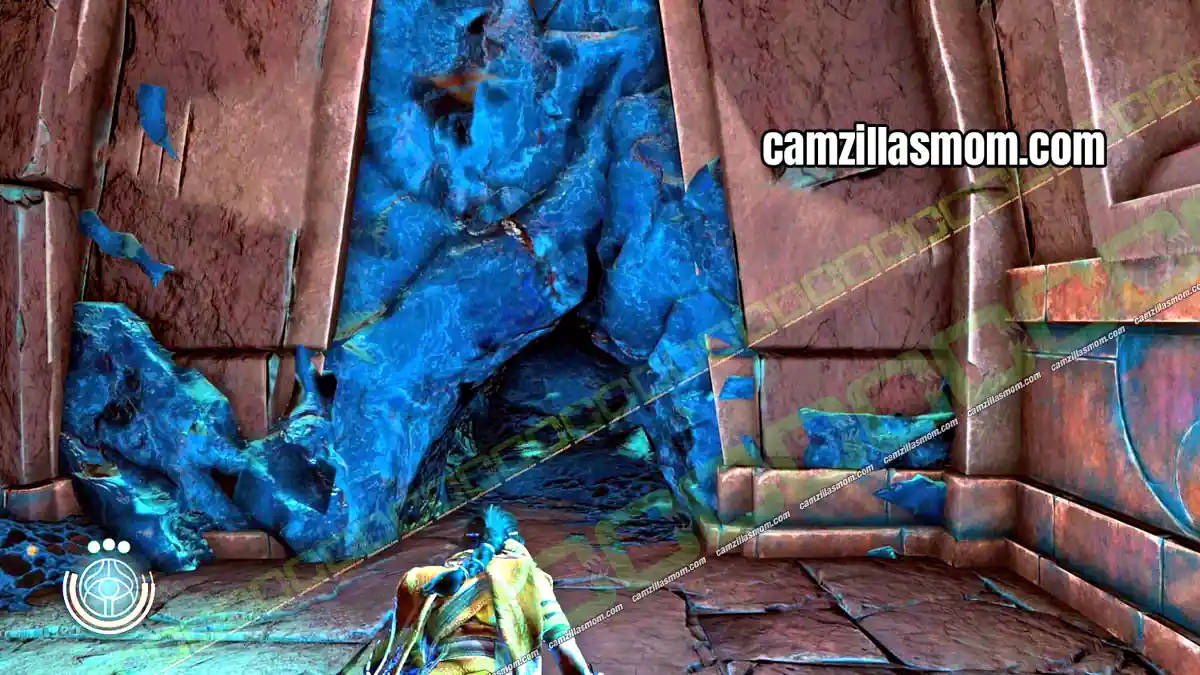
After you split from Buchra and fight the Gearhead, follow the path into a round room with a hole in the middle. Squeeze through the narrow passage into a dark corridor where you feel the Scribing. Peek into the Fold to see it through the wall, then walk around to the opening and pick it up.
Anomalies – Scribings
All 70 Anomalies in menu order. Anomaly 1 is part of the story.
Anomaly 1
1 of 70 Anomalies – Chapter 1: Richat Structure
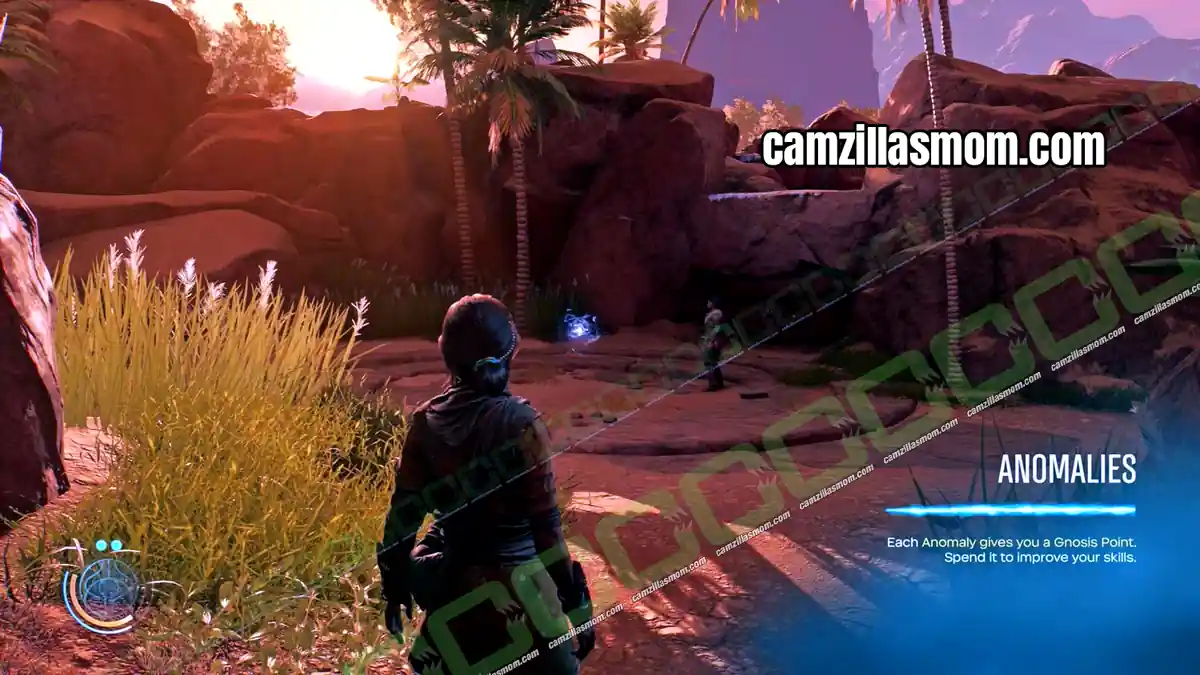
Anomaly 1 introduces the Skill Tree. It is part of the story, so you can not miss it.
Anomaly 2
2 of 70 Anomalies – Chapter 1: Richat Structure
After the sandstorm, you reach a small cave with a wooden platform. Cross the platform, take the stairs down on the other side and break the boxes to reach the Anomaly under the platform.
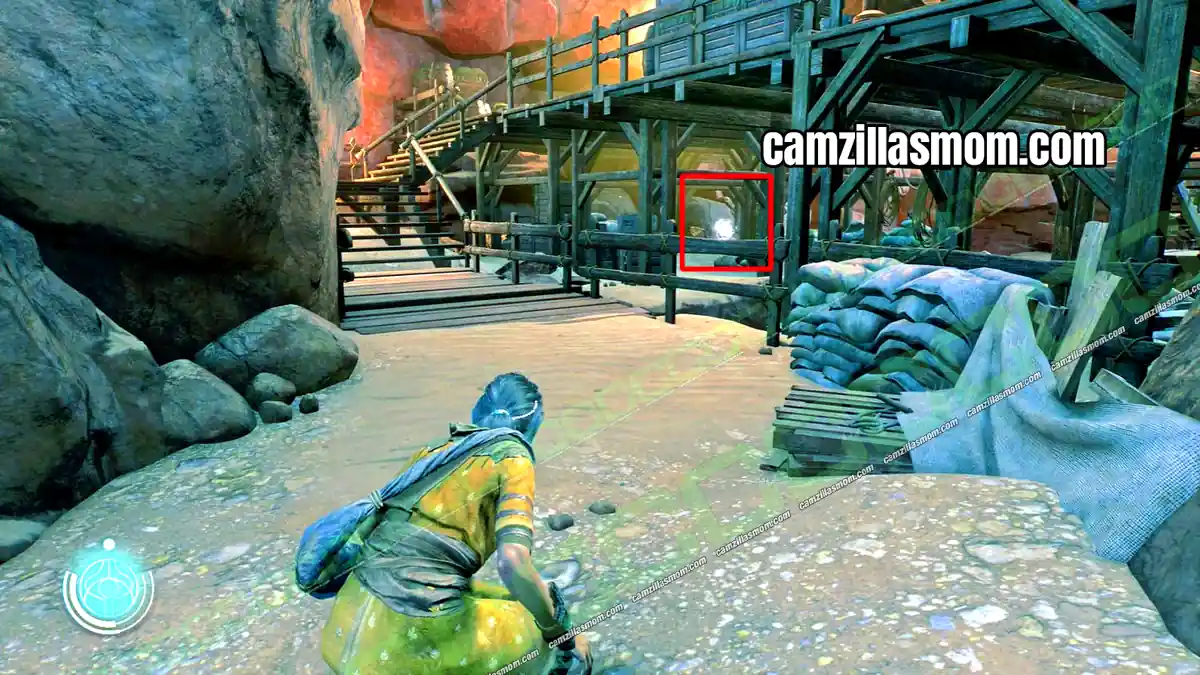
Anomaly 3
3 of 70 Anomalies – Chapter 2: Chamiri
After the second green gate, follow the path until you have tall grass on your right and a guarded area on your left. The Anomaly is in the dead-end alley there.
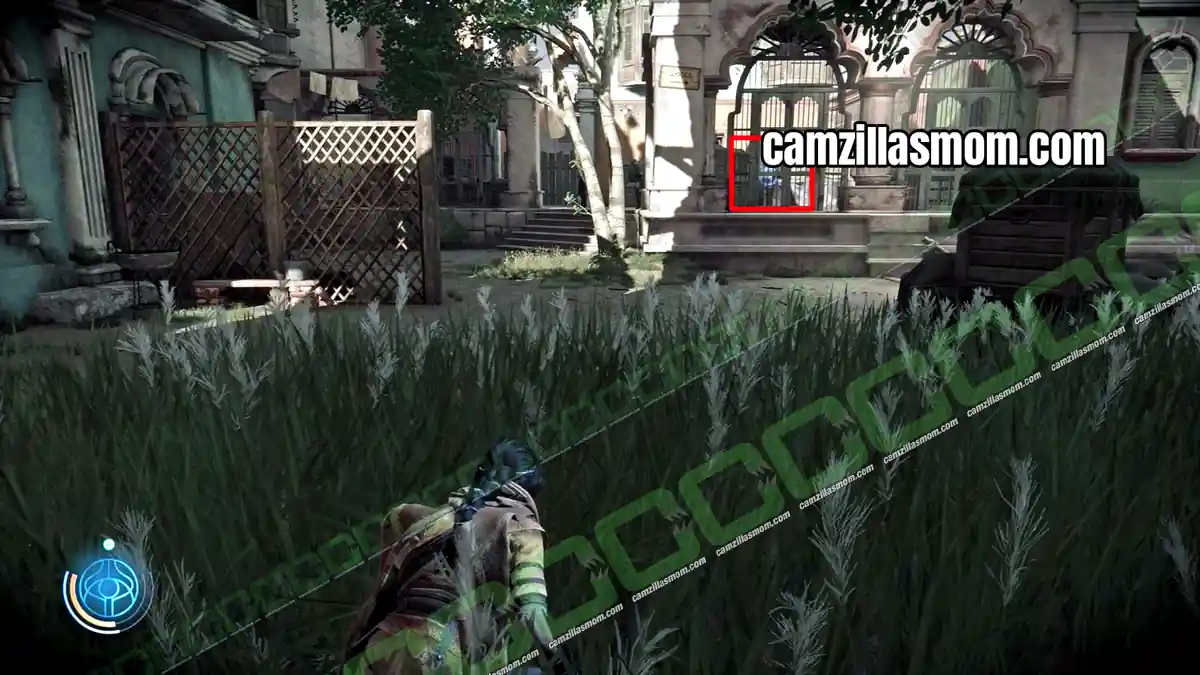
Anomaly 4
4 of 70 Anomalies – Chapter 2: Chamiri
Go through the next green gate, through the storage area and across the plank into the greenhouse. Jump onto the vines to the next building. At the end of the path, before the next hostile area, break the stack of boxes. The Anomaly is at the end of the alley behind it.
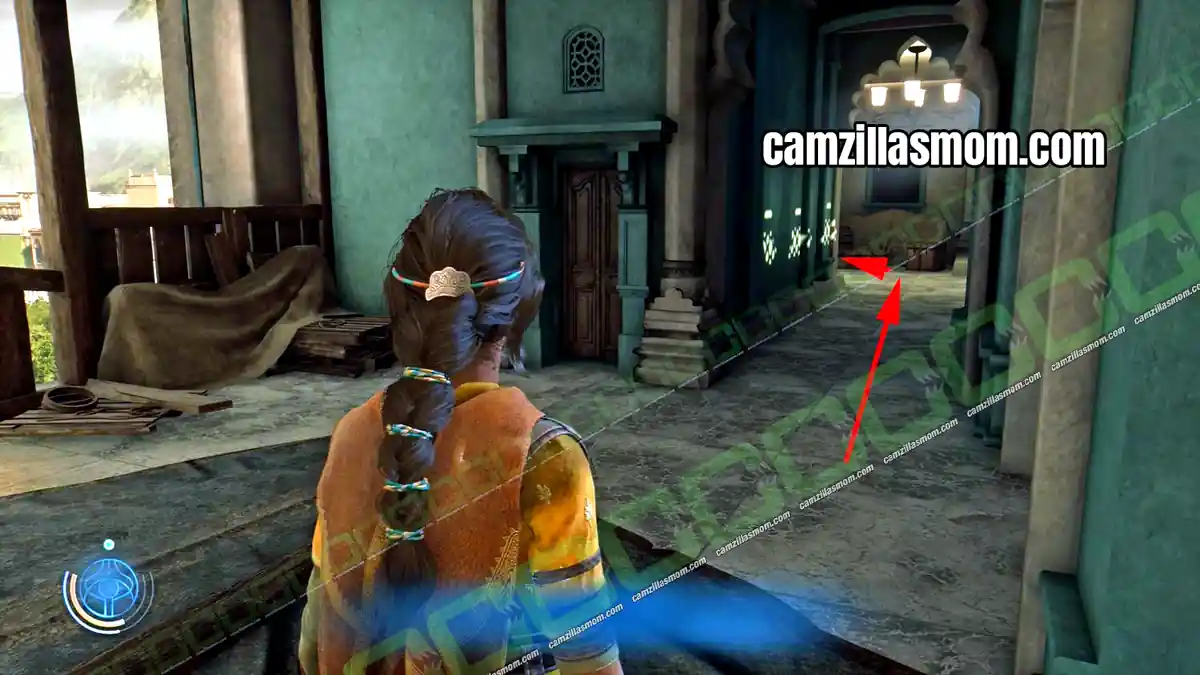
Anomaly 5
5 of 70 Anomalies – Chapter 2: Chamiri
Clear the hostiles on the rooftop, drop down and climb the vines of the next building. Balance across the plank on the right to the wine-red building and break the boxes on the balcony. Go around to the other side, drop down and jump over the plank. The Anomaly is across the gap.
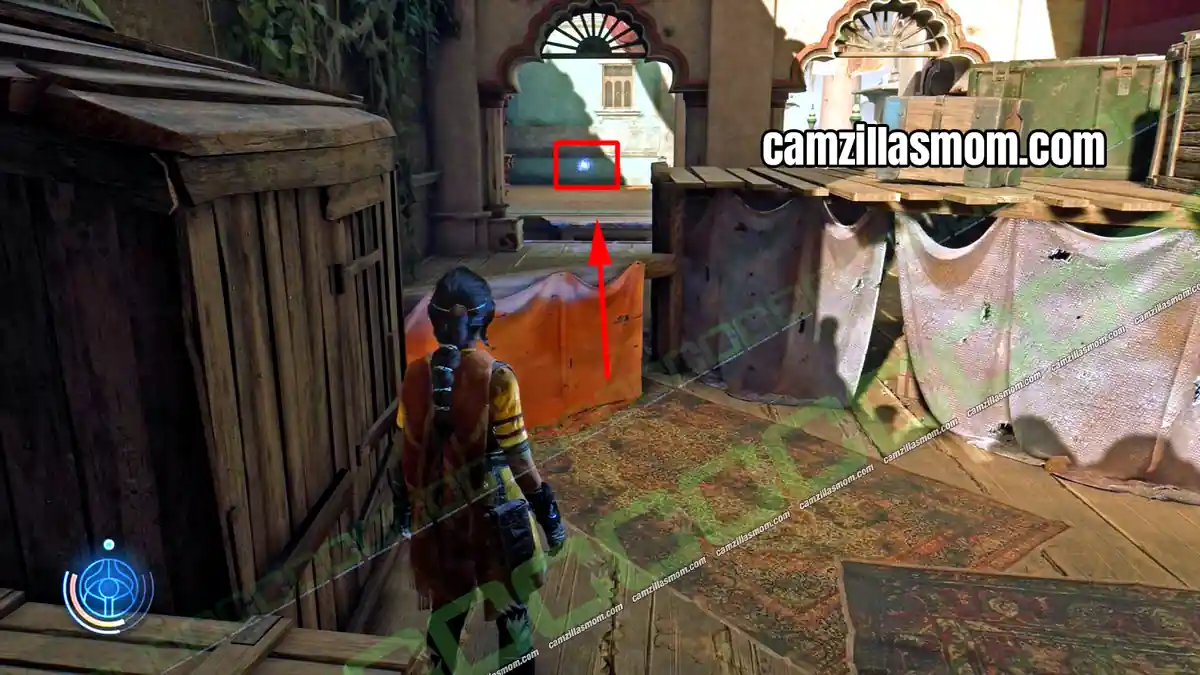
Anomaly 6
6 of 70 Anomalies – Chapter 2: Chamiri
At the docks, Haroona wants to go to the cargo docks across the harbour. In the market area, near Extractor 16, take the white staircase up to Anomaly 6.
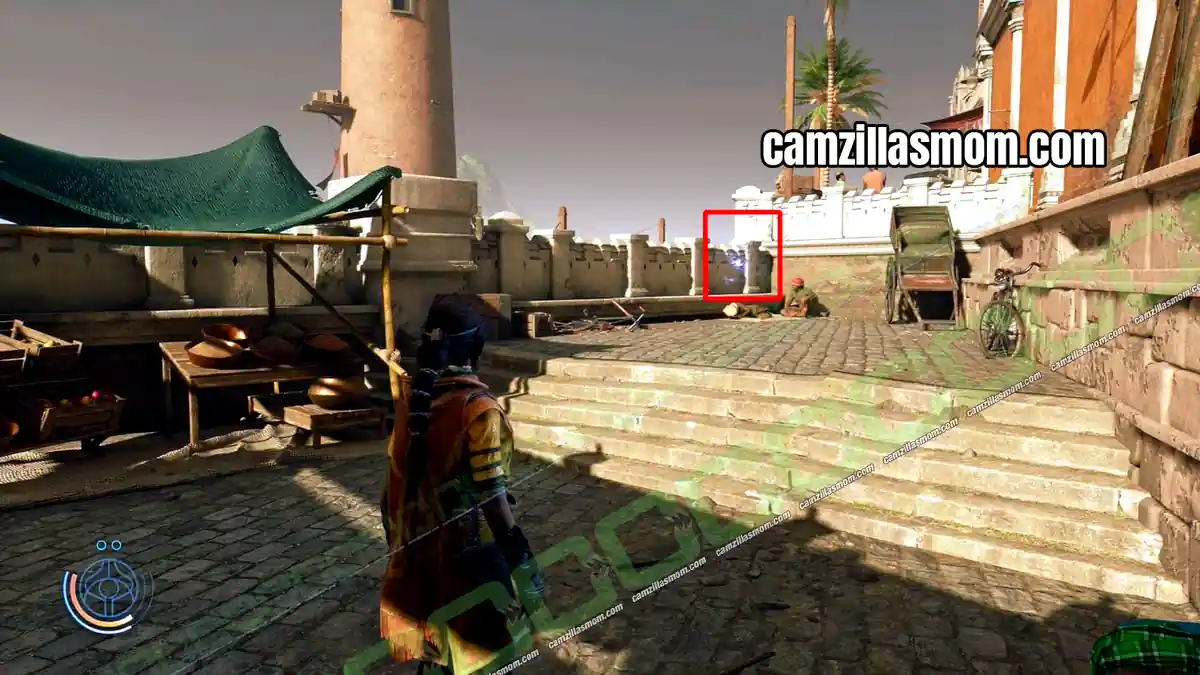
Anomaly 7
7 of 70 Anomalies – Chapter 2: Chamiri
After the last green door at the docks, go down to the water and walk back toward the docks.
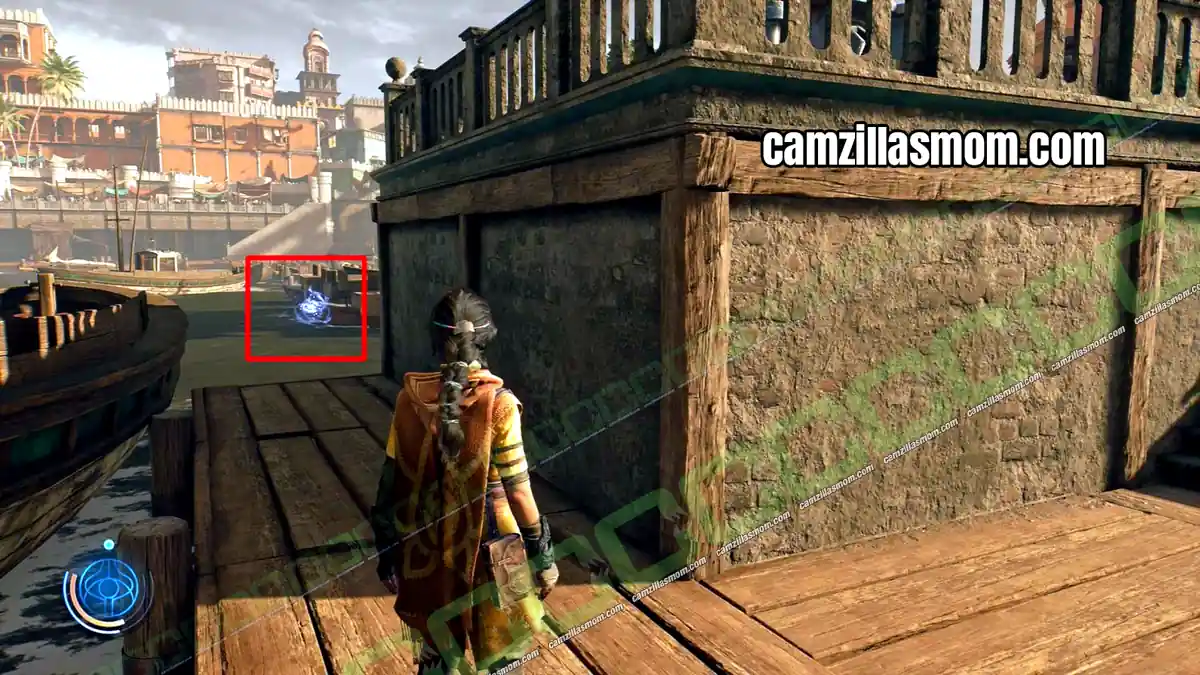
Anomaly 8
8 of 70 Anomalies – Chapter 3: Suknasari Forest
In the area with the scattered bodies, before you meet Luther, check the first building on the right.
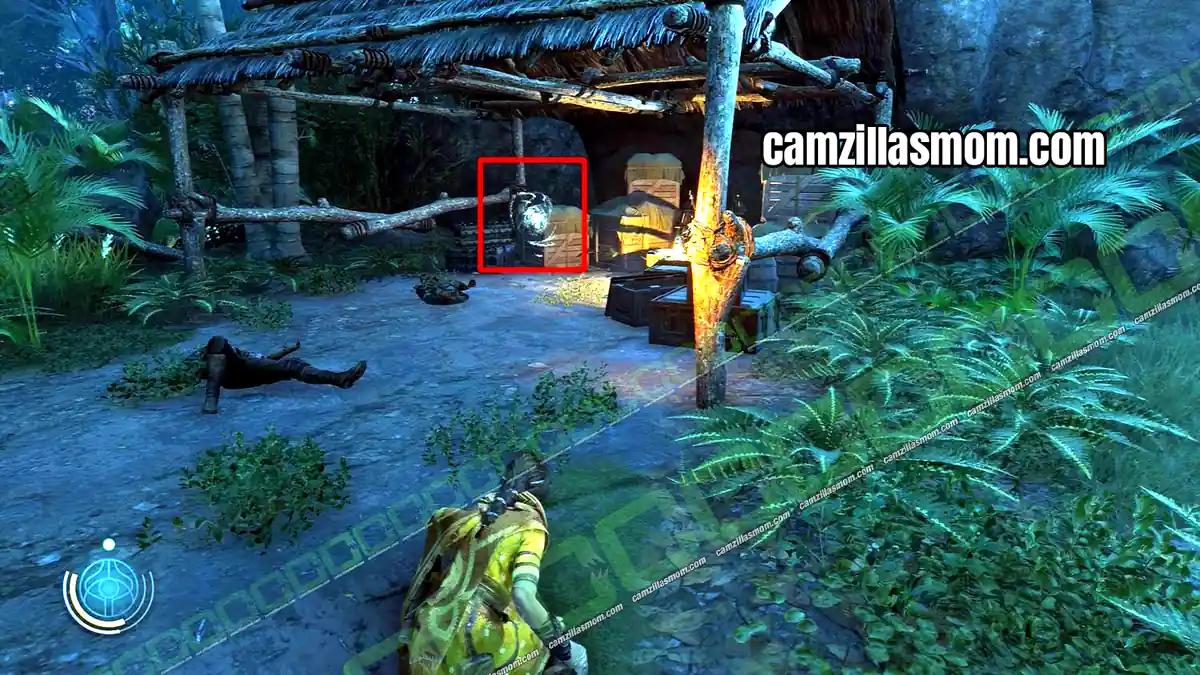
Anomaly 9
9 of 70 Anomalies – Chapter 3: Suknasari Forest
Meet Luther in the house and leave through the back. The story path goes straight ahead over the gap with the vines. Go left up the hill instead. The Anomaly is on the ledge at the top.
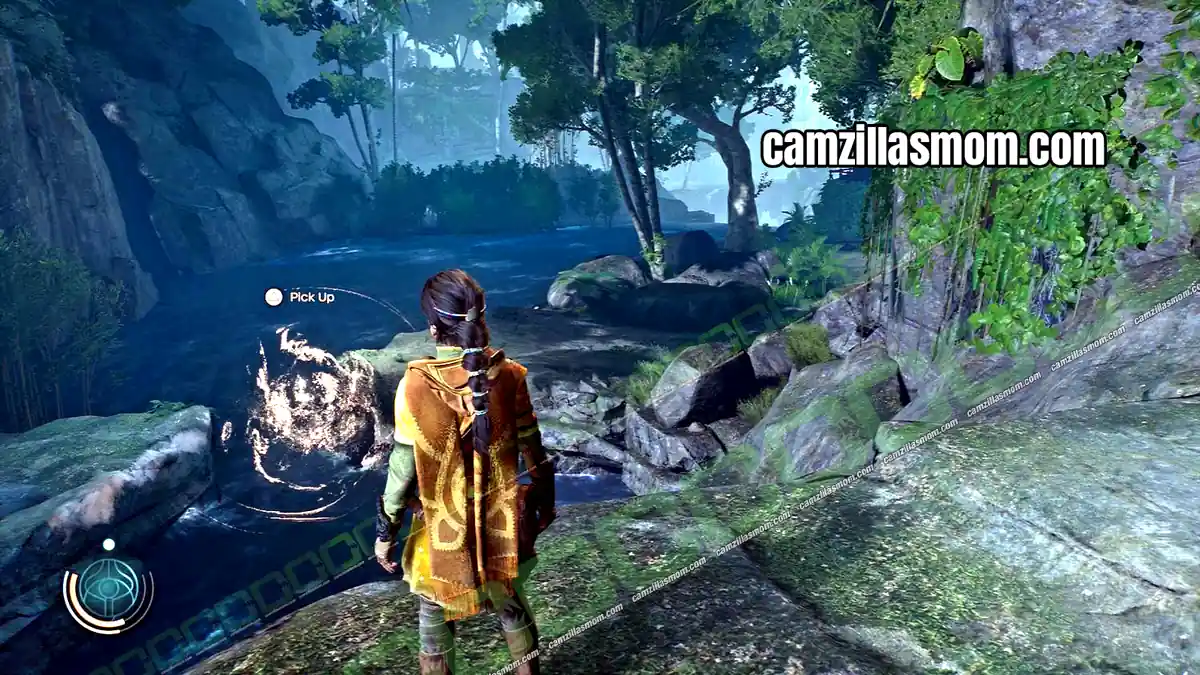
Anomaly 10
10 of 70 Anomalies – Chapter 3: Suknasari Forest
Back on the main path, go up to the bridge with Luther. Crouch under it to learn Ripple at the far end. Then cross the bridge. Anomaly 10 is at the other end, and the Force a Fight and Fail Ascension Card is in the middle of the bridge.
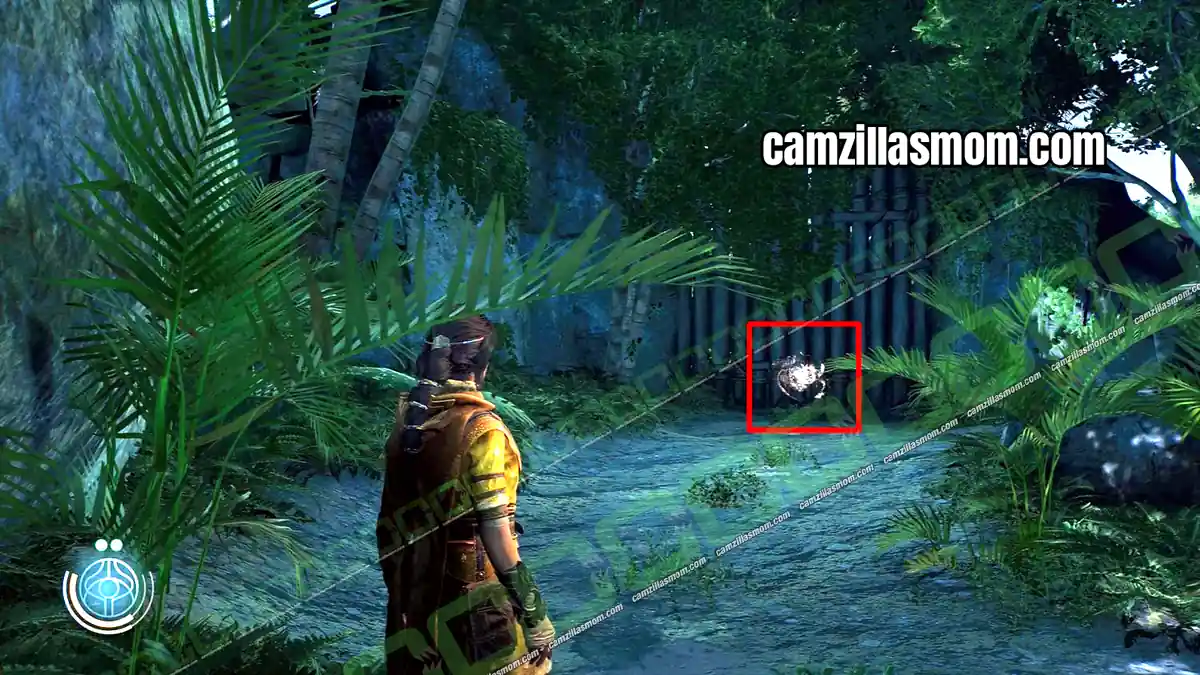
Anomaly 11
11 of 70 Anomalies – Chapter 3: Suknasari Forest
In the hostile camp in the cave with the two gunner lookouts, take the path on the opposite side from the gunners.
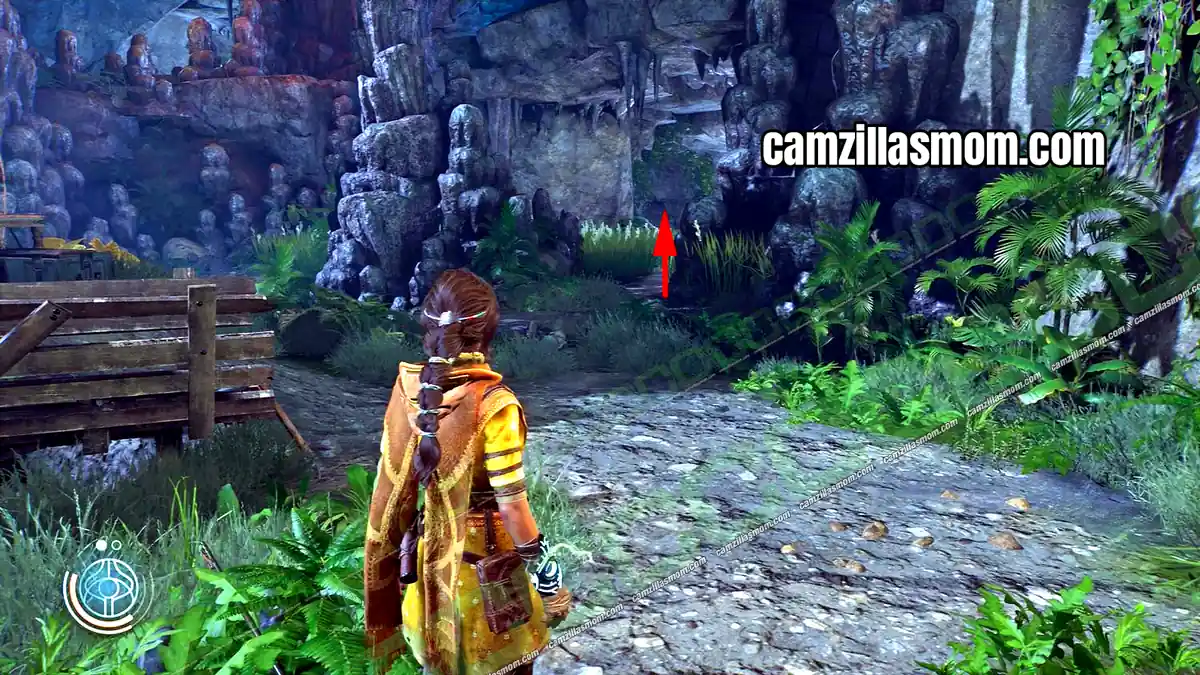
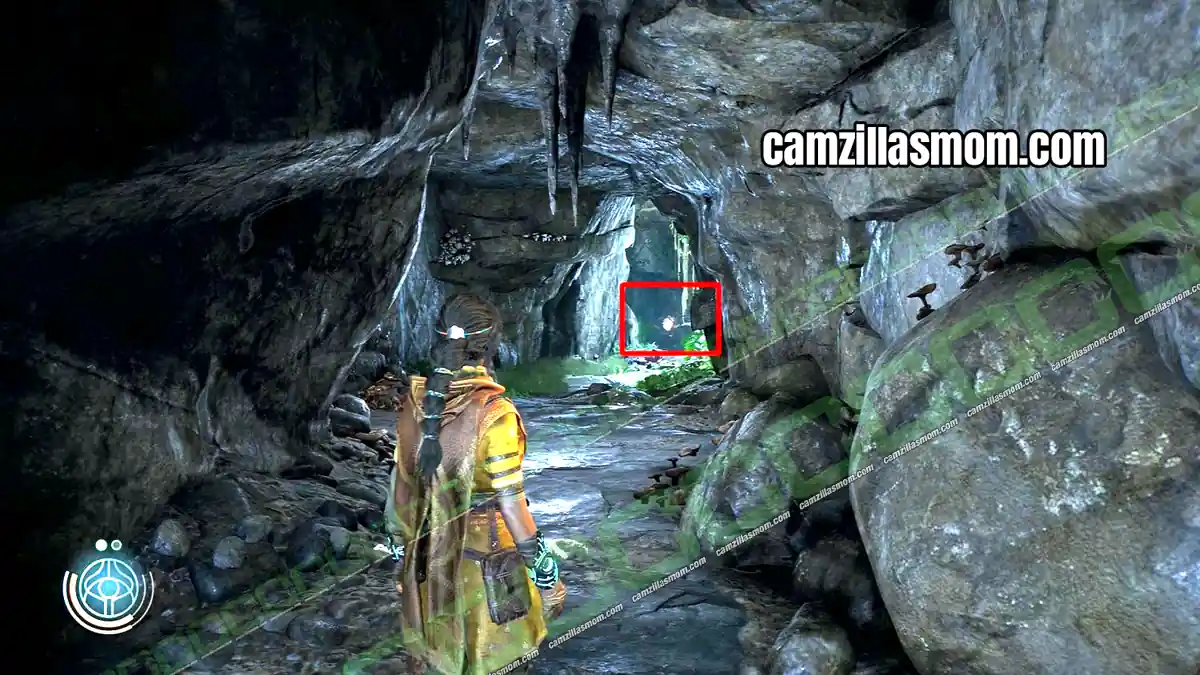
Anomaly 12
12 of 70 Anomalies – Chapter 3: Suknasari Forest
Climb up to one of the gunner positions.
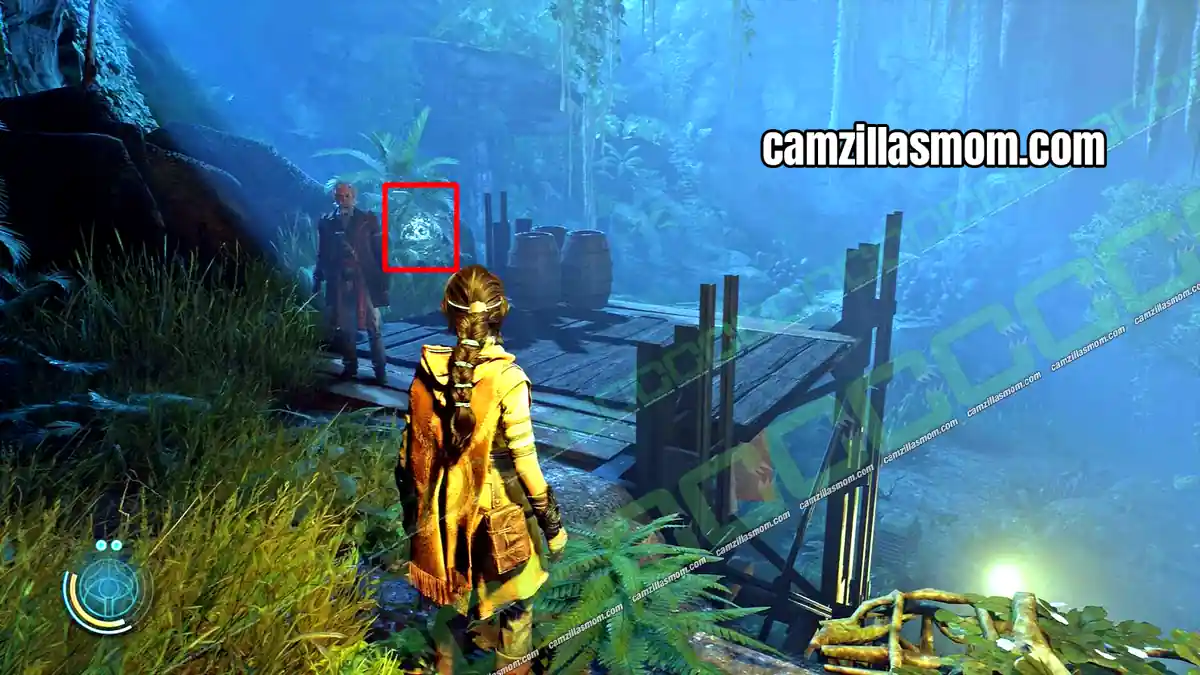
Anomaly 13
13 of 70 Anomalies – Chapter 3: Suknasari Forest
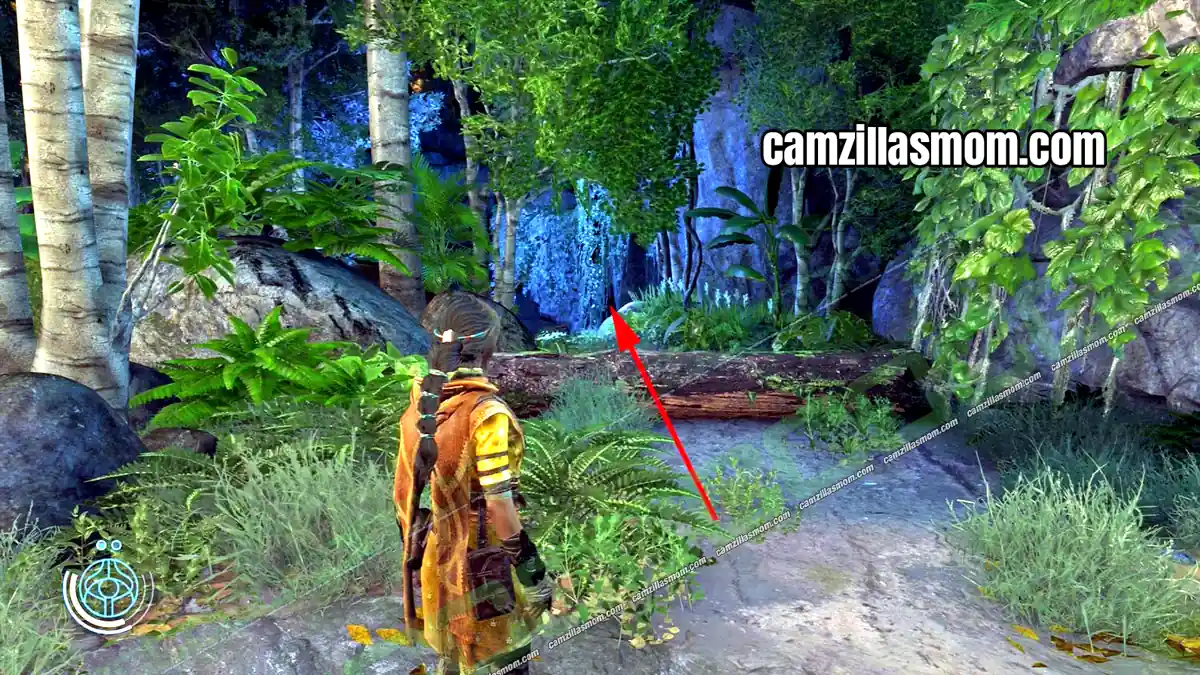
After you spot the Morning Star in the jungle, cross the log. The story goes right, but go left to a small pond. Topple the tree to cross and climb the vines.
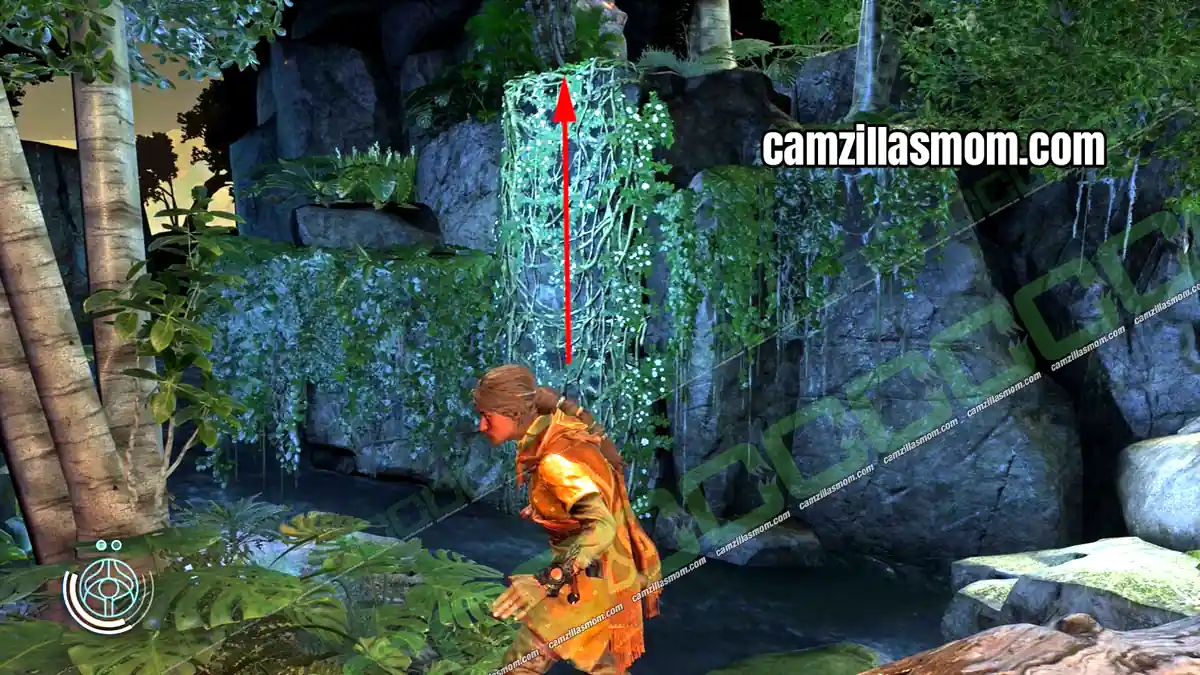
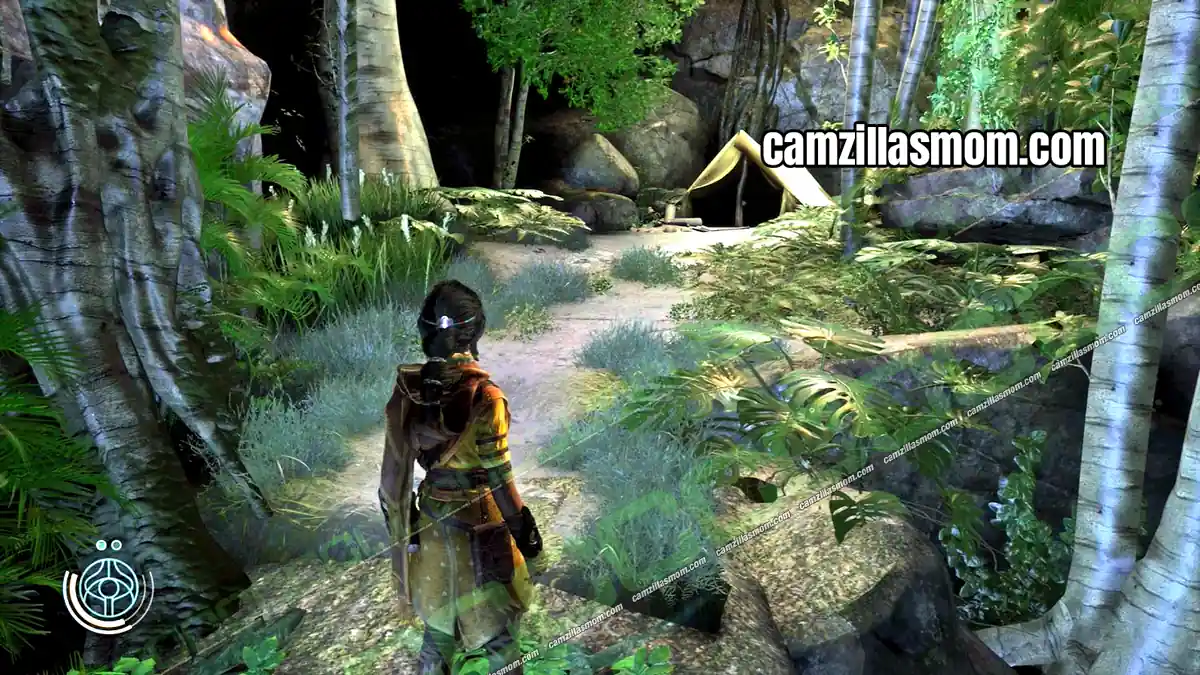
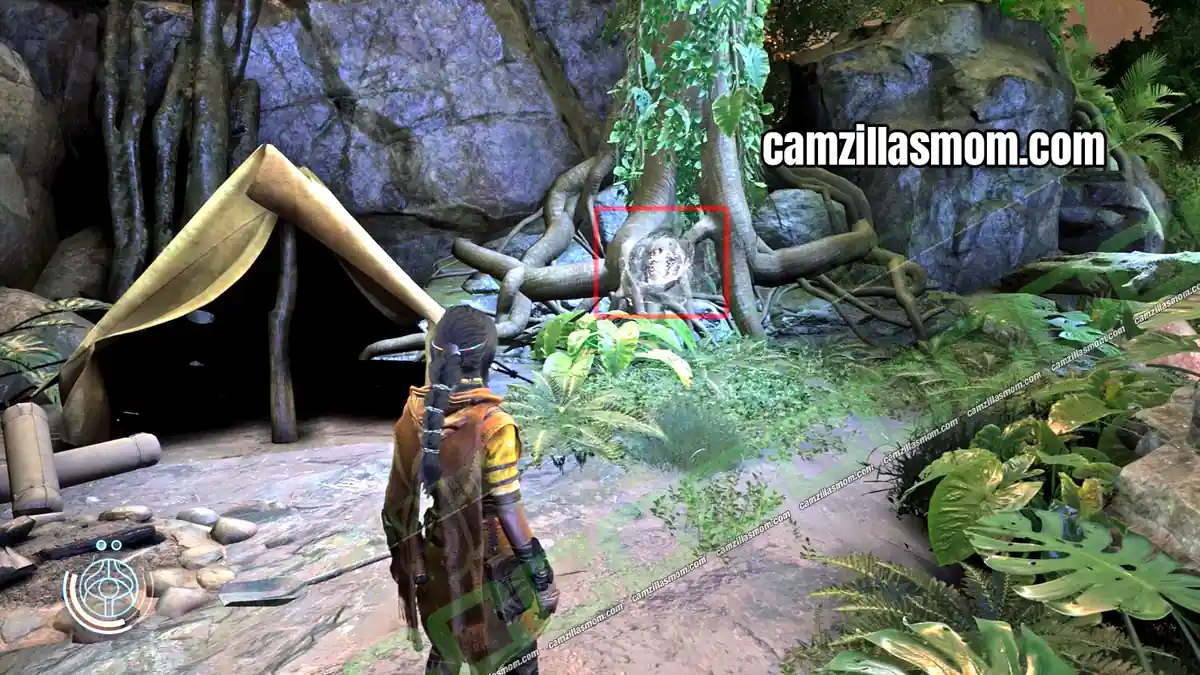
At the top, the Anomaly is next to the tent of an abandoned camp.
Anomaly 14
14 of 70 Anomalies – Chapter 3: Suknasari Forest
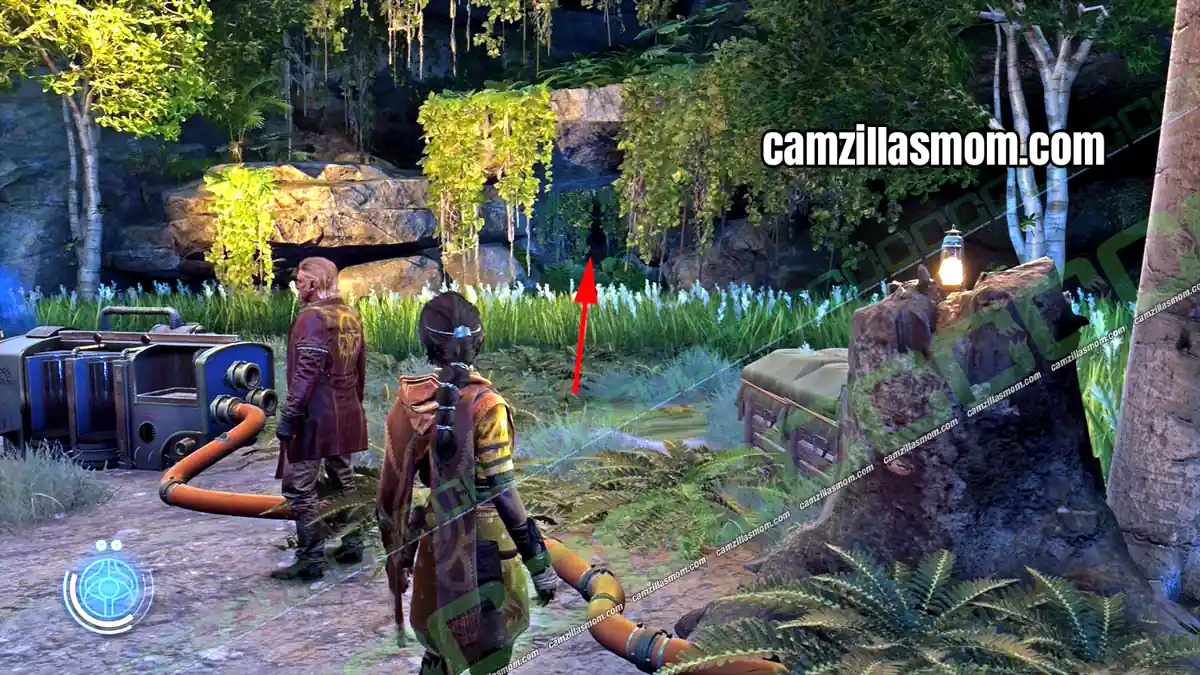
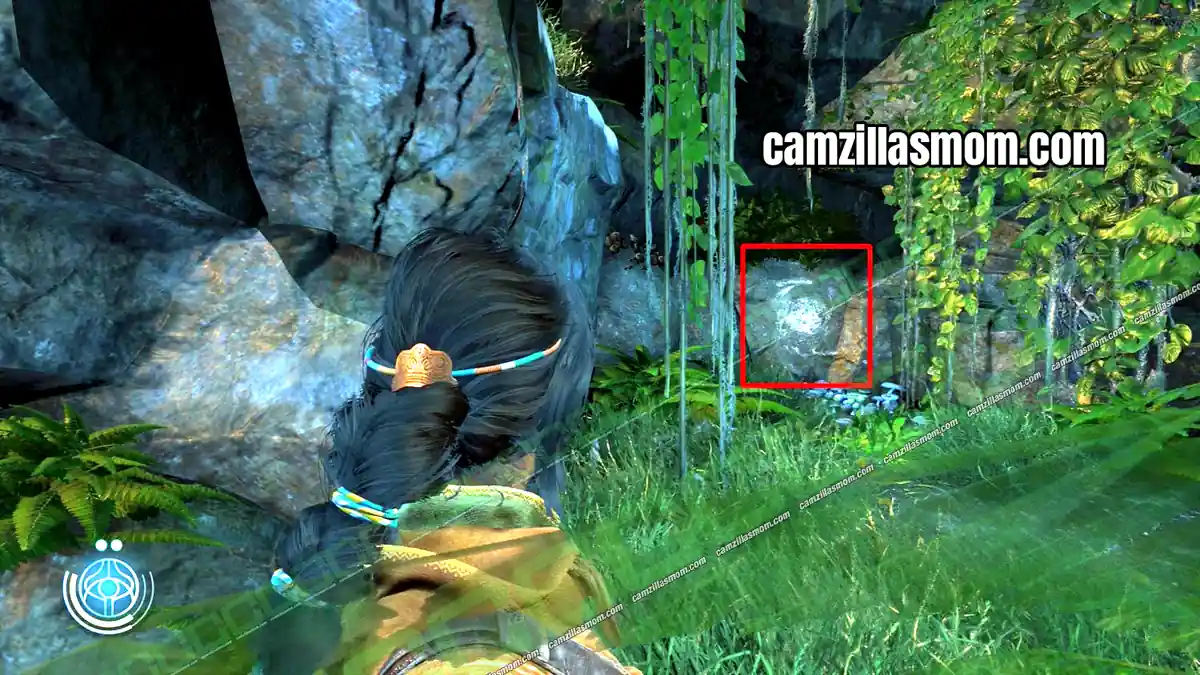
In the last camp before the Morning Star, a small cave sits next to one of the generators and the tall grass. The Anomaly is inside.
Anomaly 15
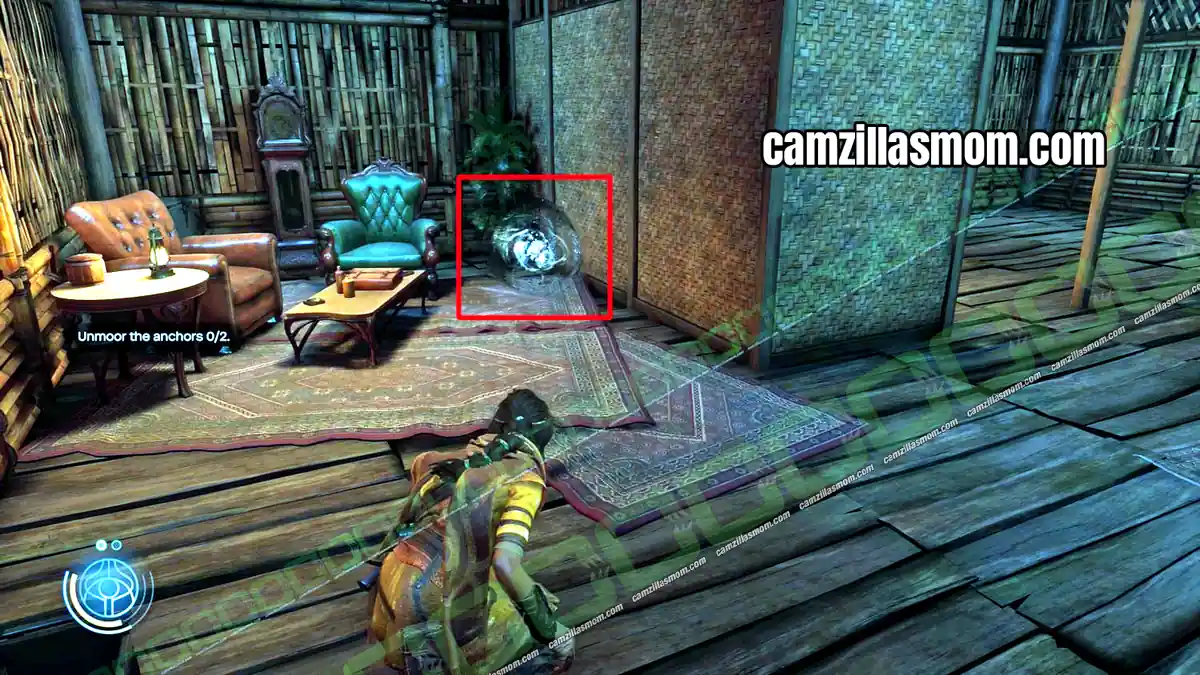
15 of 70 Anomalies – Chapter 3: Suknasari Forest
At the Morning Star, search the houses for the last Suknasari Forest Anomaly.
Anomaly 16
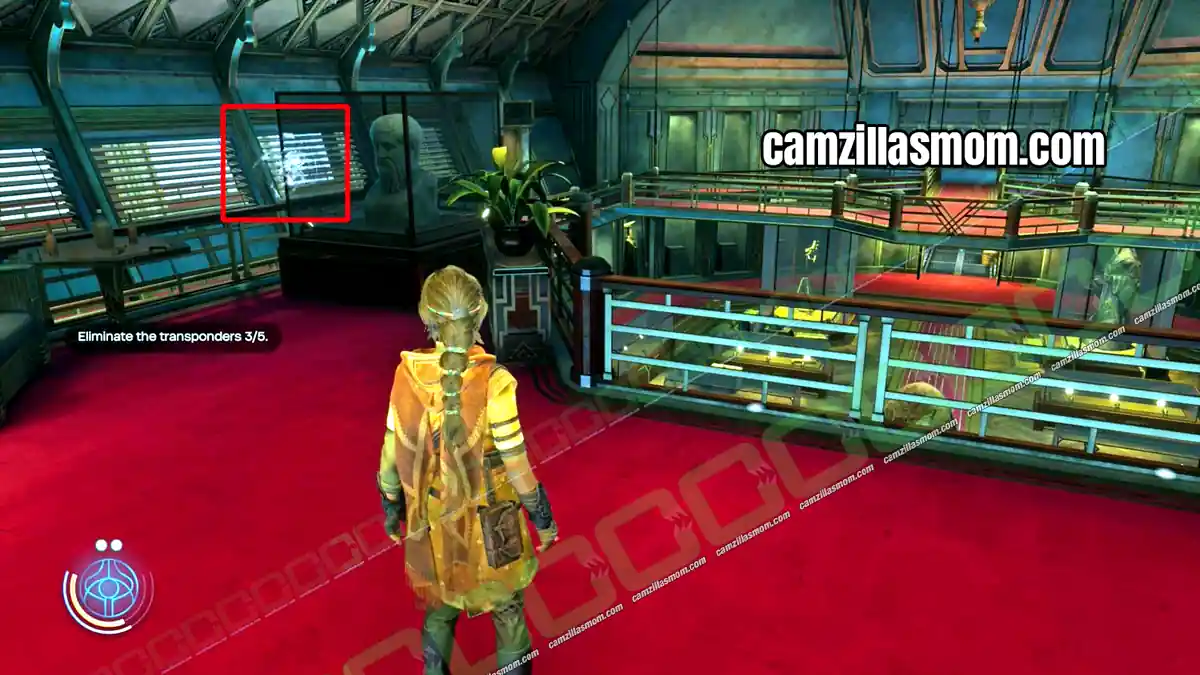
16 of 70 Anomalies – Chapter 4: The Morning Star I
On the Morning Star, go to the museum in the zeppelin. The Anomaly is on the upper floor.
Anomaly 17
17 of 70 Anomalies – Chapter 5: Chamatkari Mandir
Near the island with Tree of Life 2 you can see an Anomaly, but you can not reach it from the island. Walk up the hill, turn left straight away and go down to it.
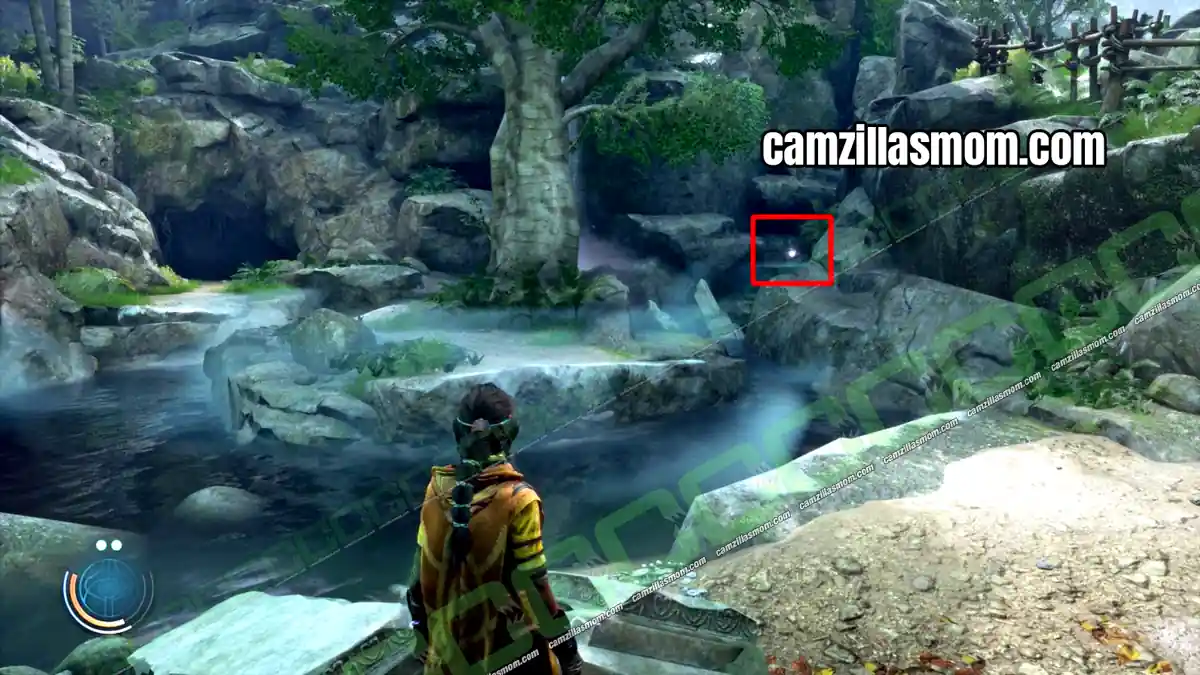
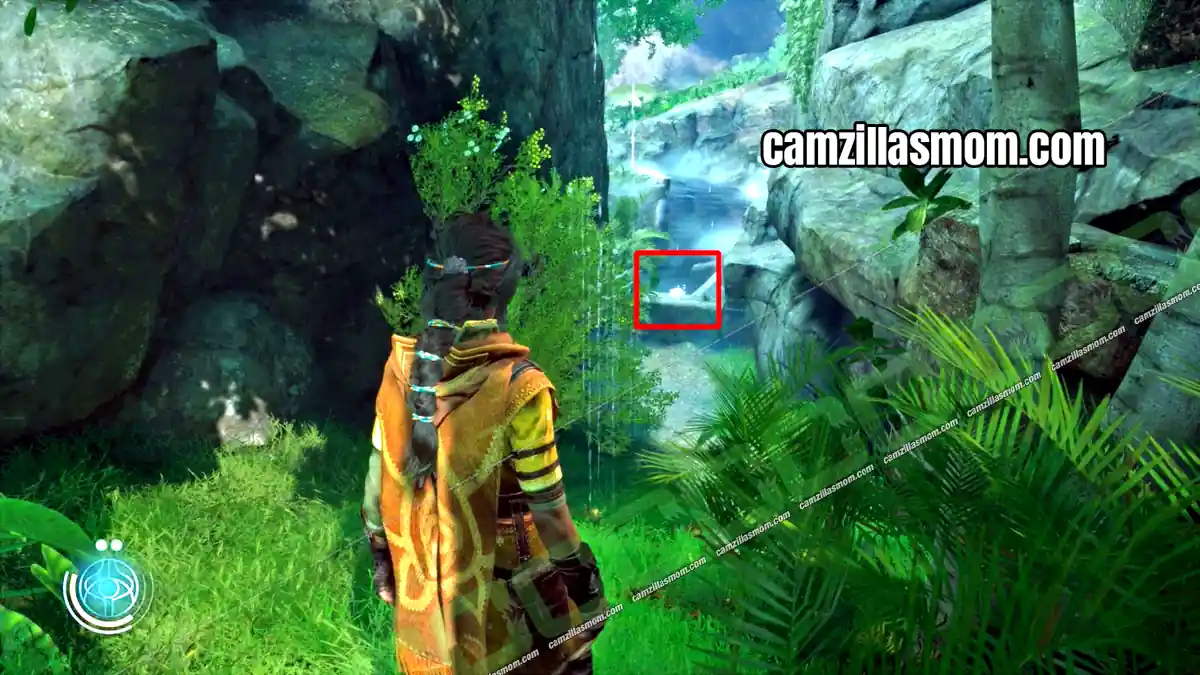
Anomaly 18
18 of 70 Anomalies – Chapter 5: Chamatkari Mandir
Jump across to the far side of the collapsed bridge and go down into the village for the next Echo. Climb the vines behind the Echo up to a destructible wall, break it, jump the next gap and keep climbing. The Anomaly is on a ledge overlooking the valley.
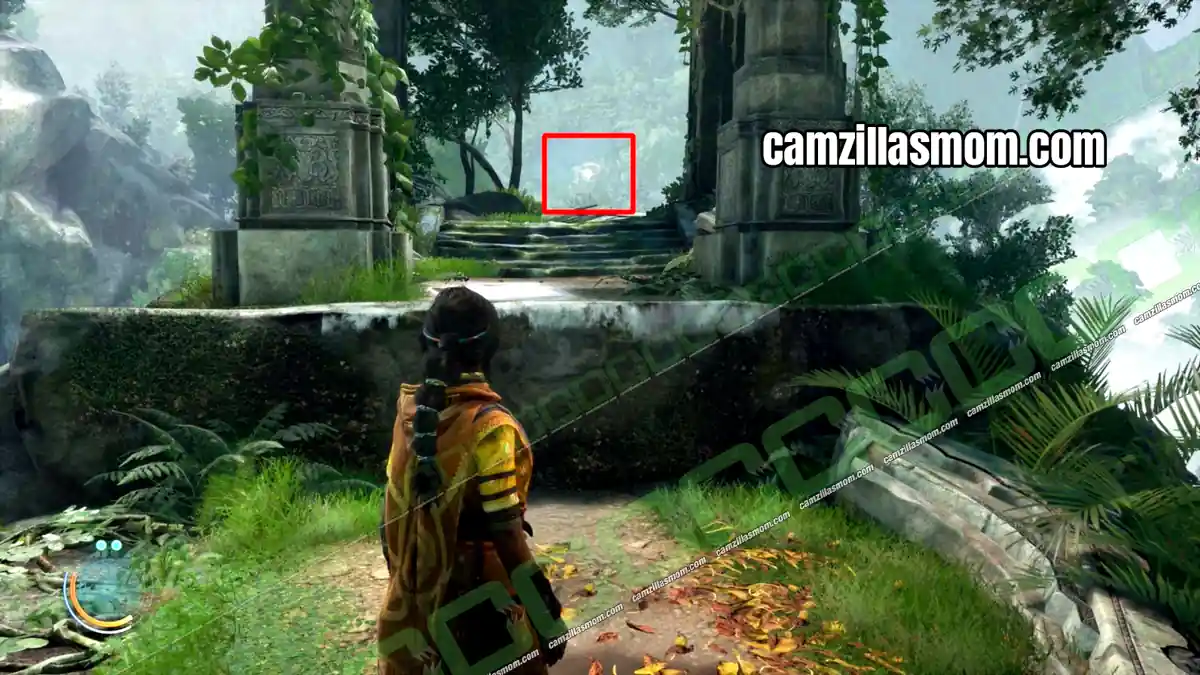
Anomaly 19
19 of 70 Anomalies – Chapter 5: Chamatkari Mandir
From Anomaly 18, go back down to the foot of the ruins. Follow the path down to the far side of the collapsed bridge.
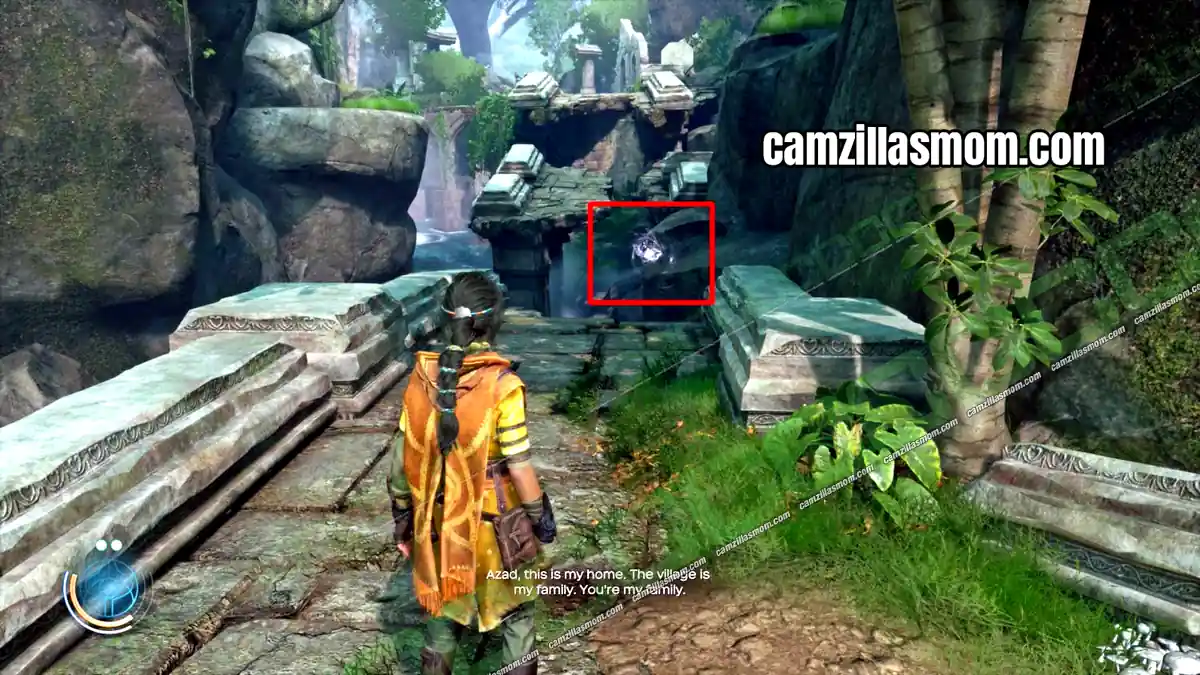
Anomaly 20
20 of 70 Anomalies – Chapter 5: Chamatkari Mandir
When you reach the village, Azra warns Haroona about a sharpshooter in one of the huts. Before you cross the rope bridge, check the hut at the top of the hill.
Anomaly 21
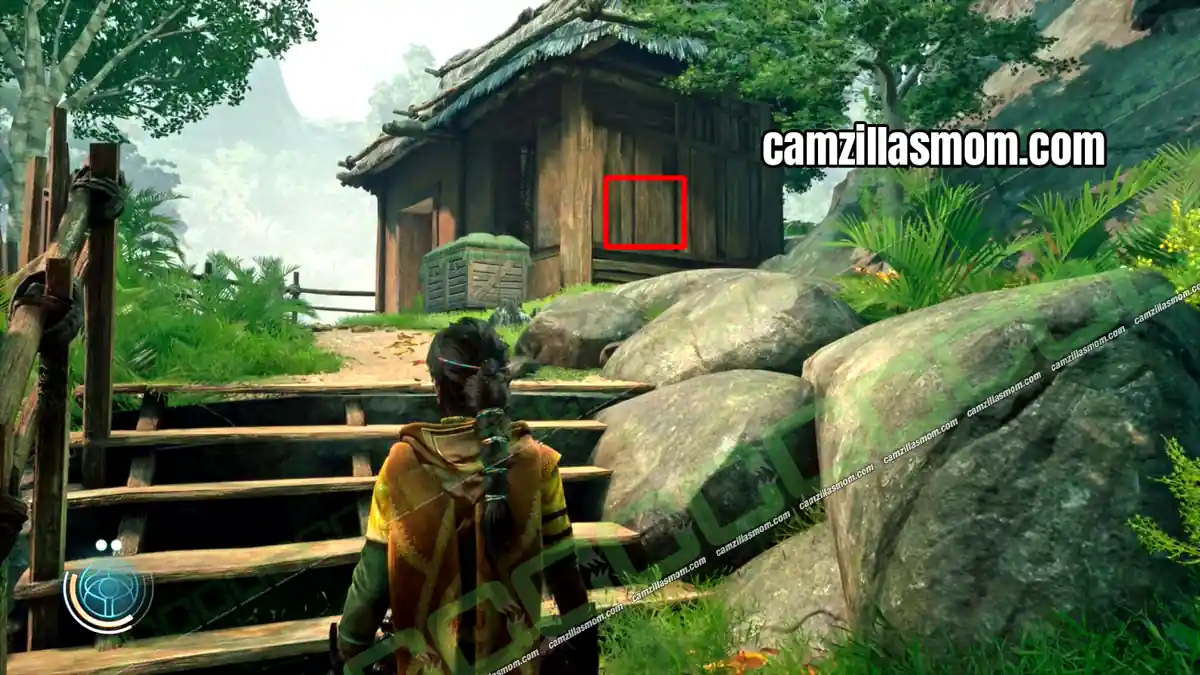
21 of 70 Anomalies – Chapter 5: Chamatkari Mandir
In the top hut of the village. Take the stairs up and walk around the house to get in.
Anomaly 22
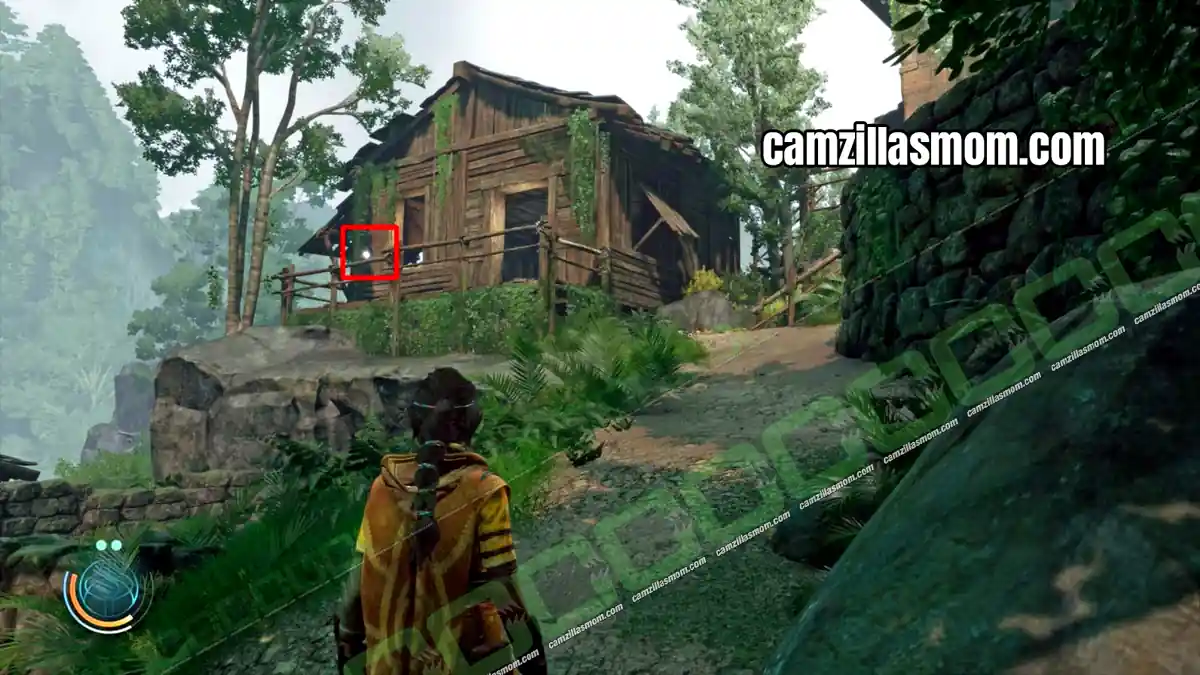
22 of 70 Anomalies – Chapter 5: Chamatkari Mandir
On your way down from Anomaly 21, check behind the house on your left.
Anomaly 23
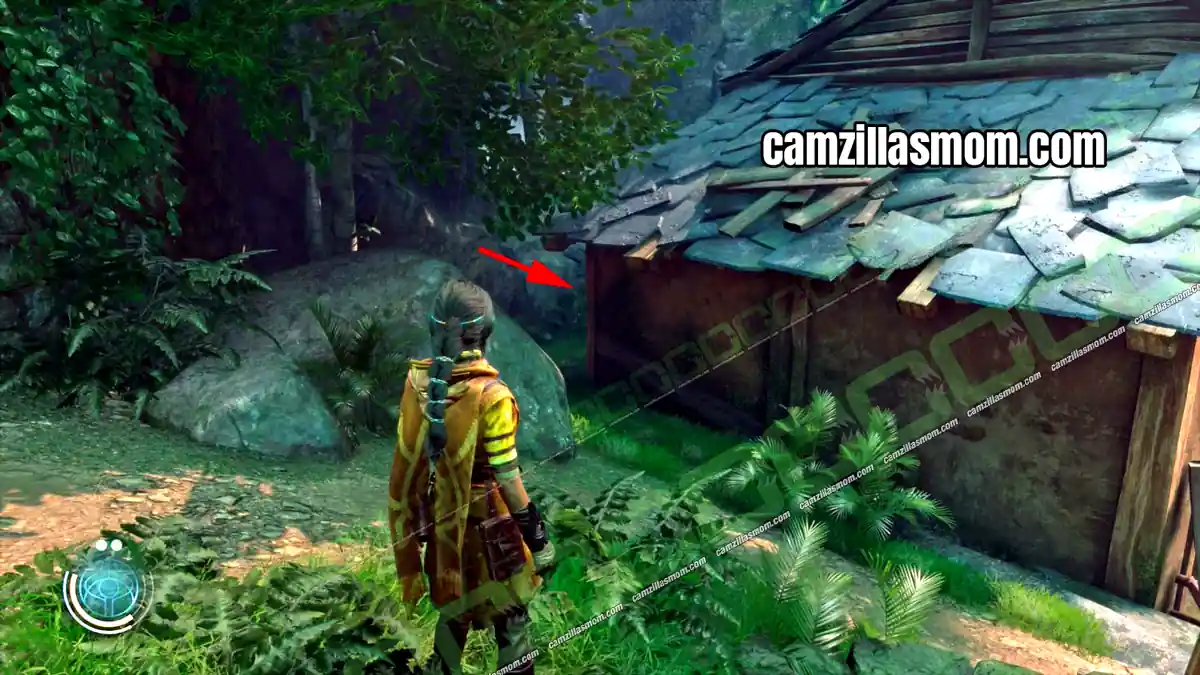
23 of 70 Anomalies – Chapter 5: Chamatkari Mandir
Break the crates to get behind the mill where the sharpshooter is.
Anomaly 24
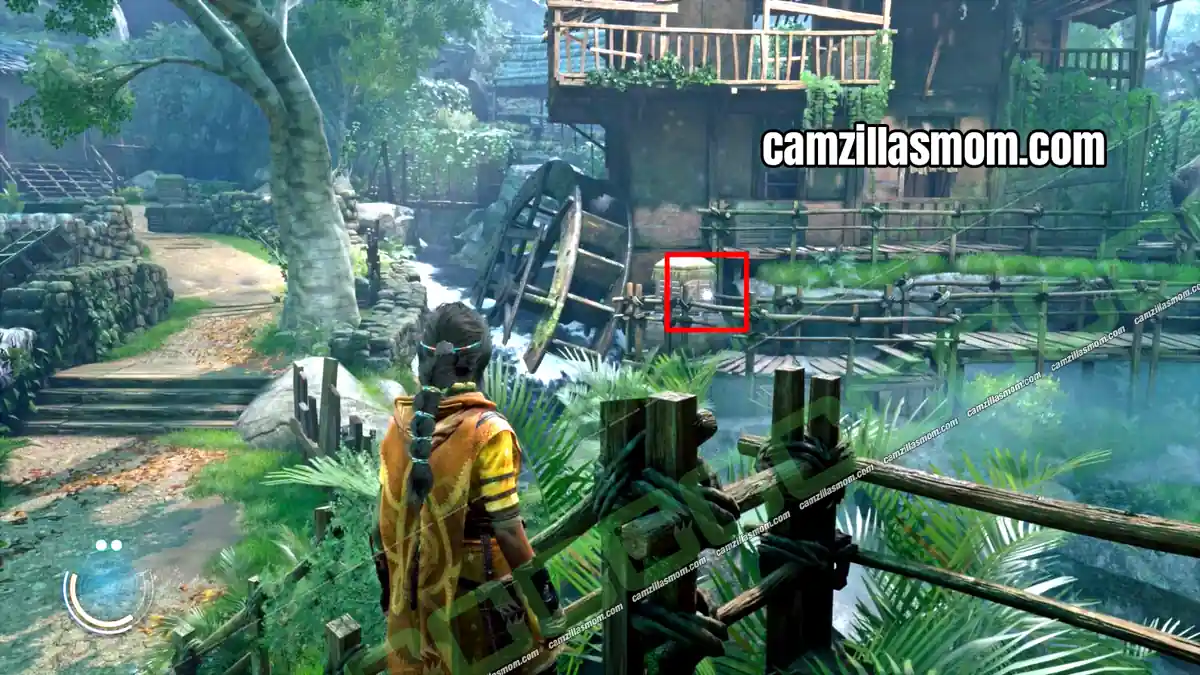
24 of 70 Anomalies – Chapter 5: Chamatkari Mandir
After Haroona practices the Faze attack, clear the hostiles and leave with her friend. The Anomaly is behind wooden boxes in the back alley of the first house.
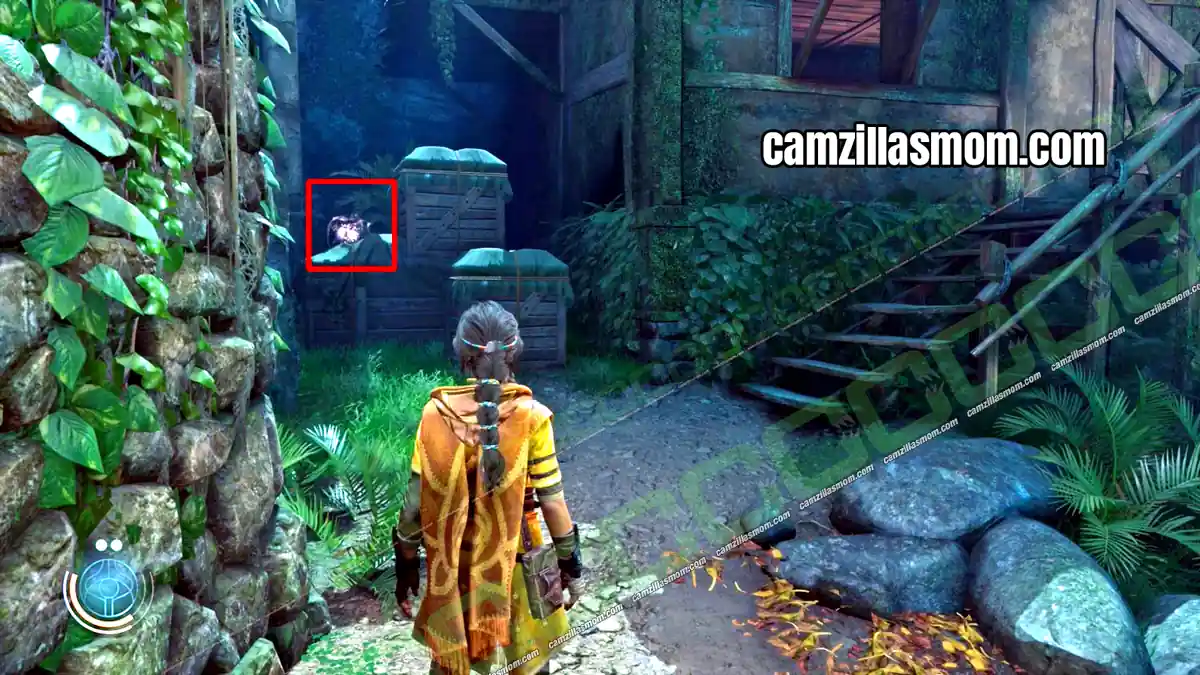
Anomaly 25
25 of 70 Anomalies – Chapter 5: Chamatkari Mandir
After the burning village and the area with the alarms and the generator in the house, follow the monkey heads uphill.
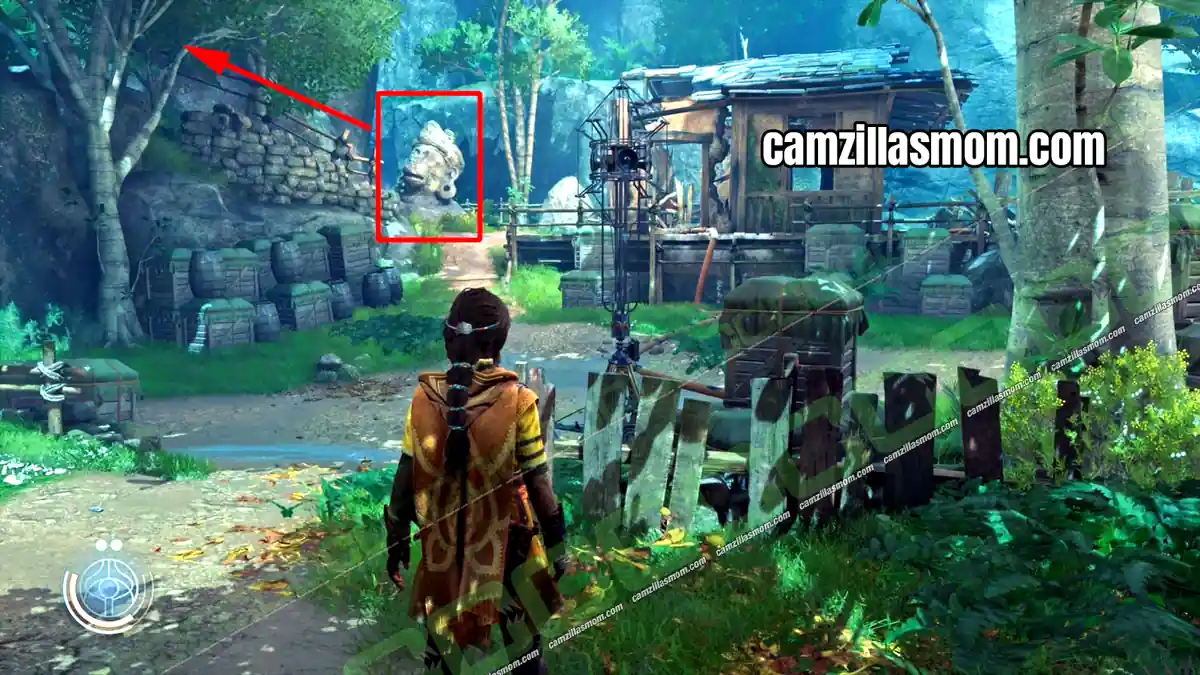
Anomaly 26
26 of 70 Anomalies – Chapter 5: Chamatkari Mandir
At the hostile area with the red forcefield, clear it and climb the vines. Cross the bridge and look left. The Anomaly overlooks the camp.
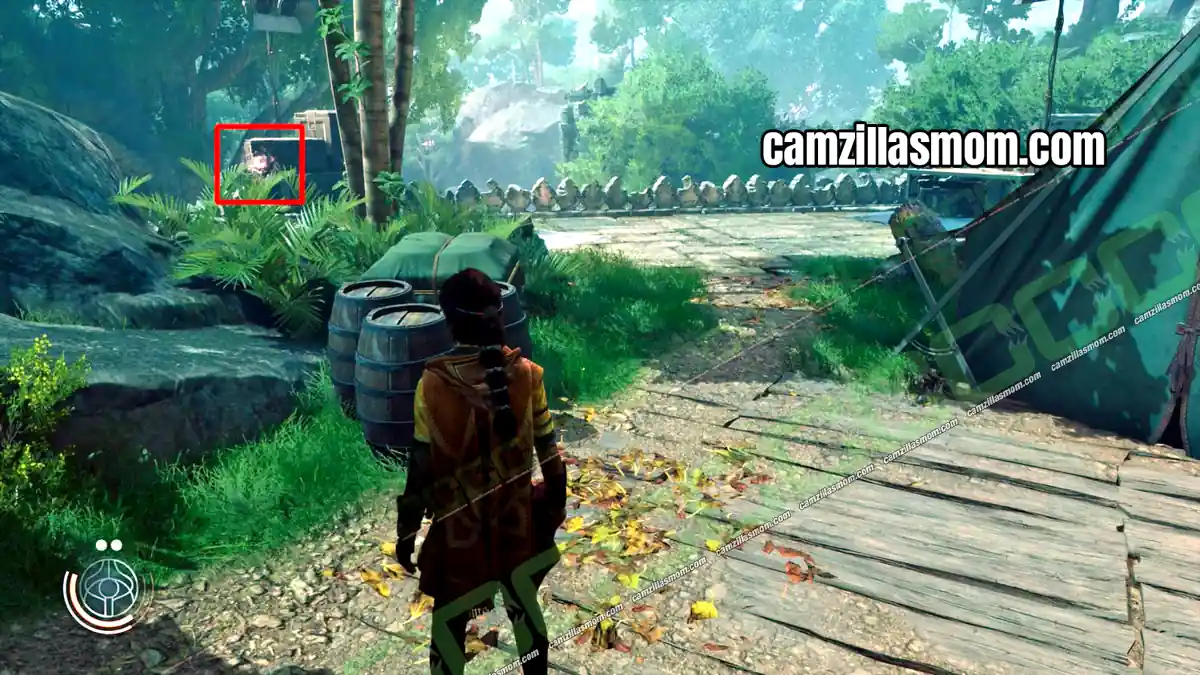
Anomaly 27
27 of 70 Anomalies – Chapter 5: Chamatkari Mandir
After Azra leaves, keep climbing to the next forcefield. Turn right and follow the path to the end.
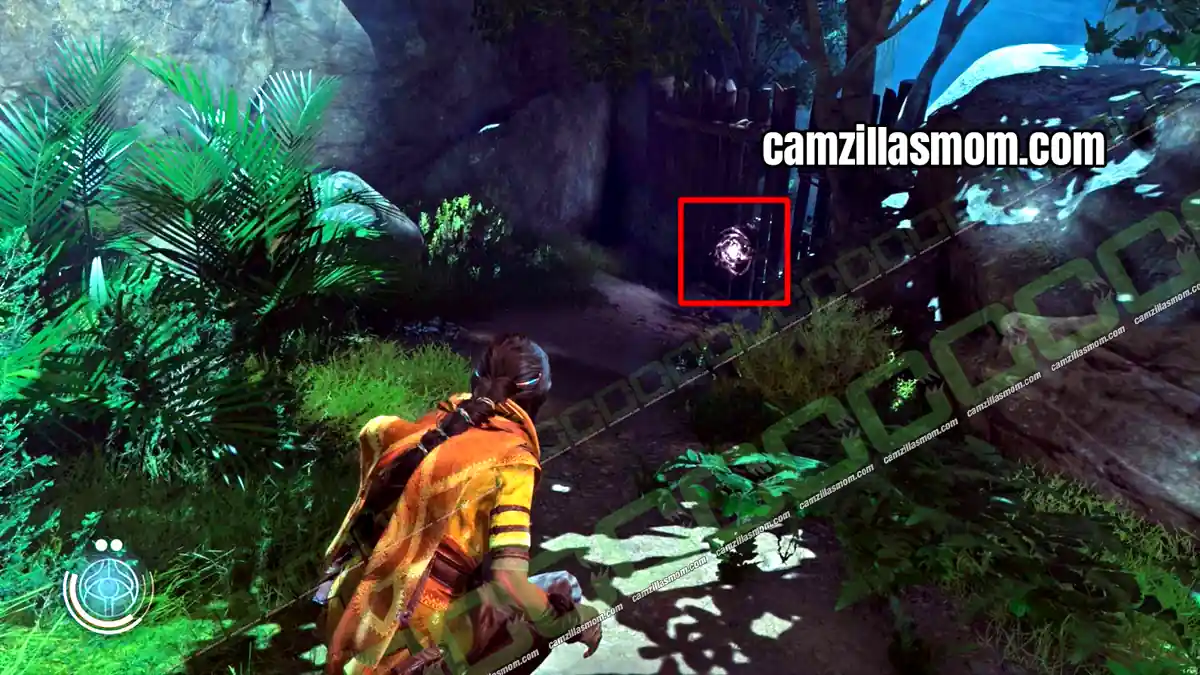
Anomaly 28
28 of 70 Anomalies – Chapter 5: Chamatkari Mandir
Clear the last camp and go through the gate with the green light. The Anomaly is at the far end of the room.
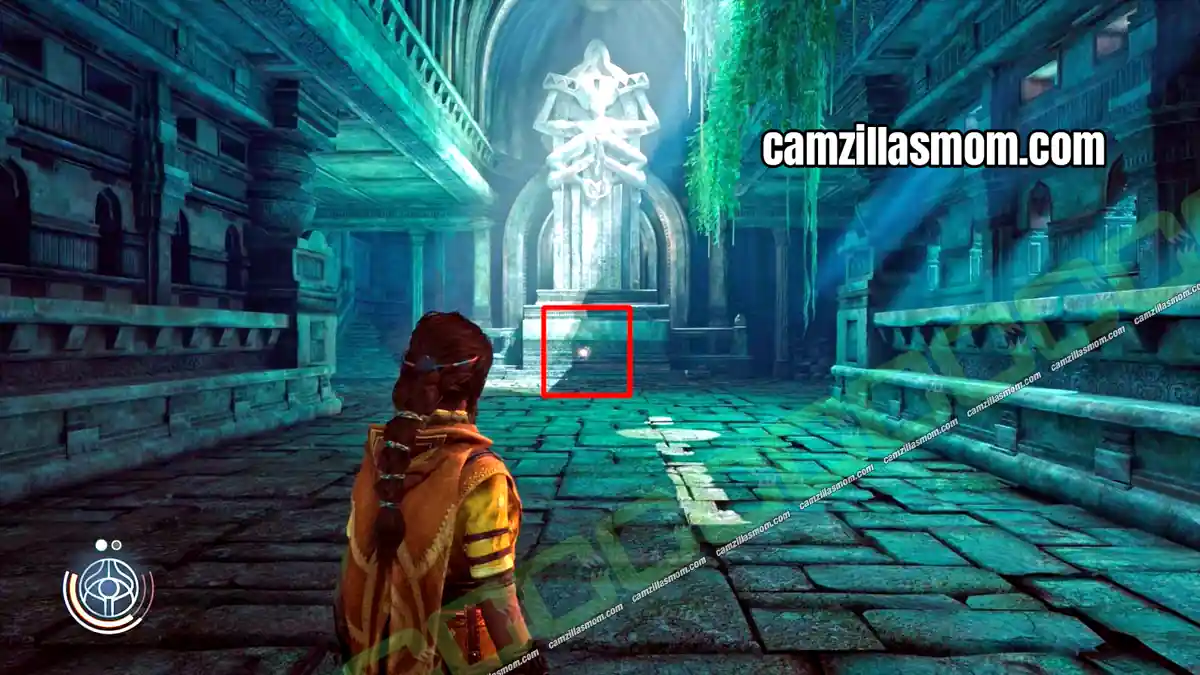
Anomaly 29
29 of 70 Anomalies – Chapter 7: Quinta Matos
In the basement kitchen, Haroona finds an Echo. Do not go upstairs yet. The Anomaly is at the back of the wine cellar.
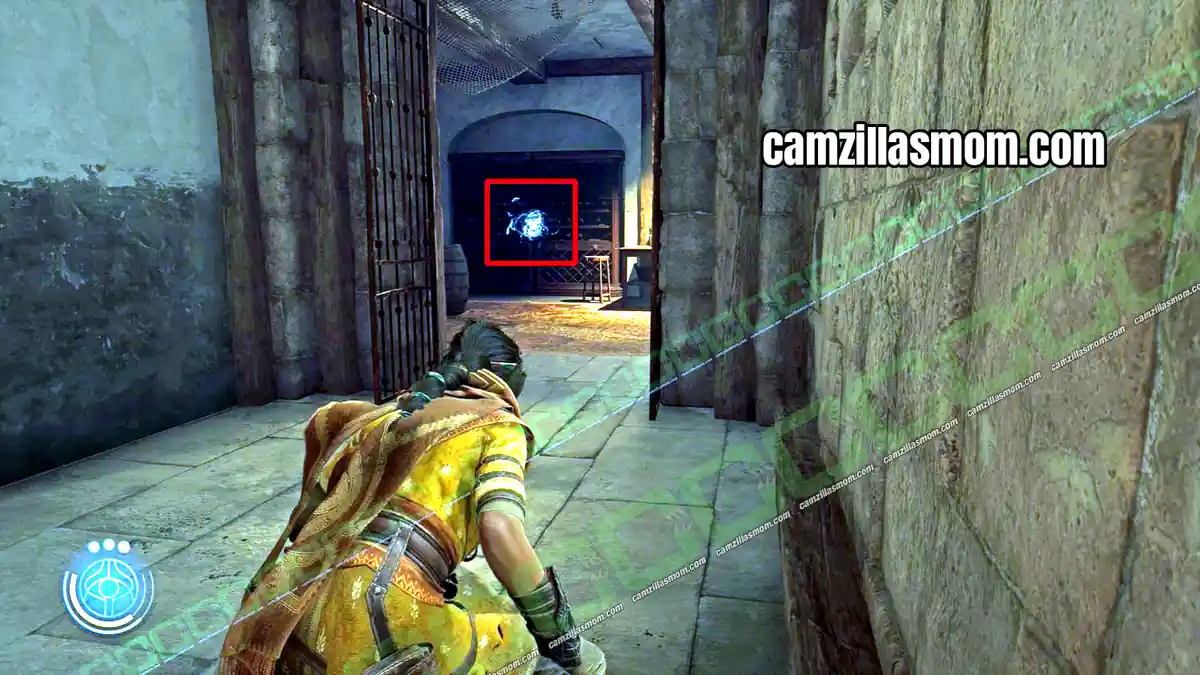
Anomaly 30
30 of 70 Anomalies – Chapter 7: Quinta Matos
Go up to the ground floor and out into the garden. The Anomaly is next to a statue.
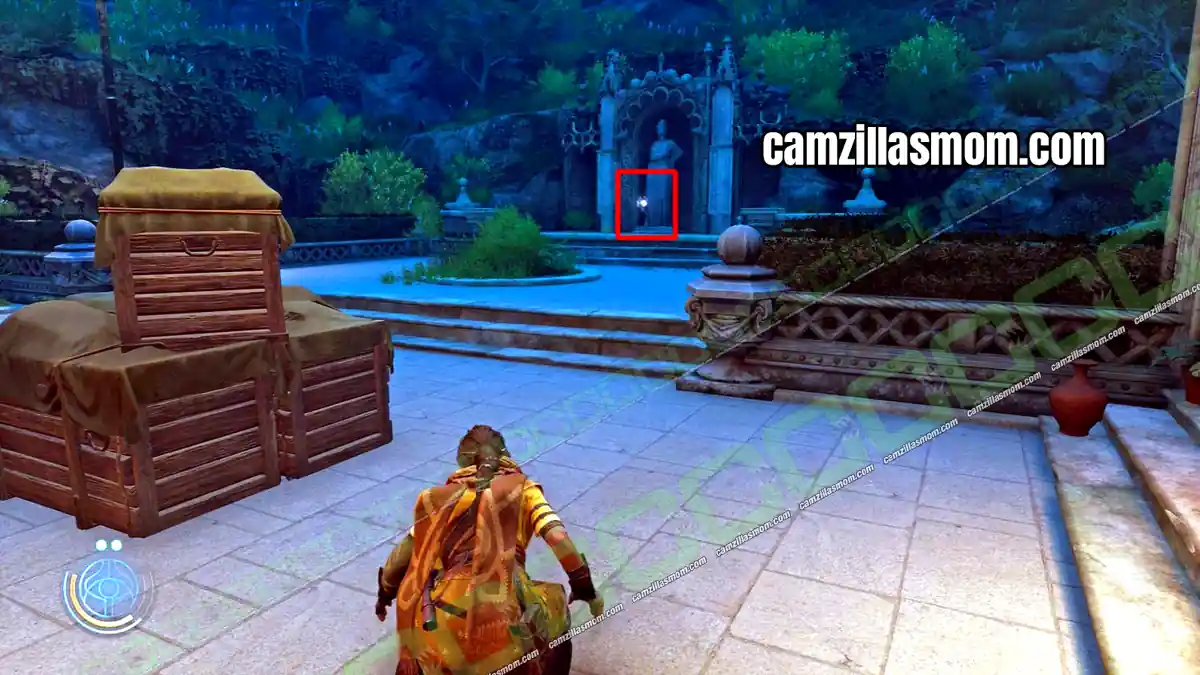
Anomaly 31
31 of 70 Anomalies – Chapter 7: Quinta Matos
Play through the Tethering Device, Reika’s scarf and the Phantom Ascendant, then climb the lift shaft to the third floor. The Anomaly is in the first room.
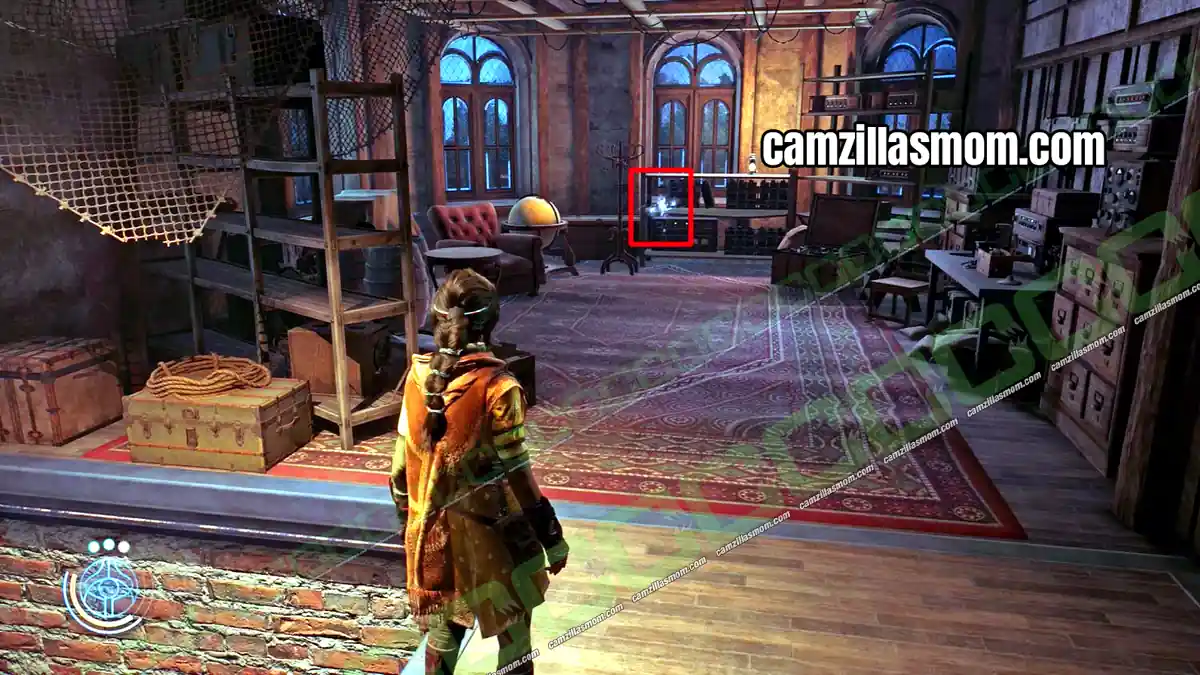
Anomaly 32
32 of 70 Anomalies – Chapter 7: Quinta Matos
Leave the workshop and go downstairs. The Anomaly is under the staircase.
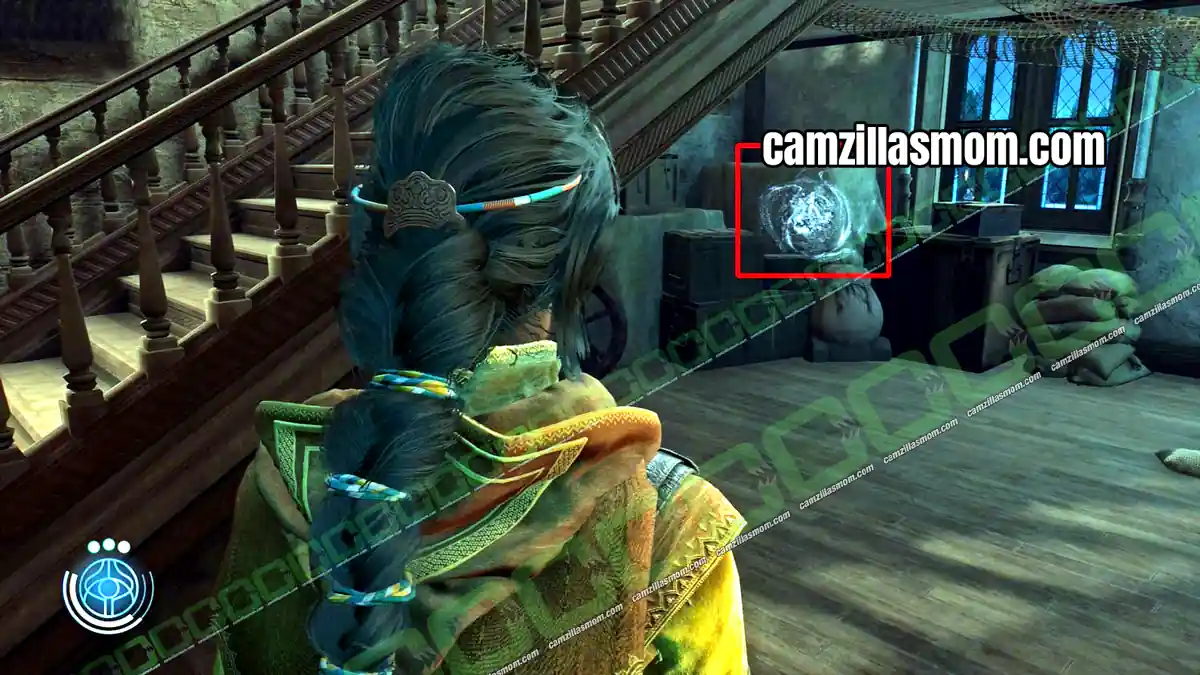
Anomaly 33
33 of 70 Anomalies – Chapter 7: Quinta Matos
Leave the manor and clear the hostiles near the greenhouse. Go through the red door, turn left and left again toward the water.
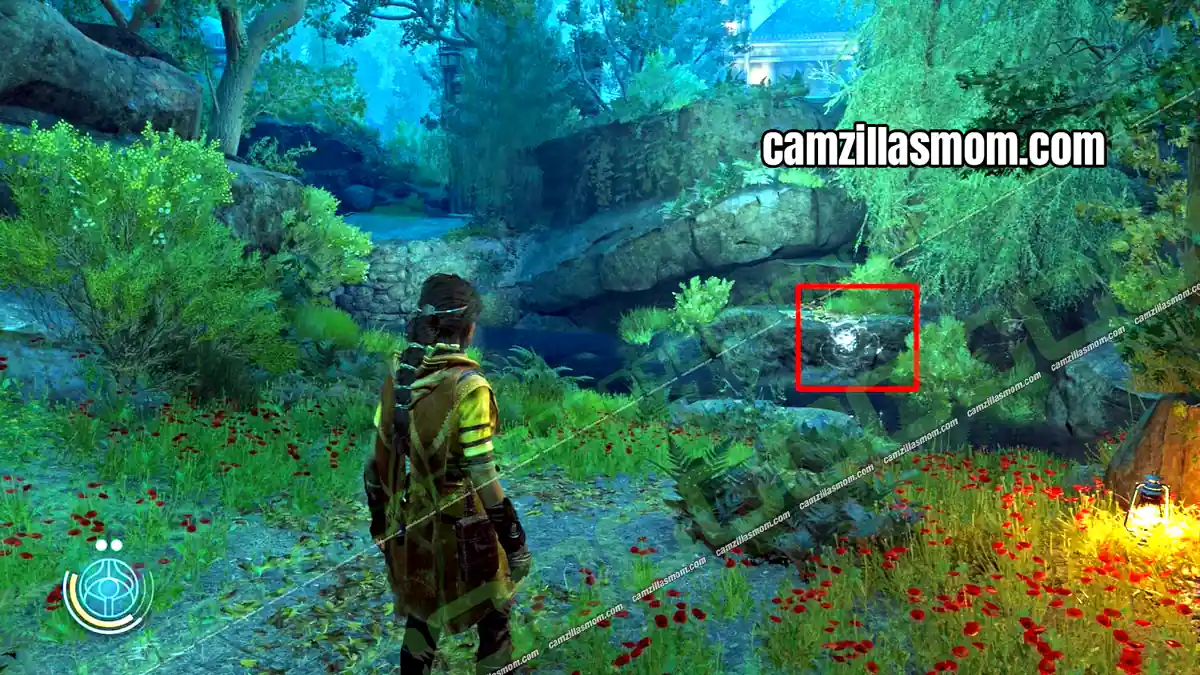
Anomaly 34
34 of 70 Anomalies – Chapter 7: Quinta Matos
After the large hostile area that ends with Luther crashing in with a truck, go through the gate. The Anomaly is in the storage area with a truck on your left.
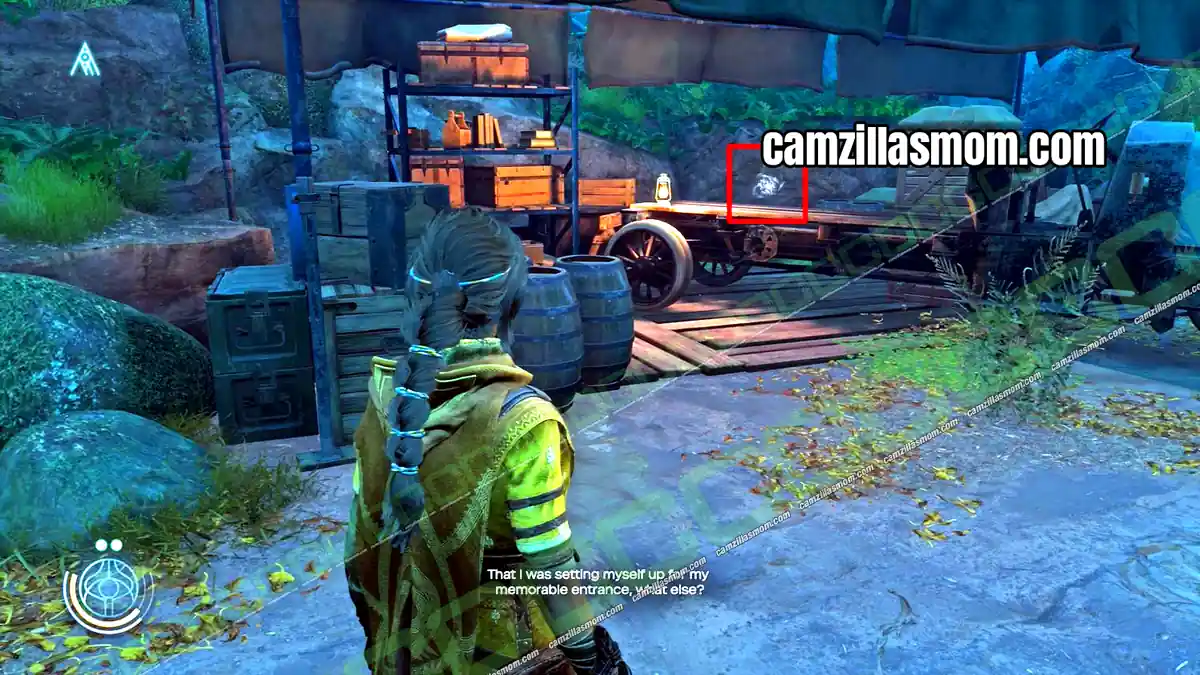
Anomaly 35
35 of 70 Anomalies – Chapter 7: Quinta Matos
In the cemetery, before the green-lit gate, look up at the tomb. Break the side wall of the tomb to get to the Anomaly.
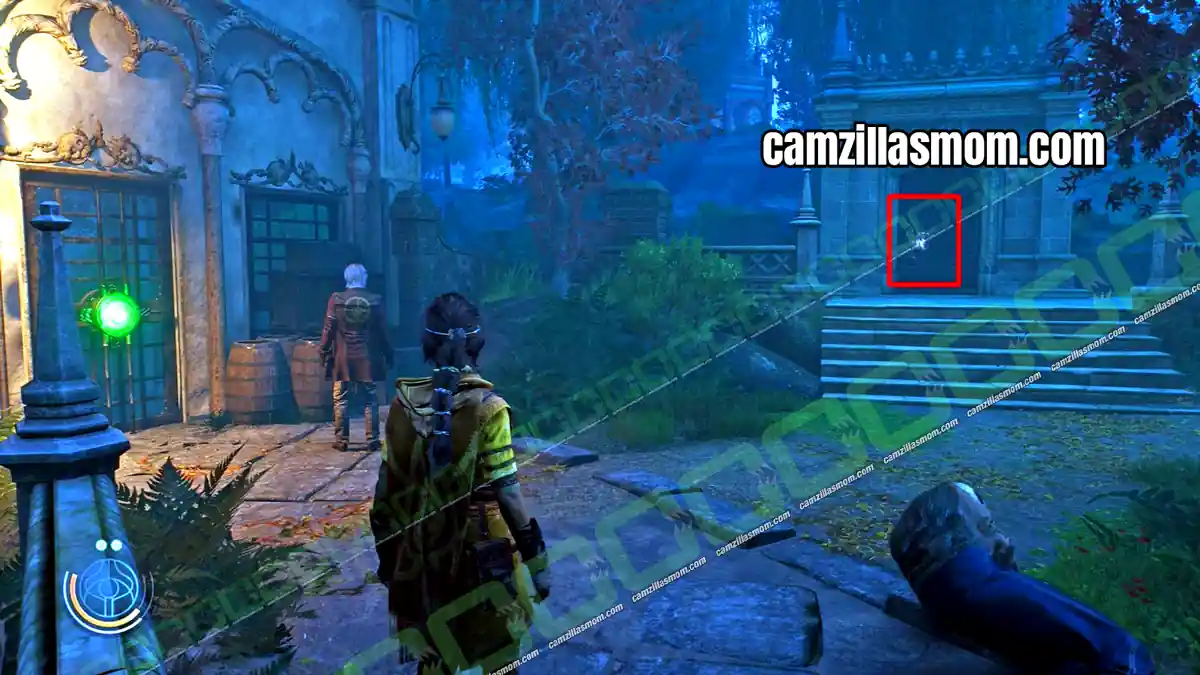
Anomaly 36
36 of 70 Anomalies – Chapter 7: Quinta Matos
Go through the green gate and follow Luther until you see the Anomaly on a ledge ahead. Walk as close to the ledge as you can to pick it up.
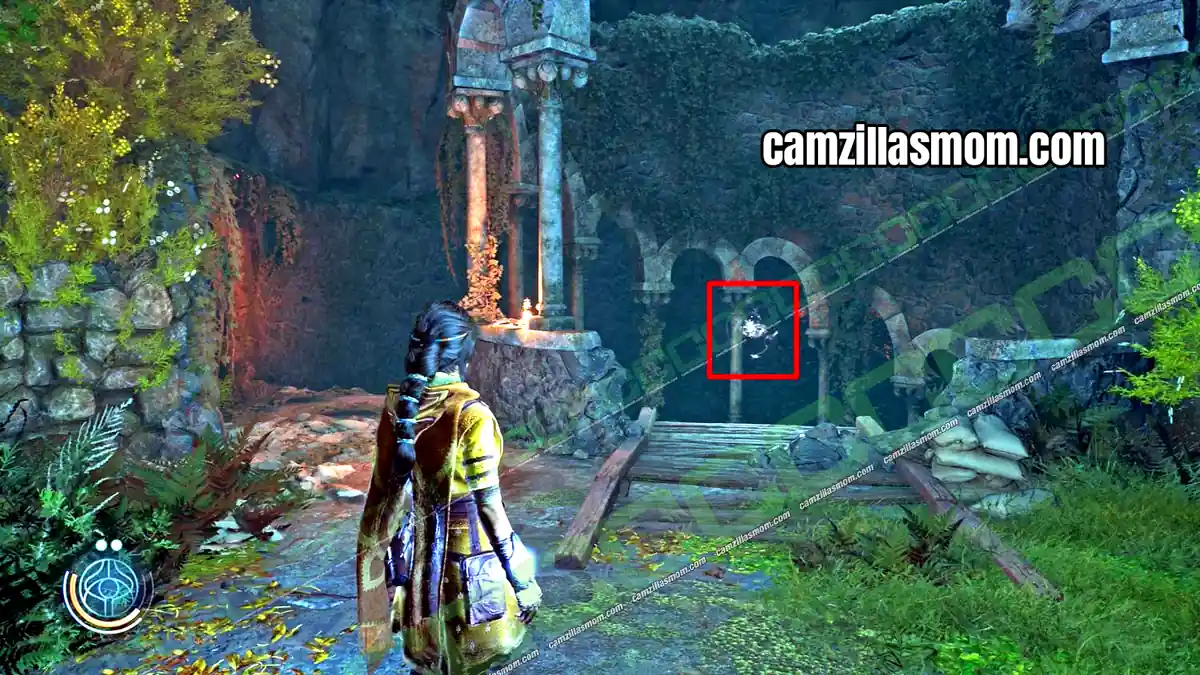
Anomaly 37
37 of 70 Anomalies – Chapter 7: Quinta Matos
In the room where the Doctor disappears down the stairs into the catacombs, break the crates next to the wooden structure you climb with Luther.
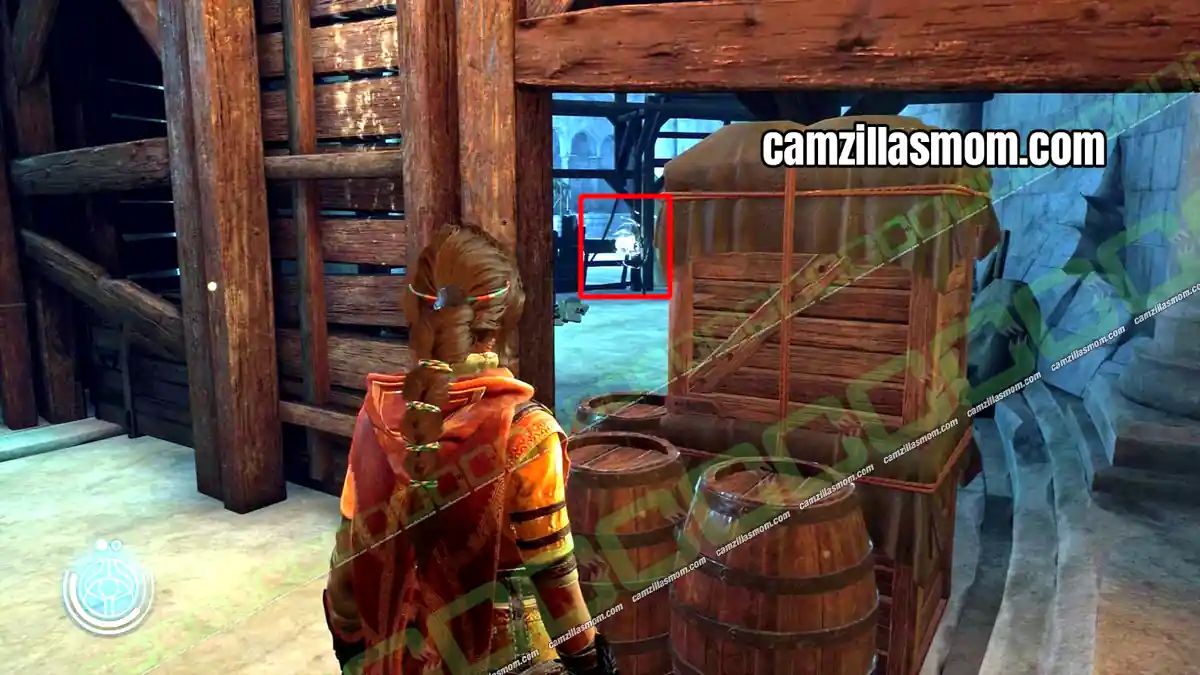
Anomaly 38
38 of 70 Anomalies – Chapter 7: Quinta Matos
Climb the structure and cross to the other side. Before you move on, check the small cave at the back.
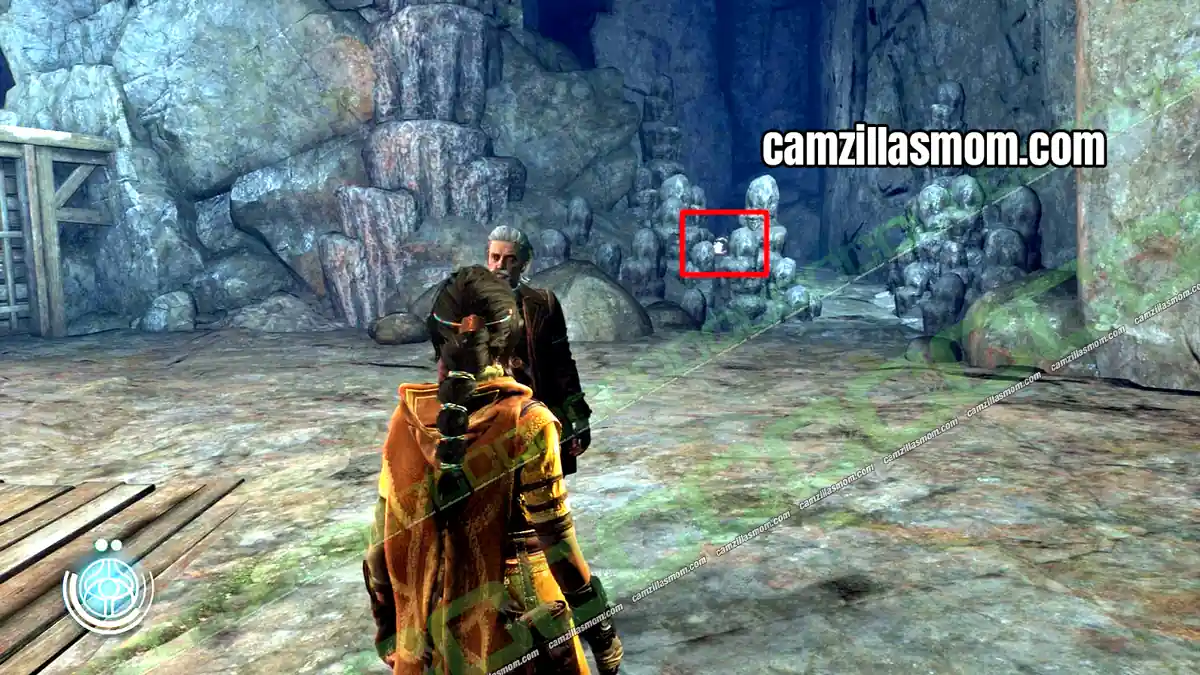
Anomaly 39
39 of 70 Anomalies – Chapter 7: Quinta Matos
Climb the wooden wall and continue. From above, you can see the Anomaly through a gap in the floor. Drop down one level, balance across the plank and break the wall to reach it.
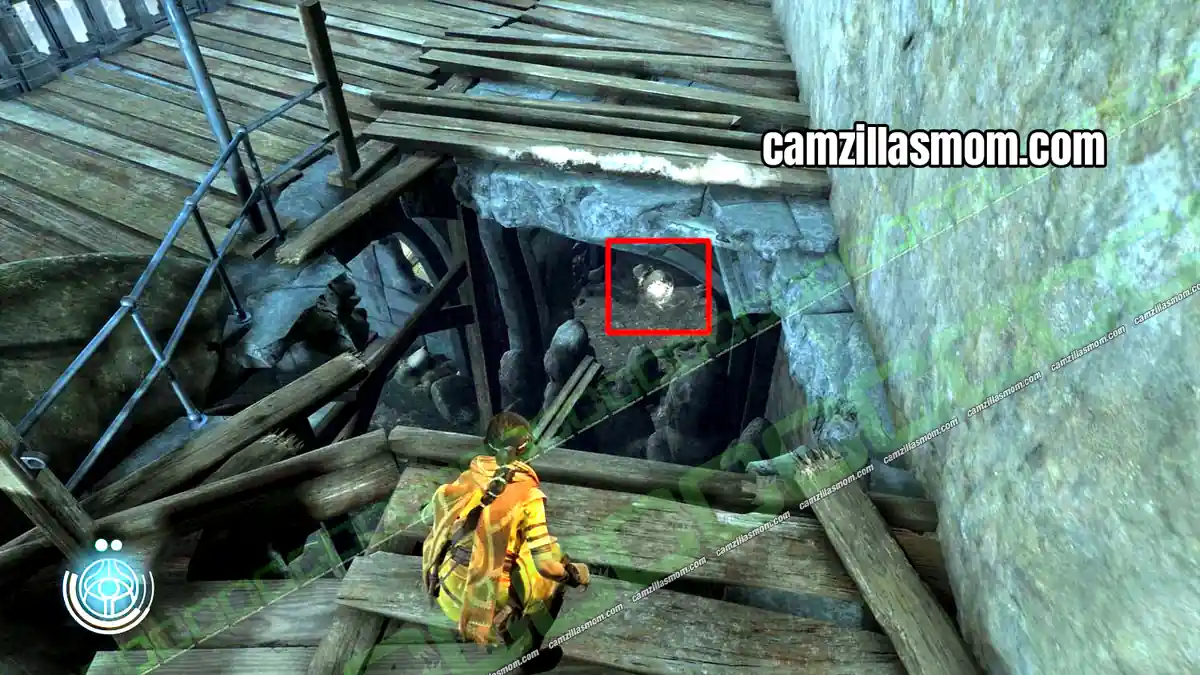
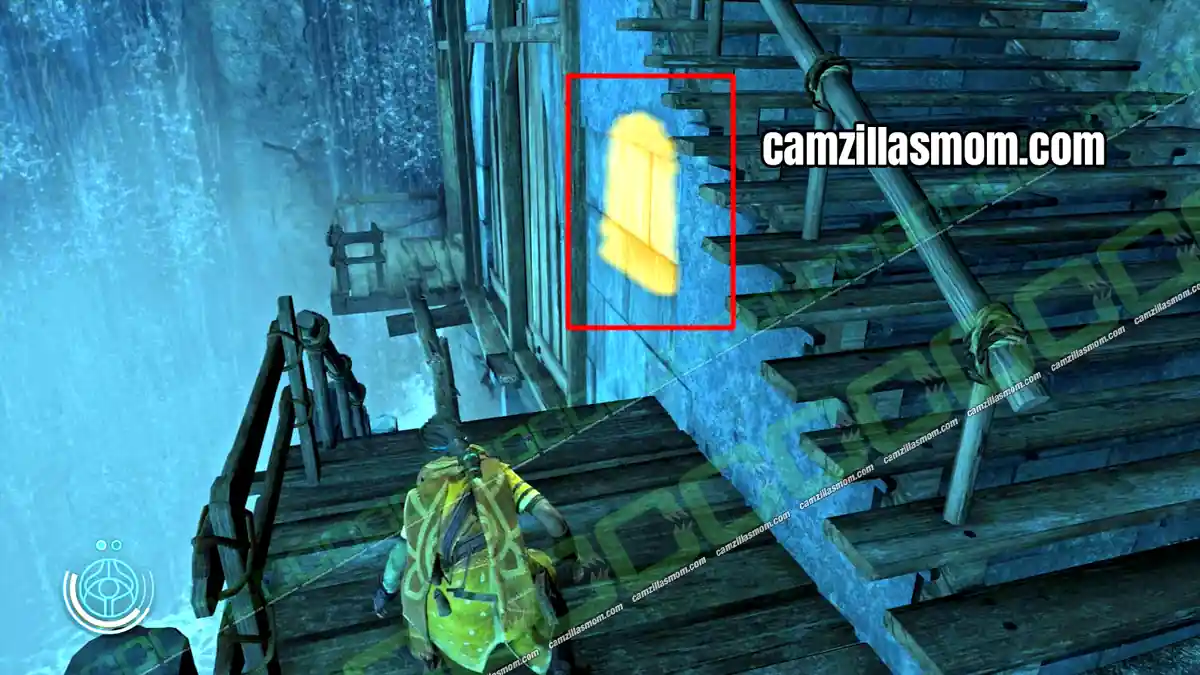
Anomaly 40
40 of 70 Anomalies – Chapter 9: Anatolia
At the start of the chapter, Haroona, Luther and Buchra drop down into a cave. Look left at the large broken doorframe. The Anomaly is behind the big rock next to it.
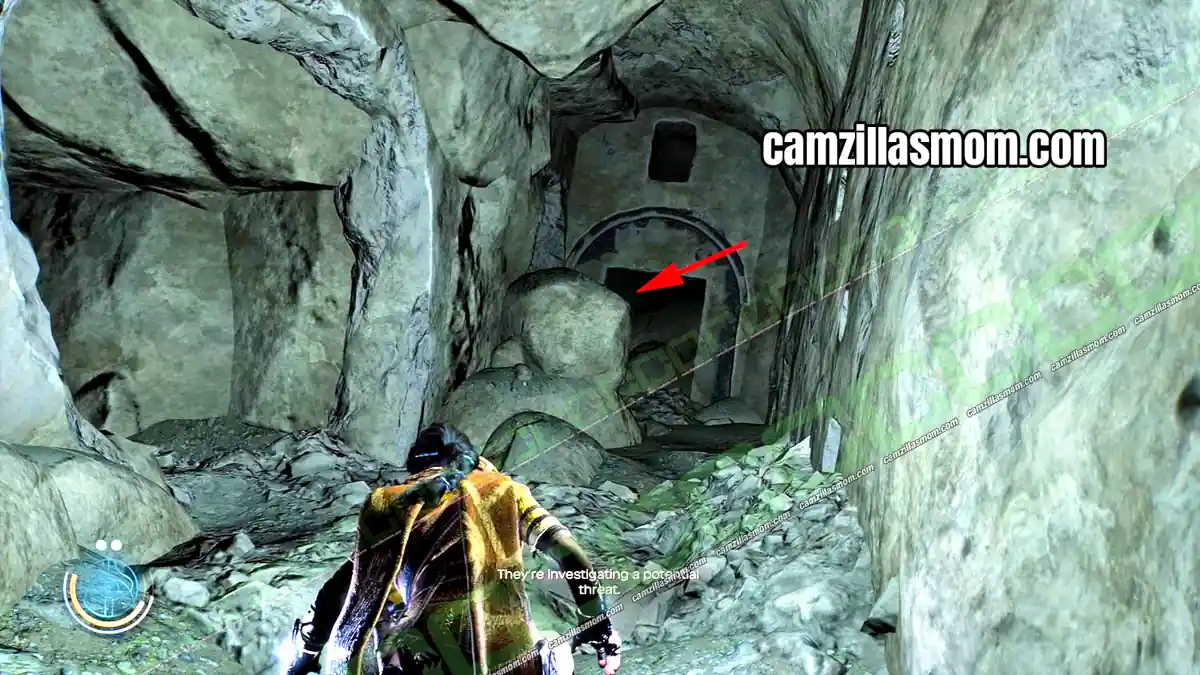
Anomaly 41
41 of 70 Anomalies – Chapter 9: Anatolia
After the first hostile area with the two forcefield domes, Luther lowers a bridge. On the other side, the Anomaly is behind boxes in a small storage area.
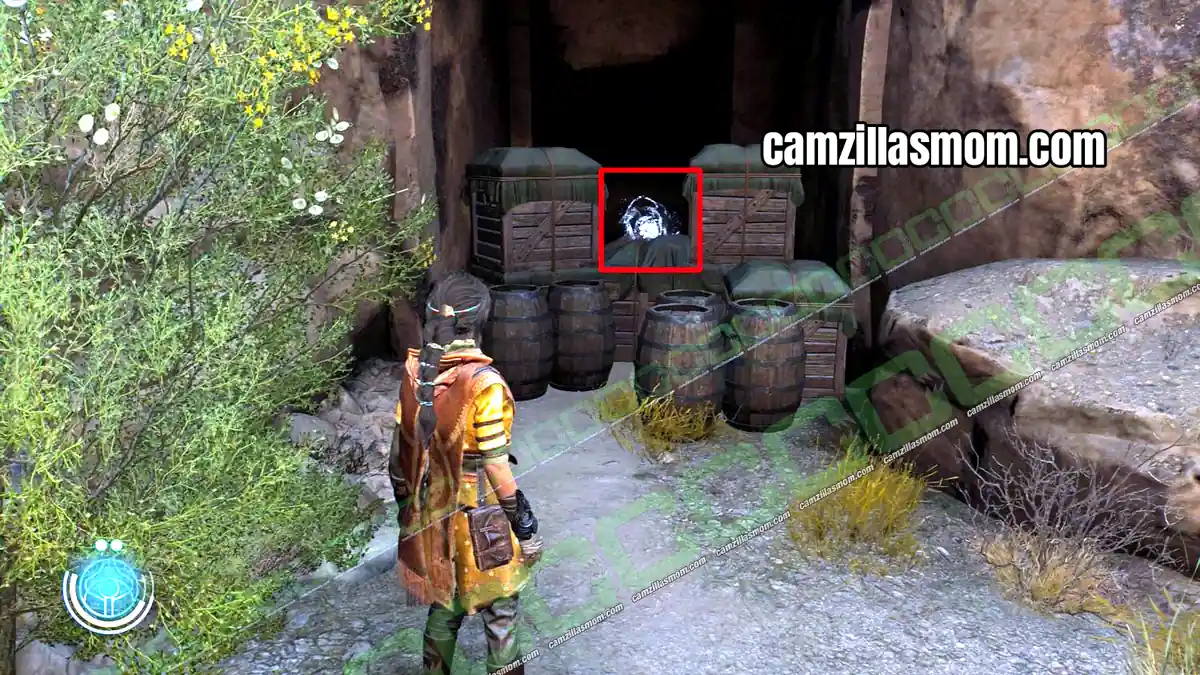
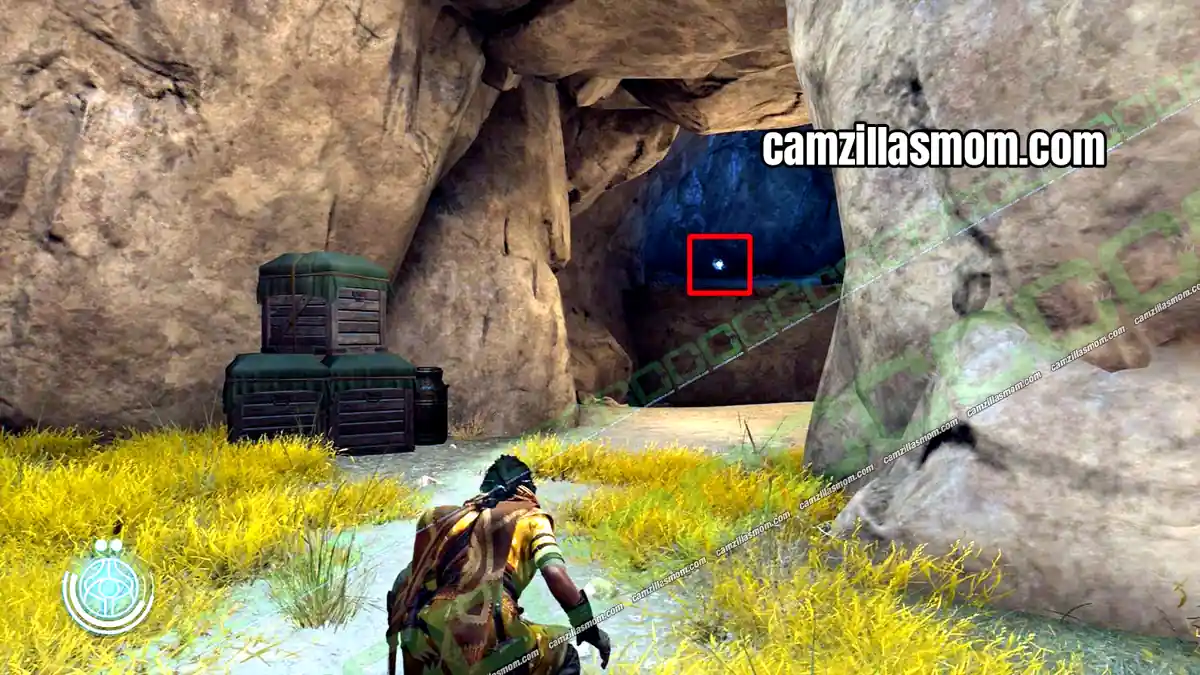
Anomaly 42
42 of 70 Anomalies – Chapter 9: Anatolia
In the next area, Luther runs ahead and gets attacked. Clear the hostiles and find the cave. Break the wall to reach the Anomaly.
Anomaly 43
43 of 70 Anomalies – Chapter 9: Anatolia
After the Gearhead fight, the path is blocked. Squeeze through the gap in the wall and look left.
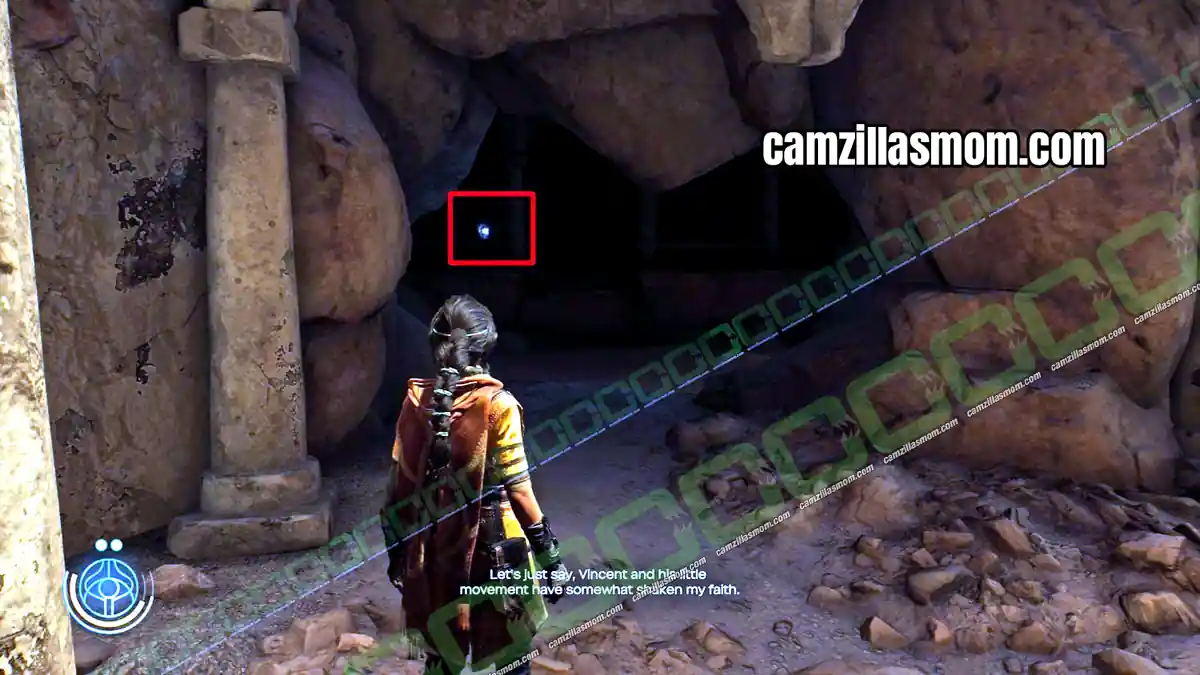
Anomaly 44
44 of 70 Anomalies – Chapter 9: Anatolia
Clear the next hostile area and climb the wall with Luther to the other side of the valley. Before you go down into the next cave, check the area on the right. The Anomaly overlooks the valley.
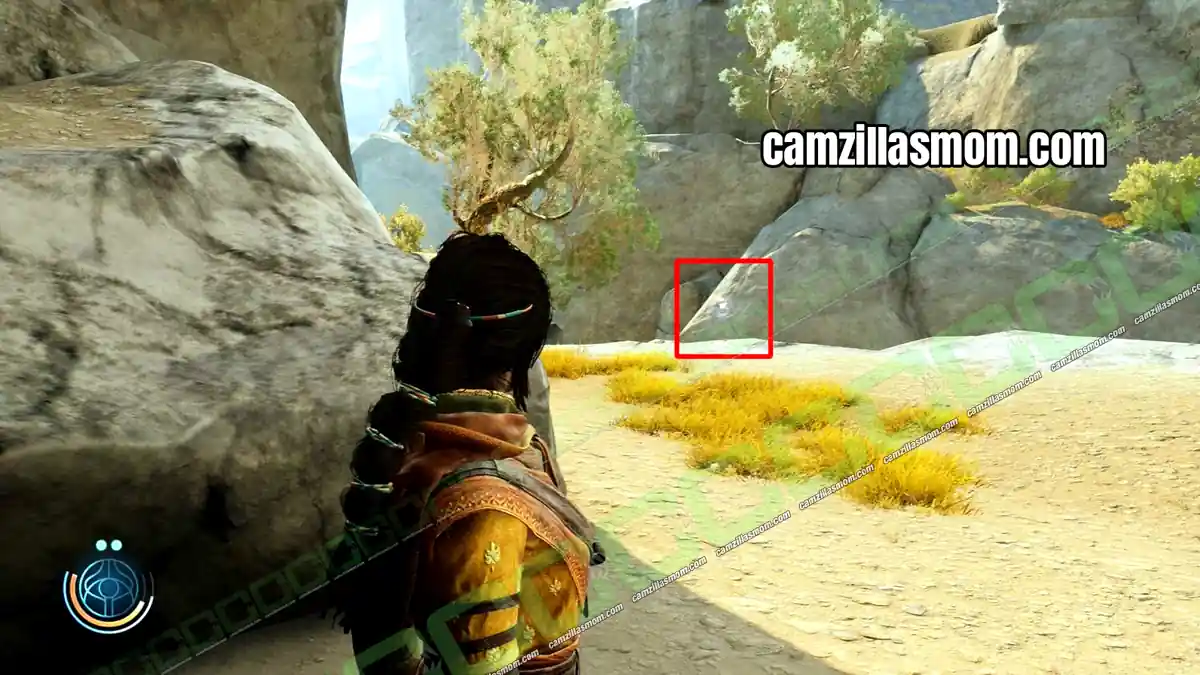
Anomaly 45
45 of 70 Anomalies – Chapter 9: Anatolia
Continue to the large round room and squeeze through the gap into the next area. Go up to the closed stone door with the coin in front of it and break the stone wall there.
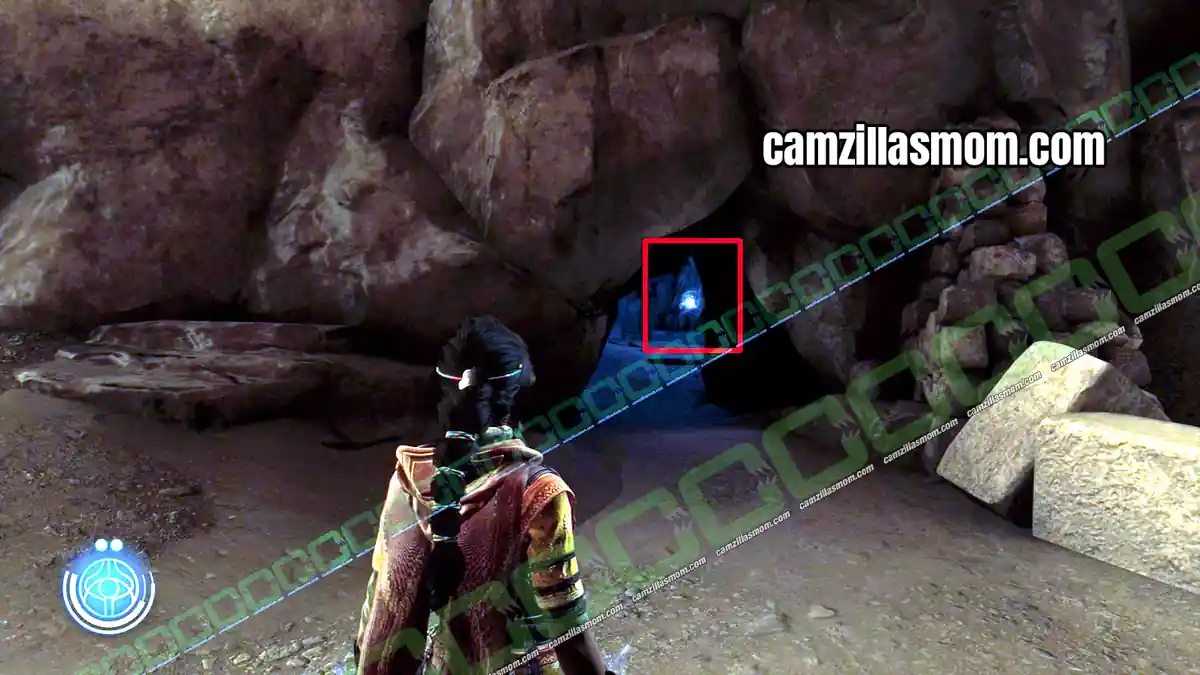
Anomaly 46
46 of 70 Anomalies – Chapter 9: Anatolia
Climb the wall and drop down on the other side of the path.
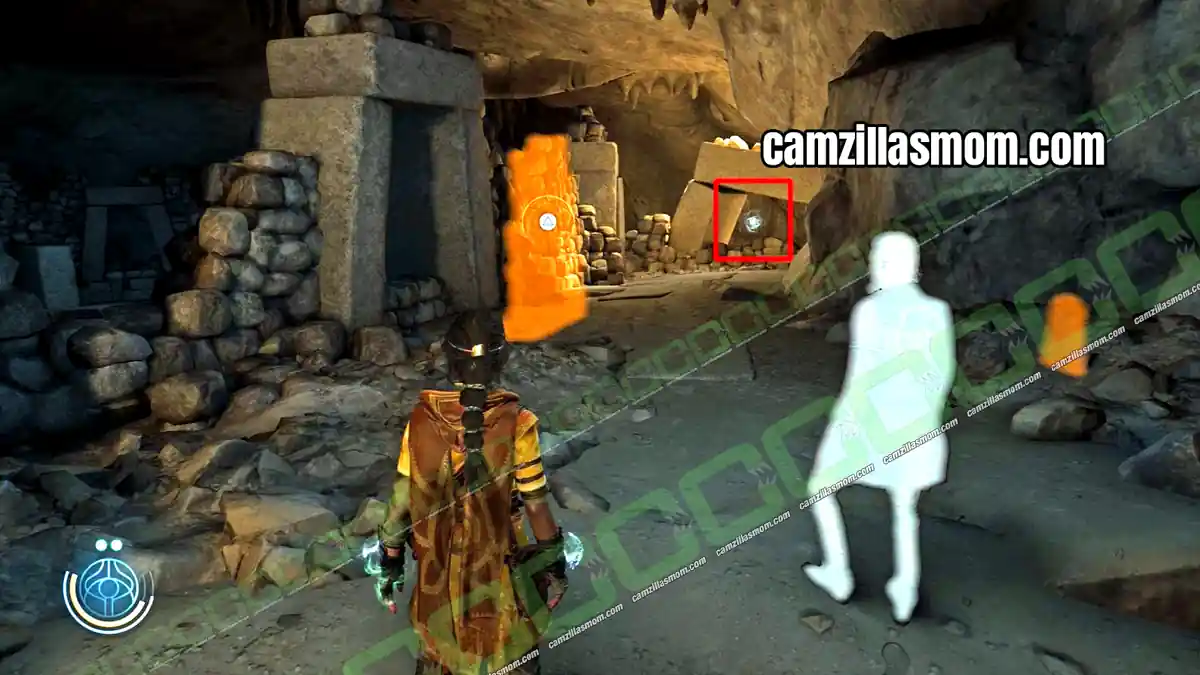
Anomaly 47
47 of 70 Anomalies – Chapter 9: Anatolia
Break the stone wall near Anomaly 46 and cross the round room. Leave Anomaly 50 there for later. On the other side, turn left, then follow the path right to another destructible wall. The Anomaly is on your left. This is your last chance to pick it up.
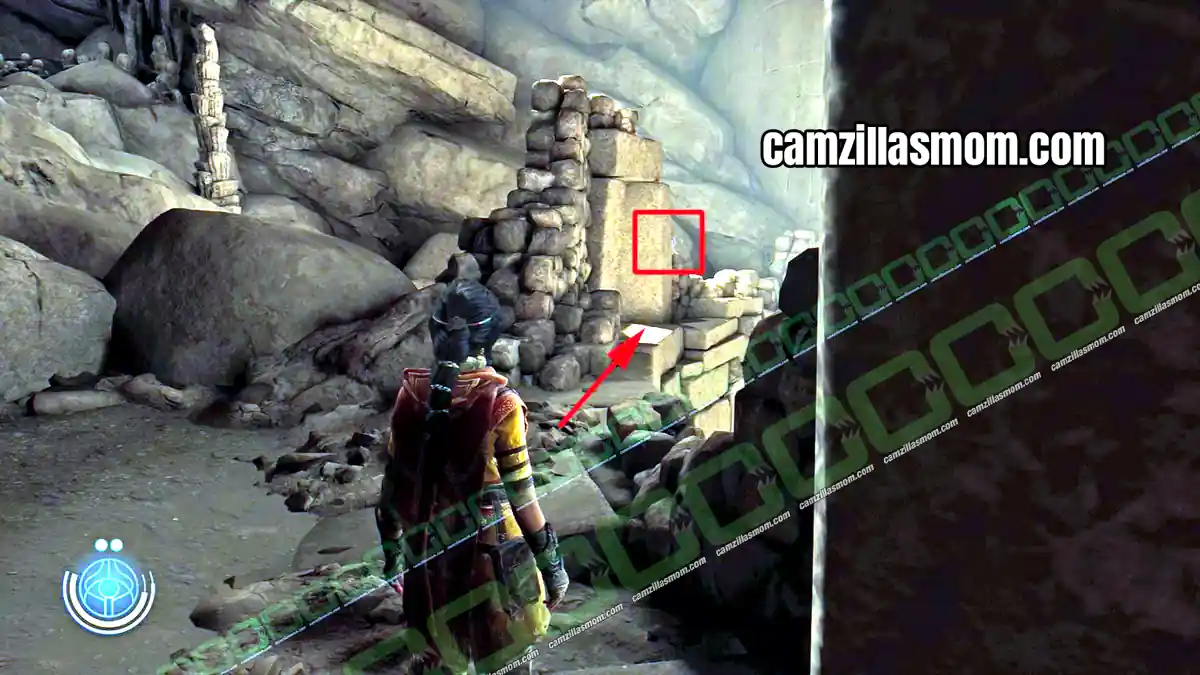
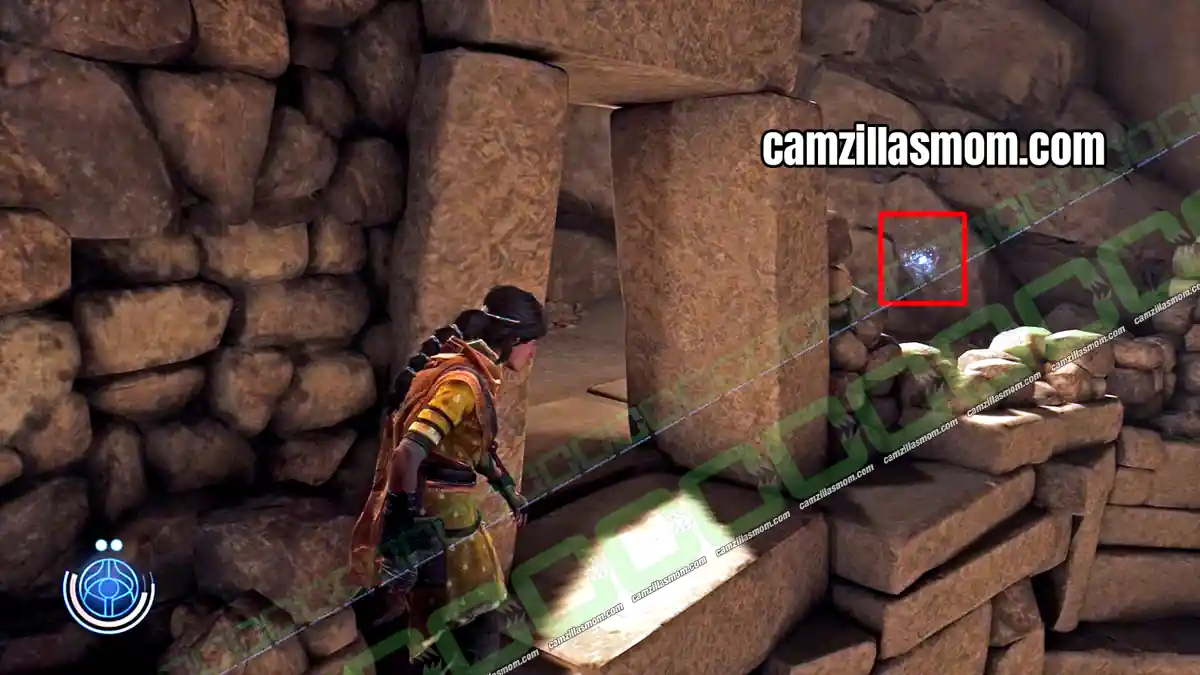
Anomaly 48
48 of 70 Anomalies – Chapter 9: Anatolia
Go through the stone wall. You can see Anomaly 48 in the distance. Climb down the stone wall in front of you to reach it.
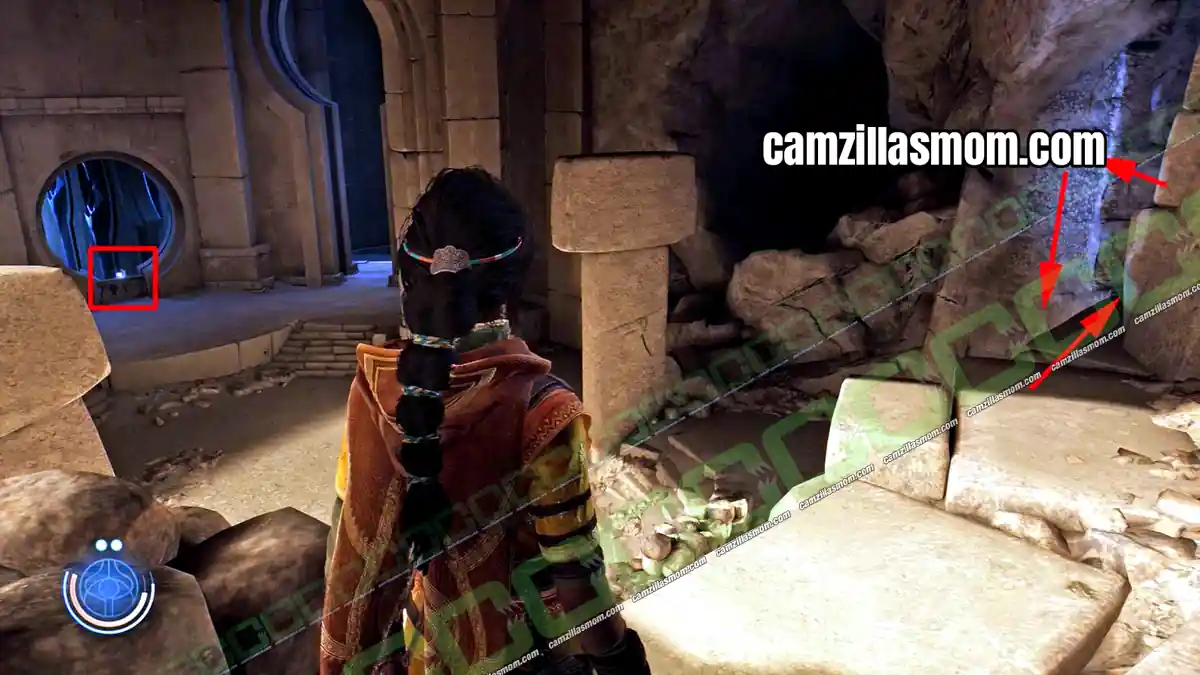
Anomaly 49
49 of 70 Anomalies – Chapter 9: Anatolia
After the Sahin Table and the Unknown 9 vision, fight the hostiles and escape into the cave. Pick up the last Anatolia Sahin Tile. Anomaly 49 is a few steps further.
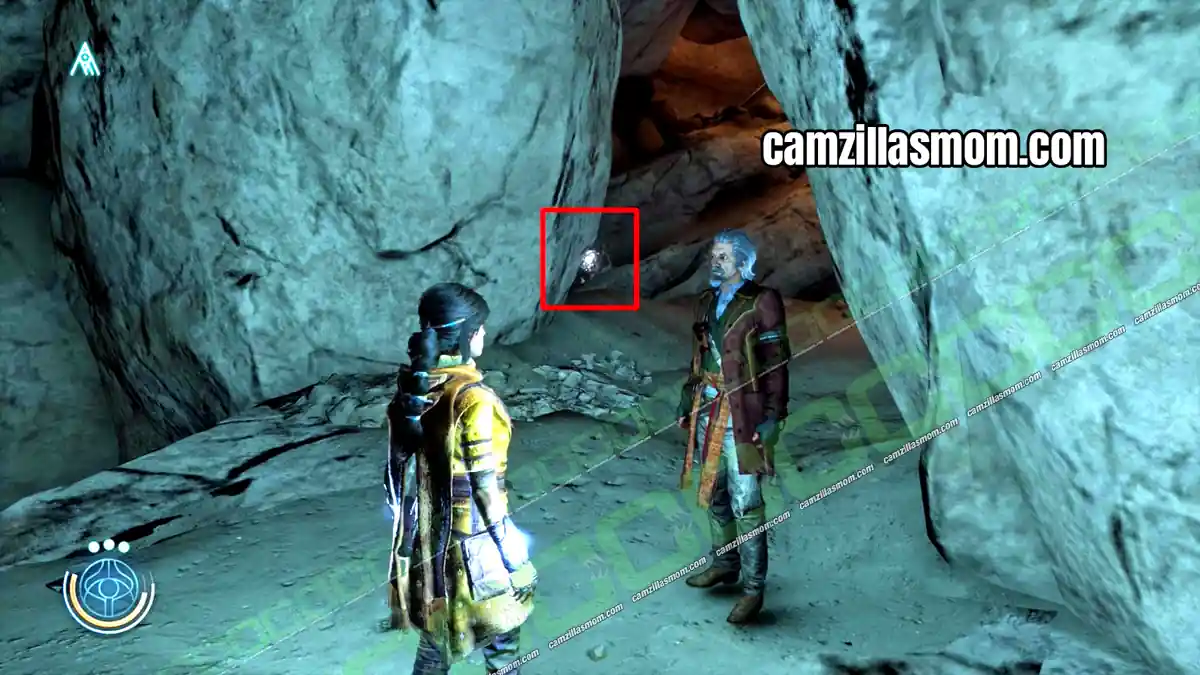
Anomaly 50
50 of 70 Anomalies – Chapter 9: Anatolia
After the section with the gunners, you reach the round room you crossed before. Anomaly 50 is there.
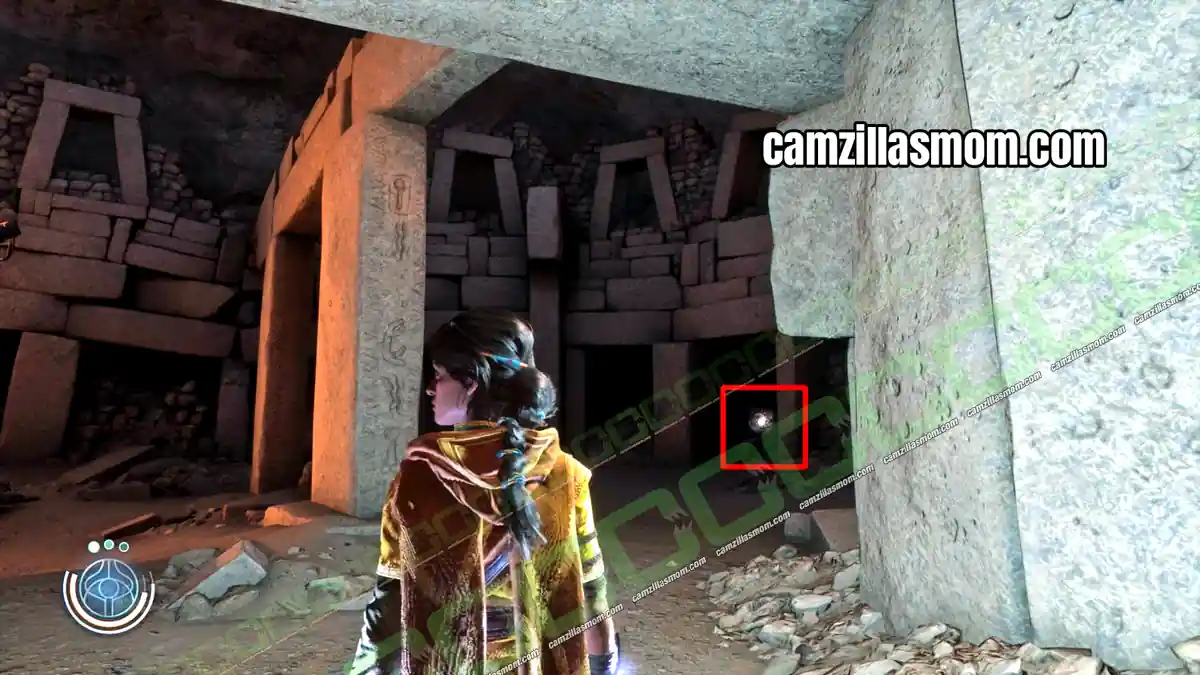
Anomaly 51
51 of 70 Anomalies – Chapter 9: Anatolia
Go back to the start of the chapter. In the now empty area where you first fought the Gearhead, enter the building carved into the stone and turn left.
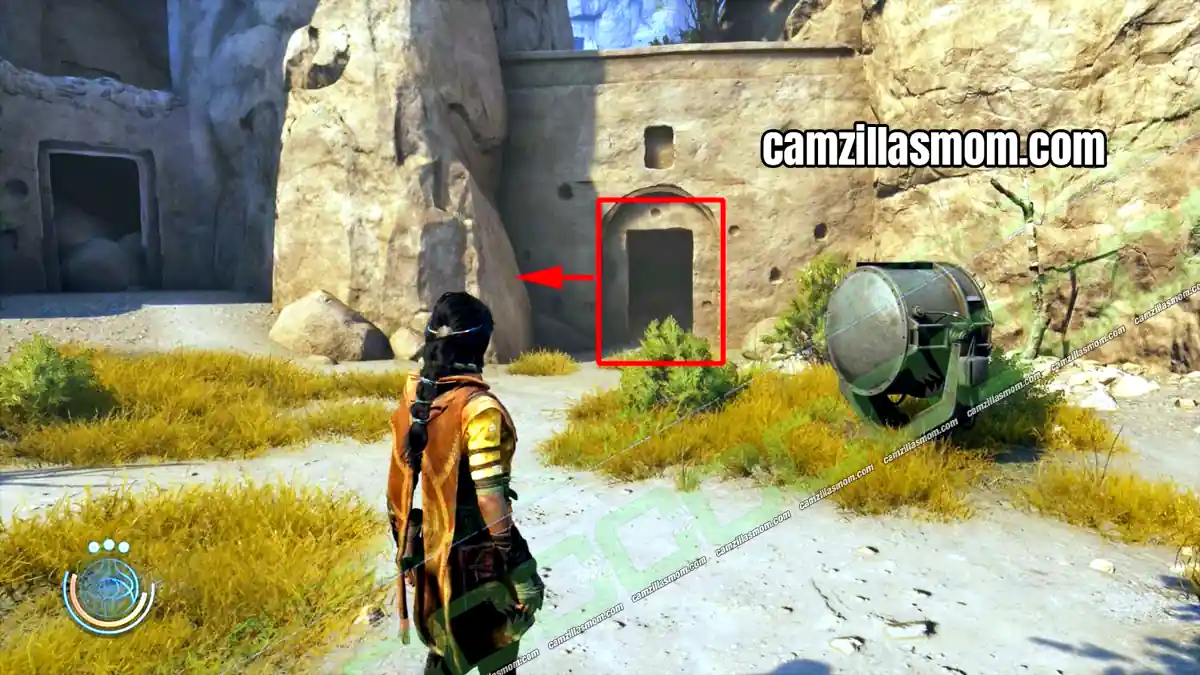
Anomaly 52
52 of 70 Anomalies – Chapter 11: Dasuden
At the start of the chapter, look uphill before you follow Luther. The Anomaly is behind a stack of crates.
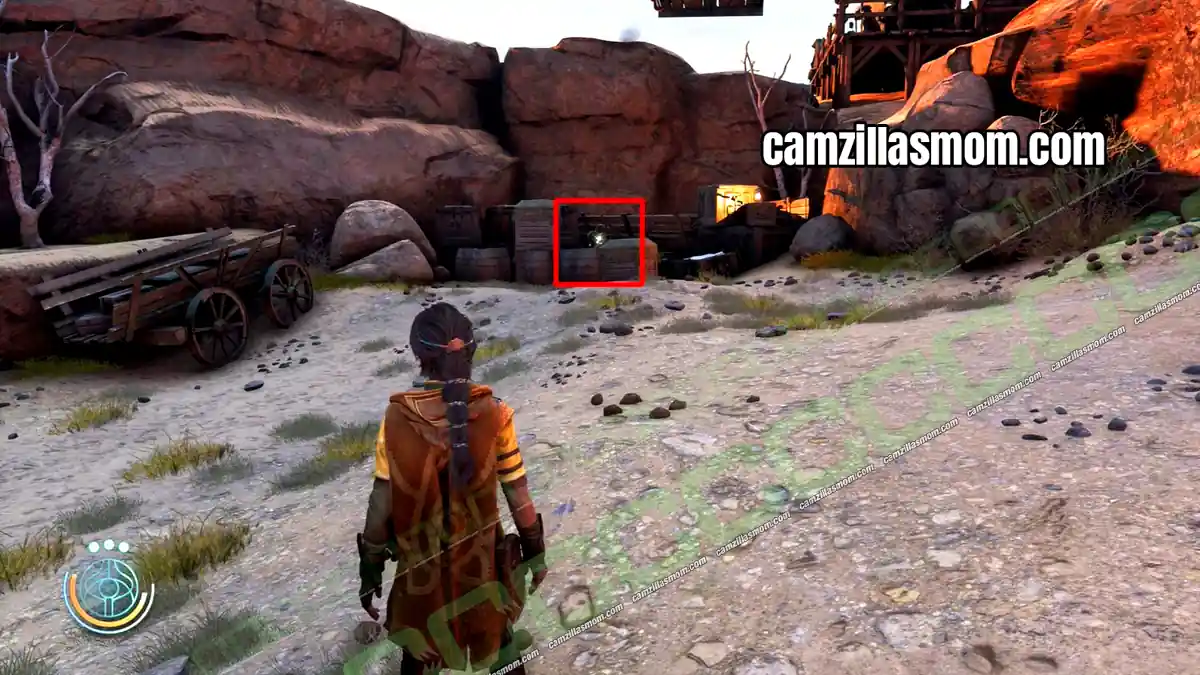
Anomaly 53
53 of 70 Anomalies – Chapter 11: Dasuden
You and Buchra reach a cave where you topple a tree to cross to a red door. The Anomaly is on the table next to the red door.
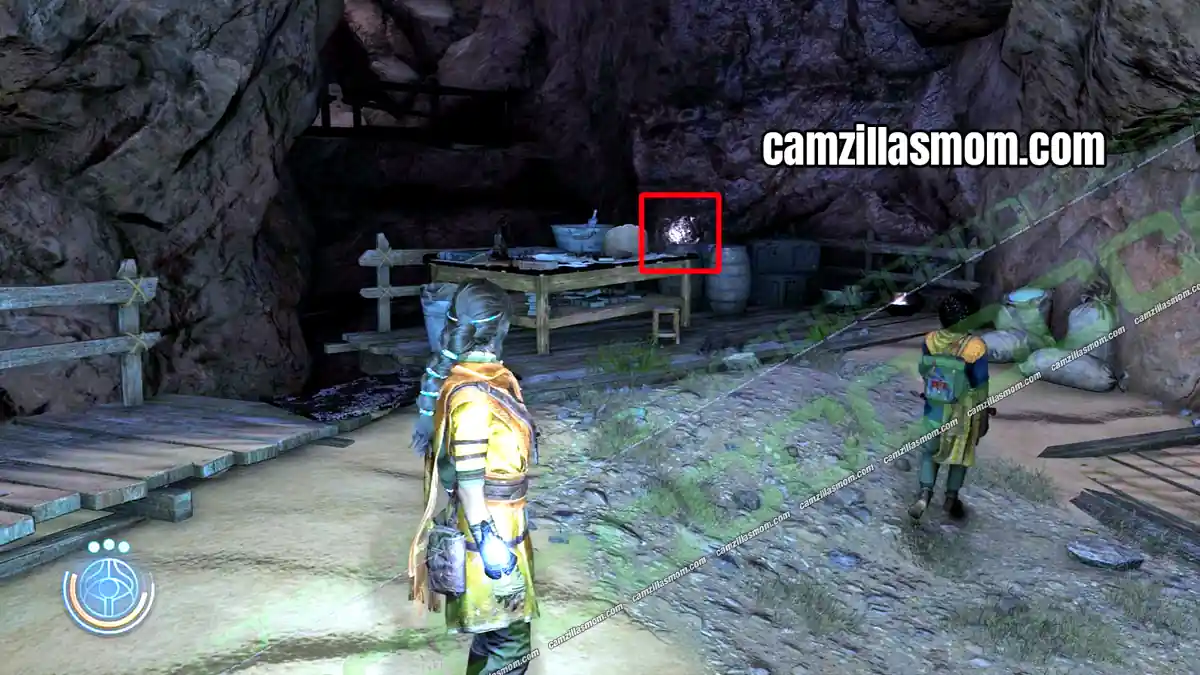
Anomaly 54
54 of 70 Anomalies – Chapter 11: Dasuden
Go through the red door into the hostile camp. The Anomaly is on the ground floor in the collapsed mine.
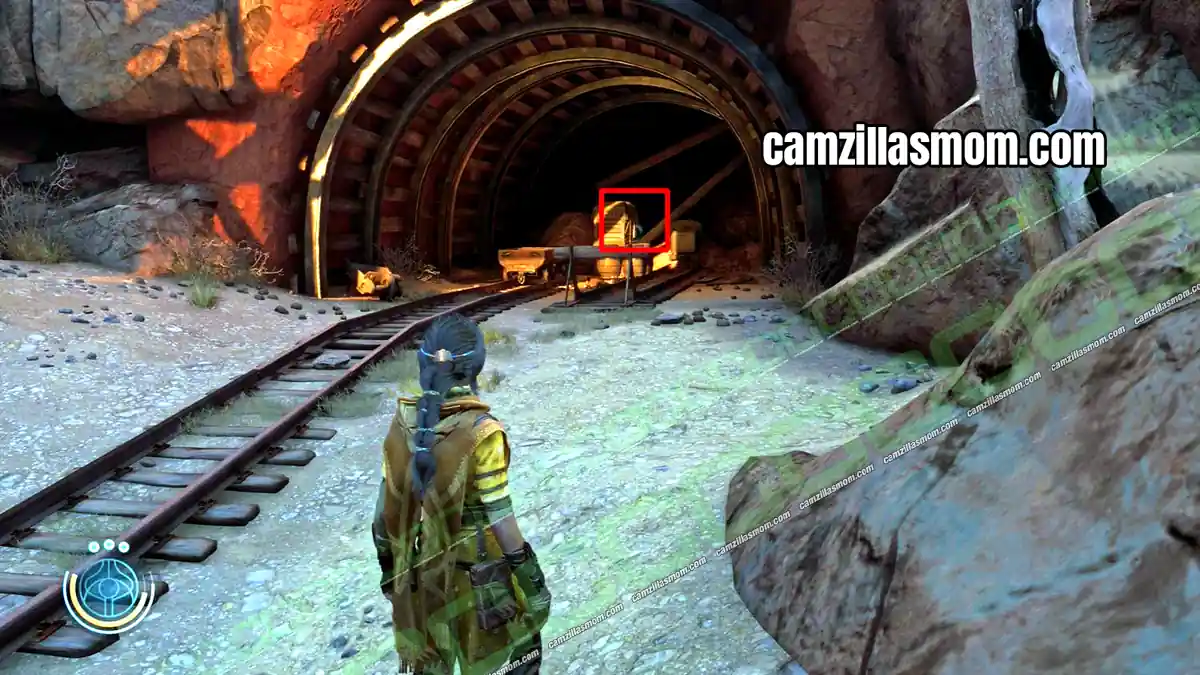
Anomaly 55
55 of 70 Anomalies – Chapter 11: Dasuden
Ride the mining cart to the next area, clear it and go through the green gate. Cross the area with the tall statues, but take the stairs down instead of leaving. The Anomaly is next to the top of a broken statue.
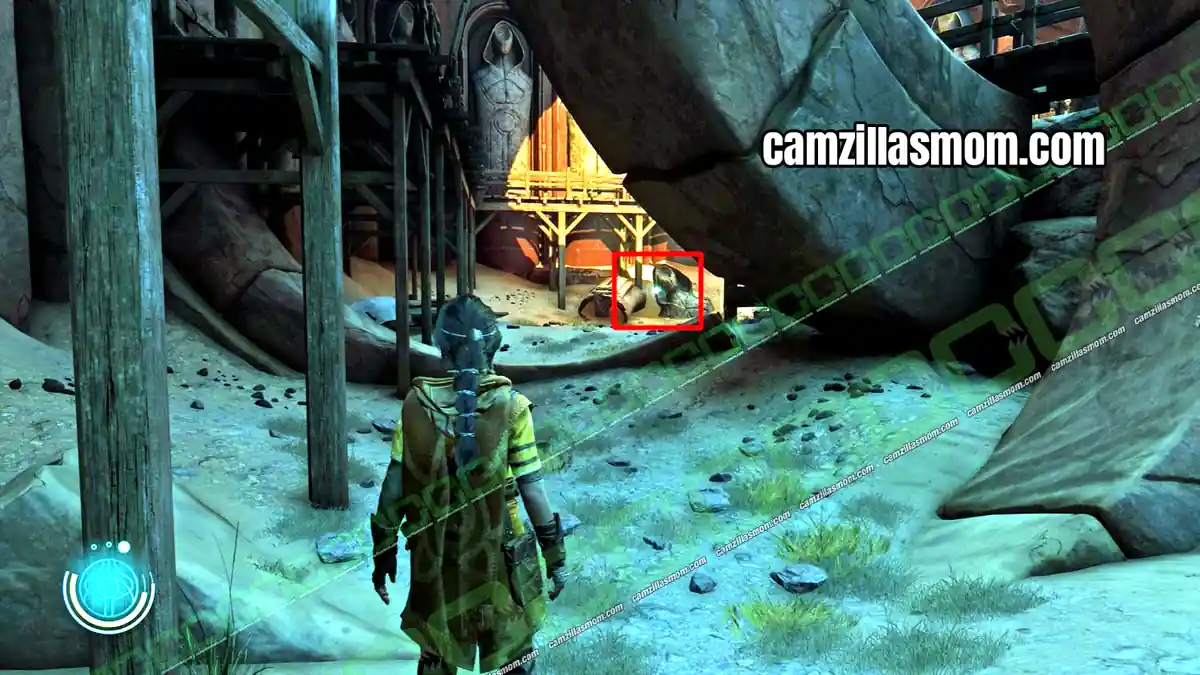
Anomaly 56
56 of 70 Anomalies – Chapter 11: Dasuden
Go back toward the exit where Buchra waits. Look up to the left at the climbable wall. Climb it, break the wall at the top and crouch through to the Anomaly.
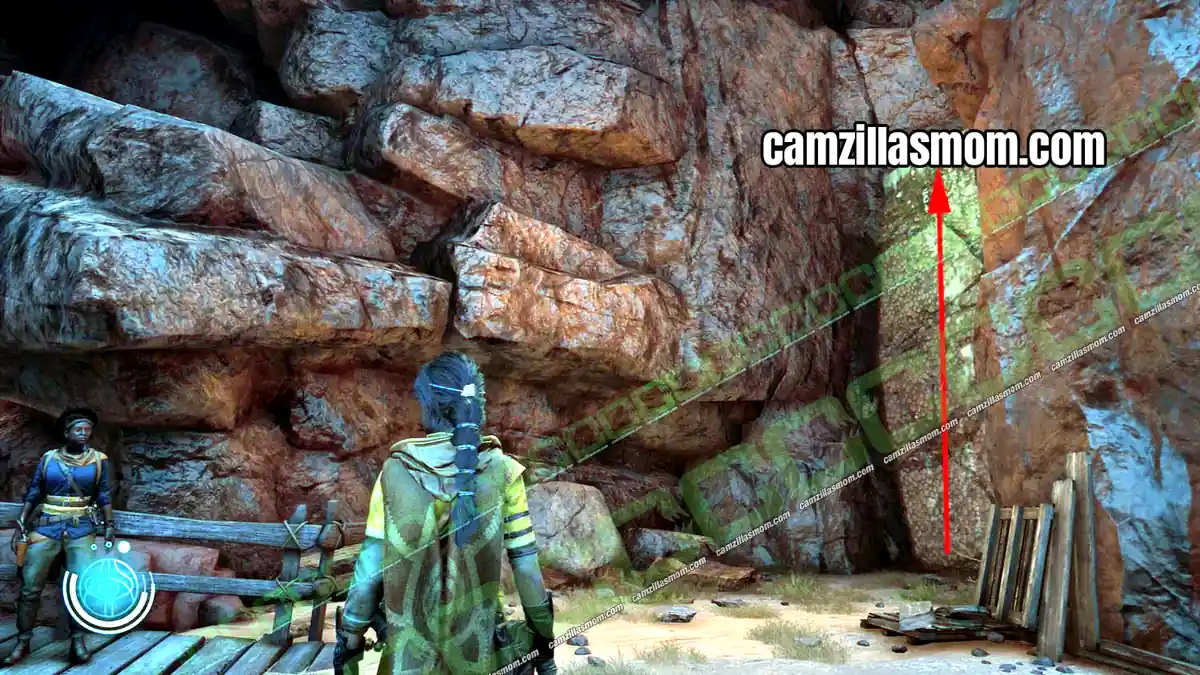
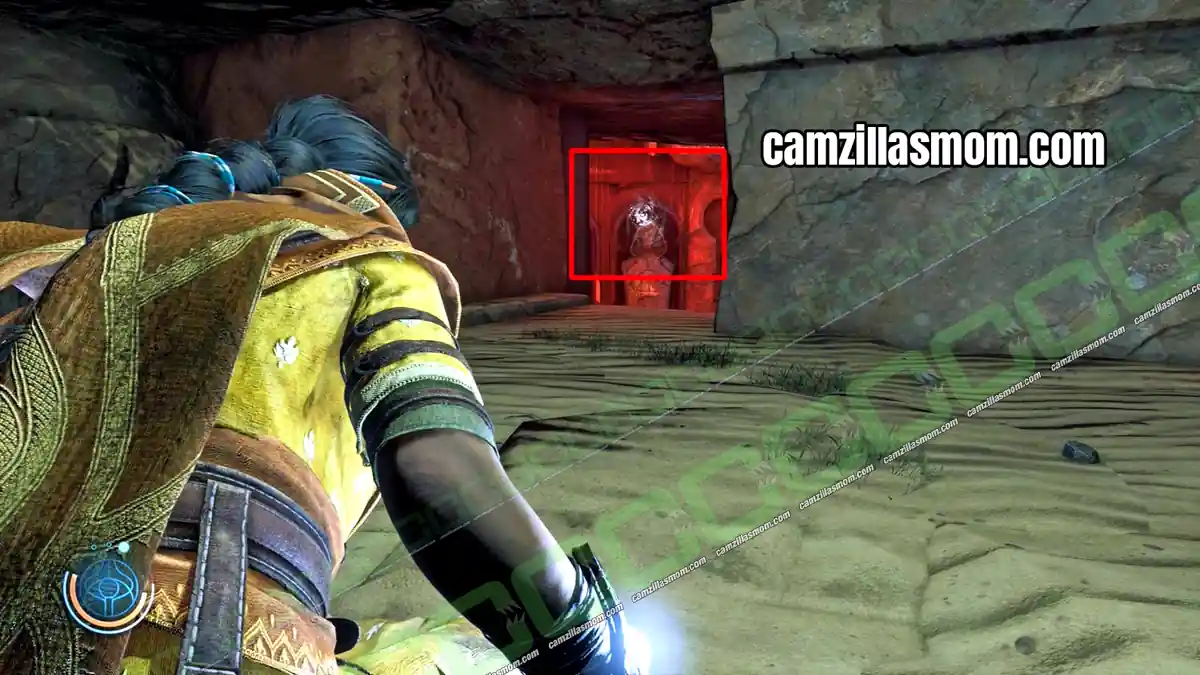
Anomaly 57
57 of 70 Anomalies – Chapter 11: Dasuden
Leaving this area, look down. You can see a path with an Anomaly. On the left, jump onto the wall and climb down to the path. Follow it to the end and climb up to the Anomaly.
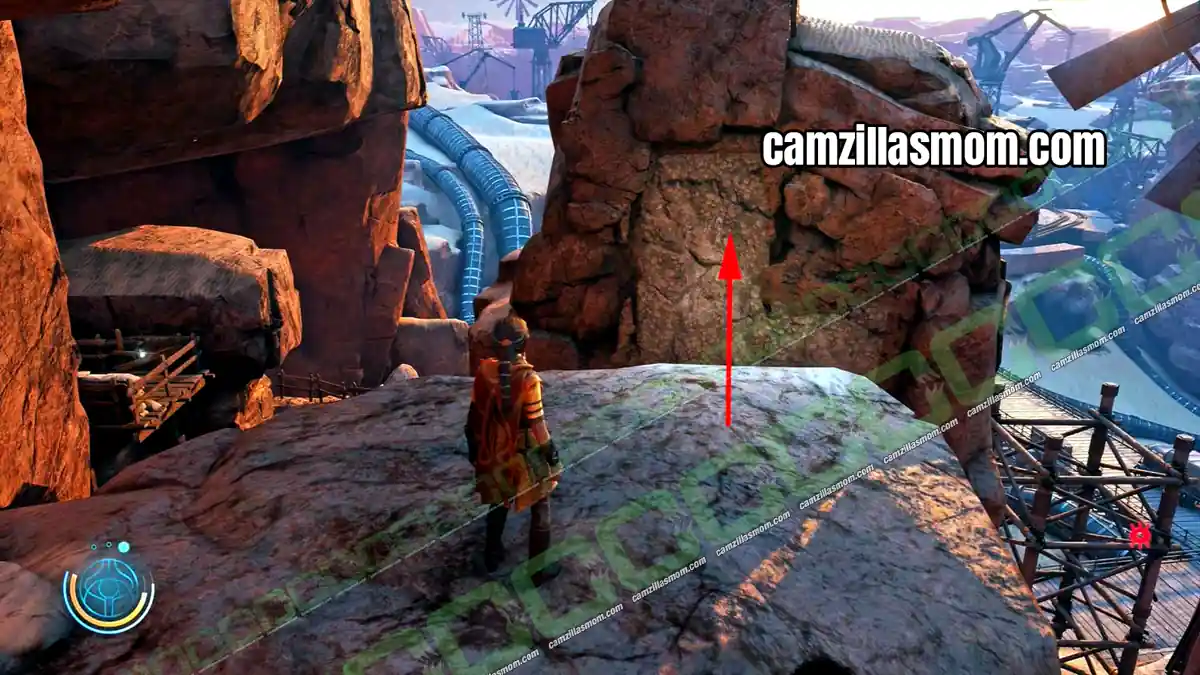
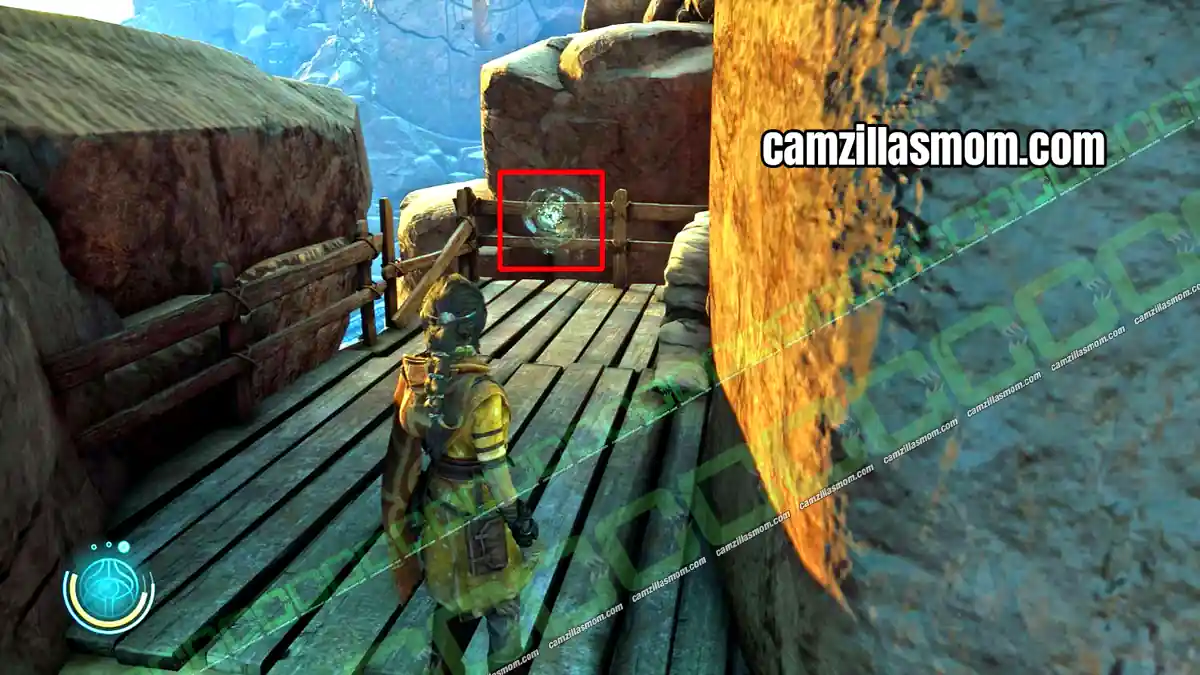
Anomaly 58
58 of 70 Anomalies – Chapter 11: Dasuden
In the next area, Luther causes trouble again. The Anomaly is in the mine shaft.
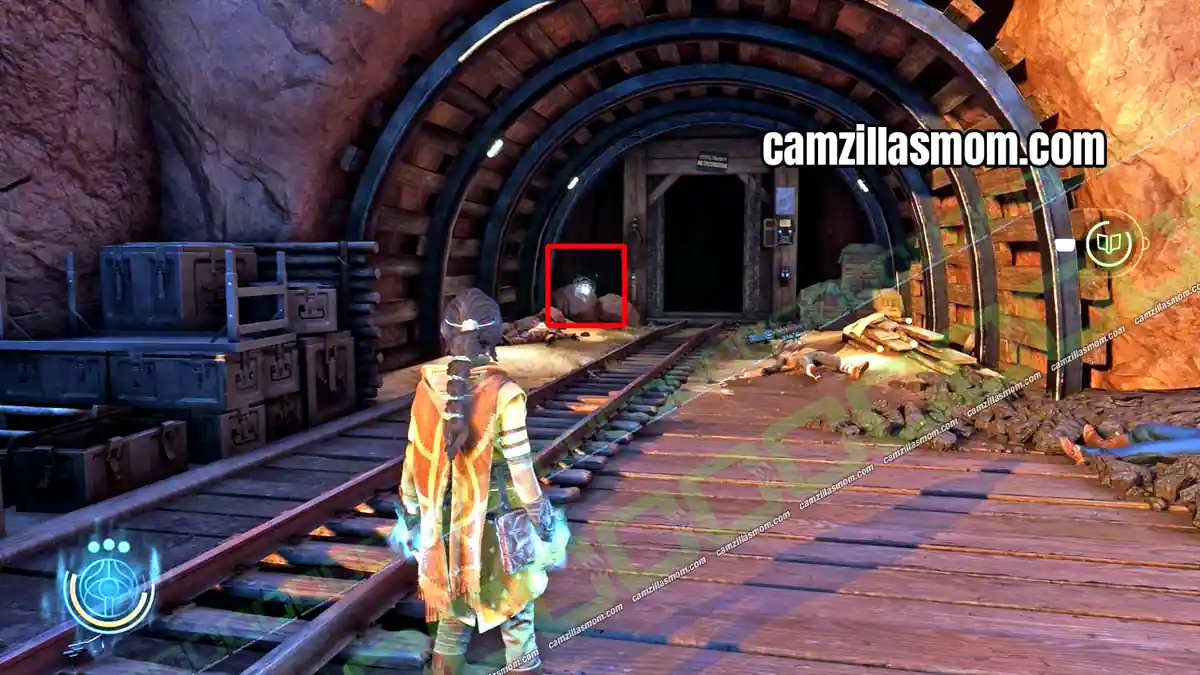
Anomaly 59
59 of 70 Anomalies – Chapter 11: Dasuden
After you move the crane, clear the next camp and enter the large building from the far side. Take the stairs up past the red door to the next floor.
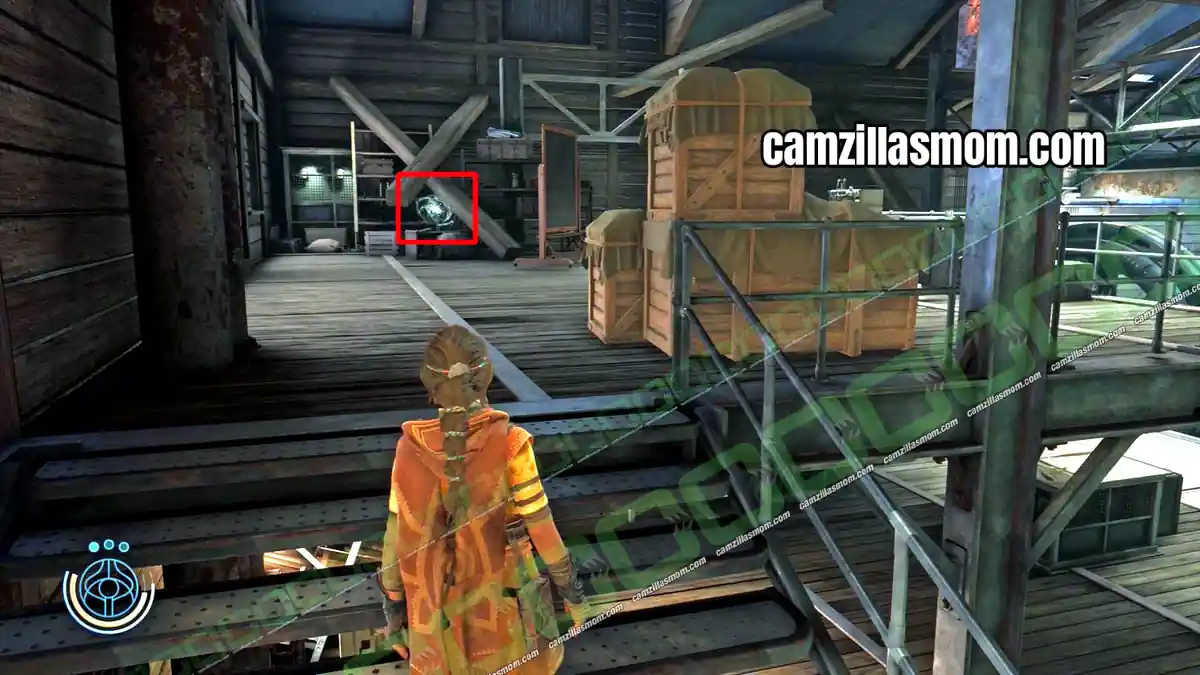
Anomaly 60
60 of 70 Anomalies – Chapter 11: Dasuden
Go through the cave and meet Luther on the other side. After the cutscene, go left. The Anomaly is on a balcony.
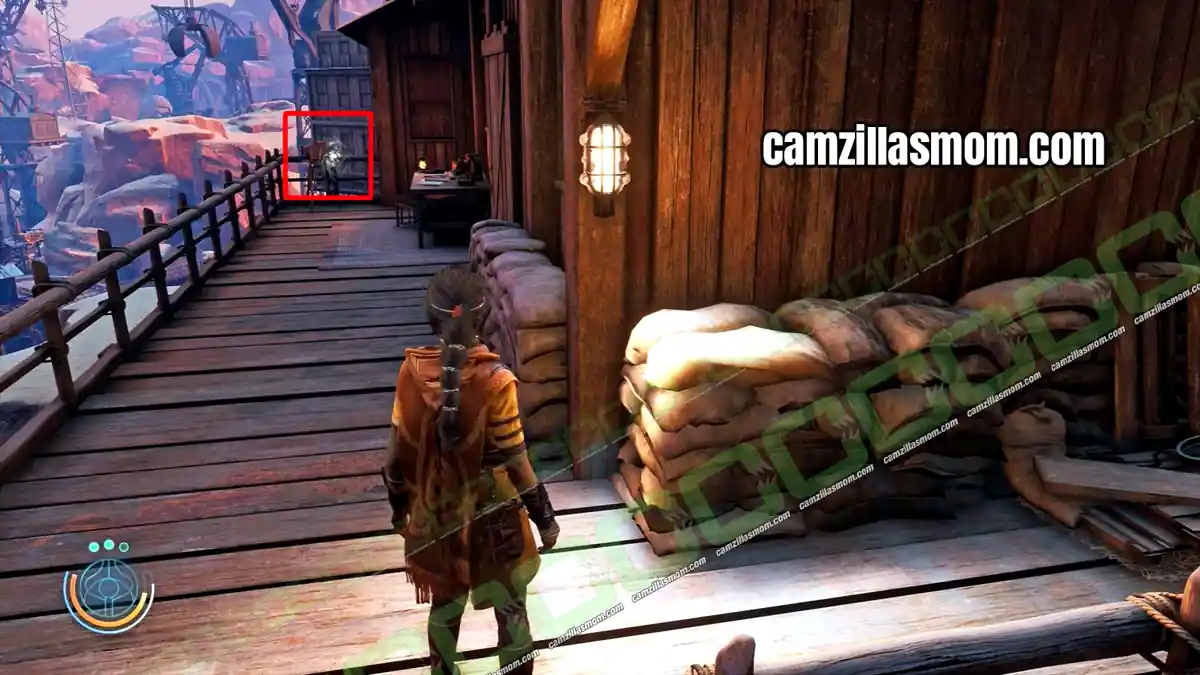
Anomaly 61
61 of 70 Anomalies – Chapter 11: Dasuden
After you rescue Buchra, climb the wall and turn around for the last Dasuden Anomaly.
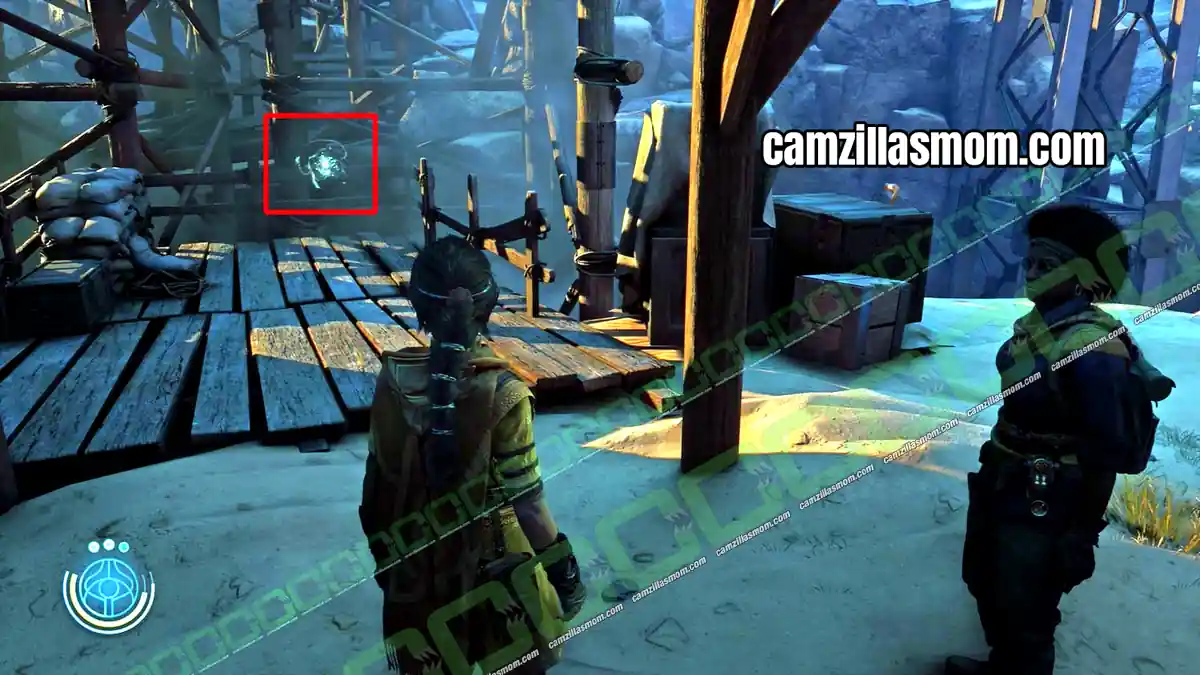
Anomaly 62
62 of 70 Anomalies – Chapter 12: Peshanden
In the room with the first Sahin Gate, check the room next to it first.
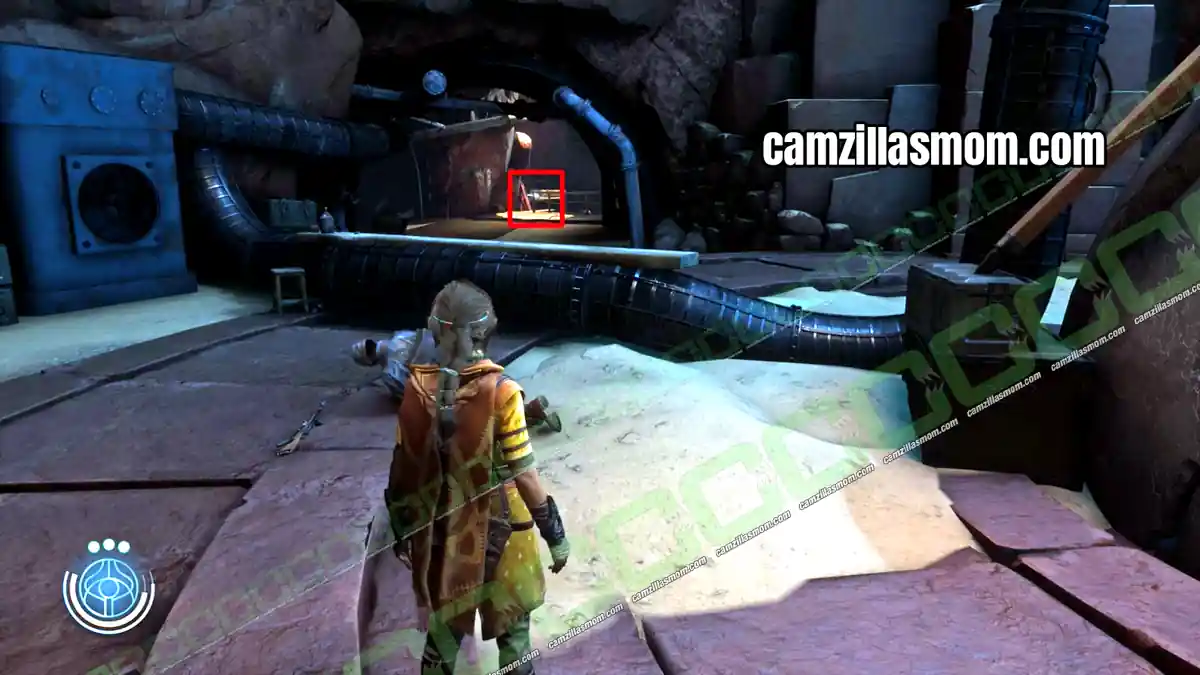
Anomaly 63
63 of 70 Anomalies – Chapter 12: Peshanden
After the second Sahin Gate, clear the area. Go through the hole in the wall near the table with the coin. Climb down the wall at the far end, follow the path and climb down again. Climb the wall right behind you. The Anomaly is straight ahead.
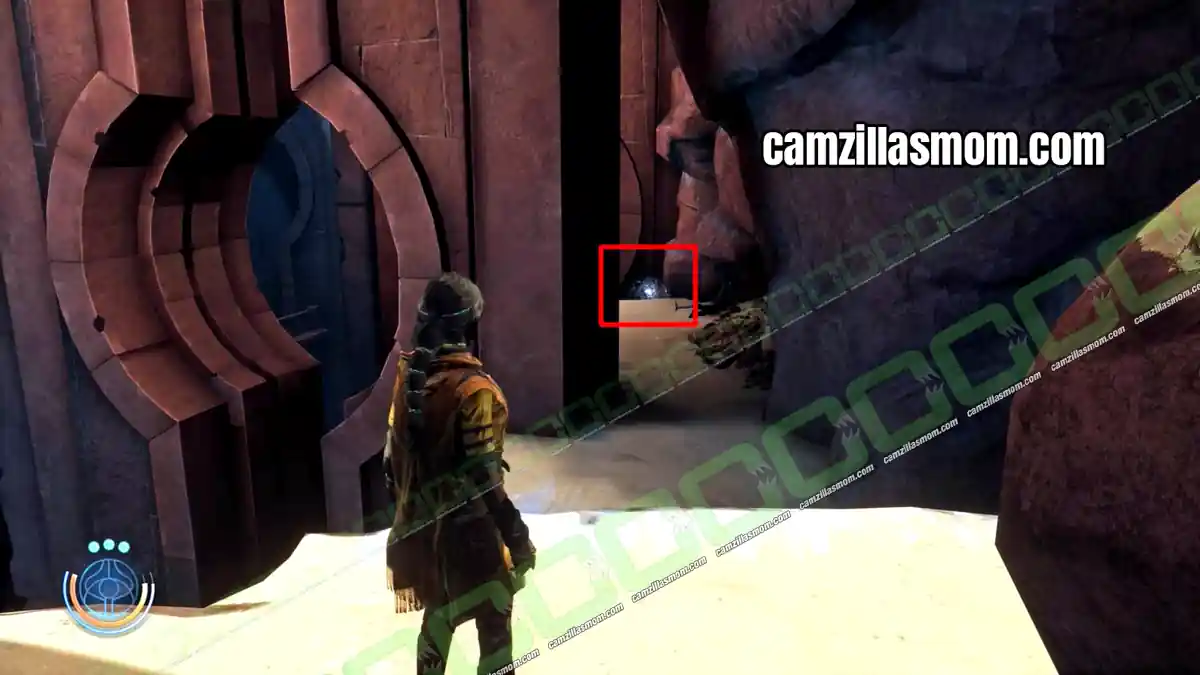
Anomaly 64
64 of 70 Anomalies – Chapter 12: Peshanden
Go back and talk to Buchra. Climb over the wooden house to Reika’s Echo and check the area below for the Anomaly.
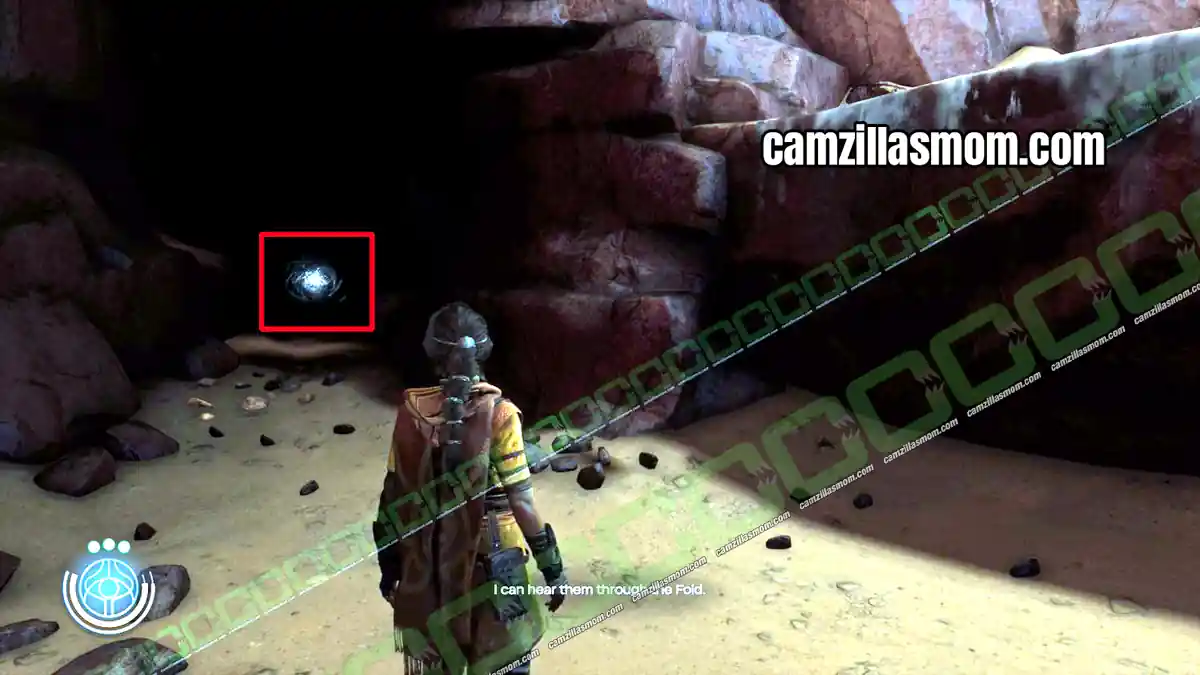
Anomaly 65
65 of 70 Anomalies – Chapter 12: Peshanden
Climb down the long wall into the room with the large ball and the Echo. Take the stairs left of the entrance.
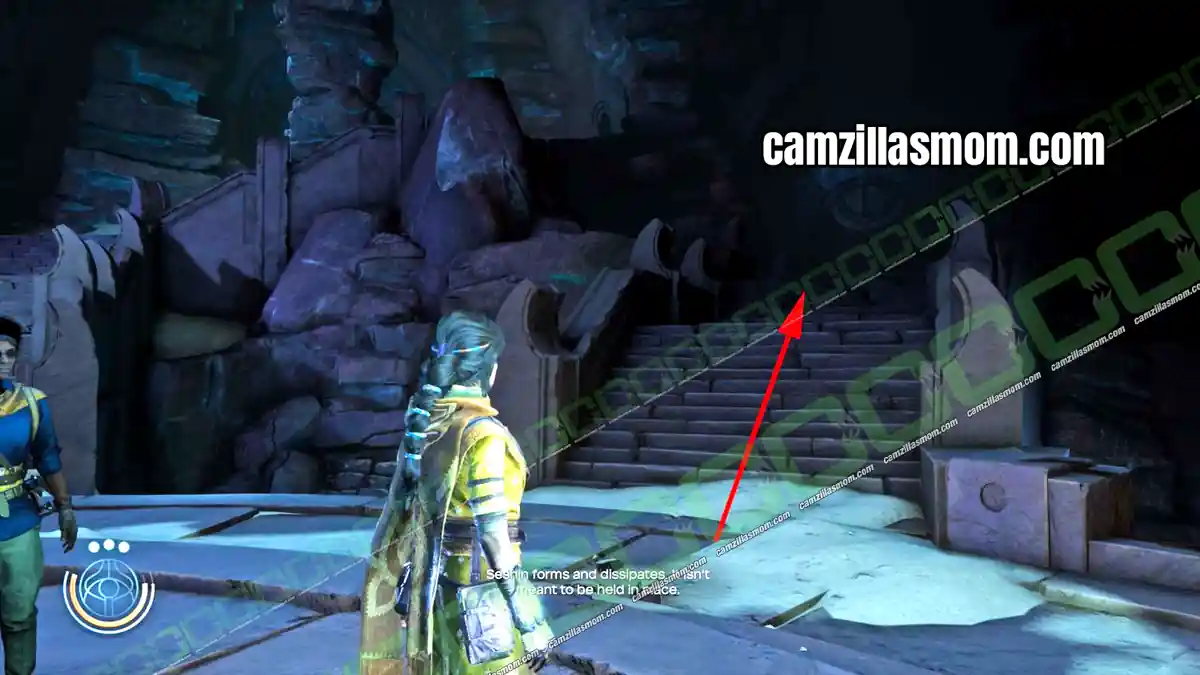
Anomaly 66
66 of 70 Anomalies – Chapter 12: Peshanden
In the hostile area with the red dome, go through the red door and look left right away.
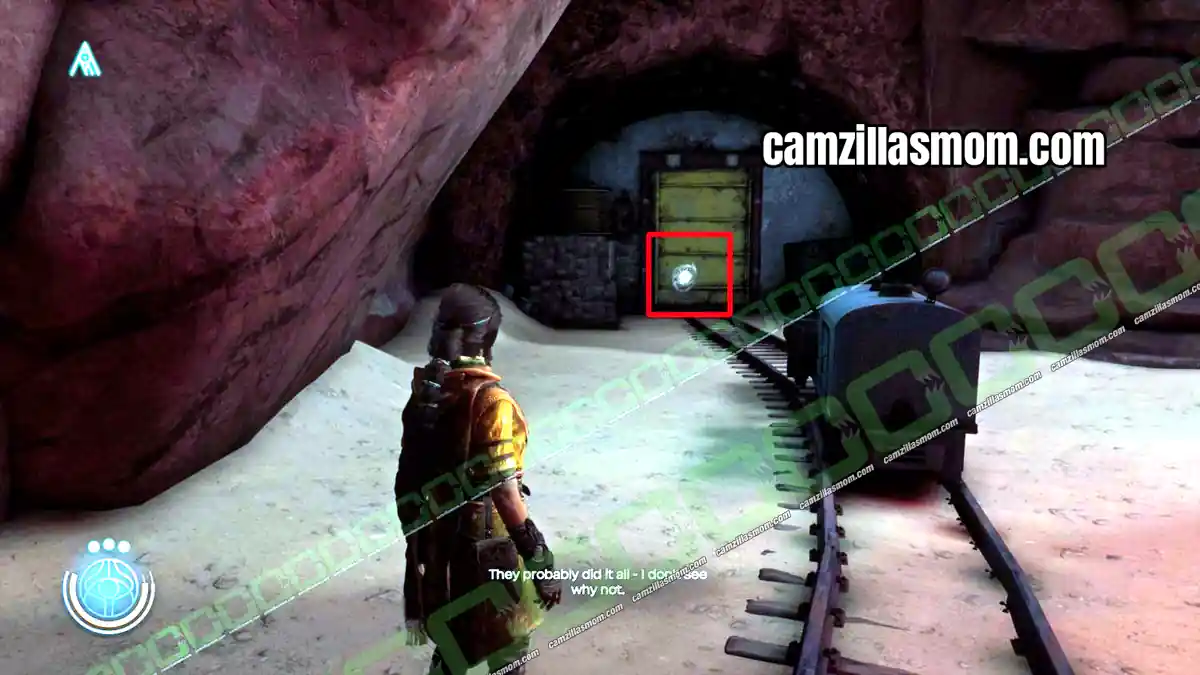
Anomaly 67
67 of 70 Anomalies – Chapter 12: Peshanden
After you split from Buchra, the corridor leads to a round room with a hole in the middle. Take the opening on the left. The Anomaly is behind bars.
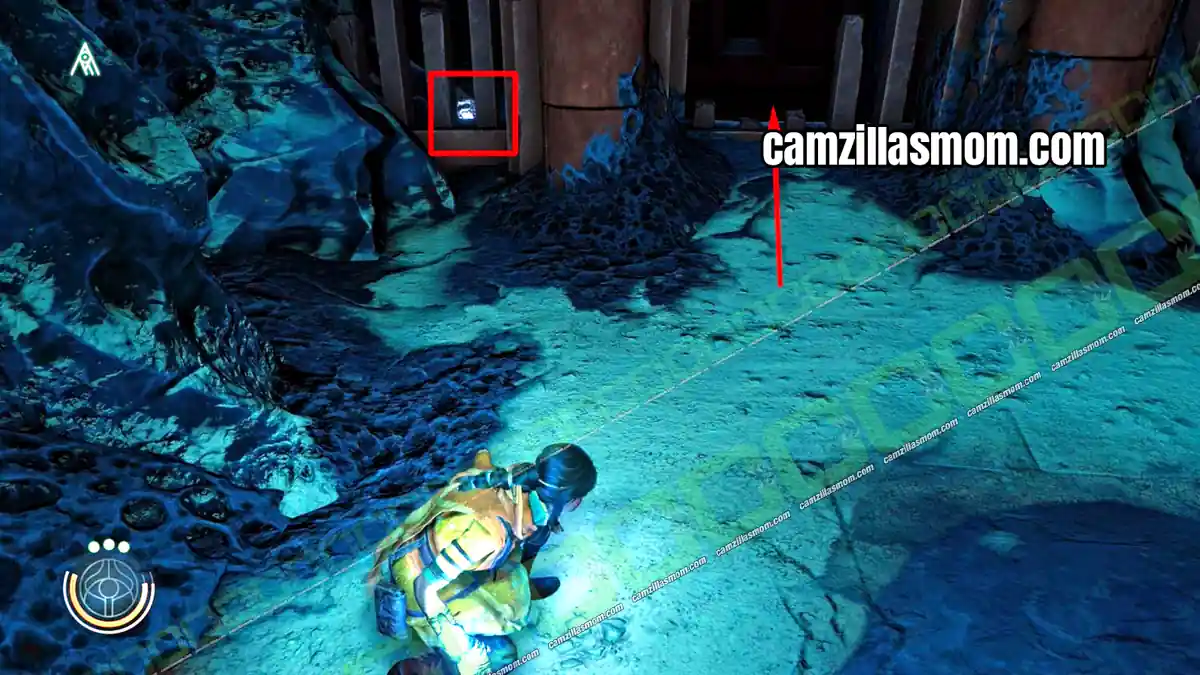
Anomaly 68
68 of 70 Anomalies – Chapter 12: Peshanden
After the open fourth Sahin Gate, there is a gap you squeeze through to continue. Pick up the Anomaly next to it first.
Anomaly 69
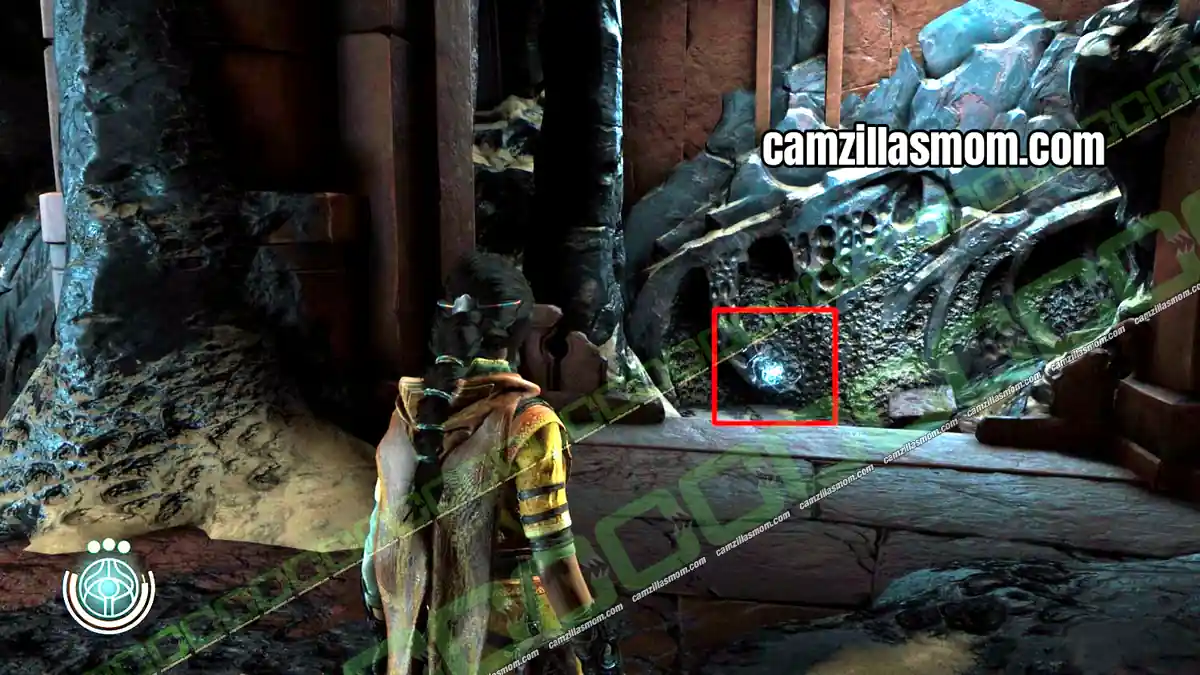
69 of 70 Anomalies – Chapter 12: Peshanden
After Buchra lowers Haroona deeper into the cave, the Anomaly is in the large hostile camp with the two red domes.
Anomaly 70
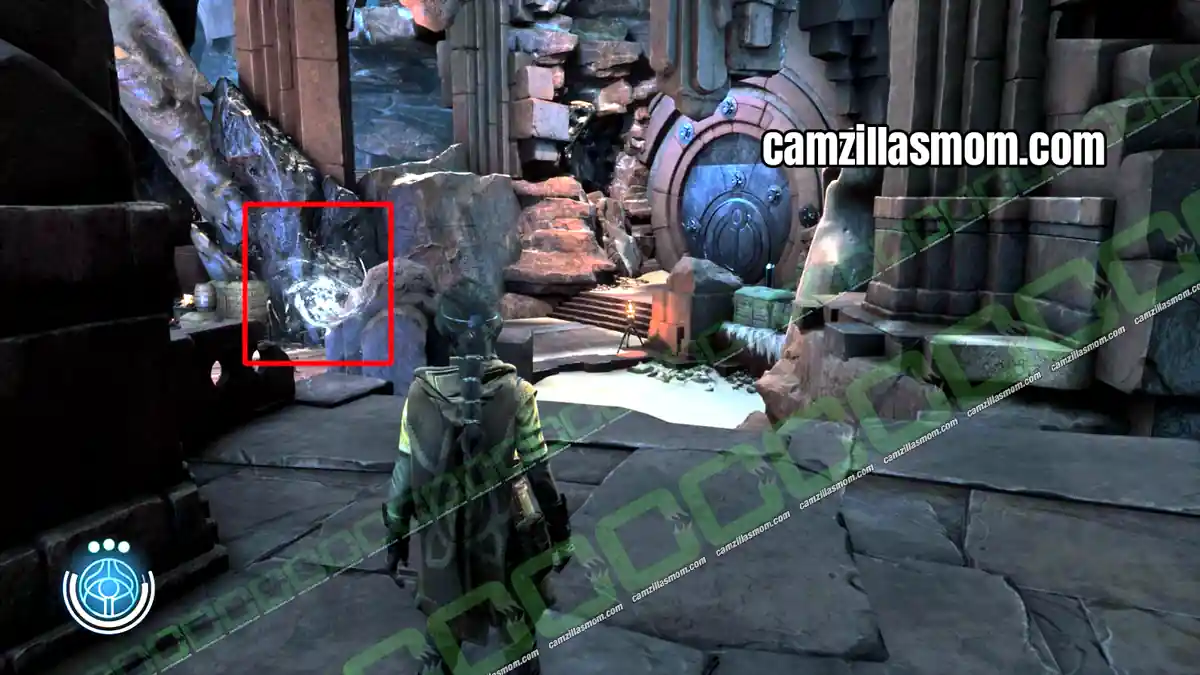
70 of 70 Anomalies – Chapter 12: Peshanden
Open the Sahin Gate in this area. After the cutscene, the last Anomaly is on your left.
Letters – Documents
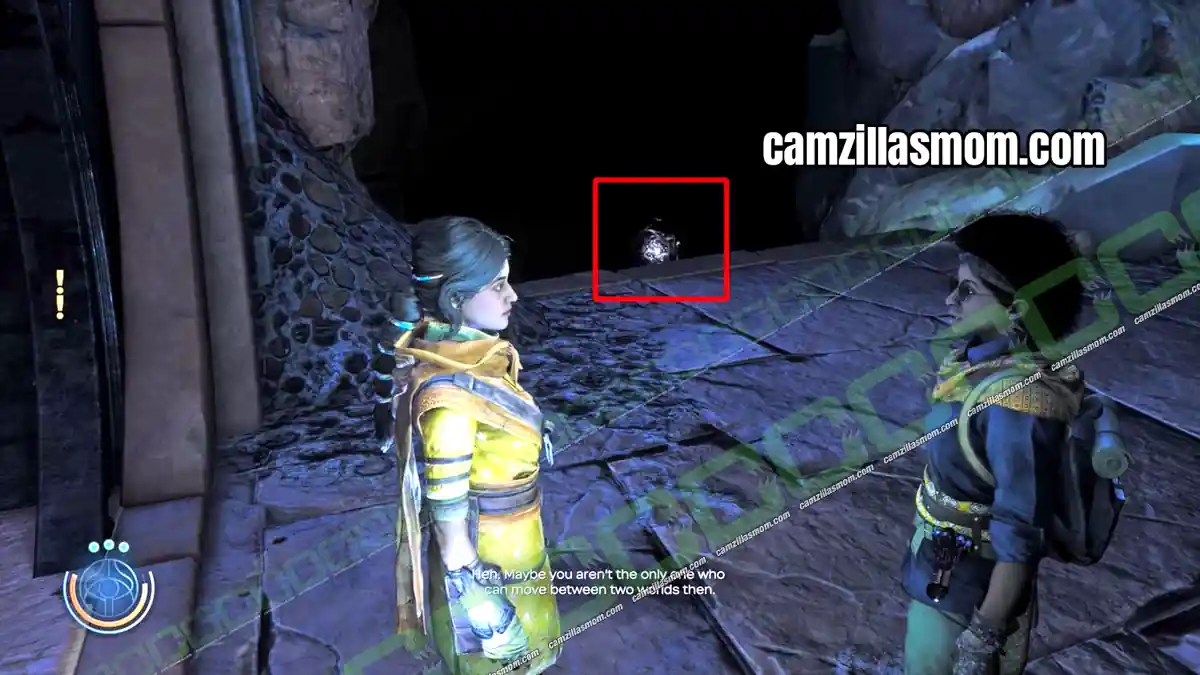
All 12 Letters in menu order.
Letter 1
1 of 12 Letters – Chapter 1: Richat Structure
In the camp where Haroona learns to use tall grass and first sees explosive canisters, the letter is near a tent.
Letter 2
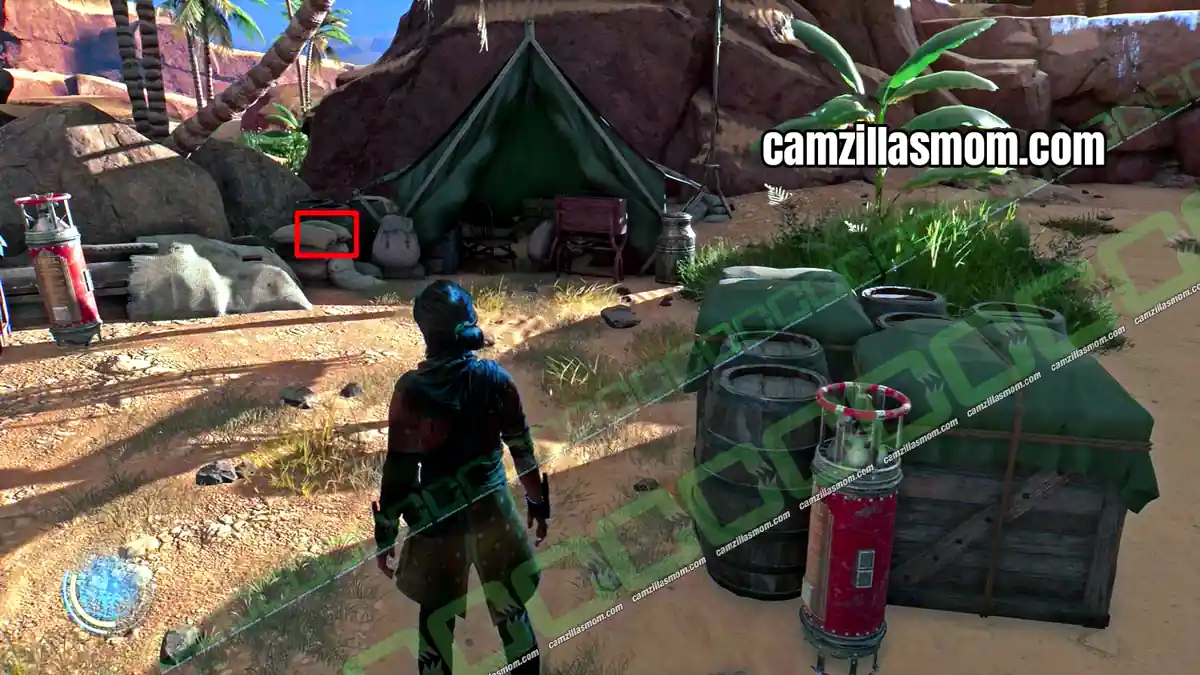
2 of 12 Letters – Chapter 1: Richat Structure
In the camp where you learn to Crush canisters, walk through the large tent and follow the path up to the tent at the top of the mountain. The letter is inside.
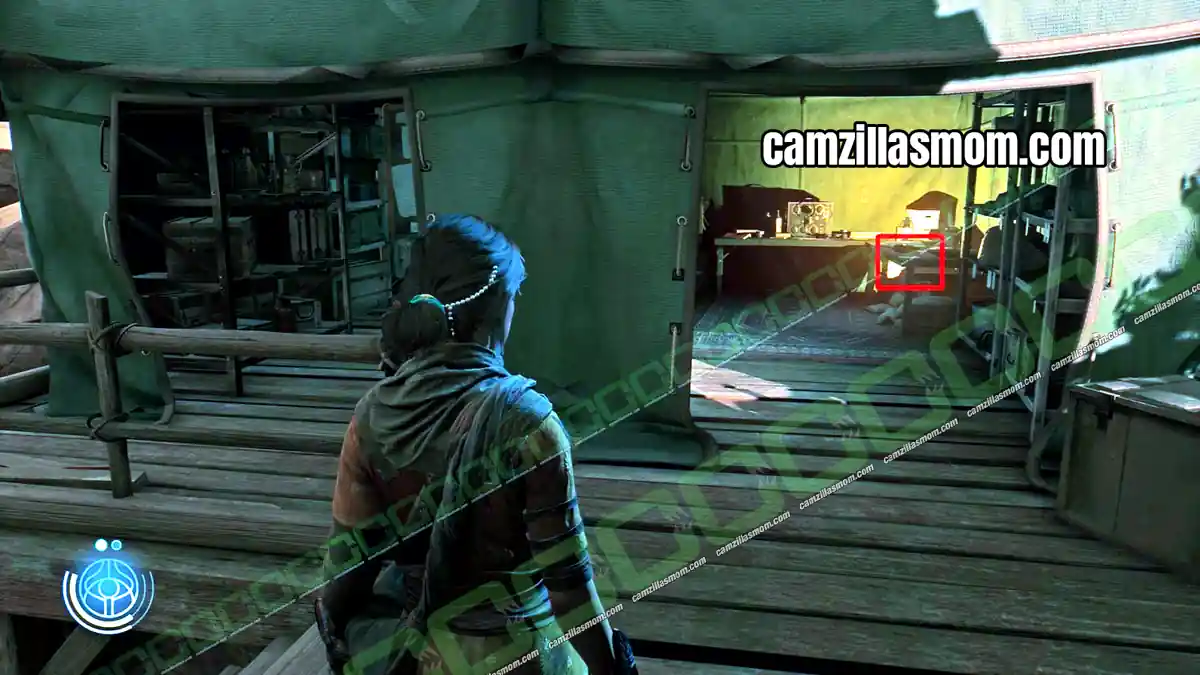
Letter 3
3 of 12 Letters – Chapter 1: Richat Structure
In the camp with the red barrier, go left into the tent. The letter is on the table.
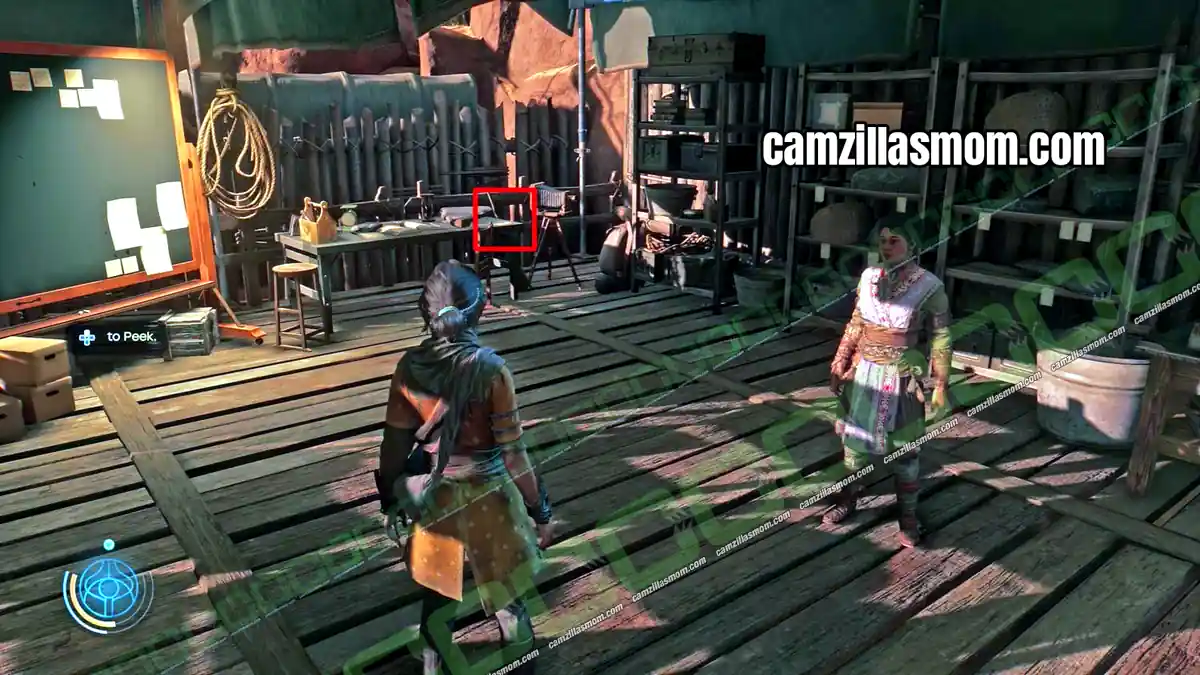
Letter 4
4 of 12 Letters – Chapter 1: Richat Structure
In the last camp before the sandstorm, check the table on your right before you fight.
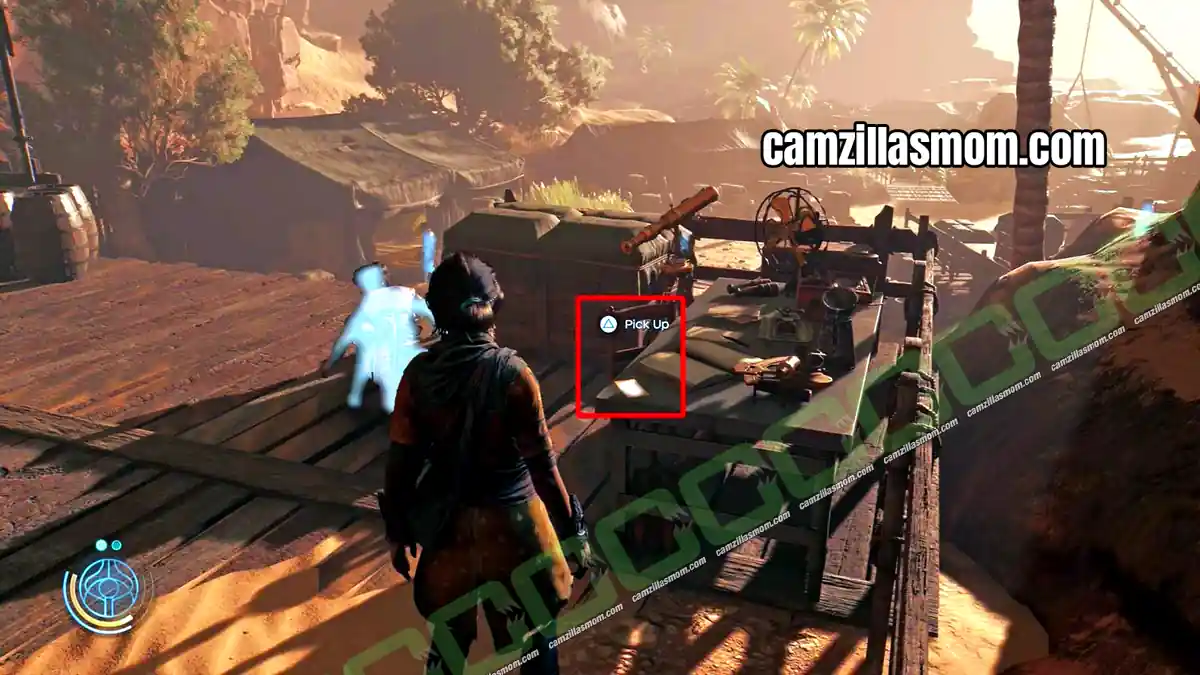
Letter 5
5 of 12 Letters – Chapter 2: Chamiri
Where Haroona points out the lighthouse, go left and break the boxes to reach a hidden spot with the letter.
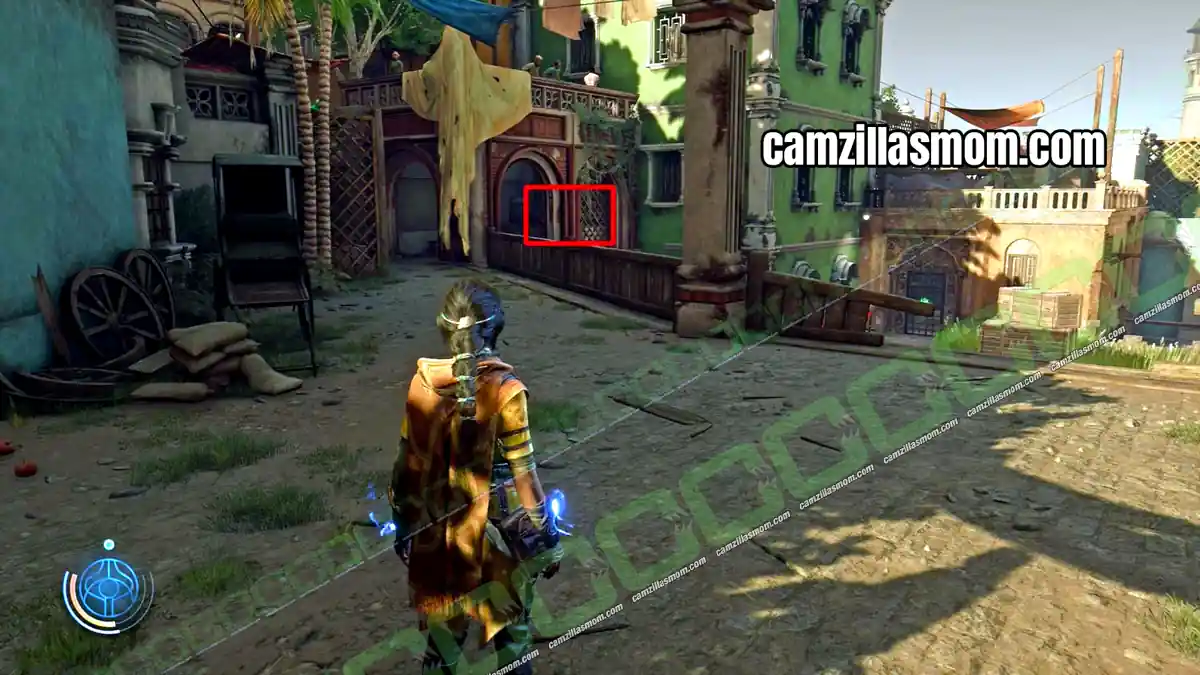
Letter 6
6 of 12 Letters – Chapter 2: Chamiri
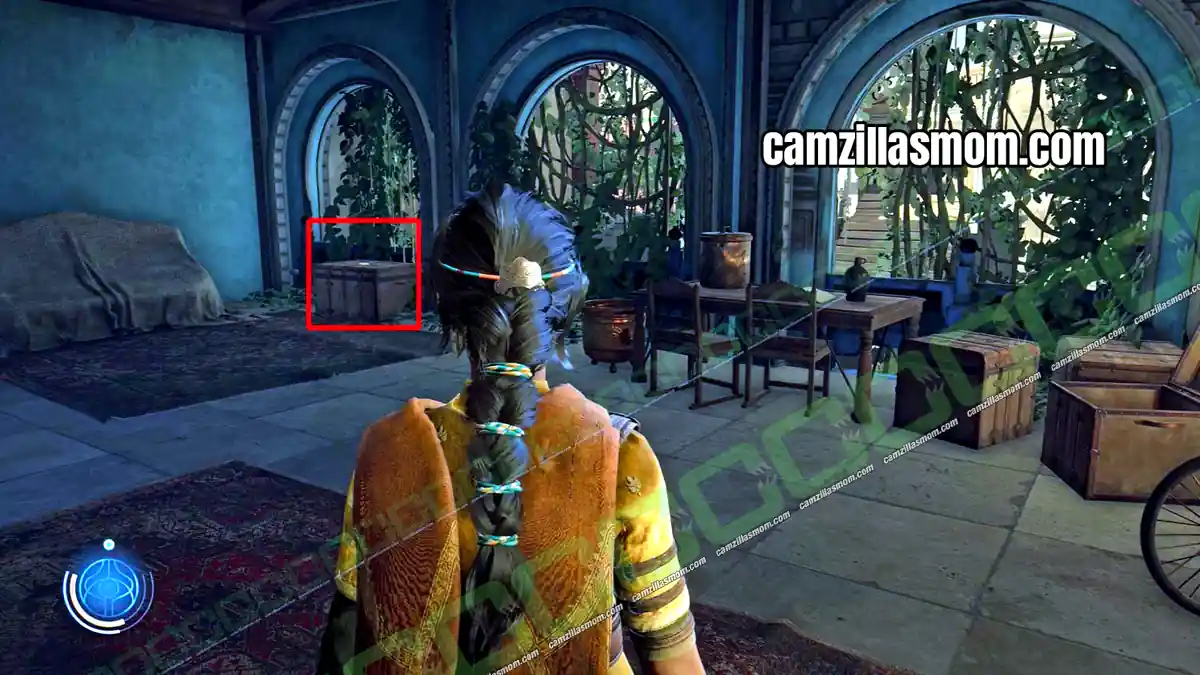
Clear the area and go through the green door. Cross the storage area and the plank onto the green house, then climb the vines on the left and jump to the rooftop with more enemies.
Drop to the balcony, jump to the next building and climb the vines. On the roof, take the stairs down. The letter is on a wooden box in this room.
Letter 7
7 of 12 Letters – Chapter 2: Chamiri
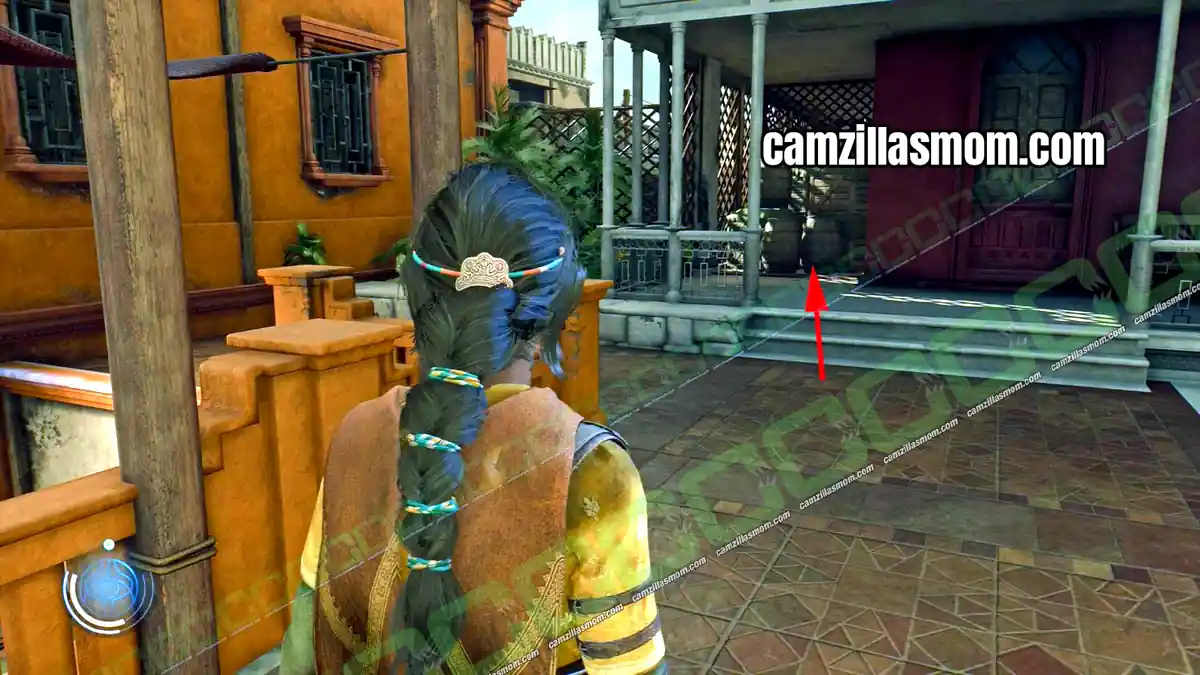
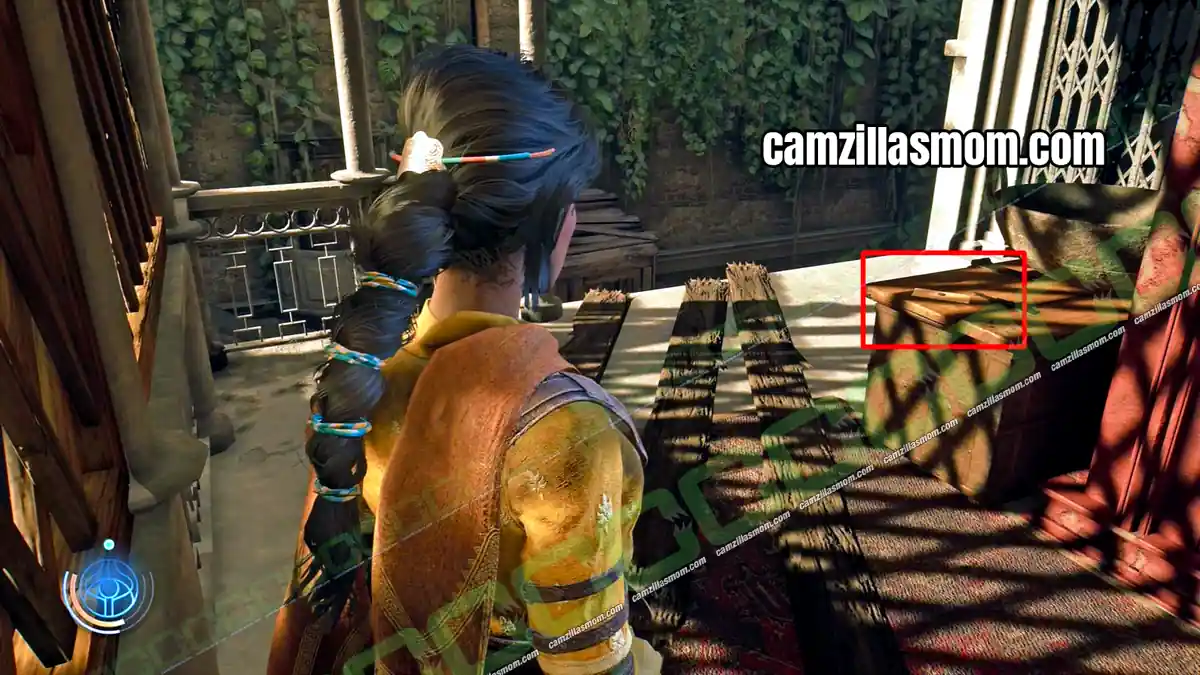
Go back up and cross the plank to the next house. Climb up and break the boxes blocking the balcony. The letter is on a wooden box at the far end.
Letter 8
8 of 12 Letters – Chapter 2: Chamiri
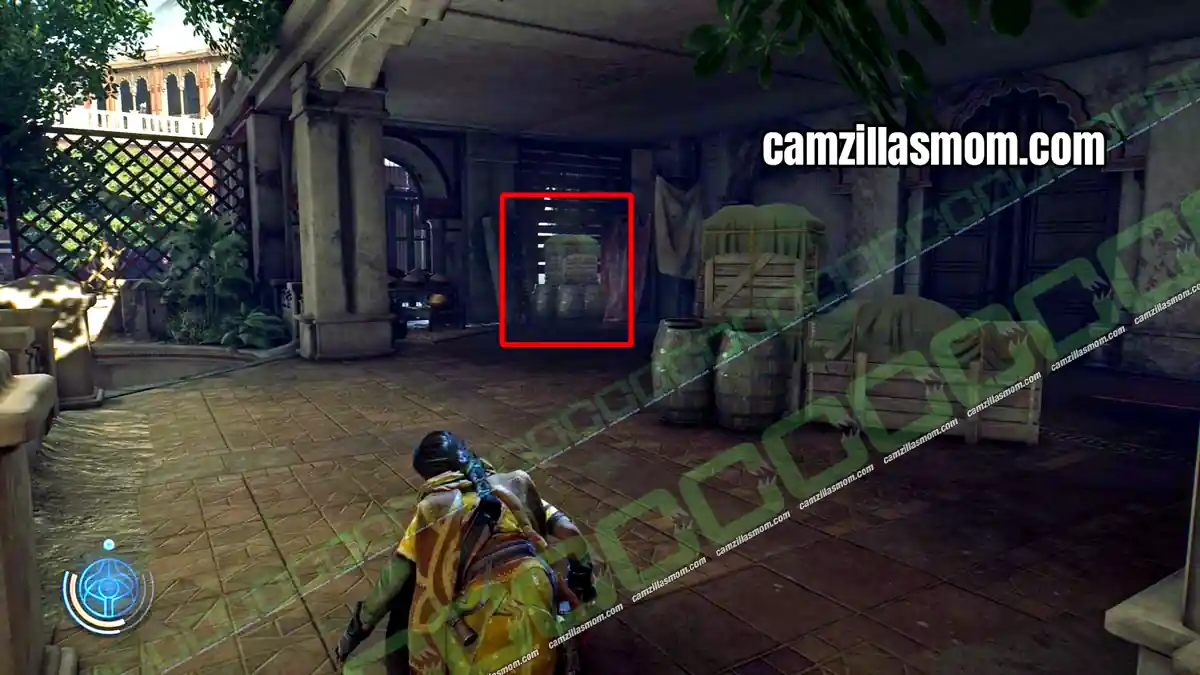
Go through the next green door into the hostile market. In the upper part, break the barrels and crates to reach a room with Letter 8.
Letter 9
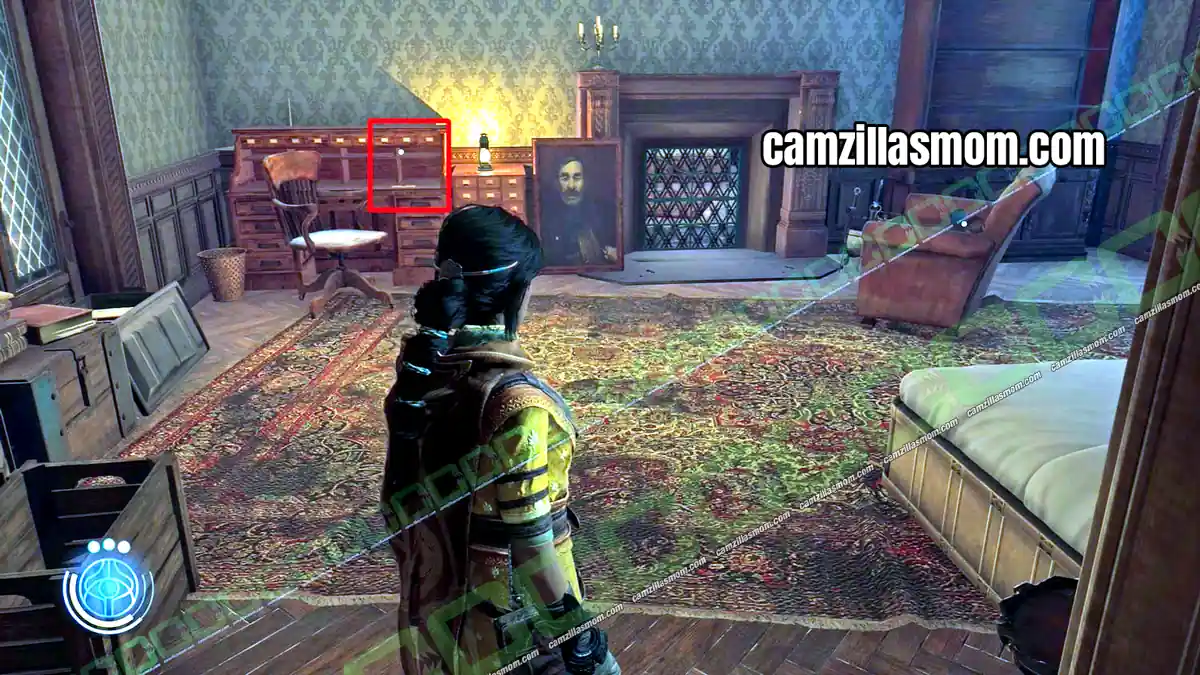
9 of 12 Letters – Chapter 7: Quinta Matos
On the second floor of the mansion, walk through the art room into the bedroom. The letter is on the desk.
Letter 10
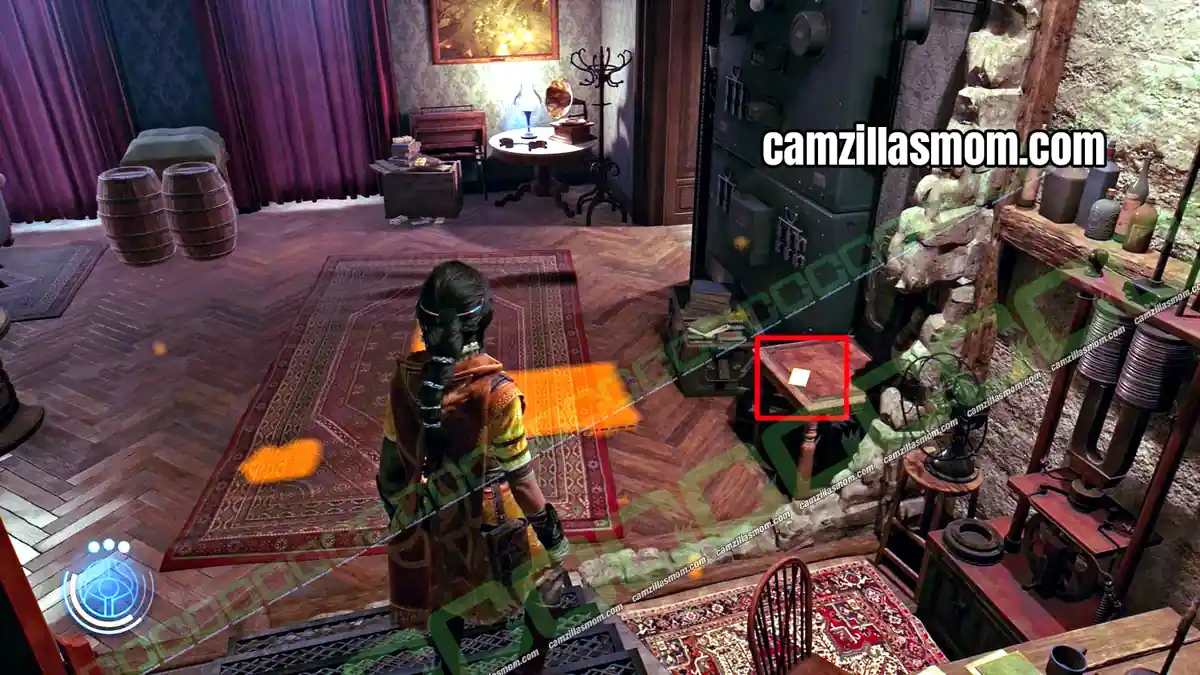
10 of 12 Letters – Chapter 7: Quinta Matos
When you reach the workshop, the letter is on a table at the bottom of the stairs.
Letter 11
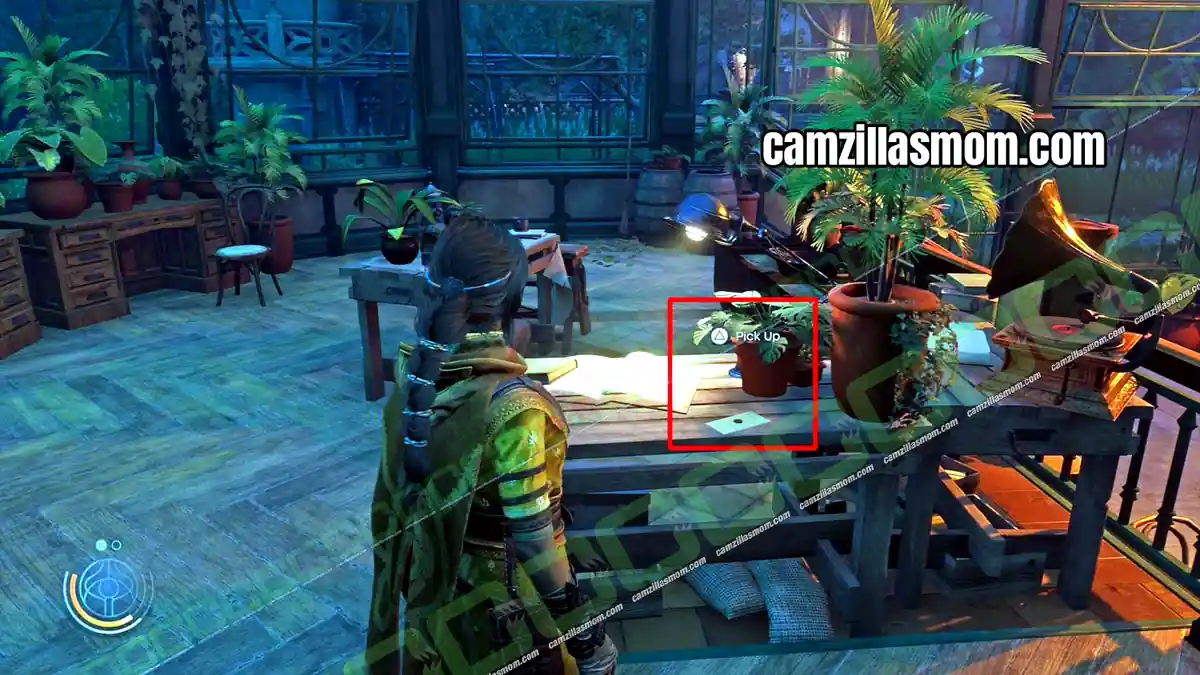
11 of 12 Letters – Chapter 7: Quinta Matos
In the greenhouse, the letter is on the table upstairs.
Letter 12
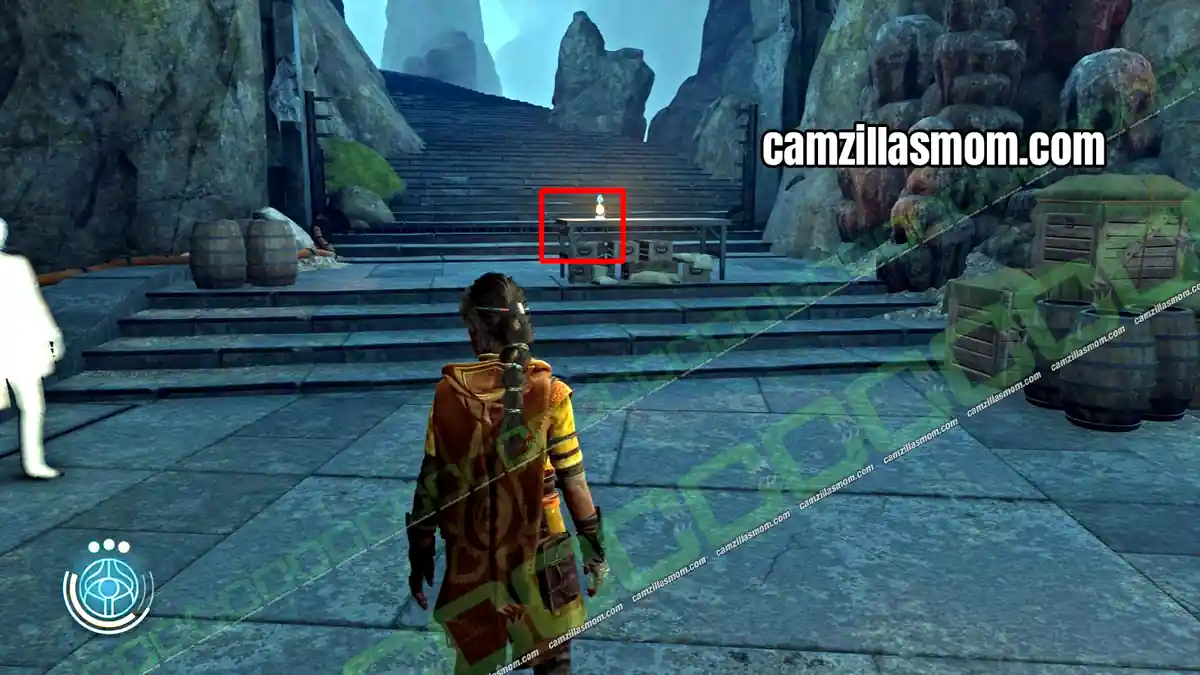
12 of 12 Letters – Chapter 7: Quinta Matos
Near the end of the chapter, Haroona and Luther reach a forcefield deep in the cave. The last letter is on the table closest to the forcefield.
Dossiers – Documents
All 12 Dossiers in menu order.
Dossier 1
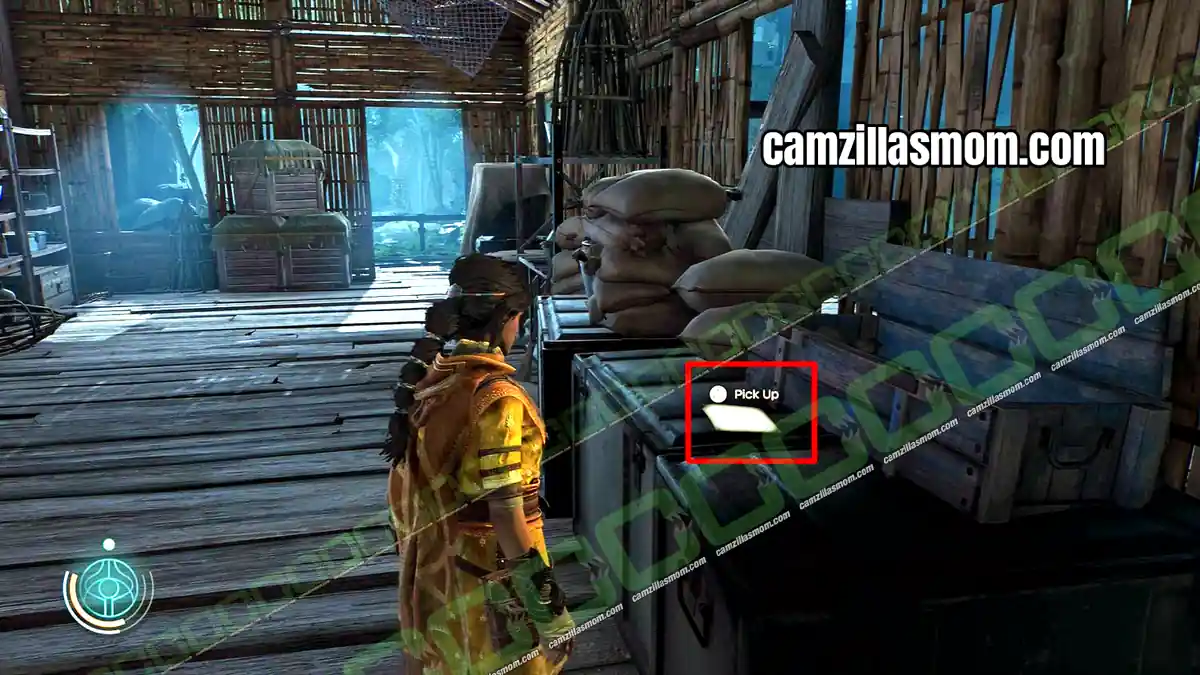
1 of 12 Dossiers – Chapter 3: Suknasari Forest
In the house where you meet Luther, the dossier lies on a crate near the Extractor.
Dossier 2
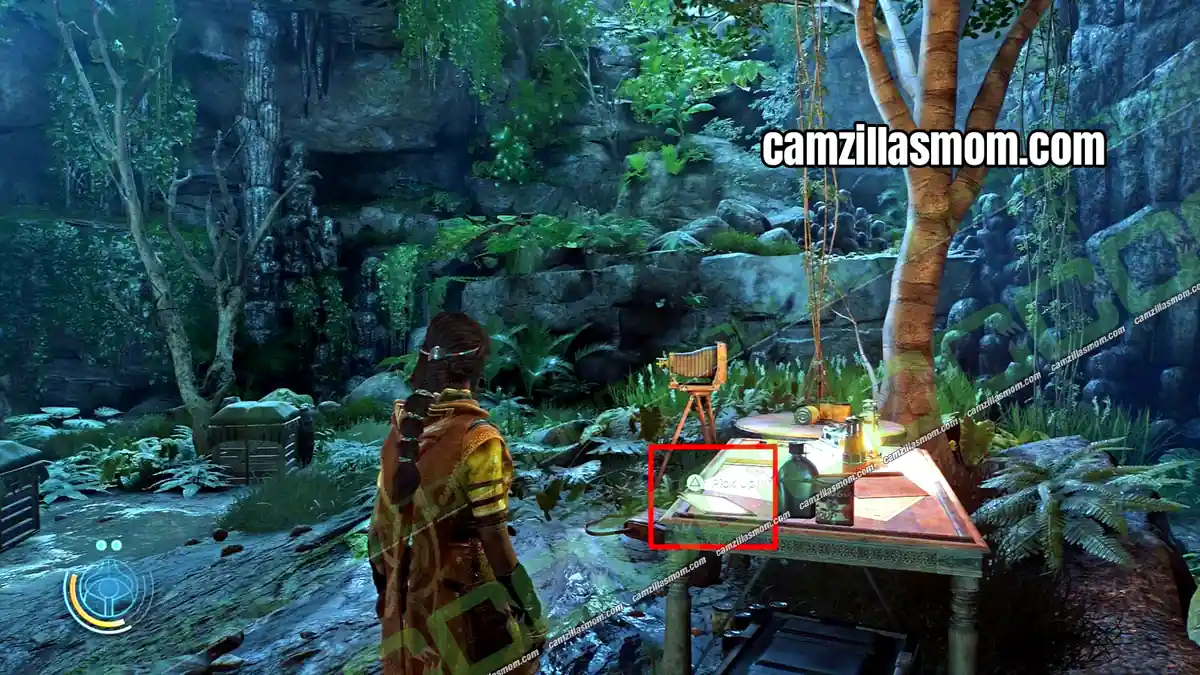
2 of 12 Dossiers – Chapter 3: Suknasari Forest
After the Sahin Table, climb down the vines and topple a tree to cross. In the hostile area with gunners above, the dossier is on the table in the middle.
Dossier 3
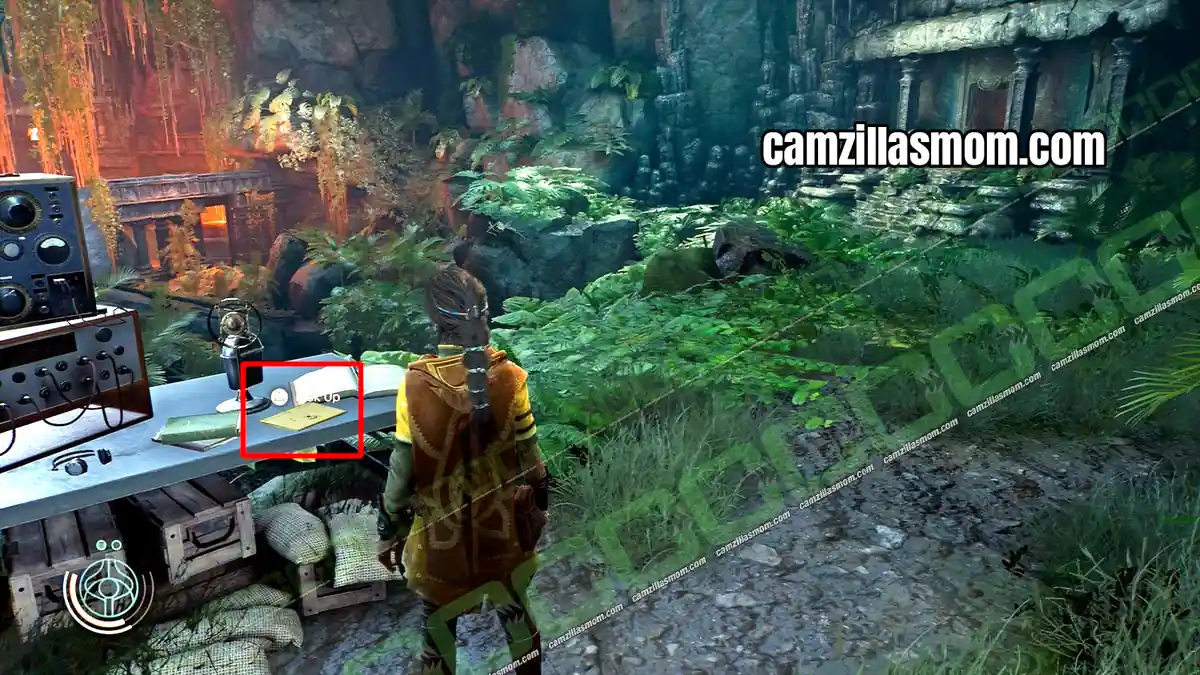
3 of 12 Dossiers – Chapter 3: Suknasari Forest
After the fight with the man Haroona calls Thick Man, go through the green-lit door. Go right up the hill instead of following Luther left. The dossier is on the table with the supplies.
Dossier 4
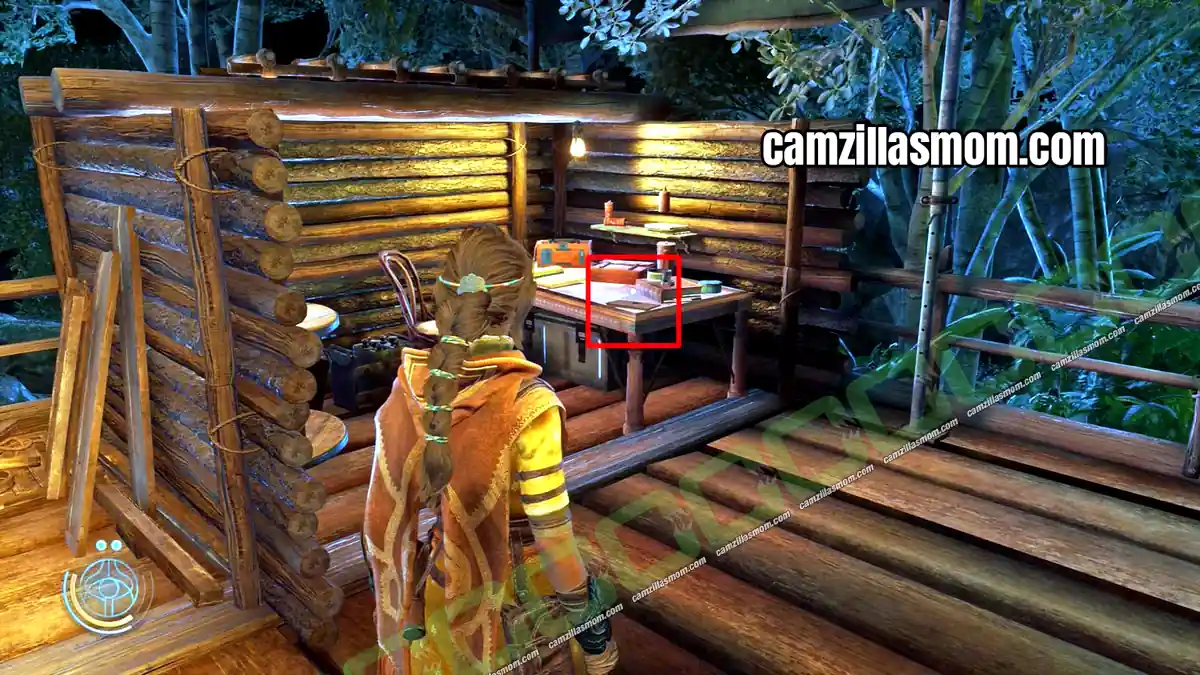
4 of 12 Dossiers – Chapter 3: Suknasari Forest
In the last camp before the Morning Star, go through the green-lit door and upstairs. The dossier is on the table.
Dossier 5
5 of 12 Dossiers – Chapter 4: The Morning Star I
In the Crew Quarters, open the door to one of the rooms at the back. The dossier is inside.
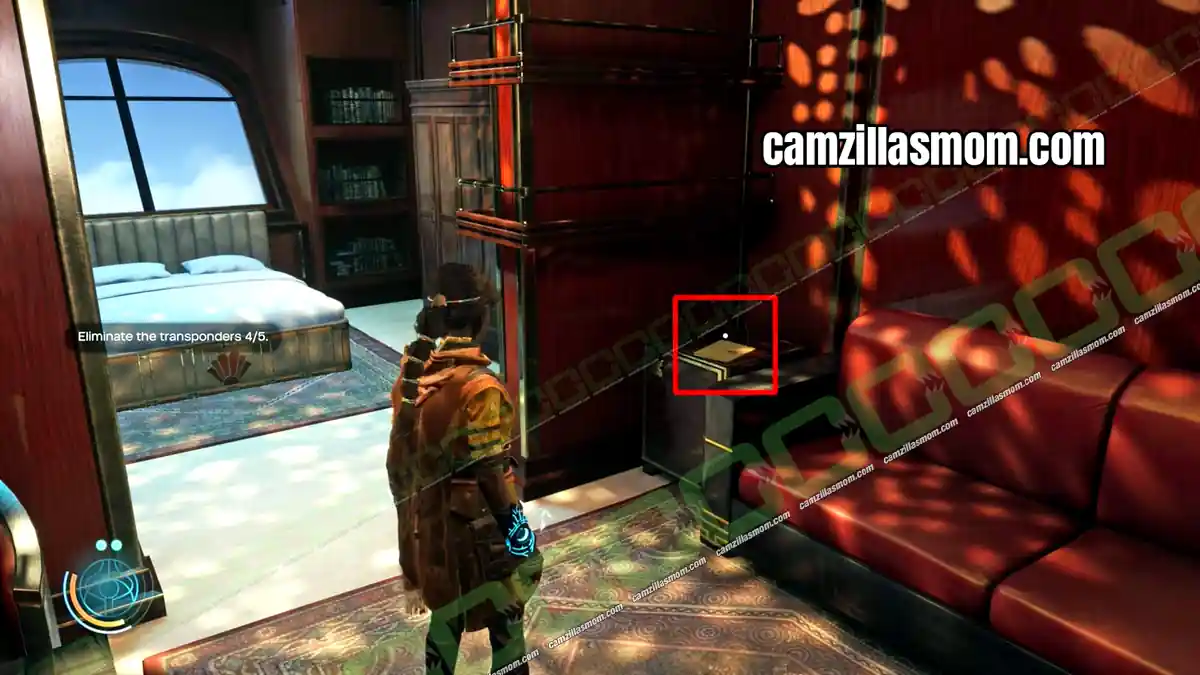
Dossier 6
6 of 12 Dossiers – Chapter 6: The Morning Star II
Buchra opens the office on the ship. The dossier is on the table.
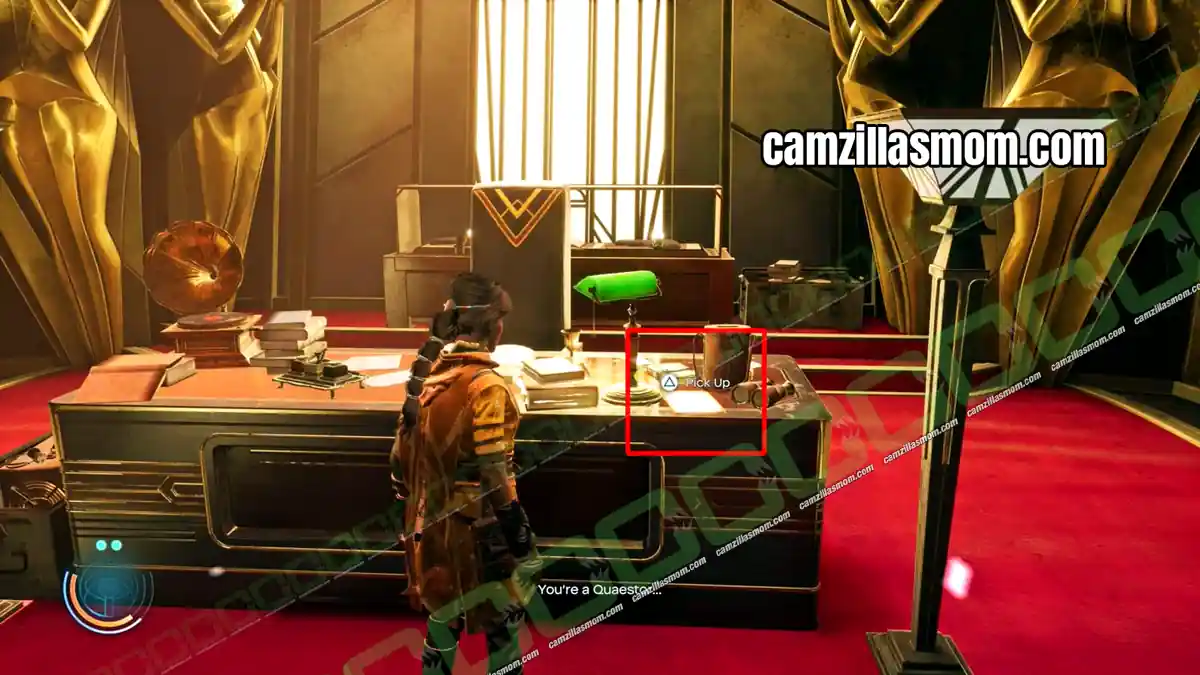
Dossier 7
7 of 12 Dossiers – Chapter 7: Quinta Matos
Stay in the basement kitchen for now and check the storage area behind it. The dossier is on a wooden bench.
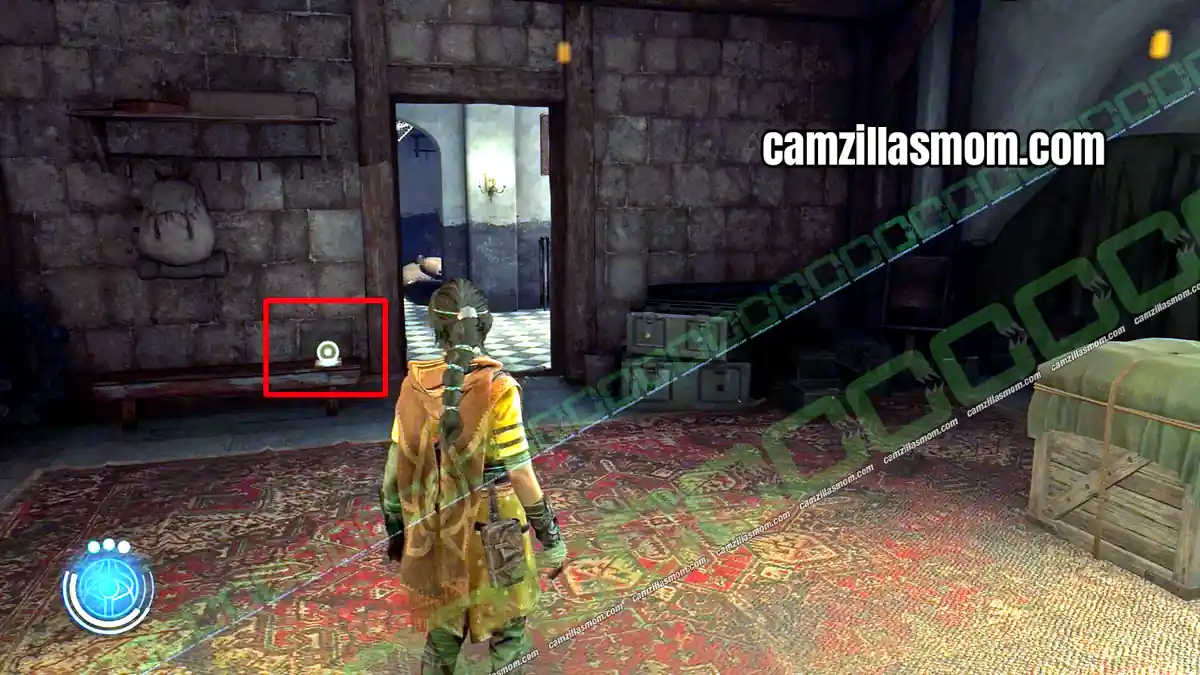
Dossier 8
8 of 12 Dossiers – Chapter 8: The Morning Star III
Interact with the display behind the desk in Vincent’s office to open the secret room. The dossier is inside.
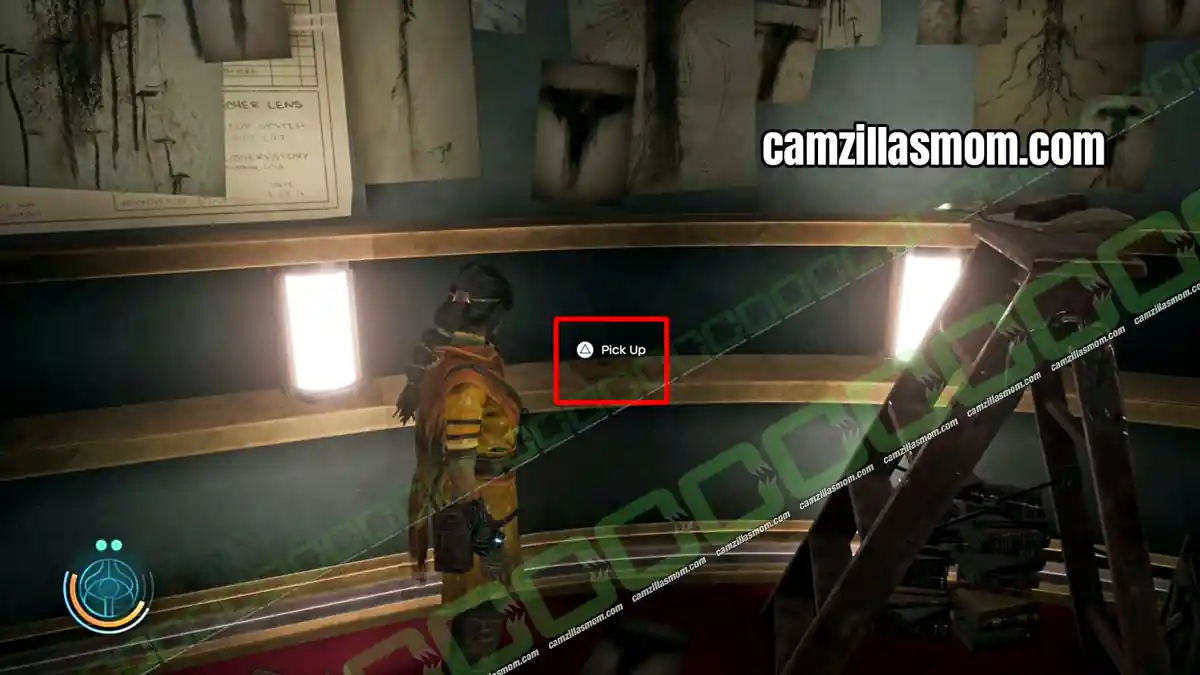
Dossier 9
9 of 12 Dossiers – Chapter 11: Dasuden
After the first red door in the cave, the dossier is on the first table in the camp.
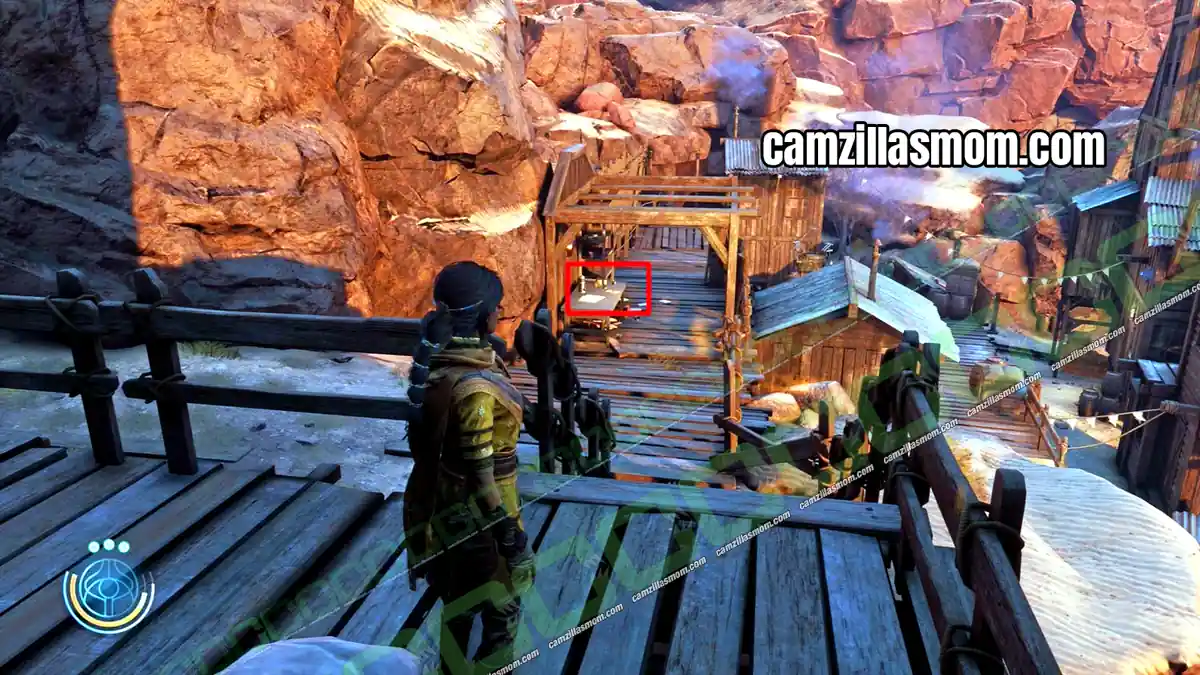
Dossier 10
10 of 12 Dossiers – Chapter 11: Dasuden
Clear the area and ride the mining cart to the next area. Clear it too, then check the table before you go through the green-lit gate.
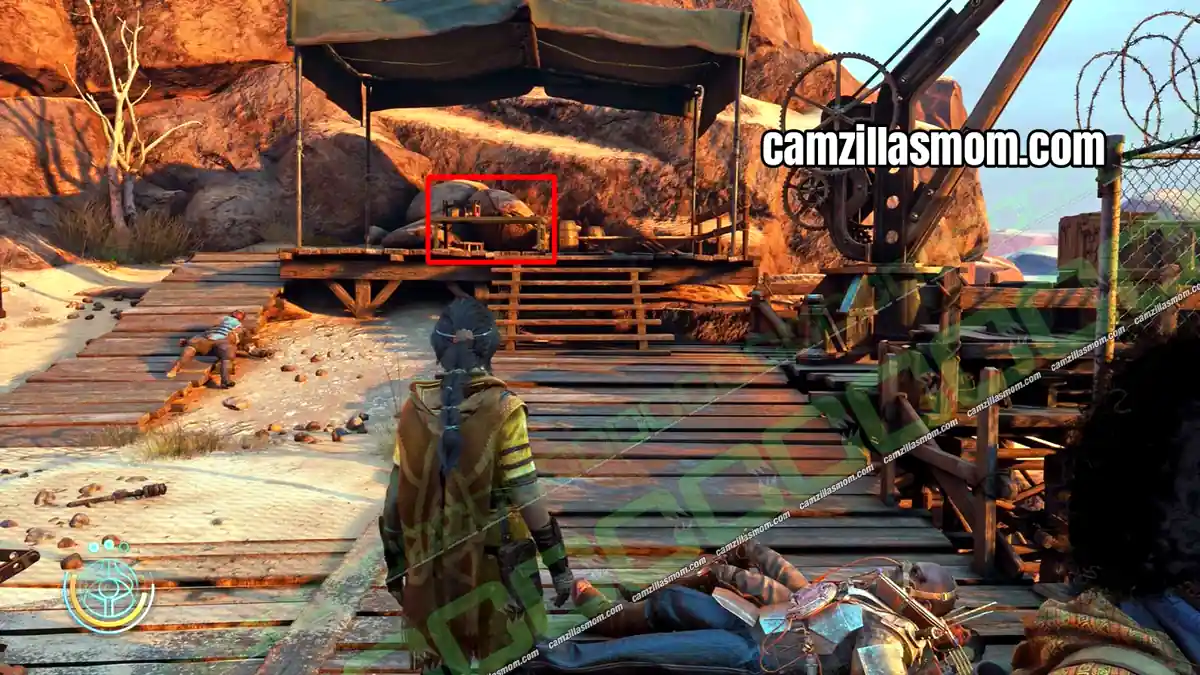
Dossier 11
11 of 12 Dossiers – Chapter 11: Dasuden
Go through the green-lit gate to the next camp, where everyone gets called to the mine. The dossier is on the table.
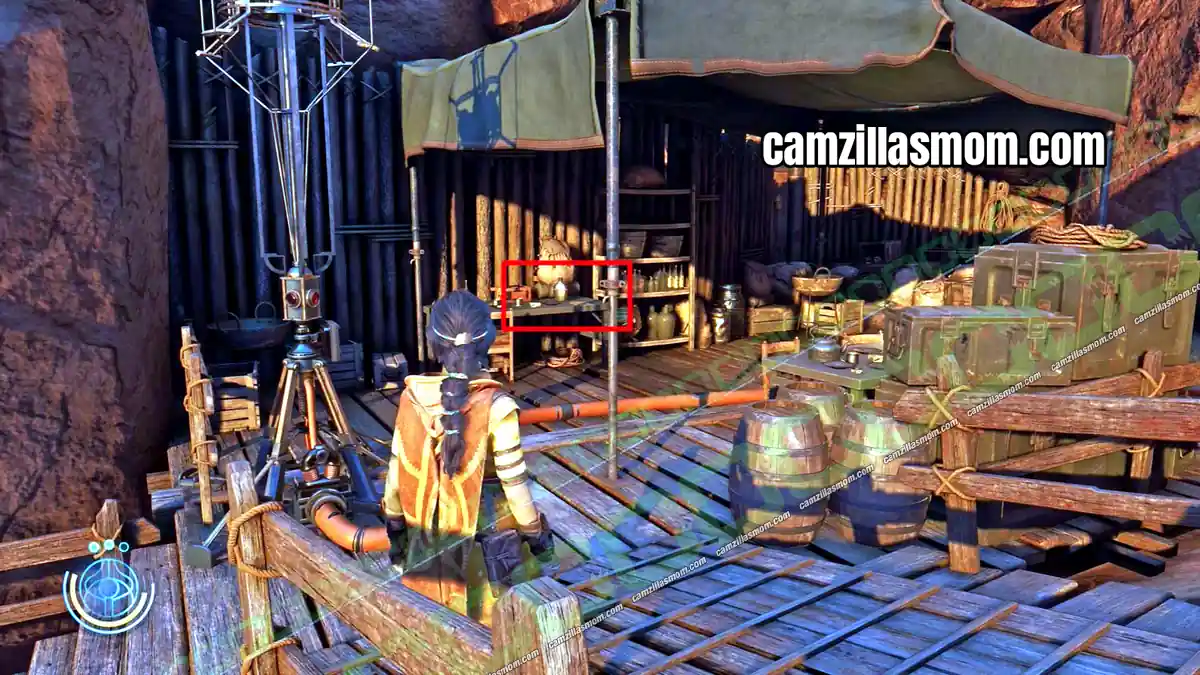
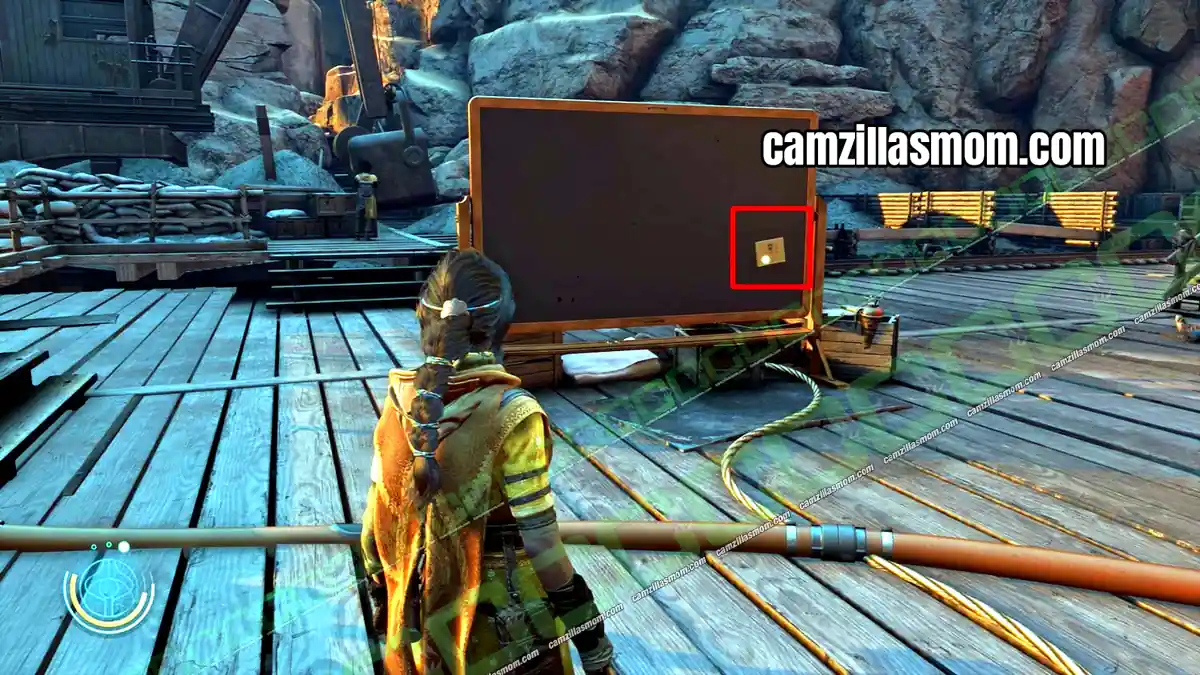
Dossier 12
12 of 12 Dossiers – Chapter 11: Dasuden
Cross the area with the tall statues to the camp where Luther causes trouble. Clear it and check the pinboard.
Memos – Documents
All 15 Memos in menu order. In Quinta Matos you find Memo 11 first.
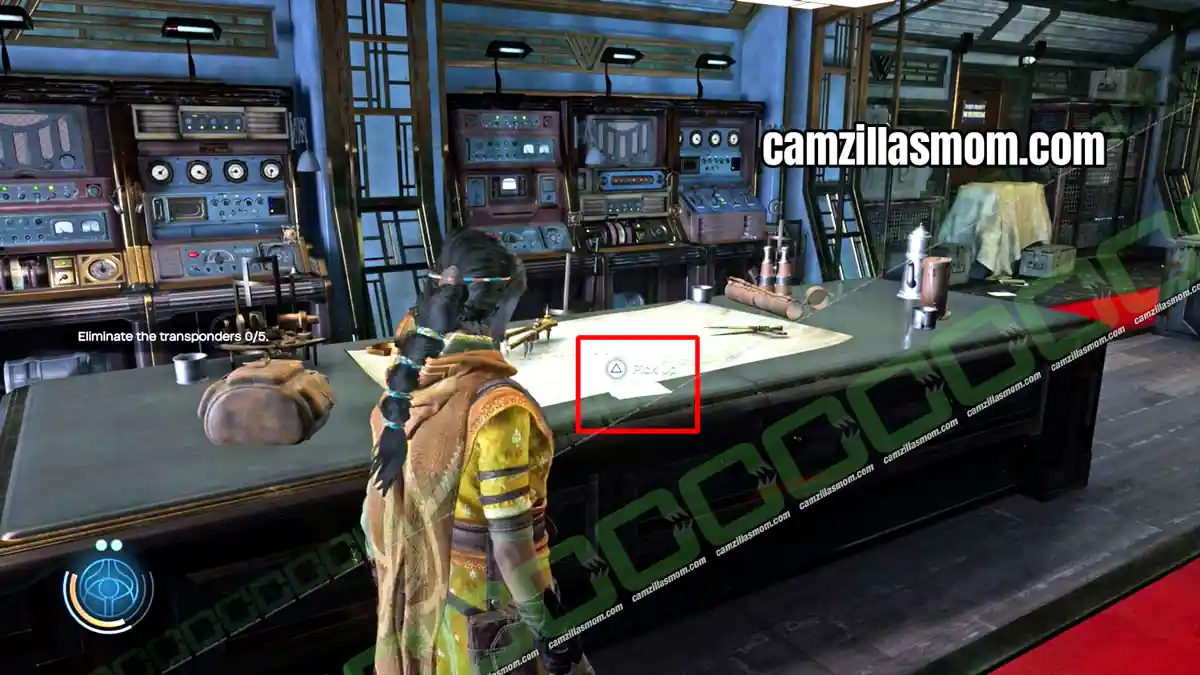
Memo 1
1 of 15 Memos – Chapter 4: The Morning Star I
At the start of the Morning Star, check the main table in the cockpit.
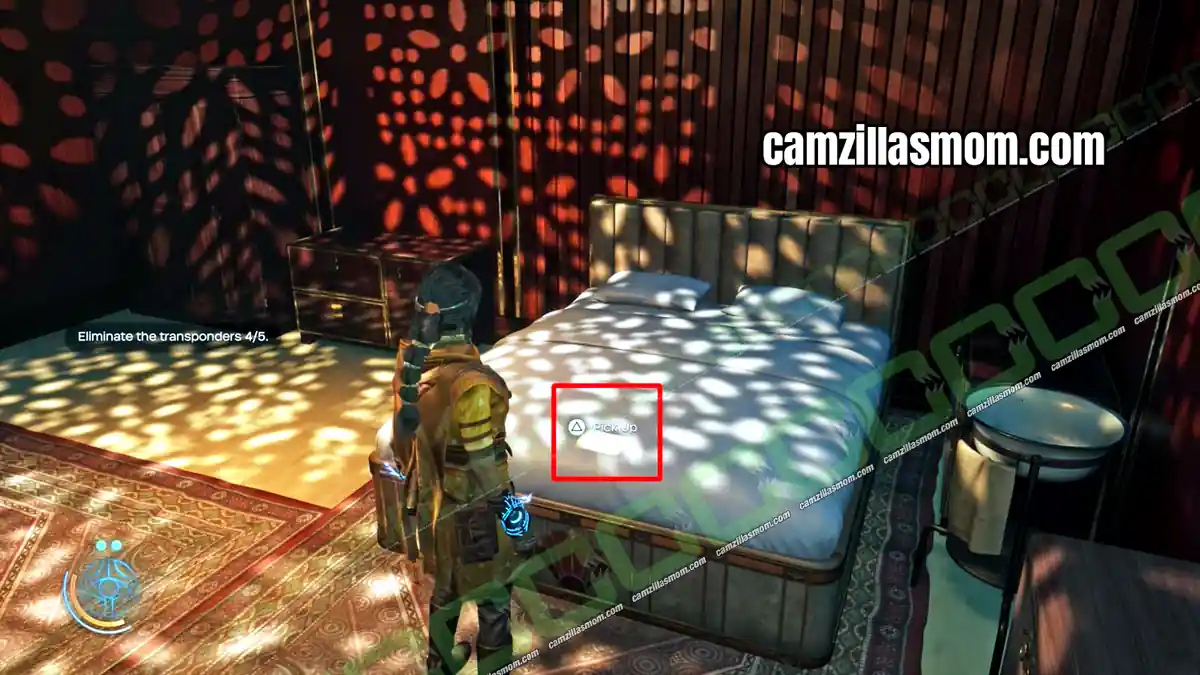
Memo 2
2 of 15 Memos – Chapter 4: The Morning Star I
In the Crew Quarters, the memo lies on one of the beds.
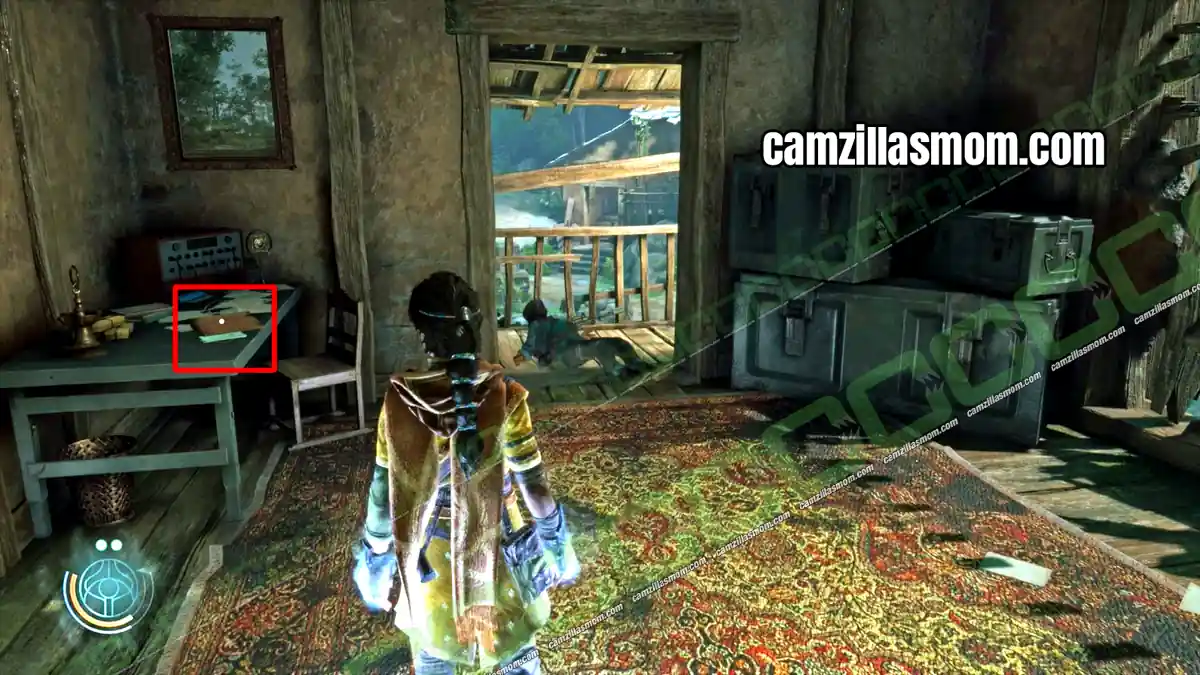
Memo 3
3 of 15 Memos – Chapter 5: Chamatkari Mandir
In the house of the sharpshooter who gives Haroona trouble in the village. Climb the vines at the foot of the house, jump over at the top and go inside.
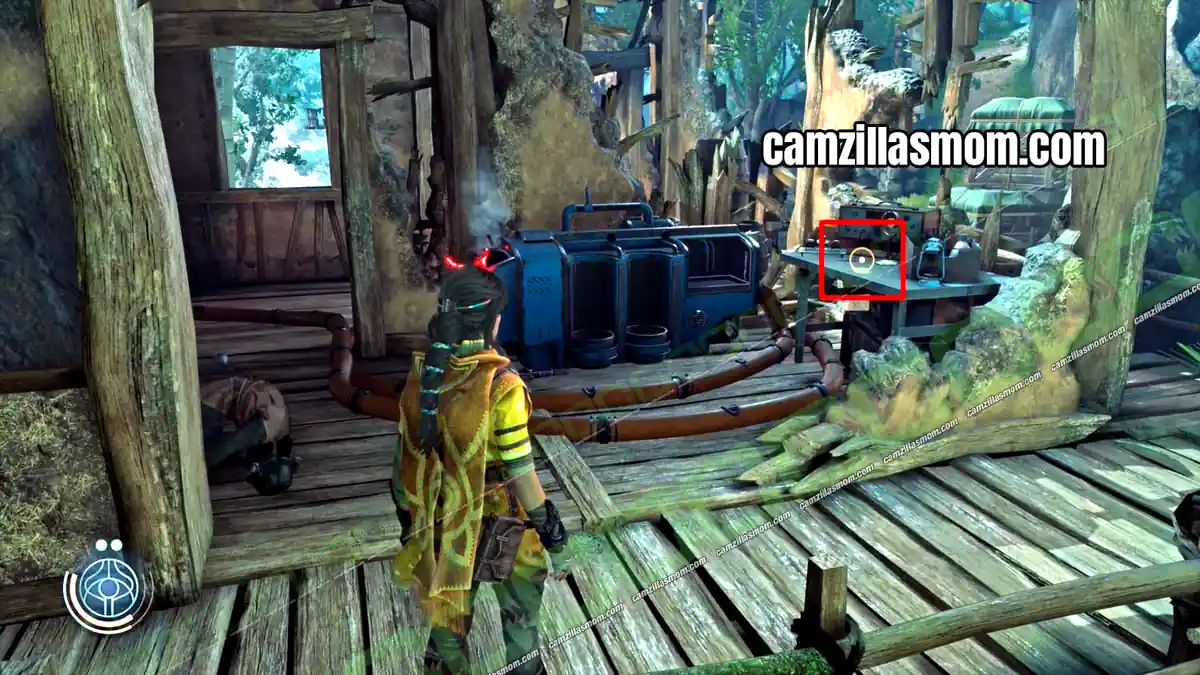
Memo 4
4 of 15 Memos – Chapter 5: Chamatkari Mandir
Continue to the burning village and through the red door. Clear the hostiles. The memo is in the building with the generator.
Memo 5
5 of 15 Memos – Chapter 5: Chamatkari Mandir
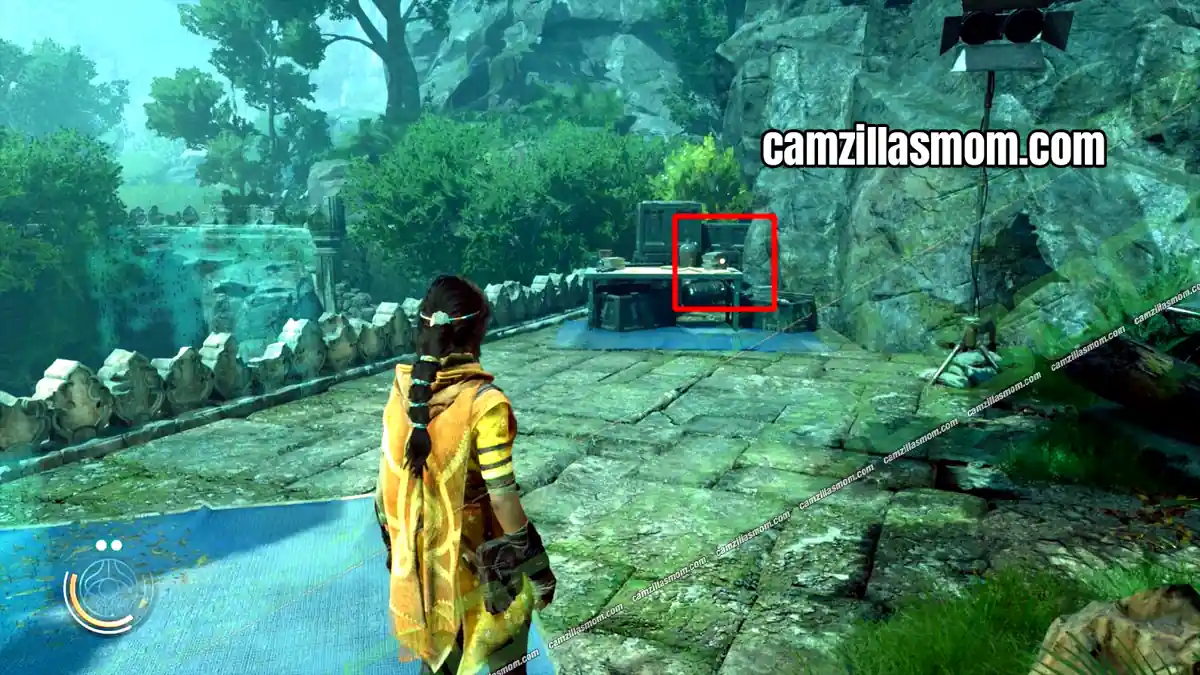
At the camp with the red forcefield, clear it and climb the vines. Cross the bridge and go left onto the roof. The memo is on the table next to Anomaly 26.
Memo 6
6 of 15 Memos – Chapter 5: Chamatkari Mandir
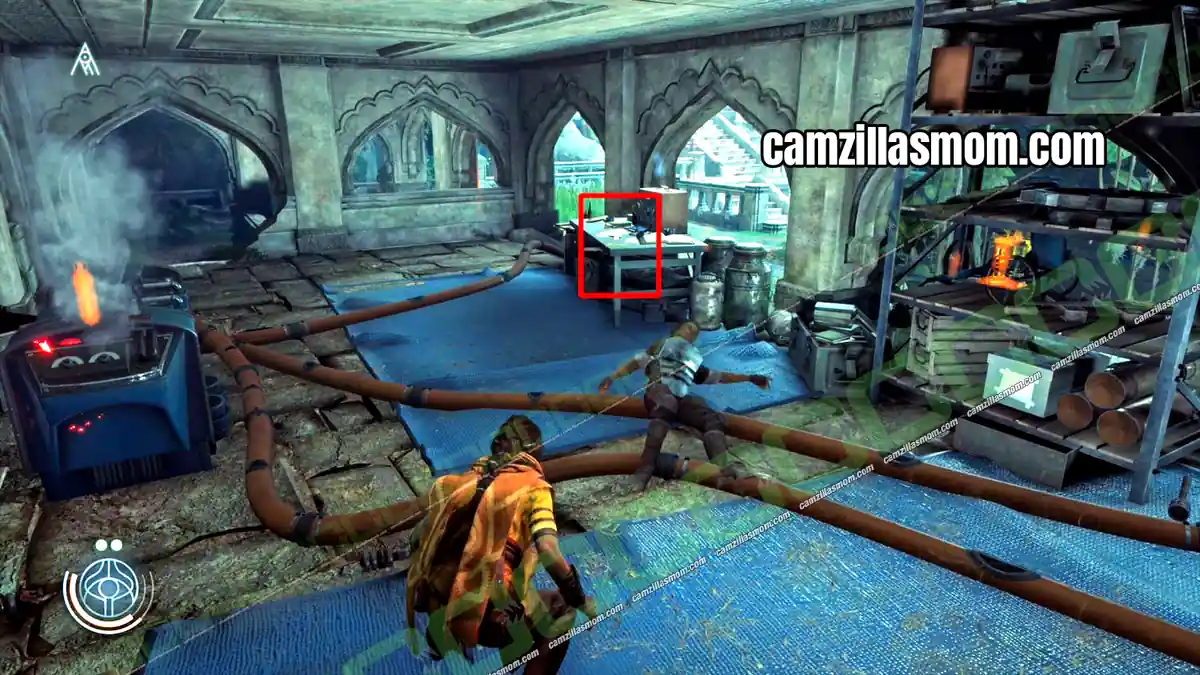
In the large hostile area with the elephant statues near the end, go left. The memo is on the table next to the generator.
Memo 7
7 of 15 Memos – Chapter 7: Quinta Matos
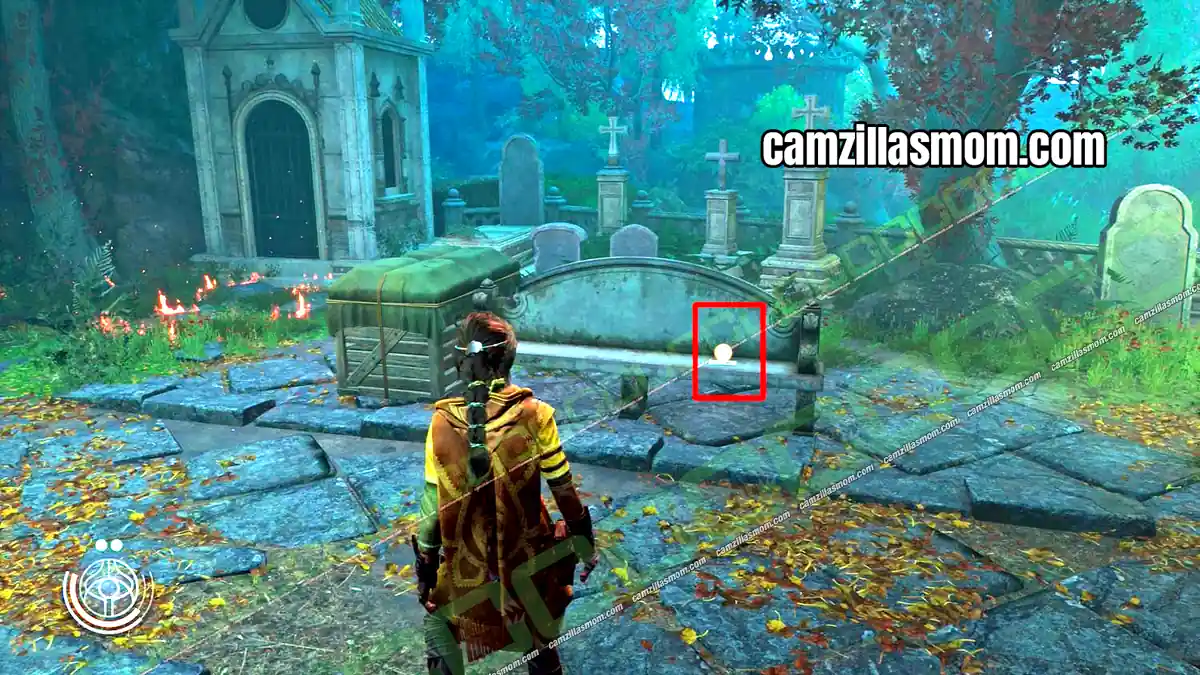
You pick up Memo 11 in the manor office before this one. Memo 7 lies on a stone bench in the cemetery.
Memo 8
8 of 15 Memos – Chapter 7: Quinta Matos
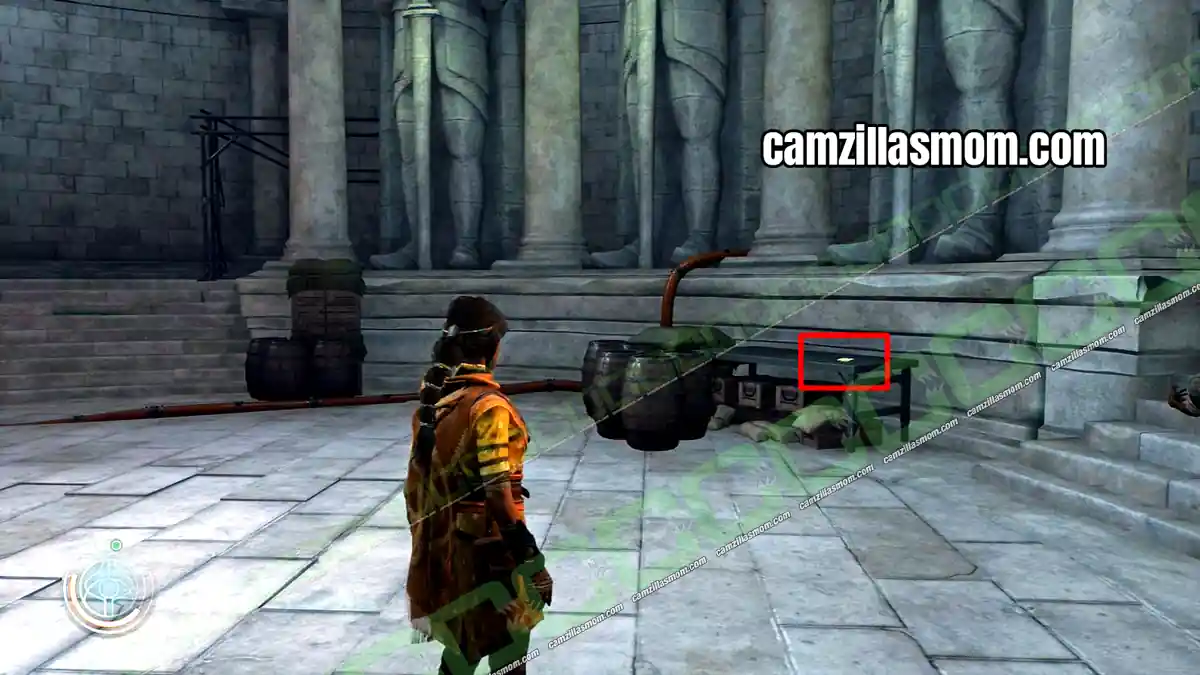
After Memo 7, go through the green-lit gate and down the spiral staircase into the catacombs. The memo is on a table in the round room in the middle.
Memo 9
9 of 15 Memos – Chapter 7: Quinta Matos
Deep in the cave, the memo is on a table.
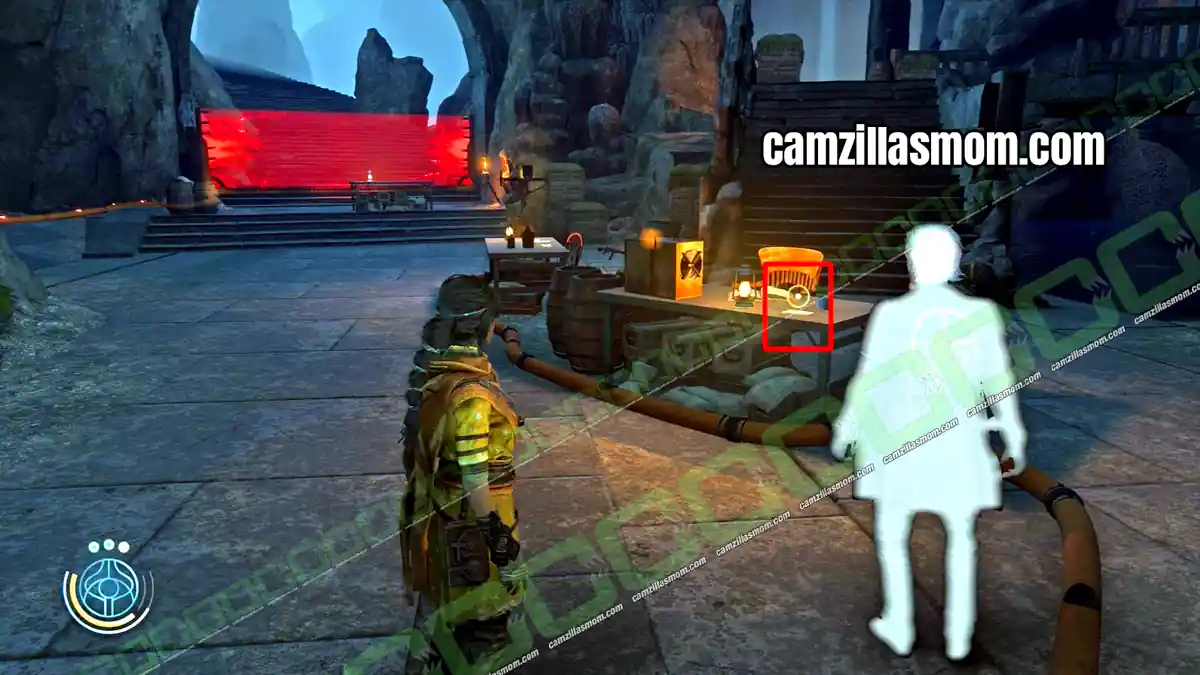
Memo 10
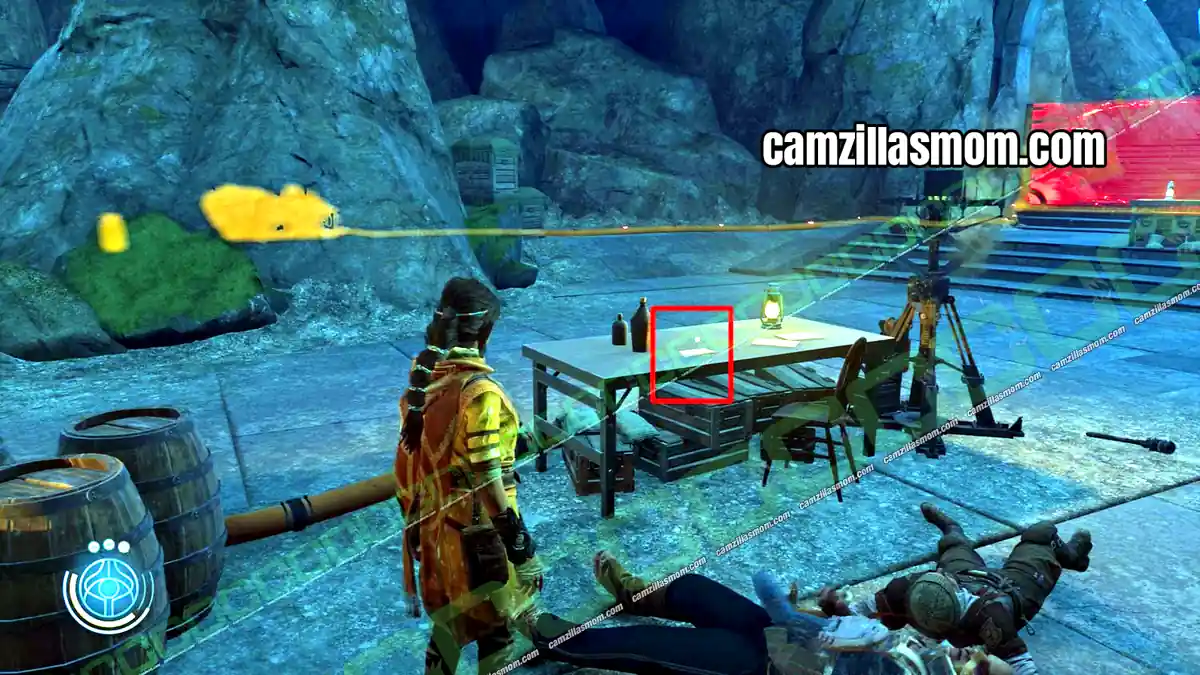
10 of 15 Memos – Chapter 7: Quinta Matos
On the table next to Memo 9.
Memo 11
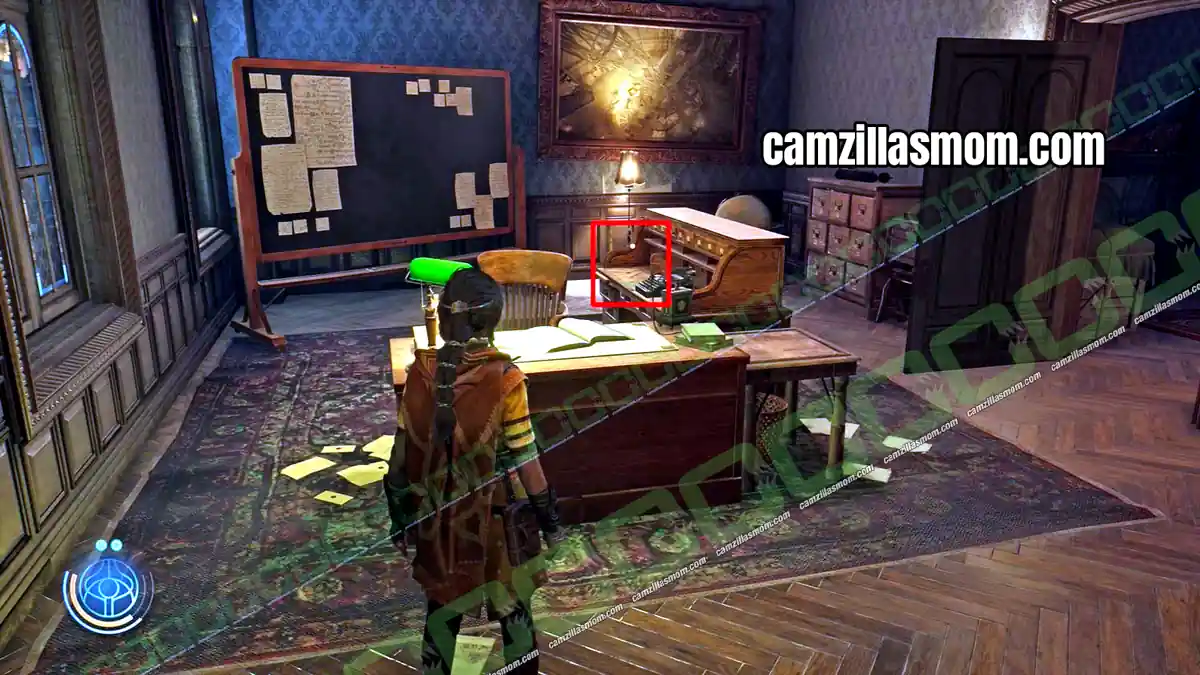
11 of 15 Memos – Chapter 7: Quinta Matos
In the office on the ground floor of the manor. This is the first memo you find in Quinta Matos.
Memo 12
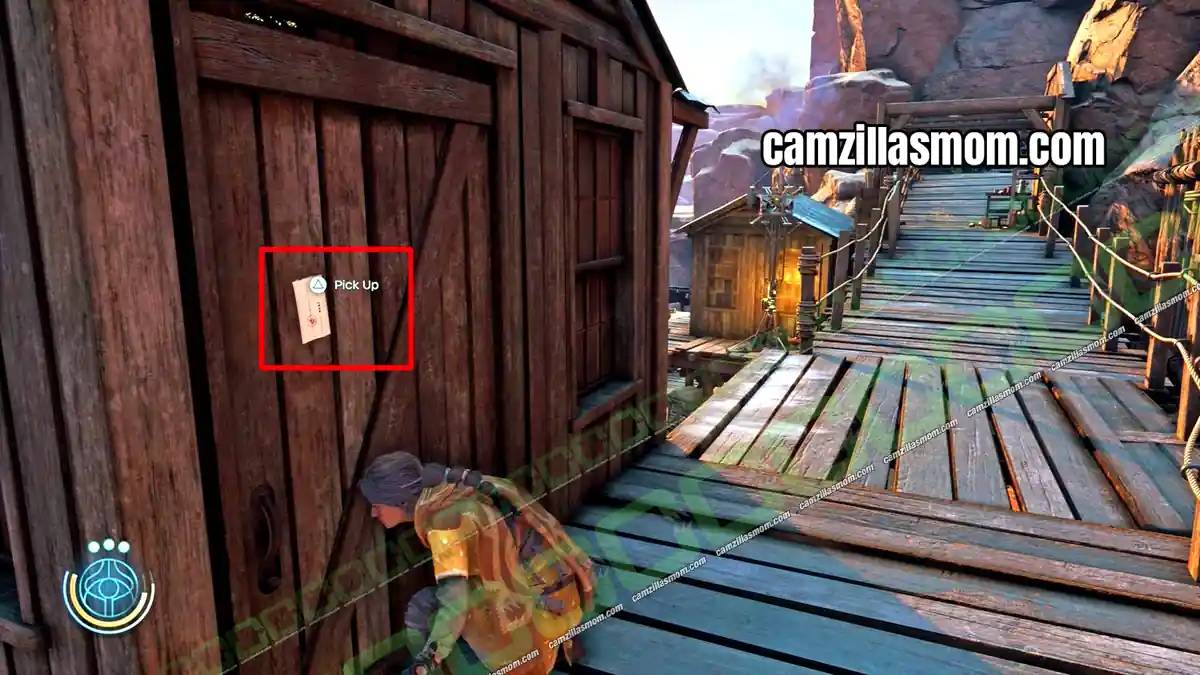
12 of 15 Memos – Chapter 11: Dasuden
After the first red door in the cave, go down the wooden platform in the first hostile camp. The memo is pinned to the door of the hut.
Memo 13
13 of 15 Memos – Chapter 11: Dasuden
In the same camp, the memo is pinned to one of the supports of the house.
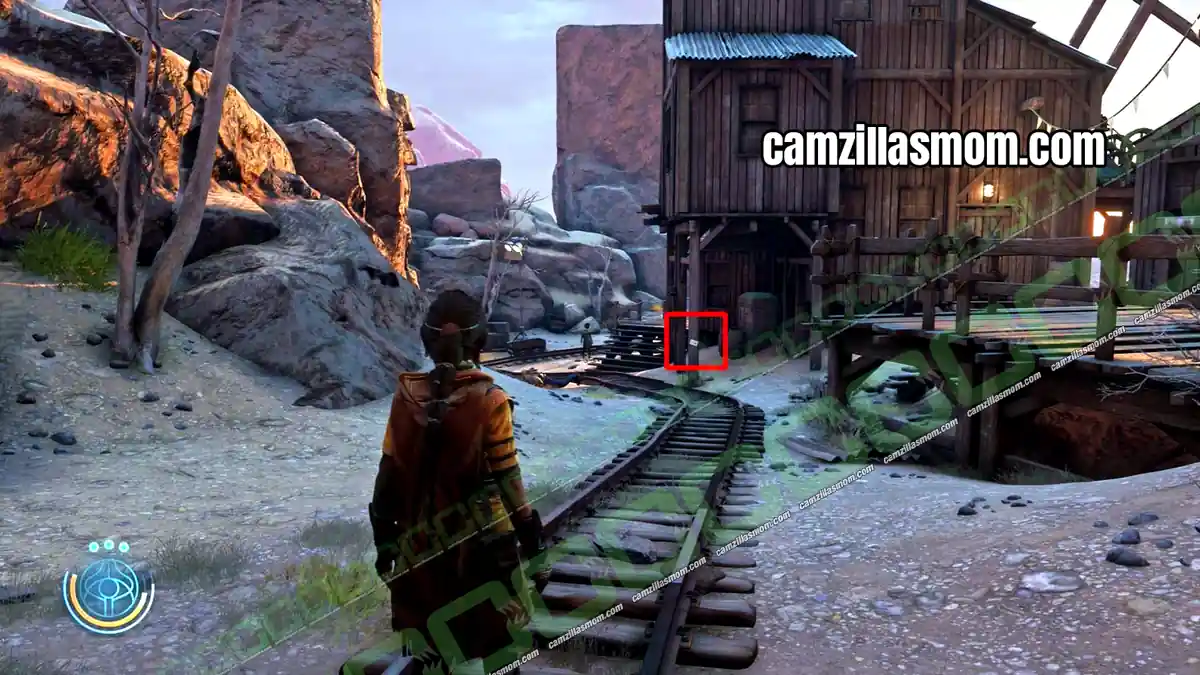
Memo 14
14 of 15 Memos – Chapter 11: Dasuden
After you move the crane, enter the building and go through the first red door. Upstairs, the memo is on a large box right by the entrance.
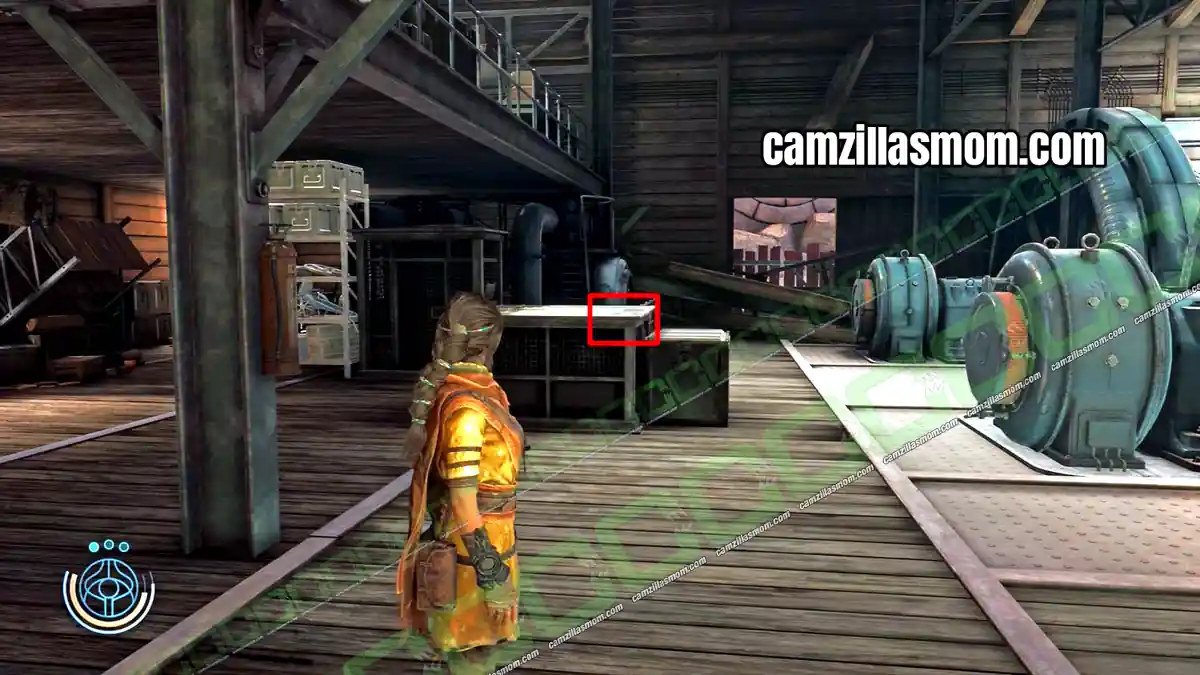
Memo 15
15 of 15 Memos – Chapter 11: Dasuden
Go through the cave and meet Luther on the other side. At the end of the building, turn left and break the boxes to reach Memo 15.
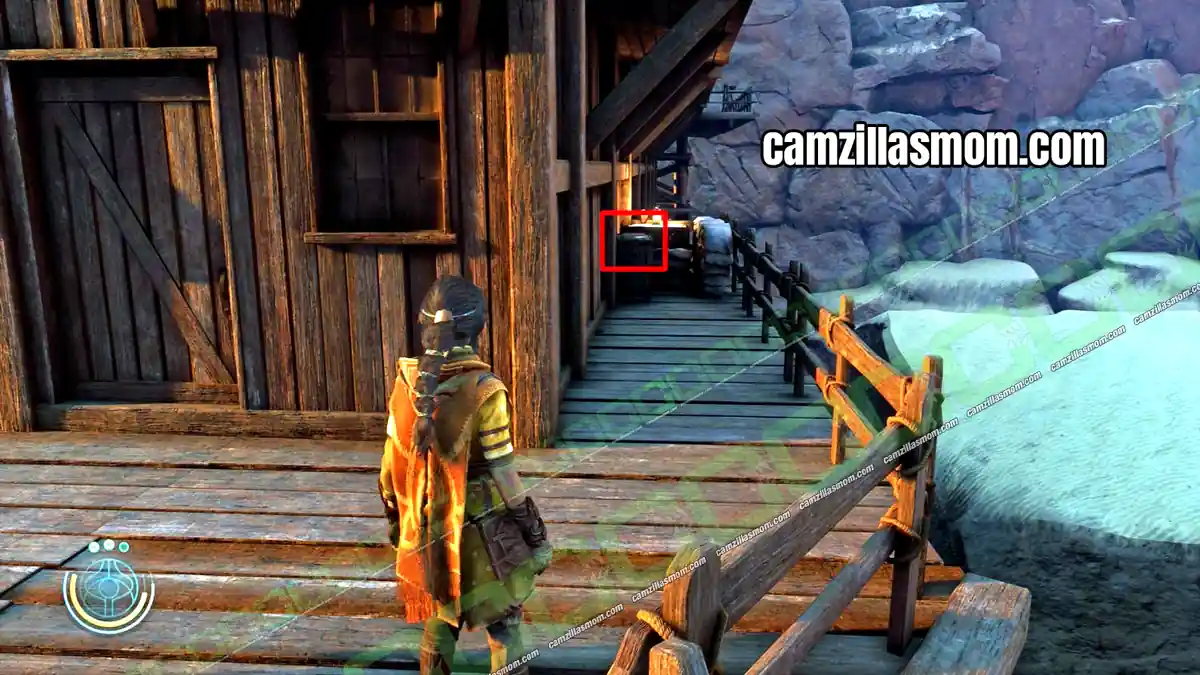
Diagrams – Documents
All 11 Diagrams in menu order.
Diagram 1
1 of 11 Diagrams – Chapter 4: The Morning Star I
In one of the Morning Star crew quarters, next to a radio.
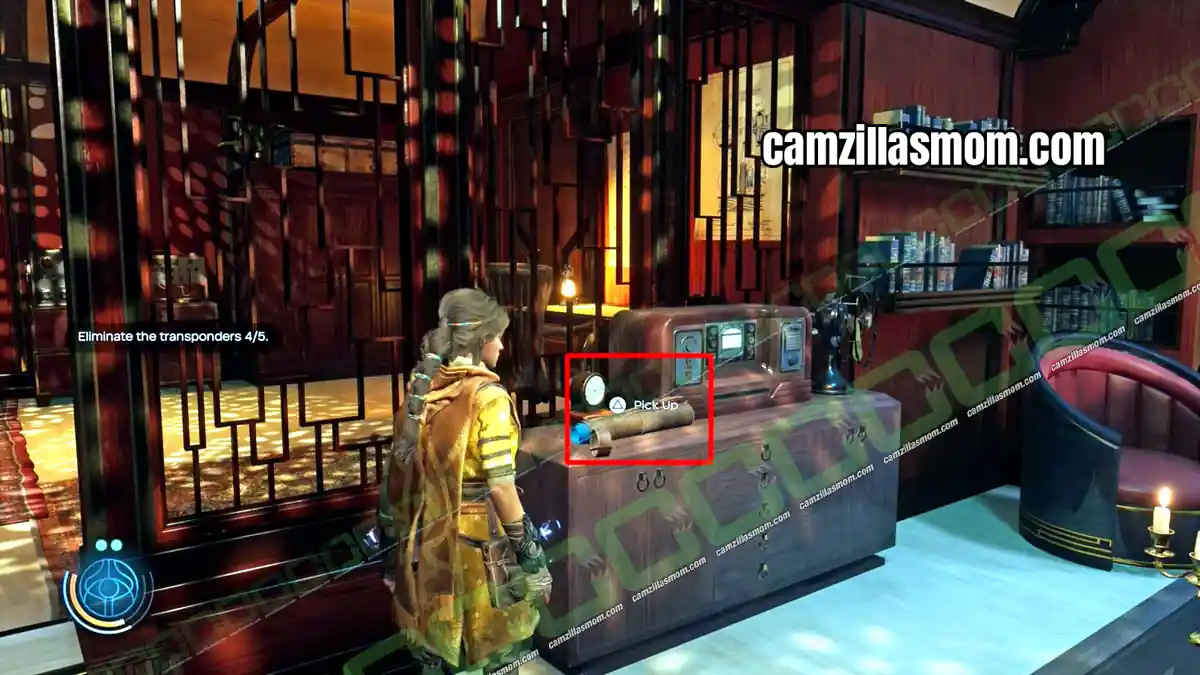
Diagram 2
2 of 11 Diagrams – Chapter 7: Quinta Matos
On top of a filing cabinet in the ground floor office of the mansion.
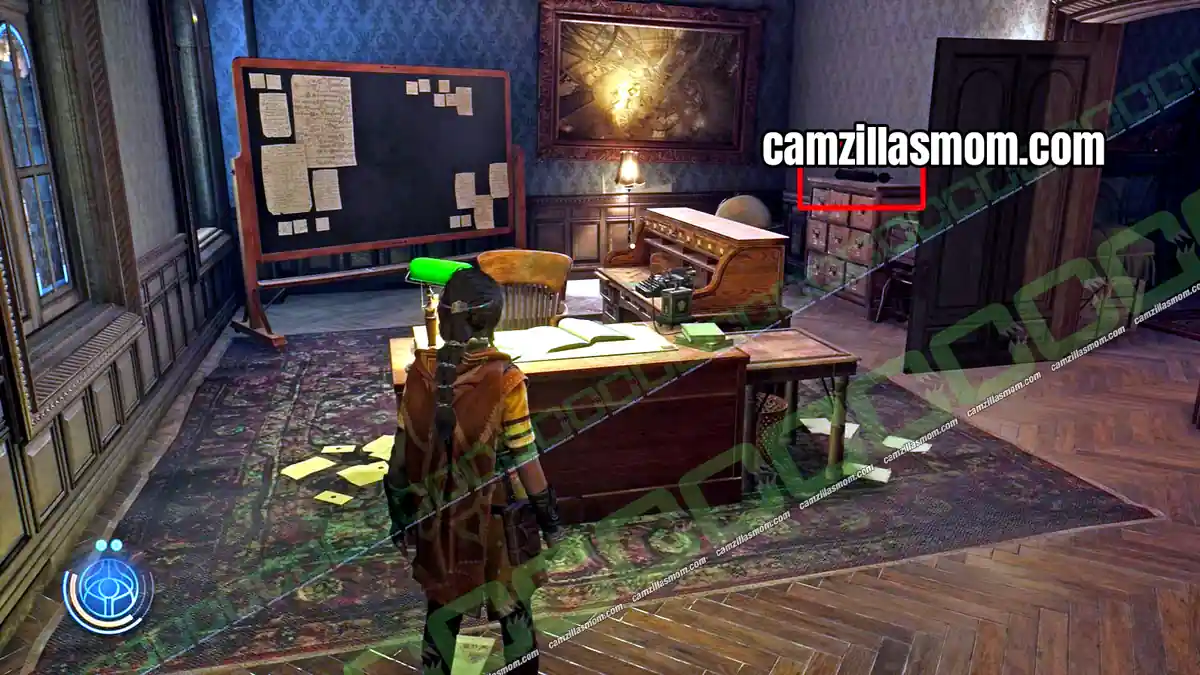
Diagram 3
3 of 11 Diagrams – Chapter 7: Quinta Matos
On the second floor, on an armchair in one of the bedrooms on the left.
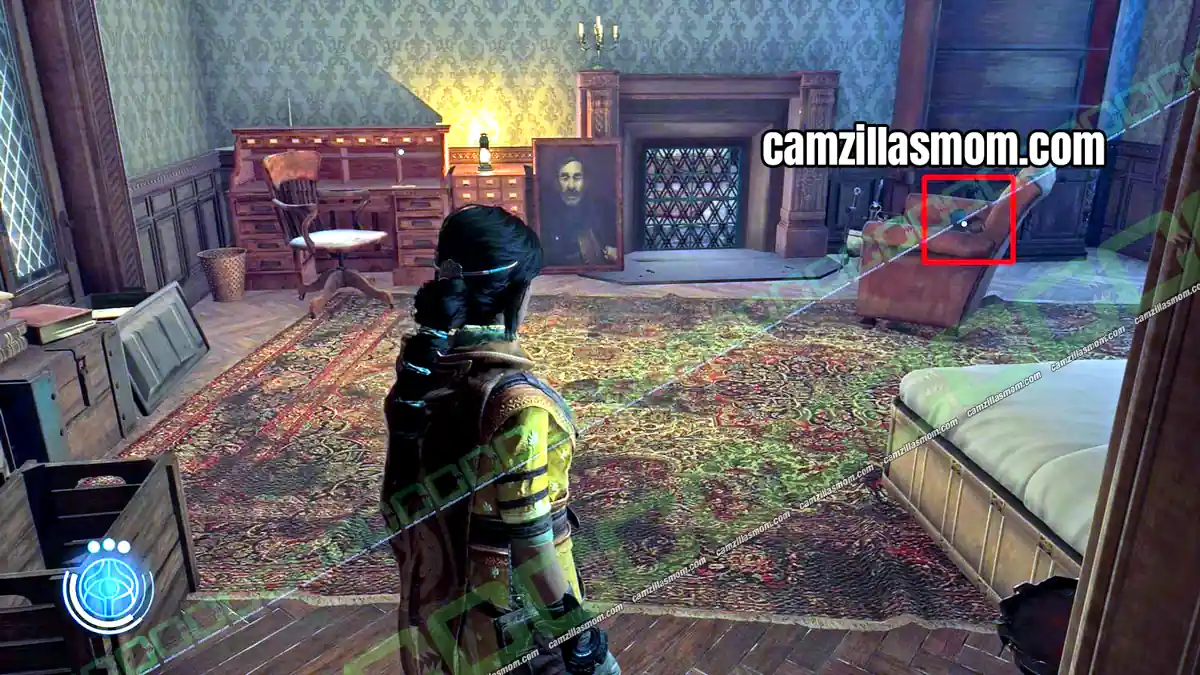
Diagram 4
4 of 11 Diagrams – Chapter 7: Quinta Matos
In the workshop on the second floor, on top of the filing cabinet.
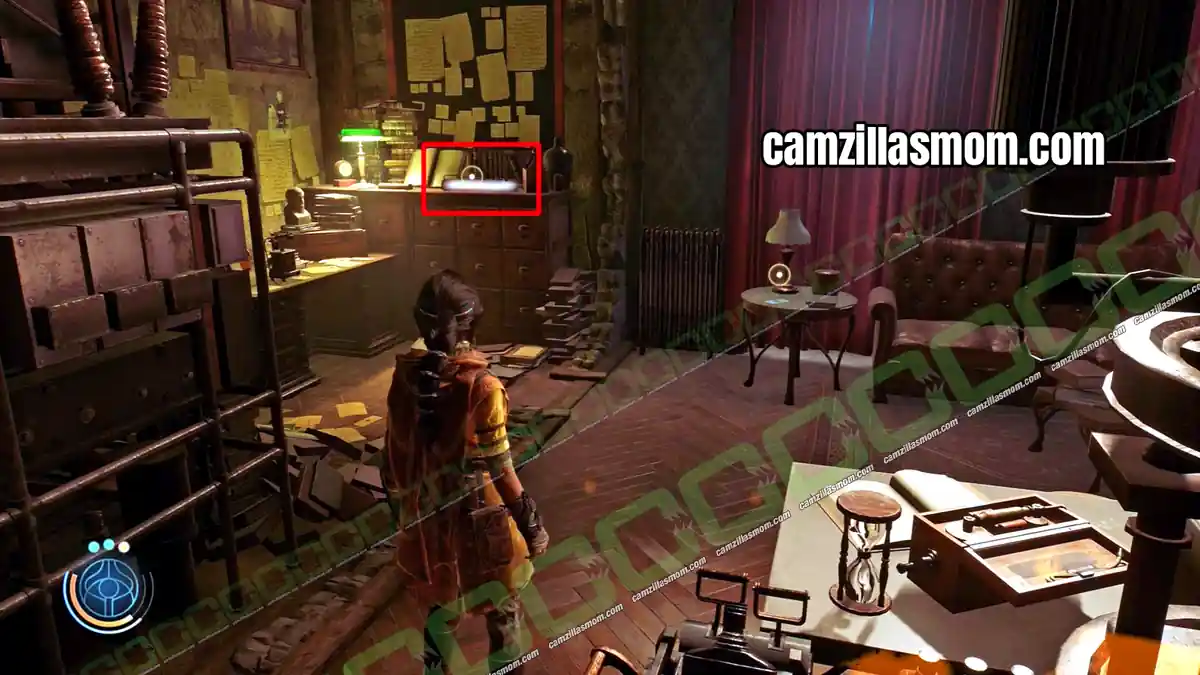
Diagram 5
5 of 11 Diagrams – Chapter 7: Quinta Matos
Leave the workshop and go downstairs. Move the shelf to get into another office. The diagram is on the desk.
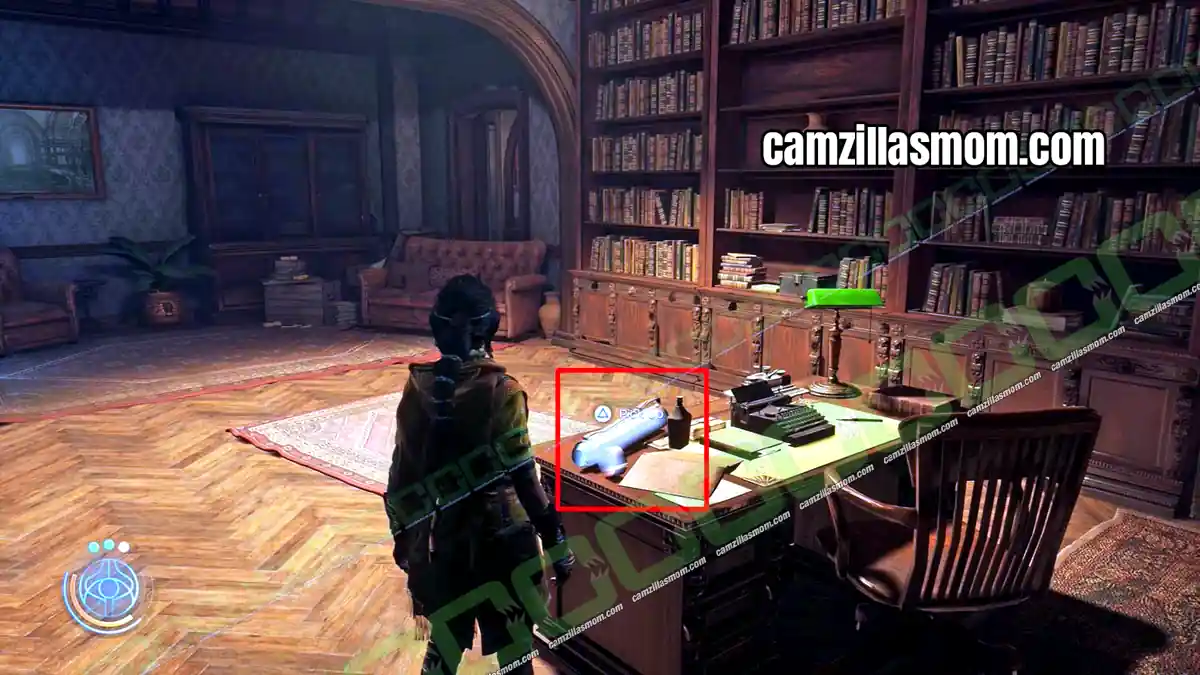
Diagram 6
6 of 11 Diagrams – Chapter 8: The Morning Star III
After you rewire the antennas, go to the control room and open the displays. The diagram is in the museum.
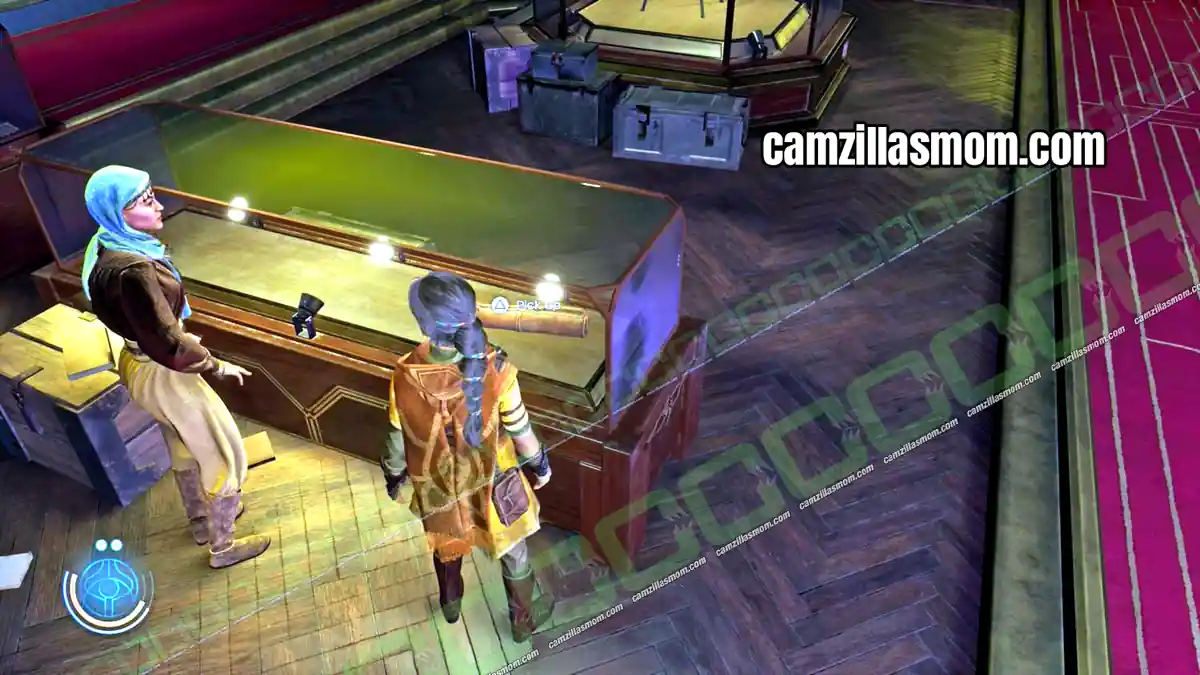
Diagram 7
7 of 11 Diagrams – Chapter 8: The Morning Star III
Interact with the display behind the desk in Vincent’s office to open the secret room. The diagram is inside.
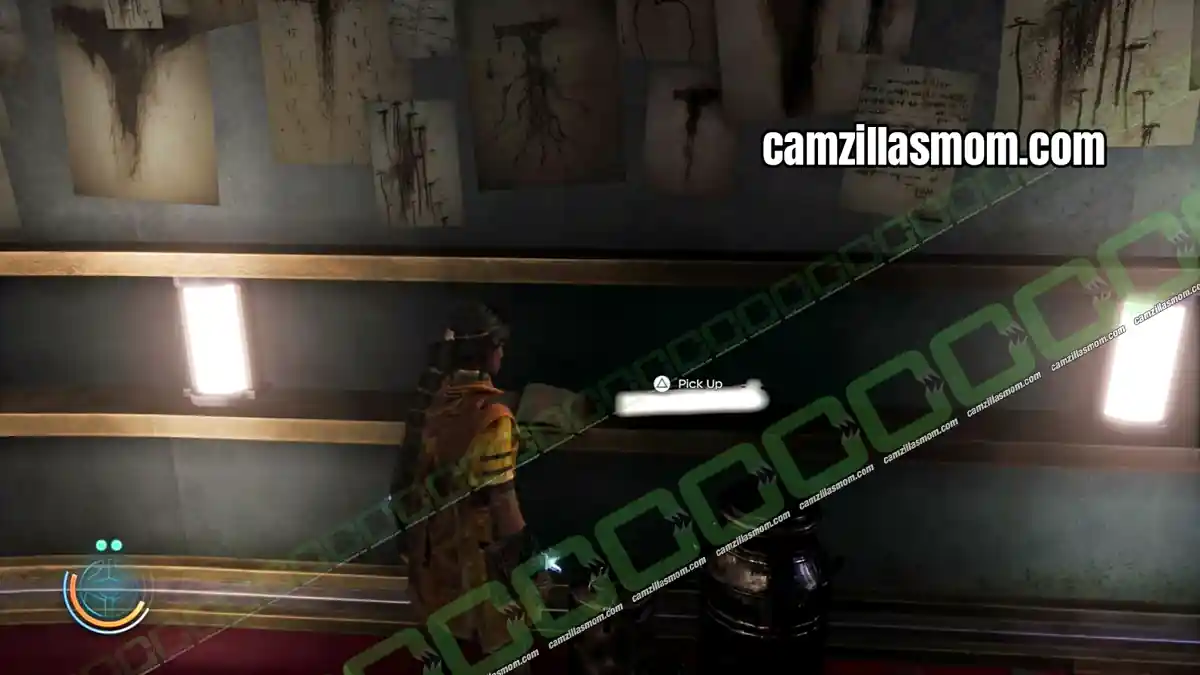
Diagram 8
8 of 11 Diagrams – Chapter 12: Peshanden
In the building with the green gate, where Haroona opens the first Sahin Gate in the Fold. Go down to the foot of the house and climb up to get in. The diagram is on the table.
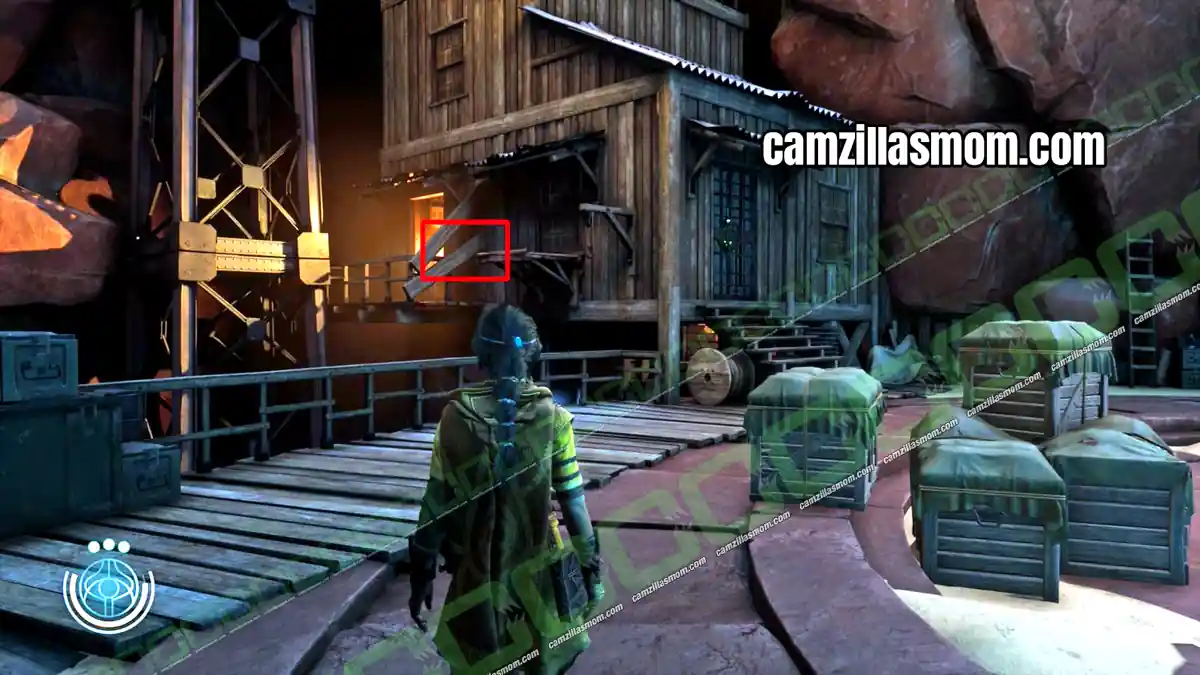
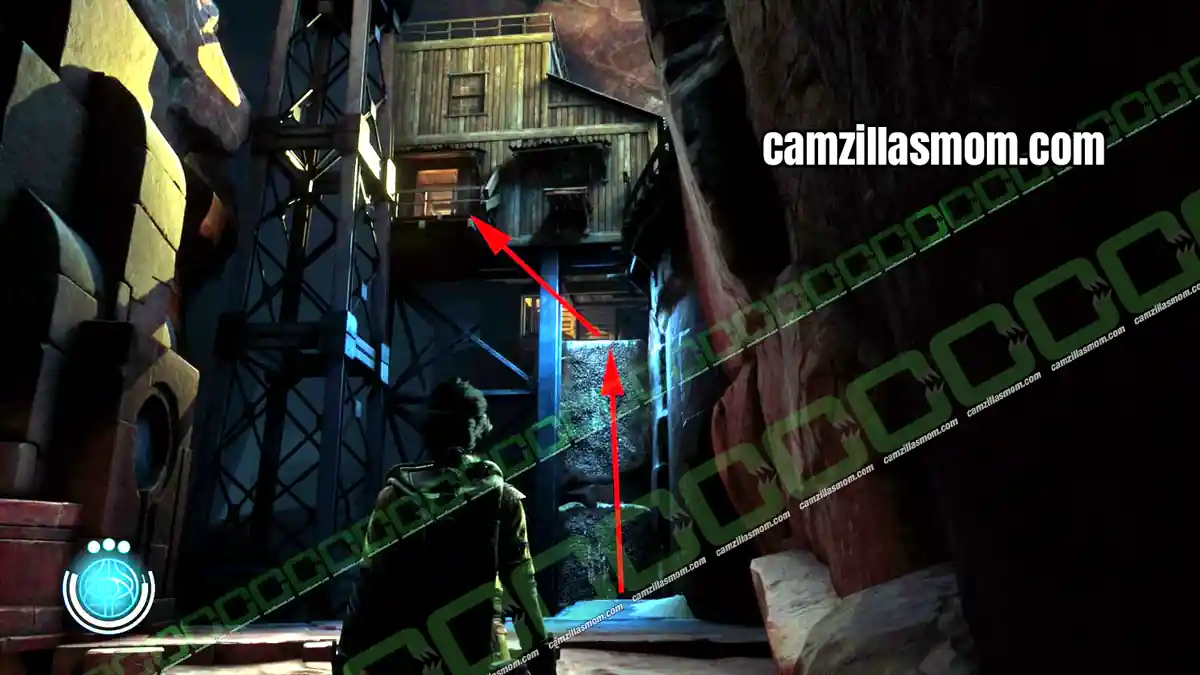
Diagram 9
9 of 11 Diagrams – Chapter 12: Peshanden
In the next hostile area with a red dome, go to the third Sahin Gate, the room with the large ball and the second Echo. The diagram is on the table at the back.
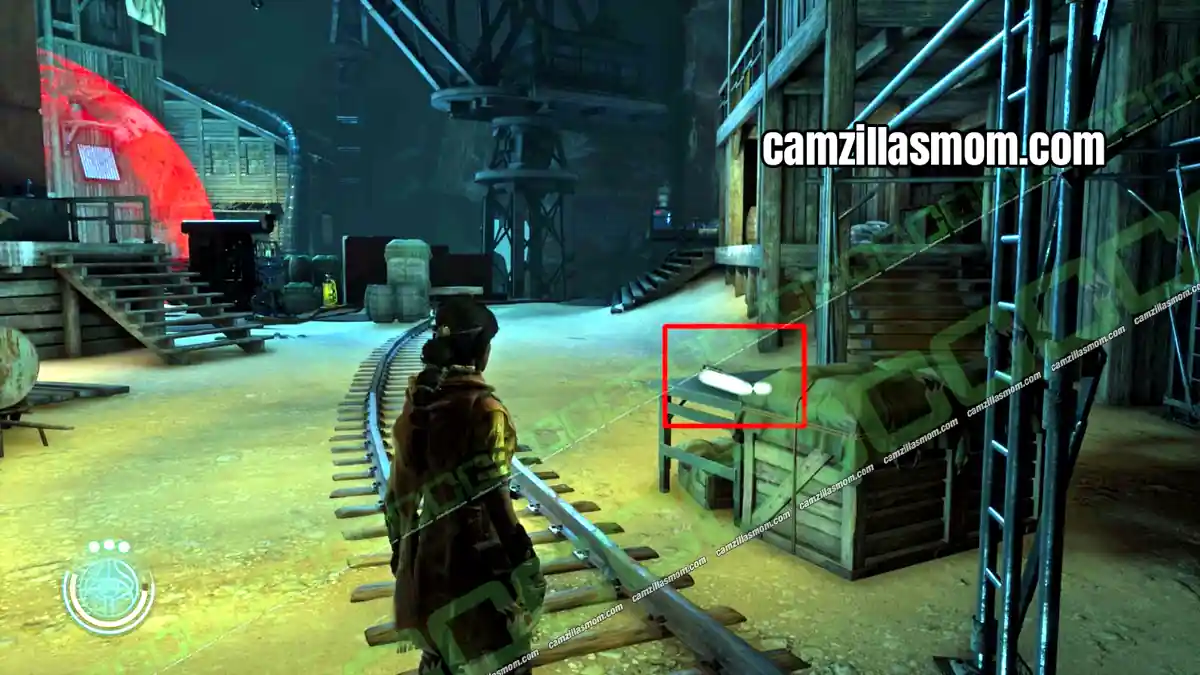
Diagram 10
10 of 11 Diagrams – Chapter 12: Peshanden
After Haroona splits from Buchra, continue to the next hostile area with a green door. Check nearby for the diagram before you go in.
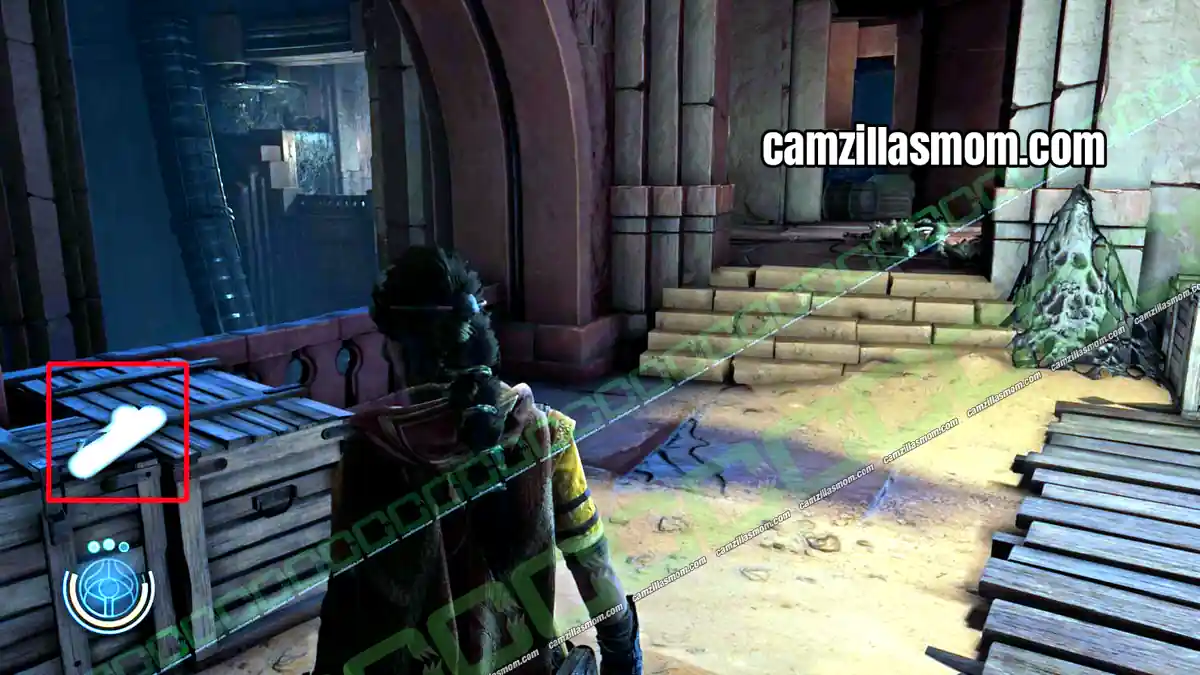
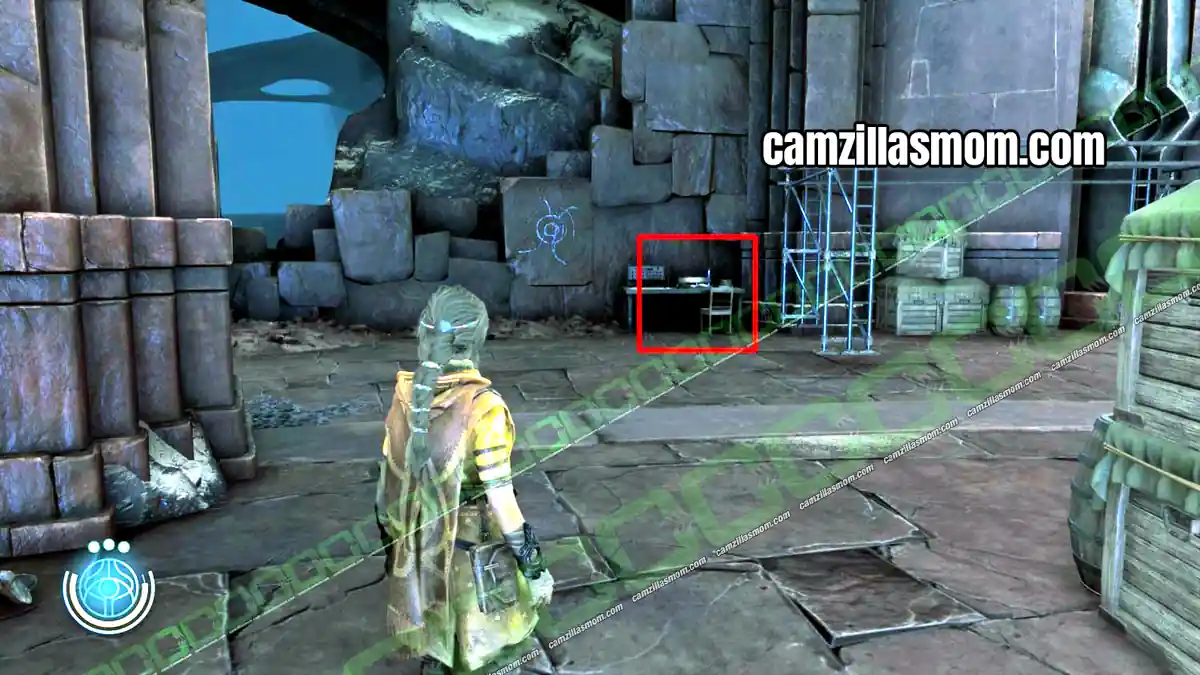
Diagram 11
11 of 11 Diagrams – Chapter 12: Peshanden
After Buchra lowers Haroona deeper into the cave, you reach the large hostile area with the two red domes. The diagram is on a table in the upper part.


About Unknown 9 Awakening
All guides: Unknown 9 Awakening Guides
Release: October 18th, 2024
Developer: Reflector Entertainment
Publisher: Bandai Namco Entertainment
Official Website: https://www.bandainamcoent.com/games/unknown9/en/