This guide will help you find all the collectibles in Mos Espa on Tatooine while playing LEGO Star Wars: The Skywalker Saga. It includes 1 Data Card, 3 Characters, 33 Kyber Bricks, and additional rewards gained by completing fun missions, puzzles, and challenges. With these detailed instructions, you’ll maximize your collection and enhance your gameplay experience.
-> More Guides at the Lego Star Wars: The Skywalker Saga HUB
- Tatooine Space
- Mos Espa – Data Card
- Mos Espa – Side Missions
- Mos Espa – Puzzles
- 1 – Akim’s Munch Bunch
- 2 – Another Brick on a Wall
- 3 – Covert Cache
- 4 – Disappearing Droids
- 5 – Downtown Lockdown
- 6 – Ghost Protocol
- 7 – Guardian Gonk
- 8 – Hovel Hotshot
- 9 – Kyber Climb
- 10 – Nice Little Nook
- 11 – Nook and Cranny
- 12 – Pillar of Wealth
- 13 – Podracer Prize
- 14 – Power Below the Porch
- 15 – Probe Droid Pursuit
- 16 – Push Over
- 17 – Rodian Raid
- 18 – Rooftop Raiding
- 19 – Salvage Droid Skipping
- 20 – Scaling the Dome
- 21 – Scattered Schematics
- 22 – Scrapyard Security
- 23 – Settlement Stacking
- 24 – Slave Quarters Water
- 25 – Storeroom Stock
- 26 – Suburban Spoils
- 27 – Sunken Sand Silver
- 28 – Top of the Tower
- 29 – Tower Treasure
- 30 – Toydarian Treasure
- 31 – Welcome to Mos Espa!
- Mos Espa – Trials
- Mos Espa – Challenges
Tatooine Space
There is only one collectible in Space.
Kyber Brick Comet
Track the Kyber Brick Comet orbiting Tatooine in space. Shoot it down to earn 5 Kyber Bricks.

Mos Espa – Data Card
The Datacard is located in the northwest corner of Mos Espa, behind a house with an interior. You can either jump over the house or walk around it to reach the back. There’s a small shed behind the house where you’ll find the Datacard.


Mos Espa – Side Missions
There are 3 Side Missions in Mos Espa.
1 – For Pit-y’s Sake
Speak to Ody Mandrell at the Mission location in southeast Mos Espa. He needs you to locate three Pit Droids.


Head to the mission marker and look for red circles. Inside the red circles, find the green speech bubbles—one of them belongs to the missing droid. He’s on a house roof. Pay him what he’s asking for.
Follow the mission marker to the next red circle. Talk to all the green speech bubbles, and once again, one of them will be the droid. Make sure to pay this one the studs it asks for.
Follow the mission marker one last time to the red circle. This time, you’ll only need to speak to the droid. Pay the droid the studs, then head back to Ody Mandrell.
Reward: Ody Mandrell (Character)
2 – Pod Parts Procurement
Speak to Mawhonic at the Mission location in southwest Mos Espa. He needs you to collect bone pieces from Pau City.
Reward: Mawhonic (Character)


Travel to Utapau – Pau City
Follow the mission marker to the large red circle to find 10 bones. Be sure to check above ground level—they’re on the roof too. If you’re having trouble, I’ve included all the pickup screenshots below to help. Once you’re done, return to Mawhonic.


3 – Wupiupi Whoopee
Head to Watto’s Junkshop in the southeast and speak with Watto. He’ll ask you to collect money from several people.


Travel to those three destinations: Takodana, Jakku, and Coruscant.
Coruscant – Federal District
Head to the mission marker and find the closed red door. The door will tell you it will only let its droid enter. To find the droid, go to the back of the house where it’s hidden behind grey boxes along with a C-3PO terminal. Use a C-3PO to control the droid, then return to the door and talk to it as the droid. Once inside, talk to the Deadbeat to get 3 coins.

Jakku – Tuanul Village
Go to the mission marker, which will lead you to the inside of a house. Once inside, talk to the woman. After that, destroy everything in the house to find the diary. The diary will reveal that the coins are buried behind the house. Head to the back of the house, destroy everything there, and you’ll uncover the coins.

Takodana – Maz’ Castle
Head to the mission marker and look for the red circle. You’ll see a person with a green speech bubble at the top of the building. Use your grapple to jump up and reach them. This will lead to a Boss Fight with a Defiant Deadbeat.
Now, return to Watto to get your Reward: Watto (Character), 1 Kyber Brick.
Mos Espa – Puzzles
There are 31 puzzles to solve in Mos Espa. Each puzzle rewards you with a Kyber Brick, which is hidden somewhere for you to find.
1 – Akim’s Munch Bunch
In the southwest corner of the map, you’ll find three flags. Raise all three, then use the flags and awnings to cross over to the roof of the house on the other side.

2 – Another Brick on a Wall
North of Mos Espa, there’s a Kyber Brick located high up on a building wall. You’ll notice some frames that can be used with a Scavenger’s Net Launcher. Since only two nets can be active at a time, start by shooting nets at the two lowest frames. Then, switch to your other character and climb up. There’s also a grapple-climb point halfway up.
Stay at this point until you’ve used your Scavenger to shoot nets onto the two highest frames. This will allow your second character to continue climbing. Climb as high as possible on the nets, and you’ll reach the Brick.

3 – Covert Cache
This Kyber Brick is out in the open, but it’s inside a room. Simply get onto the roof to access the Brick!
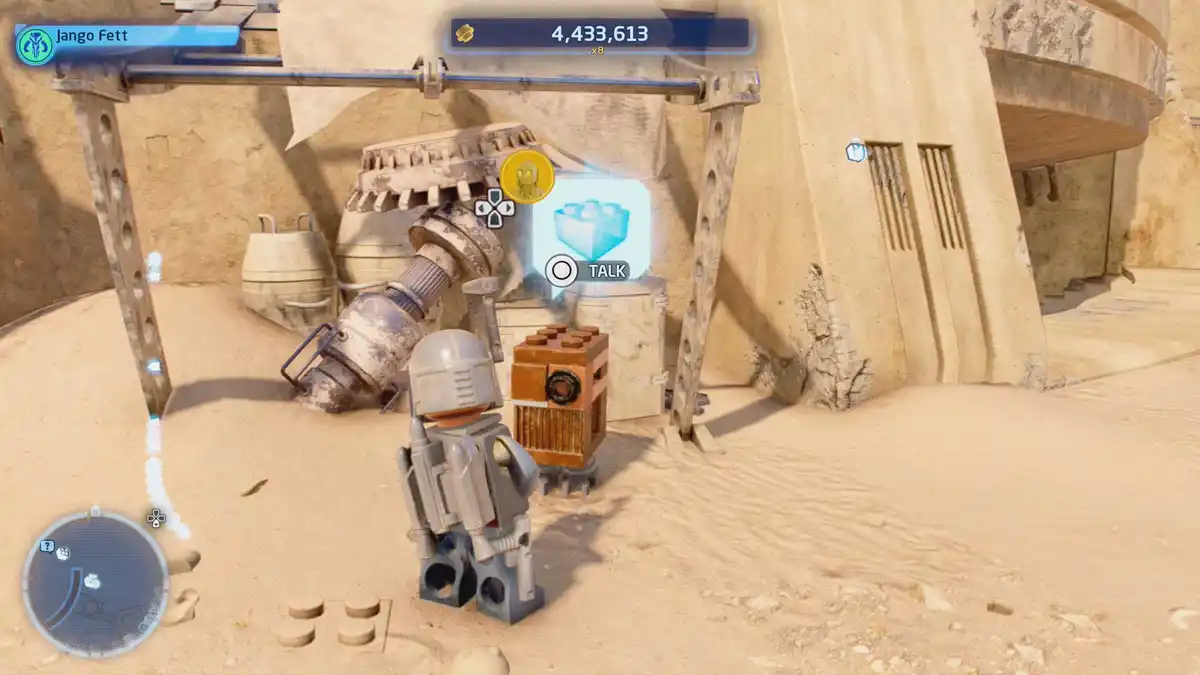
4 – Disappearing Droids
You arrive at the Pod’s and Parts Workshop in the center of Mos Espa and talk to the Pit Droid. Suddenly, all the droids disappear, and your task is to find them. Don’t worry—they’re all located near the shop. Find 4 Droids and take them down. After a cutscene, you’ll need to chase the fifth droid and defeat it as well. Here’s where I found the four droids:


5 – Downtown Lockdown
The brick is inside a locked room, along with an orange terminal that’s also locked. You’ll notice a cable coming out of the orange terminal. Follow the cable to find a target—shoot it. Once the cable turns green, follow it into the open room and look around for another target to shoot. This will unlock the door to the orange terminal. Go to the terminal and interact with it using a Hero. The door to the brick will open, and you can take it.

6 – Ghost Protocol
In the Slave Quarters, there’s a house called the Haunted Hovel, home to a ghost protocol droid. Head inside and go into the bedroom. There, you’ll need to shoot the cobweb with a spider—first on the wall, then on the floor—to get the key. You can spot its location on the mini-map marked with a purple sign. Use the key to unlock the gate, which reveals a golden entrance for either a small droid or a broken-apart C-3PO. Go through and collect the Kyber Brick.
7 – Guardian Gonk
There’s a Gonk stuck in a small alley at the location. Destroy it to access the Brick.
8 – Hovel Hotshot
At the Slave Quarters, there’s an Abandoned Hovel. Behind a pile of boxes, you’ll find a locked box containing the Brick. Inside, you’ll come across 4 targets that need to be shot within 17 seconds. I’ll point out their locations, but it’s up to you to hit them in time.


9 – Kyber Climb
Climb the ladder to a platform where you’ll find four levers. Pull one of them. Then, switch to your other character and use the lever in the center to control the two planks. Lower the planks for now and let your other character step onto one.

Raise the plank to reach the lever above the one you just pulled, and pull the second lever out of four. Then, walk the plank to the other side. On this platform, there are two ways to reach the remaining two levers. You can either glide with a Scavenger from the top platform, or run along the wall with a Jedi, Dark Force user, or Scavenger to reach the lower platform. Once you’re on the other side, follow the same process as before: use one character to control the plank and the other to cross and pull the last two levers.
10 – Nice Little Nook
Use the orange, brown blocks to build a staircase to the Kyber Brick with a Jedi or a Dark Force.

11 – Nook and Cranny
There are two nooks in this building. One contains the Kyber Brick, and the other has a lever. Climb the bars and ladder to reach the roof. The Brick is locked, but you can pull the lever to open it. After pulling the lever, switch to your other character and climb the same way. Now you can collect the Brick.

12 – Pillar of Wealth
This Brick is wedged between two houses. You can reach it by jumping down from the roof.
13 – Podracer Prize
In the southwest dead end, you’ll find a broken Podracer that needs fixing. Start by destroying everything around it.
Use the parts to repair one engine, and with the remaining parts, build an Astromech Terminal. Pair it with an Astromech to get the parts for a Kyber Brick. Build the Kyber Brick to claim it.

14 – Power Below the Porch
This Brick is locked and needs two energy cells to unlock. Check the purple circles on the mini map to locate the energy cells. Simply climb and jump to reach them.
15 – Probe Droid Pursuit
A Probe Droid is carrying a Kyber Brick. Chase it down and keep attacking. Once it takes enough damage, you’ll get the Brick.
16 – Push Over
Behind a red energy field, this Kyber Brick is waiting to be collected. Use a character that can grapple up to the lever above (Scavenger, Bounty Hunter).

17 – Rodian Raid
You need to enter the building in the Shopping District, where Rodians frequently attack and the alarm is located.
Switch to an Astromech and use the Astromech terminal to enter the building. Once inside, destroy the objects to reveal hidden items. There are 3 C-3PO terminals in this building: one to deactivate the alarm, one to retrieve a password, and one to unlock the Kyber Brick box.
Turn off the alarm, retrieve the password for the secret safe, and use it to open the Kyber Brick container.

18 – Rooftop Raiding
The Kyber Brick is locked behind a red energy shield. Look around and you can see the path you have to take. Did you see the Net Frames the Scavenger can use to attach his nets? That’s the way you have to go.
So, climb up by grappling to the net frames. Pick two Scavengers for this. One shoots two nets onto the lower frames, the other one climbs them. Climb onto the third net, which was there before.
Next, switch to the Net-Scavenger again and shoot the next two nets so you can climb to the top. Getting onto the second set of nets is a bit tricky, but doable. At the top, use a Scavenger with a Glider to glide to the other side onto the roof. The Gliding spot is marked.
On the other side, pull the lever. That will take care of the power of the red energy shield, and you can go get the Kyber Brick.

19 – Salvage Droid Skipping
Use the grab bars to move the big crates closer to the Droids, so you can use them as steps. Jump onto the first Droid and work your way to the one holding the Kyber Brick.

20 – Scaling the Dome
Get to the base of the Dome in Mos Espa so you can jump onto the rope. It takes a bit of jumping, but it is doable. Climb up the rope to the top.

21 – Scattered Schematics
Enter Anakin’s Home in the Slave Quarters. Inside, destroy everything so you can find the 3 missing pieces of the C-3PO schematics.
Use a Jedi or Dark Force to cut open the bedroom door. Inside, destroy everything to find and get the key to the locked door. Open the locked door and get inside the kitchen. Now, look inside the golden droid shaft. There is one of the missing pieces. Use the Force of a Jedi or Dark Force to take it back and put it into the right place in the schematics.

Another piece is in the boxes next to the schematics table—just break everything to find it. The final piece is on the shelves in the main room. Once you have all the pieces, the trunk near the schematics table will unlock, and you’ll get the Brick.
22 – Scrapyard Security
In the Scrapyard, there is a box with a Kyber Brick that needs a security card. Look at your mini map. The security card is the purple circle symbol. Just get it, carry it to the scanner, and get the Brick.
23 – Settlement Stacking
At the Residential Quarters, there is a Kyber Box attached to a red terminal for a Villain. But it’s too high to reach. Build a tower with orange, brown blocks to reach it. Switch to a Jedi or Dark Force and look for those blocks in the area. As soon as the tower is high enough, get your trusted Villain out and free that Kyber Brick.

24 – Slave Quarters Water
At the Slave Quarters, you probably already noticed the water tanks? One of them has a Kyber Brick. There are some parts lying around, but not the ones you need. Work with what you have and put the long blue one in the first blue water tank. It will explode and provide you with more parts.

Next, take 2 yellow pieces—a double-bent pipe and a single-bent pipe—to fix the yellow water tank and blow it up. Now, it’s time to destroy the third tank in line. Insert the blue straight pipe into tank #3’s broken pipe, then reuse the yellow pipes from tank #2 to fix tank #3’s leaking pipe. Goodbye, tank #3!
Now that we have the red piece, we can blow up the tank near the Kyber Brick. Place it in, and tank #4 is done! Finally, it’s time to destroy the Kyber Brick’s tank. Use all the remaining pieces to finish off the last tank!
25 – Storeroom Stock
At the Droid’s Quarters is a small room with a red energy shield a the entrance. Jump onto the roof and stand on the button. Switch to your second character – pick one with a blaster – and shoot at the target above the red energy shield entrance. Now you can get the Brick.
26 – Suburban Spoils
You have to reach and stand on 4 buttons in 20 seconds to get this Brick. Here are the screenshots of the buttons:


27 – Sunken Sand Silver
There is a Brick inside a small alley in the Shopping District.
28 – Top of the Tower
At the Droid’s Quarters is a Brick behind a red energy shield high up in the tower. Look up and you will see that you can use a whole parkour with sun blinds and poles to get up there. There is a pole on a roof that you could use but it’s not low enough. So time to build a small staircase tower with the Jedi or Dark Force again.

Now you have all the instruments you need to climb to the top of the tower. Additionally, some luck and timing is useful. Once you’re up there, let yourself fall into the hole, get the Brick, and pull the lever to get out.
29 – Tower Treasure
At the Residential Quarters is a tower that has two net frames and a cracked wall at the top. All for a Scavenger. Climb onto the roof that you see on my screenshot. It has climbing bars to reach, so no big deal.

It’s time to switch to a Scavenger and launch two nets onto those two frames. Then use the blaster to open up that cracked wall. Switch to the Glider and glide to the net to climb into the now open room. In the room, there is a target to shoot at. Shoot it, and you can climb onto the brown boxes and jump onto the ladder to get to the roof where the Brick is.
30 – Toydarian Treasure
There is a Brick inside a small alley in the Shopping District.
31 – Welcome to Mos Espa!
The Kyber Brick is in the most north-eastern part of the map. Where there’s sand! It’s inside the big round junk. Just destroy the box in front, jump inside to get it.
Mos Espa – Trials
To find the location of the Trials, simply select “Trials” in the Holo menu under “Missions.”
1 – Bantha Banter
Just play Basketball with a Jedi or Dark Force and score as many hoops as possible.
Mos Espa – Challenges
There are 3 Challenges to complete in Mos Espa. “Mouse Droid Hunt”, “Porg Patrol”, and “Where is the Wookiee?”
1 – Mouse Droid Hunt
To complete the Mouse Droid Hunt Challenge at Mos Espa, you’ll need to destroy two Mouse Droids. Here’s a tip: use a Bounty Hunter with a fully upgraded Enemy Detector to easily spot the droids, even through walls. At Mos Espa, the droids move in a circle around the marked location.


2 – Porg Patrol
The Porg is stuck inside a house.


3 – Where’s the Wookiee?
The Wookiee is high up on the building’s top side. Climb up the ladder to get to him.


With this complete guide, you’re all set to collect every item in Mos Espa, from characters to Kyber Bricks and beyond. Immerse yourself in the Star Wars experience and enjoy every step of completing your LEGO Star Wars adventure! May the Force be with you!
More Tatooine Guides
Tatooine Mos Eisley Collectibles – LEGO Star Wars Skywalker
Discover every collectible in Mos Eisley, Tatooine. Solve missions, find Kyber Bricks, unlock characters, and complete your LEGO Star Wars adventure!

Tatooine Jundland Wastes Collectibles – LEGO Star Wars
Uncover every collectible in Jundland Wastes, Tatooine. Solve puzzles, challenges, and missions to complete your LEGO Star Wars experience!


Lego Star Wars: The Skywalker Saga
Release: April 5th, 2022
Developer: Traveller’s Tales
Publisher: Warner Bros. Interactive Entertainment
Official Website: starwars.com/games-apps/lego-star-wars-the-skywalker-saga


