
If you’re diving into Death Stranding 2 and want to make the most of your journey, this guide on Mr. Impossible is a must-read. It offers a detailed walkthrough on building a reputation with the enigmatic twin brothers, unlocking unique rewards, and navigating their challenging tasks. Mr. Impossible in Death Stranding is probably one of the last shelters you will finish. I will show you how to earn reputation to receive all of Mr. Impossible’s Rewards.
-> More Guides at the Death Stranding 2 Hub
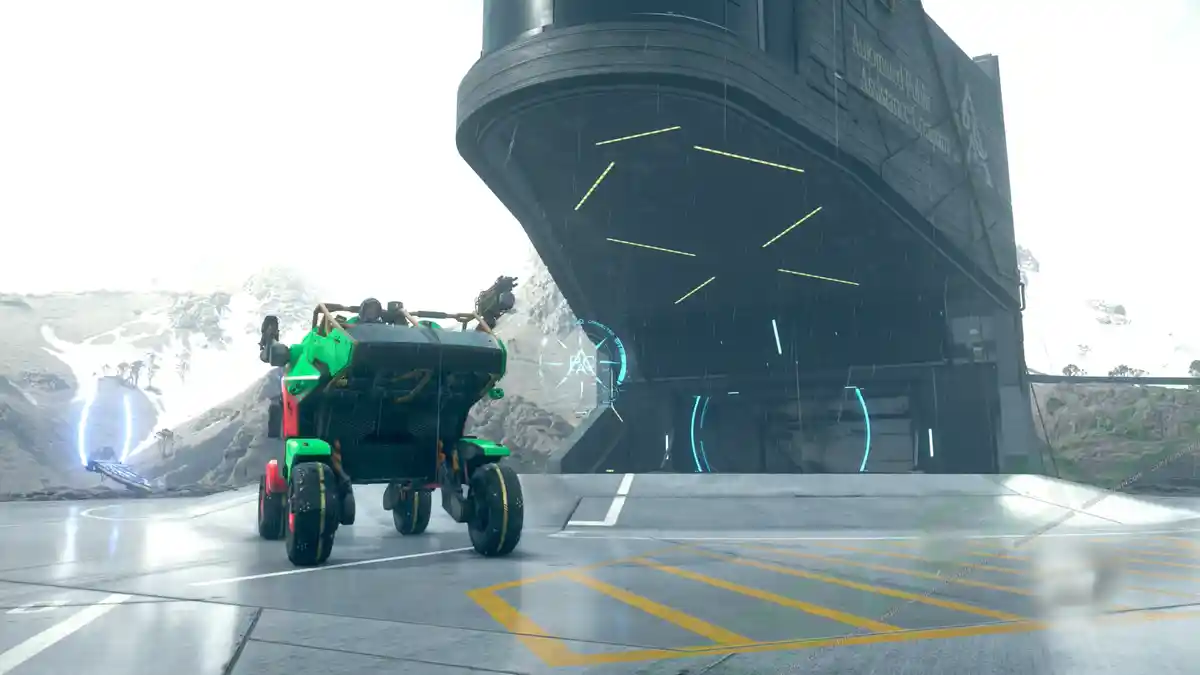
About Mr. Impossible in Death Stranding 2

Administrator: Mr. Impossible

Twin brothers who refuse to be bound by societal norms and so-called common sense. Their imaginative power is beyond most ordinary people, and they believe that imagination alone is capable of moving mountains – if you believe in something enough, then you can make it happen, even if conventional wisdom tells you it’s impossible.
Though they insist they were born before the Death Stranding and are over 100 years old, their outward appearance is of someone in their thirties. When the Death Stranding occurred, the brothers were briefly killed and pronounced dead for 21 hours before miraculously returning to life. Ever since, their bodies have shown no signs of ageing.
When the APAC advance expedition visited the brothers and heard this story, they didn’t believe it. The twins became irritated and refused to allow a delivery terminal to be set up at their shelter.
“If you won’t believe our story, then why should we believe your stories about this chiral network thing?”
“Back in the day, we got on a plane and flew to America. Where’s your plane, eh? Aren’t you able to build one?”
Flustered, the APAC staff replied, “Drawbridge will be along soon to connect you to the chiral network. Even if you don’t trust us, would you at least let us leave this terminal here?”
Will Sam be able to resolve the brothers’ suspicions and connect them to the chiral network? Or will it prove to be…impossible!
“Come on, bro! Make us feel alive again!”
Rewards: Mr. Impossible in Death Stranding 2
Each Knot City and Shelter has a five-star reward system, granting rewards and upgrades with every star reached. Gain more reputation by delivering goods. APAS firmware upgrades, bandwidth increases, and Material Allotment increases are granted with every star reward. Shelters additionally offer Sam a place to rest at the 5-Star level.
How to Earn Reputation
Reputation building with Mr. Impossible operates differently compared to most other shelters. It’s similar to the Adventurer. There are two lost cargoes that I found that are destined for Mr. Impossible: One is on a bridge just below the bridge that leads to Terminal Knot F8, and the second one is above The Aeronautical Engineer Shelter.
1 – Q-pid Connection and Sub Order 123: Recover All the Chiral Sculptures from Their Inaccessible Locations.
Once Sam arrives at the shelter of Mr. Impossible, they give him Sub Order 123: Recover All the Chiral Sculptures from Their Inaccessible Locations.
#1 – BT Weapons Factory
The first Chiral Sculpture is in the center of the BT Weapons factory, high up on a beam. There is no ladder or access point to get there. Bring a ladder and place it just next to the beam where the sculpture is. An extremely helpful fieldwear gear is the Climbing Power Gloves from The Adventurer. They let you salvage cargo from further away.
#2 – F5 East Distribution Centre Roof
The second Chiral Sculpture is on the roof of F5 East Distribution Centre. Use a ladder to get there. Maybe you’re lucky and another porter has already set it up for you.
#3 – Monorail Tracklayer AUS-Rails-TC01-04
The last sculpture is just next to the monorail tracklayer. If you can, take the opportunity to repair this part of the monorail. You will need it later.

2 – Raising Reputation just below the 5-Star Level
Next, you have to raise the reputation until Mr. Impossible gives Sam the next Sub Order. To find available Orders with Mr. Impossible as destination, open the Ring Terminal and use the Search functionality to find all available Standard Orders with Mr. Impossible as destination.
3 – Sub Order 124: Recover All the Hazardous Chiral Sculptures from the Armed Hostiles
To achieve a 5-star rating with Mr. Impossible, you must first complete a timed Sub Order. This task is essential for reaching the prestigious 5-star level. The mission requires you to recover seven Chiral Sculptures within a 50-minute time limit. Each sculpture is located in one of Australia’s seven hostile camps, making this a challenging but rewarding endeavor.

3.1 – Sub Order 124: Preparations
There are several approaches you can take to achieve this. Here’s what I did before accepting the order, finishing with eight minutes to spare:
#1 – Upgrade Paved Roads to Lv2
This order requires Sam to do an Australian round-trip. To do it at the fastest speed, upgrade all the roads connecting the Knot Cities to Level 2. F5 -> F1 -> F2 -> F4 -> F6 -> F7 -> F8. The Road upgrade is a 2 Star Reward at East Fort Knot (F4).
#2 – Repair Monorail from F5 -> F8
To quickly finish or start this road trip, depending on where you go first, the Monorail connection between F5 East Distribution Centre and Terminal Fort Knot (F8) has to be functional.
#3 – Prepare the Pickup Off-Roader
Empty the Pickup Off-Roader and focus on the task. Install the Active Defense Unit and a Heavy Machine Gun. Don’t take the Sticky Cannon with you. You don’t want extra cargo or distractions. Install Additional Armour, Antigravity Unit, and Vehicle Batteries.
#4 – Prepare Gear
Same principle for the gear backpack. Focus on fighting. Focus on Ammo Containers, Solar Generator, and Extra Battery. I used the Battle Skeleton Lv3.
#5 – Neutralising the Camps
Before accepting the Sub Order, pack enough weapons to do a dry run and neutralise all the camps on the way. Time is essential for this Sub Order. So you don’t want to waste any more time than necessary. Clean out all 7 camps and make sure you get the message “Camp Neutralised” at the end. DON’T REST AT A SAFE HOUSE, THE MAGELLAN, OR AT A KNOT CITY. You can repair your vehicle or fabricate more weapons if you run out.
3.2 – Sub Order 124: How to Finish successfully
Here is the step-by-step timeline on how I successfully finished Sub Order 124: Recover All the Hazardous Chiral Sculptures from the Armed Hostiles with 8 minutes to spare. Note: Use the boost while driving the Pickup Off-Roader at all times.
#1 – Start
After neutralising the last of the 7 camps (you have to neutralise all of them at once in a row), head straight to Mr. Impossible and accept the order. I saved the game before doing so. But the system does a quick save anyway. During the Sub Order, you’re not allowed to save or sleep.
#2 – Mr. Impossible -> F2 East Distribution Centre – Arrival: 48:30
After accepting the Sub Order, I headed back to the paved road and drove to F5 East Distribution Centre, arriving at 48:30.

#3 – F2 East Distribution Centre -> Terminal Fort Knot (F8) – Arrival: 48:30
Here, I boarded the Monorail with the Pickup Off-Roader to travel to Terminal Fort Knot (F8), arriving at 45:11.

#4 – Terminal Fort Knot (F8) -> F7 North Distribution Centre – Arrival: 41:12
Crossing the Terminal Knot (T8) bridge and travelling to F7 North Distribution Centre on the Lv2 paved road, arriving at 41:12.

#5 – F7 North Distribution Centre -> Chiral Sculpture 1 of 7 – Arrival: 40:00
I drove behind the F7 North Distribution Centre to access the now-empty enemy camp from there. The Chiral Sculpture is on top of the watchtower, the highest point in the camp. Arriving at 40:00.

#6 – F7 North Distribution Centre -> Hostile Camp #2 roadside – Arrival: 29:47
After picking up the first Chiral Sculpture, I returned to the Pickup Off-Roader and loaded the cargo onto the truck. Then, I returned to the F7 North Distribution Centre and used the Lv2 paved road to drive to the Hostile Camp. I got off the road at the camp’s south side at 29:47.

#7 – Hostile Camp #2 roadside -> Chiral Sculpture #2 – Arrival: 29:20
The hostile camp is still empty. The Chiral Sculpture is in the tent by the water in the center of the camp. Pickup time: 29:20.

#8 – Hostile Camp #2 -> Hostile Camp #3 Chiral Sculpture Pickup – Arrival: 26:05
The hostile camp is still empty. I got off the road on the western side. The Chiral Sculpture is on the roof of the concrete building on the western side of the camp. Picking up time: 26:05.

#9 – Hostile Camp #3 -> Hostile Camp #4 (Tunnel Camp) – Arrival: 23:46
I returned to the paved road and drove to the next hostile camp, the one with the tunnel. The Chiral Sculpture is above the tunnel. So at the end of the tunnel, I turned right, drove up, and stopped in front of the concrete building that is on the tunnel’s roof. The sculpture is behind the building. Pickup time: 23:46

#10 – Hostile Camp #4 (Tunnel Camp) -> F2 South Distribution Center – Arrival: 22:00
I arrived and drove past the F2 South Distribution Centre at 22:00.

#11 – F2 South Distribution Centre -> Hostile Camp #5 Auto-Paver – Arrival: 20:41
I took the paved road going towards the Northern Environmental Observatory and got off at the Auto-Paver AUS-HIGHWAY-02-10 (the one that is inside the hostile territory). I got off the paved road at 20:41.

#12 – Hostile Camp #5 Auto-Paver -> Chiral Sculpure 5 – Arrival: 20:02
The Chiral Sculpture is inside a MULE postbox, in the tent at the very west of the hostile camp. I retrieved it at 20:02.

#13 – Hostile Camp #5 -> West Fort Knot (F1) – Arrival: 15:05
I drove back to the autopaver and decided to stay on the road. Drove past the Animal Shelter and Rainbow Valley to arrive at West Fort Knot (F1) at 15:05.

#14 – West Fort Knot (F1) -> Hostile Camp #6 – Arrival: 13:36
Drove past West Fort Knot (F1) and arrived at the northern side of the next hostile camp, where the Chiral Sculpture is inside the concrete building. Hostiles are still unconscious from my pre-run. Pickup at 13:36.

#15 – Hostile Camp #6 -> Hostile Camp #7 – Arrival: 11:34
I returned to the paved road and drove towards the Government’s Base to the last, smallest hostile camp. The seventh Chiral Sculpture is on the floor in the center of the camp. Pickup time: 11:34

#16 – Hostile Camp #7 -> Mr. Impossible – Arrival: 08:00
I returned to the paved road and drove straight to Mr. Impossible’s shelter, where I arrived at the 08:00 time mark and fulfilled the order.

1-Star Rewards
Omnireflector – Colour

2-Star Rewards
1 – Chiral Gold – Colour

2 – Custom Hologram: Die-Hardman Dance

A Hologram of a dancing Die-Hardman can now be selected under any Structure Customisation.
3-Star Reward
1 – Red Mask

Higgs’s red mask. It has the air of mysterious power. Mr. Impossible have unleashed the mighty Power it contains within – holding your breath while wearing this mask now prevents detection by gazers, catchers, and watchers. Beware, however, that once a catcher has spotted you, holding your breath will not hide you again.
Blocks direct and reflected sunlight.
2 – Custom Hologram: Red Samurai

A Hologram of Red Samurai can now be selected under any Structure Customisation.
4-Star Rewards
1 – Golden Mask

A golden mask in the shape of a skull. Mr. Impossible have unleashed the mighty power it contains within, and the mask now strengthens any BTs that Sam summons. Blocks direct and reflected sunlight.
2 – Custom Hologram: Higgs

A Hologram of Higgs can now be selected under any Structure Customisation.
5-Star Rewards
1 – PCC Lv3

A further upgrade to the PCC, enabling the construction of Bridges and Safe Houses in their completed state. All other structures built by this PCC will come pre-upgraded to Lv2. Building structures consumes chiral bandwidth, so keep an eye on how much you have left.
2 – Custom Hologram: Mr. Impossible

A Hologram of Mr. Impossible can now be selected under any Structure Customisation.
3 – Patch 67: Impossible Shape

A 1×1 backpack patch that allows the wearer to express their individuality. Serves as proof that you have reached the maximum connection level with Mr. Impossible.
4 – Chiral Sculpture

DHV Magellan – Private room item.
Browse All Death Stranding 2 Guides

All Shelter Rewards in Death Stranding 2 – Alphabetical List
Explore an alphabetical list of all shelter rewards in Death Stranding 2. Unlock gear, upgrades, and…

All Shelters & Mines Overview Map – Death Stranding 2
Discover all shelters and mines in Death Stranding 2 with maps and tips to navigate key locations an…

Animal Shelter Location Rewards – Death Stranding 2
Explore the Animal Shelter in Death Stranding 2 to earn rewards, uncover its story, and connect with…

BPAS Shelter Info & Rewards – Death Stranding 2
Explore BPAS Shelter in Death Stranding 2 – rewards, reputation tips, and upgrades to enhance your g…

C1 South Distribution Centre Rewards – Death Stranding 2
The C1 South Distribution Centre in Death Stranding 2 plays a pivotal role in supporting deliveries …

Ciudad Nudo del Norte (C1) Rewards – Death Stranding 2
Ciudad Nudo del Norte (C1) is a key location in Death Stranding 2, offering players a range of …


Death Stranding 2
Release: June 26, 2025
Developer: Kojima Productions
Publisher: Sony Interactive Entertainment
Official Website: https://www.kojimaproductions.jp/en/death-stranding-2
