Skip to content

Tiny Tina’s Wonderlands: All Lore Scrolls Locations

Here are all the Lore Scrolls locations in Tiny Tina’s Wonderlands, alphabetically by region. Each region has two marbles.

-> More Guides at the HUB

Tiny Tina’s Wonderlands: All Lore Scrolls
  1. Brighthoof
    1. Brighthoof Overview Map
    2. 1 – Is He?
    3. 2 – Submission Denied
    4. 3 – The Yumming
  2. Crackmast Cove
    1. Crackmast Cove Overview Map
    2. 1 – A No-Twin Scenario
    3. 2 – Gilbert Rapport
    4. 3 – Misjudgement
    5. 4 – The Legend of Pookie
    6. 5 – Twin C’est La Vie
  3. Drowned Abyss
    1. Drowned Abyss Overview Map
    2. 1 – Climbing the Ladder
    3. 2 – Consequences
    4. 3 – Unheeded
  4. Karnok’s Wall
    1. Karnok’s Wall Overview Map
    2. 1 – Bitter and Happy
    3. 2 – Cinder
    4. 3 – History of Kwartz
    5. 4 – Miner Dispute
  5. Mount Craw
    1. Mount Craw Overview Map
    2. 1 – A Jar
    3. 2 – Expeditious Entreat
    4. 3 – Fleedom
    5. 4 – Get the Freak Out
    6. 5 – It’s a Nose Ring Thing
  6. Ossu-Gol Necropolis
    1. 1 – Pests in the Patrols
  7. Overworld
    1. 1 – Continents
    2. 2 – Icons of Darkness
    3. 3 – Privateers
    4. 4 – Sands
    5. 5 – The Adamant Throne
  8. Queen’s Gate
    1. Queen’s Gate Overview Map
    2. 1 – Funny Story
    3. 2 – Rebellions are Hard Work
    4. 3 – Thief Thoughts
  9. Snoring Valley
    1. Snoring Valley Overview Map
    2. 1 – Diary of Garrifex
    3. 2 – Harrowfast
    4. 3 – Prophecy: Fire and Dreams
  10. Sunfang Oasis
    1. Sunfang Oasis Overview Map
    2. 1 – Eternal Wellspring
    3. 2 – Goddess of Air
    4. 3 – Goddess of Fire
    5. 4 – Goddess of Sand
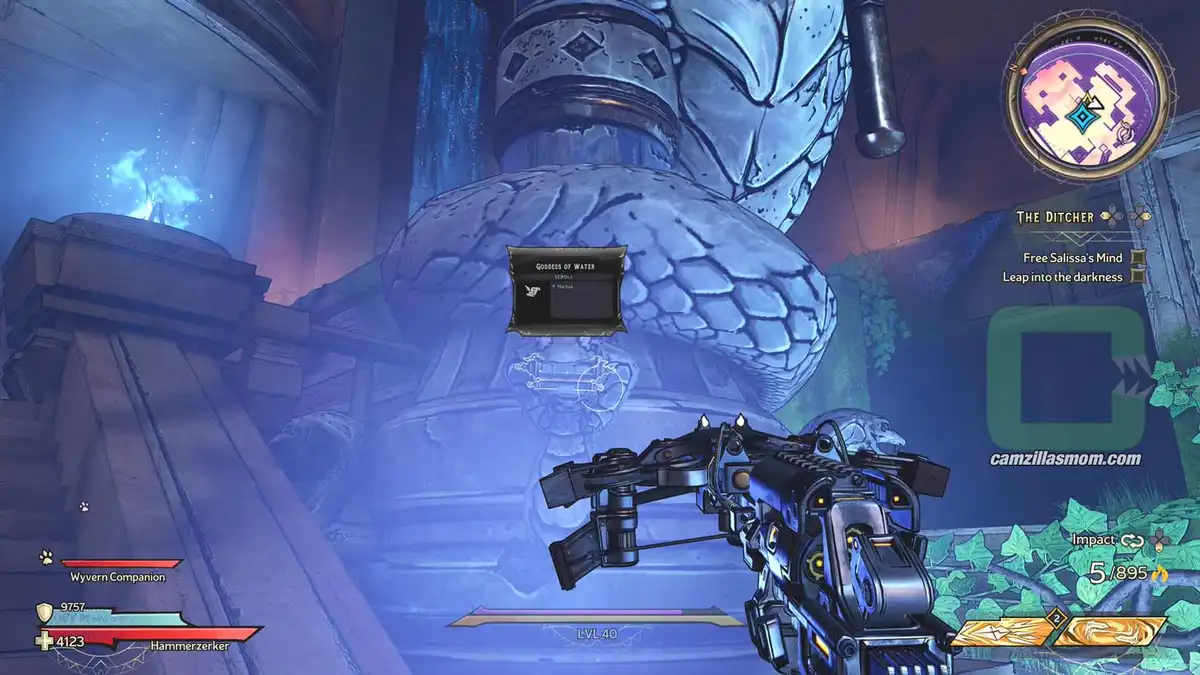
    6. 5 – Goddess of Water
    7. 6 – The Damned
    8. 7 – The Shattering
    9. 8 – Twists and Turns
  11. Tangledrift
    1. Tangledrift Overview Map
    2. 1 – A One-Blacksmith Town
    3. 2 – Kastor the Caster
    4. 3 – Misfortune Teller
    5. 4 – Sonny Disposition
    6. 5 – Sonny Skies
  12. Wargtooth Shallows
    1. Wargtooth Shallows Overview Map
    2. 1 – My Saltwater Heart
    3. 2 – Pirate Words
    4. 3 – The Curse
    5. 4 – The War of The Claw
  13. Weepwild Dankness
    1. Weepwild Dankness Overview Map
    2. 1 – Fungal Fun Times
    3. 2 – Mara’s Lament
    4. 3 – Watching You
  14. More Tiny Tina’s Wonderlands Guides
    1. About Tiny Tina’s Wonderlands

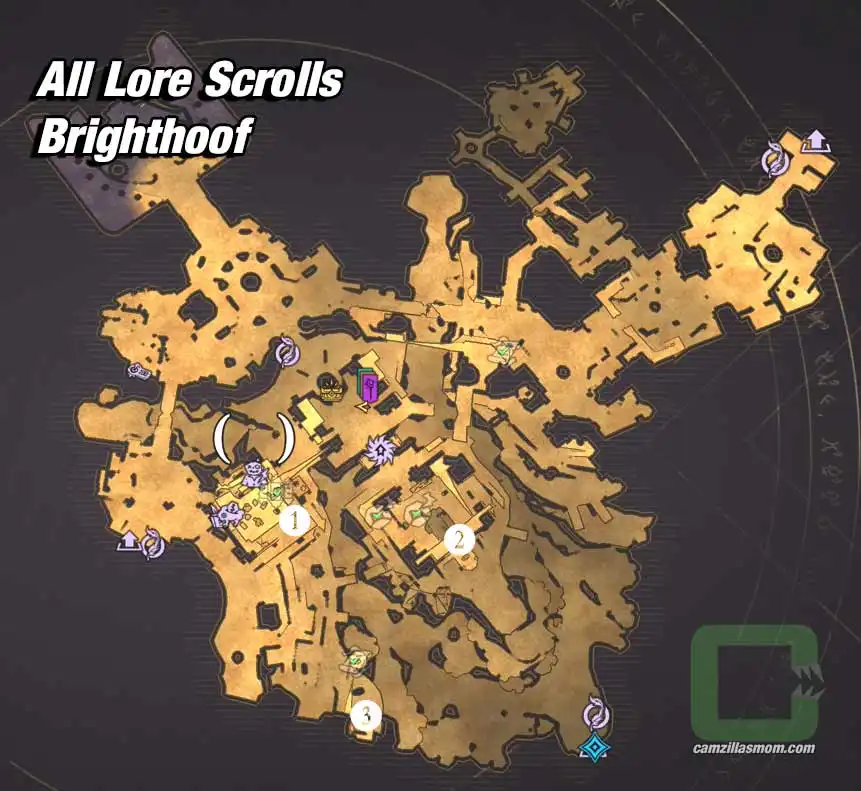
Brighthoof Overview Map

Brighthoof overview map with 3 Lore Scrolls collectibles highlighted. › camzillasmom.com

1 – Is He?
2 – Submission Denied
3 – The Yumming

1 – Is He?

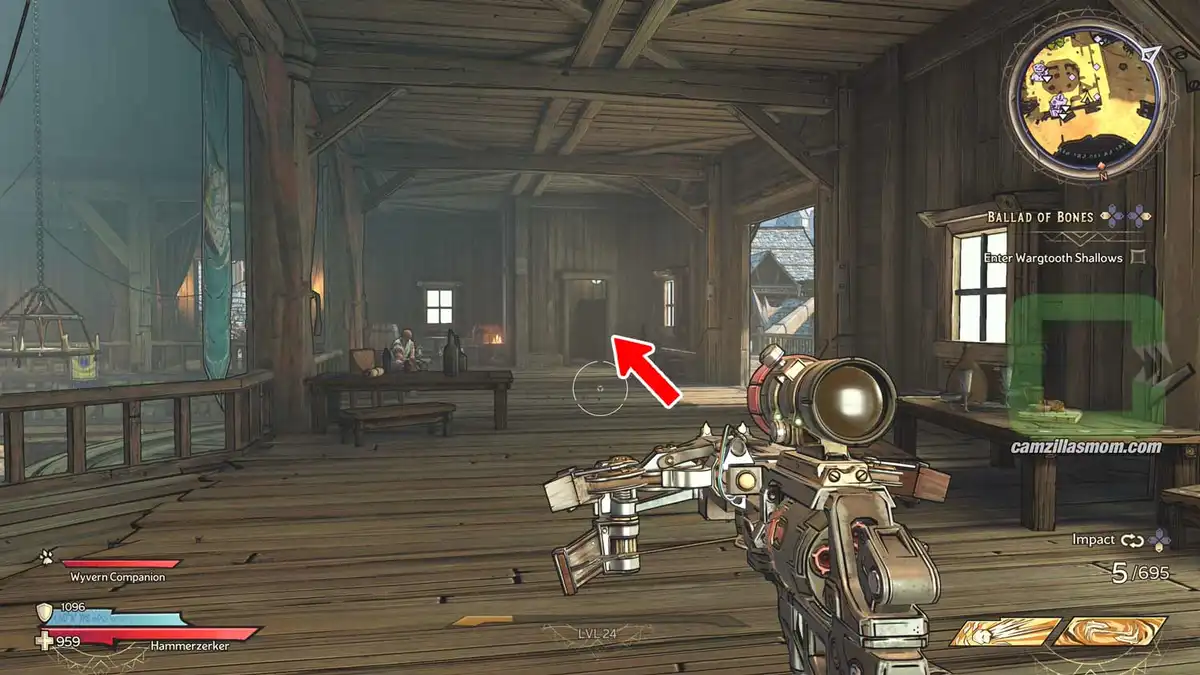
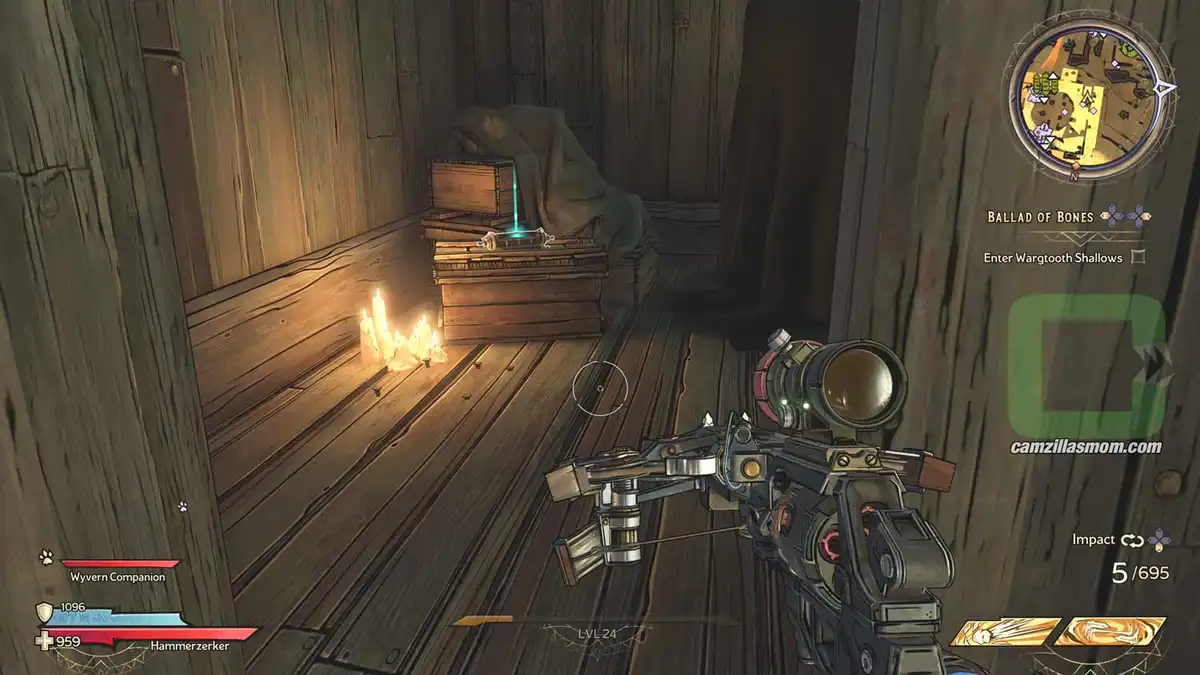
Inside Izzy’s Fizzies, on the second floor, is a small room with this Lore Scroll.
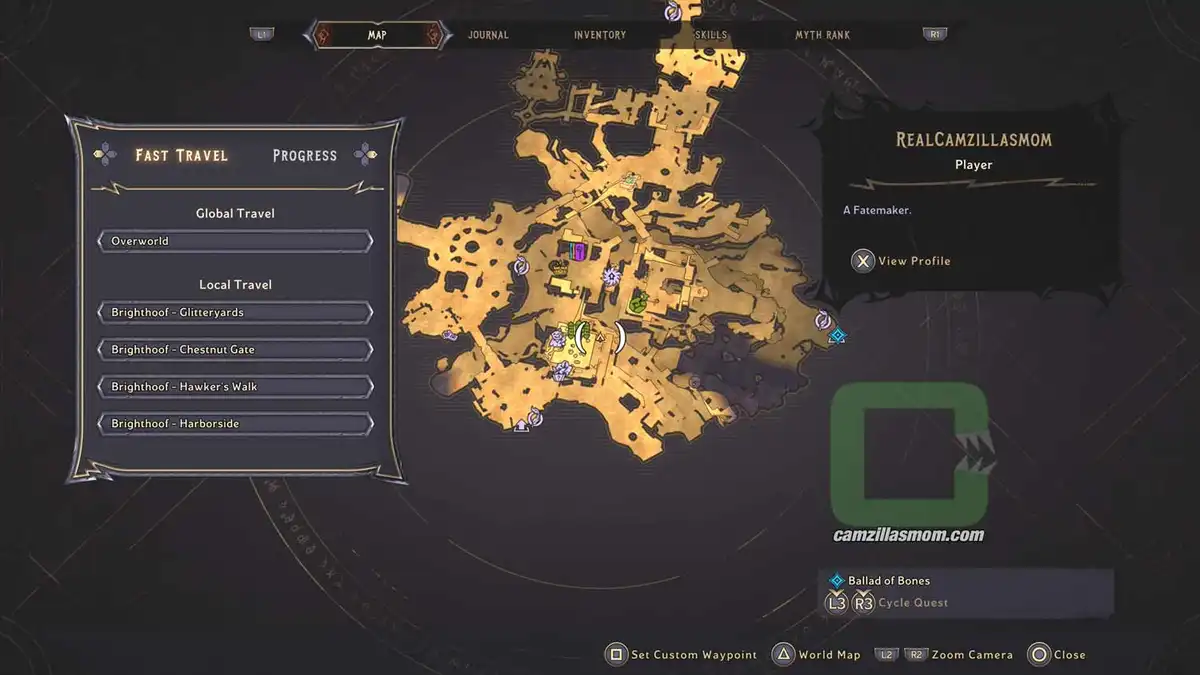
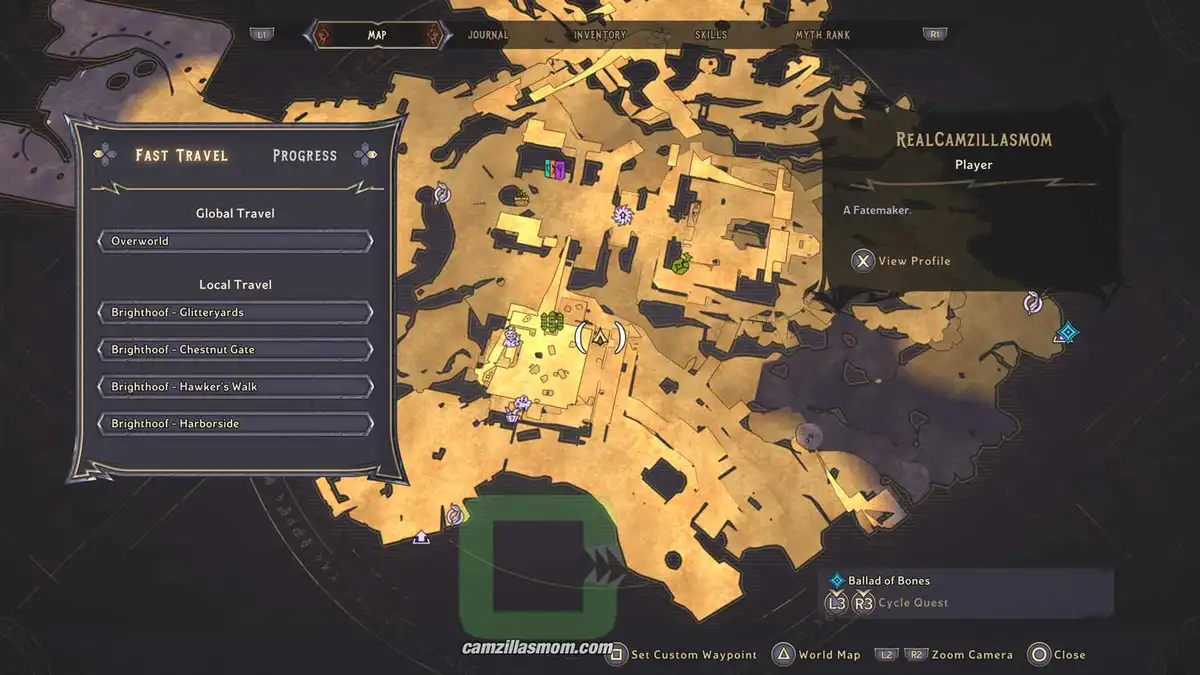
The zoomed-out map showing the Lore Scroll › camzillasmom.com's location.
The zoomed-in map showing the Lore Scroll › camzillasmom.com's location.
Screenshot highlighting the small room in Izzy › camzillasmom.com's Fizzies.
Screenshot showing the Lore Scroll › camzillasmom.com's location in the small room.

2 – Submission Denied

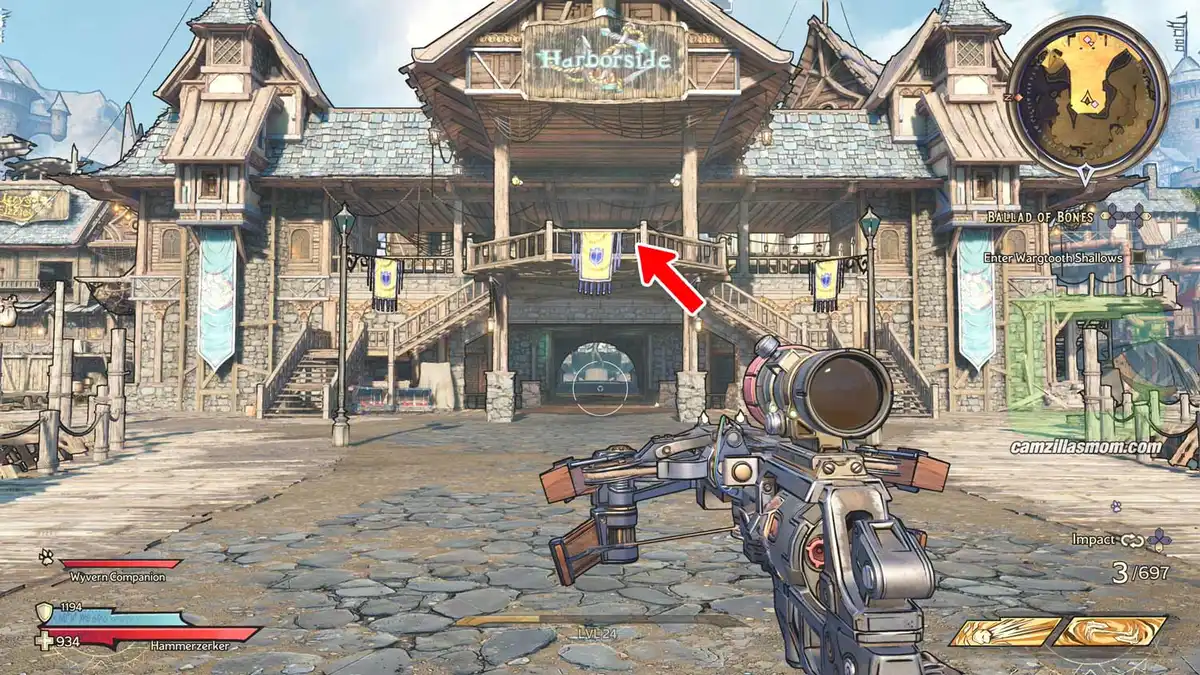
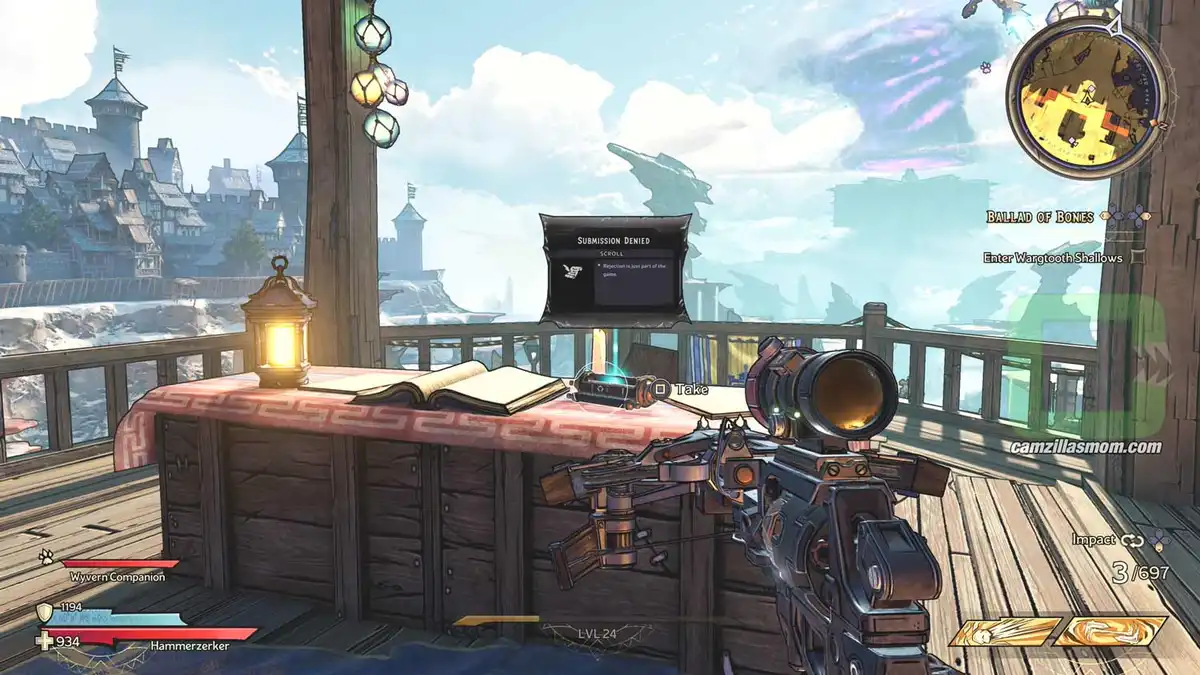
On the second floor of the “Harborside” main building is the scroll on the desk.
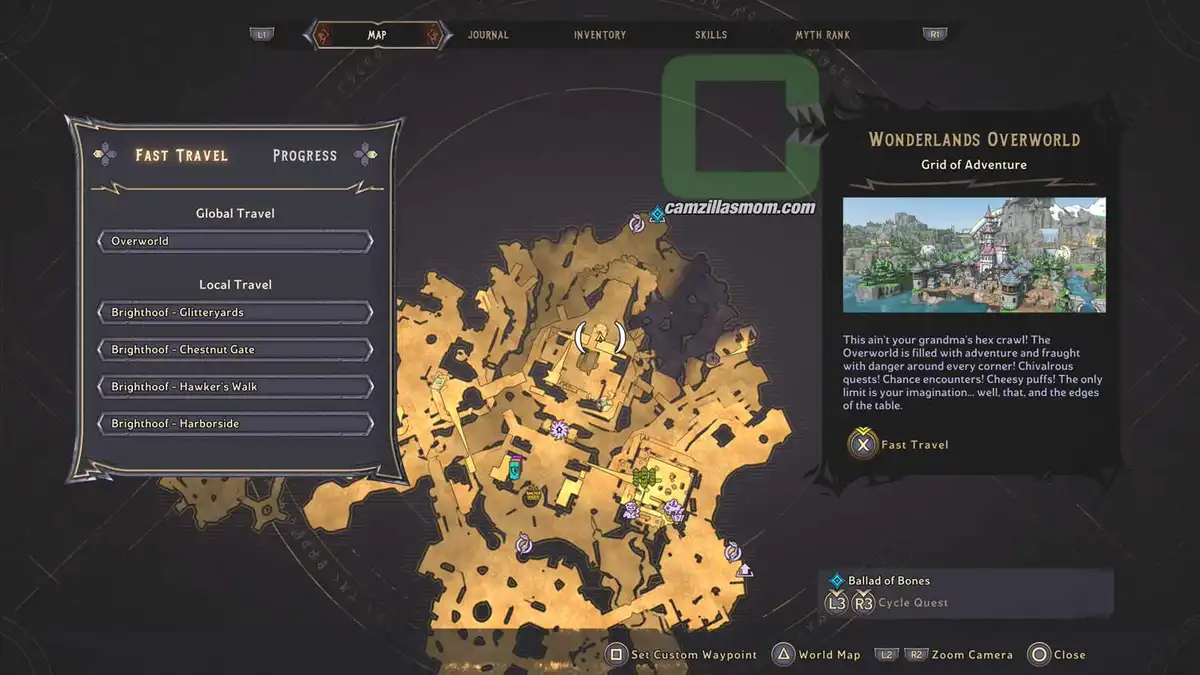
The zoomed-out map showing the Lore Scroll › camzillasmom.com's location.
The zoomed-in map showing the Lore Scroll › camzillasmom.com's location.
Screenshot showing the building with the upper floor highlighted. › camzillasmom.com
Screenshot showing the Lore Scroll on the desk. › camzillasmom.com

3 – The Yumming

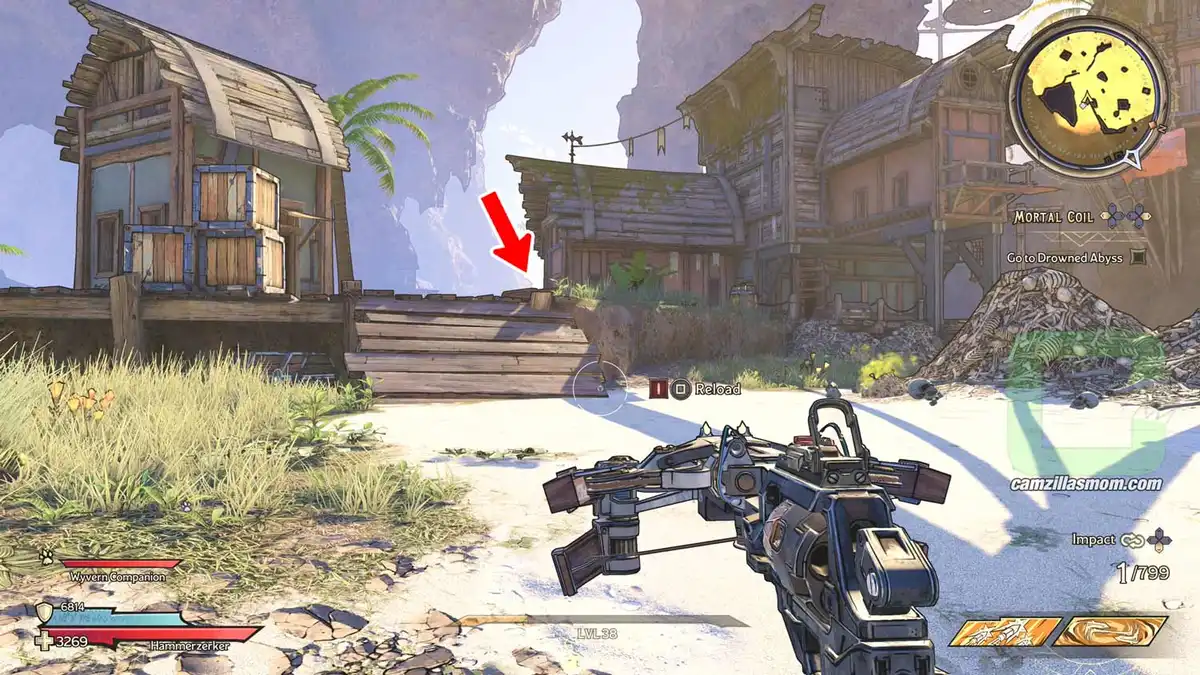
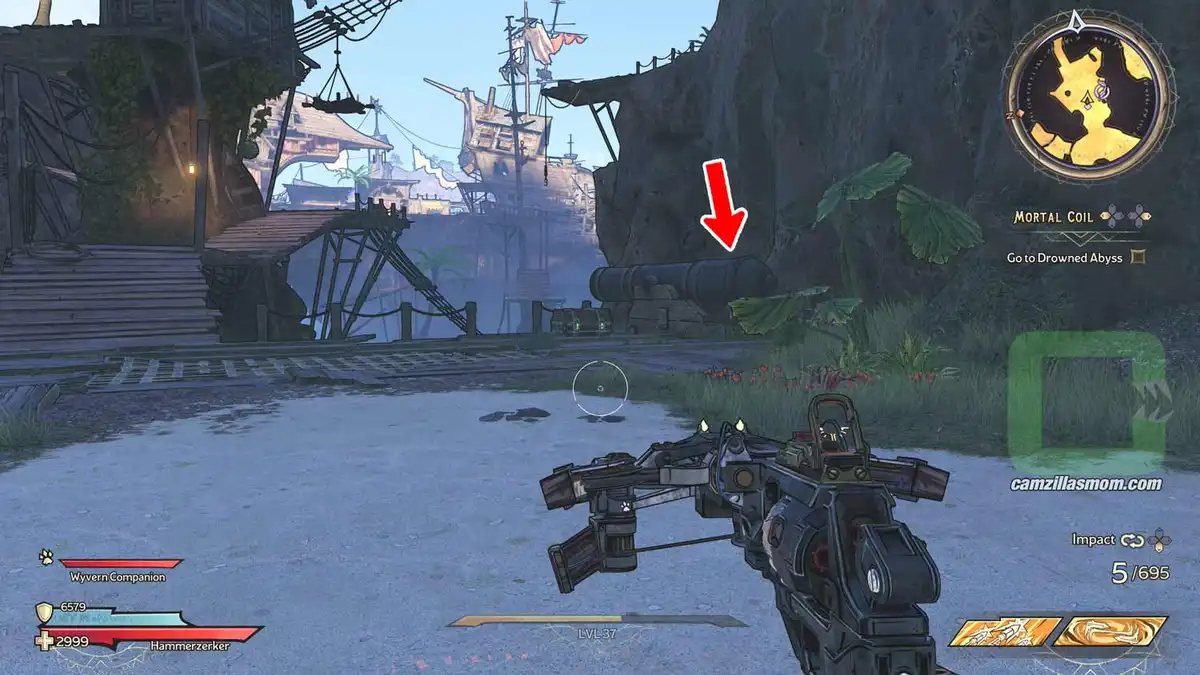
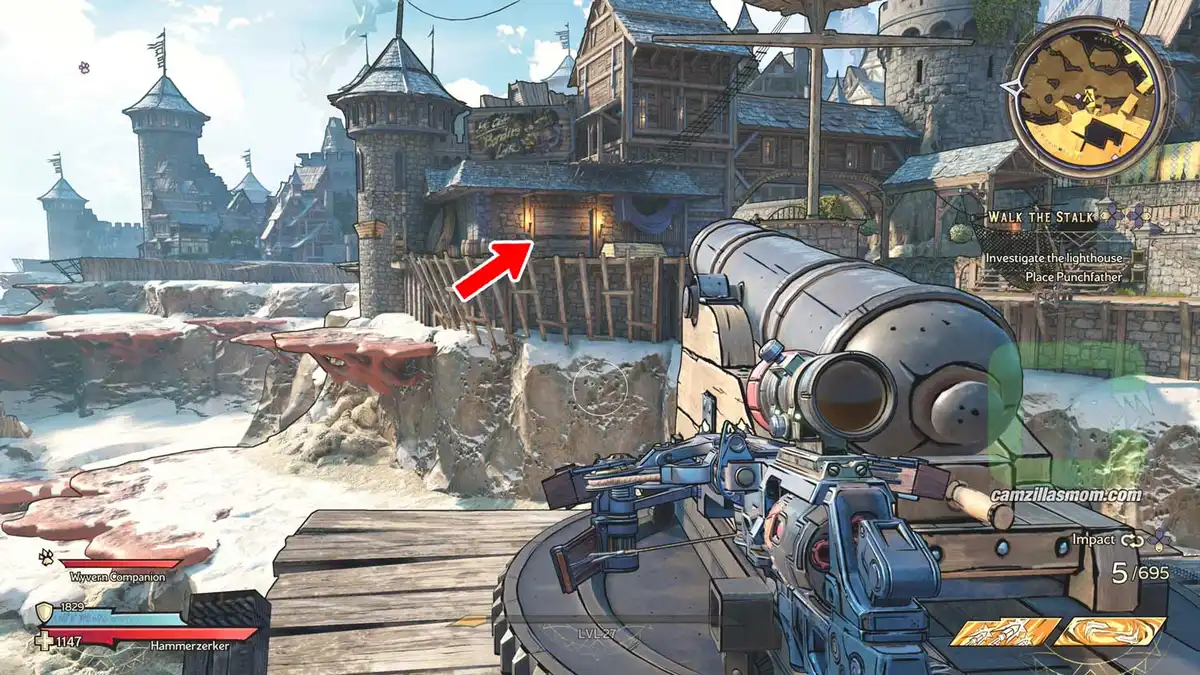
East of “Izzy’s Fizzies” is a ship’s birds nest/lookout. At its feet is a hidden room blocked by a wall. Go over to the pier of “Harborside”. There is a cannon. To fire it, shoot the barrel with explosives in the sea bed below it. Just follow the rope from the cannon to the barrel. The Cannon shoots and the path is open. But be careful. Some pirate thugs want it too.
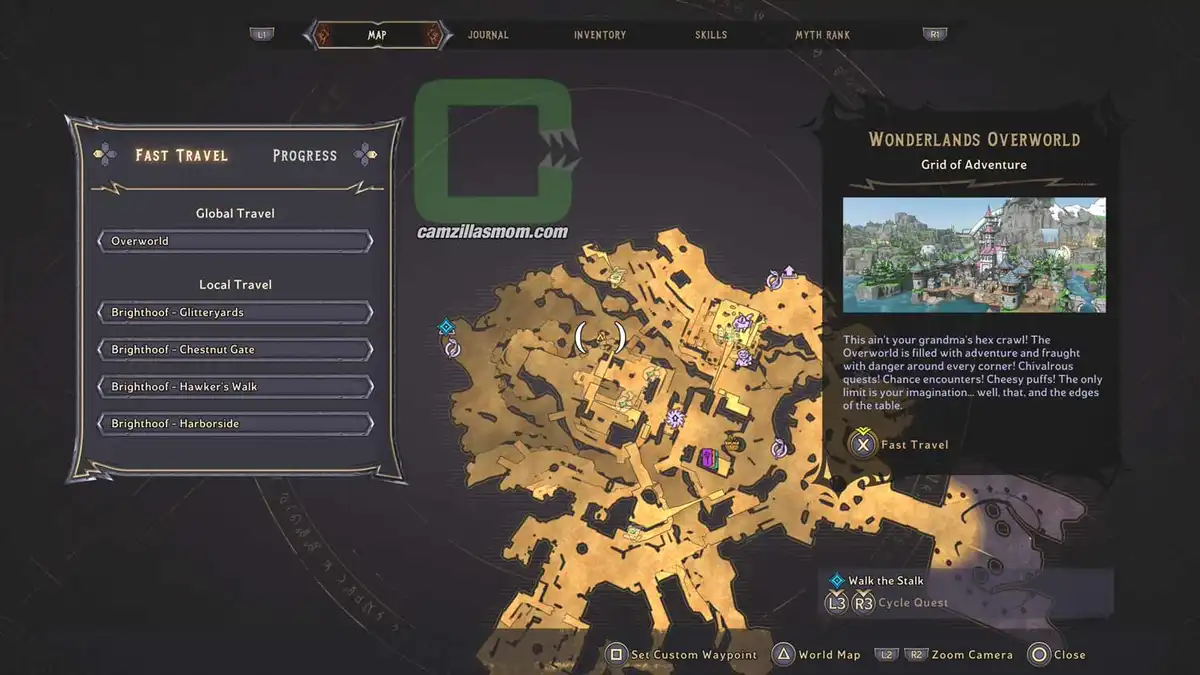
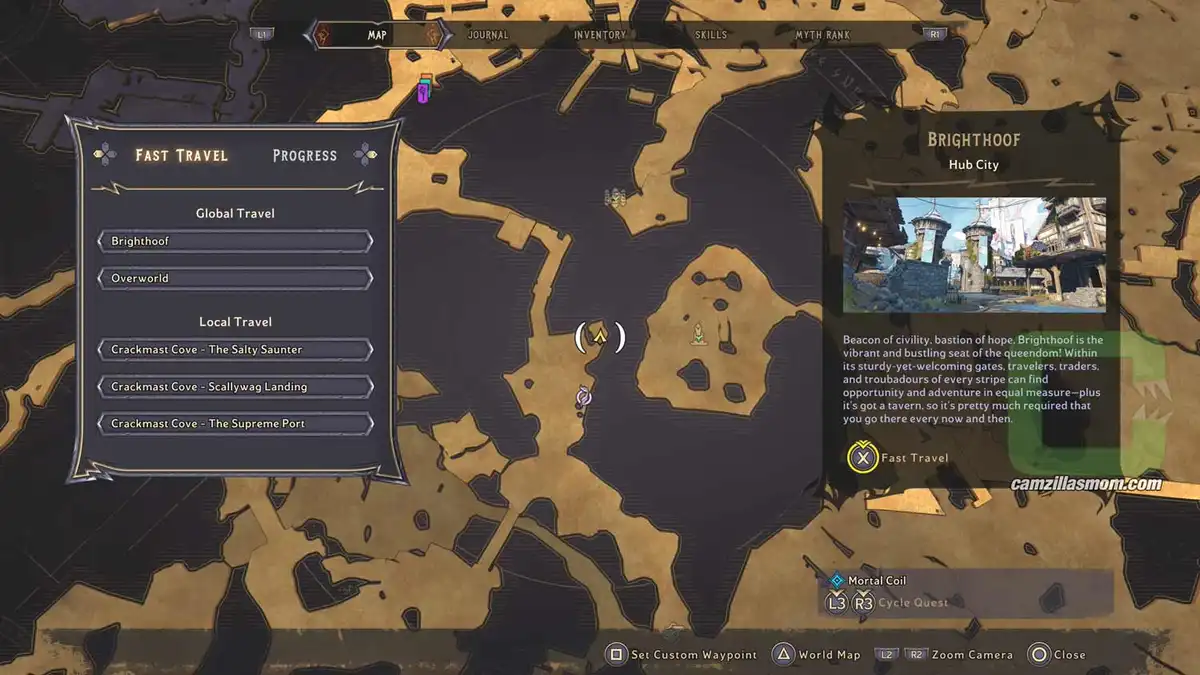
The zoomed-out map showing the Lore Scroll › camzillasmom.com's location.
The zoomed-in map showing the Lore Scroll › camzillasmom.com's location.
Screenshot showing the cannon and the room in the distance. › camzillasmom.com
Screenshot shows the open room with the Lore Scroll. › camzillasmom.com

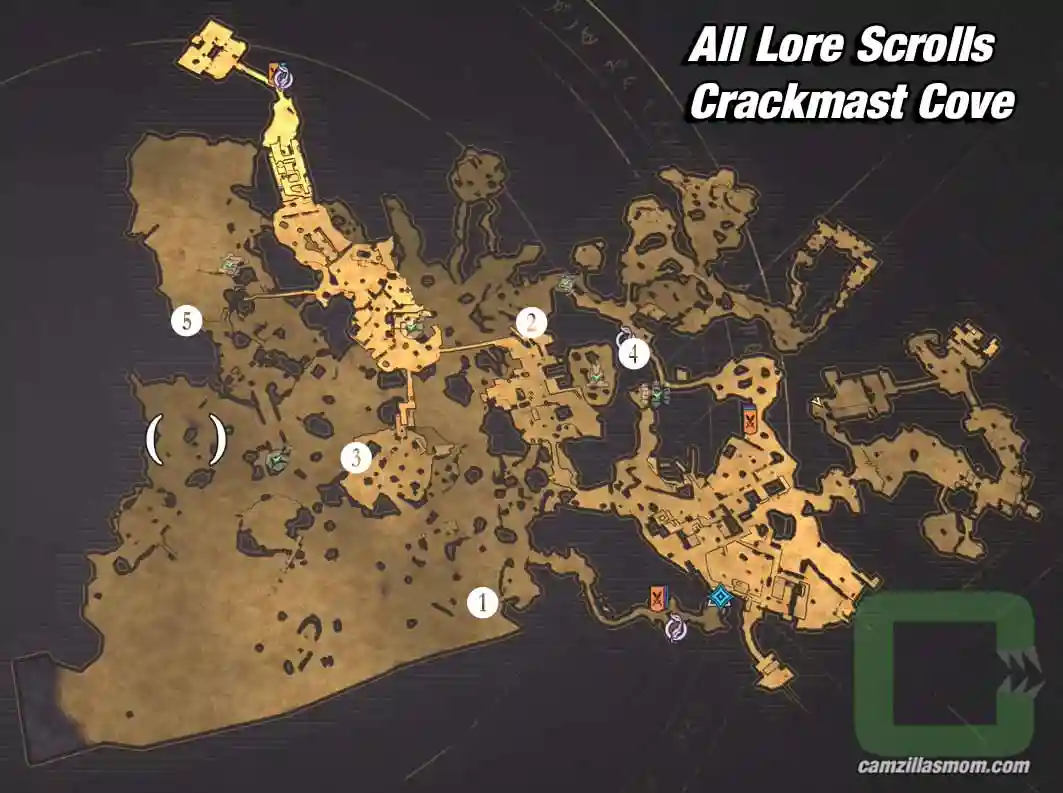
Crackmast Cove Overview Map

› camzillasmom.com

1 – A No-Twin Scenario
2 – Gilbert Rapport
3 – Misjudgement
4 – The Legend of Pookie
5 – Twin C’est La Vie

1 – A No-Twin Scenario

Near the “Swarthy Cannonade” save point is a house with a hammock in front of it. The scroll is next to the hammock.
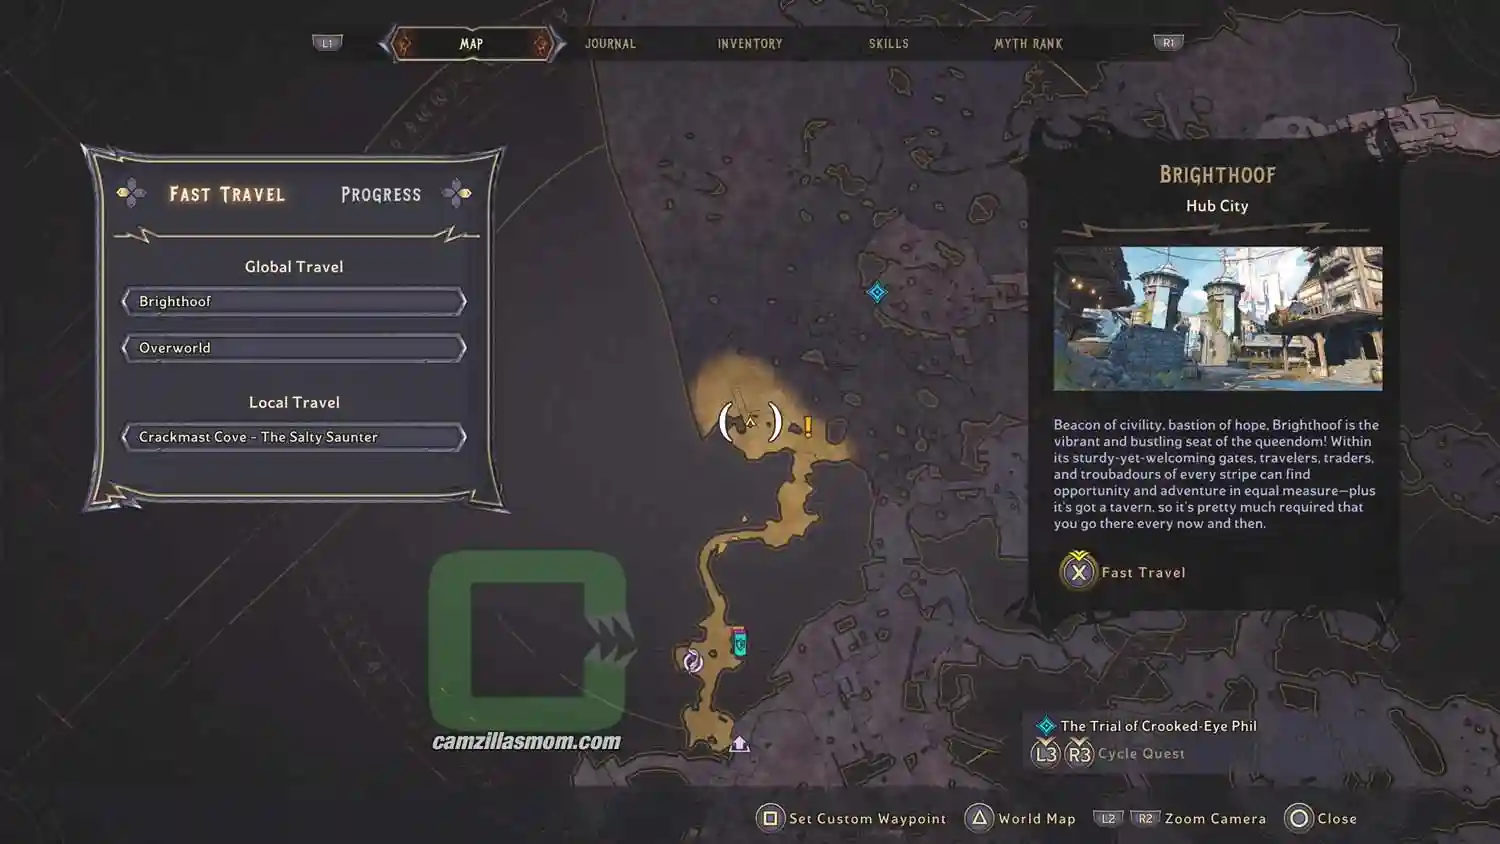
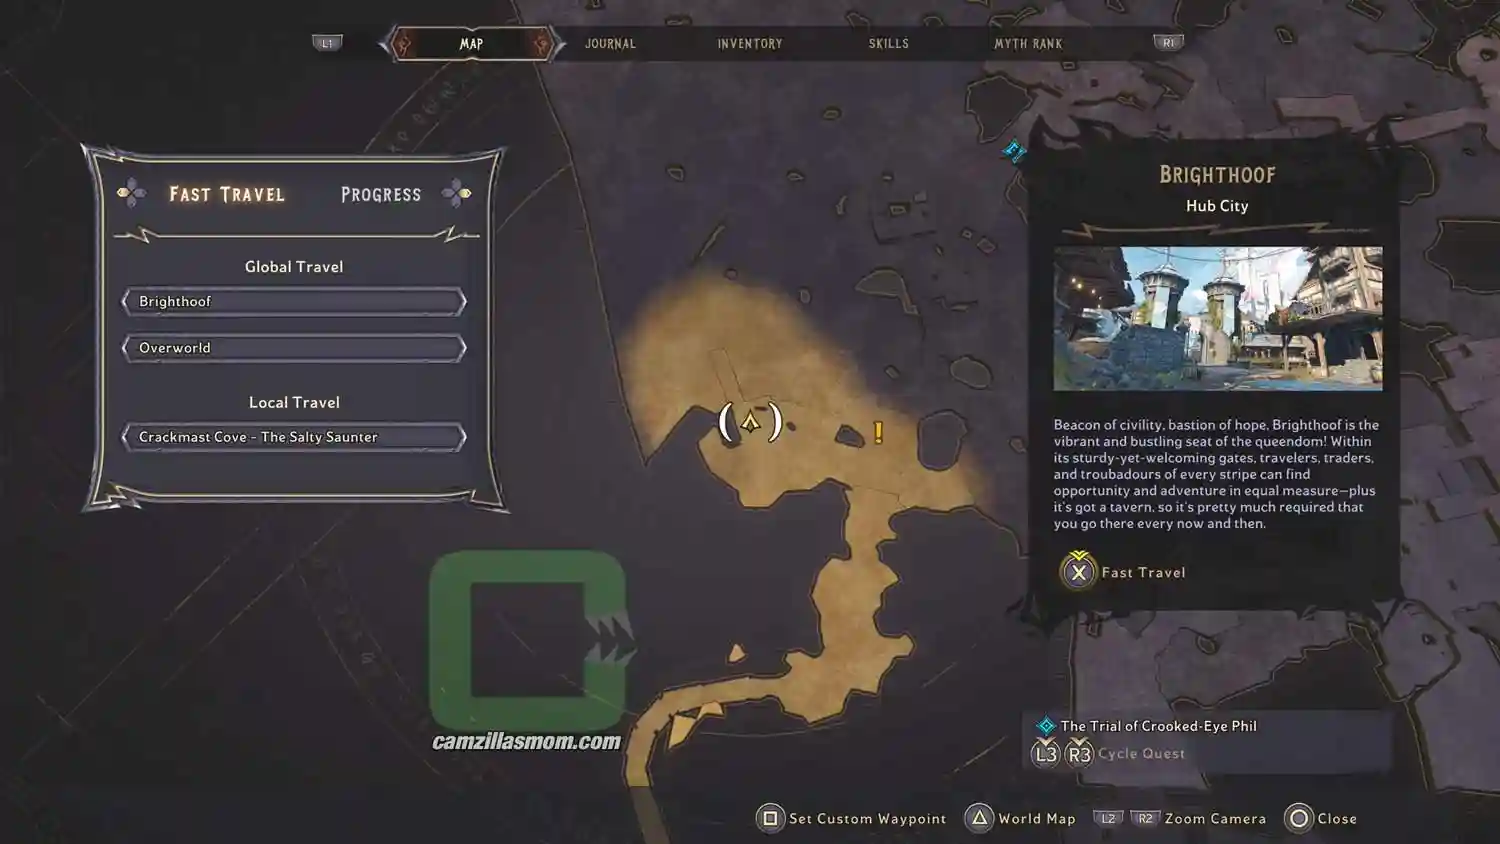
› camzillasmom.com
› camzillasmom.com
› camzillasmom.com
› camzillasmom.com

2 – Gilbert Rapport

At the top of the “Scalliwag Landing” settlement, there is a nice viewpoint, overlooking the valley. Here, on top of a box, is the Scroll.
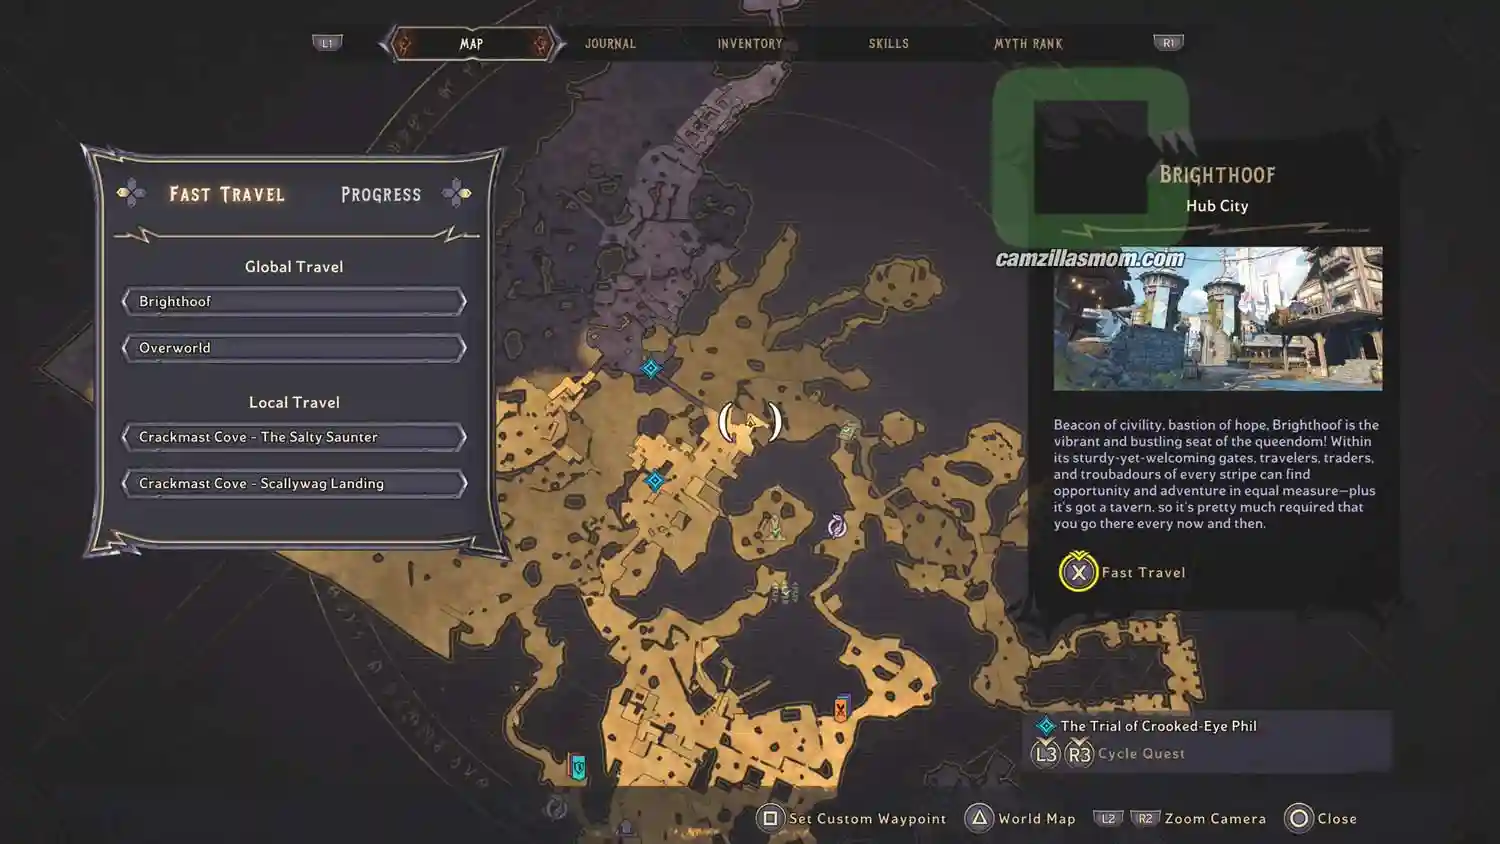
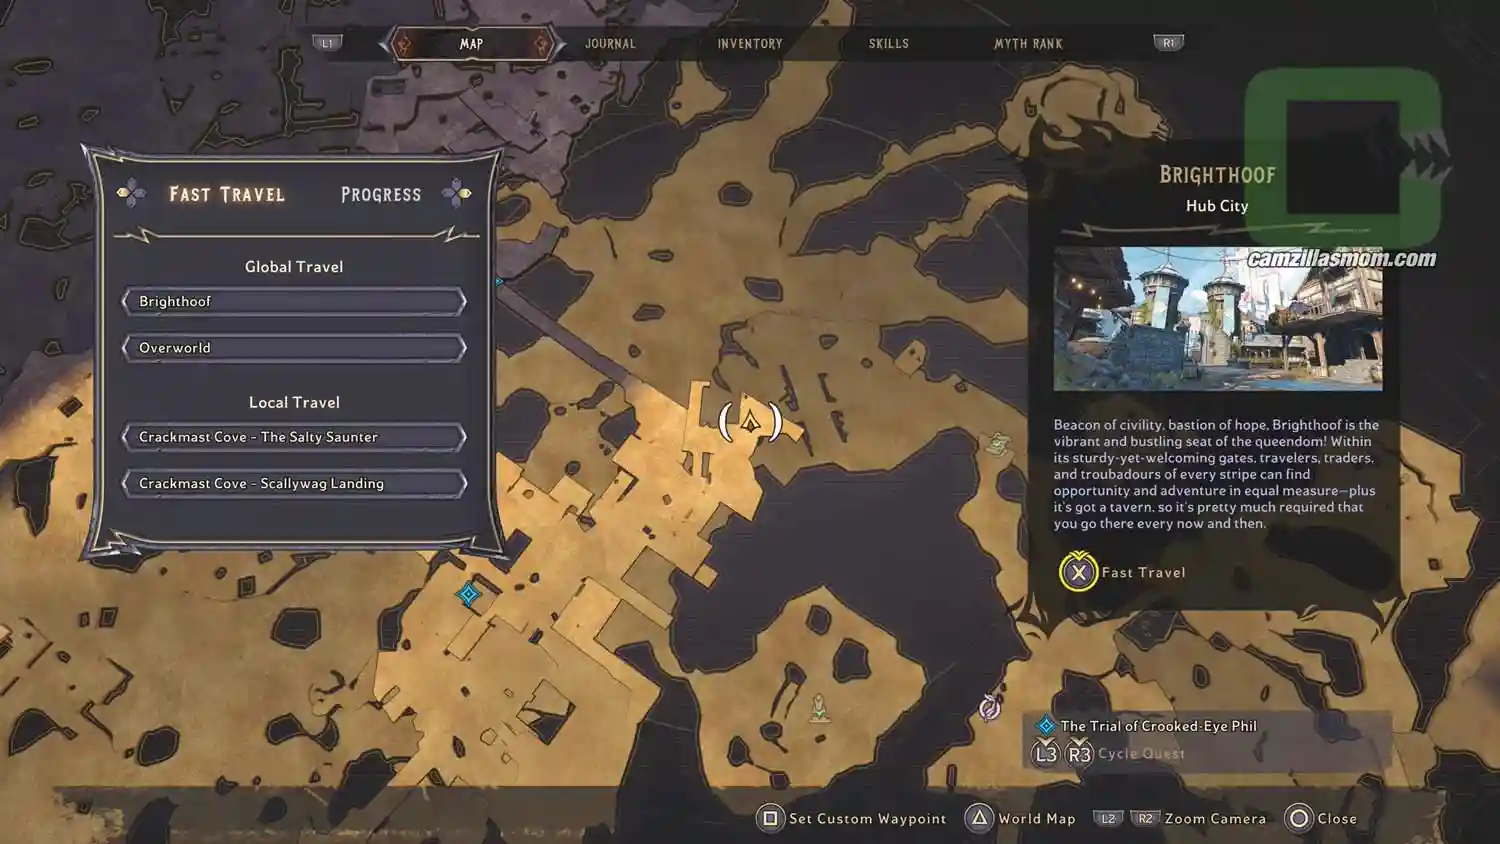
› camzillasmom.com
› camzillasmom.com
› camzillasmom.com
› camzillasmom.com

3 – Misjudgement

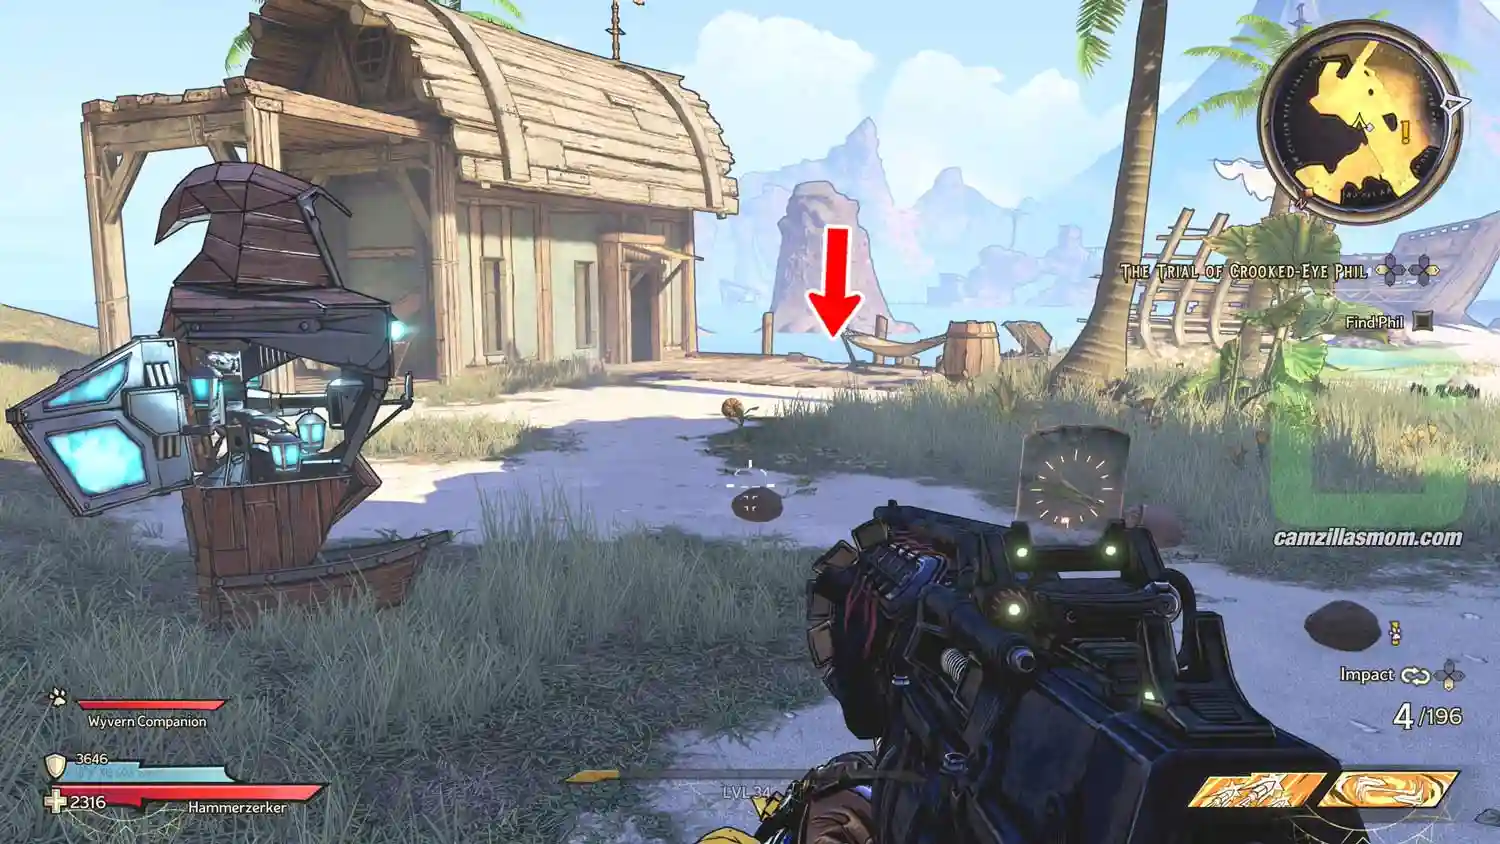
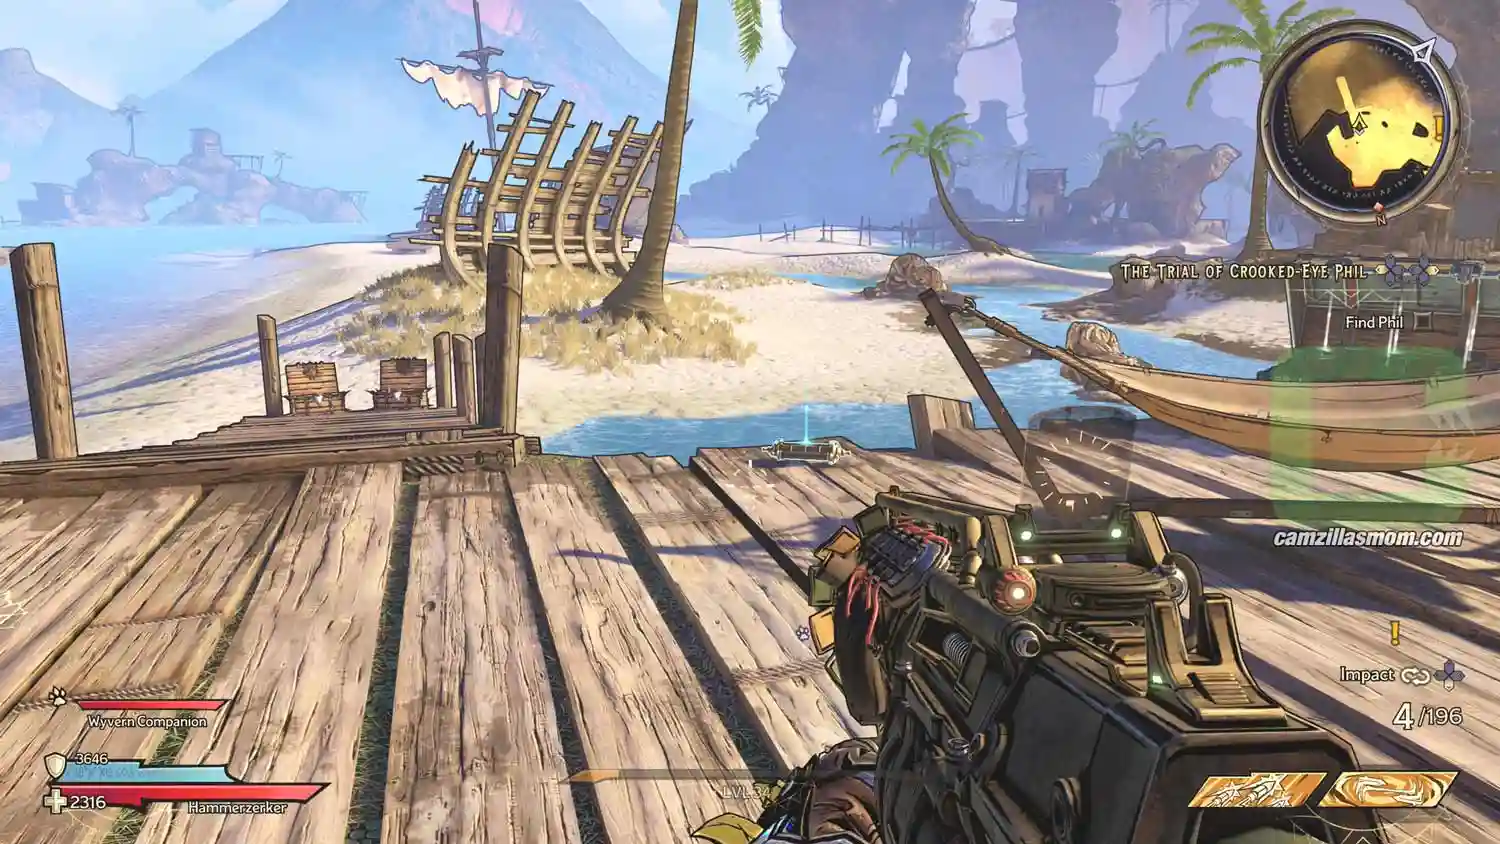
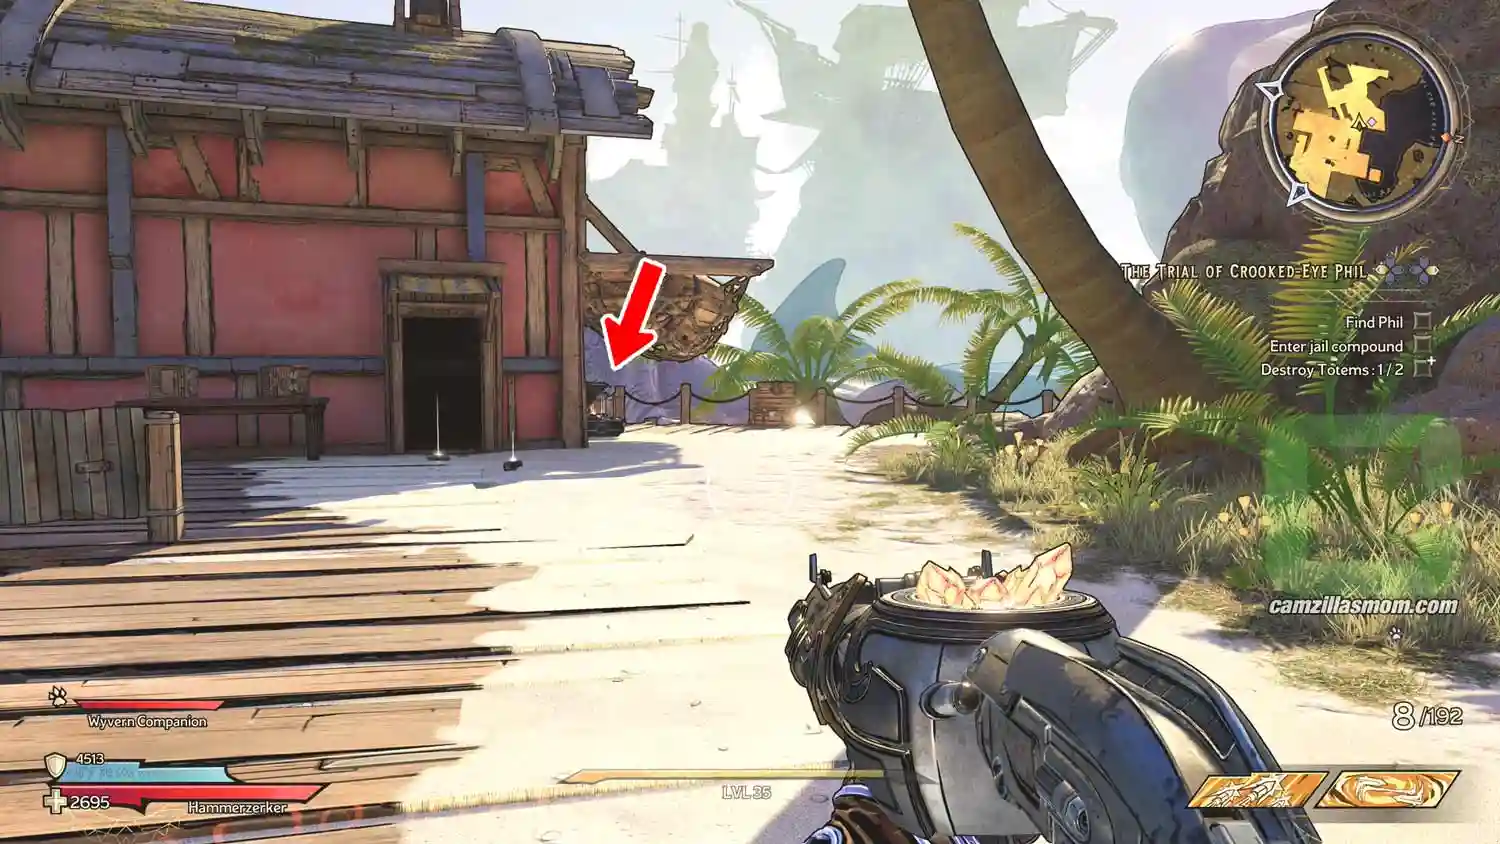
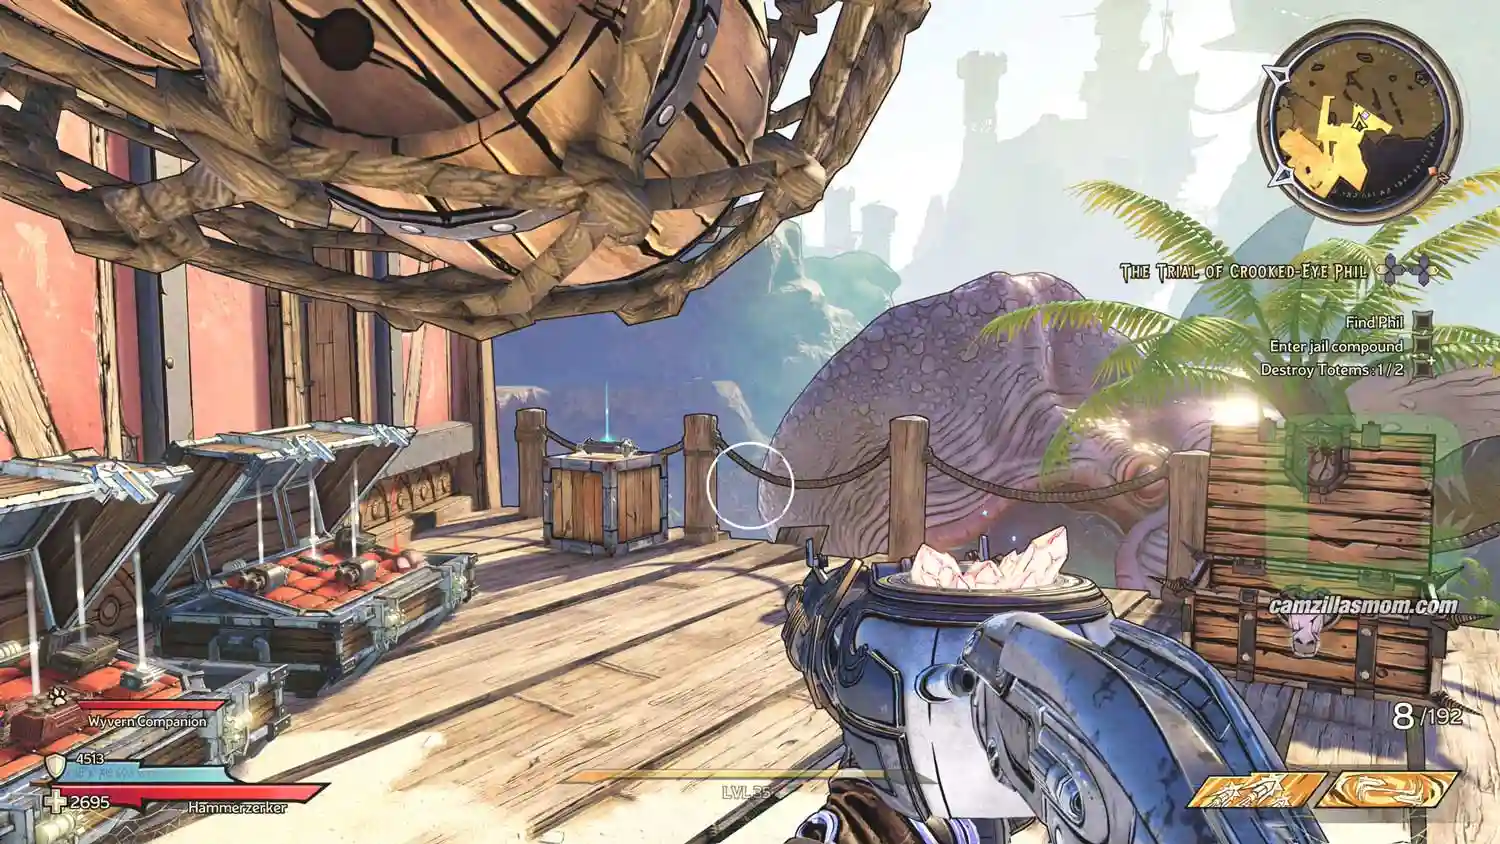
Go up to the “Judgment’s Wait” Settlement, where you meet Phil from the Side Quest the first time. Here, behind the red house at the top is the scroll.
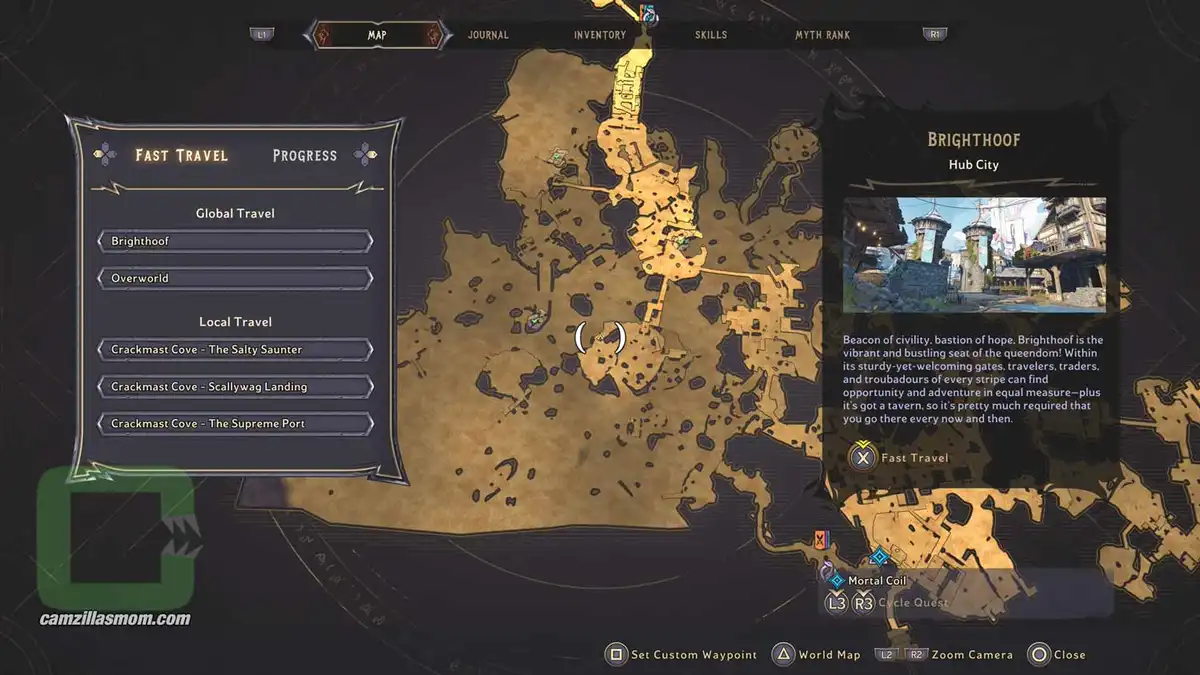
The zoomed-out map showing the Misjudgement Lore Scroll. › camzillasmom.com
The zoomed-in map showing the Misjudgement Lore Scroll. › camzillasmom.com
Screenshot showing the Misjudgement Lore Scroll highlighted behind the red house. › camzillasmom.com
Screenshot showing the exact Lore Scroll location. › camzillasmom.com

4 – The Legend of Pookie

Just by the “Scalliwag Landing” Fast Travel Point behind the cannon.
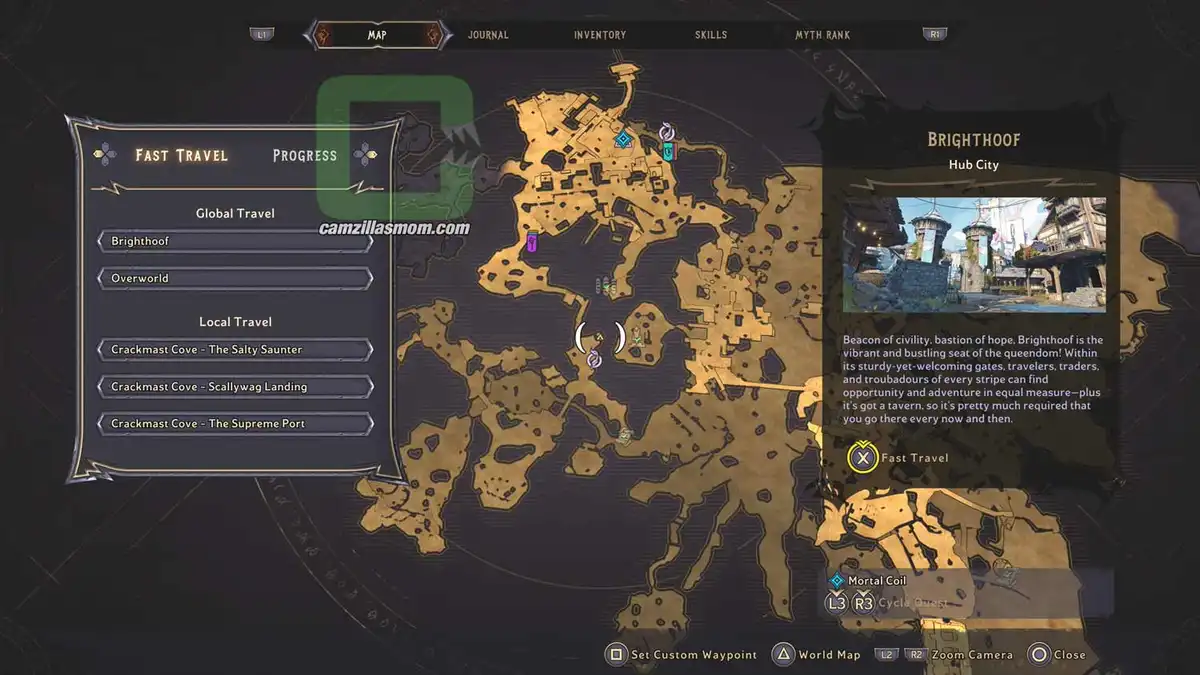
The zoomed-out map showing the Legend of Pookie Lore Scroll. › camzillasmom.com
The zoomed-in map showing the Legend of Pookie Lore Scroll. › camzillasmom.com
Screenshot is highlighting the canon in front of the Lore Scroll. › camzillasmom.com
Screenshot showing the Legend of Pookie Lore Scroll location. › camzillasmom.com

5 – Twin C’est La Vie

The scroll is at the pier overlooking “Bonethrow Bay”.

The zoomed-out map showing the Twin C › camzillasmom.com'est La Vie Lore Scroll.
The zoomed-in map showing the Twin C › camzillasmom.com'est La Vie Lore Scroll.
Screenshot showing the pier from afar. › camzillasmom.com
Screenshot showing the Pier with the Lore Scroll. › camzillasmom.com

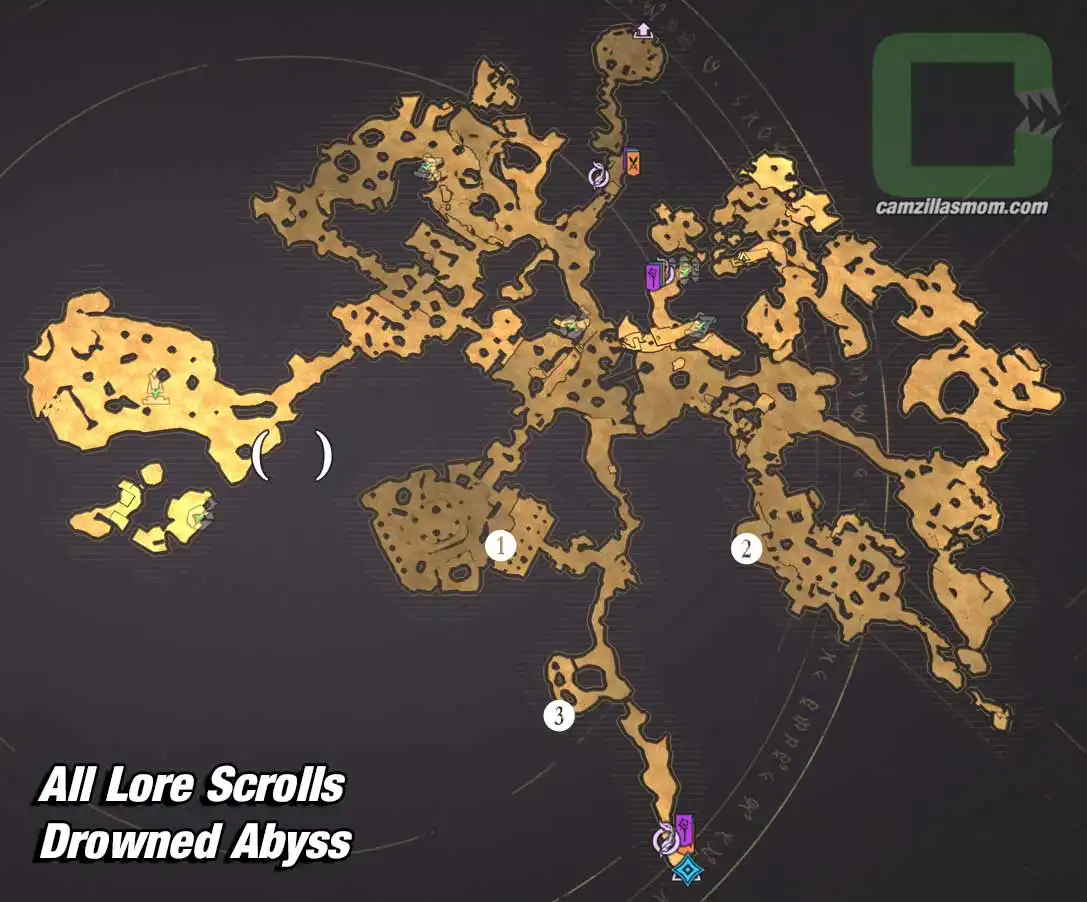
Drowned Abyss Overview Map

Drowned Abyss overview map with 3 Lore Scrolls collectibles highlighted. › camzillasmom.com

1 – Climbing the Ladder
2 – Consequences
3 – Unheeded

1 – Climbing the Ladder

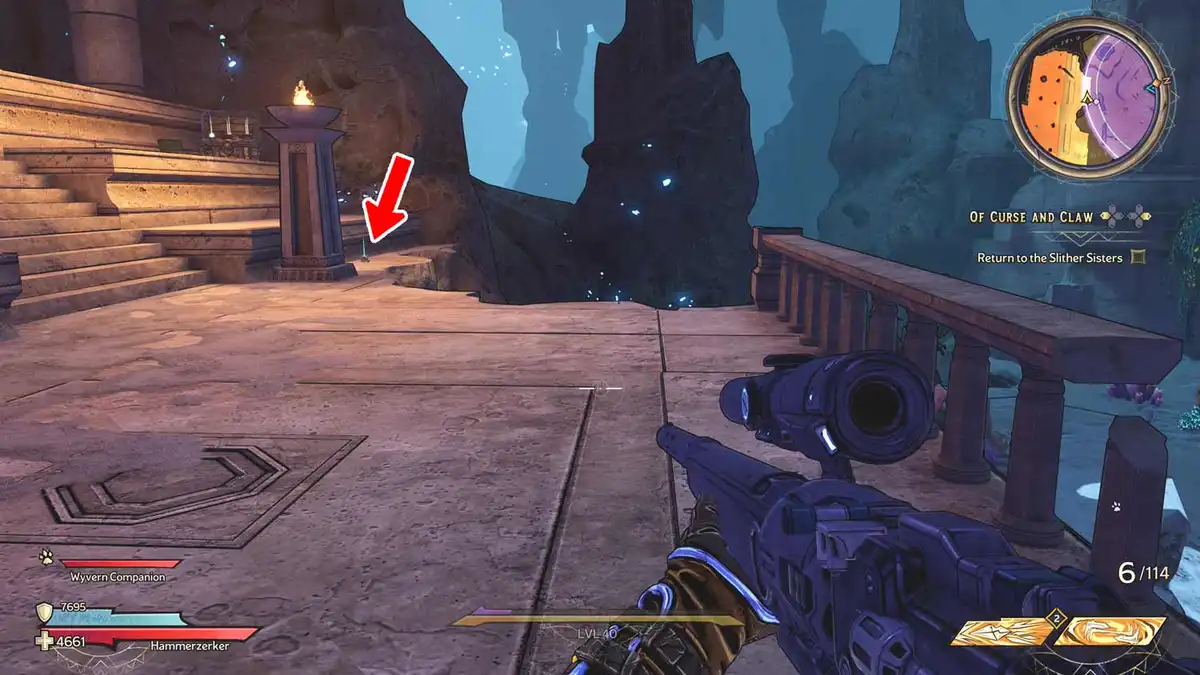
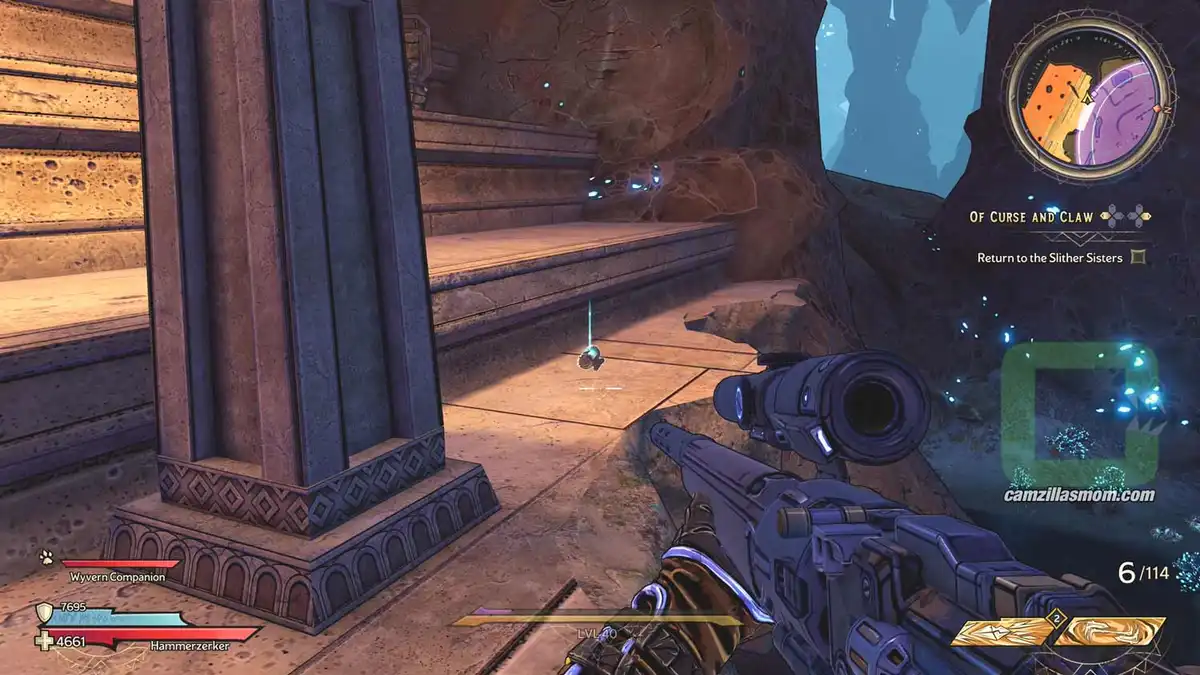
This scroll is in the upper part of the “Temple of the Slithersong”. You will be able to access this part when doing the “Of Curse and Claw” Side Quest.
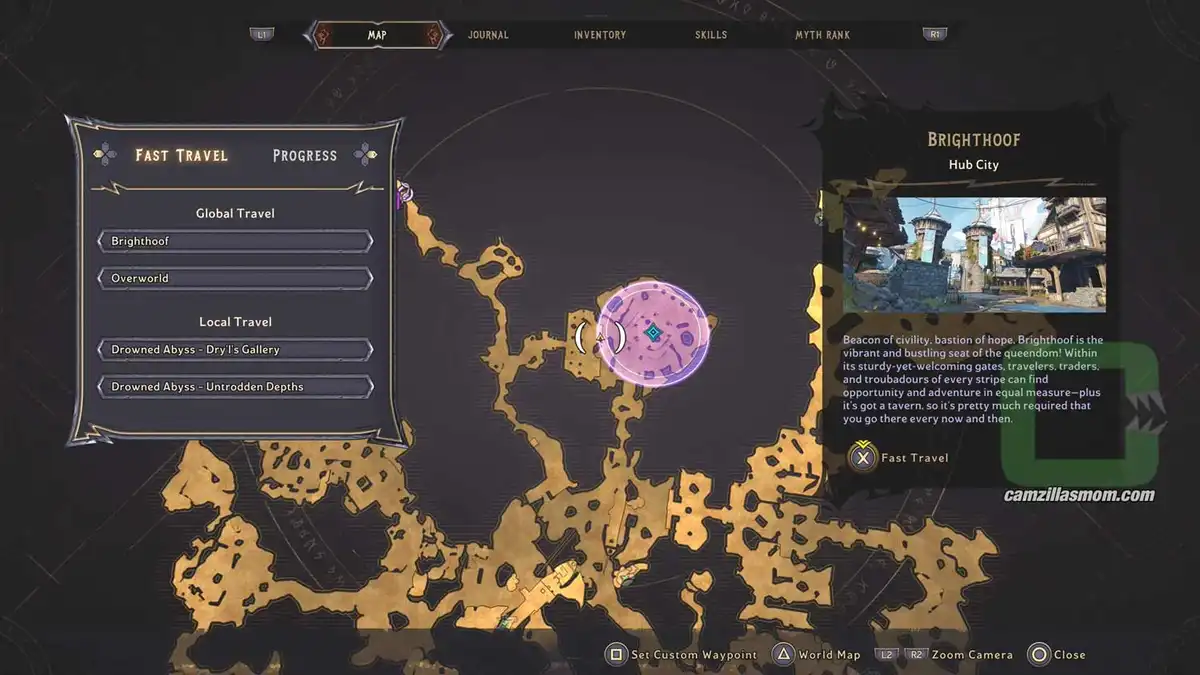
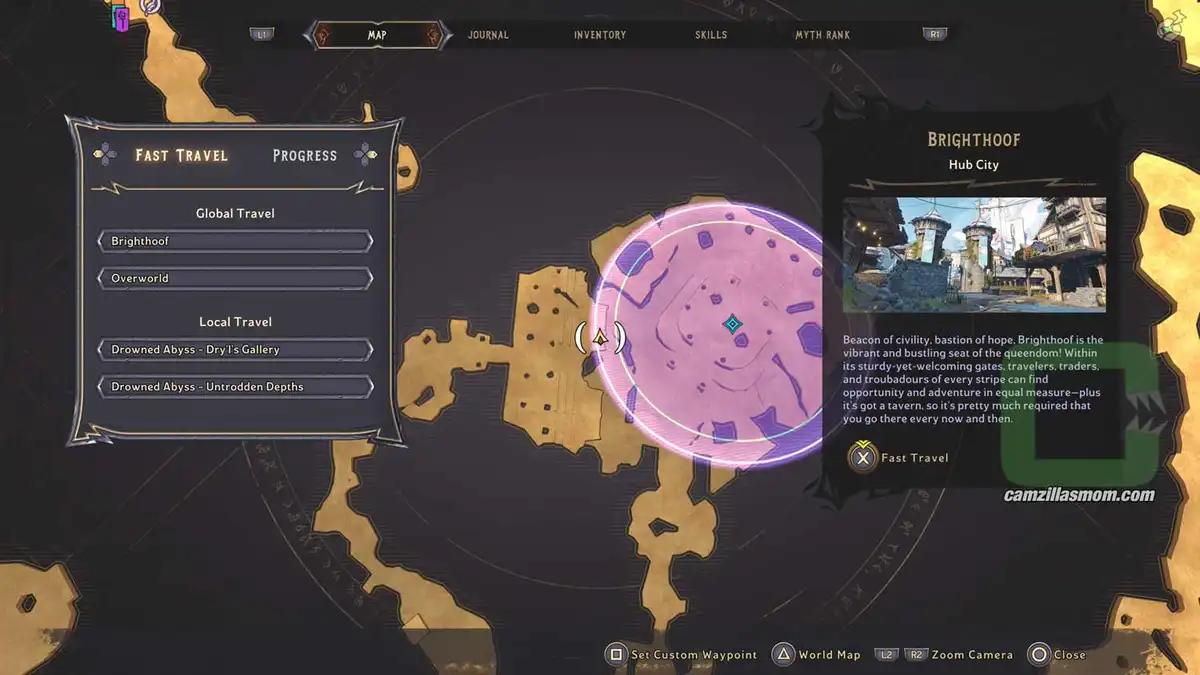
The zoomed-out map showing the Climbing the Ladder Lore Scroll. › camzillasmom.com
The zoomed-in map showing the Climbing the Ladder Lore Scroll. › camzillasmom.com
Screenshot of the Lore Scroll on the temple floor from afar. › camzillasmom.com
Closer screenshot of the same Lore Scroll on the temple floor. › camzillasmom.com

2 – Consequences

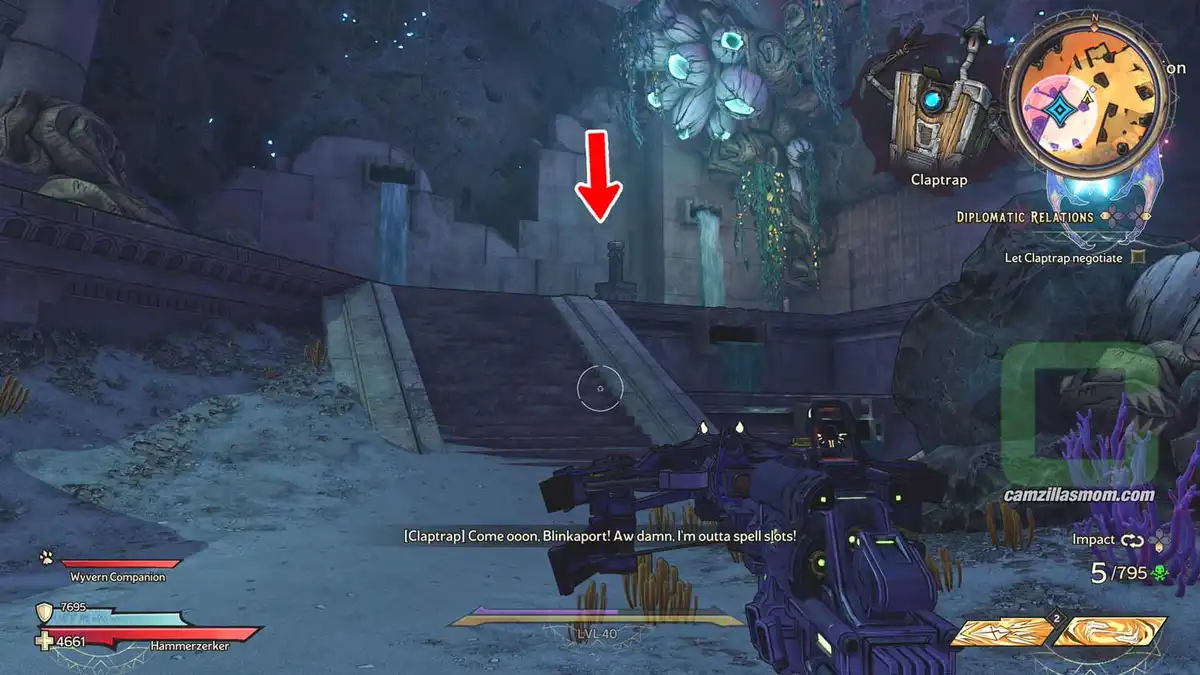
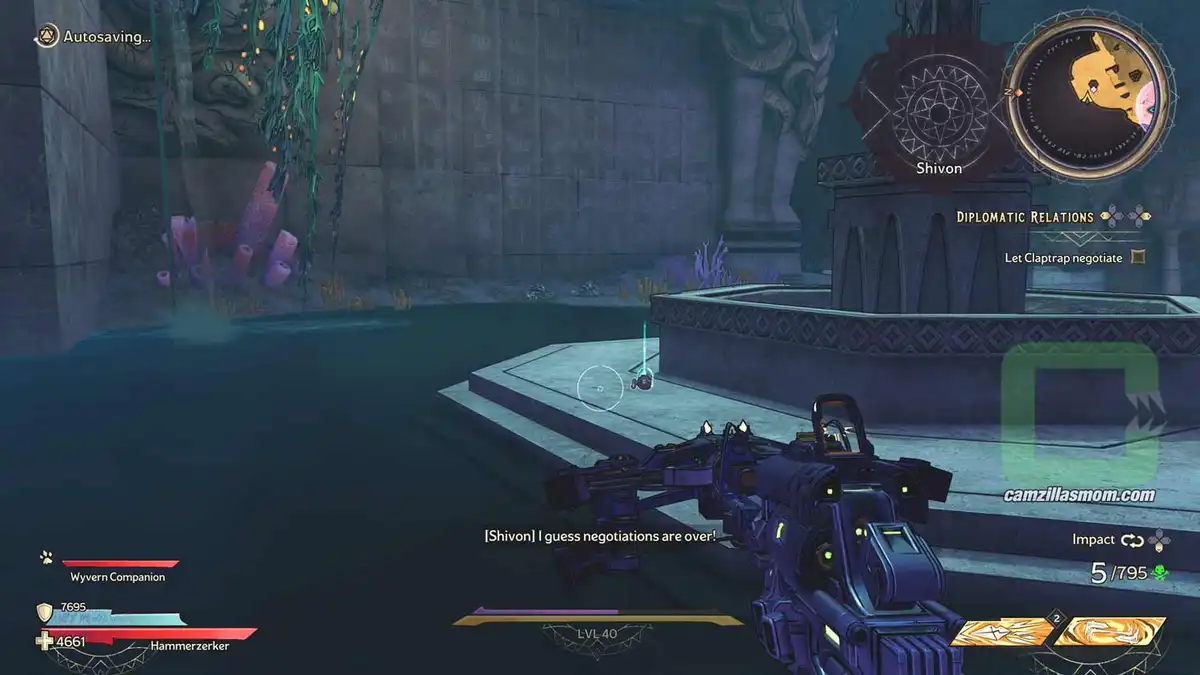
While doing the Side Mission with Claptrap, you will gain access to “Oncewet Court”. Here, behind a fountain is the scroll.
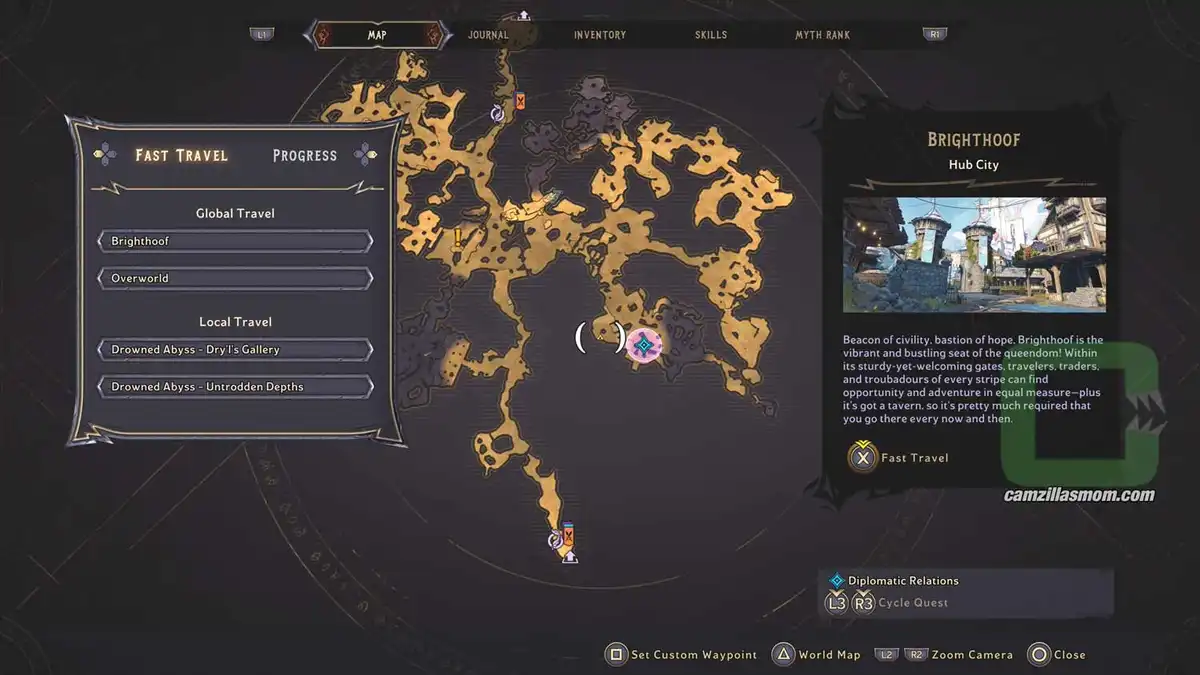
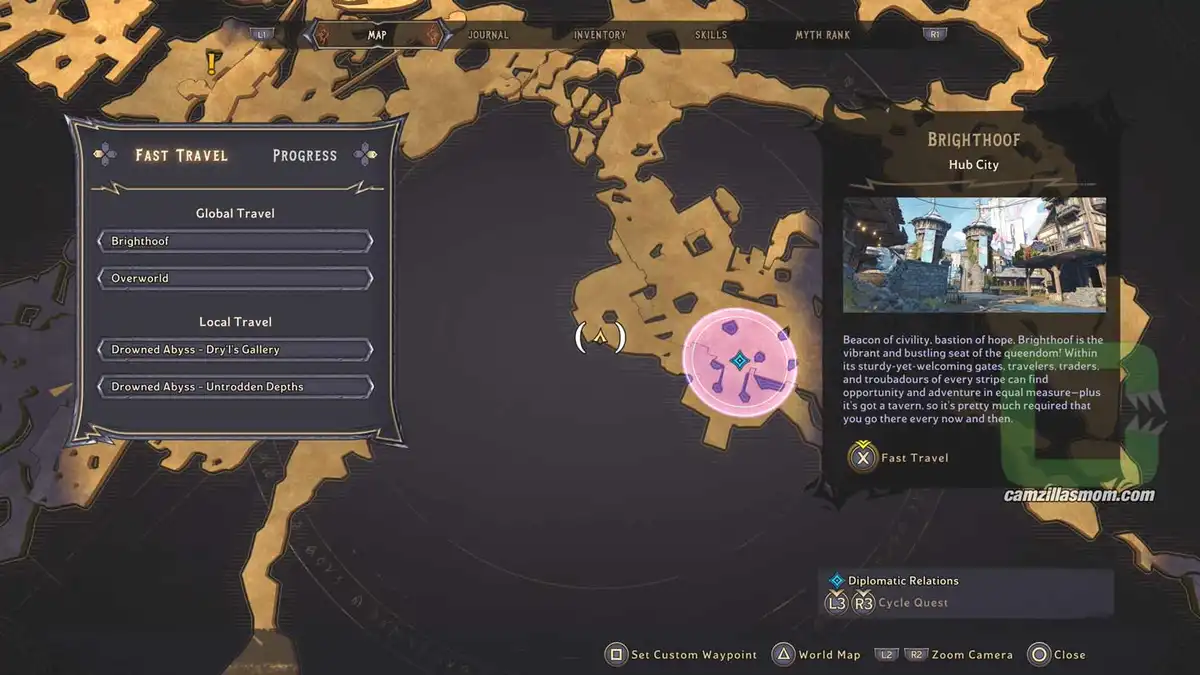
The zoomed-out map showing the Consequences Lore Scroll. › camzillasmom.com
The zoomed-in map showing the Consequences Lore Scroll. › camzillasmom.com
Screenshot highlighting the Lore Scroll at the top of the stairs. › camzillasmom.com
Screenshot showing the Lore Scroll by the fountain. › camzillasmom.com

3 – Unheeded

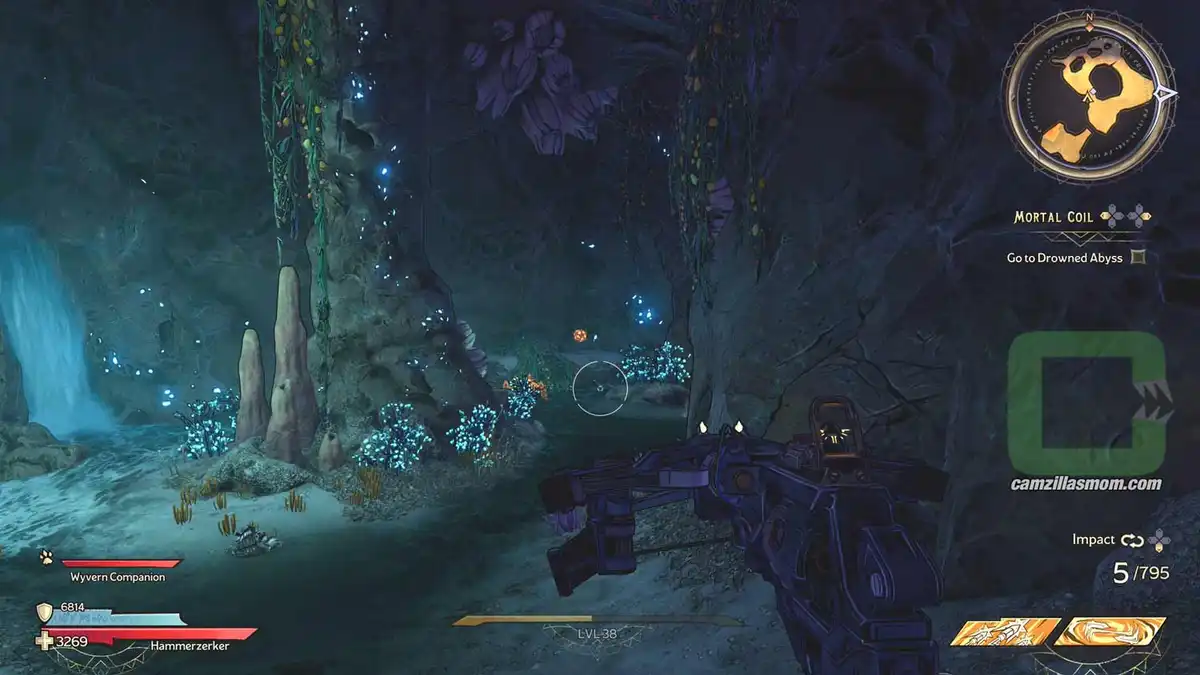
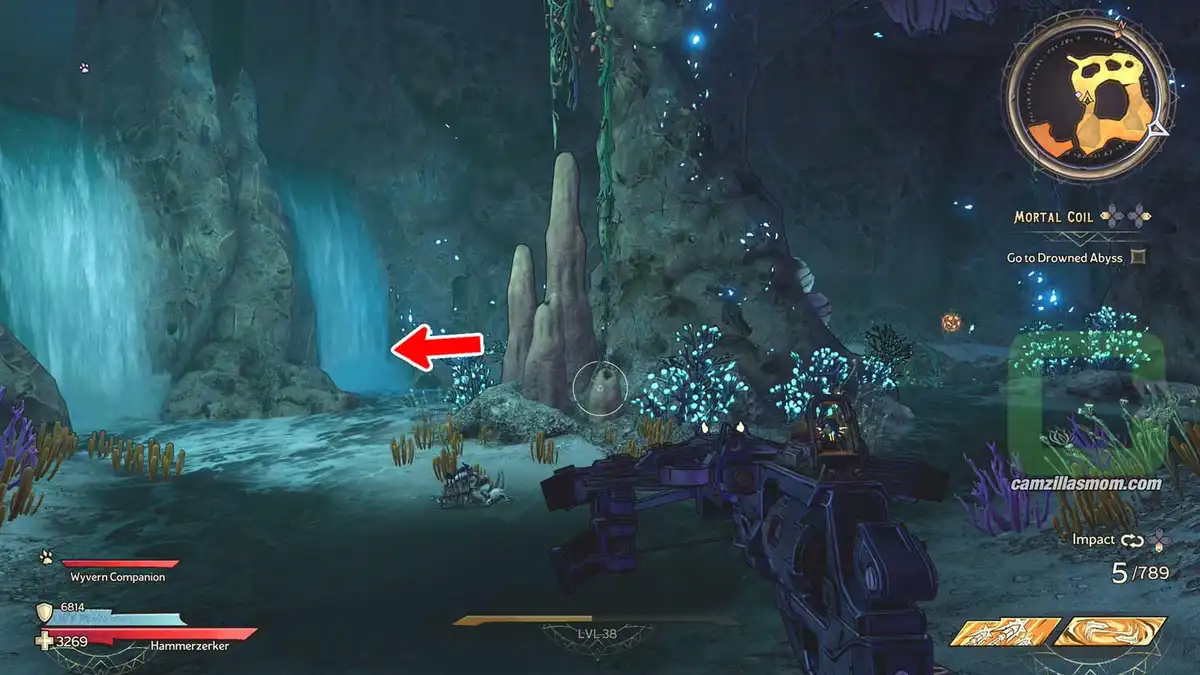
Near the Drowned Abyss entrance is a black, red glowing wall you can destroy to the left. Do so and it opens a passage. You can even see a Lucky Dice in there. Next to the Dice is a waterfall. Walk through and you will find this scroll.
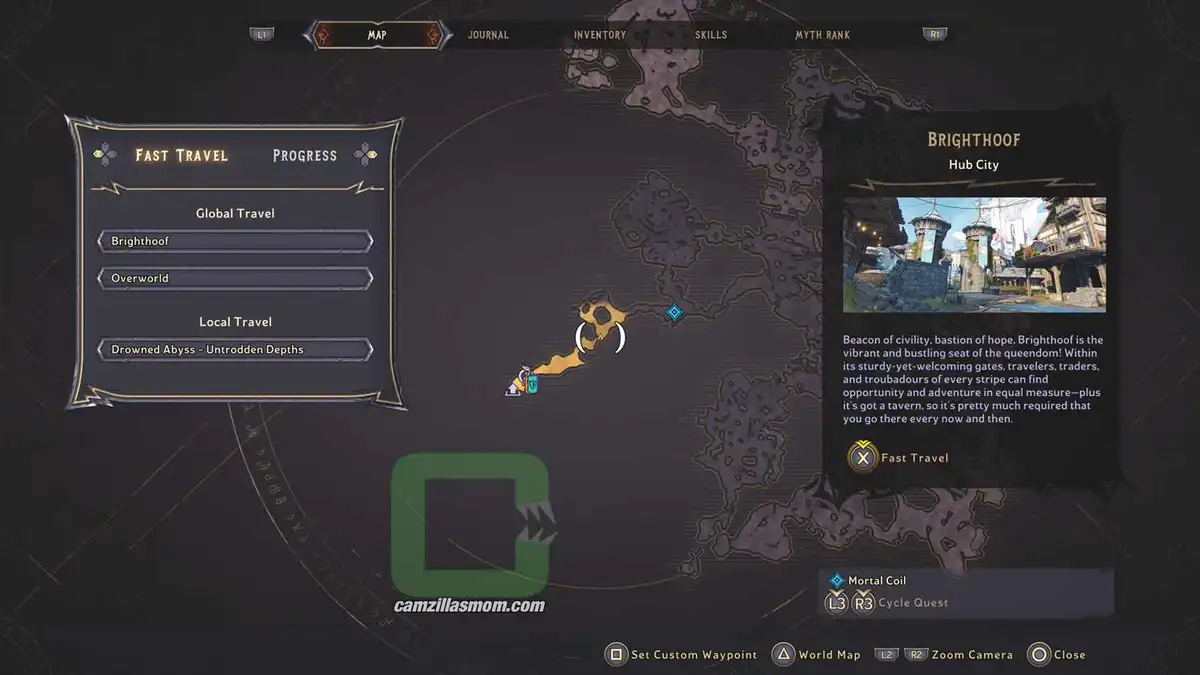
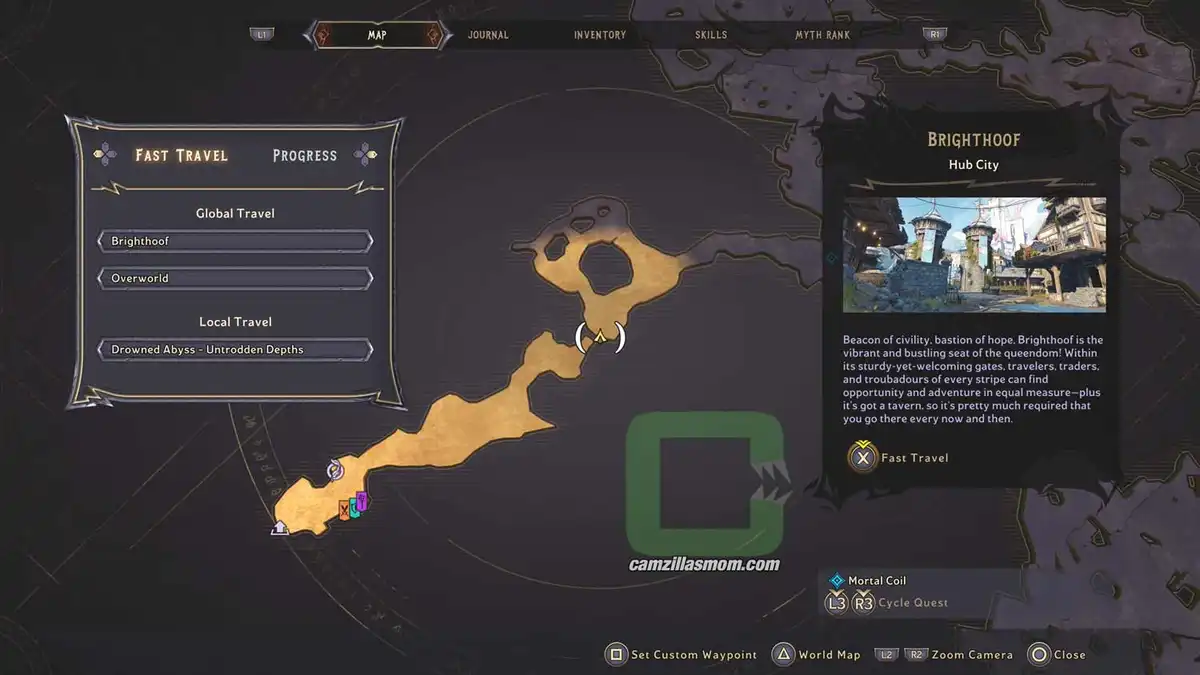
The zoomed-out map showing the Unheeded Lore Scroll. › camzillasmom.com
The zoomed-in map showing the Unheeded Lore Scroll. › camzillasmom.com
Screenshot showing the passage to the Lore Scroll. › camzillasmom.com
Screenshot showing the waterfall near the Lucky Dice. › camzillasmom.com

Karnok’s Wall Overview Map

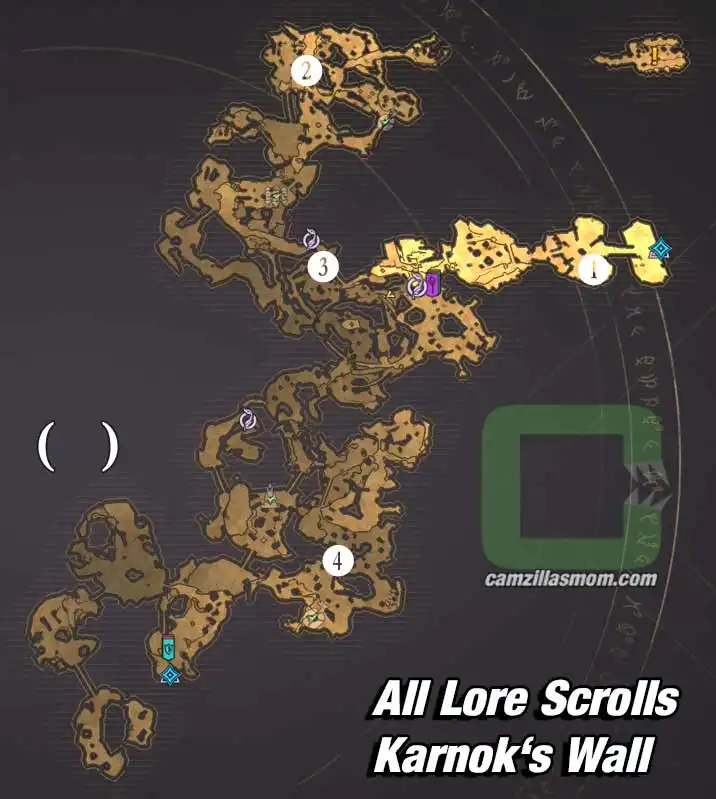
Karnok › camzillasmom.com's Wall overview map with 4 Lore Scrolls collectibles locations highlighted.

1 – Bitter and Happy
2 – Cinder
3 – History of Kwartz
4 – Miner Dispute

1 – Bitter and Happy

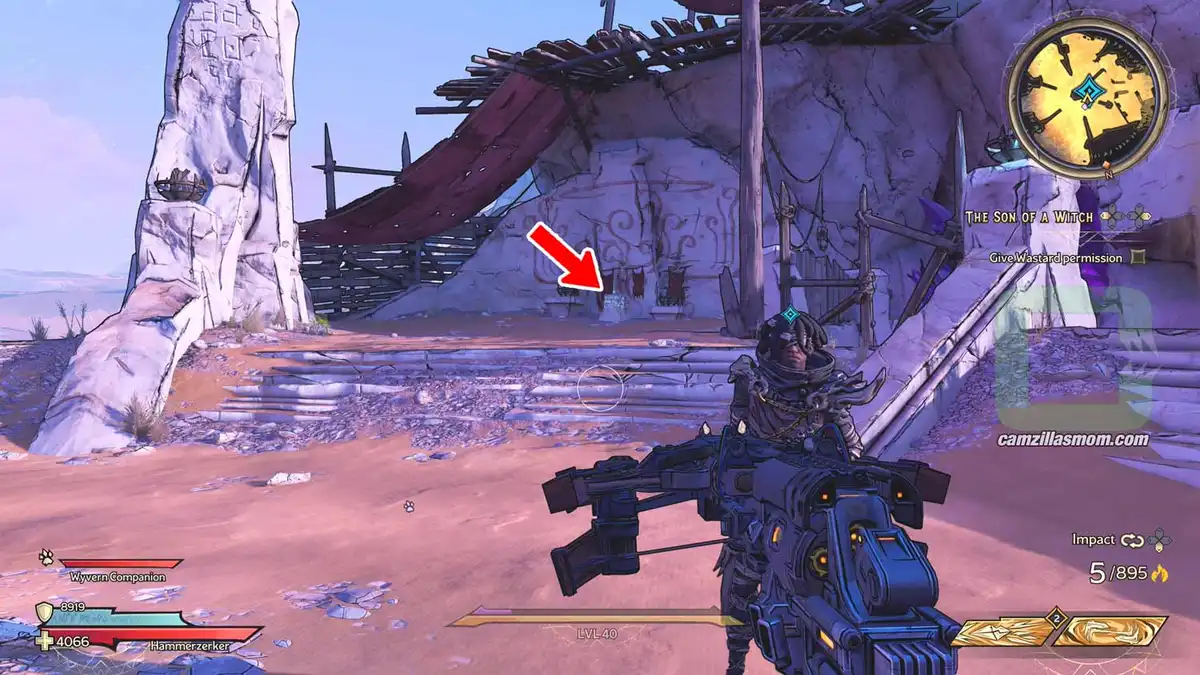
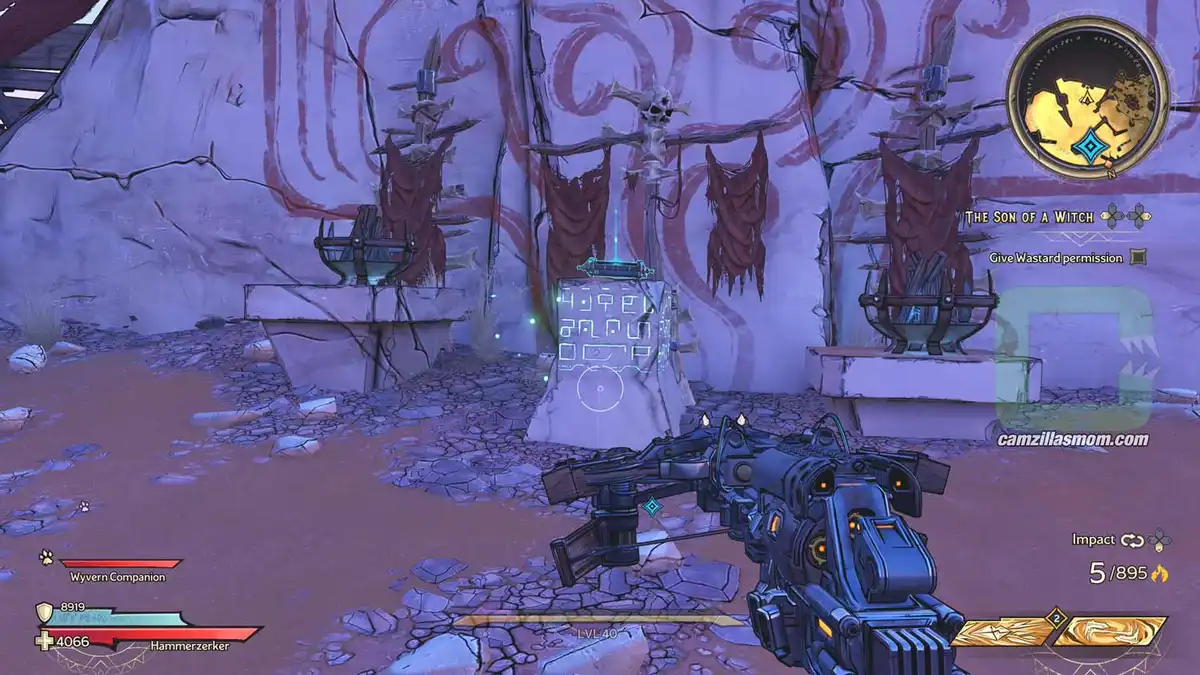
Just after “Positive Headspace”, where you give Wastard the permission is a little altar with this scroll.
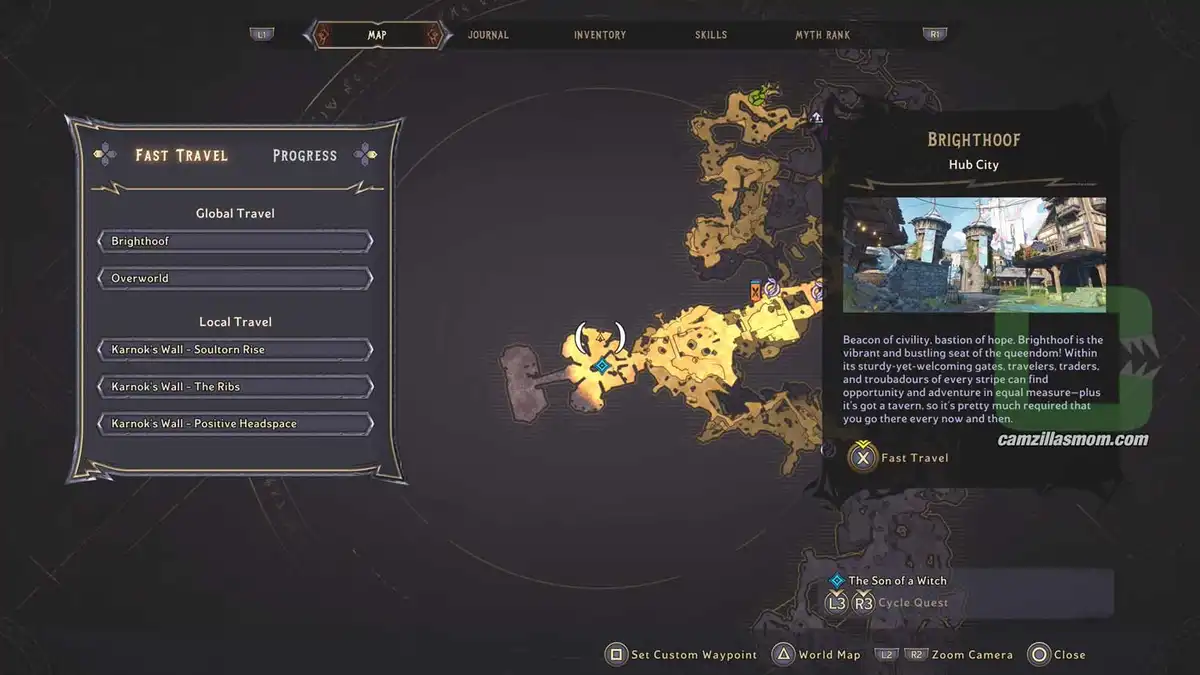
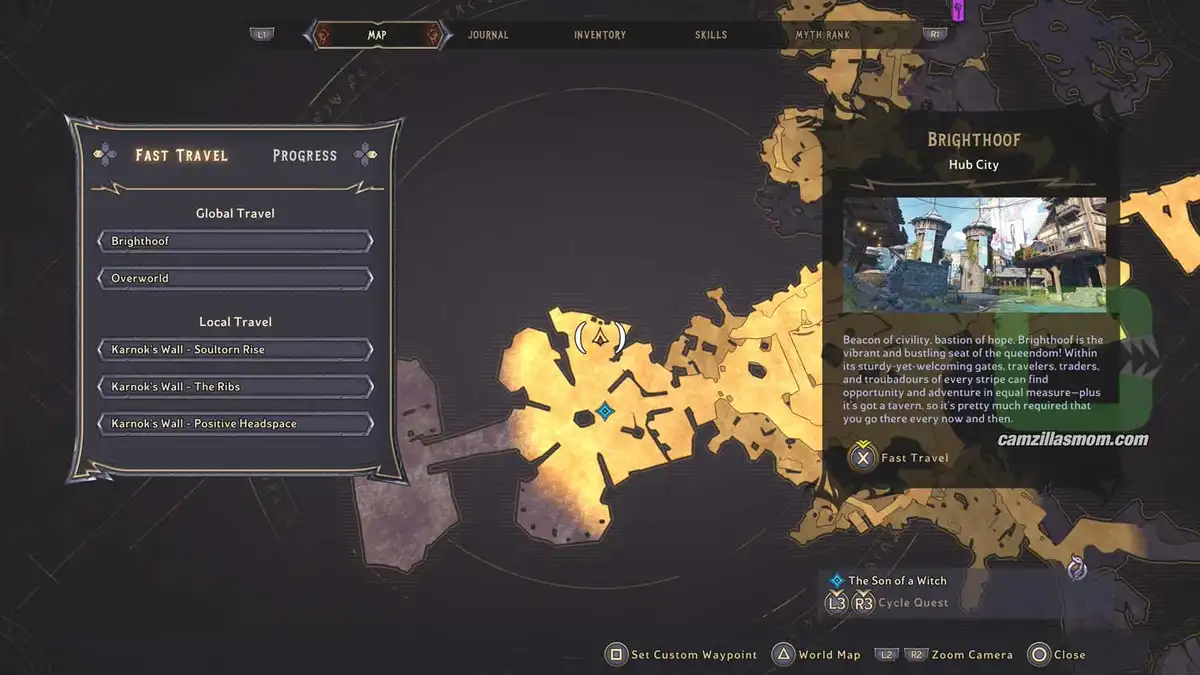
The zoomed-out map showing the Bitter and Happy Lore Scroll location. › camzillasmom.com
The zoomed-in map showing the Bitter and Happy Lore Scroll location. › camzillasmom.com
Screenshot is highlighting the Lore Scroll Location on the altar. › camzillasmom.com
Closer screenshot showing the Lore Shot clearly on the altar. › camzillasmom.com

2 – Cinder

Travel to “The Ribs”. From there, go all the way up in “The Dreadspine”, through the door you had to open with two keys in the Side Quest. Your target destination is the top, where wyvern attack you. So destroy those blackish red wooden walls so you can get there. Once at the wyvern’s, turn left and go all the way to the back. There in the corner is the scroll.

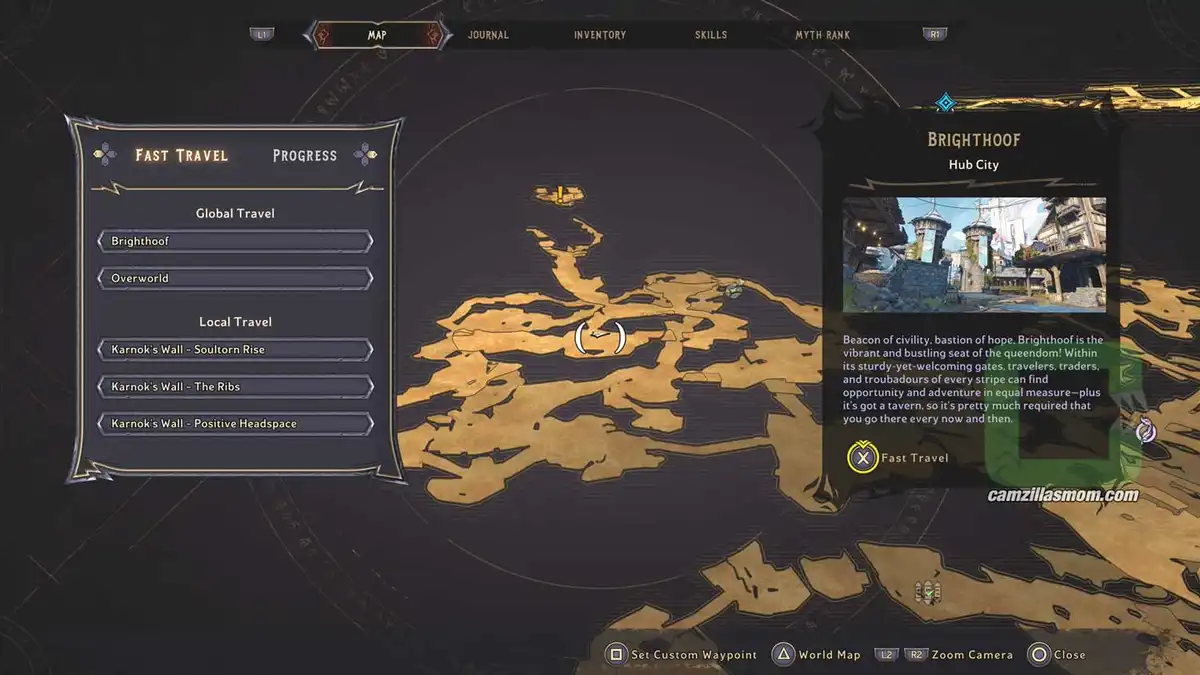
The zoomed-out map showing the Cinder Lore Scroll location. › camzillasmom.com
The zoomed-in map showing the Cinder Lore Scroll location. › camzillasmom.com
Screenshot highlighting the path to the Wyvern. › camzillasmom.com
Screenshot showing the location of the Cinder Lore Scroll. › camzillasmom.com

3 – History of Kwartz

Fast Travel to “The Ribs” and walk to the south towards the Mines. After the second bridge, turn around and look underneath it. The scroll is there. Also visible by that little ledge on the Minimap.

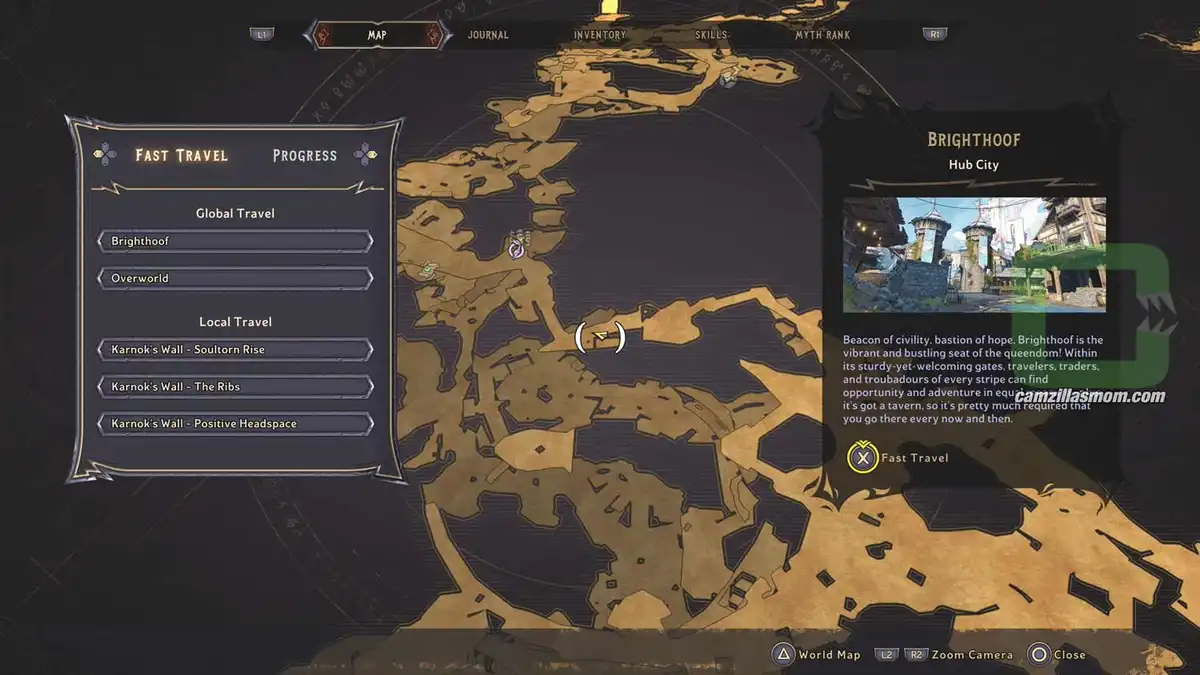
The zoomed-out map showing the History of Kwartz Lore Scroll location. › camzillasmom.com
The zoomed-in map showing the History of Kwartz Lore Scroll location. › camzillasmom.com
Screenshot showing the bridge, where the Lore Scroll is hidden. › camzillasmom.com
Screenshot showing the Lore Scroll under the bridge. › camzillasmom.com

4 – Miner Dispute

Fast Travel to “The Ribs” and go all the way to “Fort Calcium”. There is an area where those two nail traps are on the floor. On the other side, in the story, you have to shoot the floating crystal island to cross over the ledge. This time, just get onto the island and shoot it again. It will move up again. Climb the hanging platform and from there onto the ledge with a red chest and the scroll.
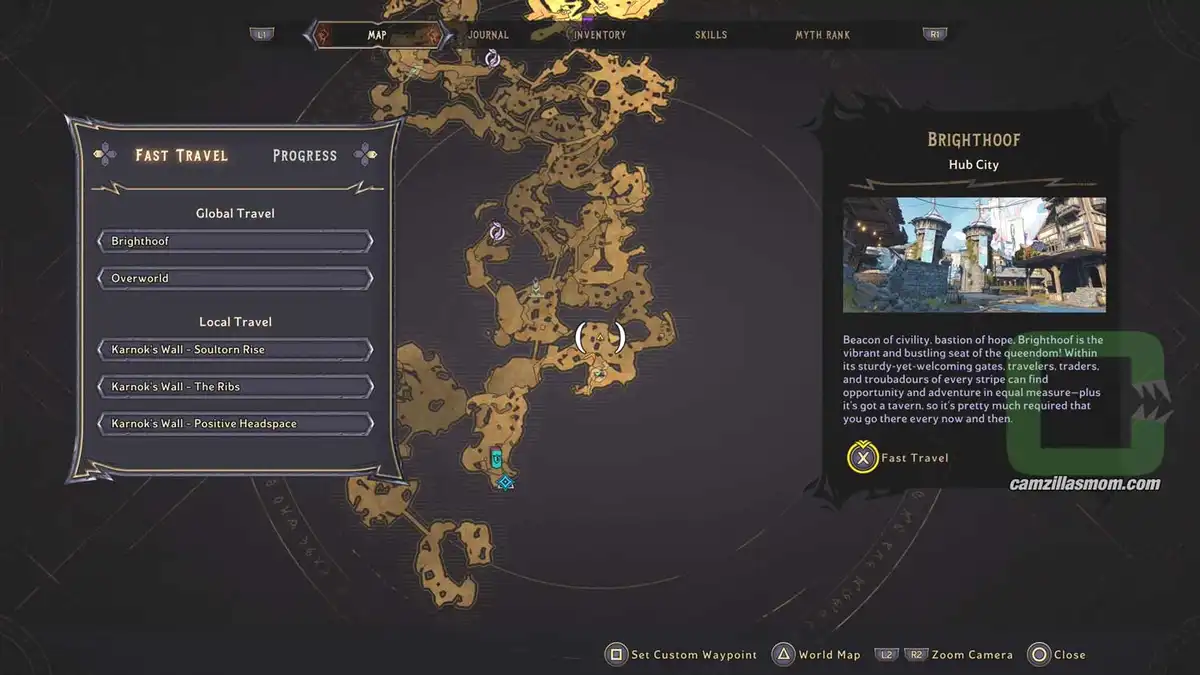
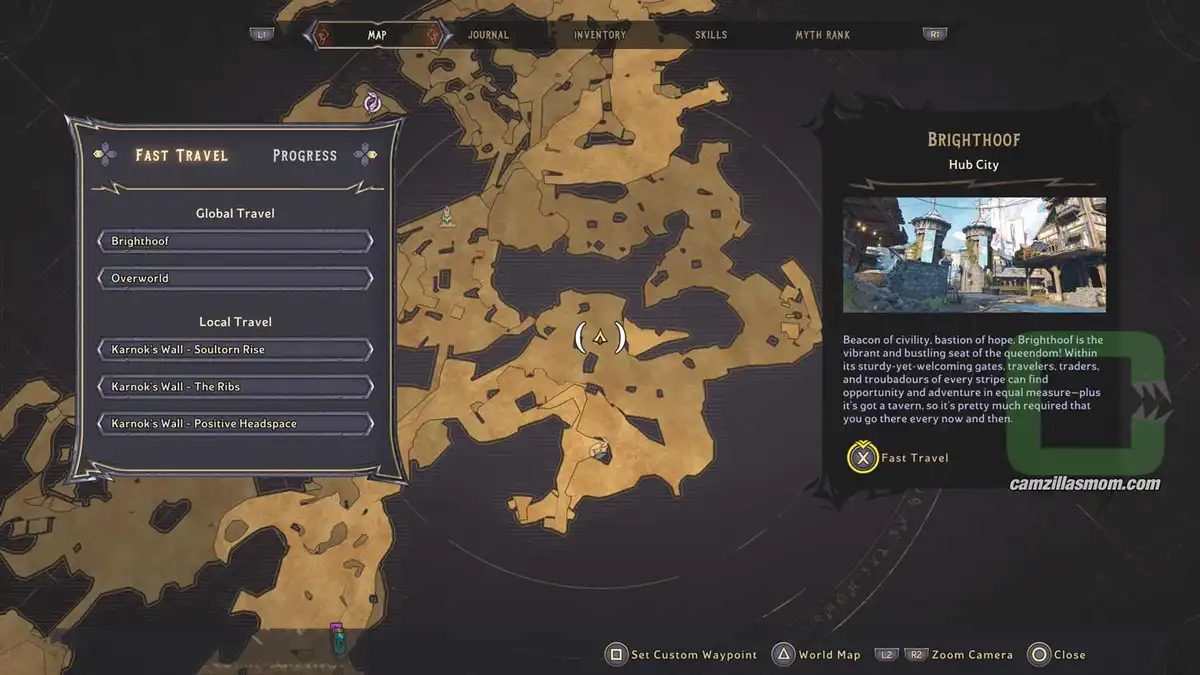
The zoomed-out map showing the Miner Dispute Lore Scroll location. › camzillasmom.com
The zoomed-in map showing the Miner Dispute Lore Scroll location. › camzillasmom.com
Screenshot of the path the player needs to take to reach the Lore Scroll. With arrows showing the way. › camzillasmom.com
Screenshot showing the red chest and the Lore Scroll. › camzillasmom.com

Mount Craw Overview Map

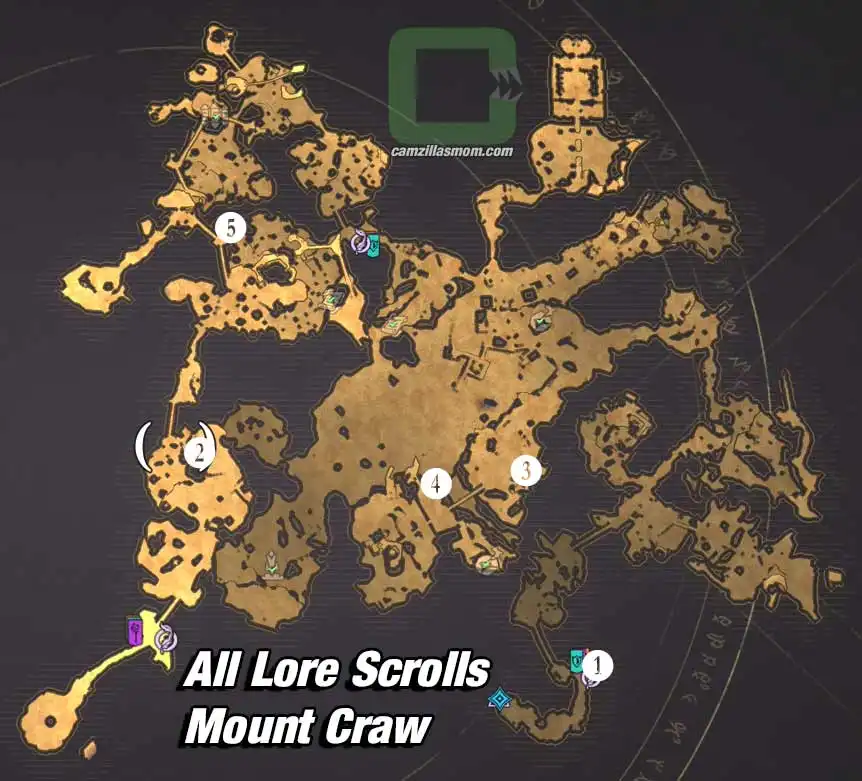
Mount Craw overview map with 5 Lore Scrolls collectibles locations highlighted. › camzillasmom.com

1 – A Jar
2 – Expeditious Entreat
3 – Fleedom
4 – Get the Freak Out
5 – It’s a Nose Ring Thing

1 – A Jar

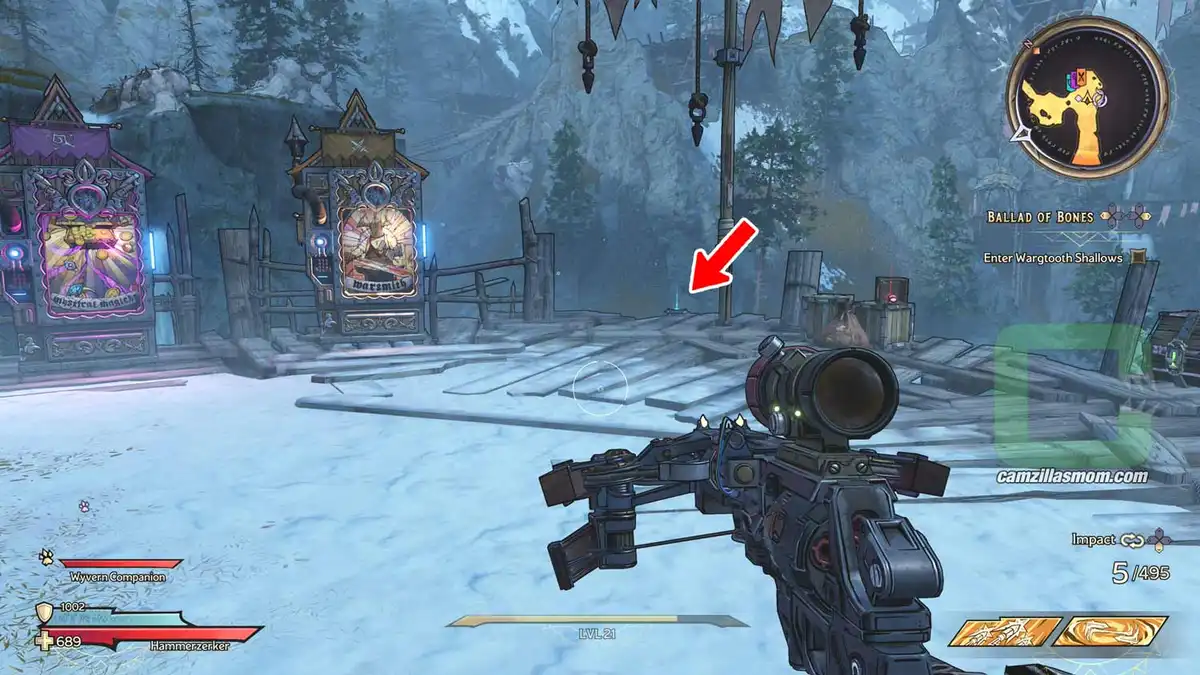
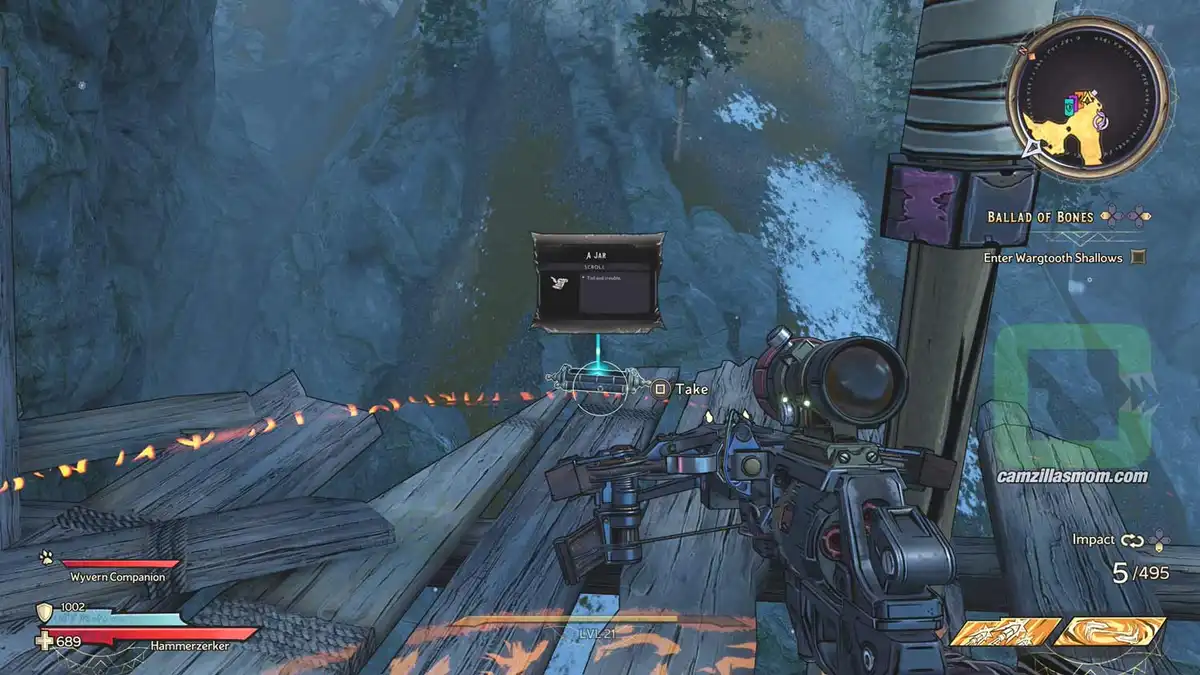
The Lore Scroll couldn’t be easier to find: It’s at the “Craw’s Craw” Fast Travel Point next to the vending machines.

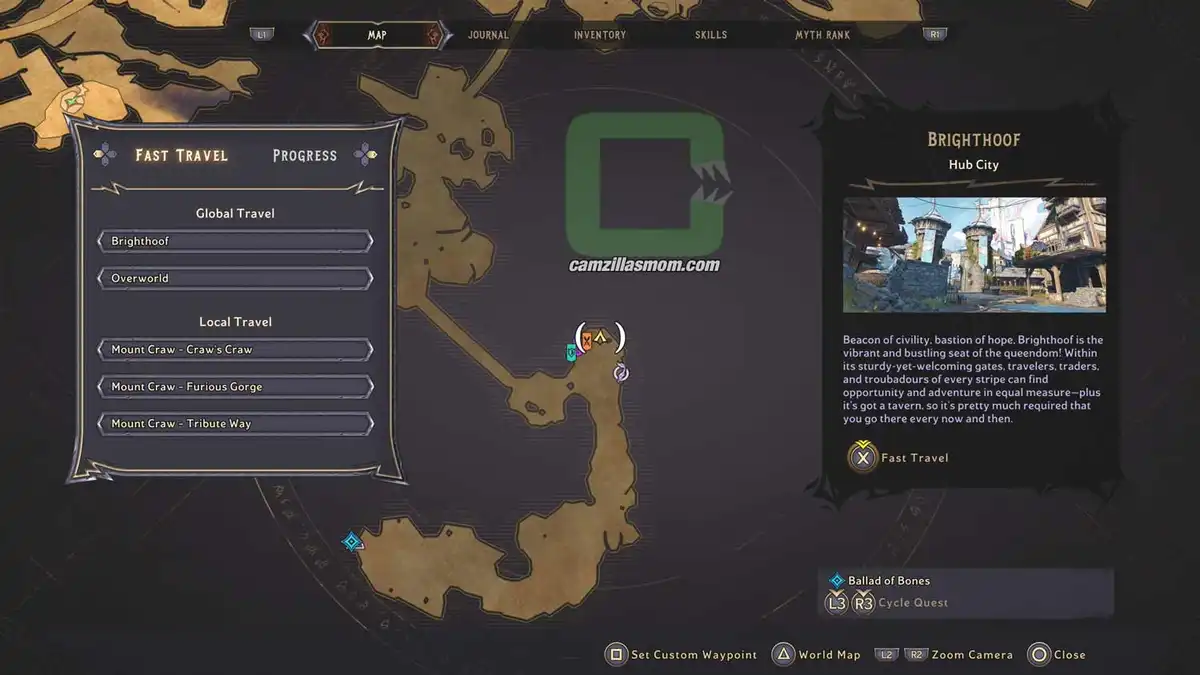
The zoomed-out map showing the A Jar Lore Scroll location at Mount Craw. › camzillasmom.com
The zoomed-in map showing the A Jar Lore Scroll location at Mount Craw. › camzillasmom.com
Screenshot highlighting the Lore Scroll next to the vending machines. › camzillasmom.com
Close-up screenshot of the Lore Scroll › camzillasmom.com's location.

2 – Expeditious Entreat

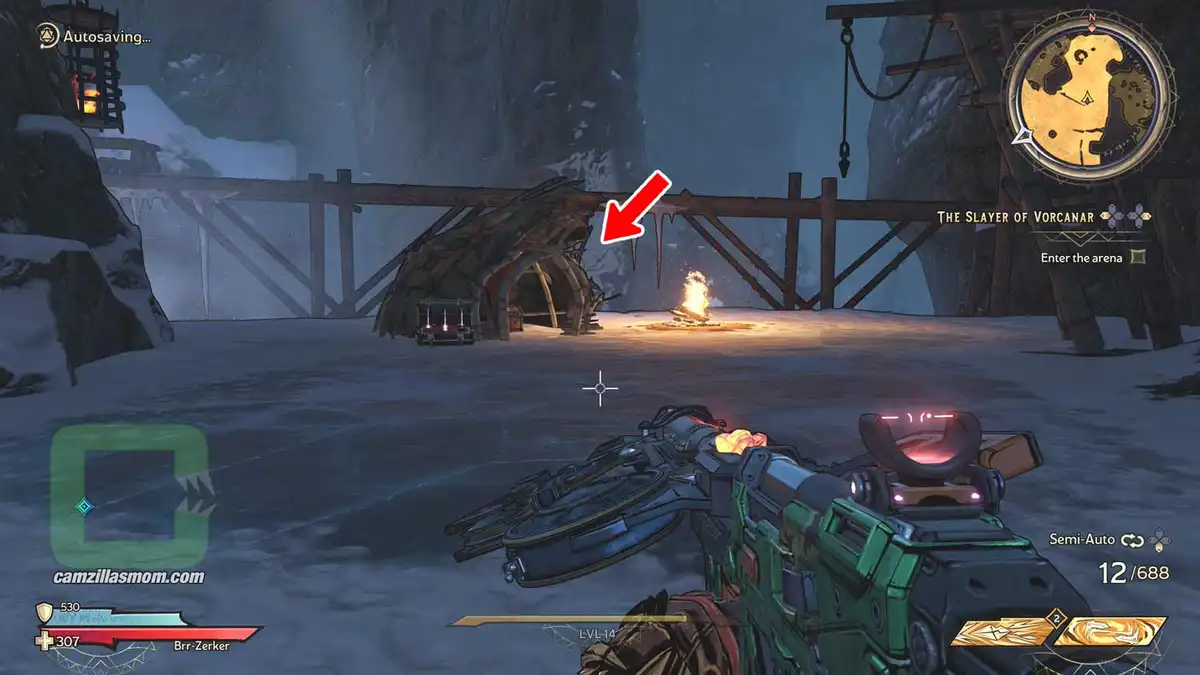
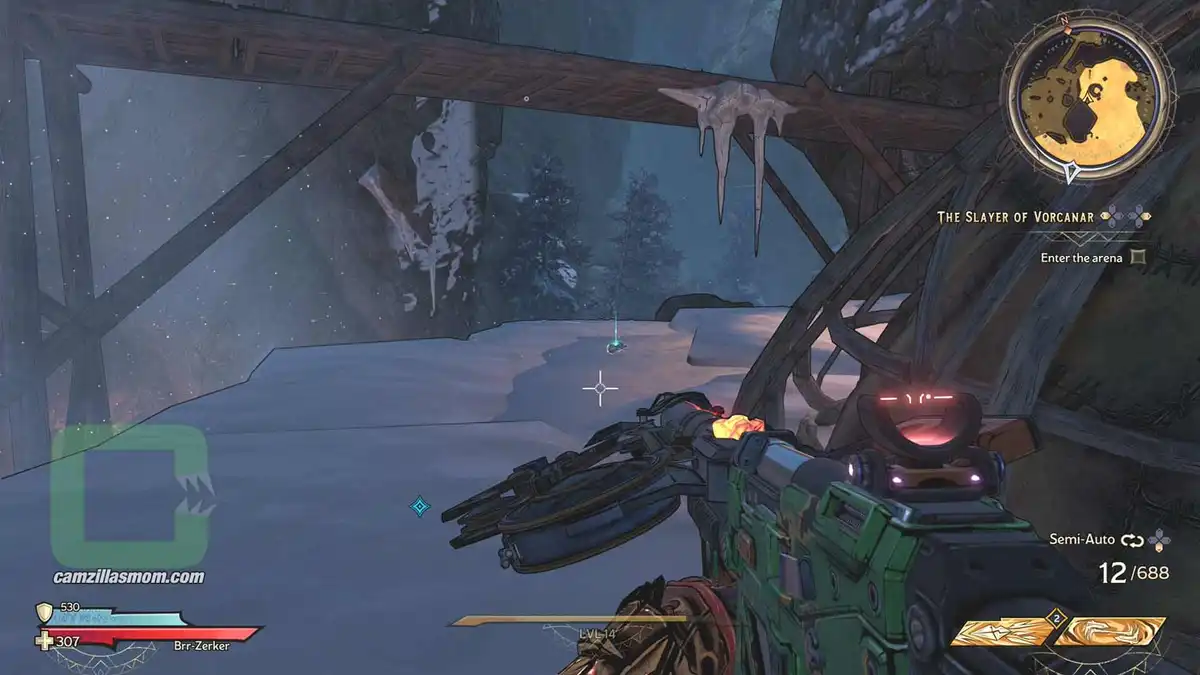
This Lore Scroll is at Mount Craw“Tribute Way”. It’s at the arena that you need to go to for the Side Quest “The Slayer of Vorcanar”. There are some huts in front of the entrance gates. The scroll is behind one of them.
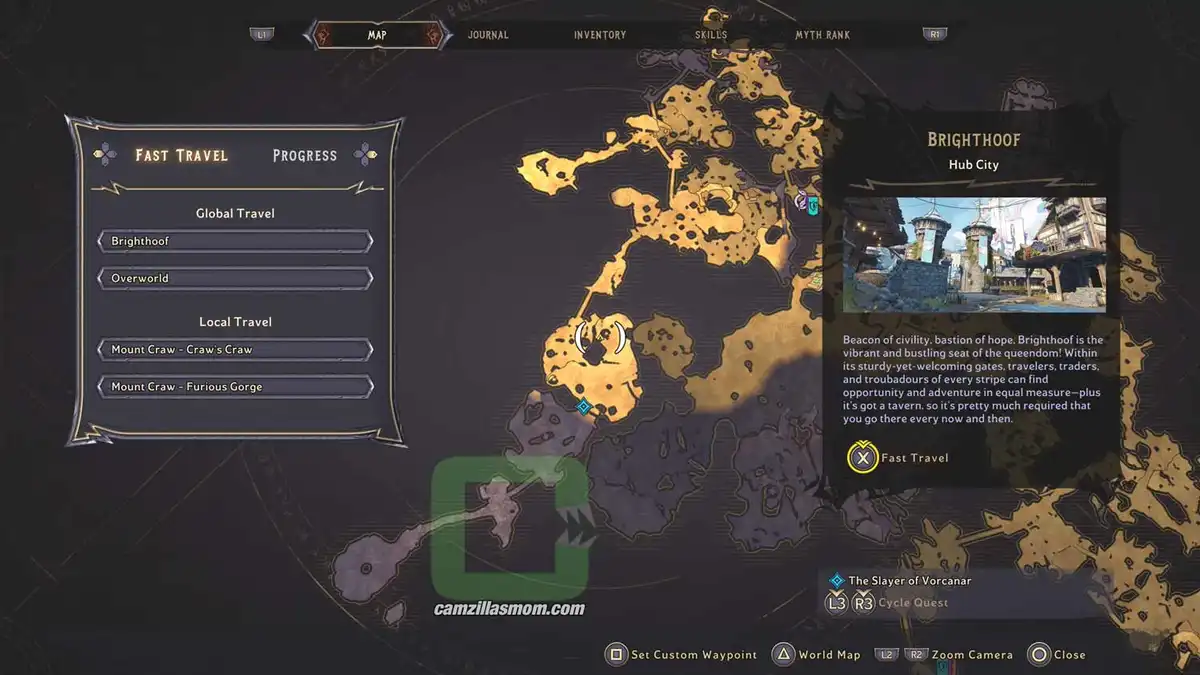
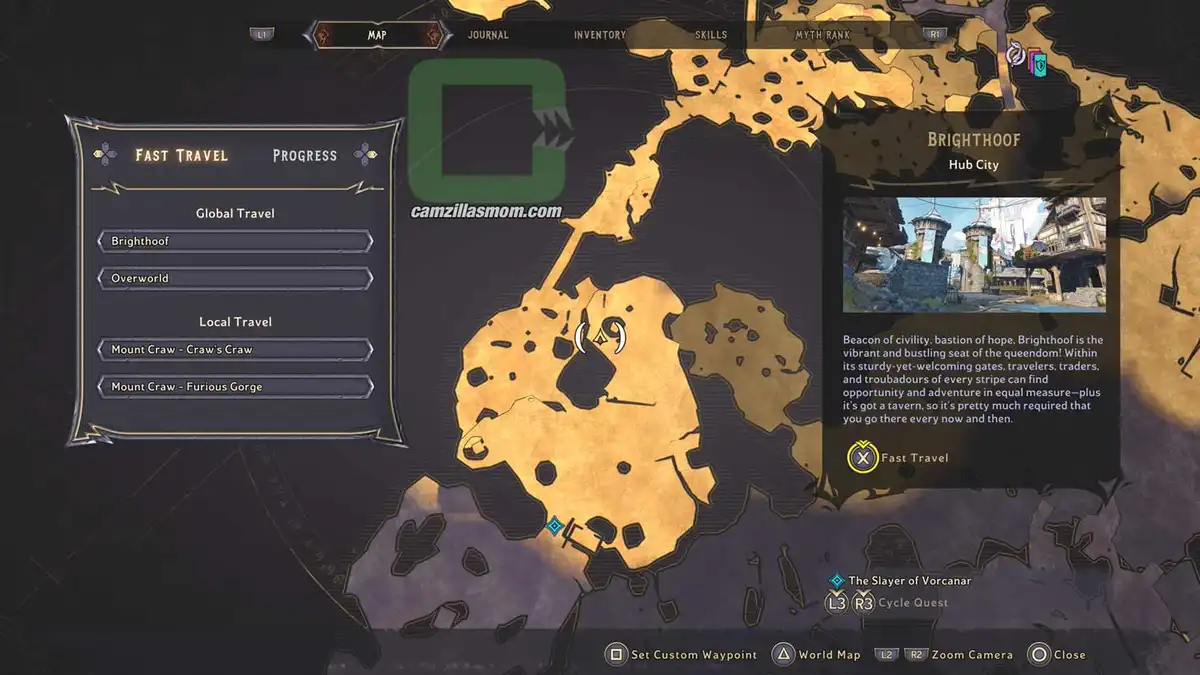
The zoomed-out map showing the Expeditious Entreat Lore Scroll location at Mount Craw. › camzillasmom.com
The zoomed-in map showing the Expeditious Entreat Lore Scroll location at Mount Craw. › camzillasmom.com
Screenshot highlighting the Lore Scroll behind one of the huts. › camzillasmom.com
The screenshot shows the Lore Scroll behind the hut. › camzillasmom.com

3 – Fleedom

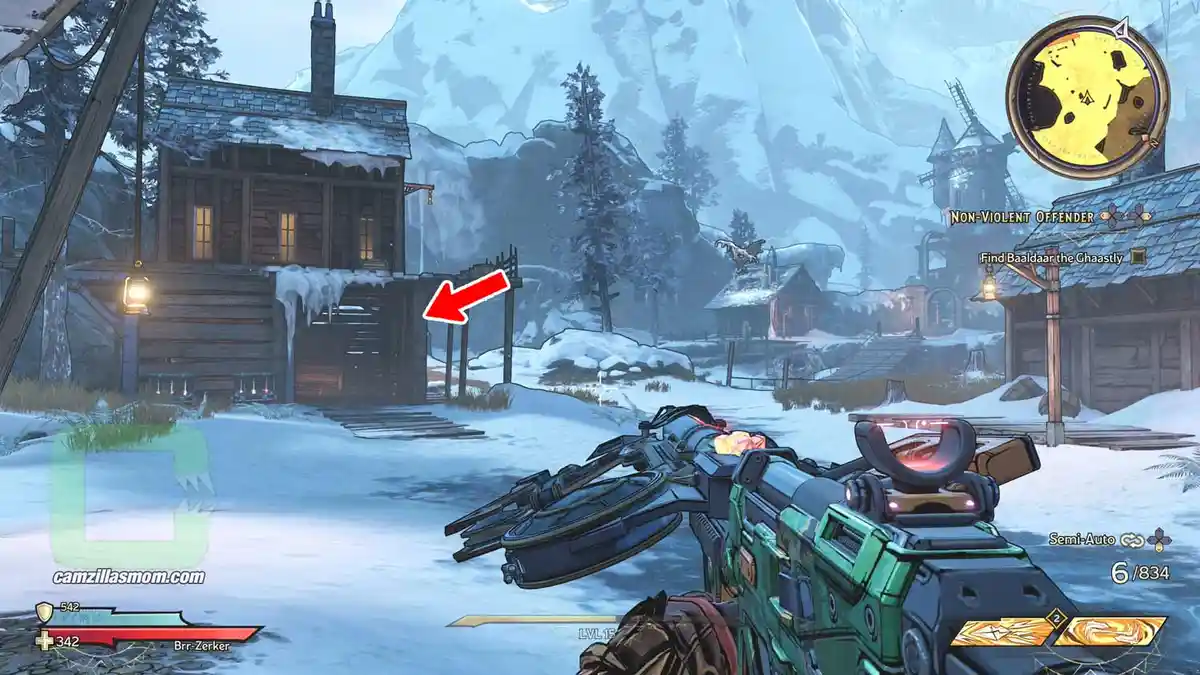
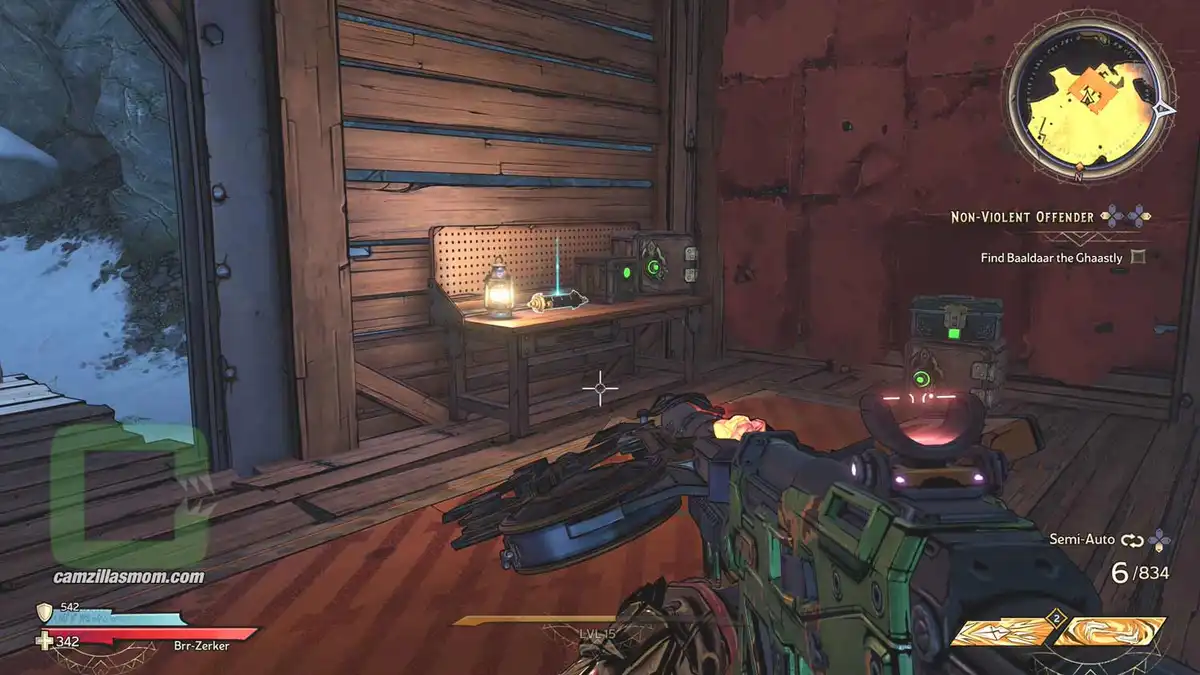
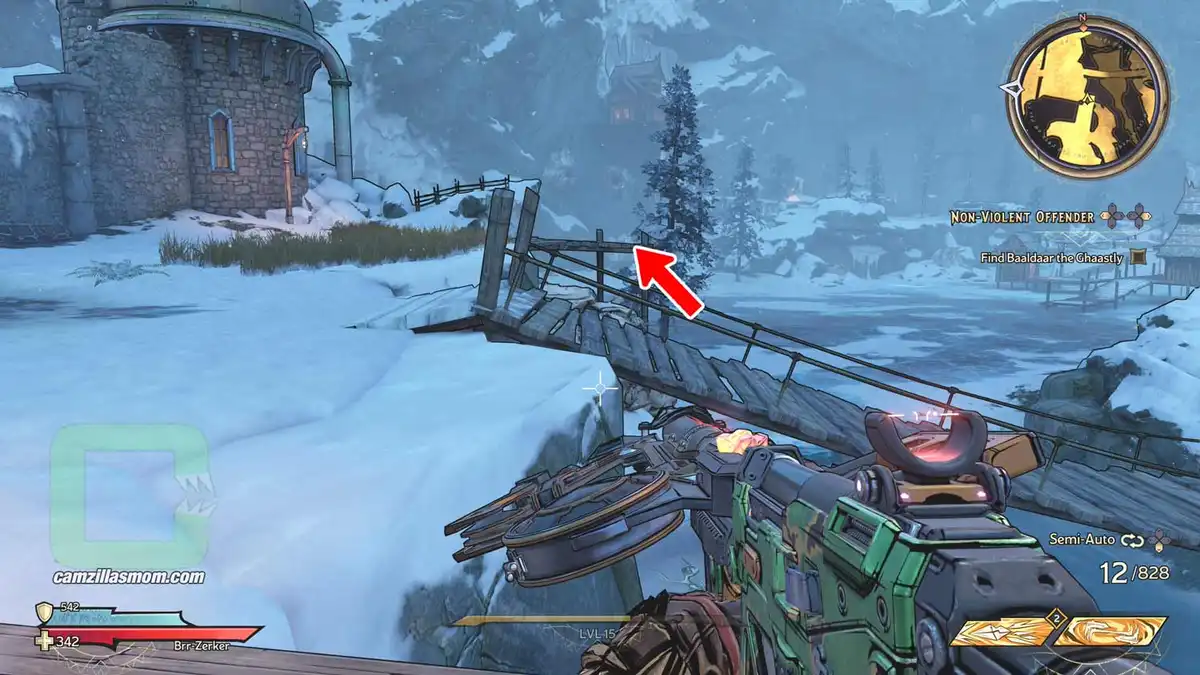
This Lore Scroll is at Mount Craw – “The Shimmering Loch”. High above The Shimmering Loch is a village with a windmill. At the village entrance is a building you can enter. The scroll is at ground floor.
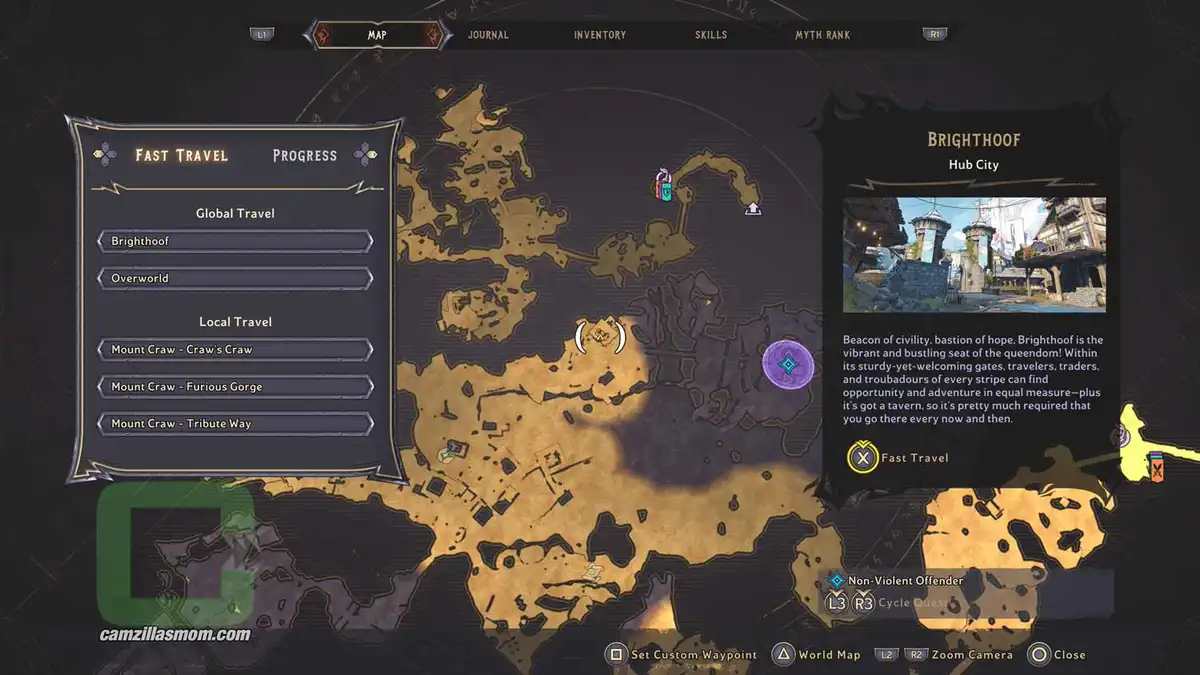
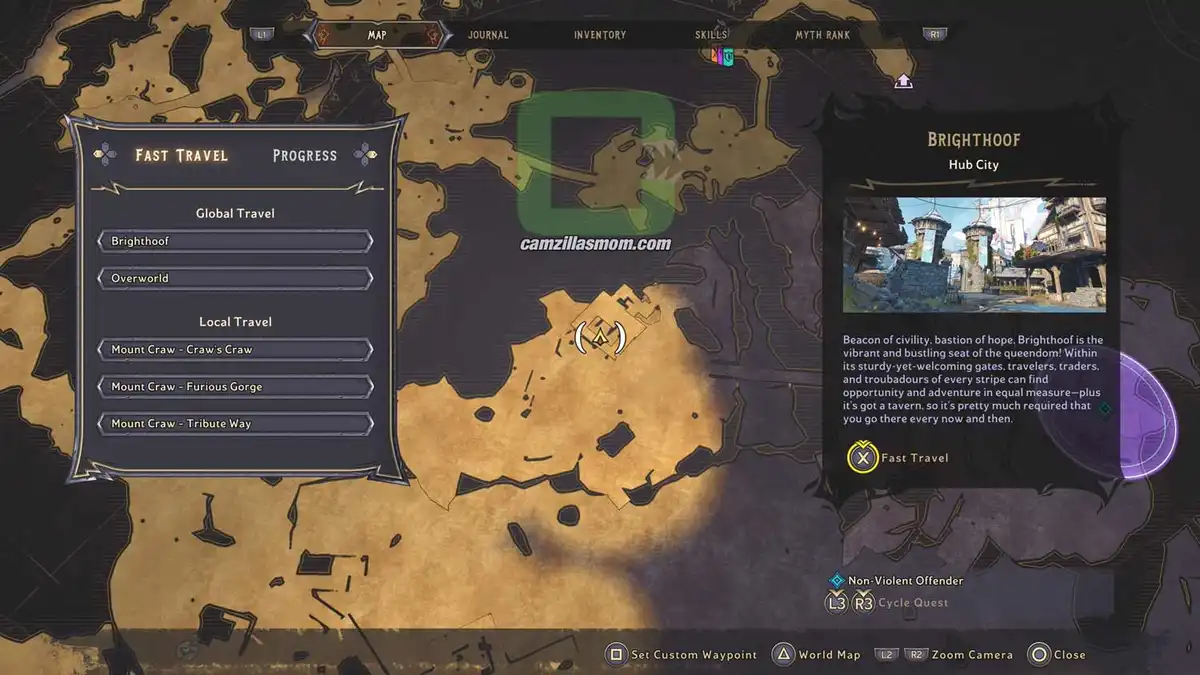
The zoomed-out map showing the Fleedom Lore Scroll location at Mount Craw. › camzillasmom.com
The zoomed-in map showing the Fleedom Lore Scroll location at Mount Craw. › camzillasmom.com
The screenshot is highlighting the building at the Shimmering Loch with the Lore Scroll Inside. › camzillasmom.com
Screenshot showing the Lore Scroll in side the building. › camzillasmom.com

4 – Get the Freak Out

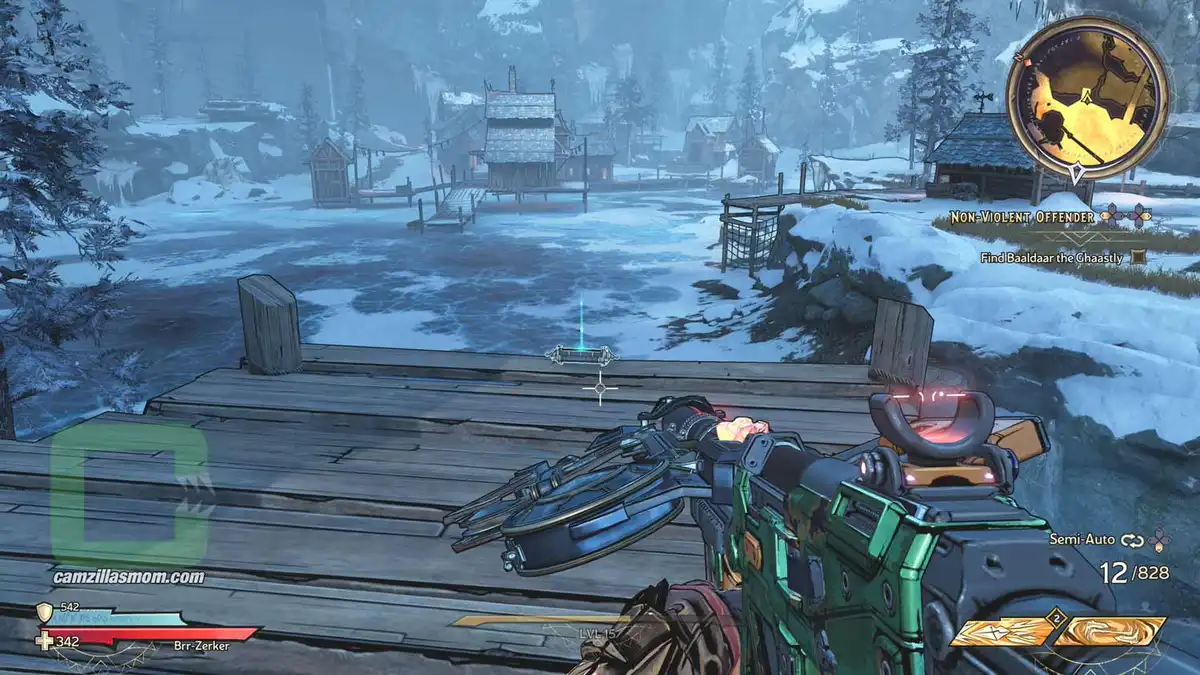
This Lore Scroll is at Mount Craw. Above “The Shimmering Loch” is a village with a wind mill. That’s “Baaldar’s Lair”. Here, in front of the gates, is a nice viewpoint overlooking The Shimmering Loch. Here’s the Lore Scroll.
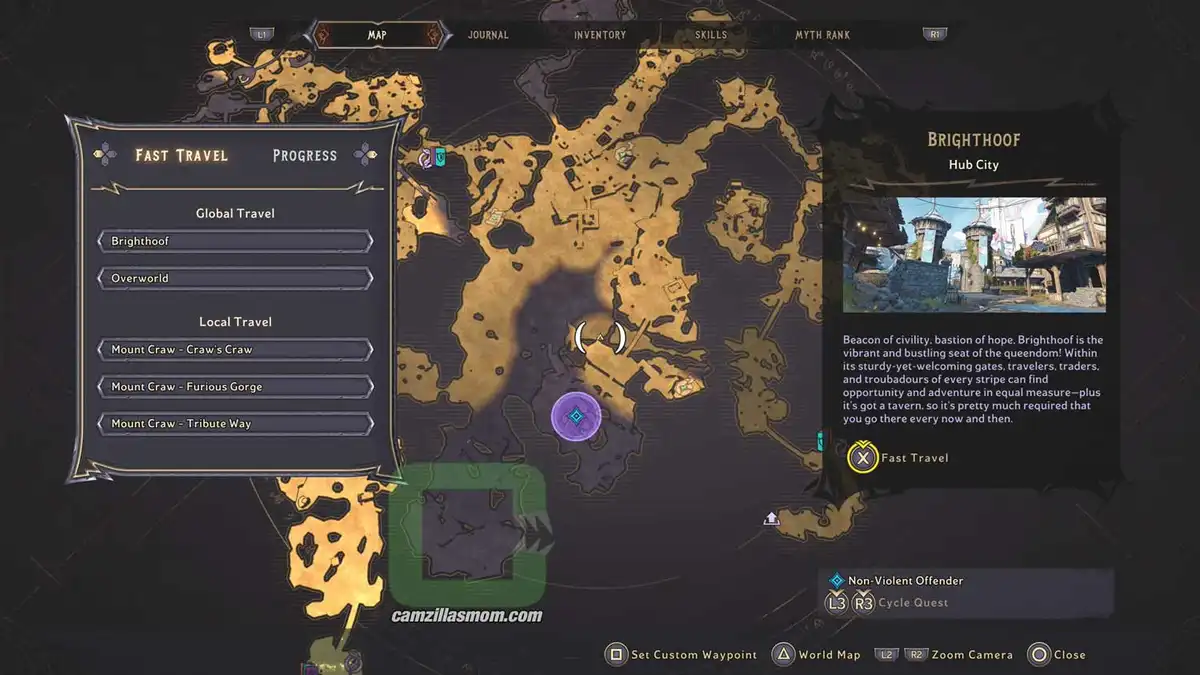
The zoomed-out map showing the Get the Freak Out Lore Scroll location at Mount Craw. › camzillasmom.com
The zoomed-in map showing the Get the Freak Out Lore Scroll location at Mount Craw. › camzillasmom.com
This screenshot shows the Lore Scroll at the view point. › camzillasmom.com
another screenshot shows the same Lore Scroll close-up. › camzillasmom.com

5 – It’s a Nose Ring Thing

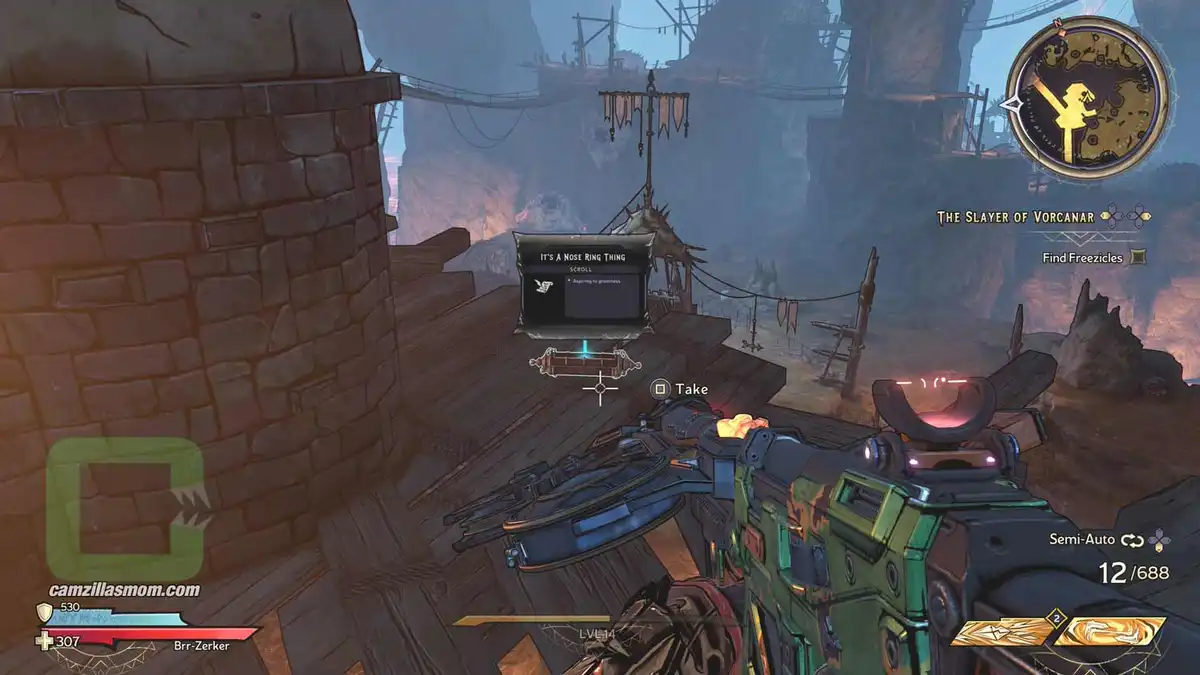
The Lore Scroll is at Mount Craw. Best to get this scroll, while doing the “The Slayer of Vorcanar” Side Quest. For this Quest, you have to go to the “Furious Gorge” and “Find Freezicles”. On the way there, you can find the scroll behind a small forge.
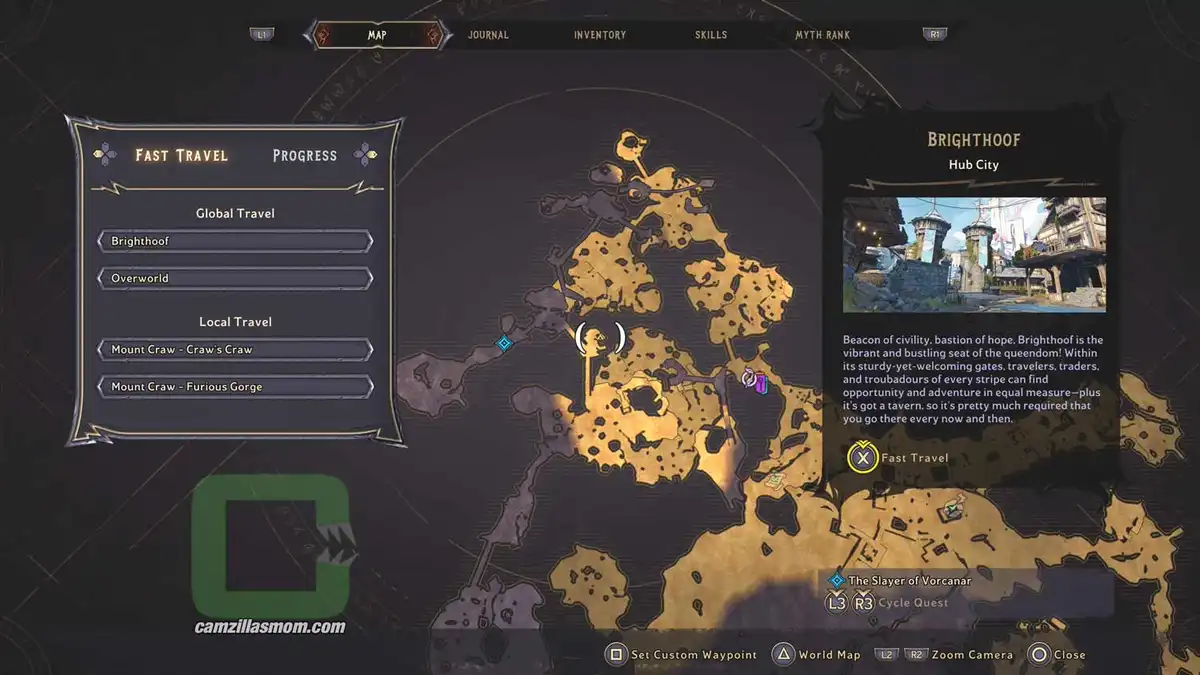
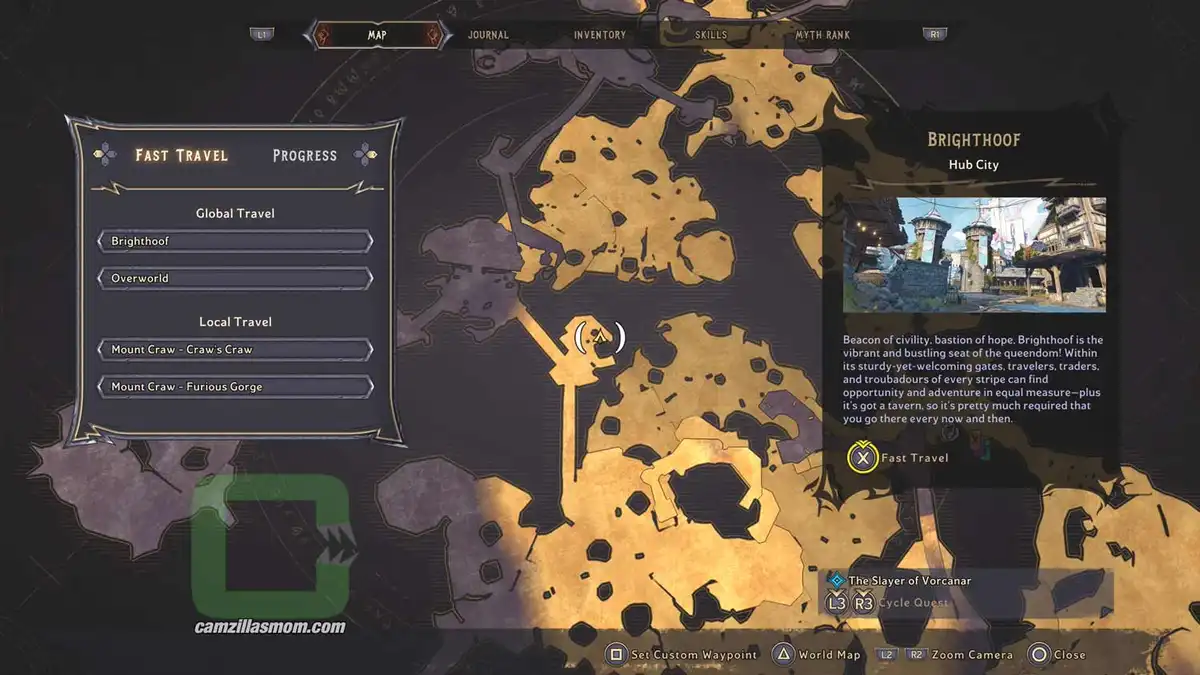
The zoomed-out map showing the It › camzillasmom.com's a Nose Ring Thing Lore Scroll location at Mount Craw.
The zoomed-in map showing the It › camzillasmom.com's a Nose Ring Thing Lore Scroll location at Mount Craw.
The screenshot shows the forge with the Lore Scroll hidden behind it. › camzillasmom.com
Detailed screenshot of the Lore Scroll behind the forge. › camzillasmom.com

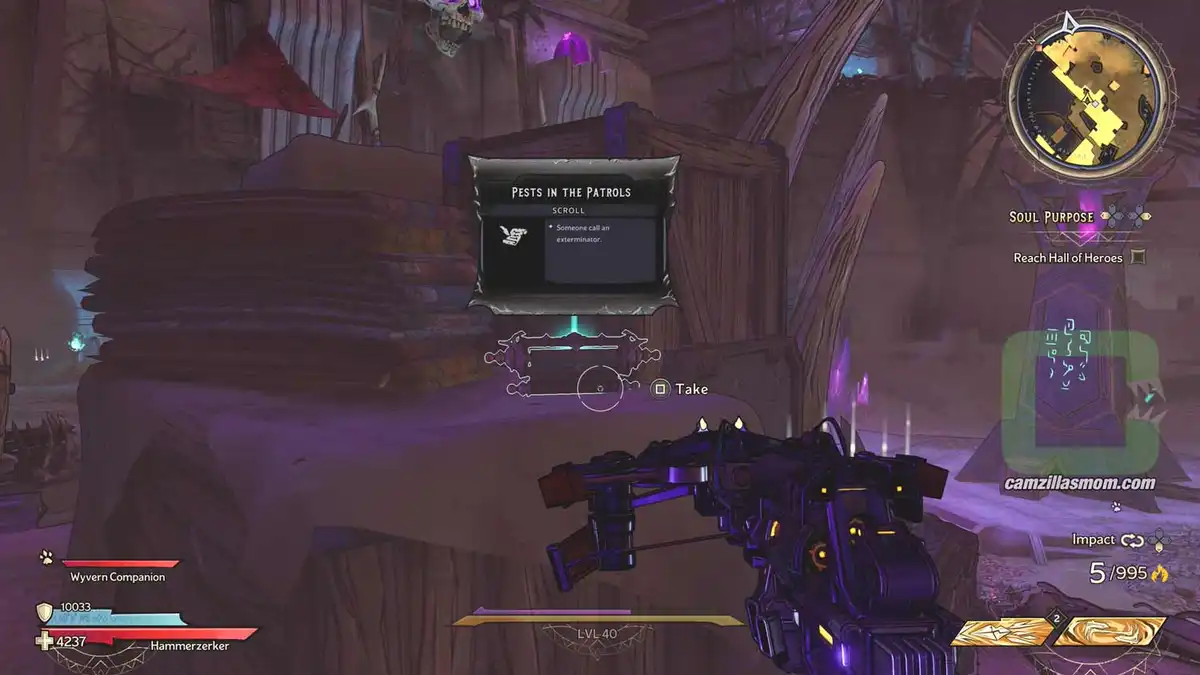
1 – Pests in the Patrols

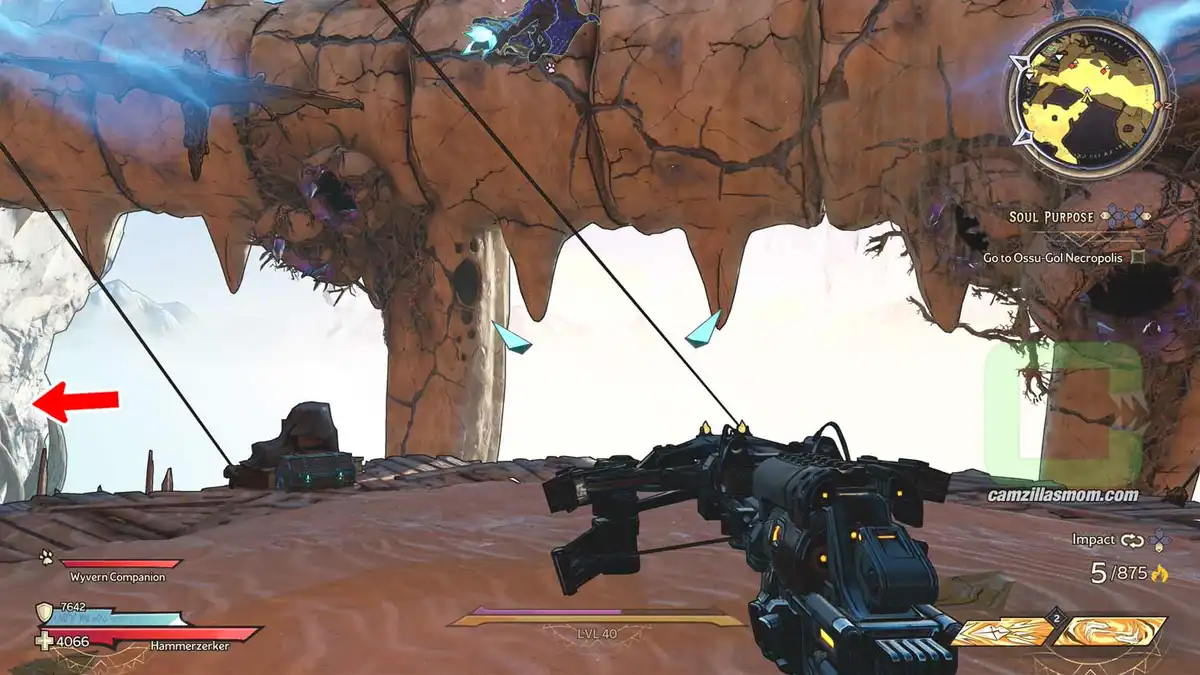
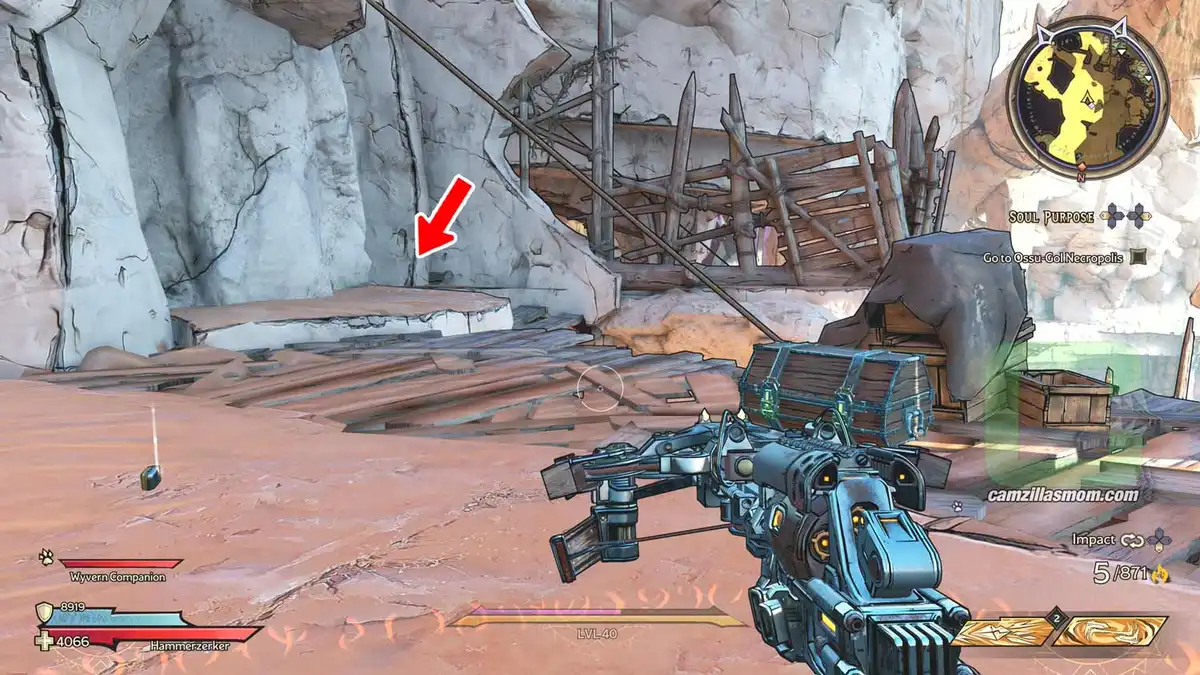
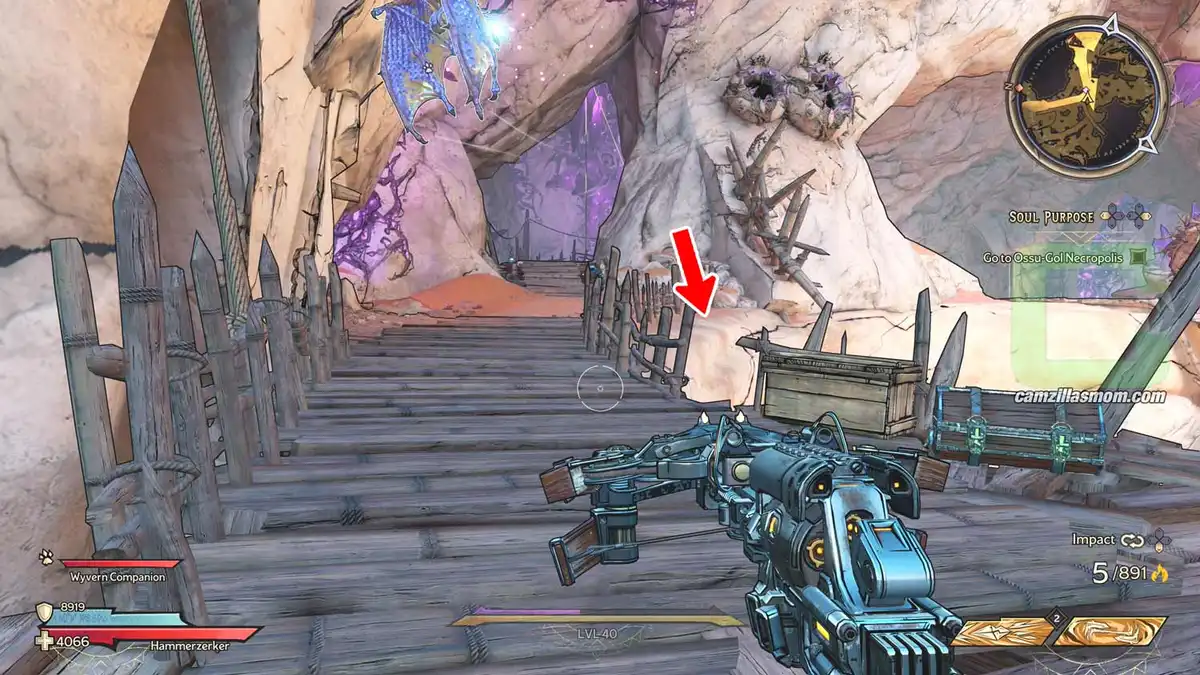
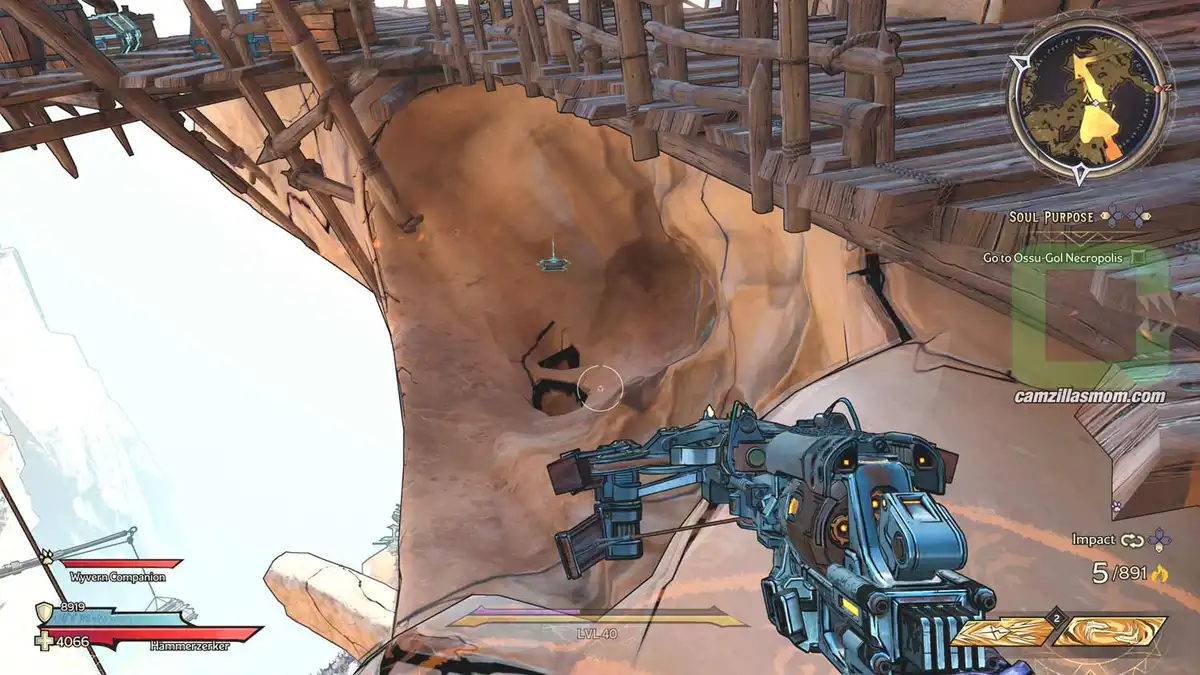
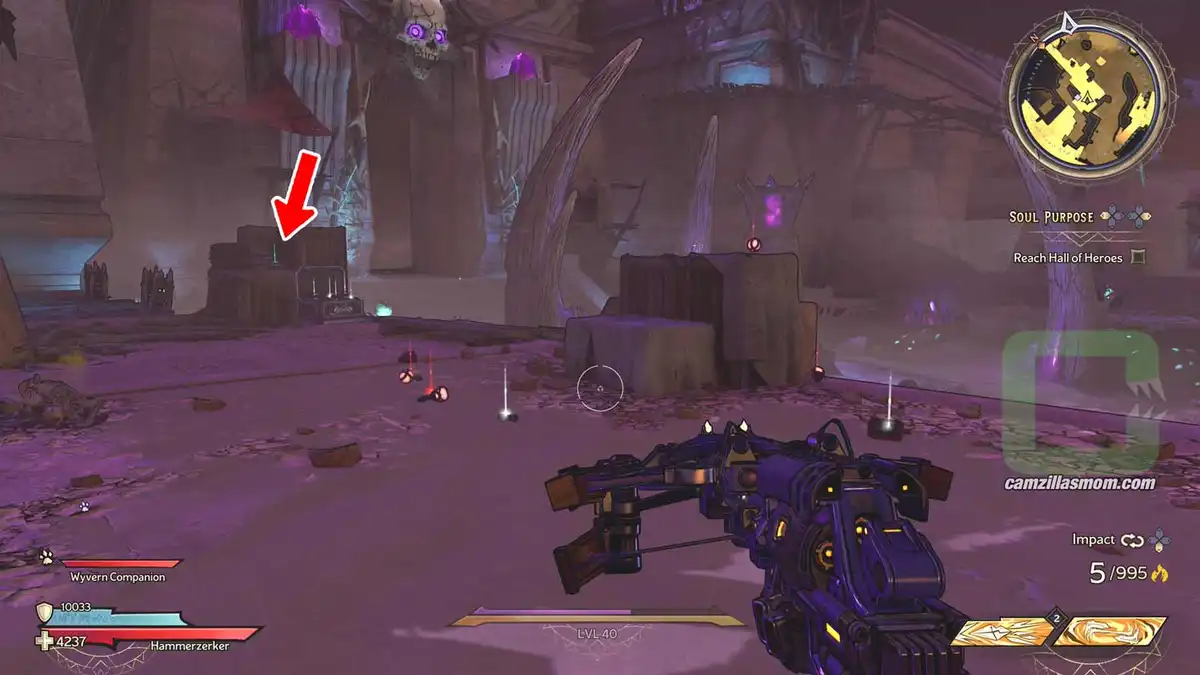
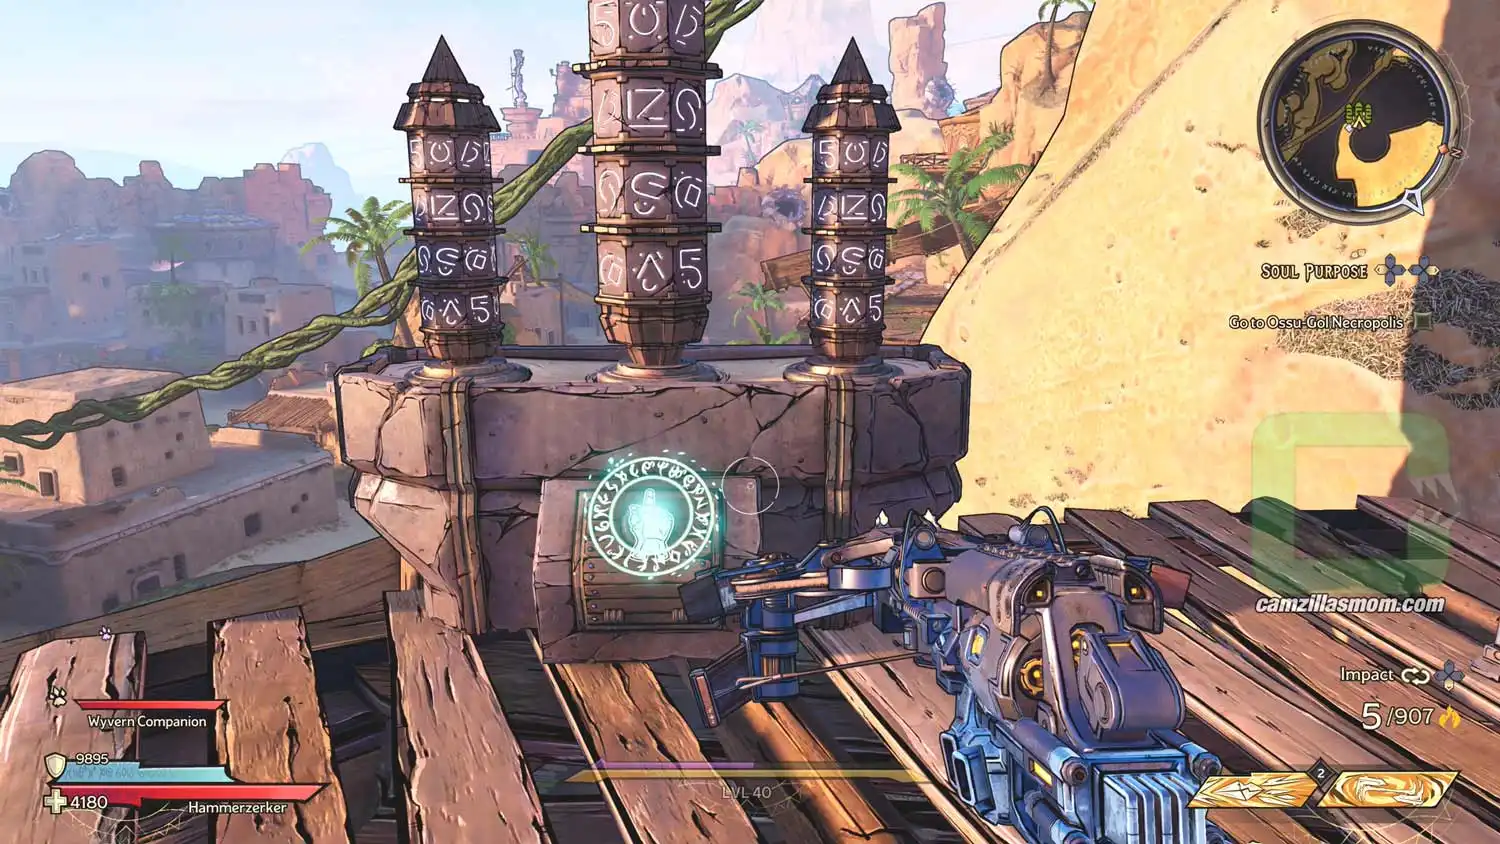
Near the Well of Wrath, the last hex well, there is a platform on stilts on the side of the wall. The scroll is up there.
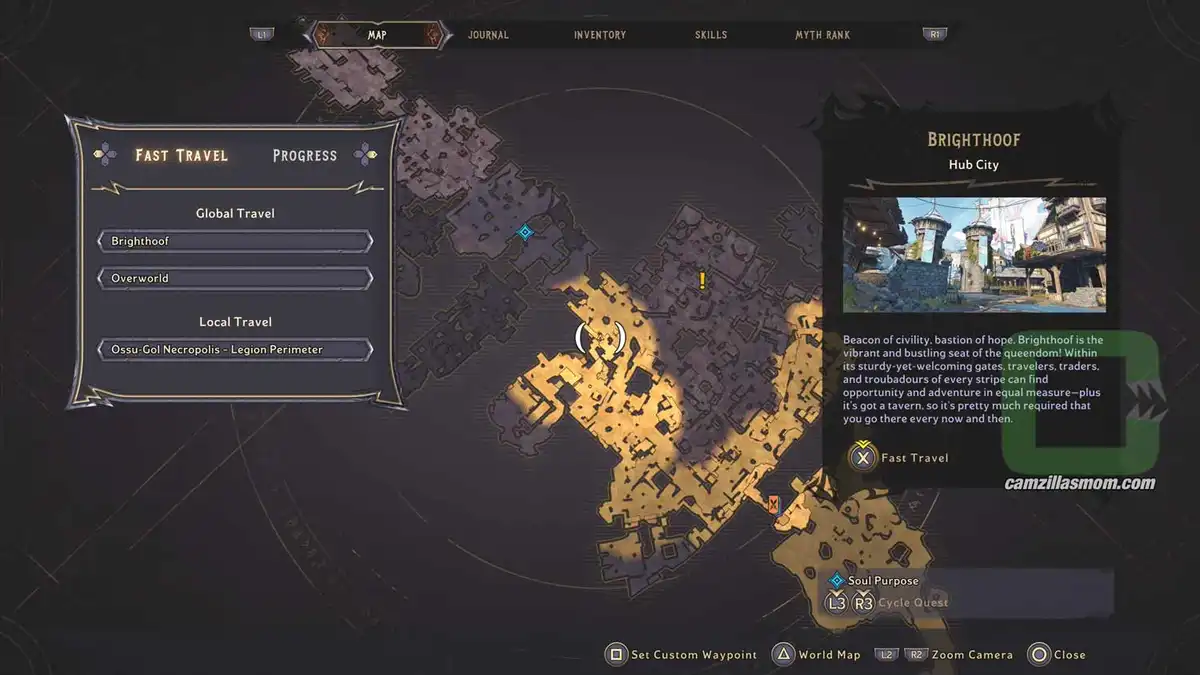
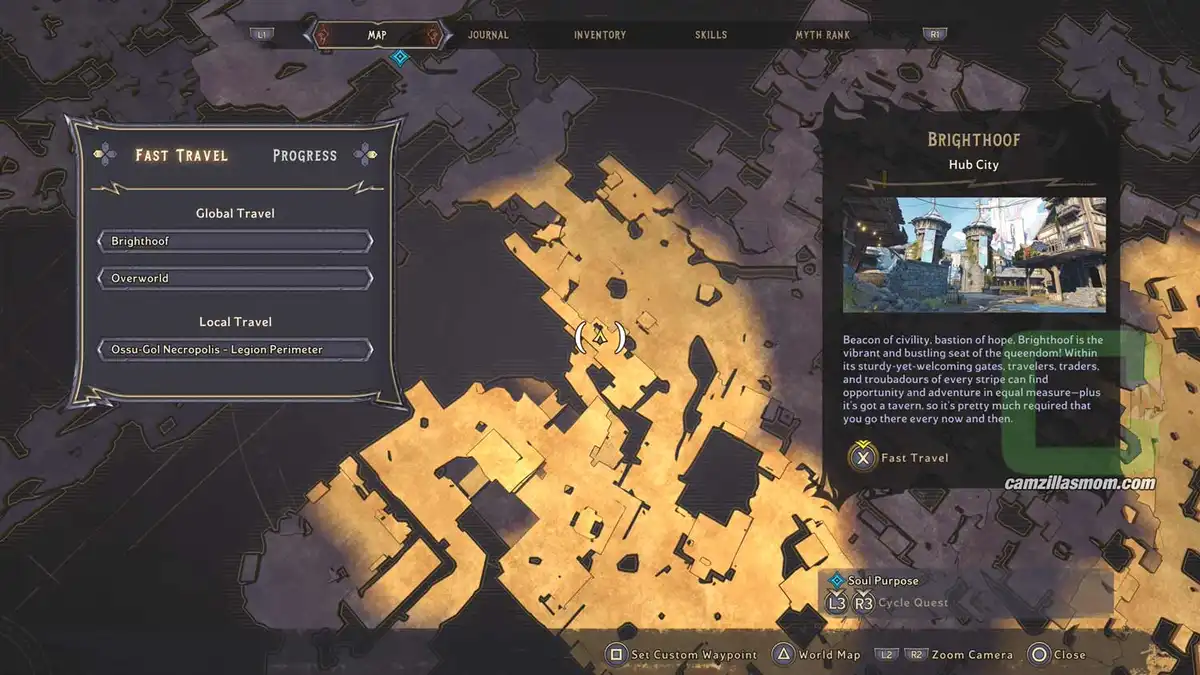
The zoomed-out map showing the only Lore Scroll at the Ossu-Gol Necropolis. › camzillasmom.com
The zoomed-in map showing the only Lore Scroll at the Ossu-Gol Necropolis. › camzillasmom.com
The screenshot highlights the well, where the Lore Scroll is hiding. › camzillasmom.com
The detailed location of the Lore Scroll. › camzillasmom.com

1 – Continents

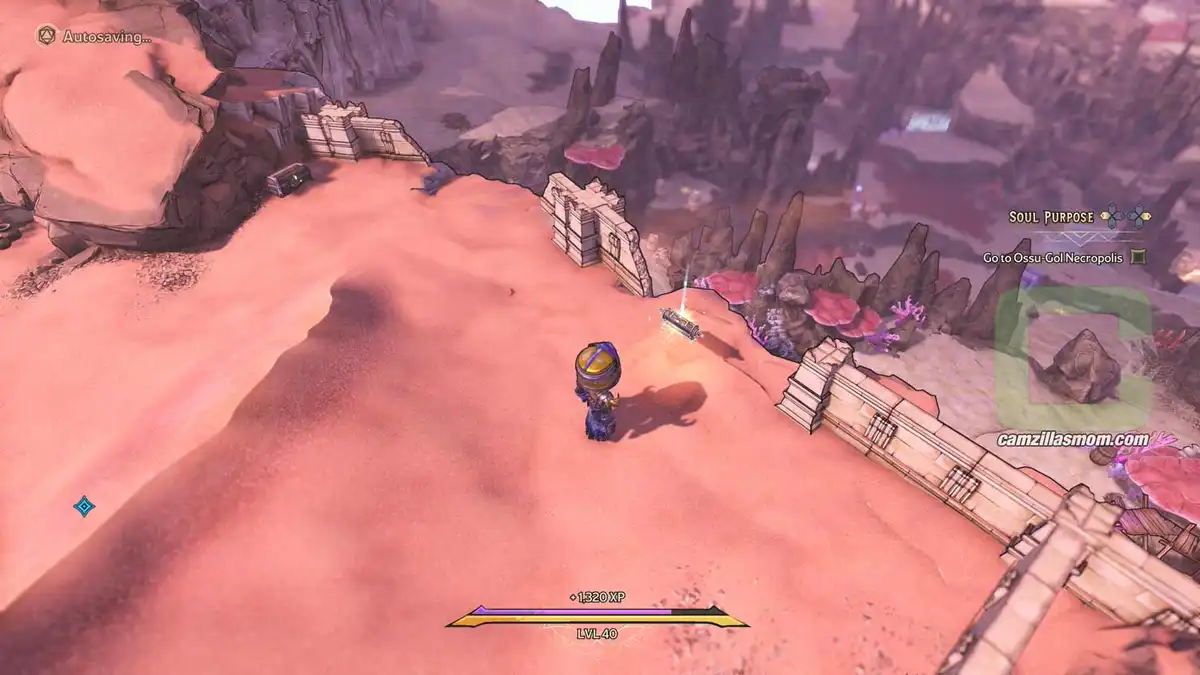
At Parched Lands, at the northern exit of Karnok’s wall is this scroll.
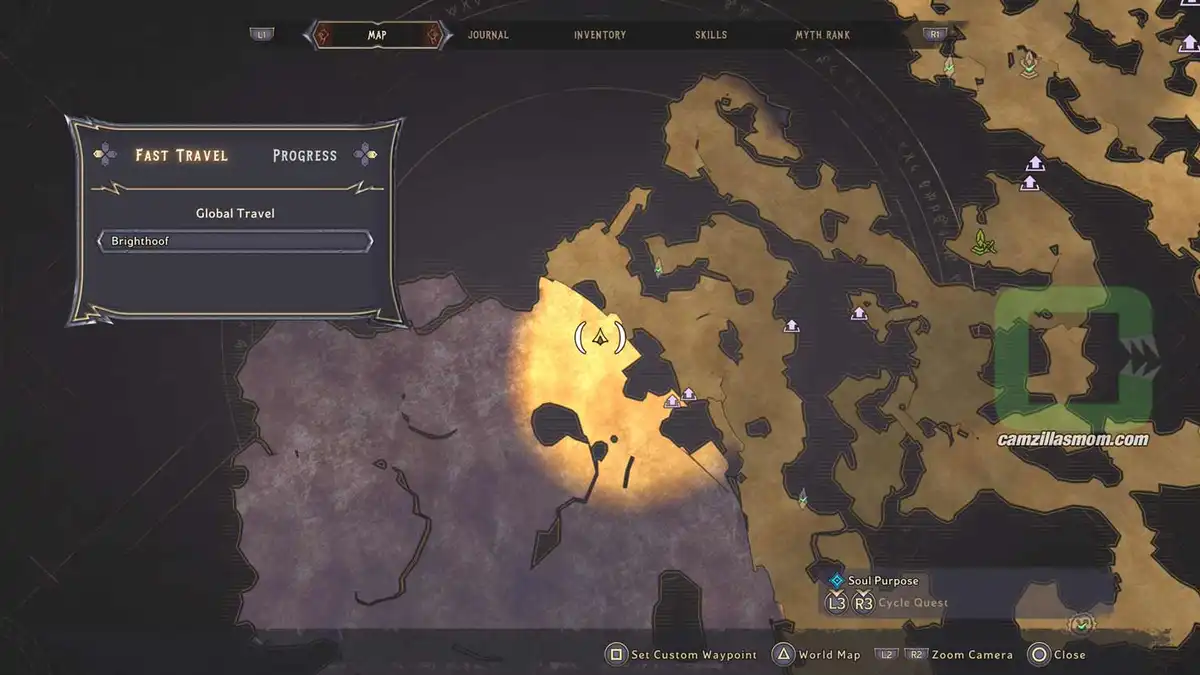
The Overworld map showing the location of the Continents Lore Scroll. › camzillasmom.com
The screenshot shows the Lore Scroll location in the Overworld. › camzillasmom.com

2 – Icons of Darkness

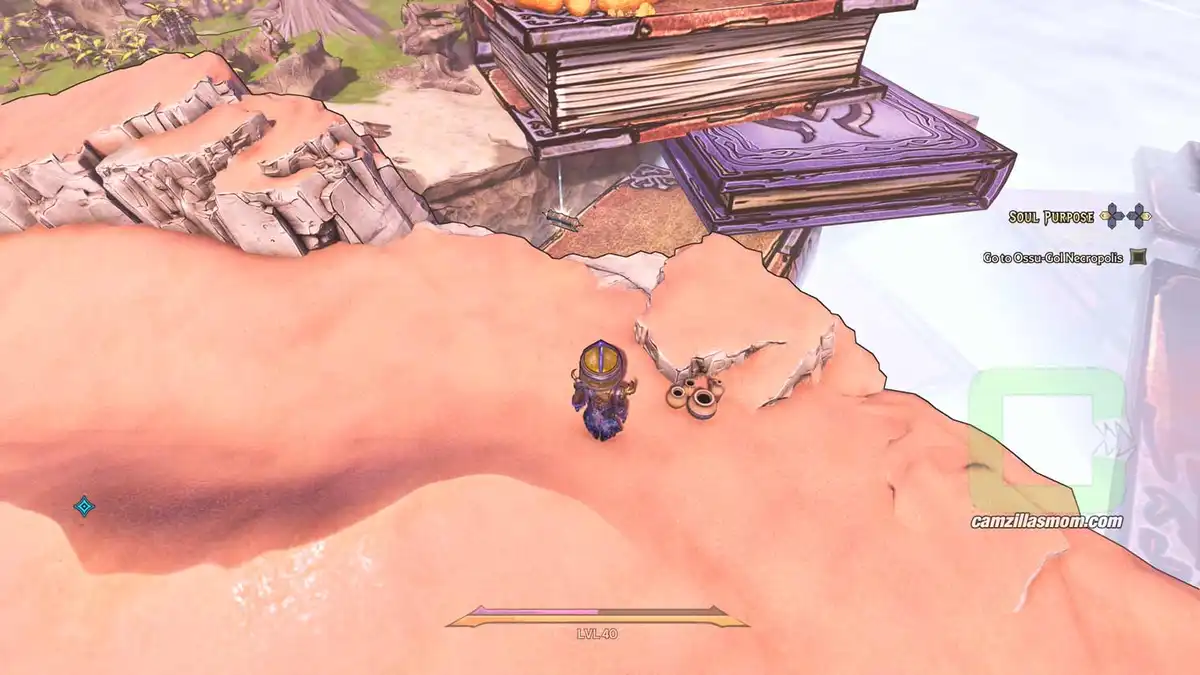
Do the nearby Side Quest in the Desert and the sand will be scooped away. Then you can go up to get the scroll.
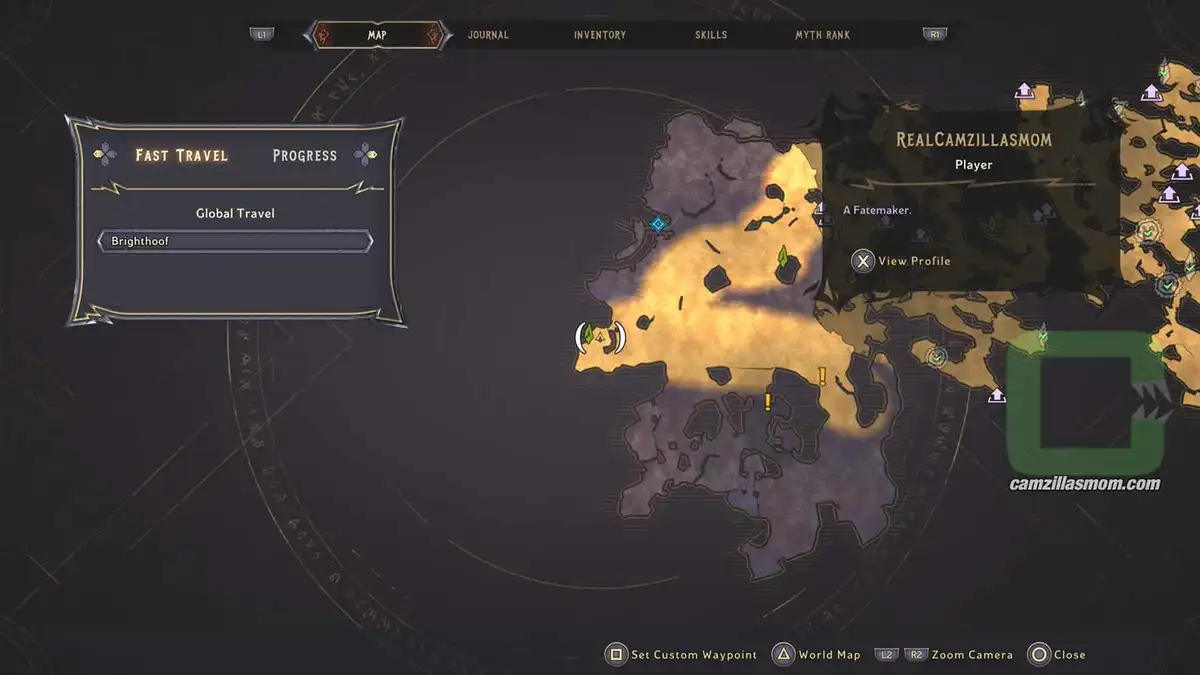
The Overworld map showing the location of the Icons of Darkness Lore Scroll. › camzillasmom.com
The screenshot shows the Lore Scroll location in the Overworld. › camzillasmom.com

3 – Privateers

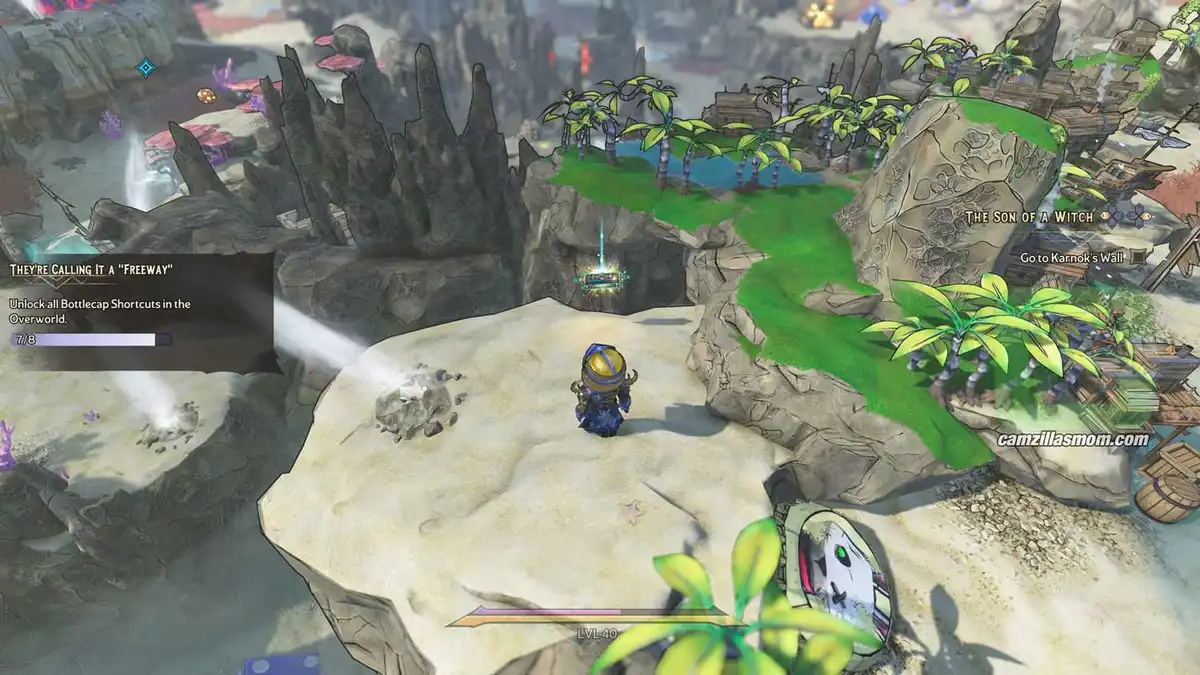
You can get this scroll after finishing “Drowned Abyss”. Use one of the Overworld jump pads to get there.
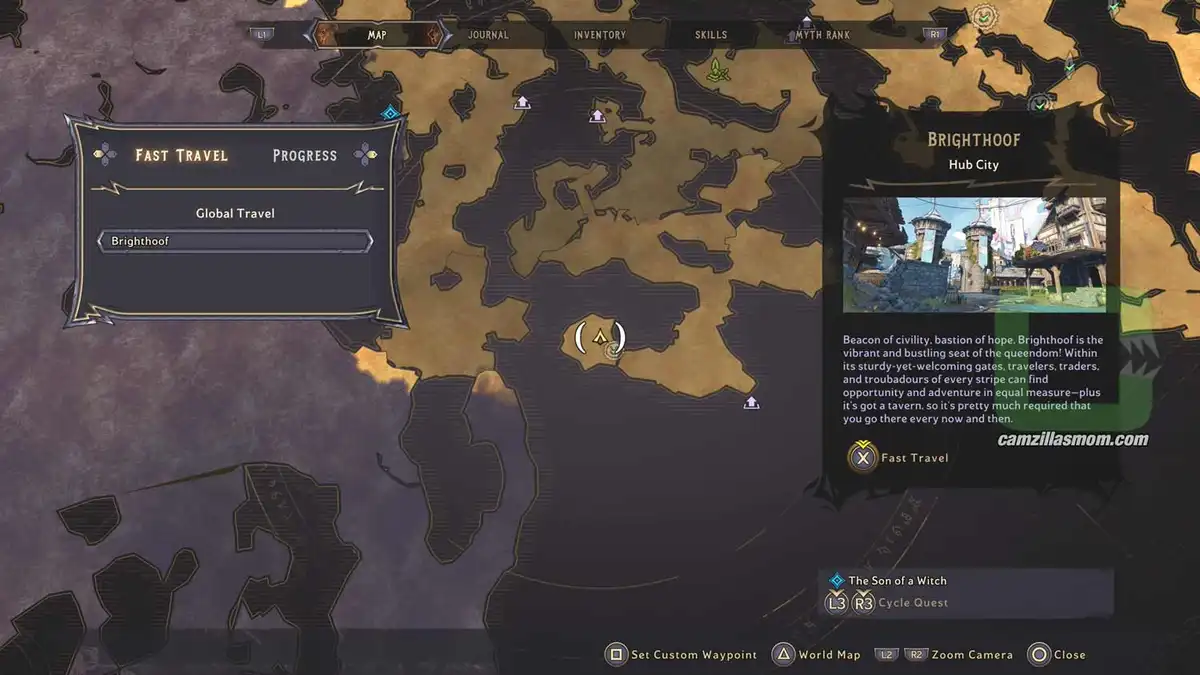
The Overworld map showing the location of the Privateers Lore Scroll. › camzillasmom.com
The screenshot showing the jump pad that leads to the Lore Scroll. › camzillasmom.com

4 – Sands

The Scroll is at “The Sweetsands”, just at the map border.
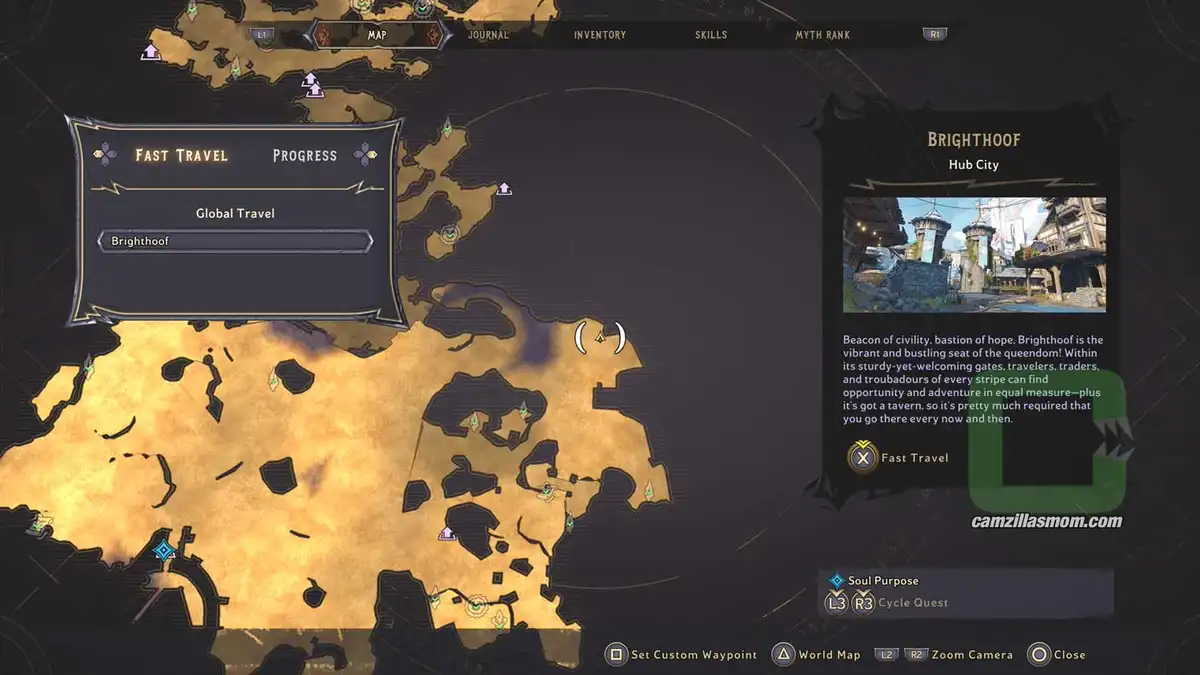
The Overworld map showing the location of the Sands Lore Scroll. › camzillasmom.com
Screenshot showing the Sands Lore Scroll in the Overworld. › camzillasmom.com

5 – The Adamant Throne

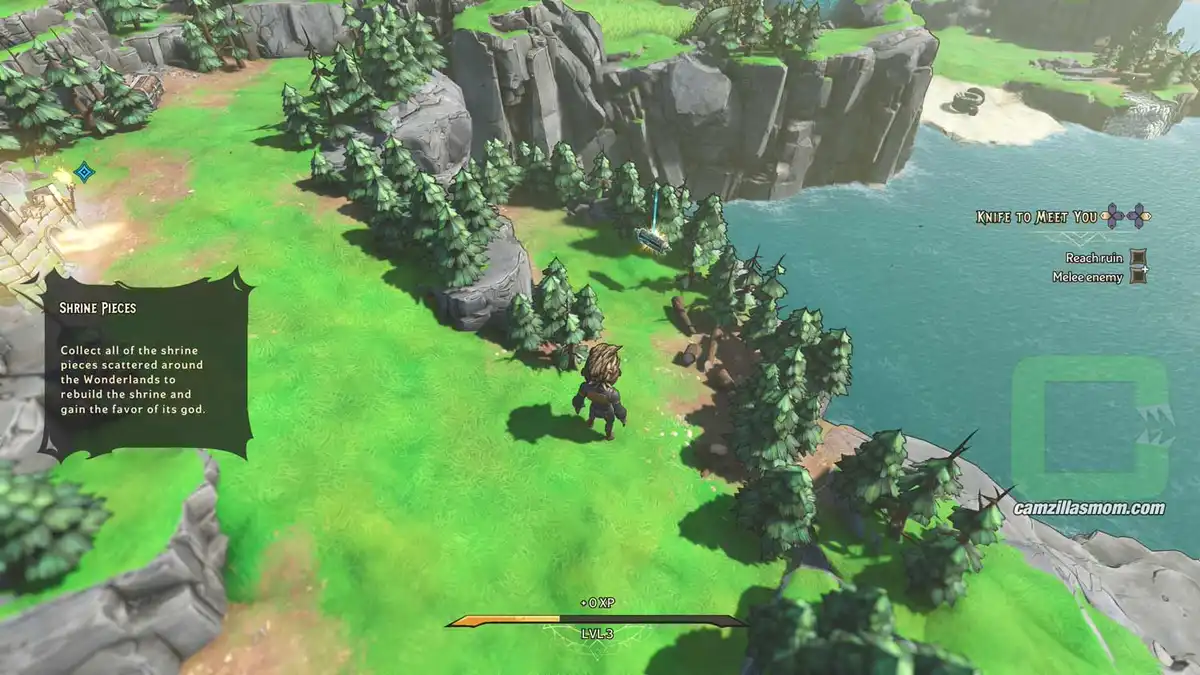
This scroll can be found in the starting area of the “Overworld”.
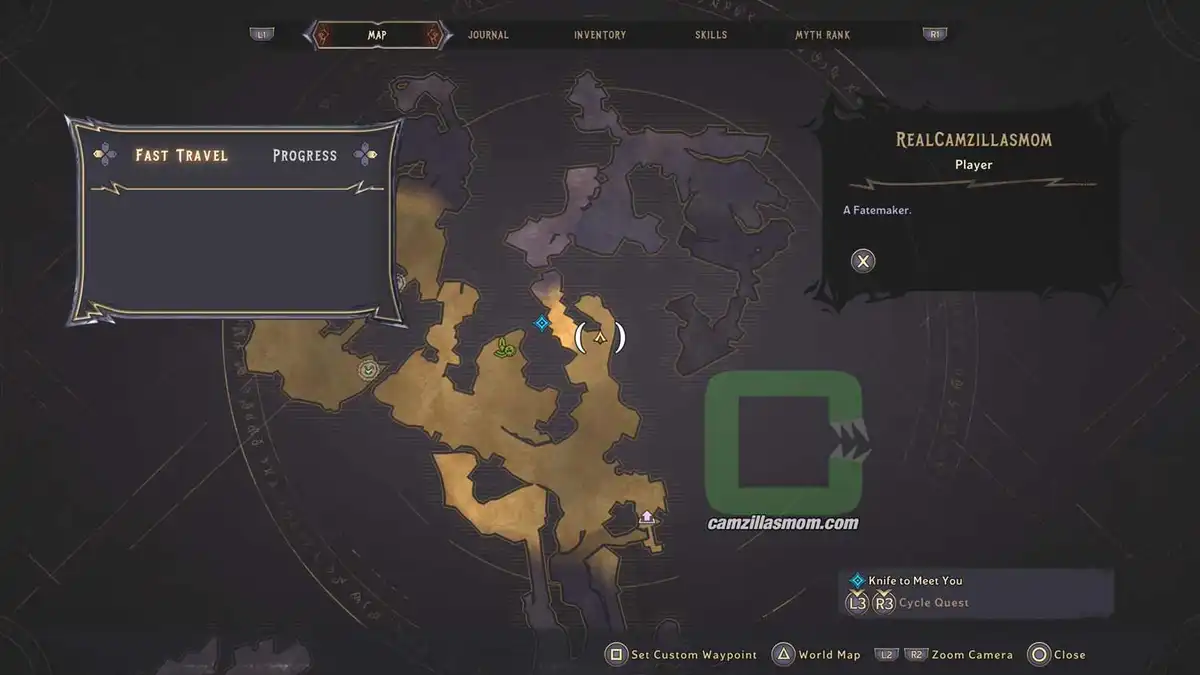
The Overworld map showing the location of the Adamant Thorne Lore Scroll. › camzillasmom.com
The screenshot showing the Lore Scroll in the Overworld starting area. › camzillasmom.com

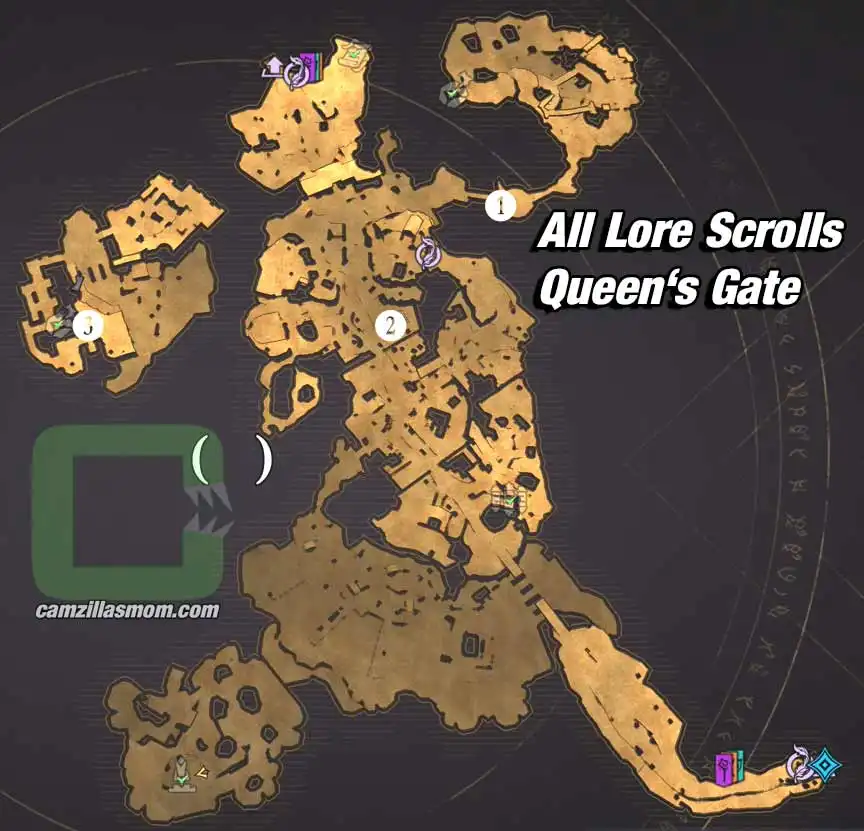
Queen’s Gate Overview Map

Queen › camzillasmom.com's Gate overview map with 3 Lore Scrolls collectibles locations highlighted.

1 – Funny Story
2 – Rebellions are Hard Work
3 – Thief Thoughts

1 – Funny Story

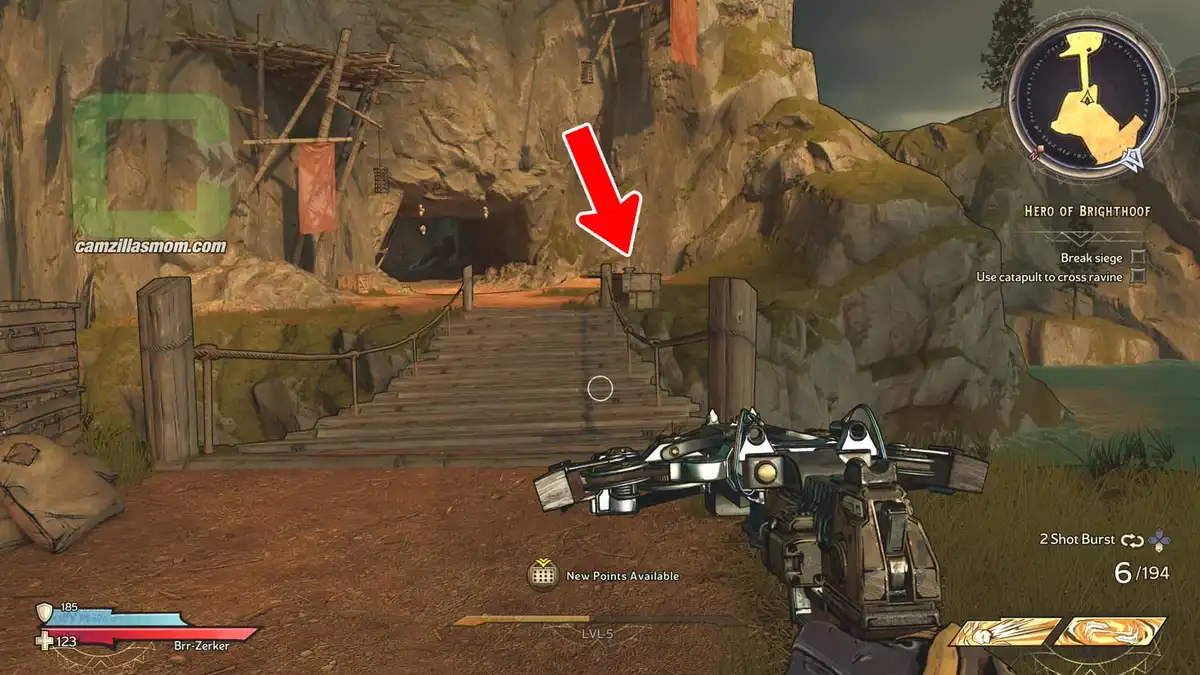
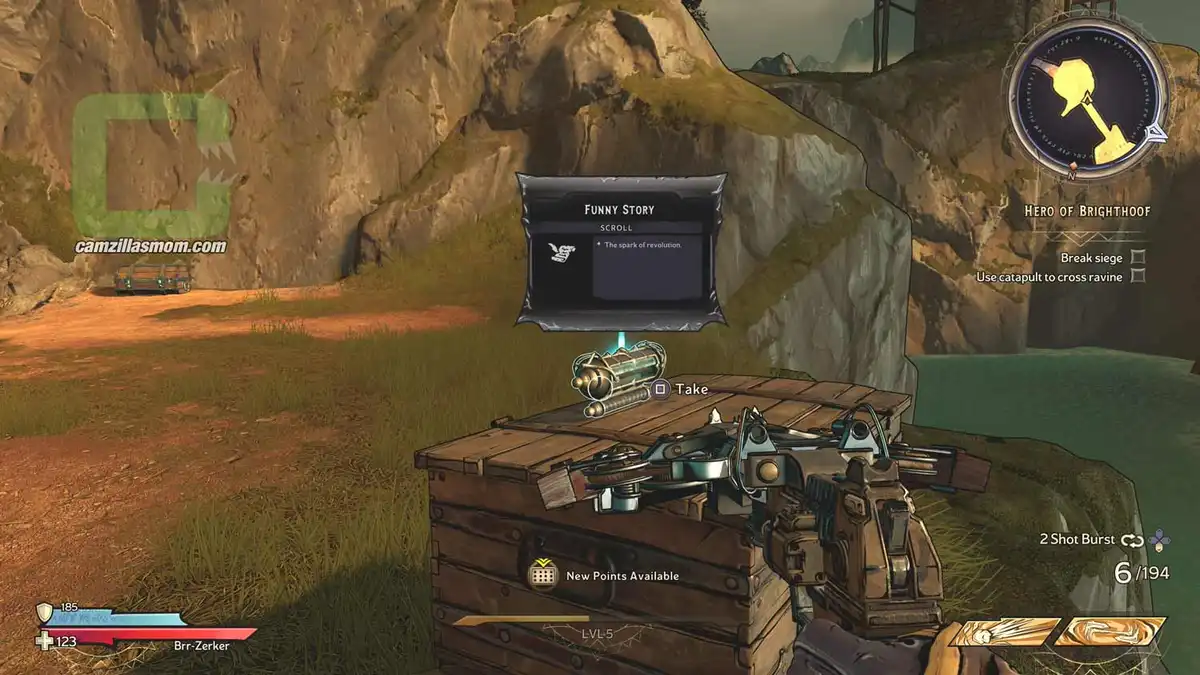
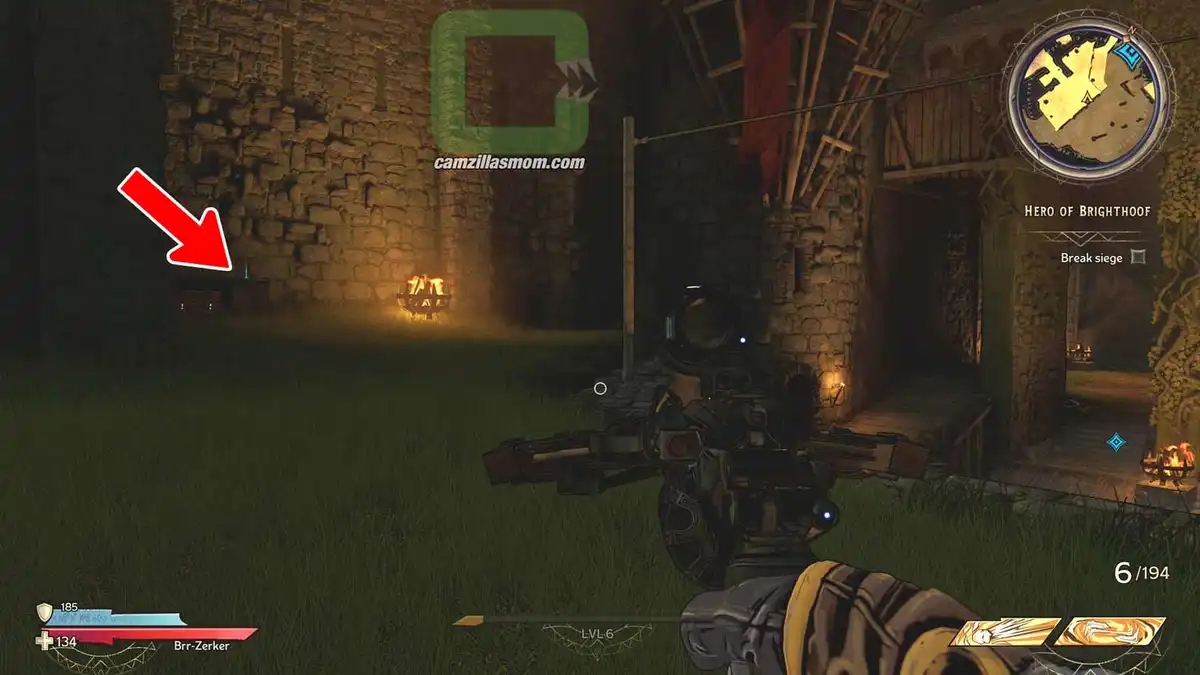
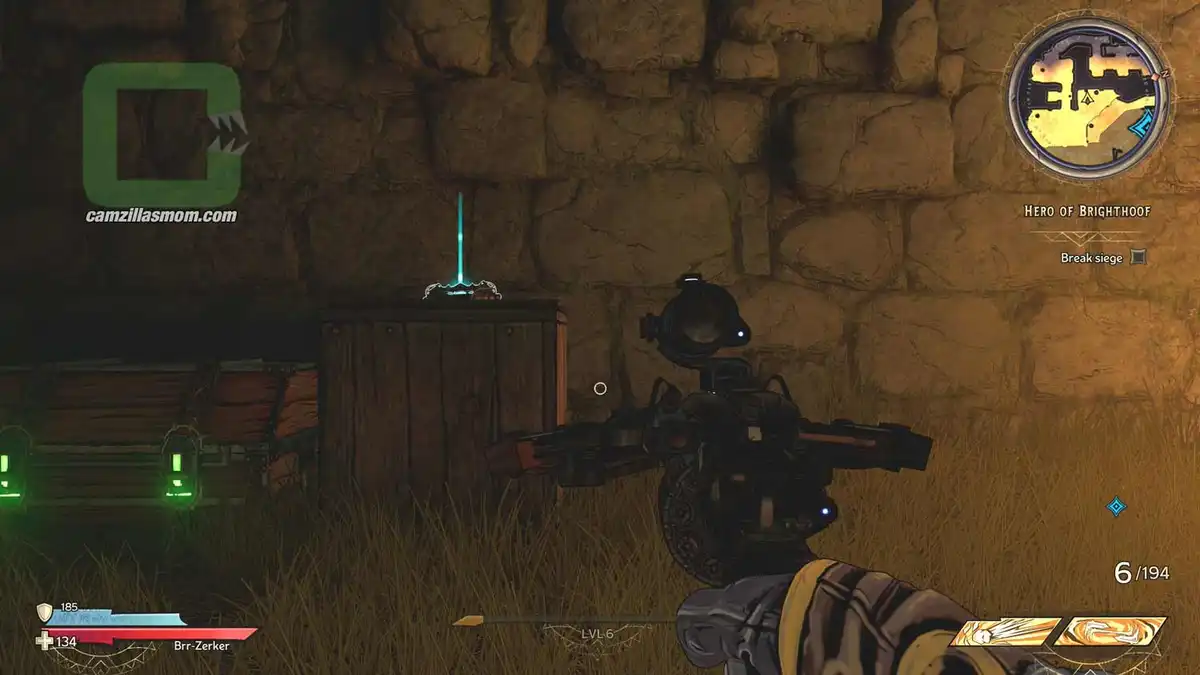
This Lore Scroll is at Queen’s Gate. While you’re doing the “Hero of Brighthoof” Quest, you have to pass Queen’s Gate. Here you have to destroy a couple of catapults in the town of “Buttsville”. This Scroll is in the area of the second catapult. Cross the bridge over the water in the northeast of the catapult. The scroll is on the other side of the bridge on top of the boxes.
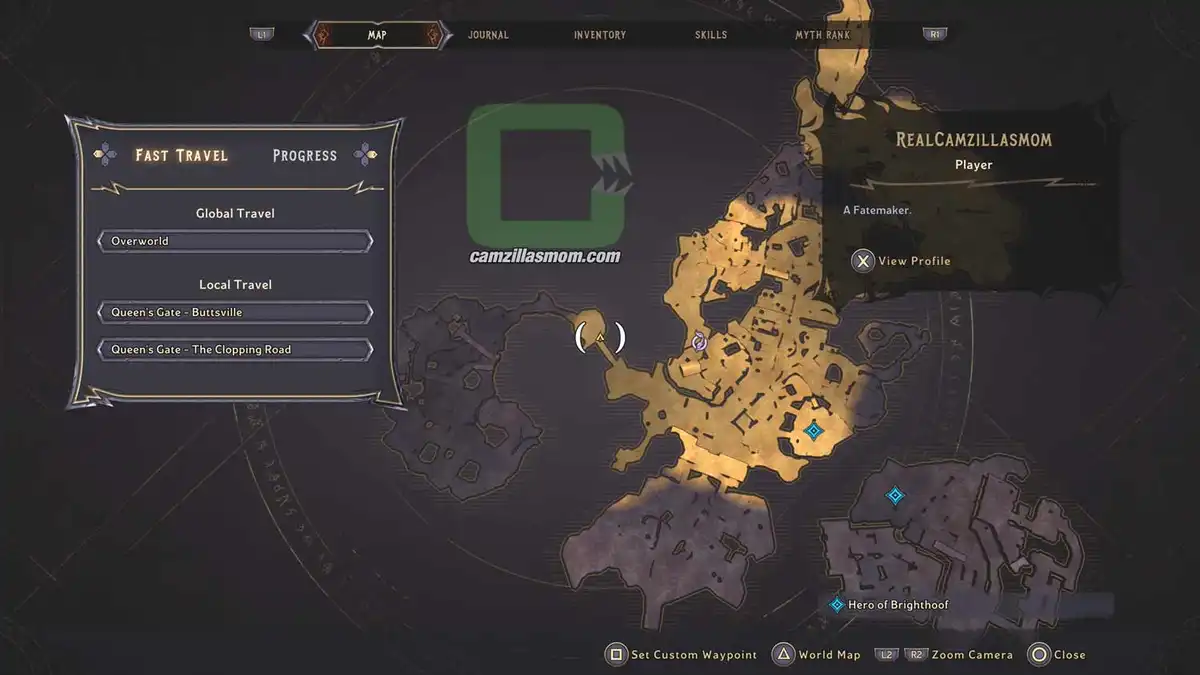
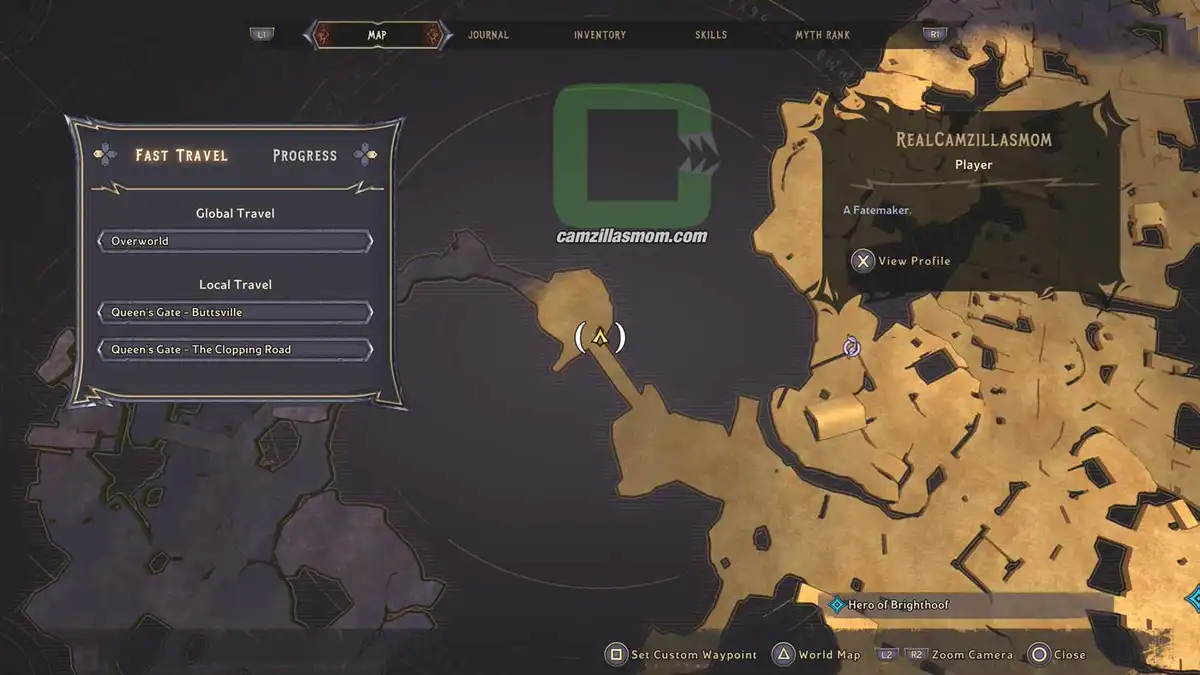
The zoomed-out map showing the Funny Story Lore Scroll location at Queen › camzillasmom.com's Gate.
The zoomed-in map showing the Funny Story Lore Scroll location at Queen › camzillasmom.com's Gate.
Screenshot pointing out the Lore Scroll on the other side of the bridge. › camzillasmom.com
Closer screenshot of the Lore Scroll on top of the box. › camzillasmom.com

2 – Rebellions are Hard Work

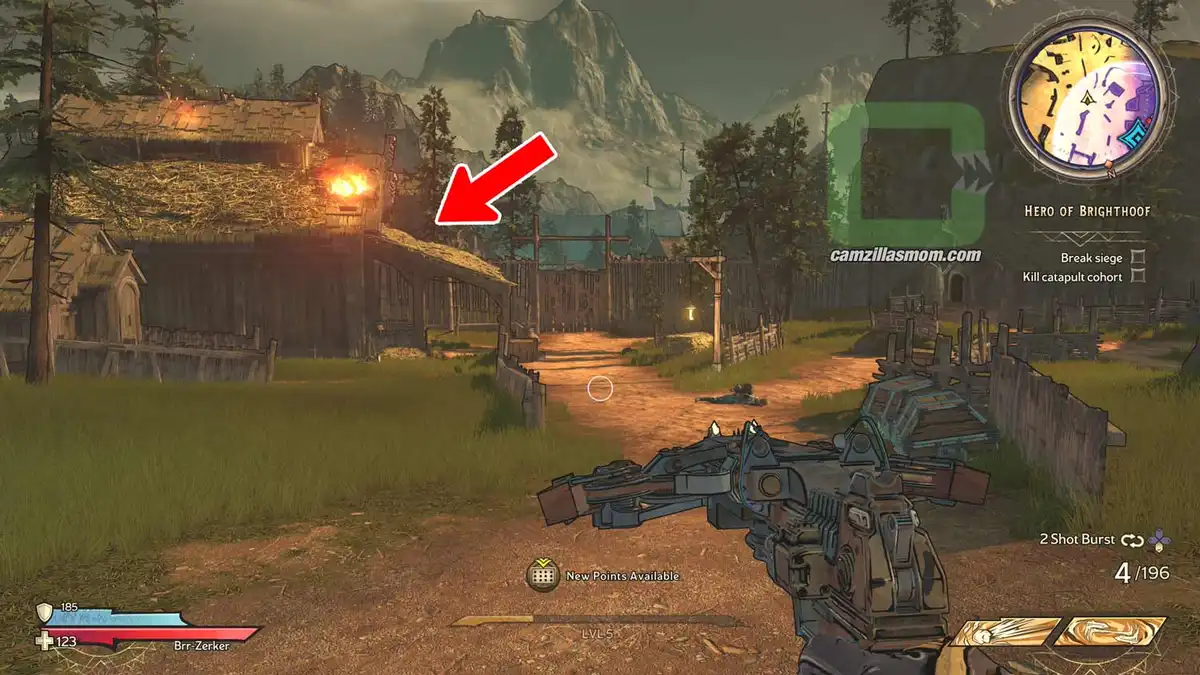
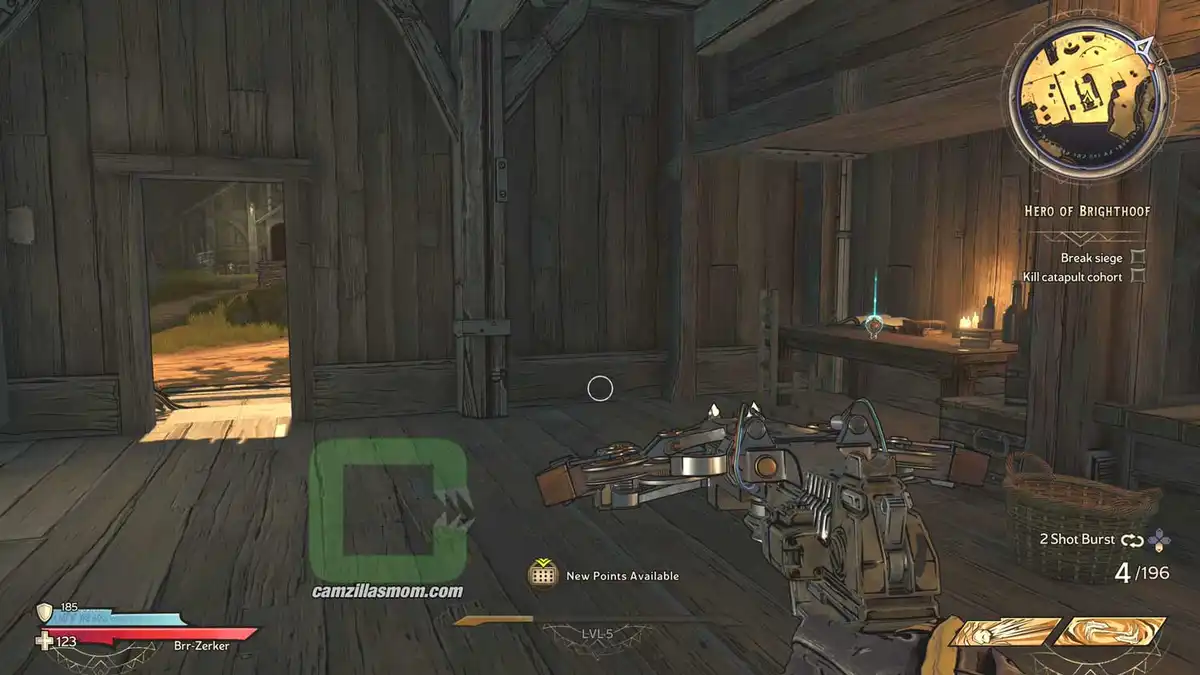
This Lore Scroll is at Queen’s Gate. While you’re doing the “Hero of Brighthoof” Quest, you have to pass Queen’s Gate. Here you have to destroy a couple of catapults in the town of “Buttsville”. This Scroll is in the area of the second catapult in the building next to the southern gate.
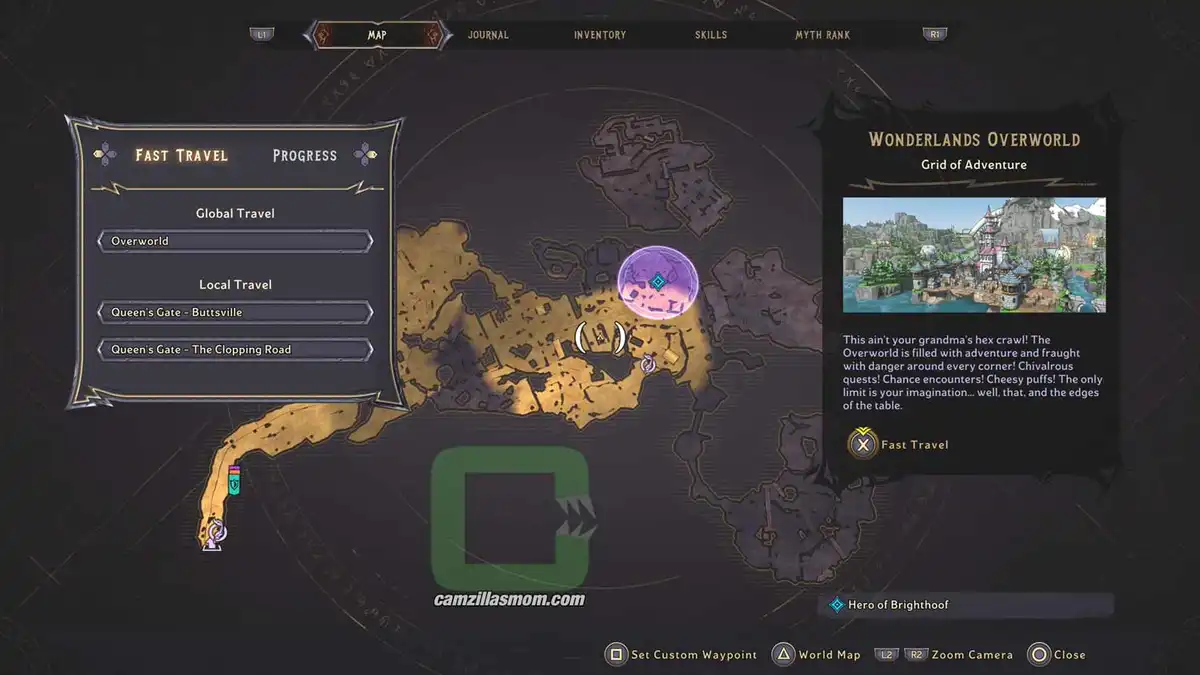
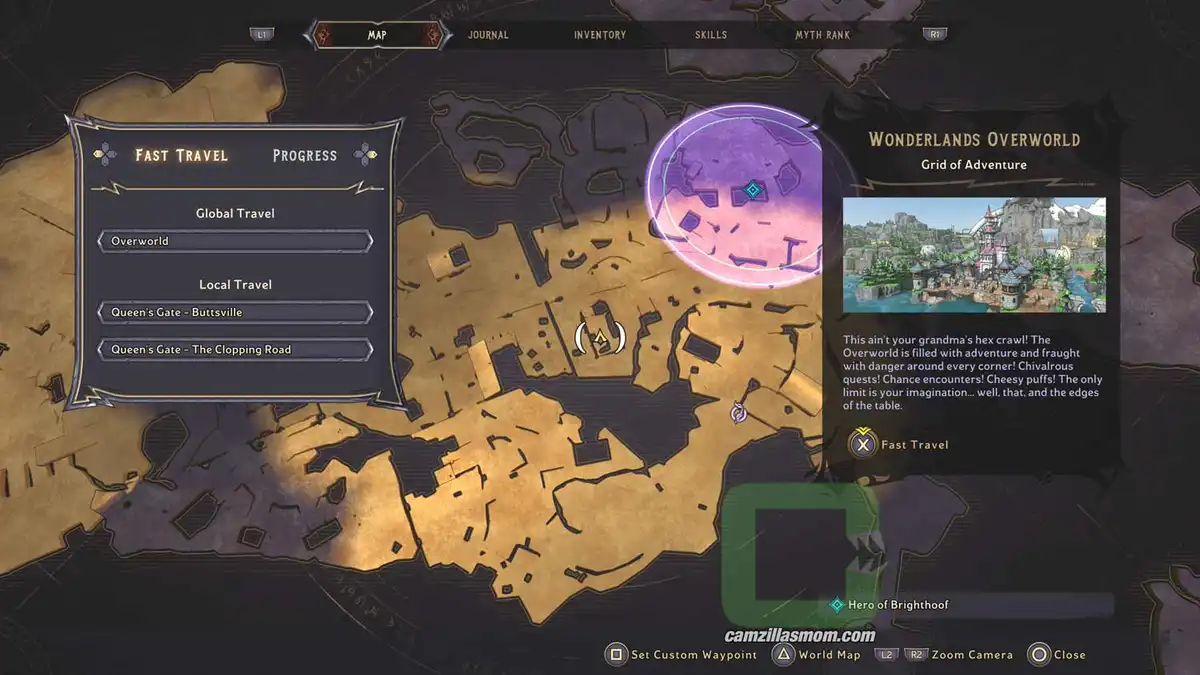
The zoomed-out map showing the Lore Scroll location at Queen › camzillasmom.com's Gate.
The zoomed-in map showing the Lore Scroll location at Queen › camzillasmom.com's Gate.
The screenshot is highlighting the building with the Lore Scroll inside. › camzillasmom.com
The screenshot showing the Lore Scroll inside the building. › camzillasmom.com

3 – Thief Thoughts

In the story at Queen’s Gate, you use the second catapult to get on the other side to Honor’s Tower”. Climb the top of the landing area building, where you can pick up this Lore Scroll.
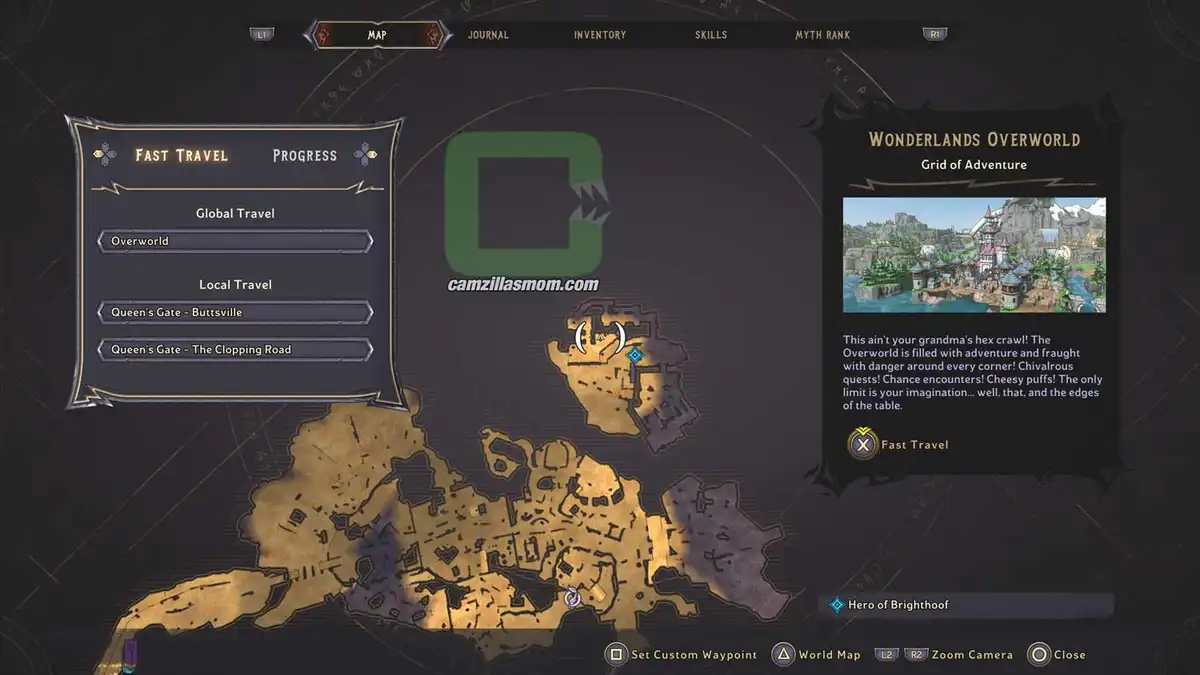
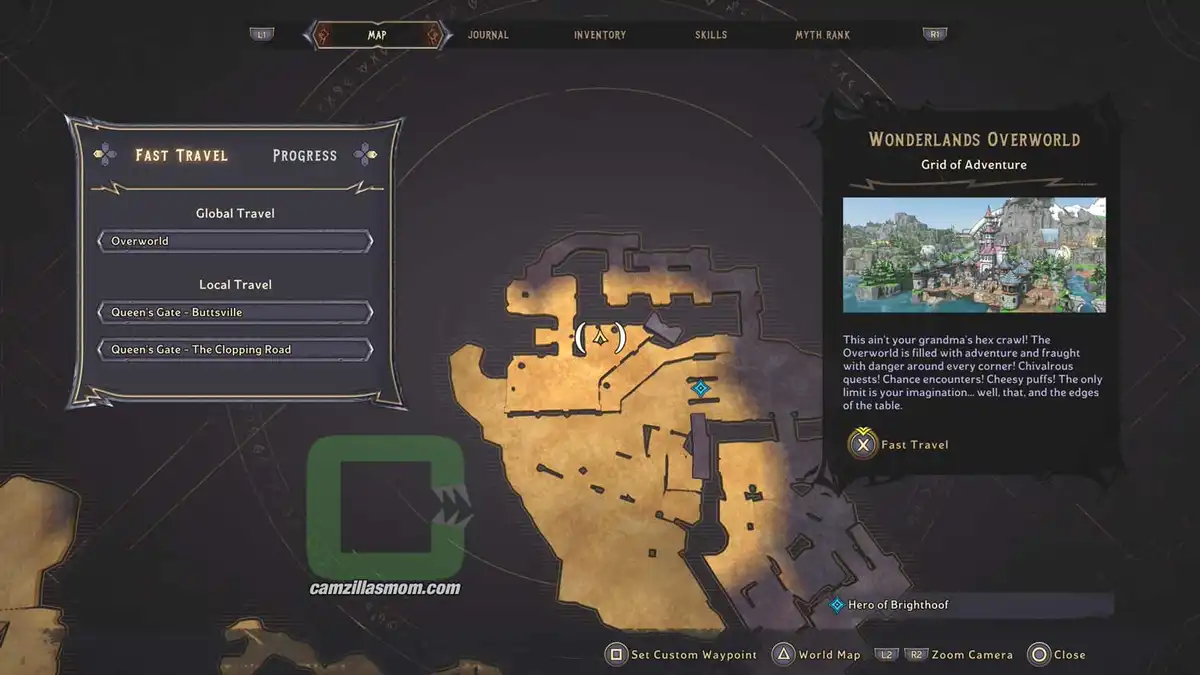
The zoomed-out map showing the Lore Scroll location at Queen › camzillasmom.com's Gate.
The zoomed-in map showing the Lore Scroll location at Queen › camzillasmom.com's Gate.
Screenshot showing the Lore Scroll at the start of the structure at Honor › camzillasmom.com's Tower.
Screenshot shows the Lore Scroll on top of the box. › camzillasmom.com

Snoring Valley Overview Map

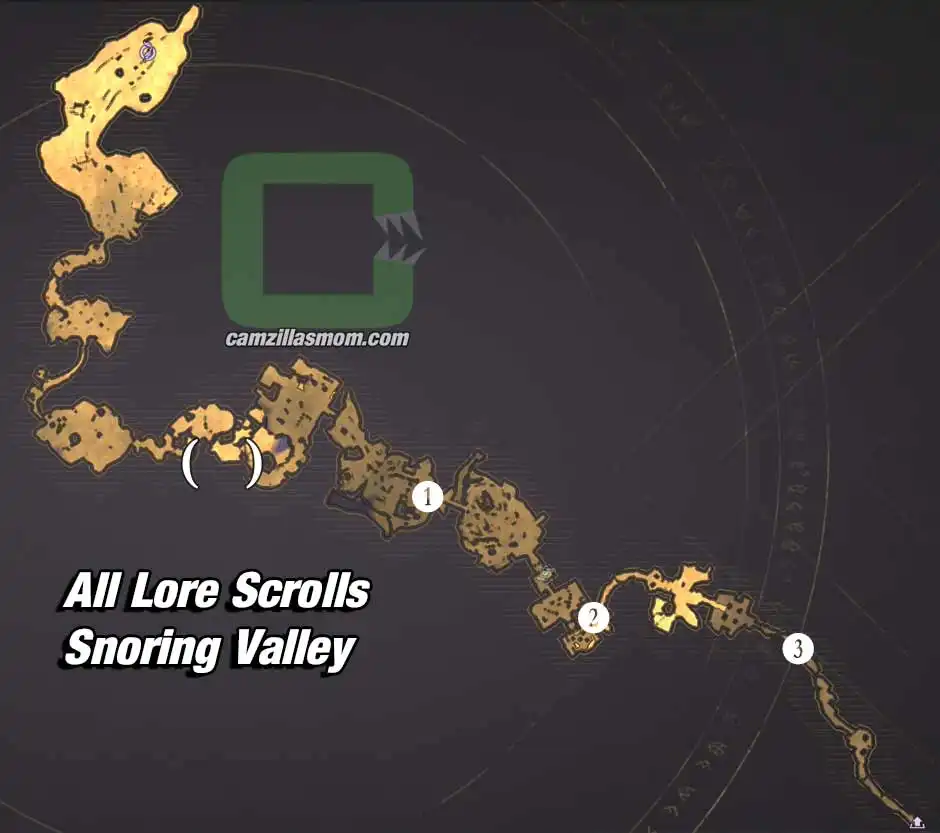
Snoring Valley overview map with 3 Lore Scrolls collectibles locations highlighted. › camzillasmom.com

1 – Diary of Garrifex
2 – Harrowfast
3 – Prophecy: Fire and Dreams

1 – Diary of Garrifex

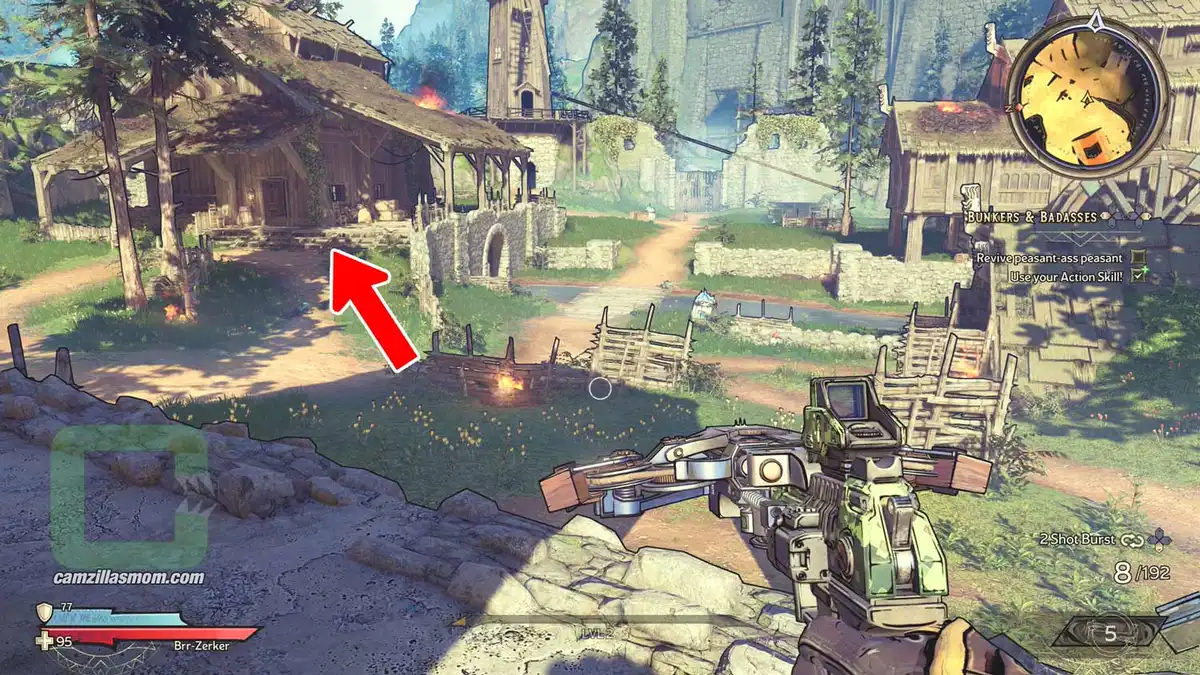
In “Bunkers and Badasses”, the Tutorial Quest that Tiny Tina sends you to, you start at the “Glade of Helpful Tutorials” in the Snoring Valley. You will cross the “Haunted Cascade” and then arrive at the “Nothinghappenshereshire” Village. In the centre of this village is a wooden house built above the river. Inside is the Lore Scroll you’re looking for on the table.
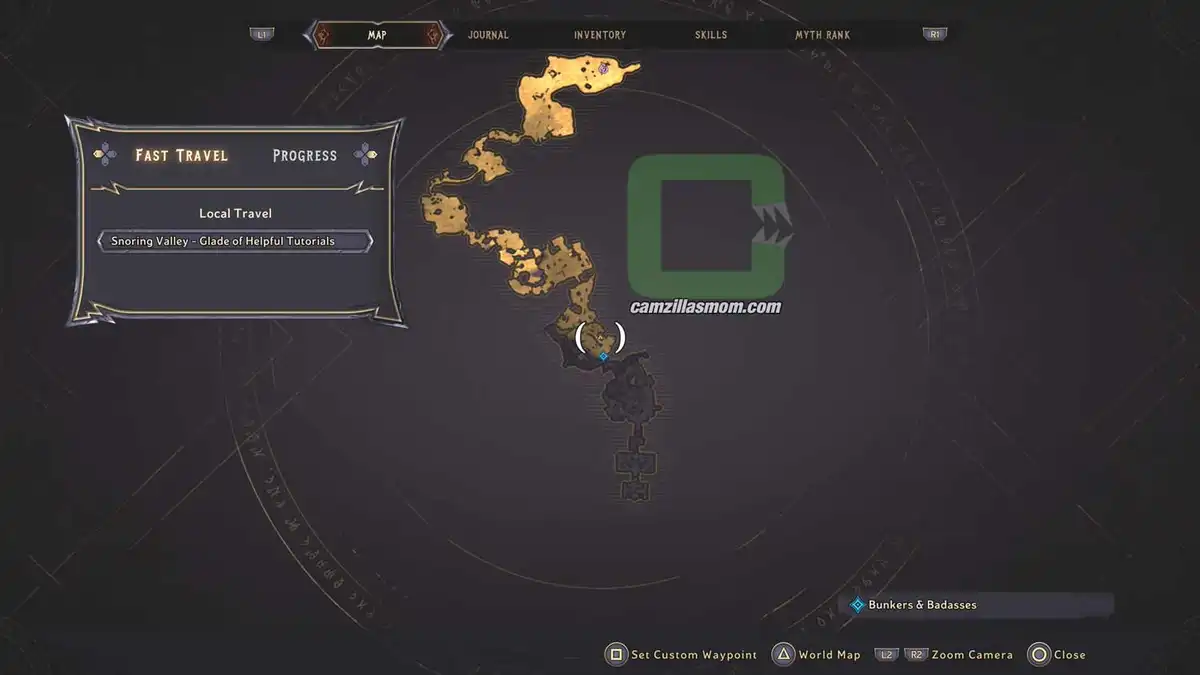
The zoomed-out map showing the Lore Scroll location at Snoring Valley. › camzillasmom.com
The zoomed-in map showing the Lore Scroll location at Snoring Valley. › camzillasmom.com
The screenshot is highlighting the wooden building with the Lore Scroll. › camzillasmom.com
Image showing the Lore Scroll inside the building. › camzillasmom.com

2 – Harrowfast

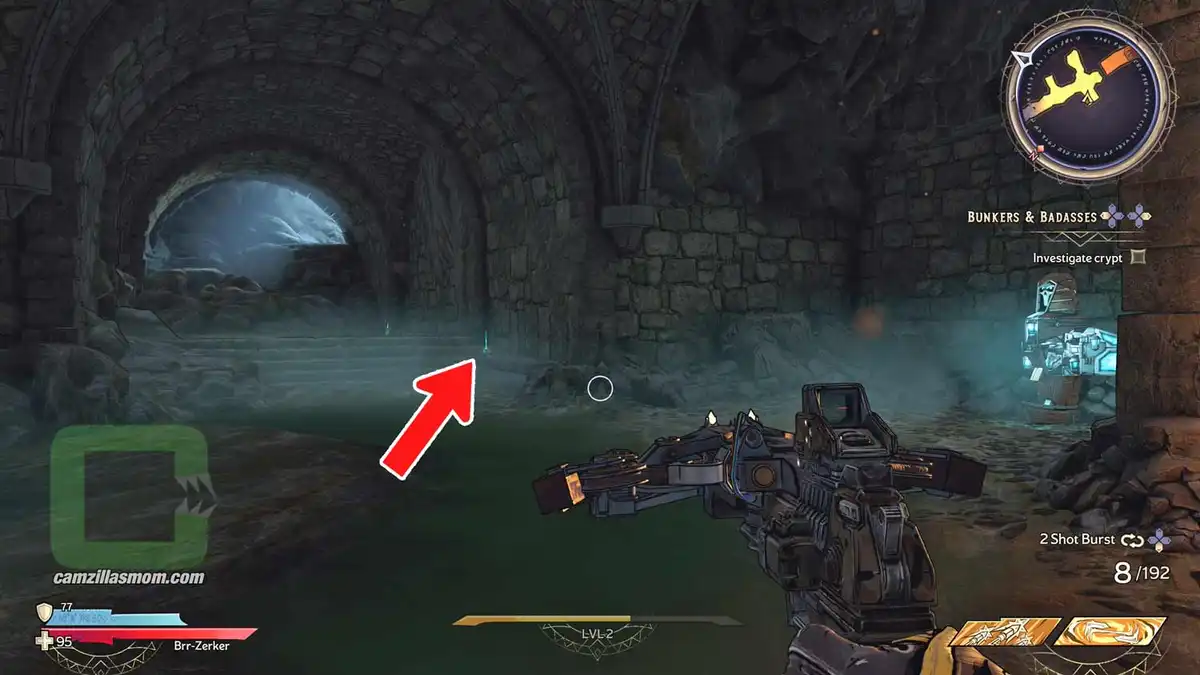
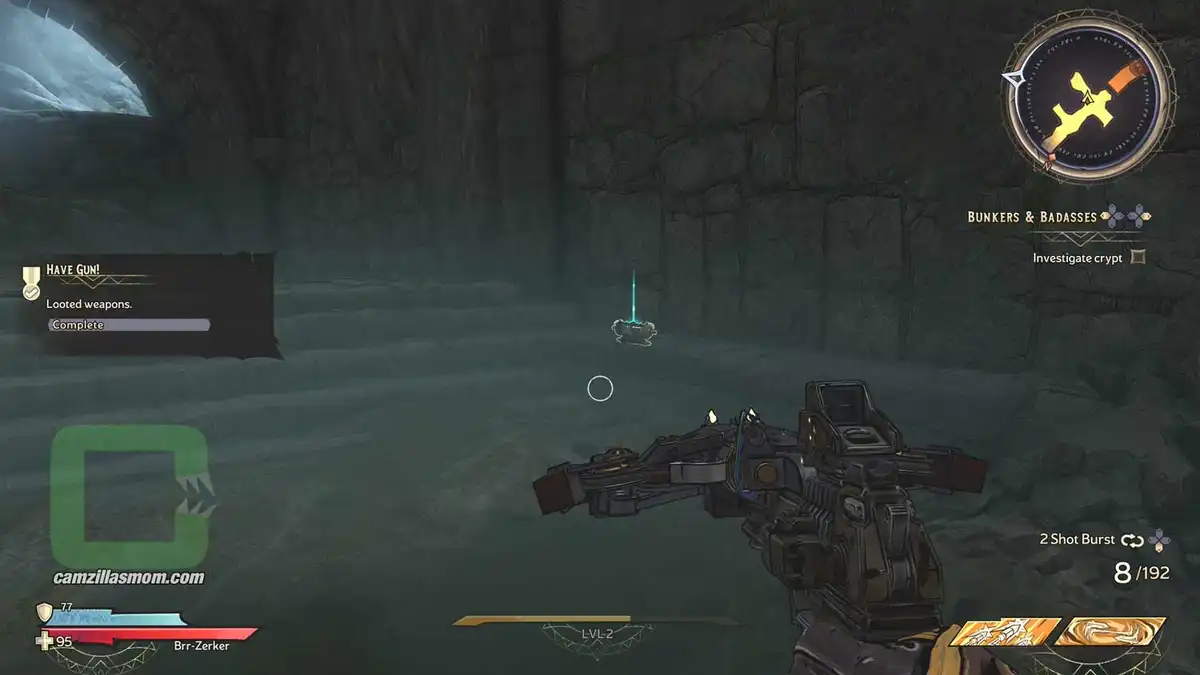
In “Bunkers and Badasses”, the Tutorial Quest that Tiny Tina sends you to, you start at the “Glade of Helpful Tutorials” in the Snoring Valley. You will cross the “Haunted Cascade”, the “Nothinghappenshereshire” Village and “Castle Harrowfast”. In the thrown room, you will slide down a hole into the Crypt. The Scroll is near the respawn point of the “Dusty Crypt”.
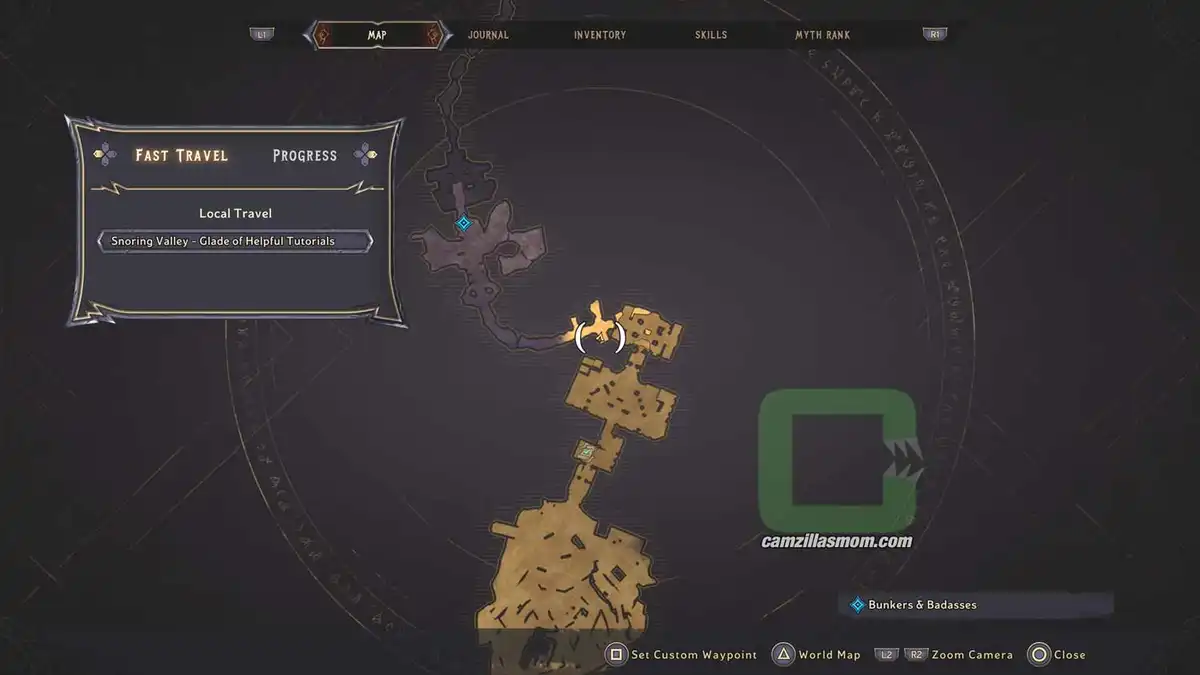
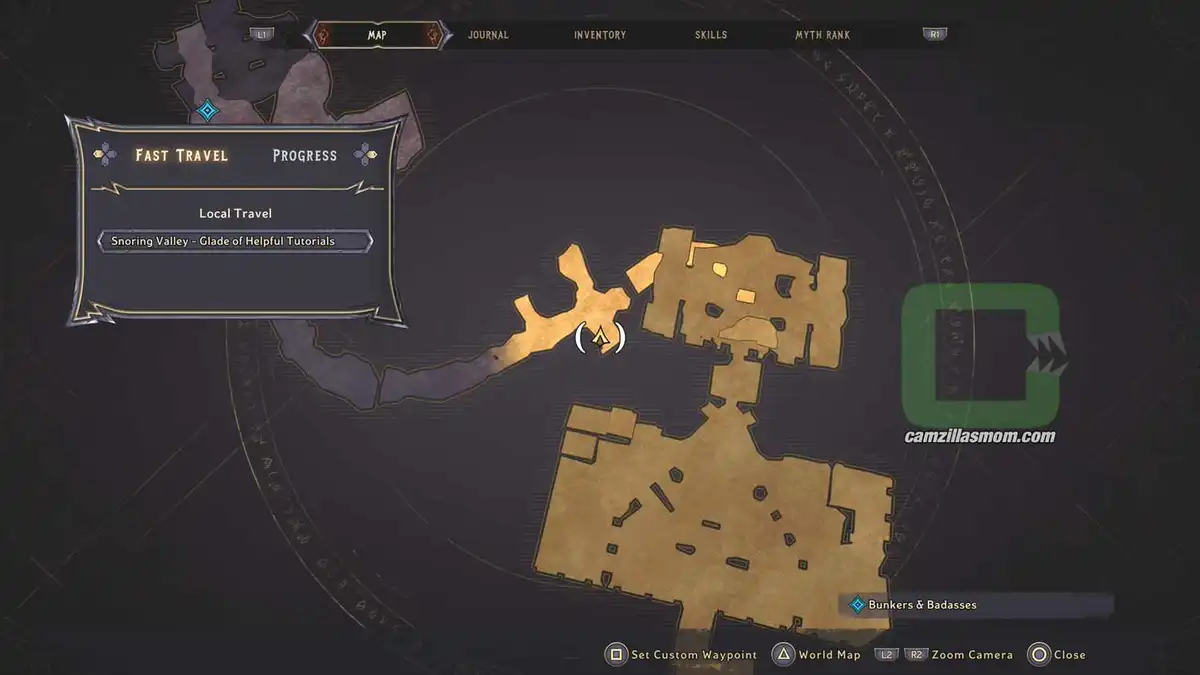
The zoomed-out map showing the Lore Scroll location at Snoring Valley. › camzillasmom.com
The zoomed-in map showing the Lore Scroll location at Snoring Valley. › camzillasmom.com
The screenshot shows the respawn point with the Lore Scroll ahead. › camzillasmom.com
Up-close screenshot of the Lore Scroll. › camzillasmom.com

3 – Prophecy: Fire and Dreams

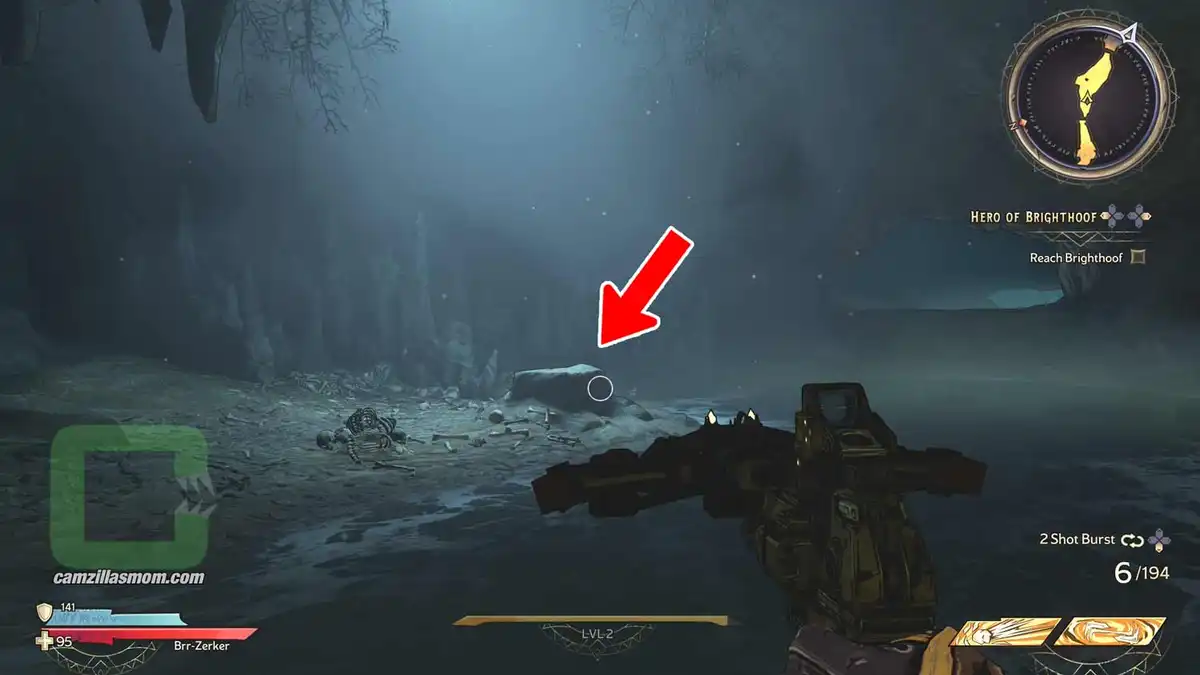
In “Bunkers and Badasses”, the Tutorial Quest that Tiny Tina sends you to, you start at the “Glade of Helpful Tutorials” in the Snoring Valley. You will cross the “Haunted Cascade”, the “Nothinghappenshereshire” Village, “Castle Harrowfast” and the “Dusty Crypt”. After the Boss Fight in the tomb, you can pick up this scroll on top of a rock.
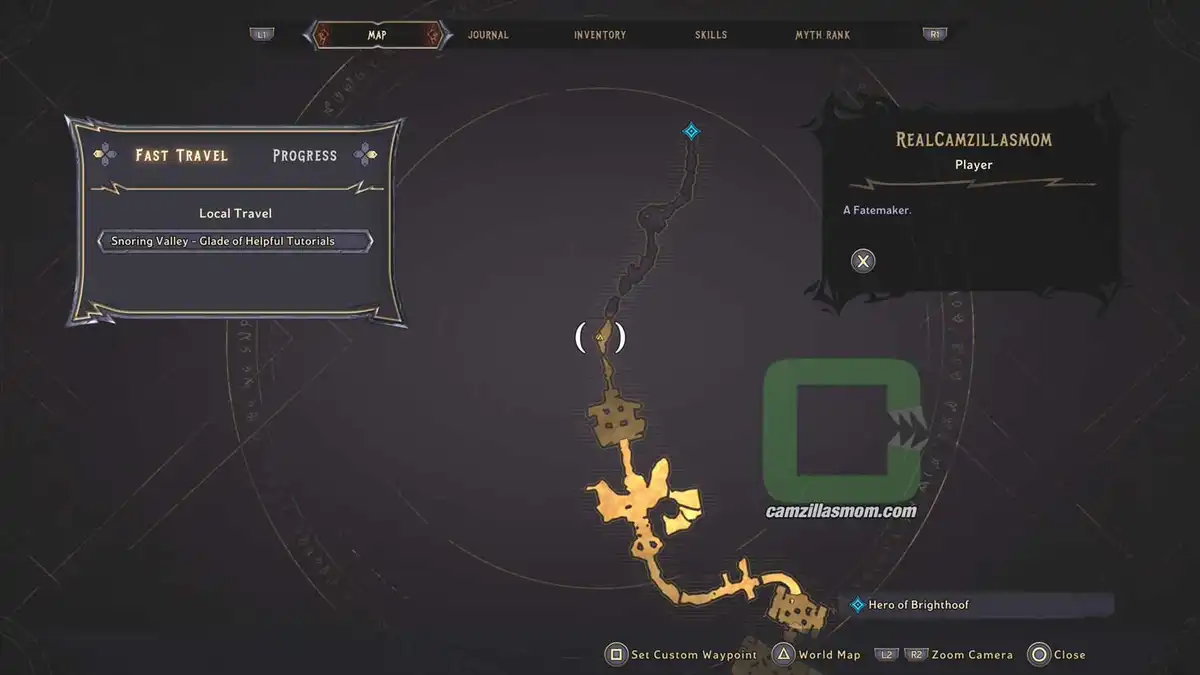
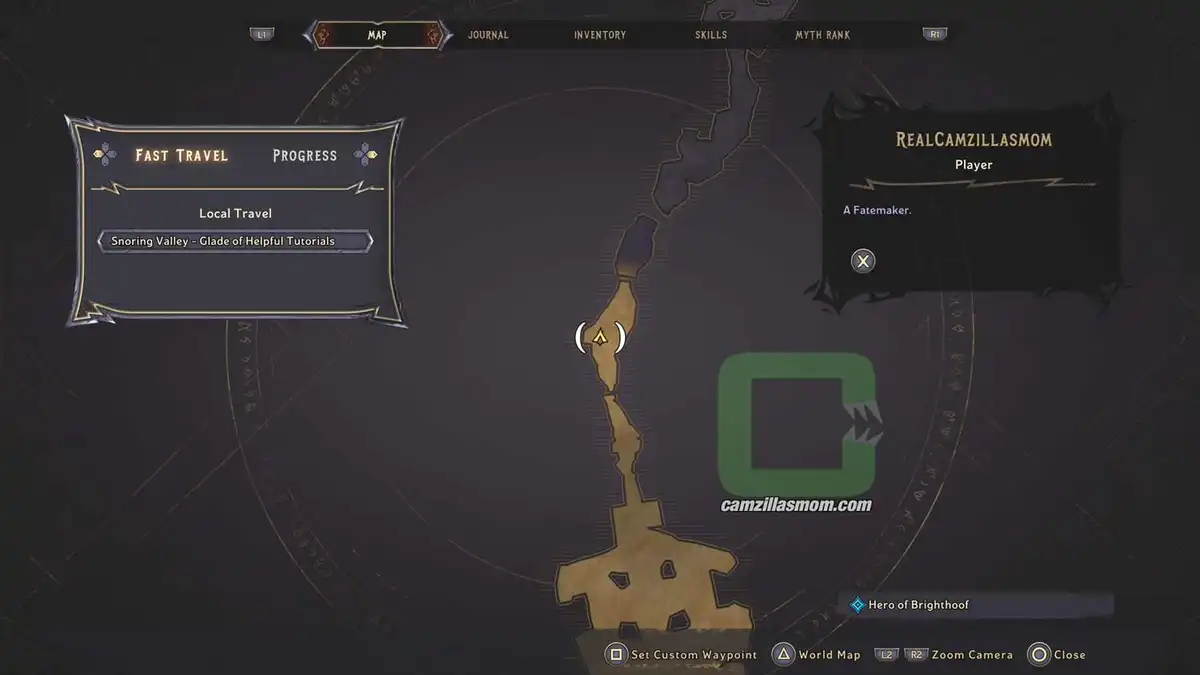
The zoomed-out map showing the Lore Scroll location at Snoring Valley. › camzillasmom.com
The zoomed-in map showing the Lore Scroll location at Snoring Valley. › camzillasmom.com
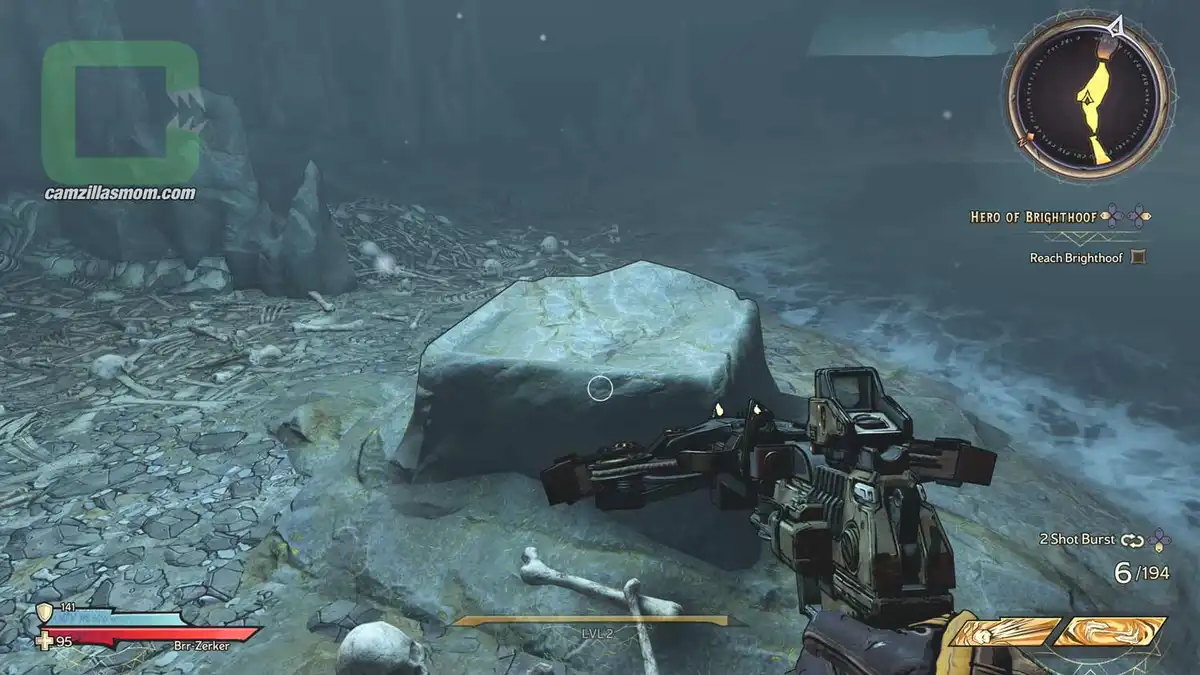
Screenshot highlighting the rock with the Lore Scroll. › camzillasmom.com
Close-up screenshot of the rock. › camzillasmom.com

Sunfang Oasis Overview Map

Sunfang Oasis overview map with 8 Lore Scrolls collectibles locations highlighted. › camzillasmom.com

1 – Eternal Wellspring
2 – Goddess of Air
3 – Goddess of Fire
4 – Goddess of Sand
5 – Goddes of Water
6 – The Damned
7 – The Shattering

8 – Twists and Turns

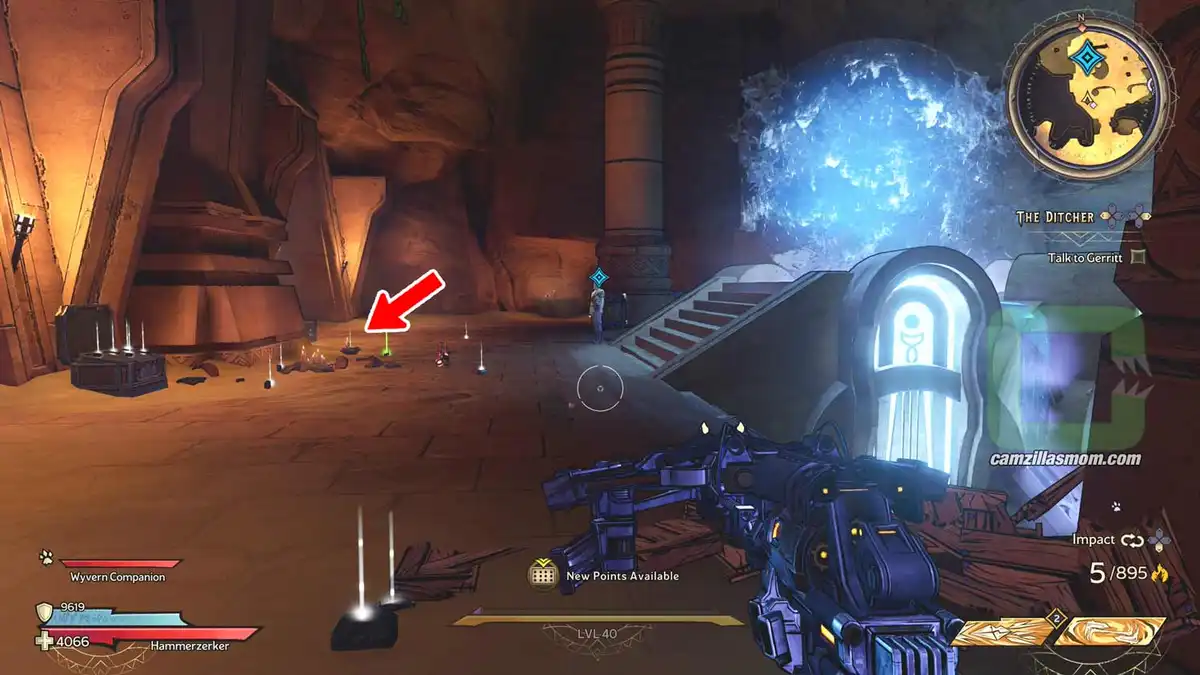
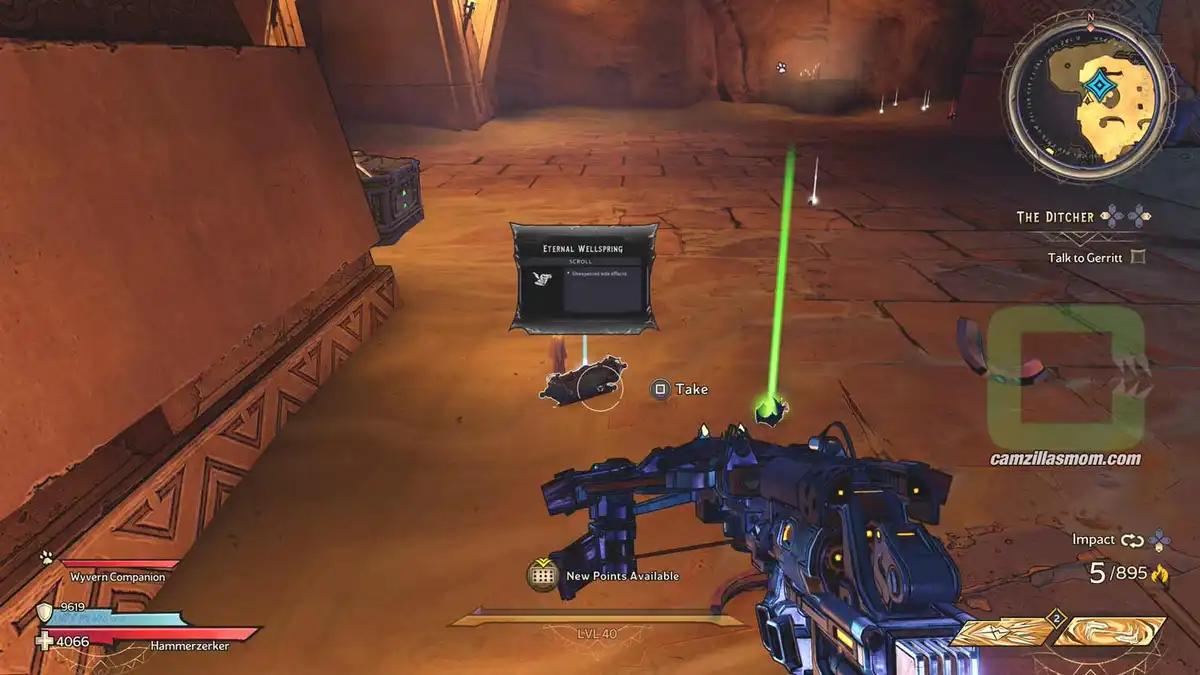
1 – Eternal Wellspring

This Lore Scroll is lying on the floor close to “Salissa’s Eternal Spring”. It can be hard to spot, especially when there’s loot lying around.
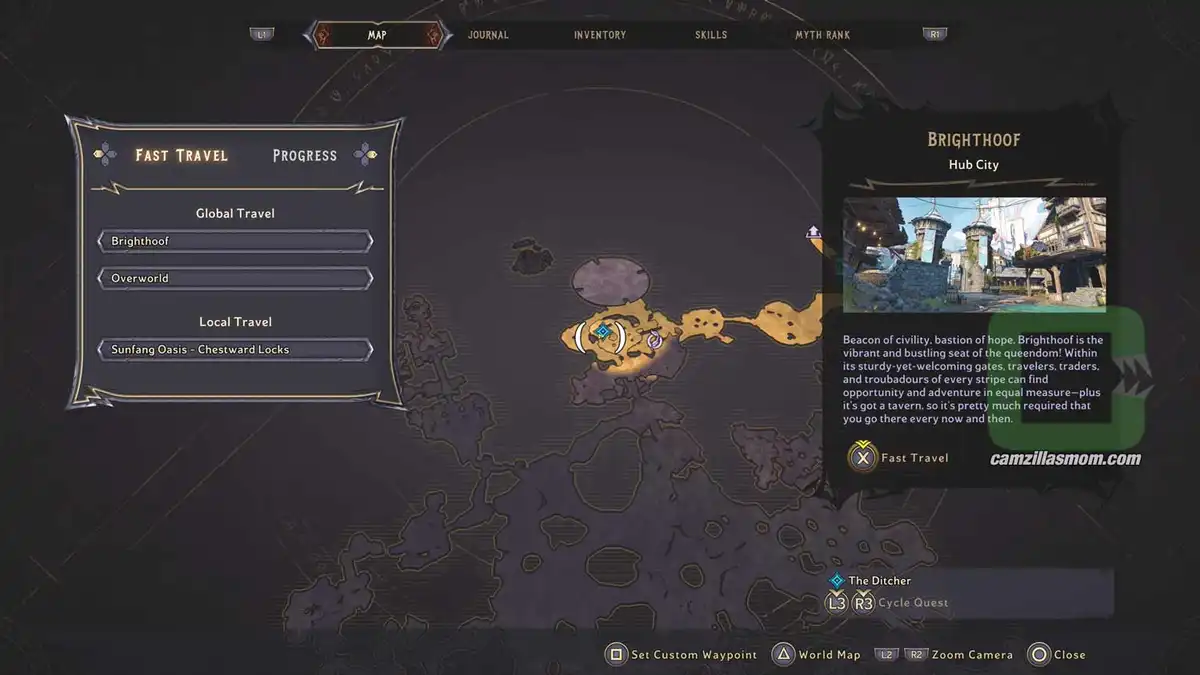
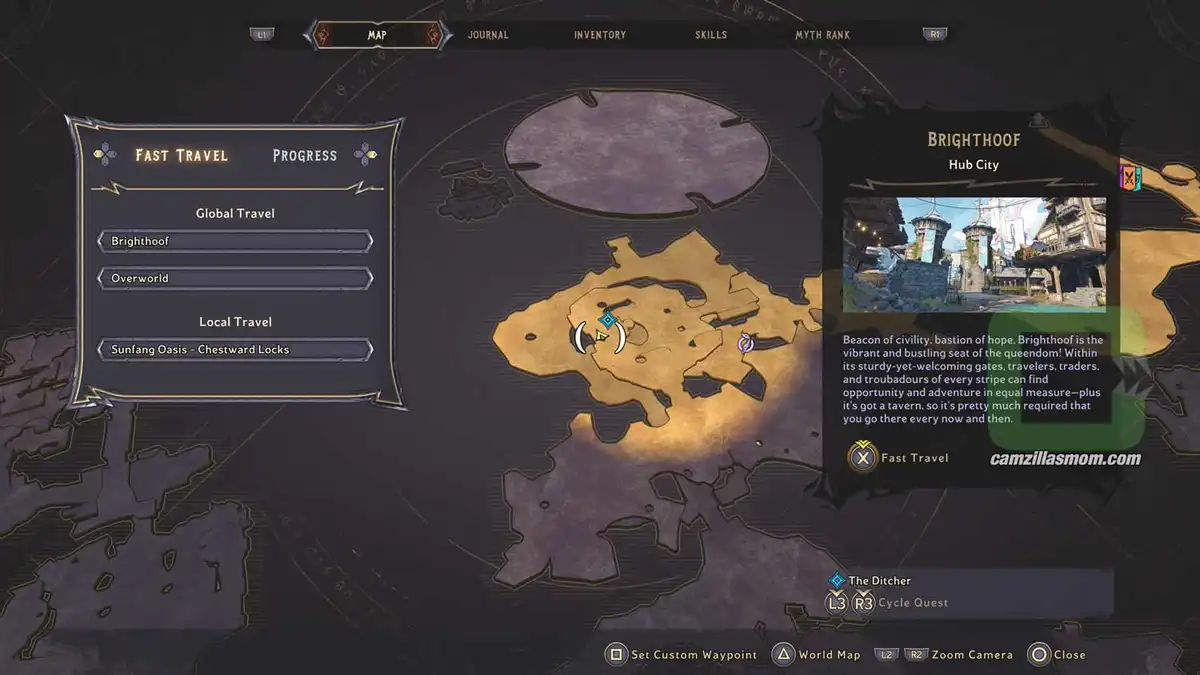
The zoomed-out map showing the Lore Scroll location at Sunfang Oasis. › camzillasmom.com
The zoomed-in map showing the Lore Scroll location at Sunfang Oasis. › camzillasmom.com
Screenshot showing the Lore Scroll on the floor of Salissa › camzillasmom.com's Eternal Spring.
› camzillasmom.com

2 – Goddess of Air

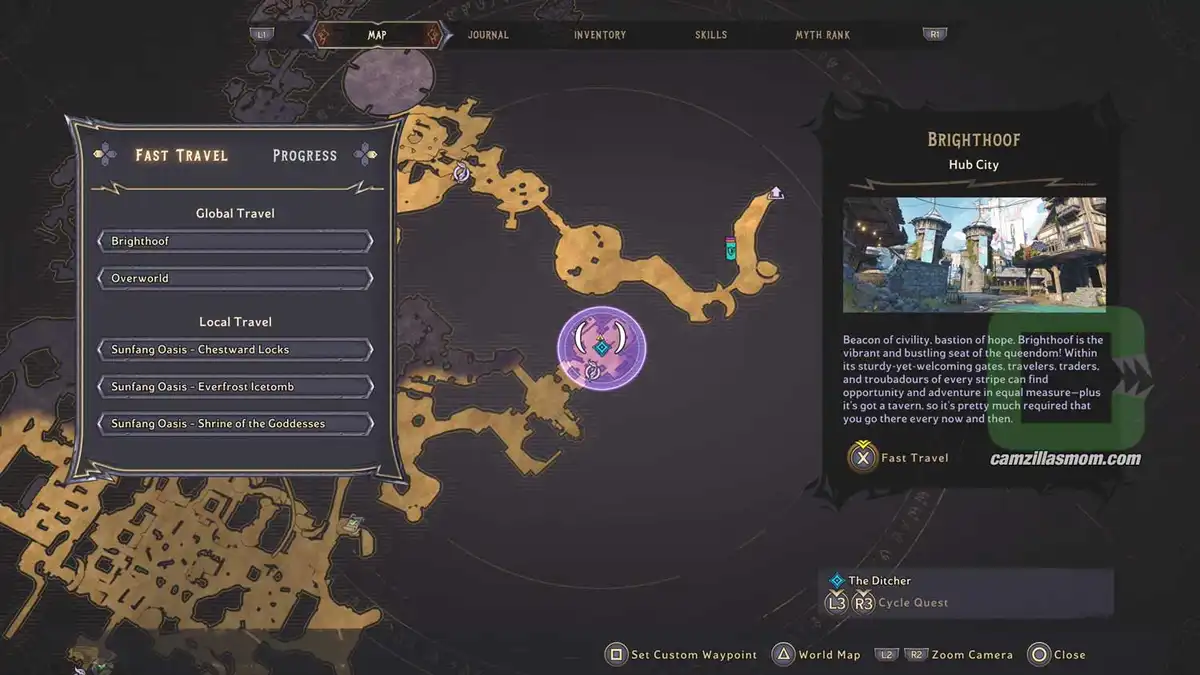
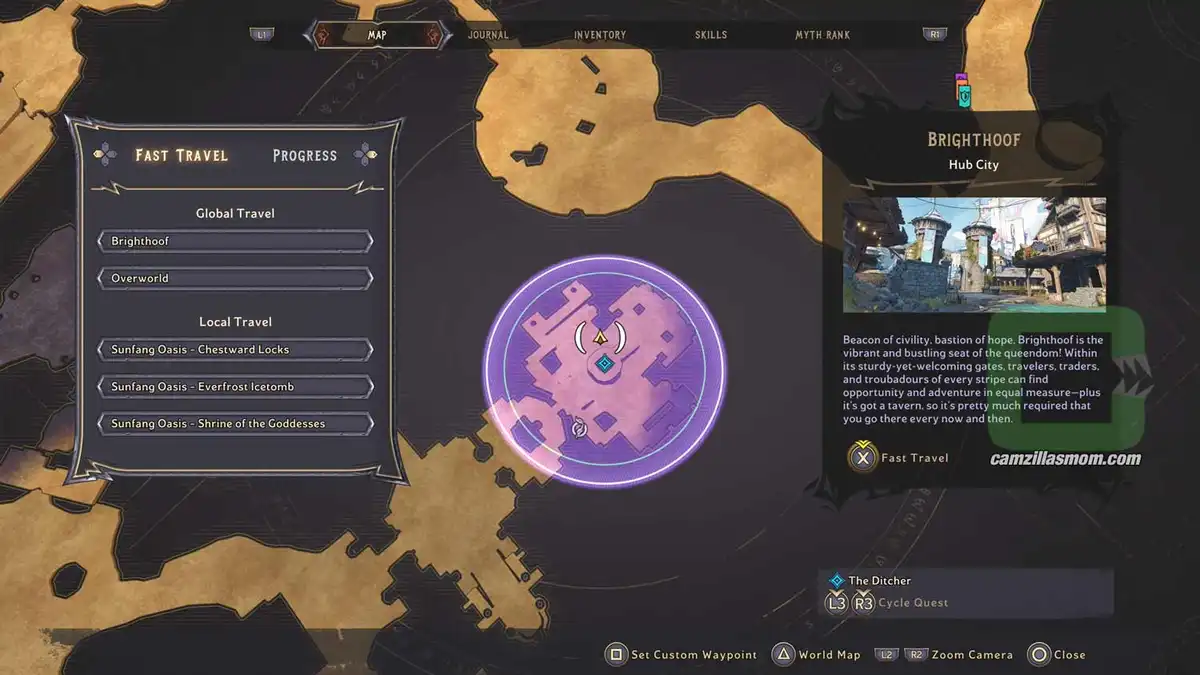
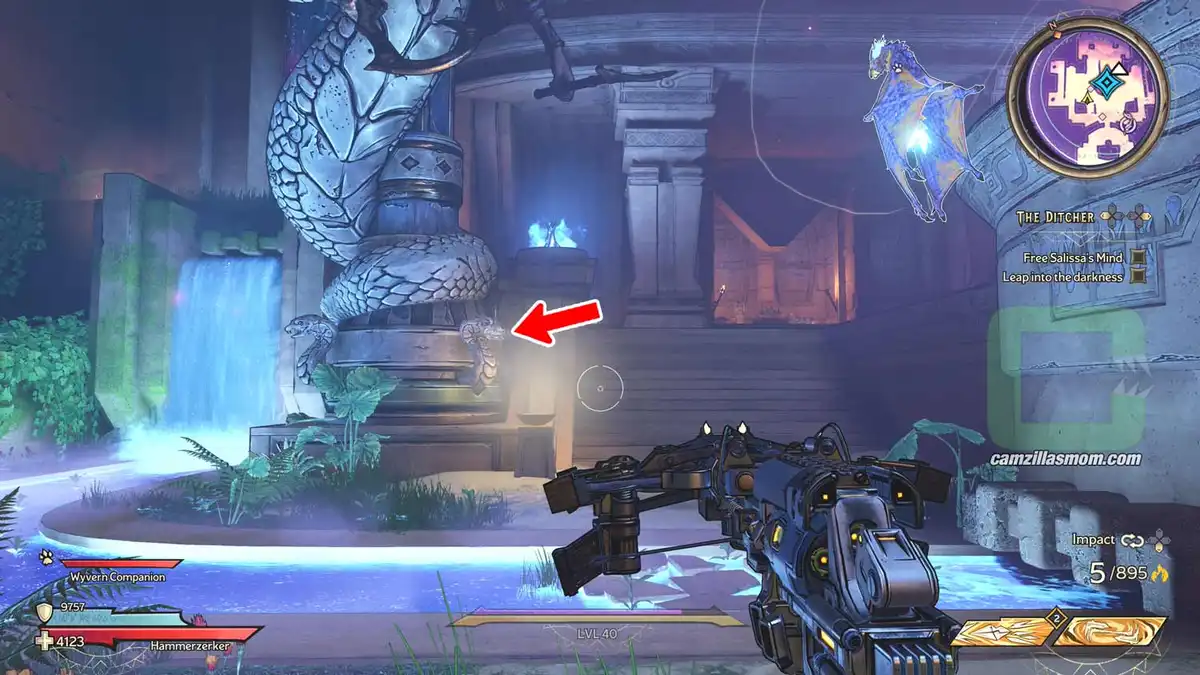
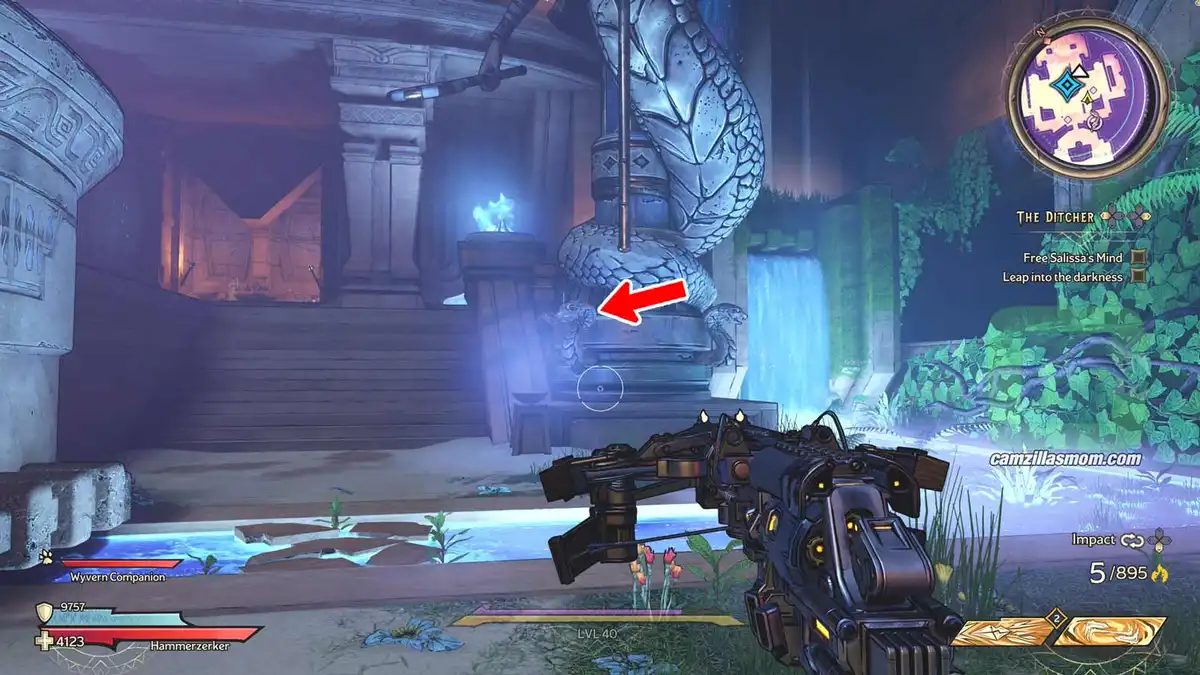
In the main room of the“Shrine of the Goddesses”, this scroll is inside one of the snakes’ mouths.

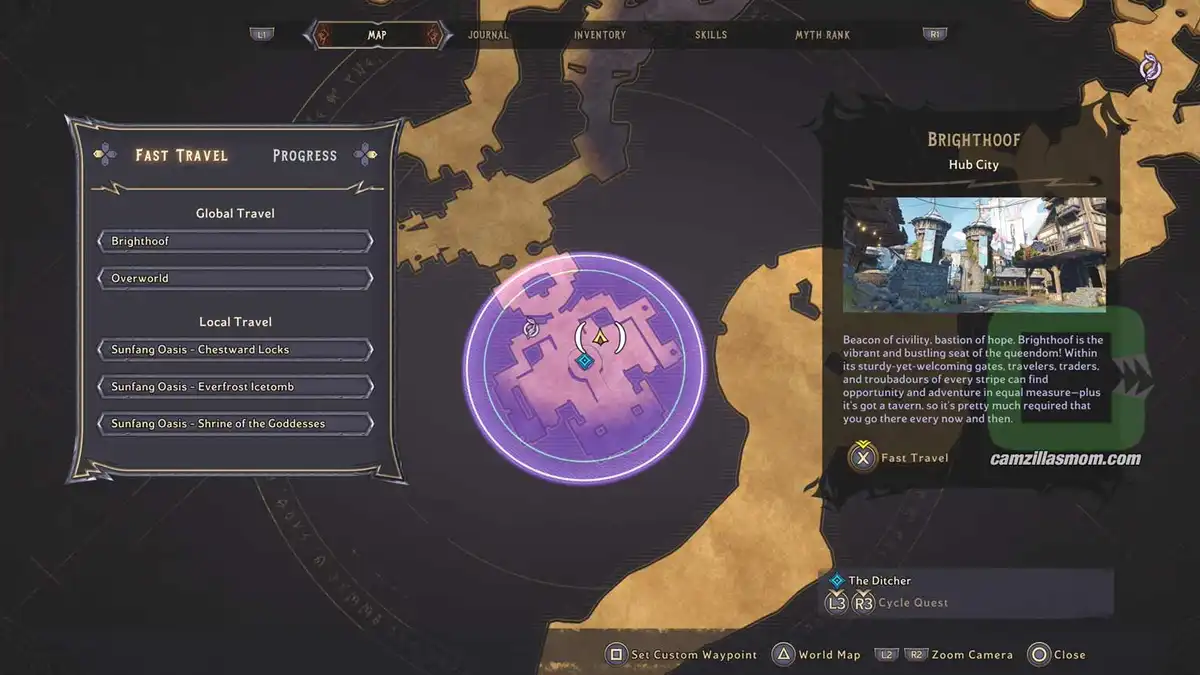
The zoomed-out map showing the Lore Scroll location at Sunfang Oasis. › camzillasmom.com
The zoomed-in map showing the Lore Scroll location at Sunfang Oasis. › camzillasmom.com
The screenshot highlights the location of the Lore Scroll in the snake › camzillasmom.com's mouth.
A close-up screenshot of the Lore Scroll and the snake. › camzillasmom.com

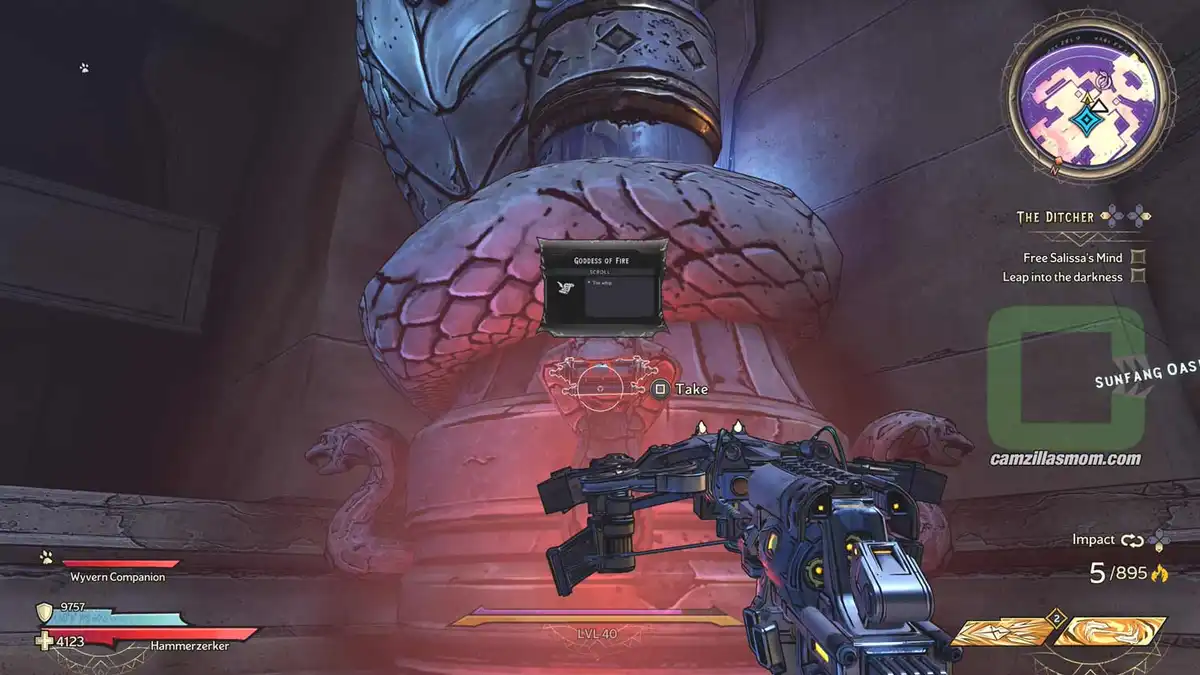
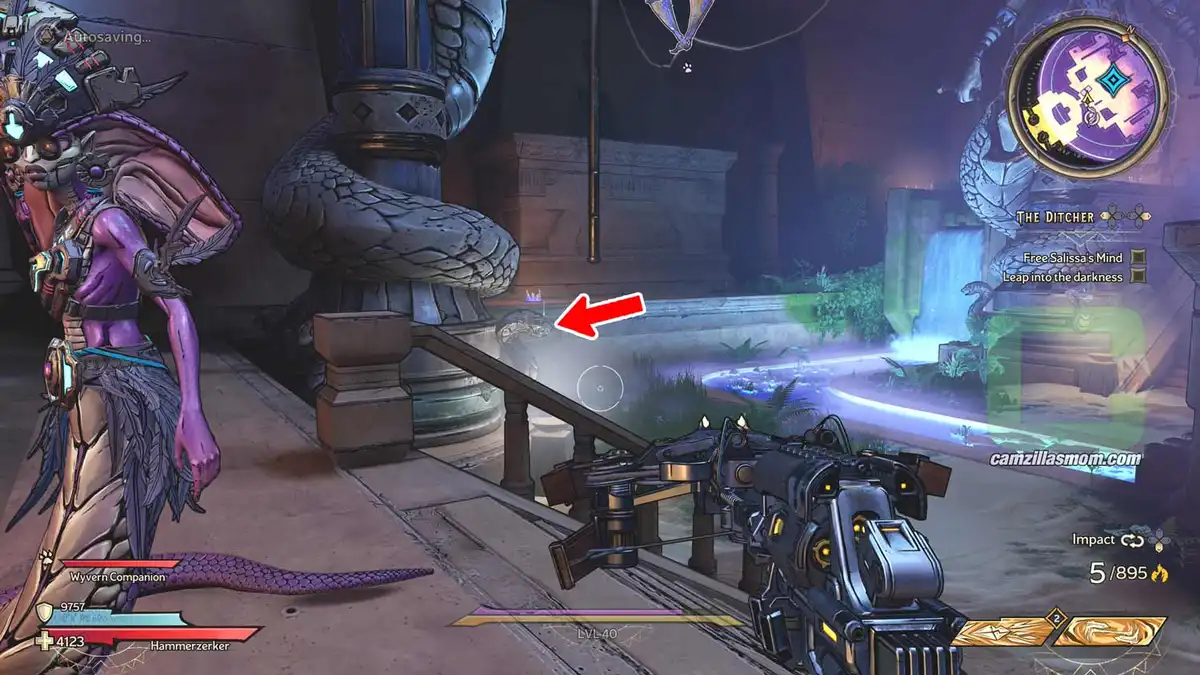
3 – Goddess of Fire

In the main room of the“Shrine of the Goddesses”, this scroll is inside one of the snakes’ mouths.
The zoomed-out map showing the Lore Scroll location at Sunfang Oasis. › camzillasmom.com
The zoomed-in map showing the Lore Scroll location at Sunfang Oasis. › camzillasmom.com
The screenshot shows the second Lore Scroll in another Snake › camzillasmom.com's mouth at Shrine of the Goddesses.
The close-up screenshot of the Lore Scroll. › camzillasmom.com

4 – Goddess of Sand

In the main room of the“Shrine of the Goddesses”, this scroll is inside one of the snakes’ mouths.

The zoomed-out map showing the Lore Scroll location at Sunfang Oasis. › camzillasmom.com
The zoomed-in map showing the Lore Scroll location at Sunfang Oasis. › camzillasmom.com
Another screenshot of a Lore Scroll in another snake › camzillasmom.com's mouth at the shrine.
Close-up screenshot of the Lore Scroll. › camzillasmom.com

5 – Goddess of Water

In the main room of the“Shrine of the Goddesses”, this scroll is inside one of the snakes’ mouths.

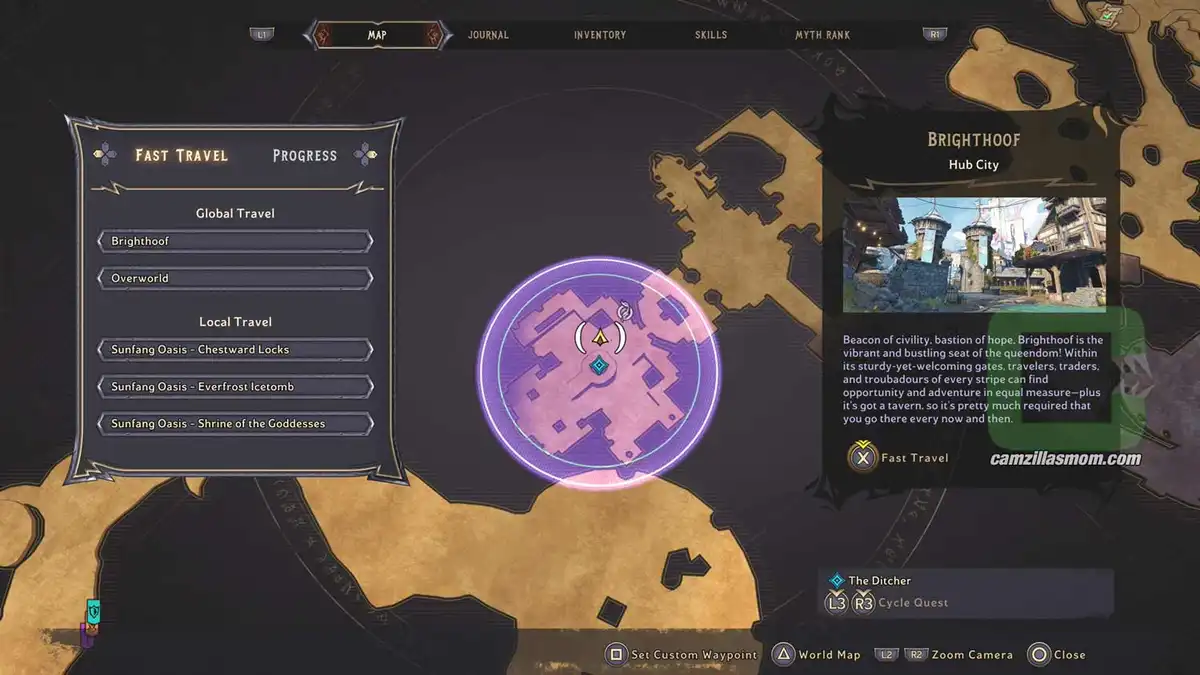
The zoomed-out map showing the Lore Scroll location at Sunfang Oasis. › camzillasmom.com
The zoomed-in map showing the Lore Scroll location at Sunfang Oasis. › camzillasmom.com
Screenshot of the Goddess of Water Lore Scroll in the snake › camzillasmom.com's mouth.
Close-up screenshot of the Lore Scroll. › camzillasmom.com

6 – The Damned

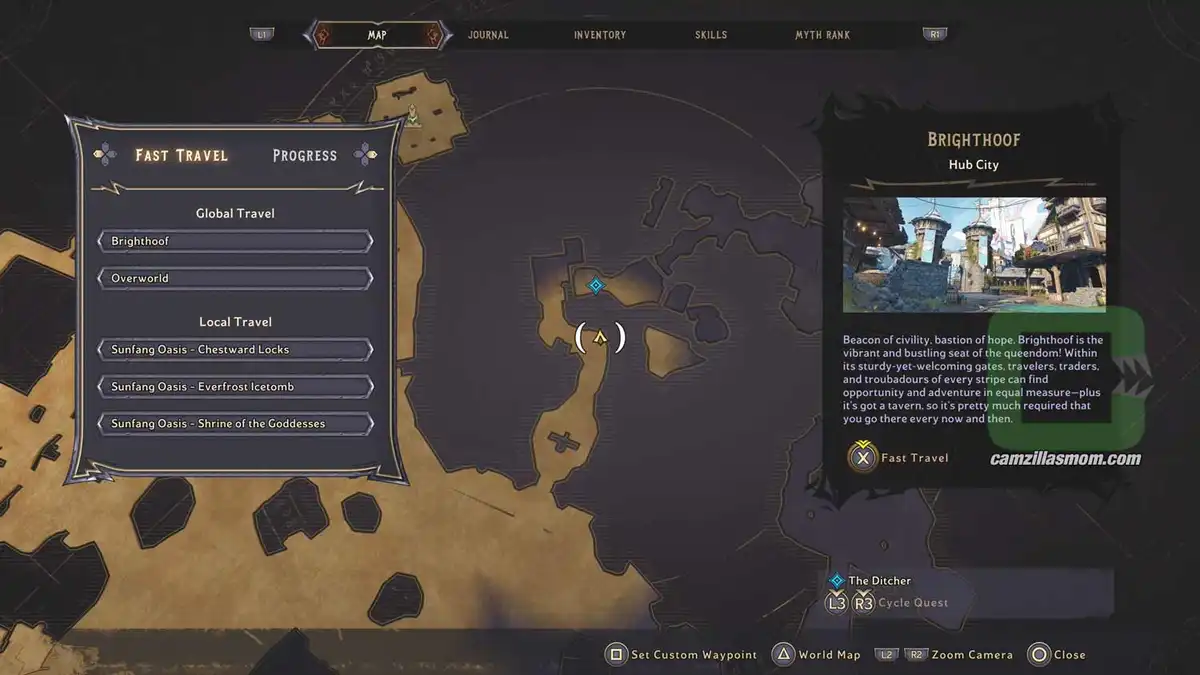
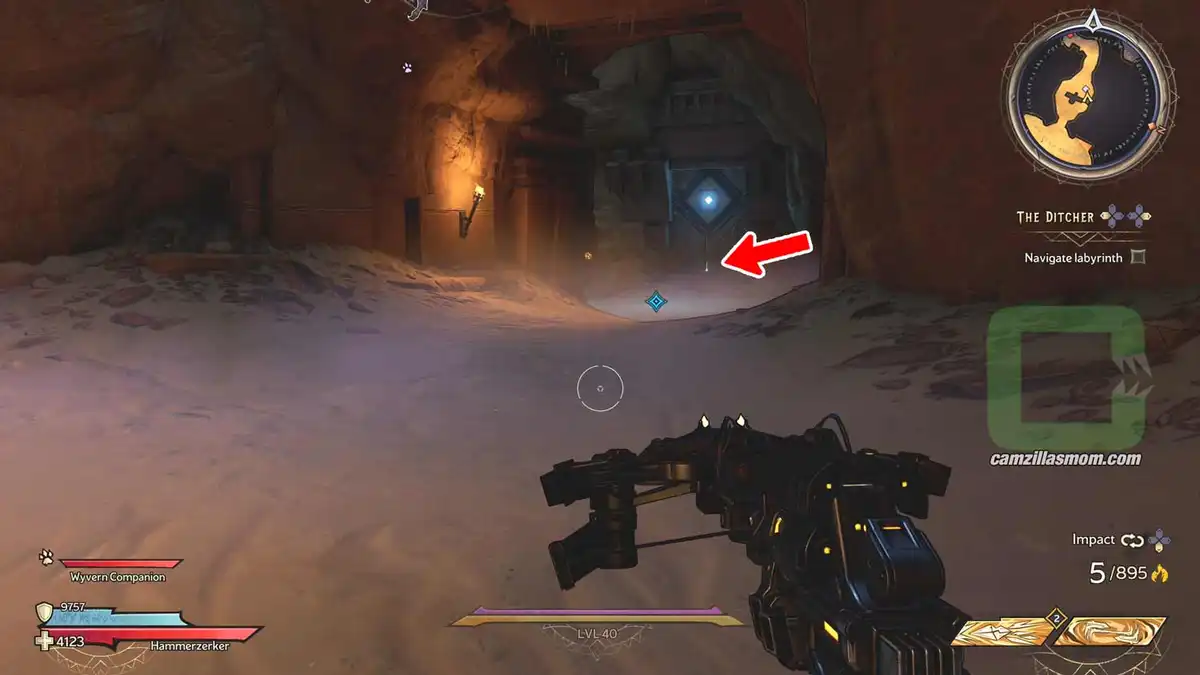
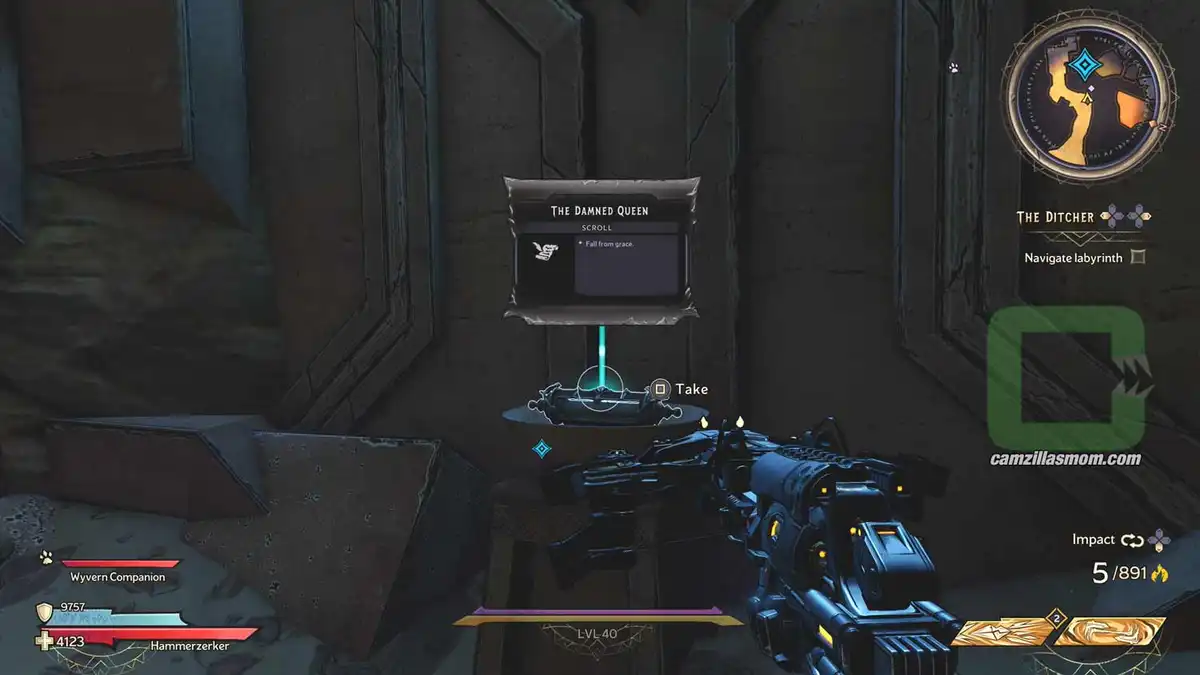
This scroll is in the first room of “The Labyrinth of No Escape”.

The zoomed-out map showing the Lore Scroll location at Sunfang Oasis. › camzillasmom.com
The zoomed-in map showing the Lore Scroll location at Sunfang Oasis. › camzillasmom.com
The Lore Scroll on the floor of the first room in the Labyrinth of No Escape. › camzillasmom.com
Close-up screenshot of the Lore Scroll. › camzillasmom.com

7 – The Shattering

In the entrance hall of the“Shrine of the Goddesses”, go upstairs to the balcony. There’s a scroll.
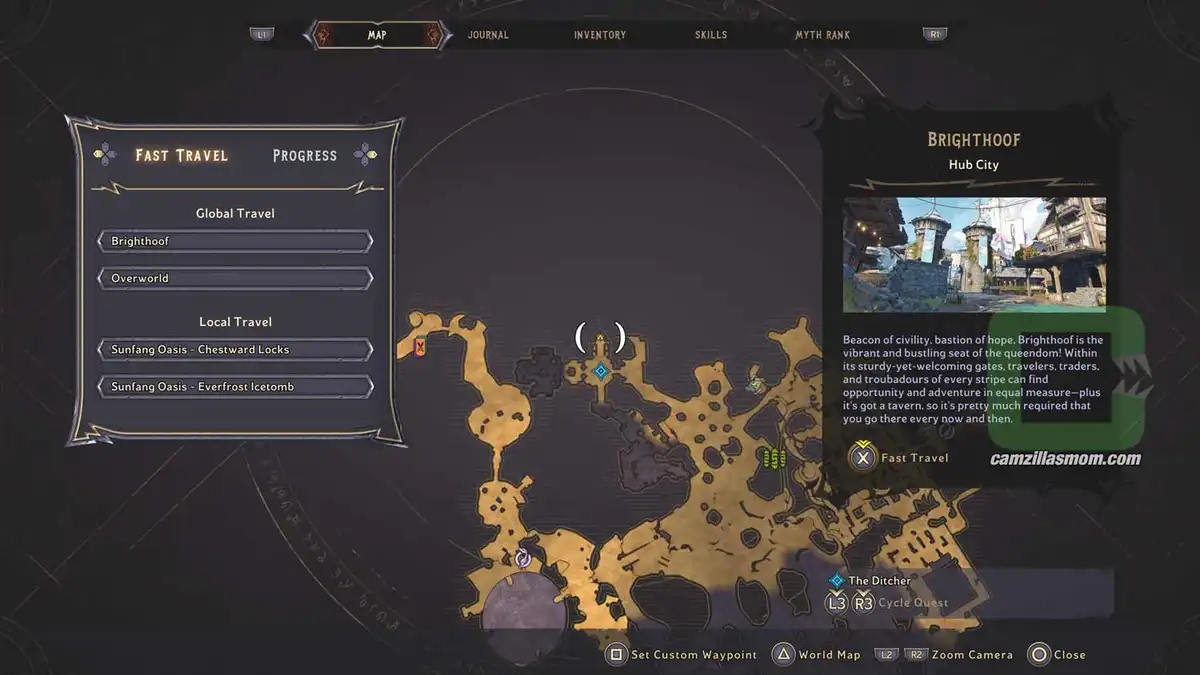
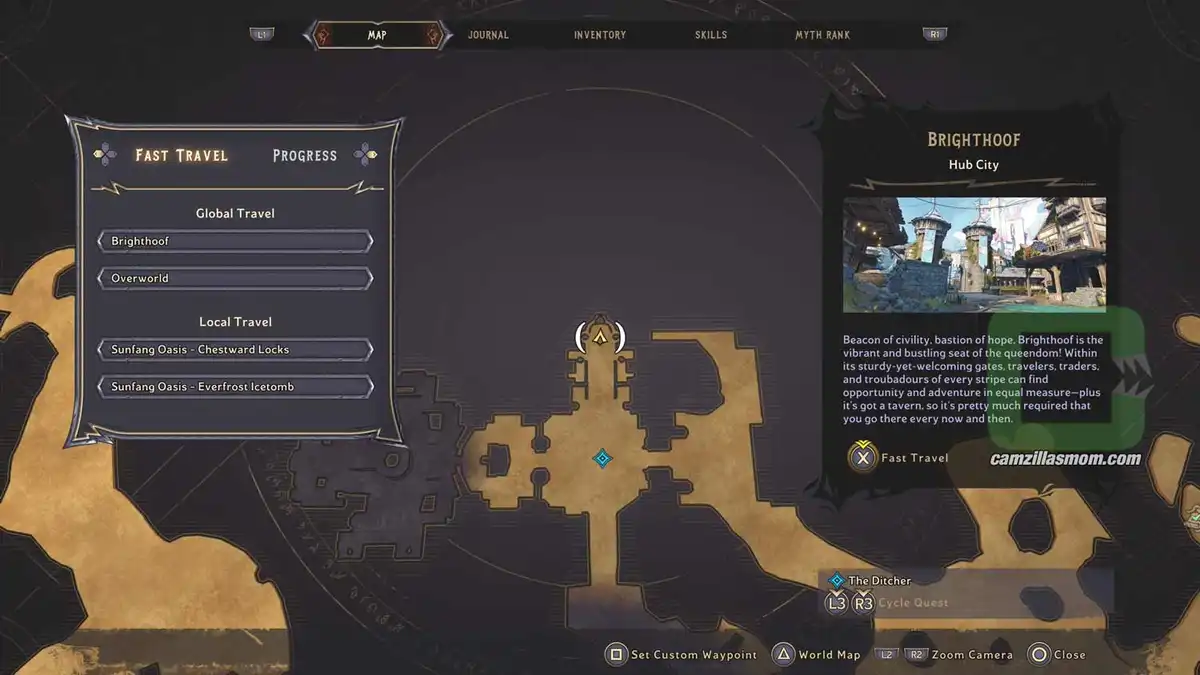
The zoomed-out map showing the Lore Scroll location at Sunfang Oasis. › camzillasmom.com
The zoomed-in map showing the Lore Scroll location at Sunfang Oasis. › camzillasmom.com
Groundfloor of the Shrine of the Goddess with the balcony upstairs highlighted. › camzillasmom.com
The Lore Scroll on the upstairs balcony. › camzillasmom.com

8 – Twists and Turns

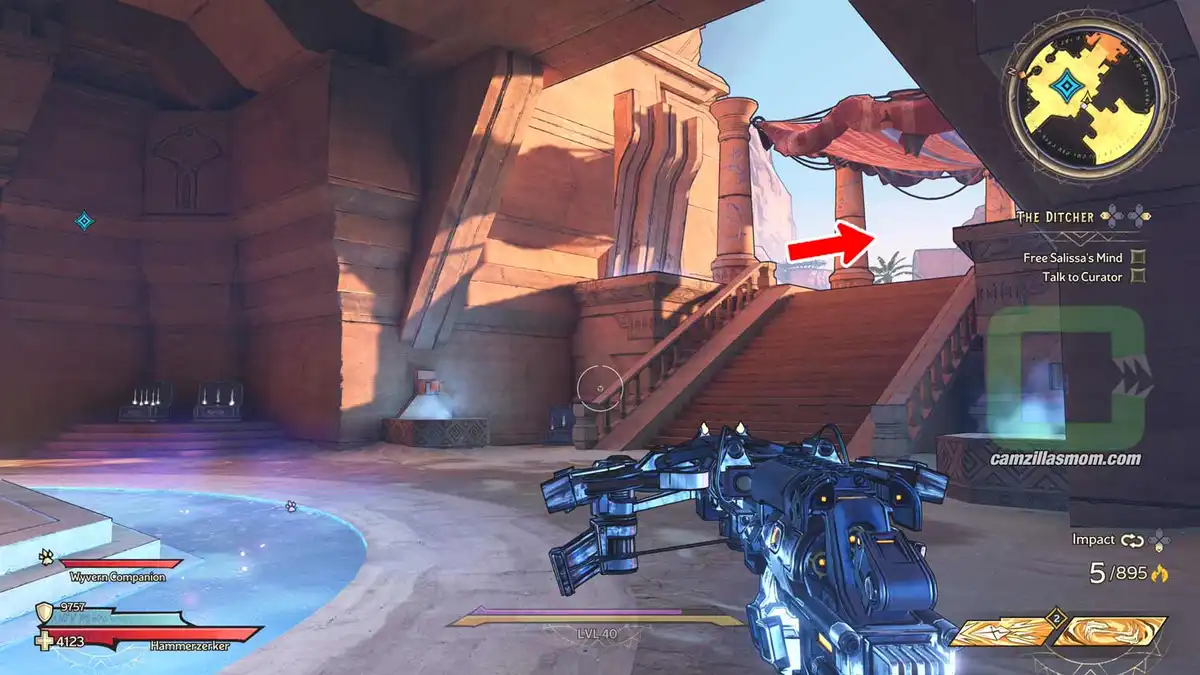
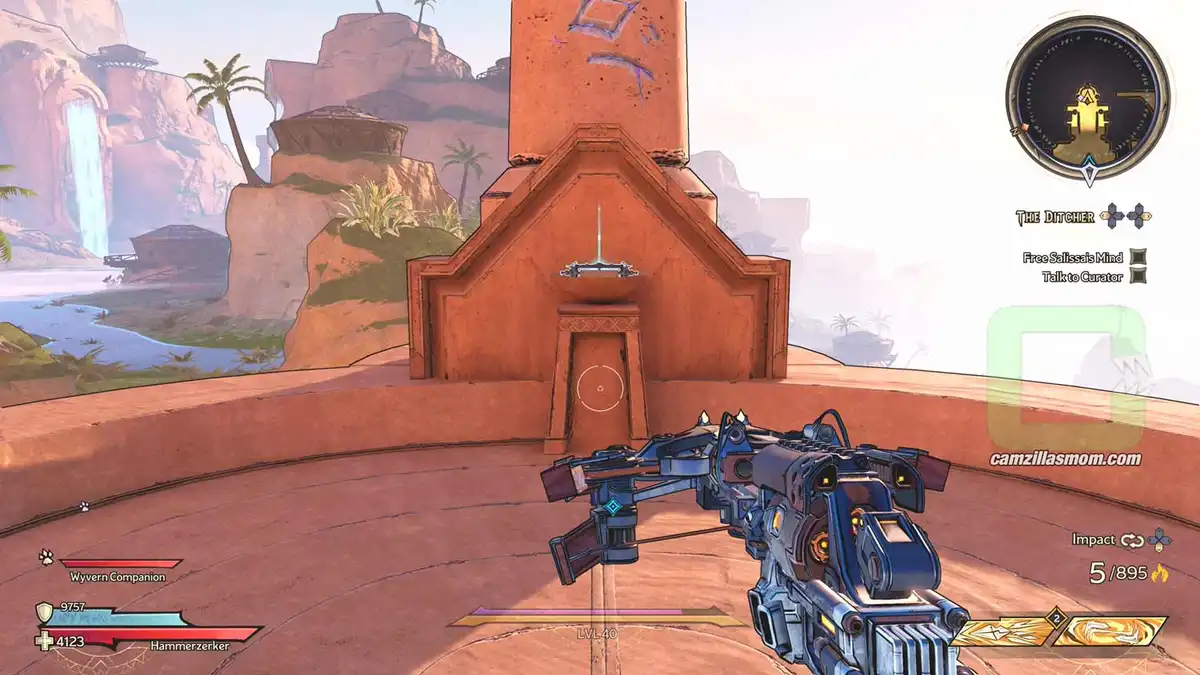
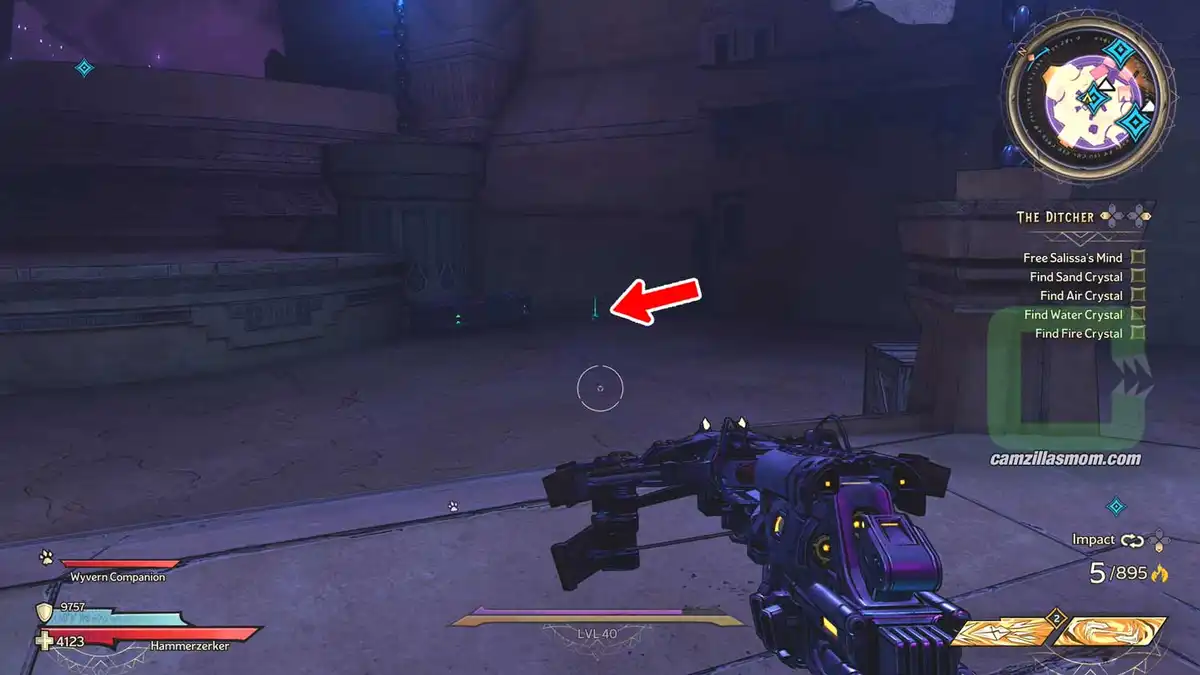
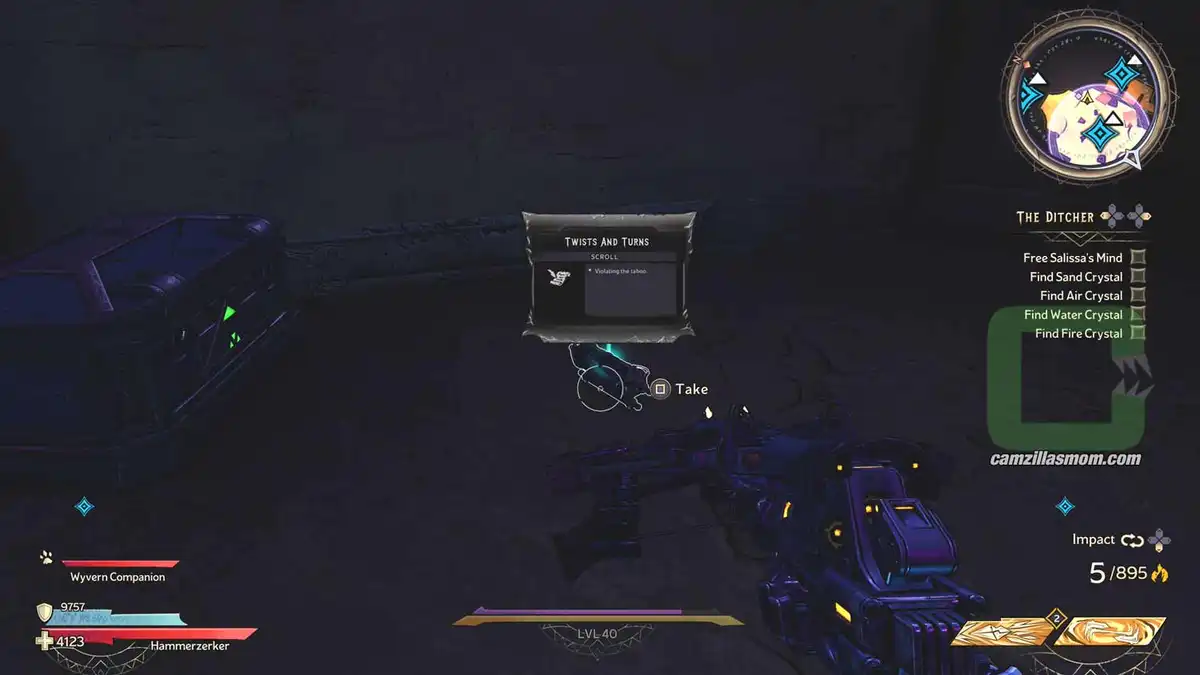
At the“Shrine of the Goddesses”, you will go on and jump into the “Wonder Well” in the story. On the other side, there is this scroll on the floor.
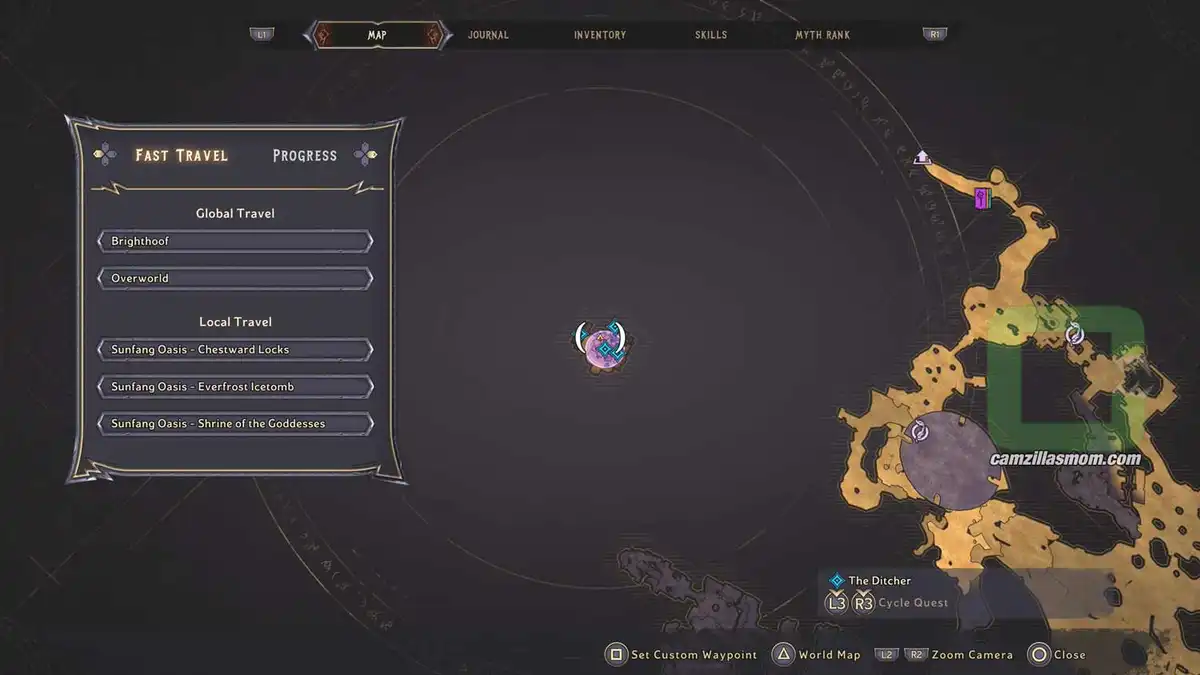
The zoomed-out map showing the Lore Scroll location at Sunfang Oasis. › camzillasmom.com
The zoomed-in map showing the Lore Scroll location at Sunfang Oasis. › camzillasmom.com
Screenshot showing the Lore Scroll on the floor. › camzillasmom.com
Close-up image of the Lore Scroll on the floor. › camzillasmom.com

Tangledrift Overview Map

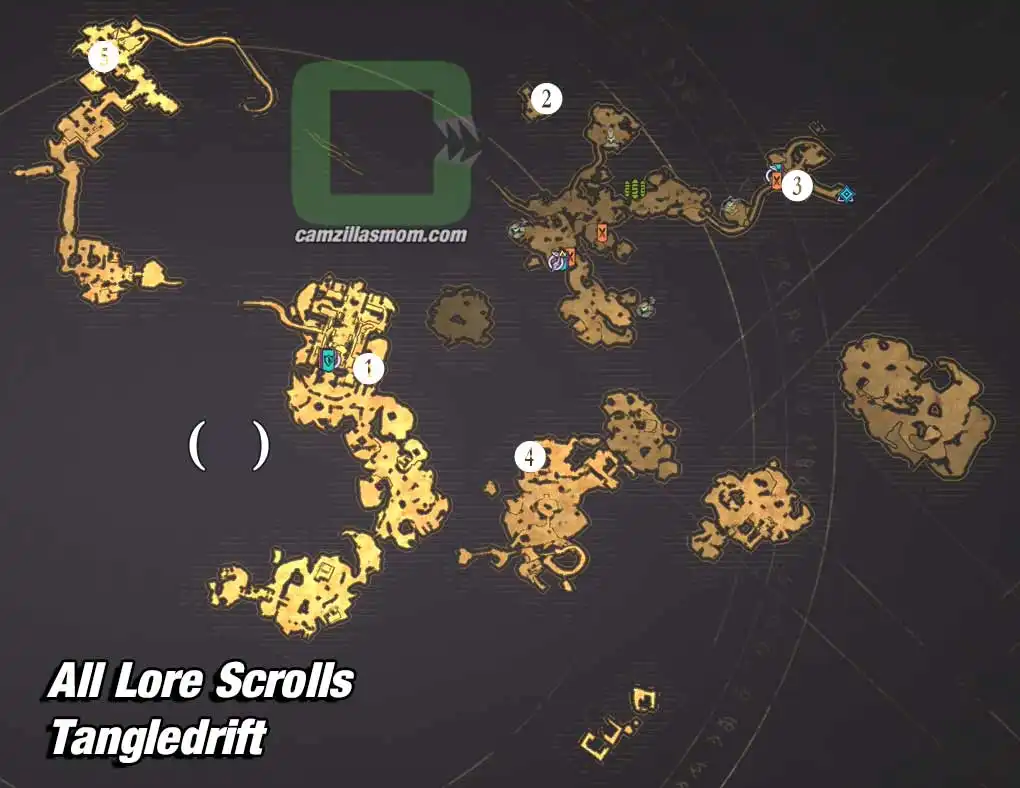
Tangledrift overview map with 4 Lore Scrolls collectibles locations highlighted. › camzillasmom.com

1 – A One-Blacksmith Town
2 – Kastor The Caster
3 – Misfortune Teller
4 – Sonny Disposition

5 – Sonny Skies

1 – A One-Blacksmith Town

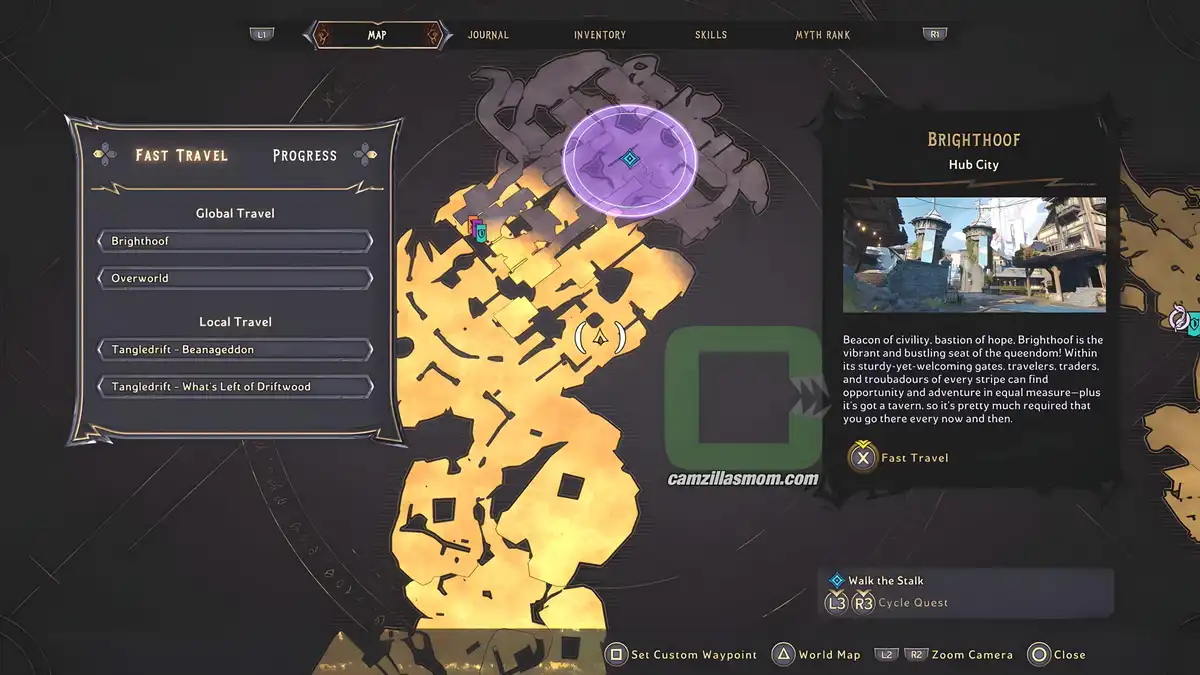
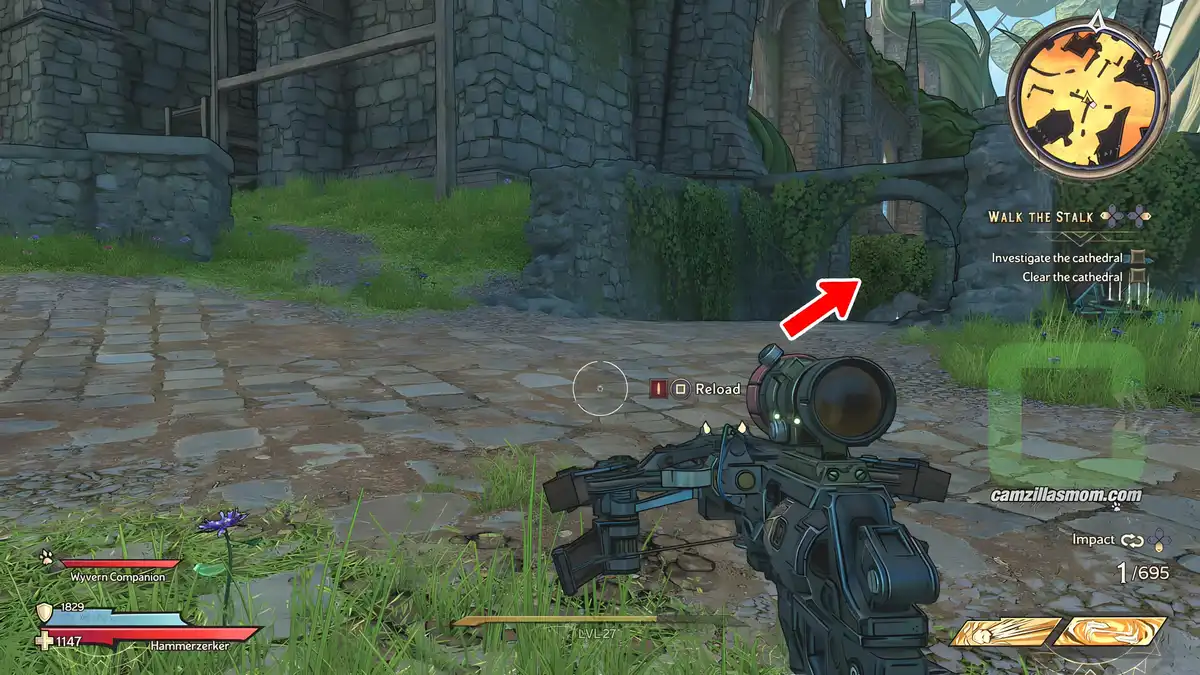
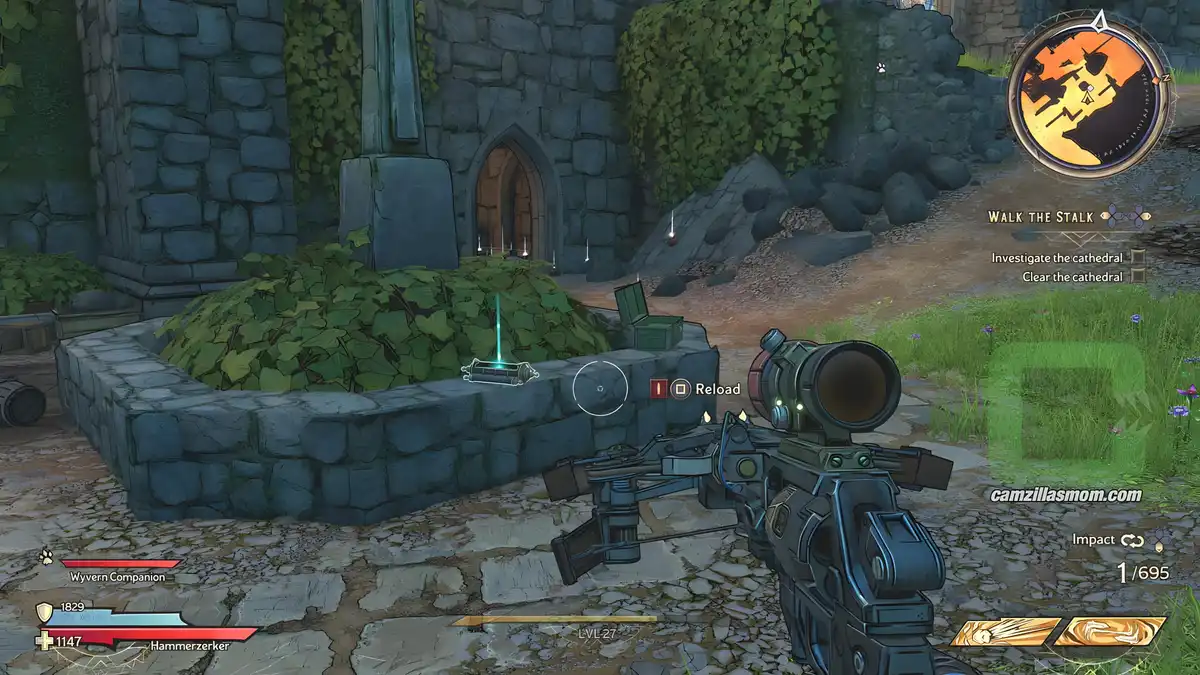
This Lore Scroll is at the outside garden of the “Murder Church”.

The zoomed-out map showing the Lore Scroll location at the Murder Church. › camzillasmom.com
The zoomed-in map showing the Lore Scroll location at the Murder Church. › camzillasmom.com
The screenshot is showing the path to the garden at the Murder Church. › camzillasmom.com
Screenshot showing the exact location of the Lore Scroll in the garden. › camzillasmom.com

2 – Kastor the Caster

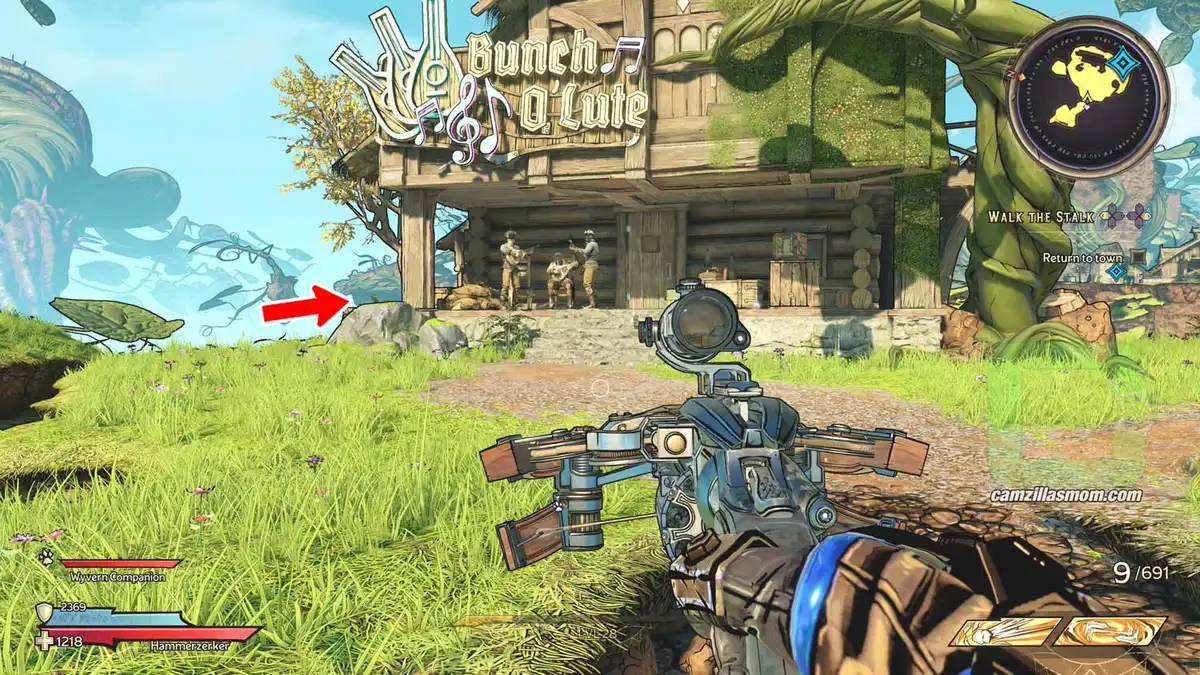
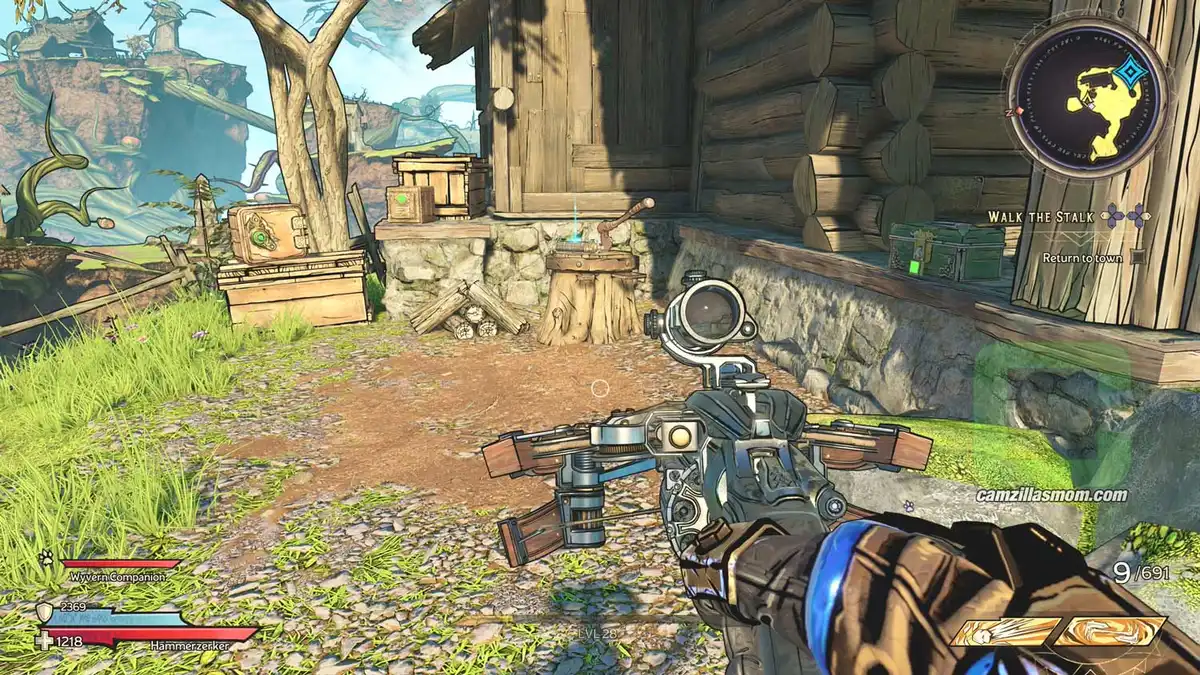
Defeat the Parasite in the Main Story and exit through the portal. Here on this little exit island is the Lore Scroll. Just walk left around the house – the Bunch O’Lute.
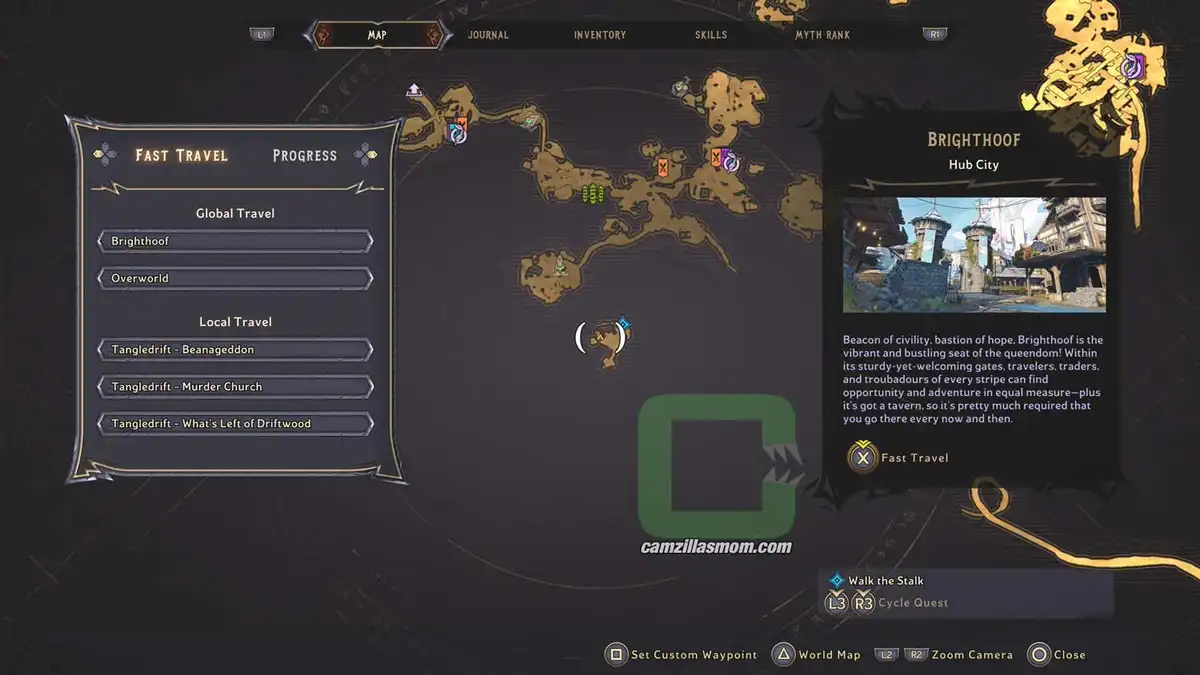
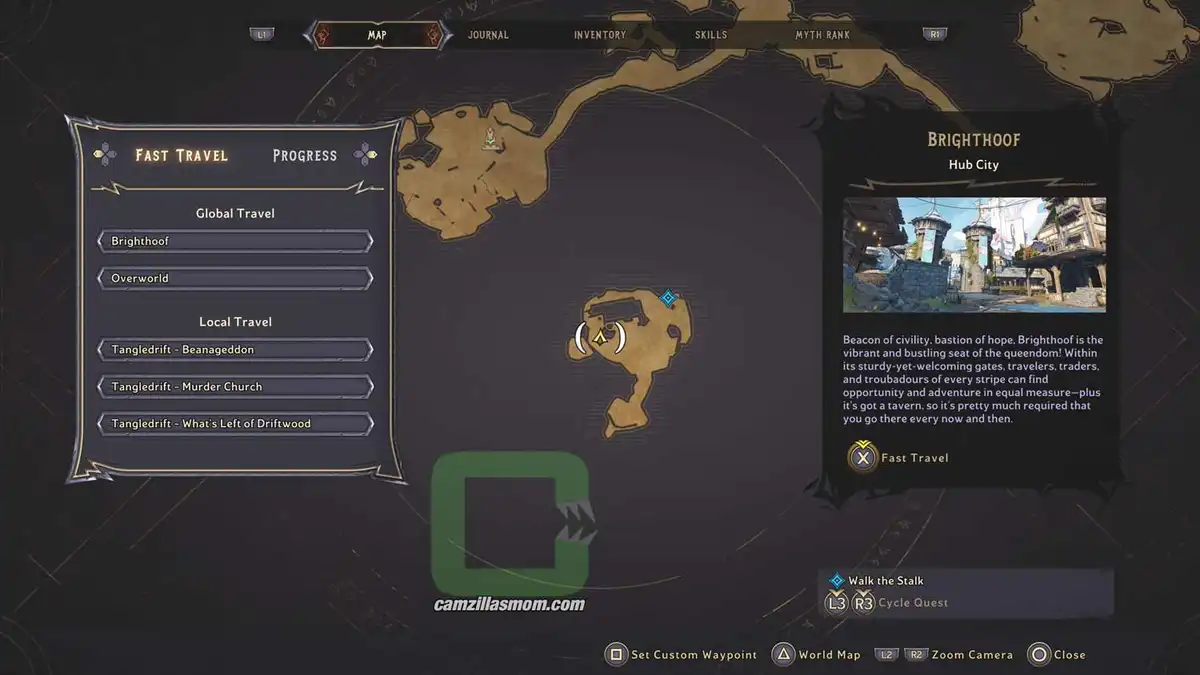
The zoomed-out map showing the Lore Scroll location. › camzillasmom.com
The zoomed-in map showing the Lore Scroll location. › camzillasmom.com
Screenshot of the Bunch O › camzillasmom.com'Lute with an arrow showing the location of the Lore Scroll.
The Lore Scroll behind the "Bunch O › camzillasmom.com'Lute".

3 – Misfortune Teller

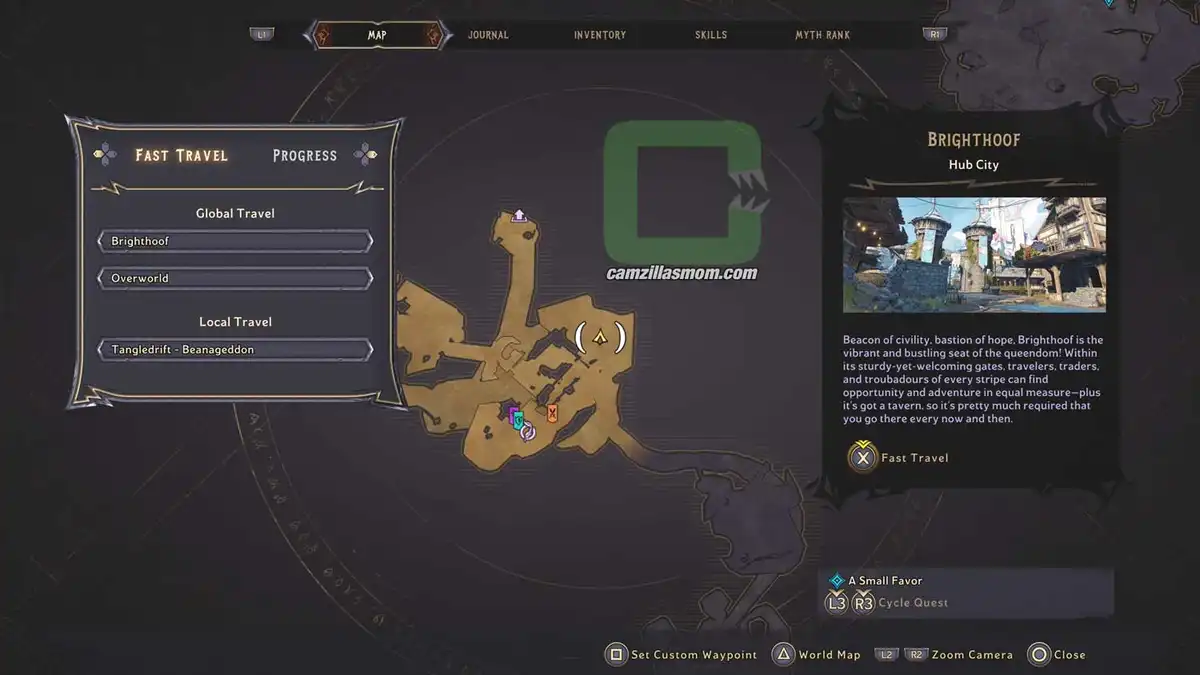
The Lore Scroll is at Beanageddon, on the second level of the house where the shops are at the start, inside a planter.
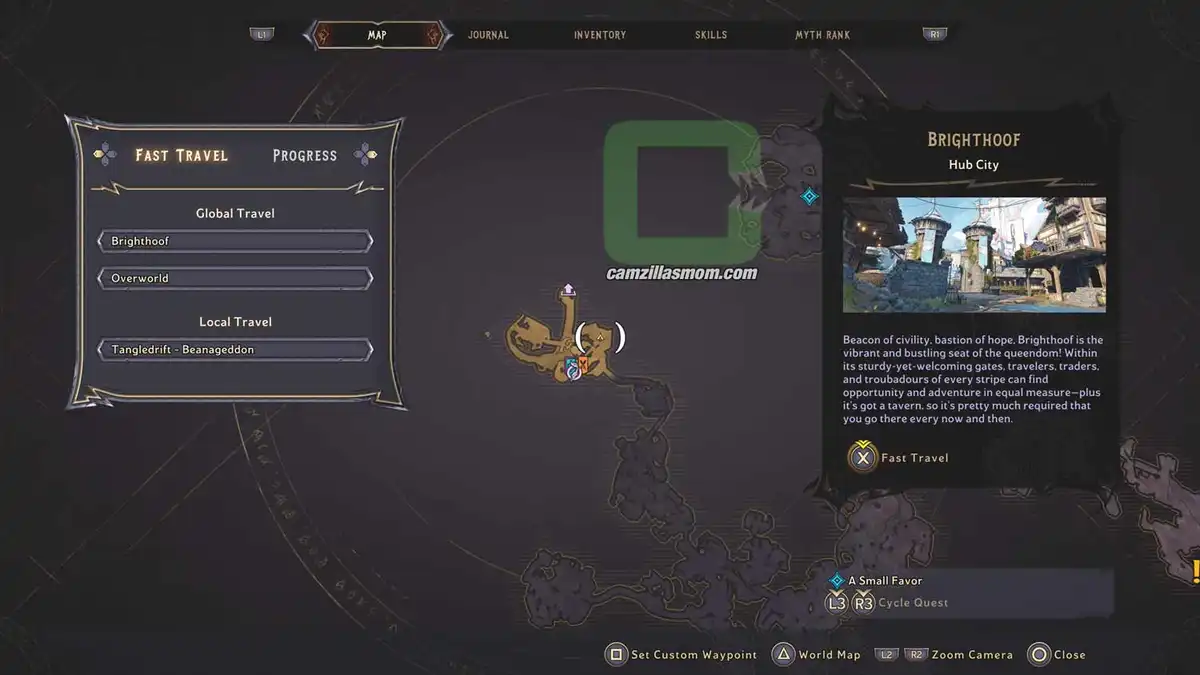
The zoomed-out map showing the Lore Scroll location at Benageddon. › camzillasmom.com
The zoomed-in map showing the Lore Scroll location at Benageddon. › camzillasmom.com
An arrow in the screenshot marks the way to the planter. › camzillasmom.com
The planter at the house with the Lore Scroll. › camzillasmom.com

4 – Sonny Disposition

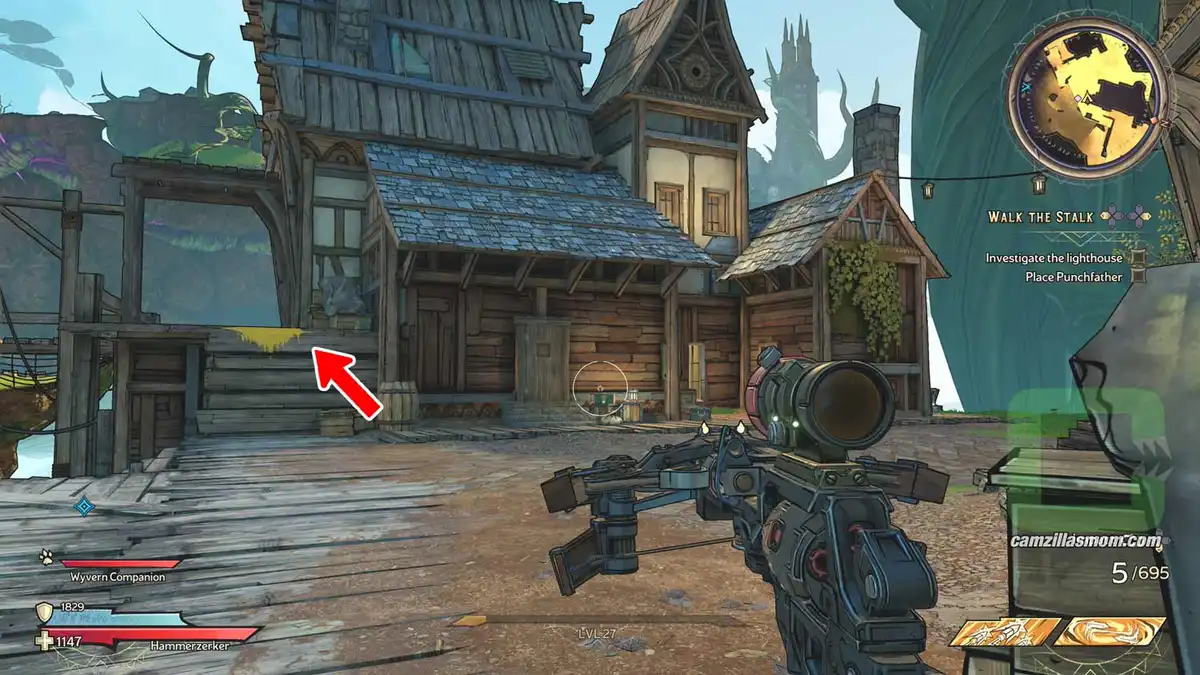
At “Last Light”, the lighthouse location, is a house with yellow paint smeared on it. Follow the paint to the back of the house. There is a platform with the Lore Scroll.
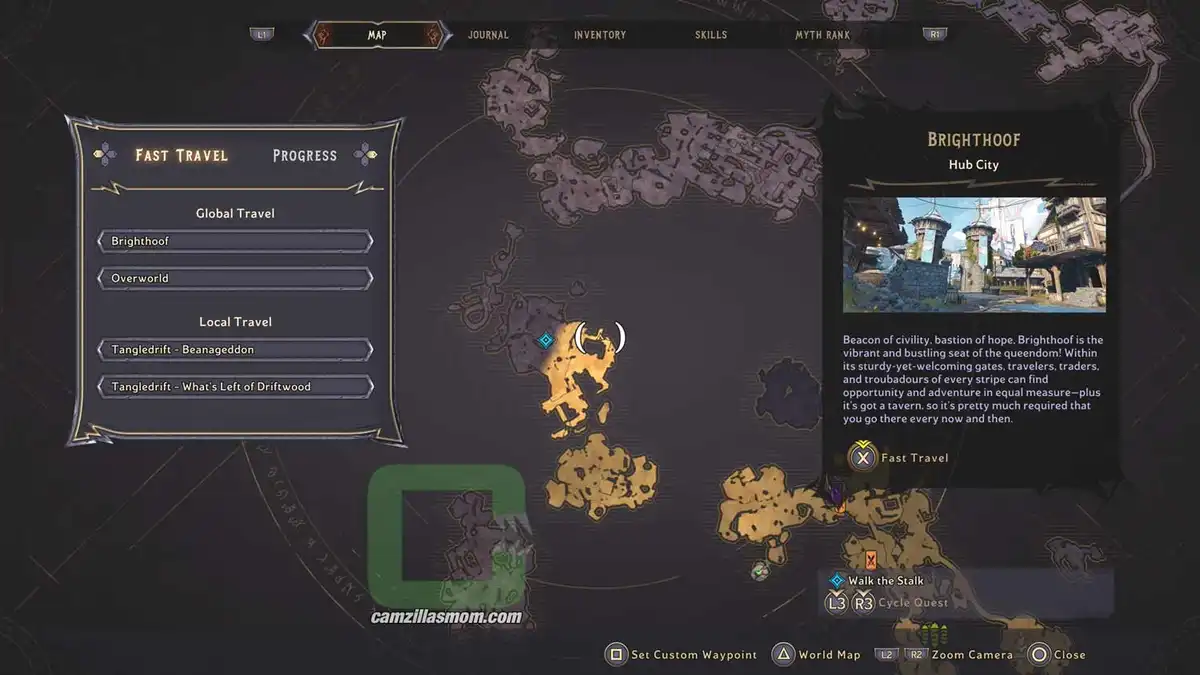
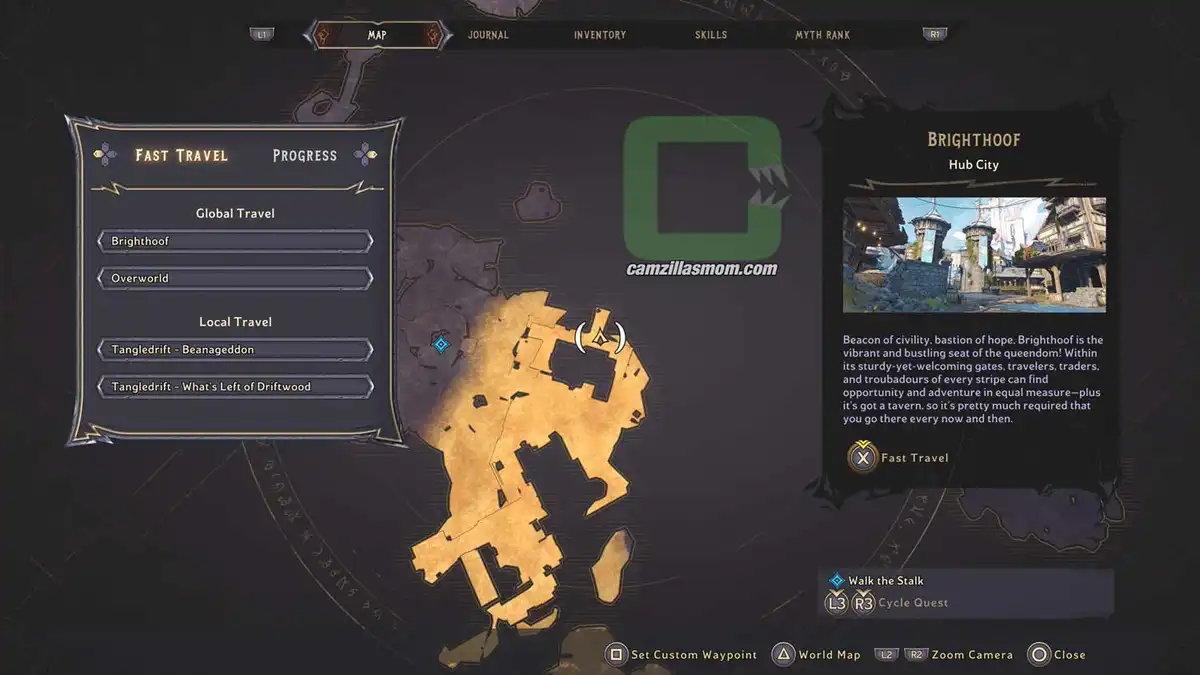
The zoomed-out map showing the Lore Scroll location at the lighthouse. › camzillasmom.com
The zoomed-in map showing the Lore Scroll location at the lighthouse. › camzillasmom.com
Screenshot of the lighthouse area with an arrow highlighting which paint to follow. › camzillasmom.com
The Lore Scroll at the end of the platform. › camzillasmom.com

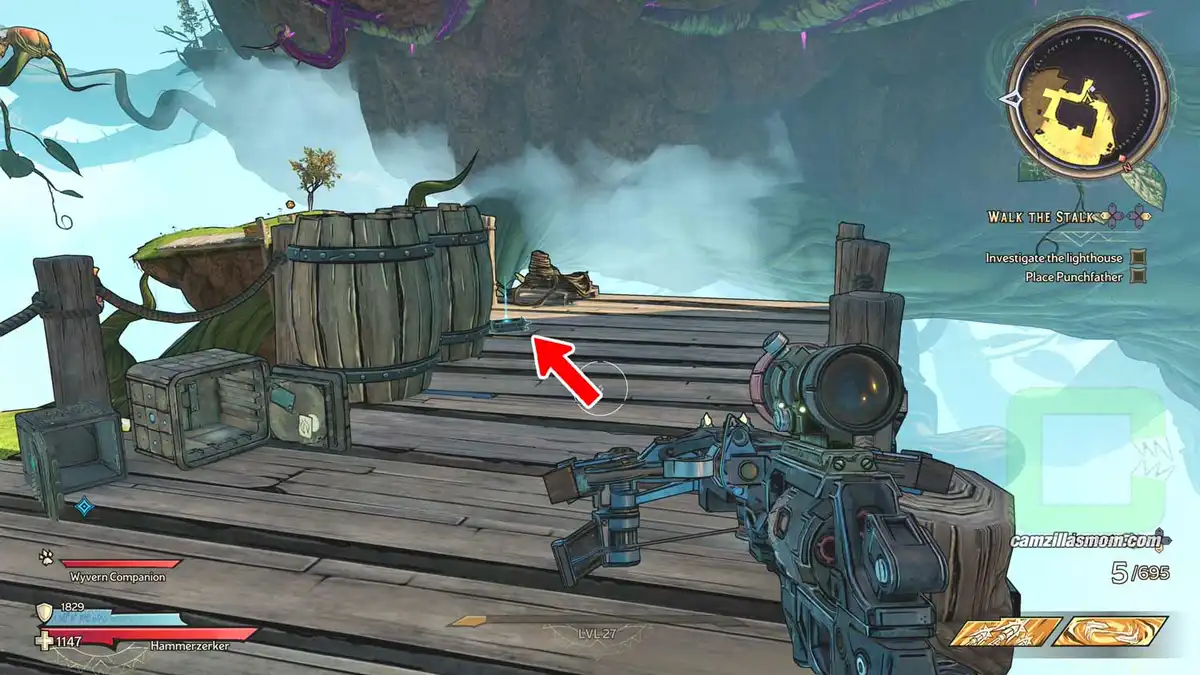
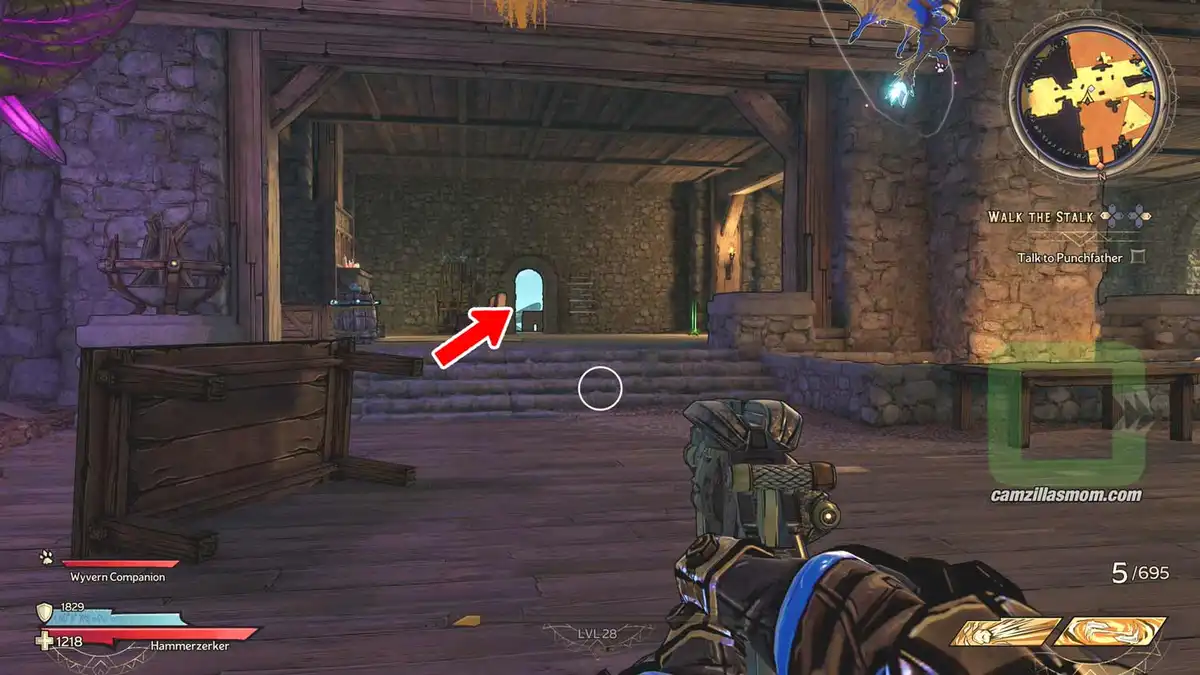
5 – Sonny Skies

At “Upkeep Keep”, at the end where you cleanse a flower together with Punchfather in the story, there is terrace at the south of the main room. Here, on a wooden chest is this Lore Scroll.
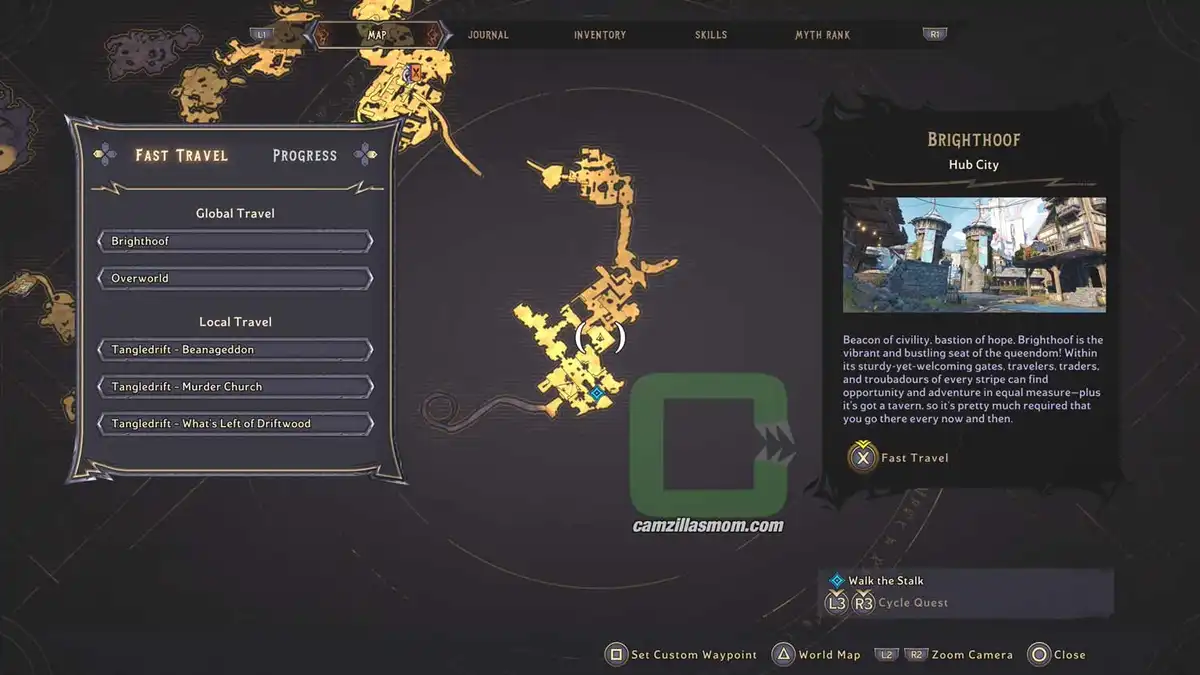
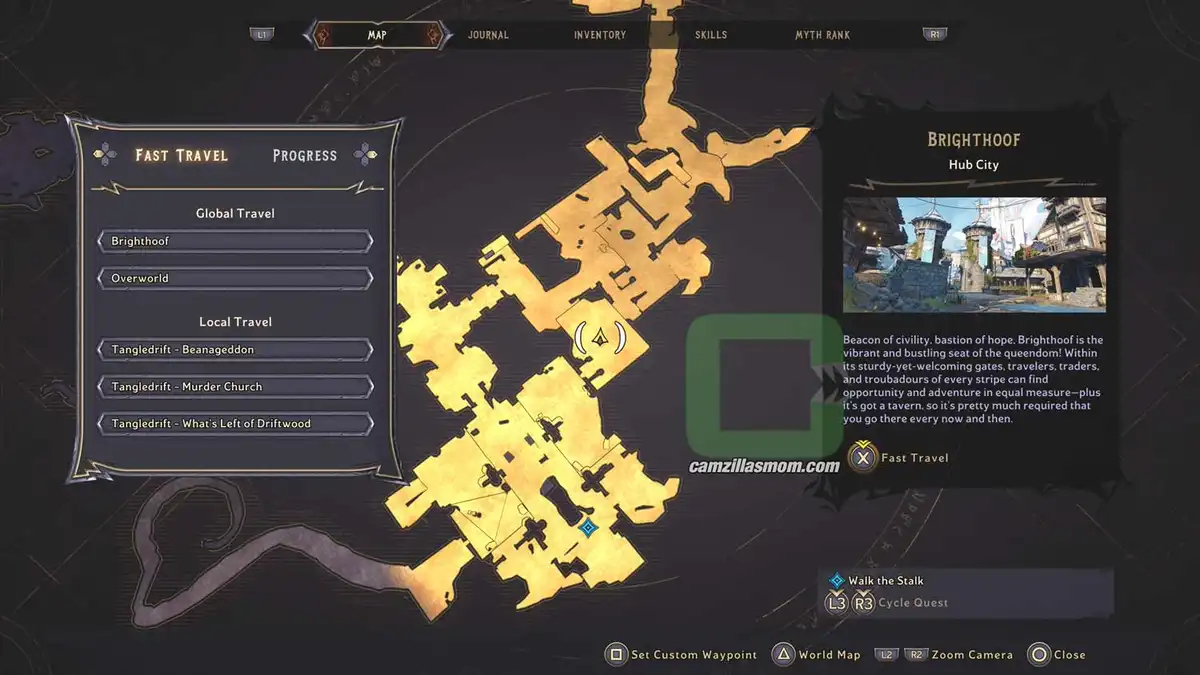
The zoomed-out map showing the Lore Scroll at Upkeep Keep. › camzillasmom.com
The zoomed-in map showing the Lore Scroll at Upkeep Keep. › camzillasmom.com
The arrow in this screenshot points to the Lore Scroll › camzillasmom.com's location by the window.
Another arrow pointing out the definitive Lore Scroll position on the Keep › camzillasmom.com's roof.

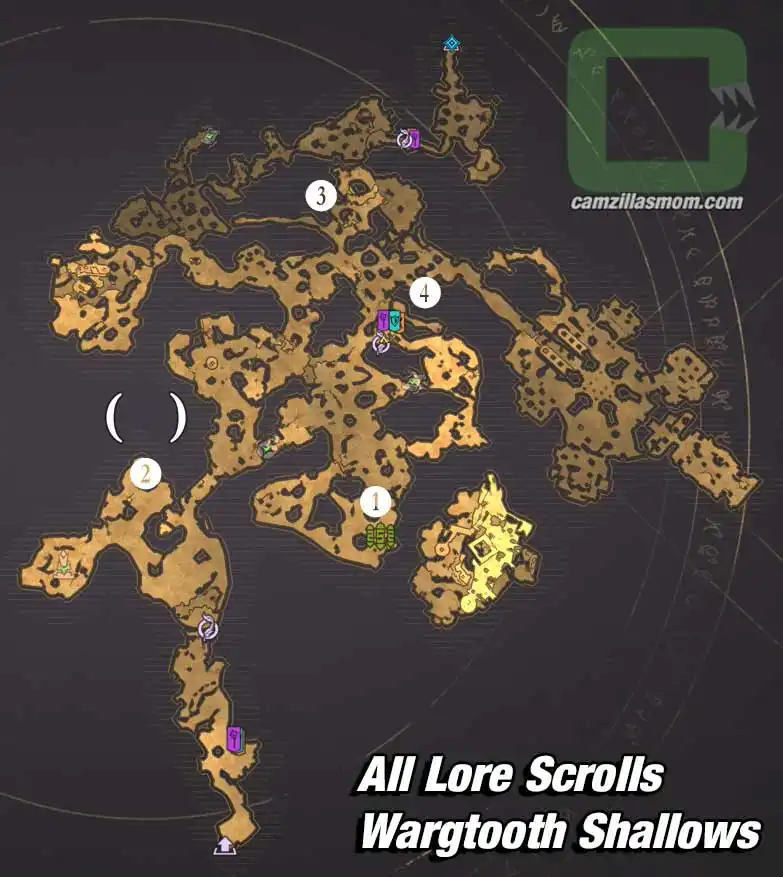
Wargtooth Shallows Overview Map

Wargtooth Shallows overview map with 4 Lore Scrolls collectibles locations highlighted. › camzillasmom.com

1 – My Saltwater Heart
2 – Pirate Words
3 – The Curse
4 – The War of The Claw

1 – My Saltwater Heart

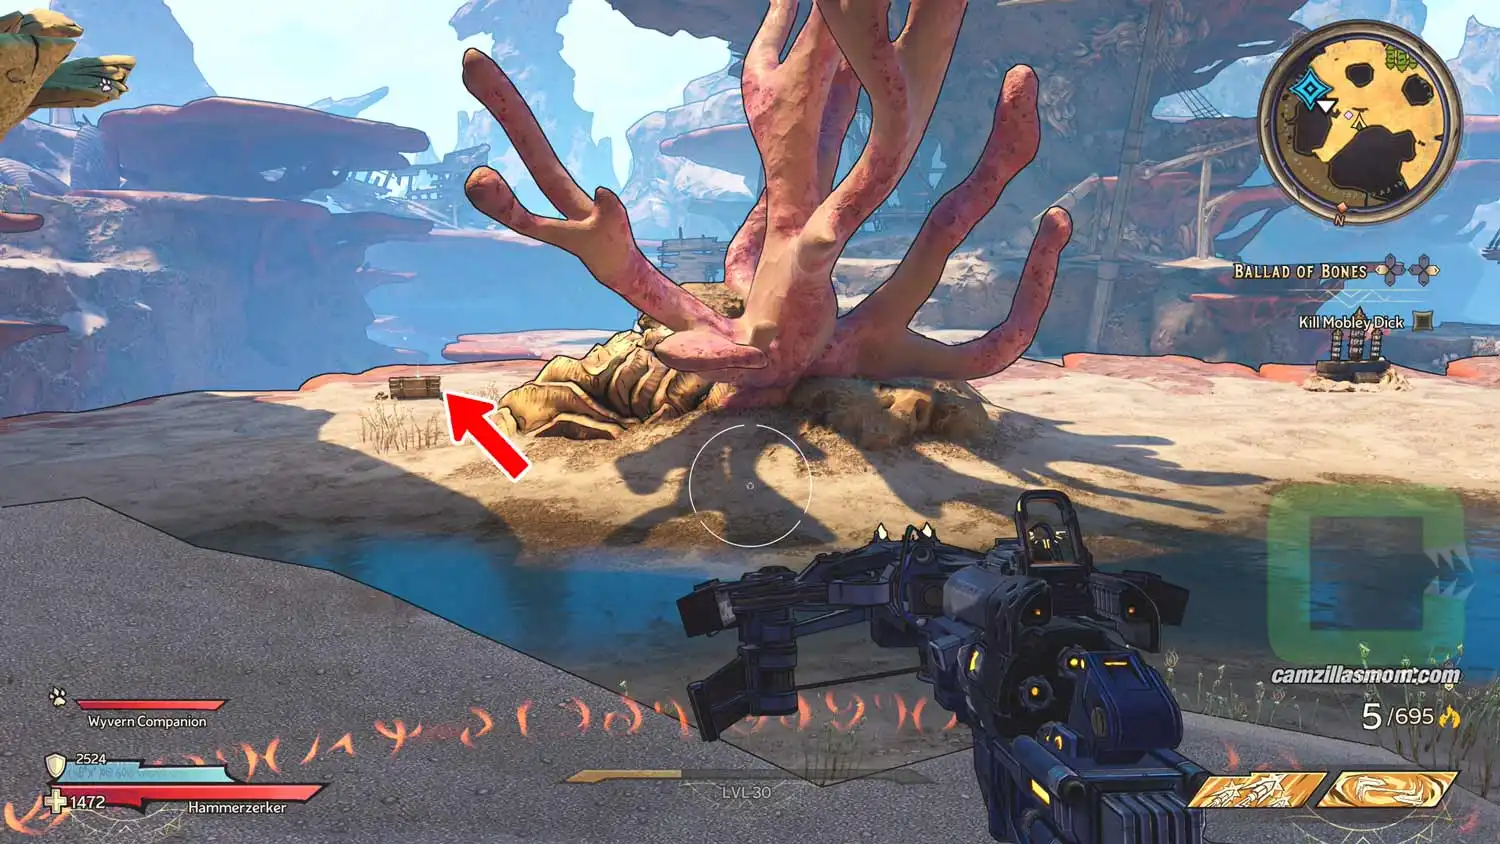
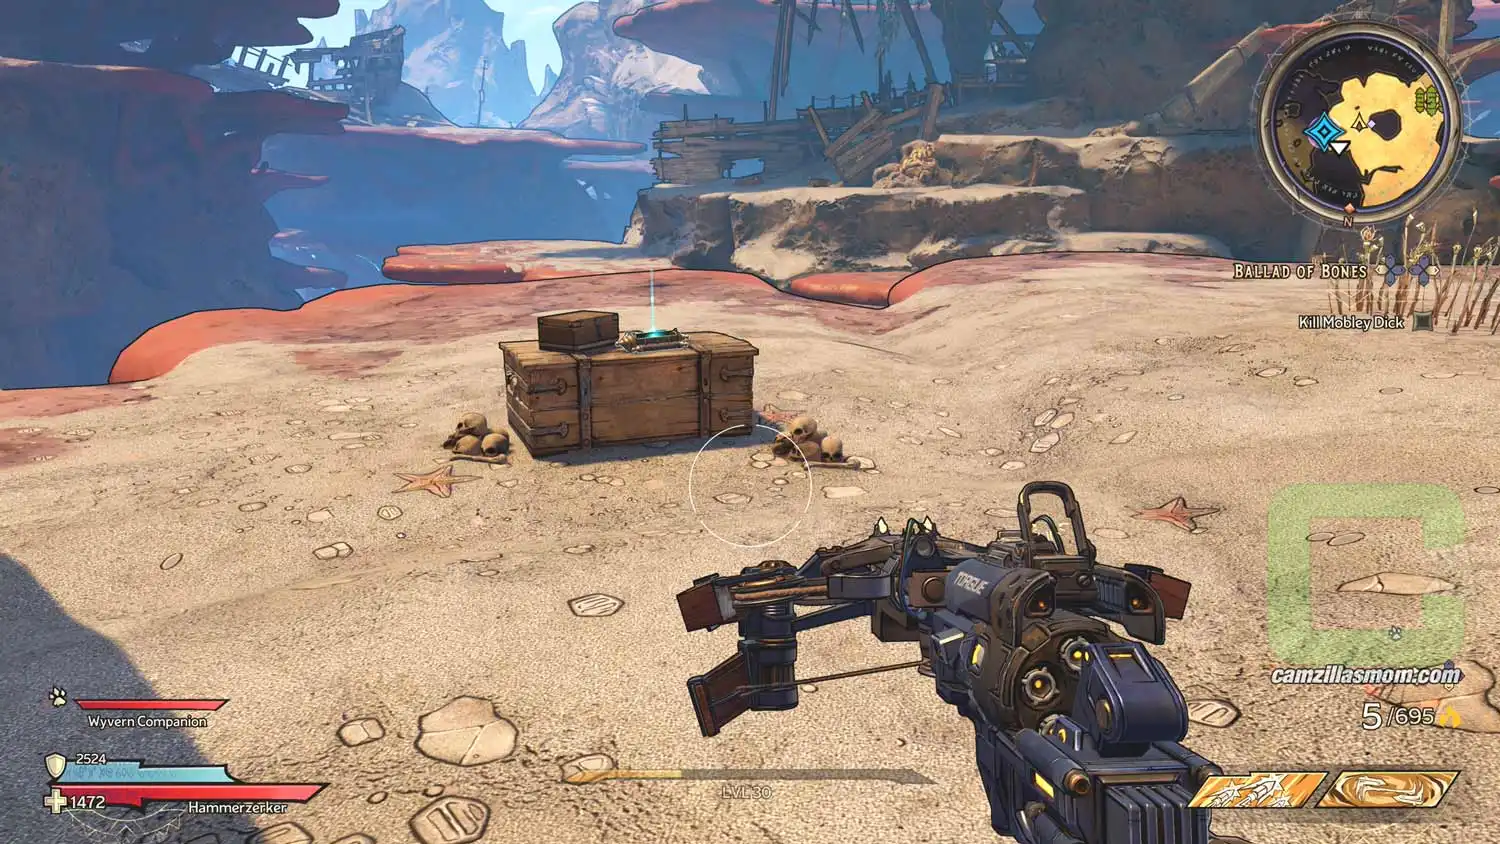
This Rune Scroll is just next to the “Rune Switch” Puzzle.
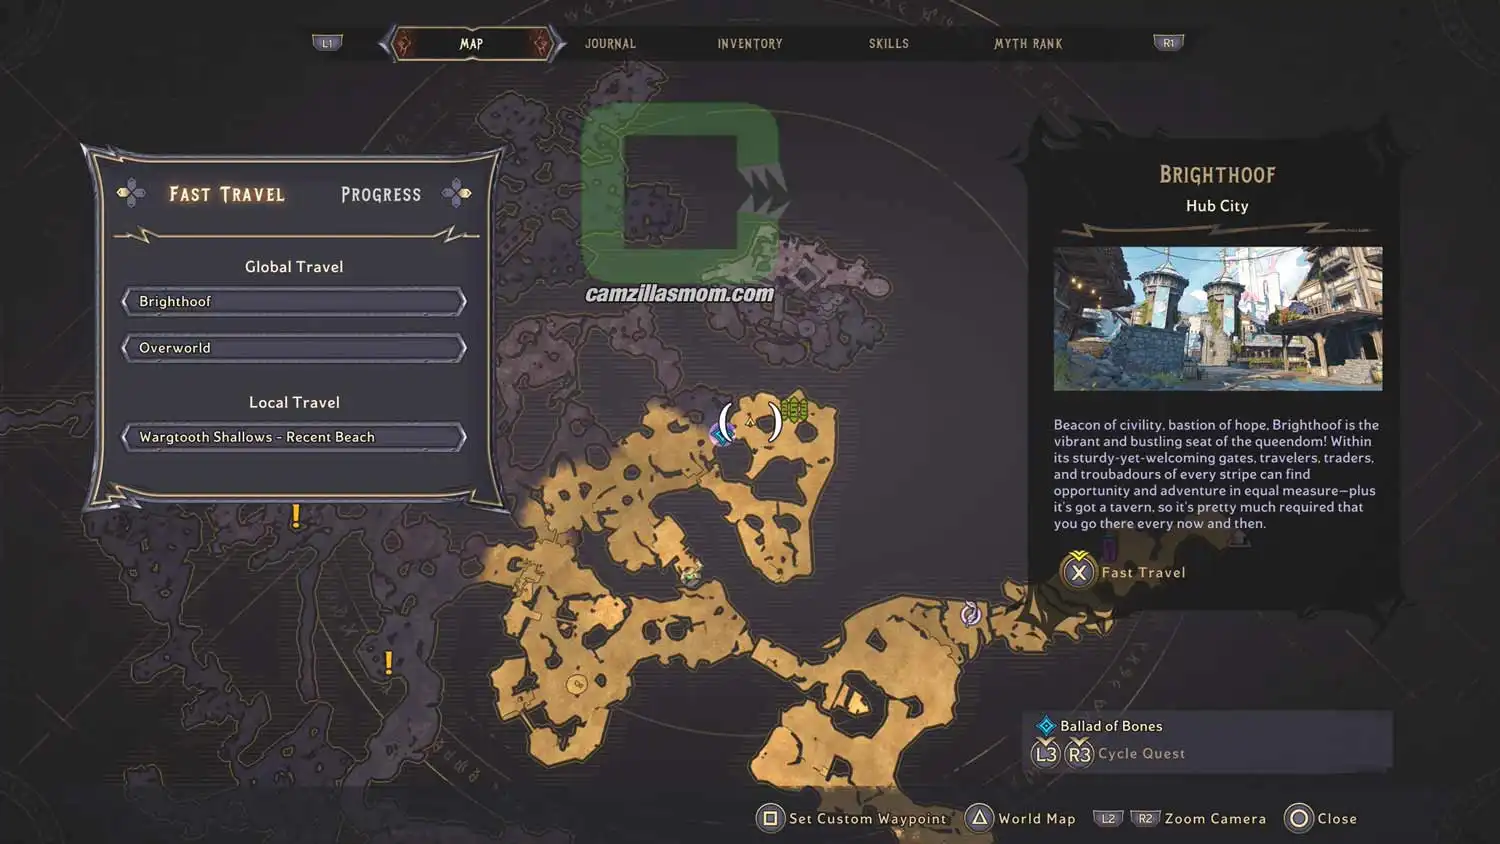
The zoomed-out map showing the Lore Scroll next to the Rune Switch. › camzillasmom.com
The zoomed-in map showing the Lore Scroll next to the Rune Switch. › camzillasmom.com
A screenshot highlighting the Lore Scroll next to a big, red coral and a wooden box. › camzillasmom.com
The close-up screenshot of the Lore Scroll on top of the wooden box. › camzillasmom.com

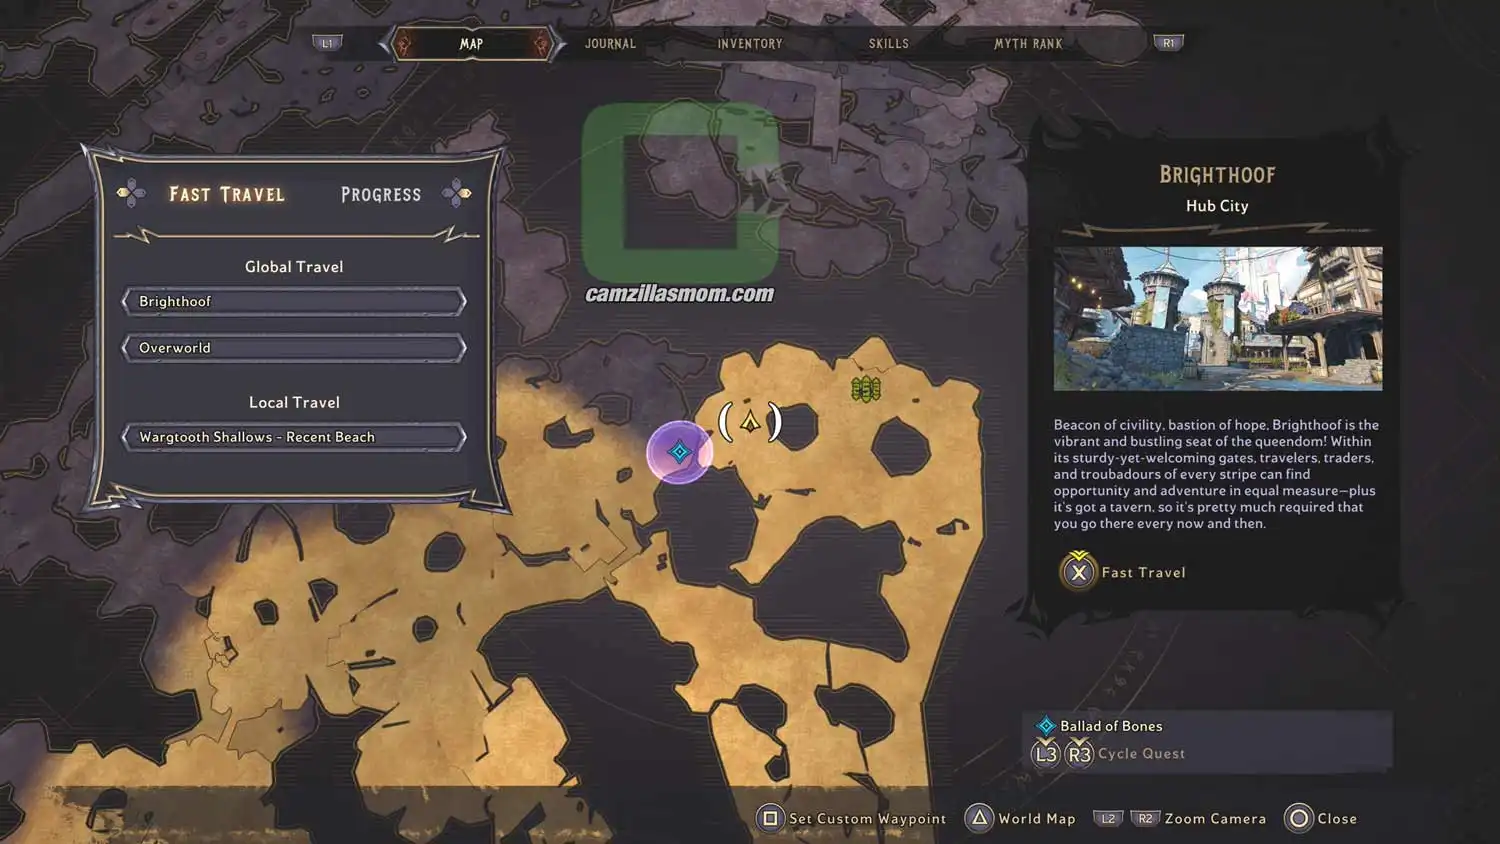
2 – Pirate Words

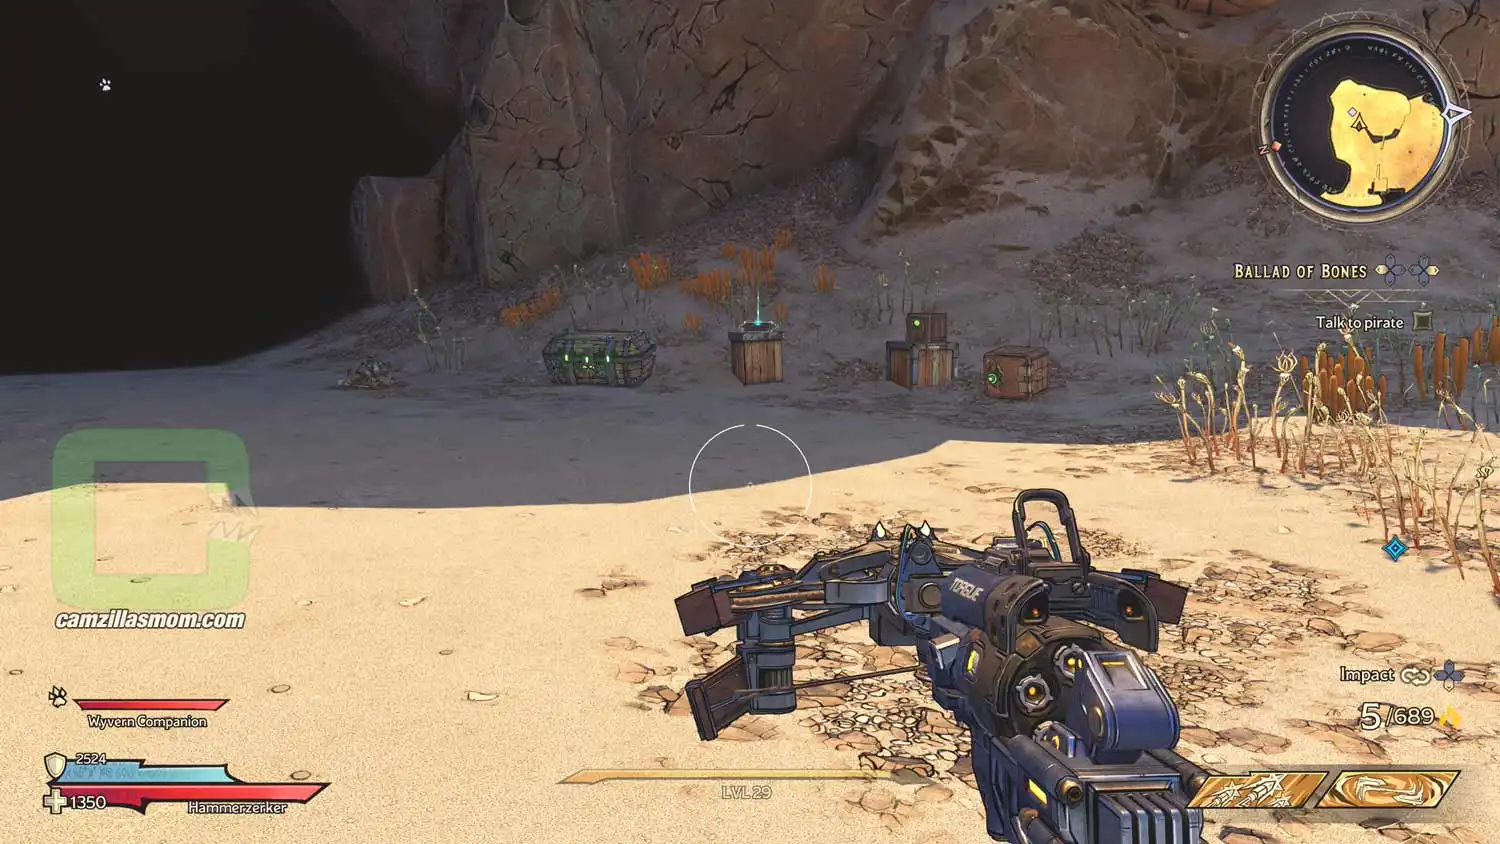
Behind the big ship wreck at “Recent Beach” is a big cave. Right in front of it is this Lore Scroll.
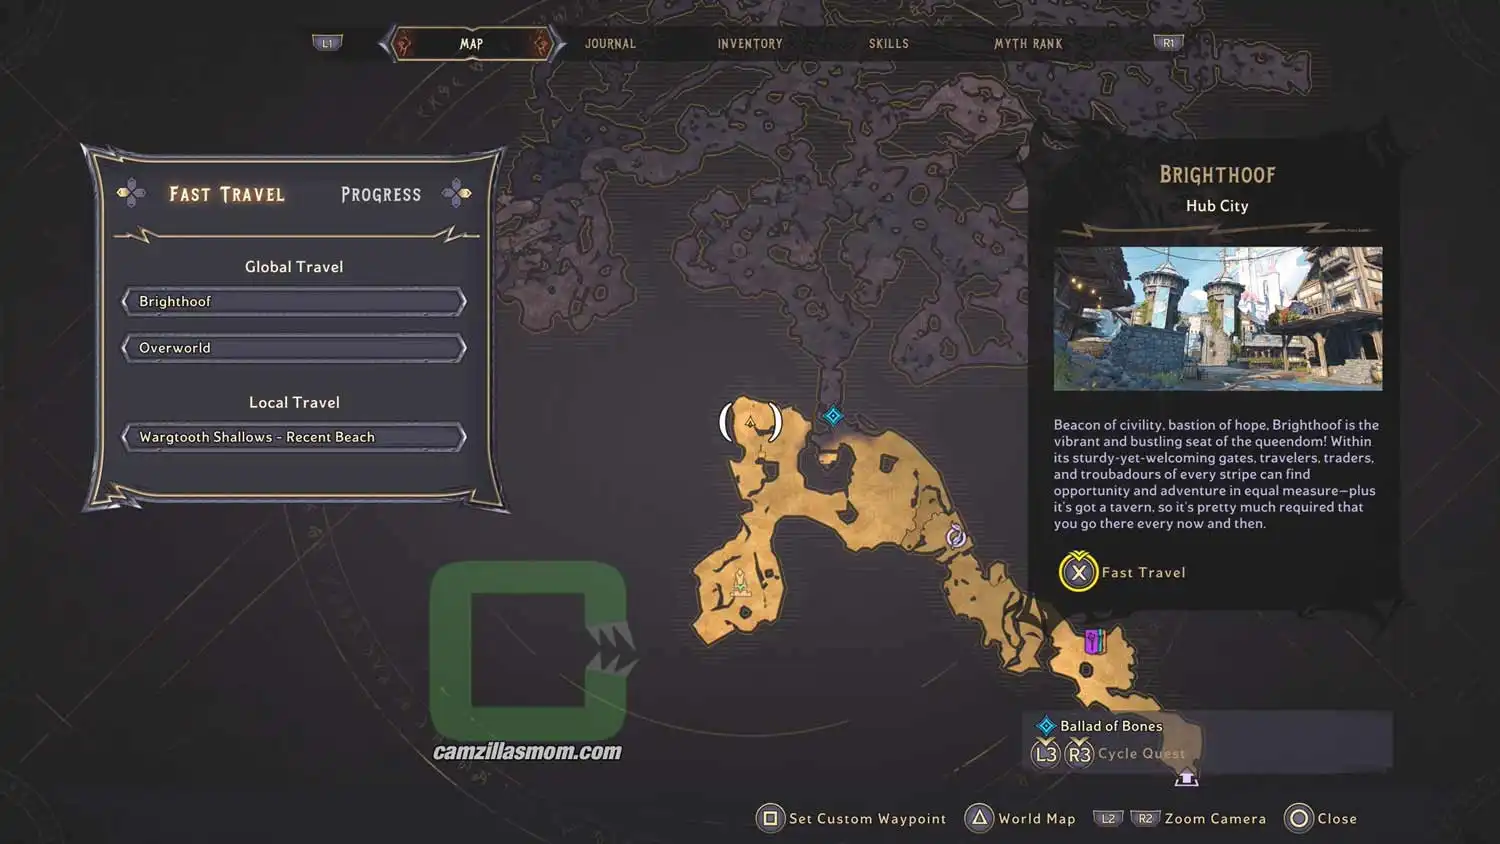
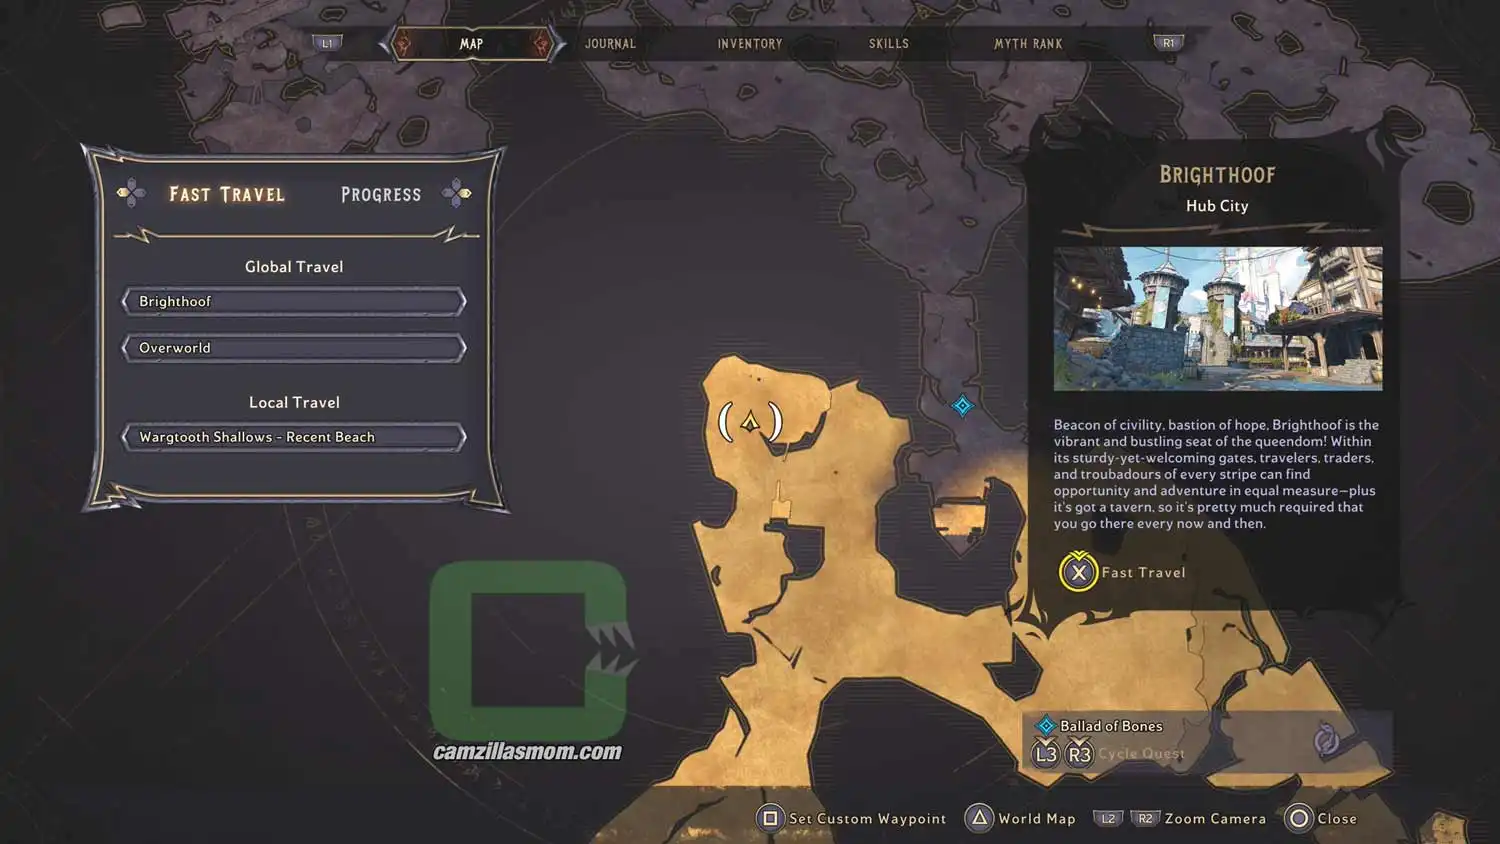
The zoomed-out map showing the Lore Scroll at Recent Beach. › camzillasmom.com
The zoomed-in map showing the Lore Scroll at Recent Beach. › camzillasmom.com
A screenshot with a red arrow pointing to a cave entrance. › camzillasmom.com
Close-up screenshot of the cave entrance with the Lore Scroll. › camzillasmom.com

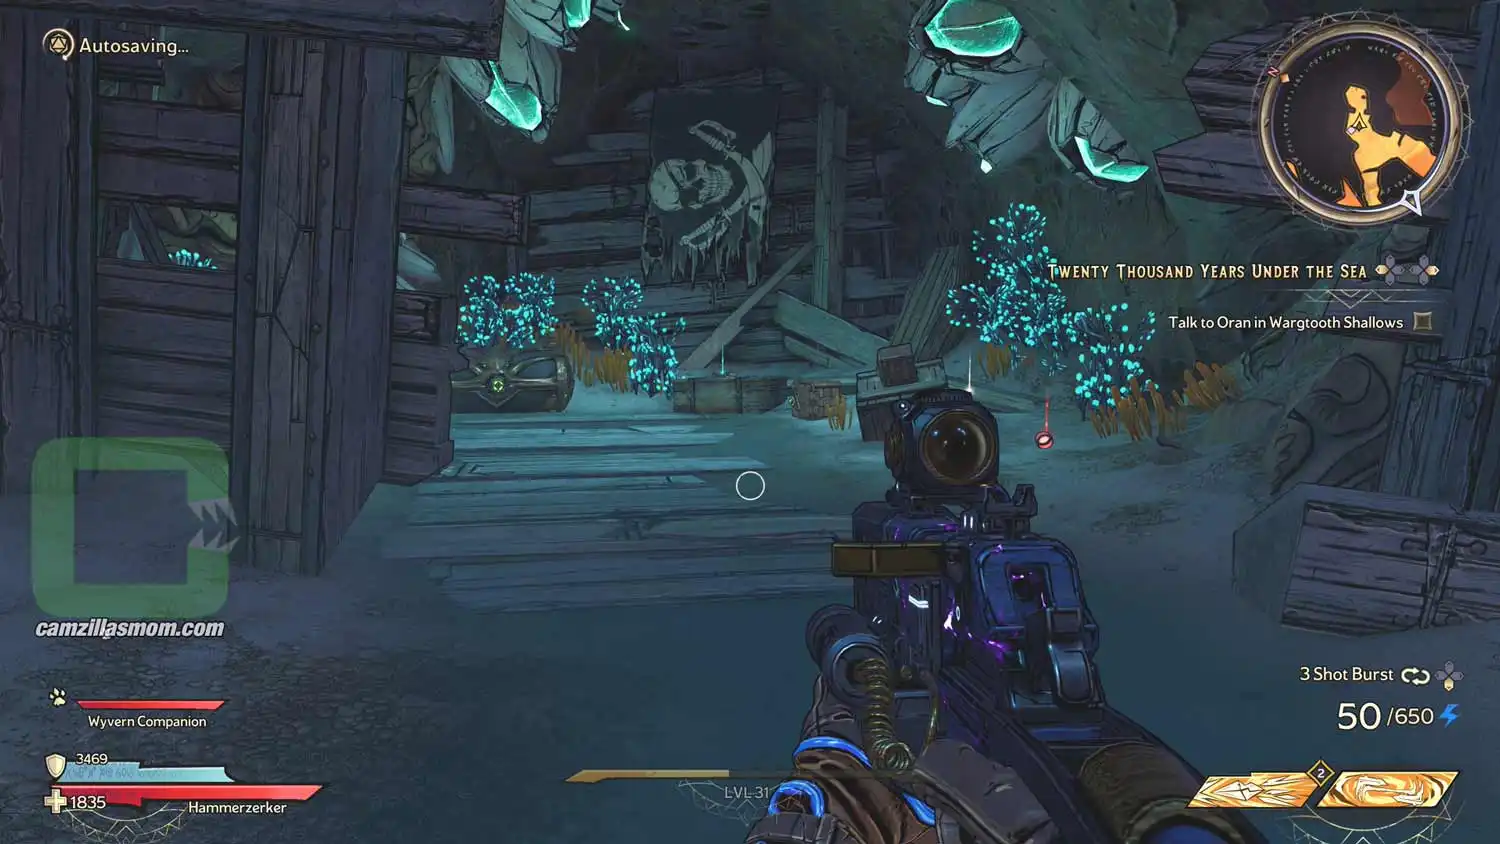
3 – The Curse

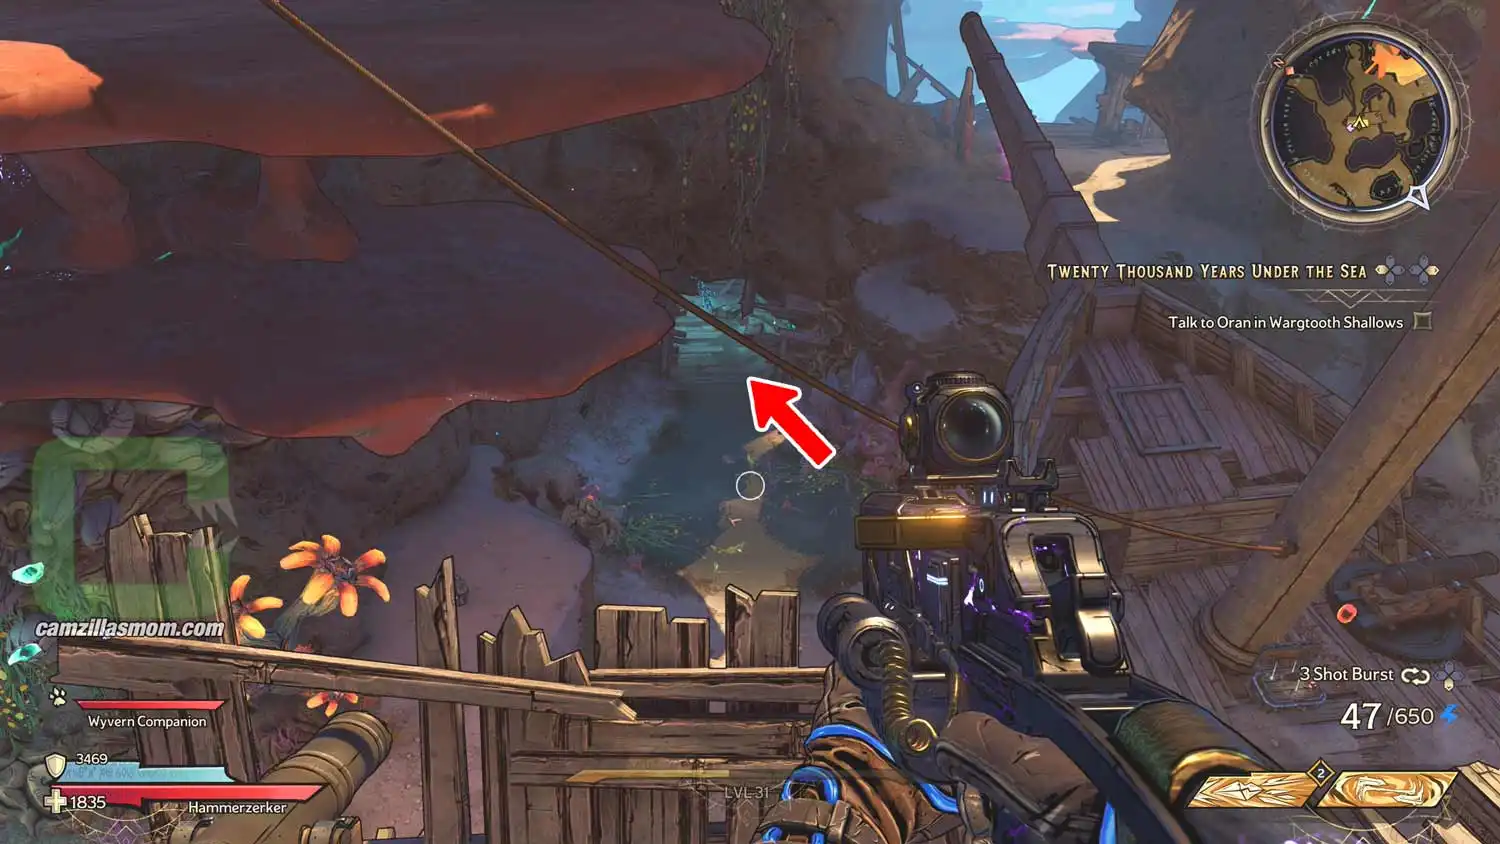
Not far from the “Dumpstat Torch” is a blocked gate with a shipwreck in front of it. There are two cannons you can fire from that ship. One will destroy the gate. The other one is on the upper deck. Use the nearby purple sparkling trampoline to get to the top of the area. From there, you can jump down to the ship to fire said cannon. This will open the barricaded nearby cave where the Lore Scroll is.
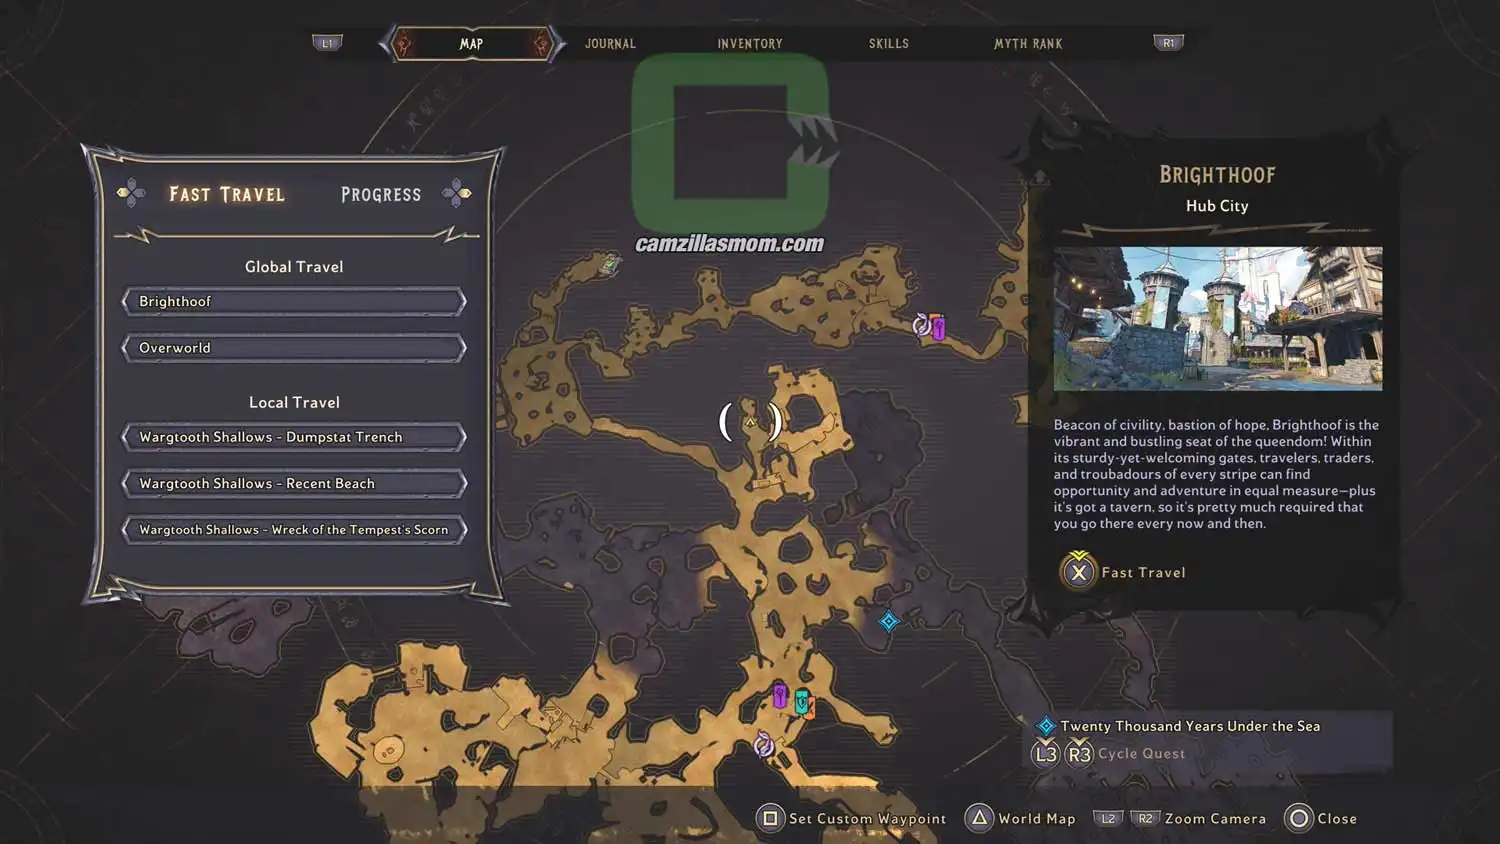
The zoomed-out map showing the Lore Scroll at Dumpstat Torch. › camzillasmom.com
The zoomed-in map showing the Lore Scroll at Dumpstat Torch. › camzillasmom.com
The screenshot shows the cave ahead and the cannon at the bottom left. › camzillasmom.com
A screenshot of the now open cave with the Lore Scroll. › camzillasmom.com

4 – The War of The Claw

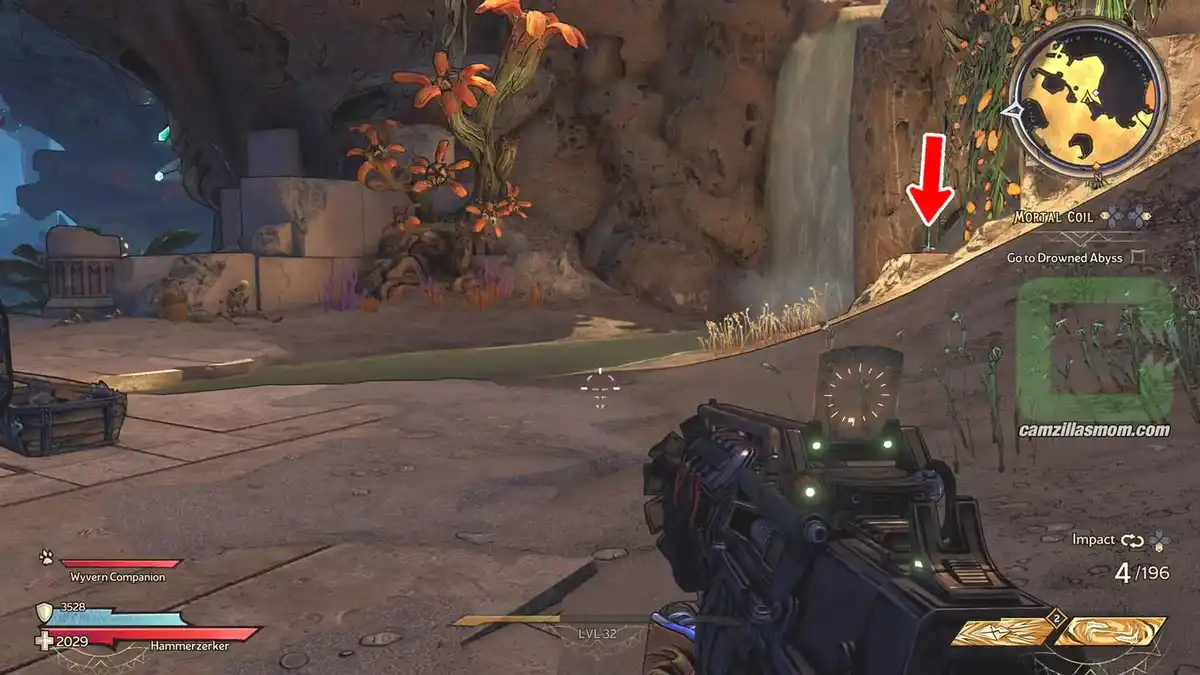
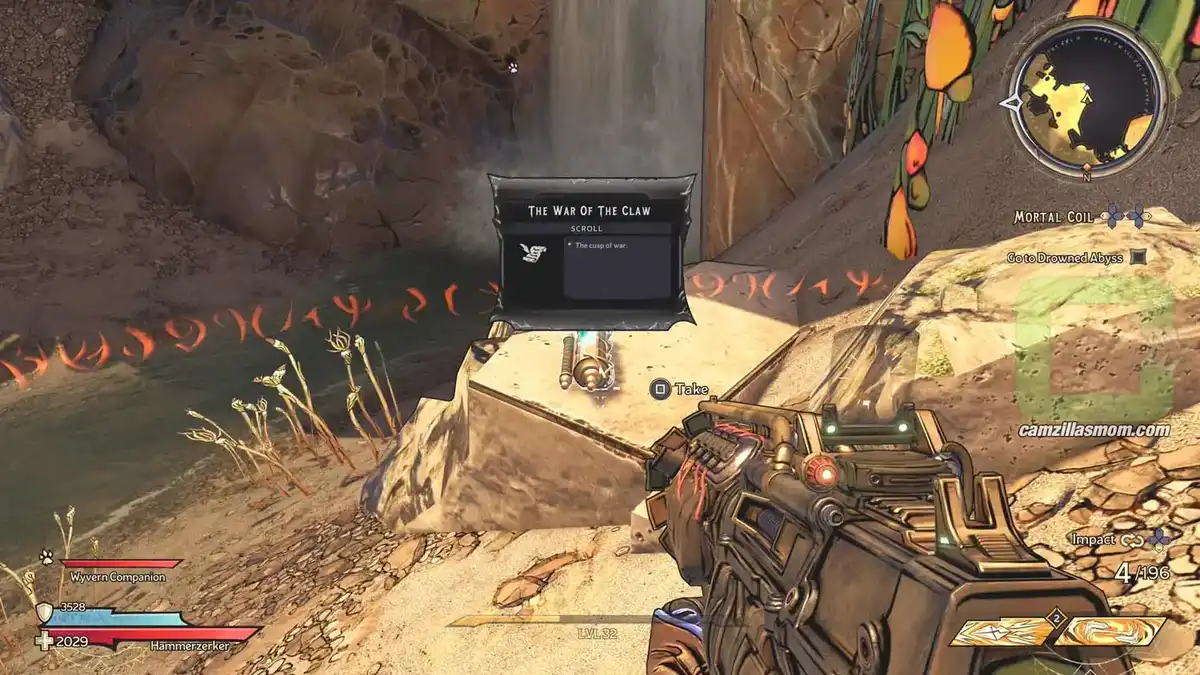
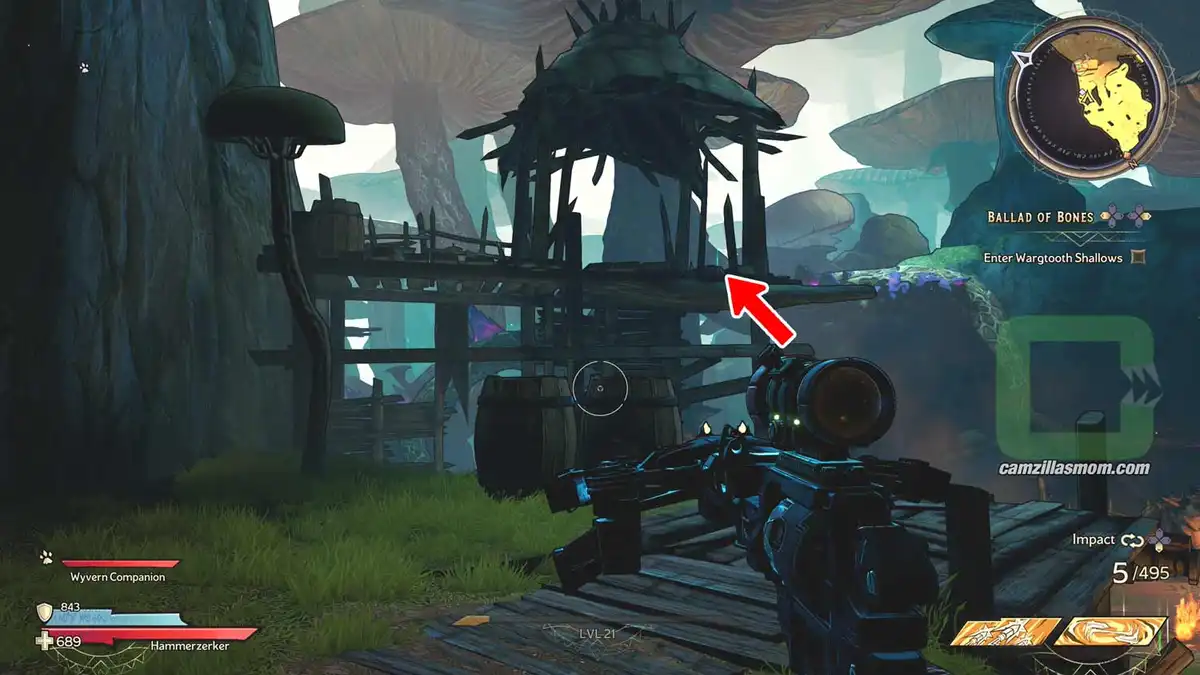
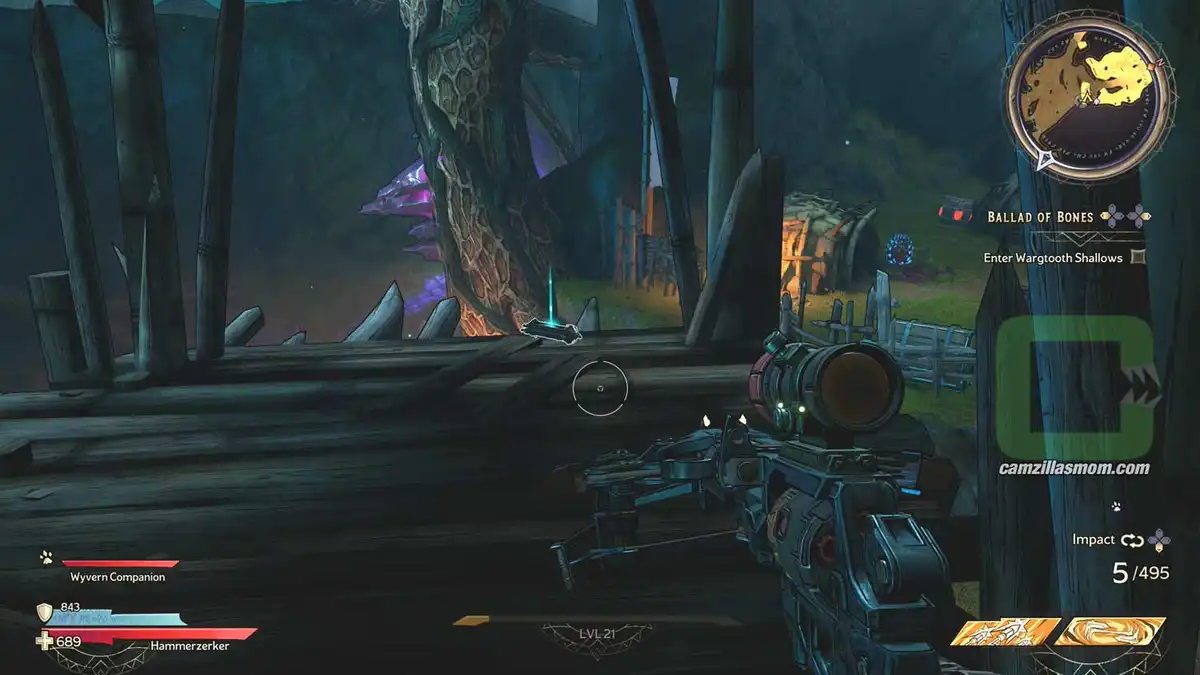
Near “Dumpstat Torch” are some ancient ruins, where you can pick up a Side Quest that leads you to the Temple of Grissnissak. Here, near a waterfall is the Lore Scroll.

The zoomed-out map showing the Lore Scroll at Dumpstat Torch. › camzillasmom.com
The zoomed-in map showing the Lore Scroll at Dumpstat Torch. › camzillasmom.com
Screenshot highlighting the Lore Scroll near the waterfall. › camzillasmom.com
Screenshot of the Lore Scroll just by the waterfall. › camzillasmom.com

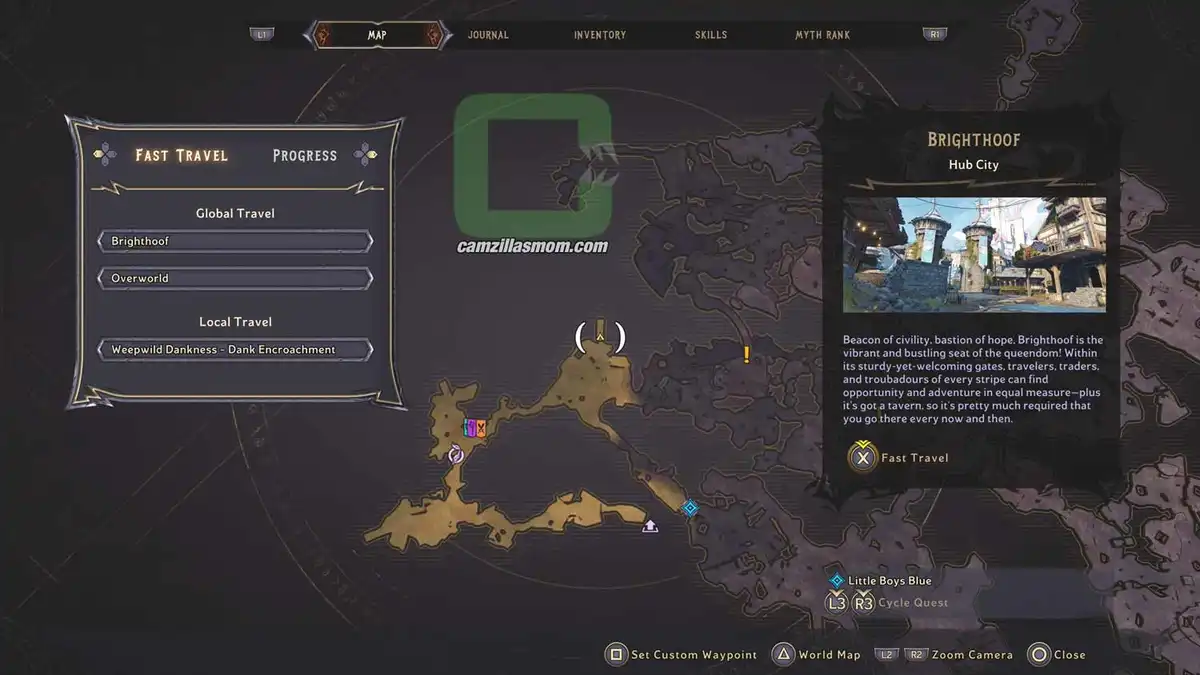
Weepwild Dankness Overview Map

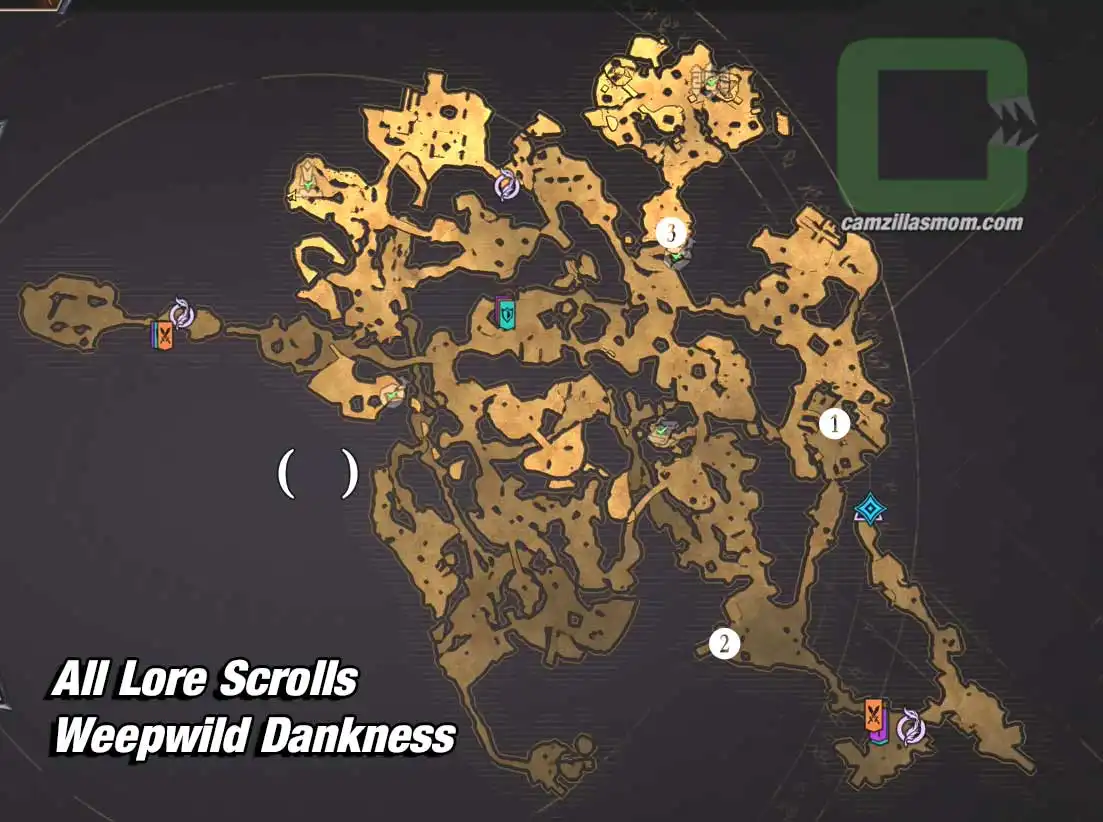
Weepwild Dankness overview map with 3 Lore Scrolls collectibles locations highlighted. › camzillasmom.com

1 – Fungal Fun Times
2 – Mara’s Lament
3 – Watching You

1 – Fungal Fun Times

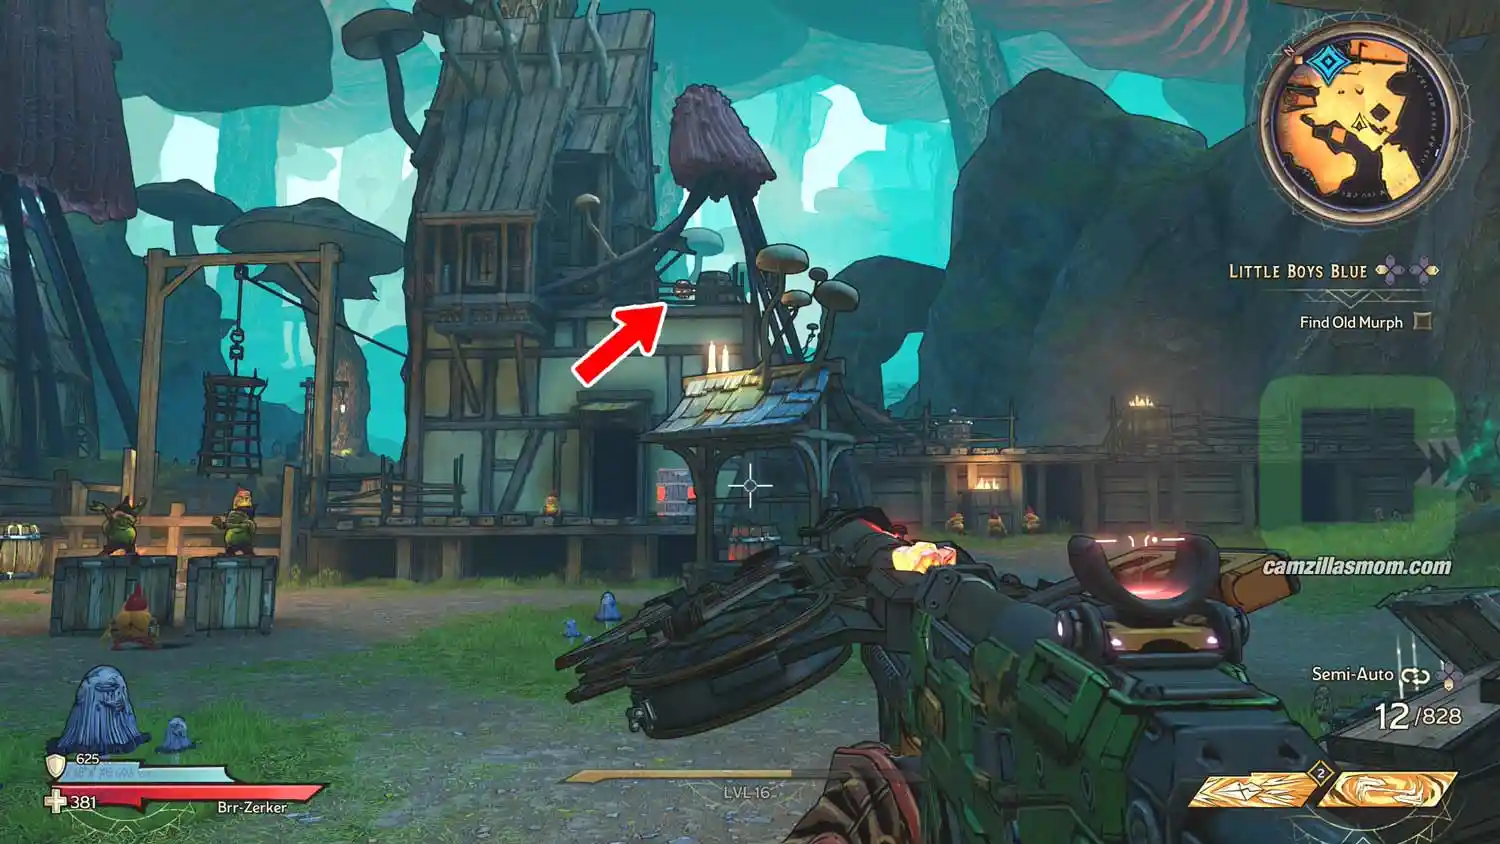
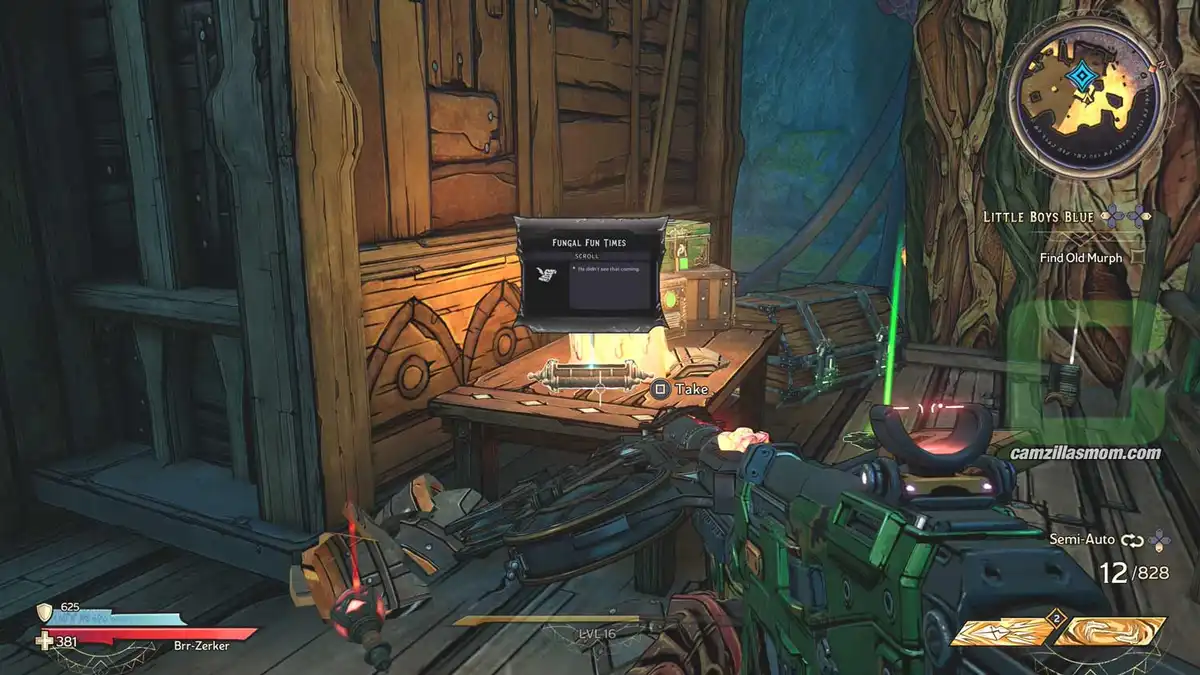
At the “Murph Refugee Camp” is a two storey building. At the top is the scroll on a table.
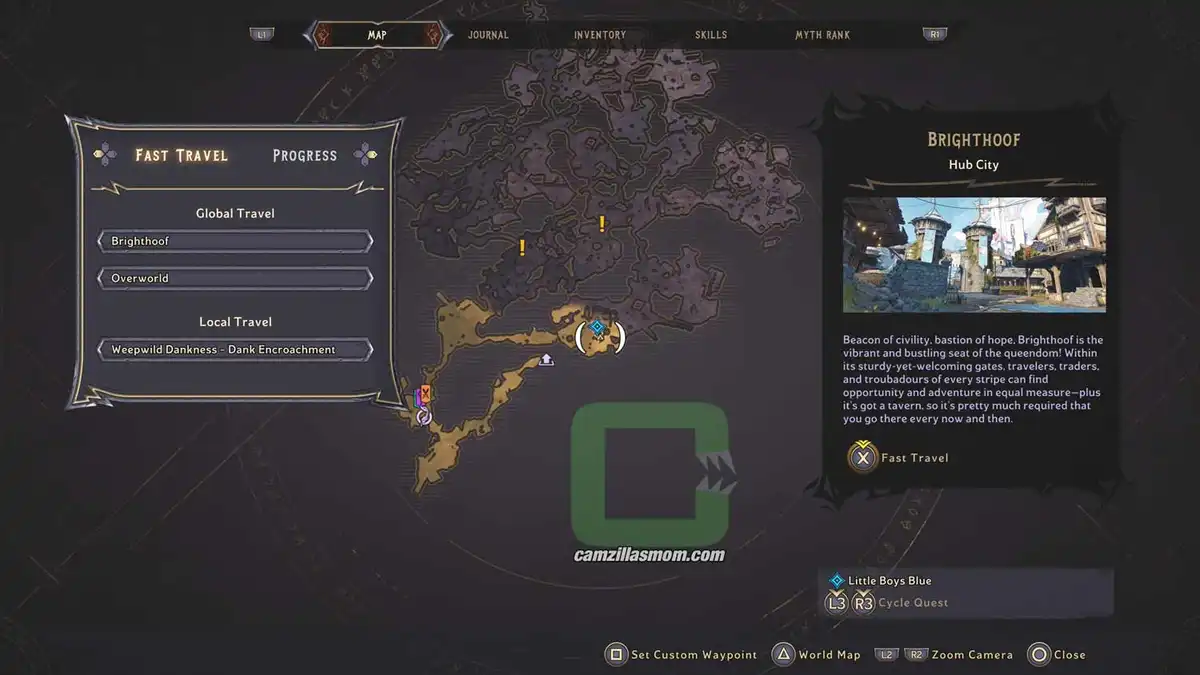
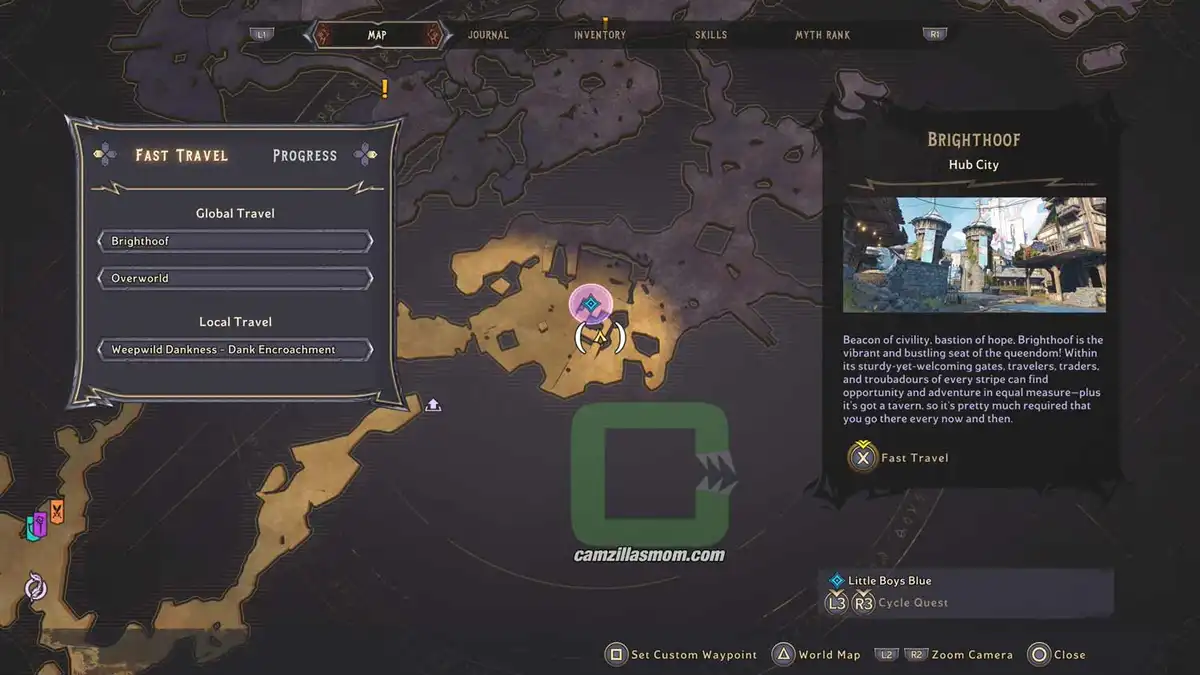
The zoomed-out map showing the Lore Scroll at the Murph Refugee Camp. › camzillasmom.com
The zoomed-in map showing the Lore Scroll at the Murph Refugee Camp. › camzillasmom.com
Screenshot highlighting the building with the Lore Scroll. › camzillasmom.com
The Lore Scroll inside the building. › camzillasmom.com

2 – Mara’s Lament

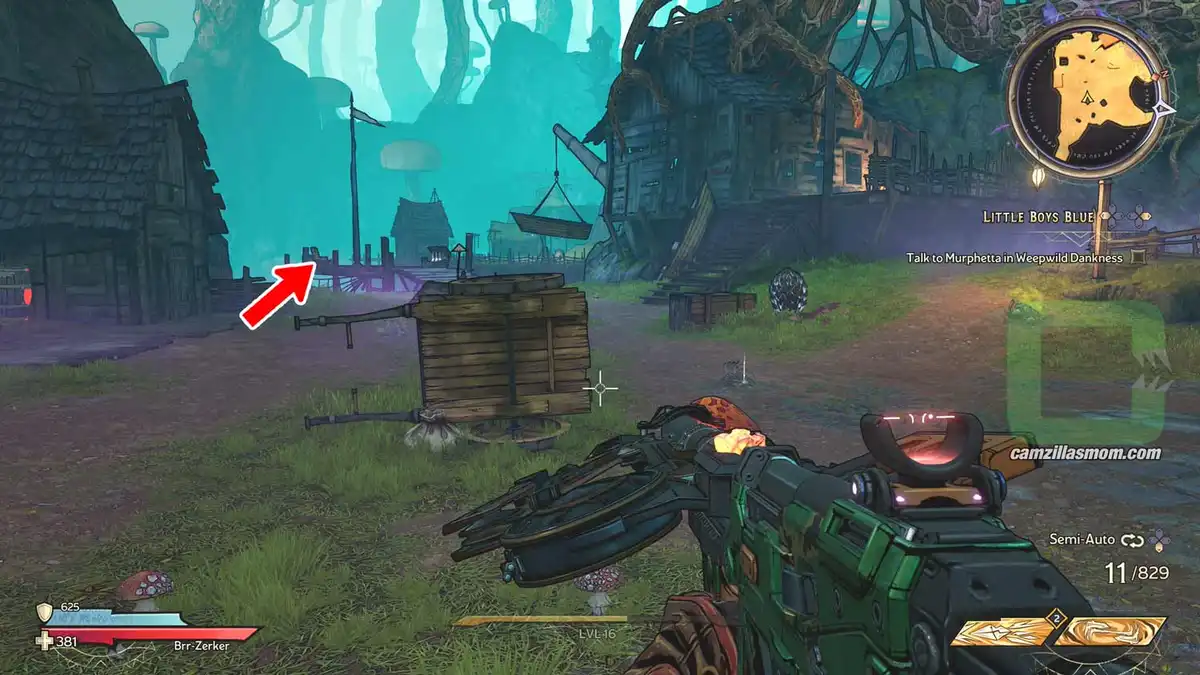
At “Dank Encroachment – Grotto of Sorrows” is a house with an overlook platform at the back. The scroll is at the end of the platform.
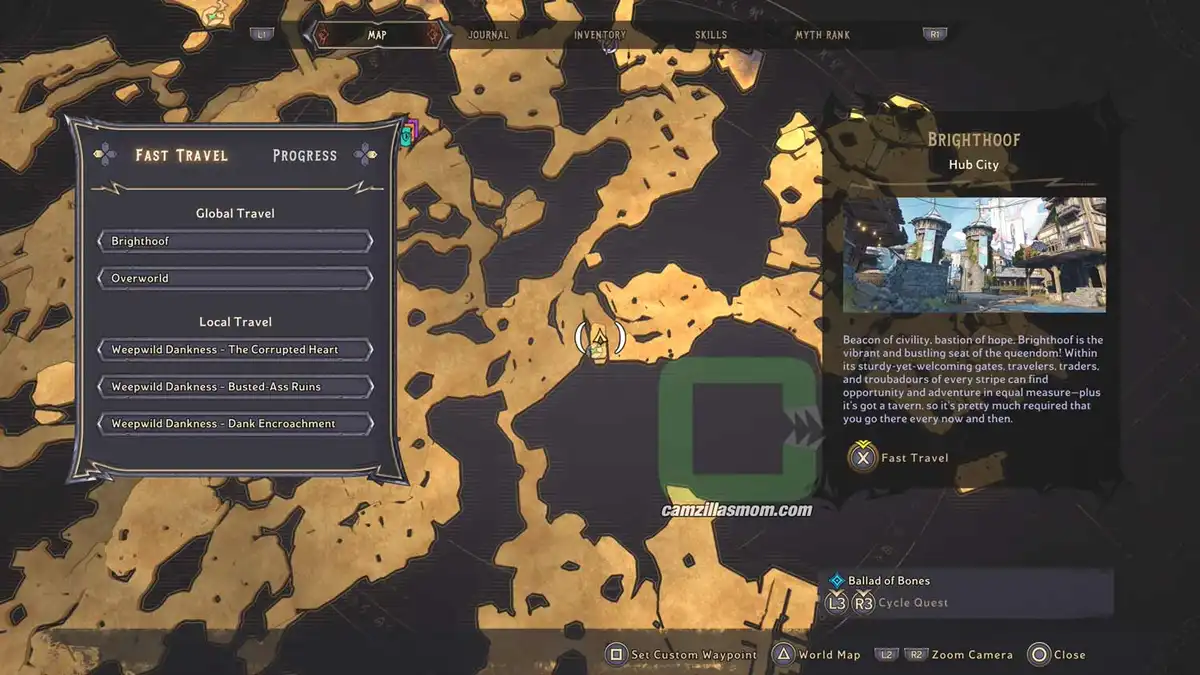
The zoomed-out map showing the Lore Scroll at Mara › camzillasmom.com's Lament.
The zoomed-in map showing the Lore Scroll at Mara › camzillasmom.com's Lament.
The arrow points to the platform with the scroll ahead. › camzillasmom.com
The Lore scroll at the end of the platform on the box. › camzillasmom.com

3 – Watching You

At “Murphshire” – the Murph Village – is a Marble high up on a tower. At the end of the platform is this scroll.

The zoomed-out map showing the Lore Scroll at Murphshire. › camzillasmom.com
The zoomed-in map showing the Lore Scroll at Murphshire. › camzillasmom.com
The arrow points at the location on the platform with the scroll. › camzillasmom.com
The scroll is visible at the end of the platform. › camzillasmom.com
› camzillasmom.com

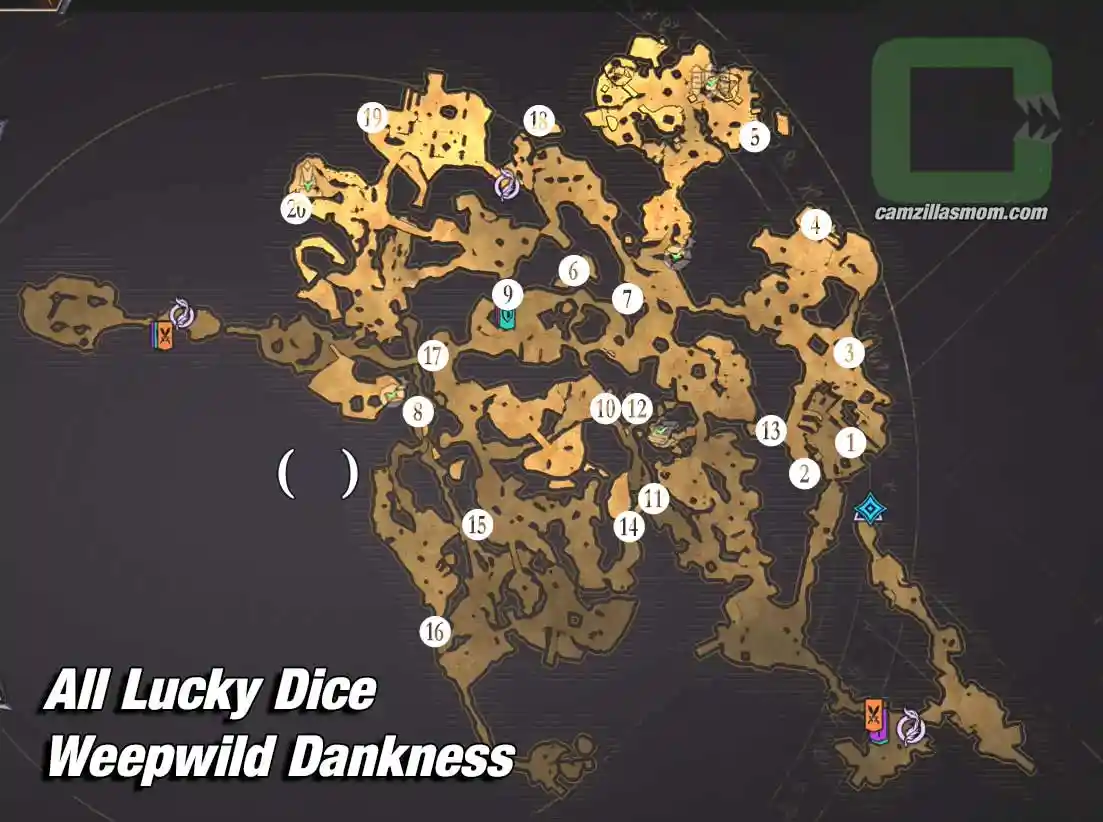
Tiny Tina’s Wonderlands: All Lucky Dice at Weepwild Dankness

Find all Lucky Dice in the Weepwild Dankness region of Tiny Tina's Wonderlands with this guide.
› camzillasmom.com

Tiny Tina’s Wonderlands: Ancient Obelisk Locations

Where to find the Ancient Obelisks in Tiny Tina's Wonderlands.

› camzillasmom.com

Tiny Tina’s Wonderlands: How to Solve Rune Switch Brighthoof

Find the Rune Switch and solve the Puzzle in the given time at Brighthoof of Tiny Tina's Wonderlands…
› camzillasmom.com

Tiny Tina’s Wonderlands: How to Solve Rune Switch Crackmast Cove

Find the Rune Switch and solve the Puzzle in the given time at Crackmast Cove in Tiny Tina's Wonderl…
› camzillasmom.com

Tiny Tina’s Wonderlands: How to Solve Rune Switch Drowned Abyss

Find the Rune Switch and solve the Puzzle in the given time at Drowned Abyss in Tiny Tina's Wonderla…
› camzillasmom.com

Tiny Tina’s Wonderlands: How to Solve Rune Switch Karnok’s Wall

Find the Rune Switch and solve the Puzzle in the given time at Karnok's Wall in Tiny Tina's Wonderl…

author avatar
Camzillasmom Collectibles Hunter
It all began in the ’80s when I was just 7 years old. Starting with basic arcade games, I soon delved into titles like Loom and Monkey Island by Lucasarts. Throughout the years, as I indulged in more and more games, I consistently sought clear guides to swiftly navigate my gameplay. Now, it’s my turn to contribute back to the community.

About Tiny Tina’s Wonderlands

Release: March, 26th, 2022
Developer: Gearbox Software
Publisher: 2K Games
Official Website: https://playwonderlands.2k.com/