This guide provides a clear and detailed walkthrough for The Night Is Grey, covering all chapters step by step. Whether you’re solving puzzles, navigating through the story, or tackling tricky challenges, this guide ensures you won’t miss a thing. Perfect for players looking for straightforward assistance to complete the game.
Key Steps
1 – Chapter 1: First Steps
-> Meet the little girl.
2 – Chapter 1: Fixing the Generator
-> Fix the cabin’s generator.
3 – Chapter 1: Leaving the Cabin
-> Leave the cabin with Hannah.
4 – Chapter 2: Fix the Power Box
-> Fix the Power Box to reach the mine.
5 – Chapter 2: Mine Generator Puzzle
-> Solve the mine’s generator puzzle and enter the mine.
6 – Chapter 3: Drain the Mine
-> Solve the valve puzzle to drain the mine.
7 – Chapter 4: How to escape the Park
-> Find a way to open the park gates to get out.
8 – Chapter 5: Getting Past the Scientists
-> Distract the Syren scientists.
9 – Chapter 6: Final Choices – Tent Encounter and Ending
-> Solve the mystery.
Chapter 1 – First Steps
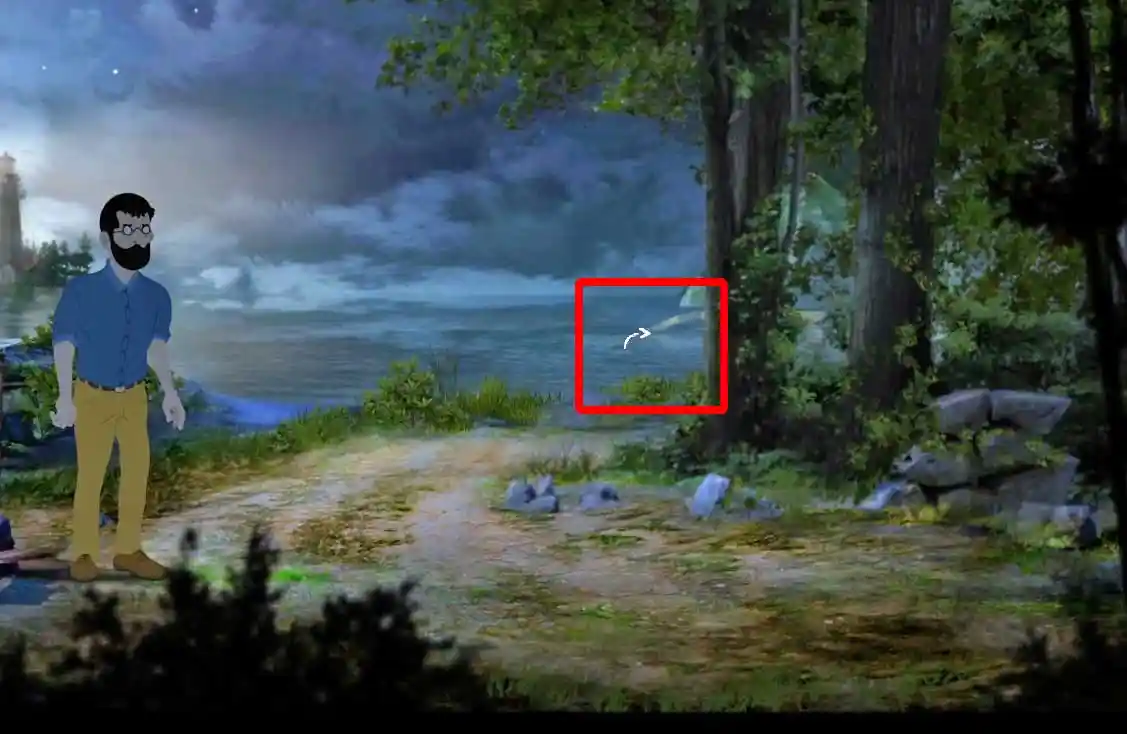
The game starts at night. Graham, the main character, crosses a small wooden bridge at the edge of the forest. We don’t know why he’s here so late, but he looks tired. Suddenly, he hears a cracking noise to the right. To find out what’s making the noise, left-click on the right side of the screen.
Graham pulls into the driveway of a house, noticing a mailbox and a small wooden shed nearby. There’s no immediate interaction available, just the option to approach the house and go inside. Once inside, he meets a frightened little girl holding a shotgun, mistaking him for a monster. She explains that her mother went out to fix the generator and restore the power, but hasn’t come back yet. Strangely, her mother didn’t take the key with her as she usually does. Graham promises to restart the power and look for her mother, but despite his reassurance, the girl remains scared and continues to threaten him.
Chapter 1 – Fixing the Generator
Restore power to the cabin
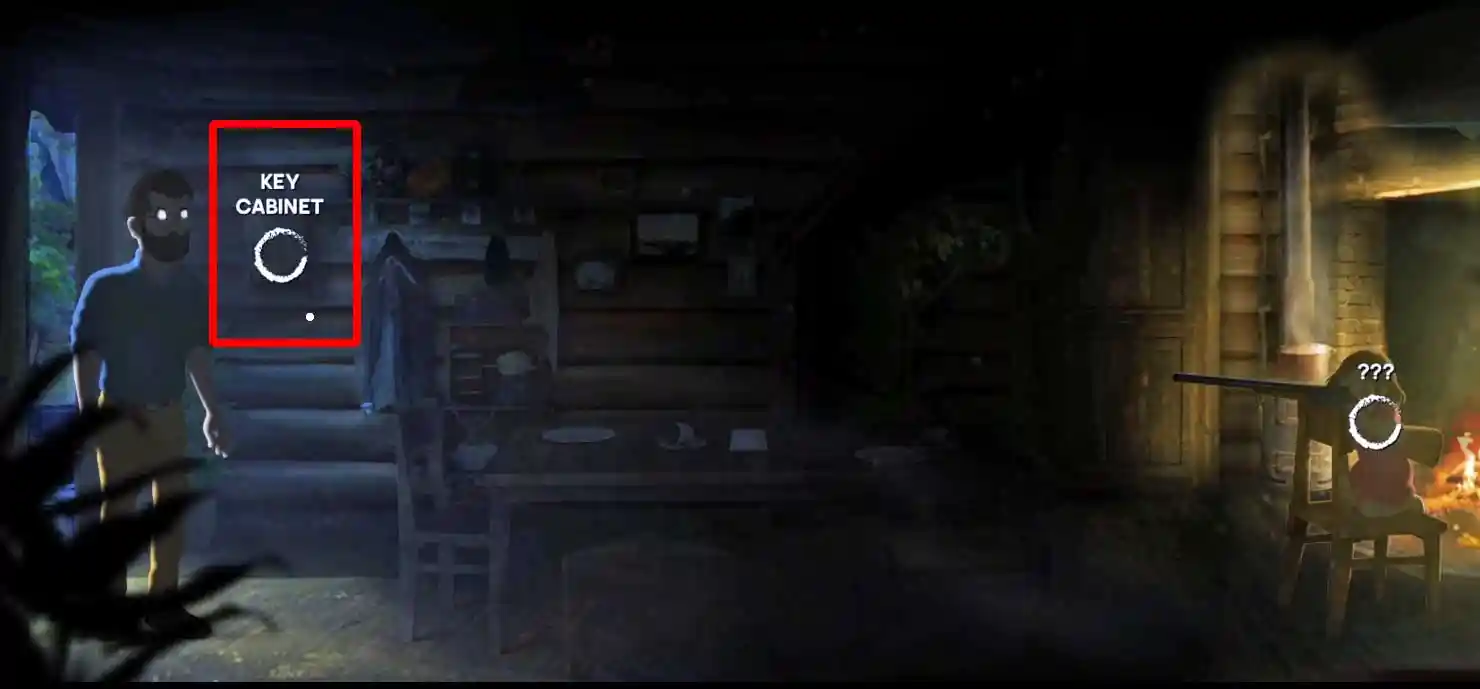
Before leaving the house, find the Key Cabinet located next to Graham. Use the Spacebar to highlight areas of interest if needed. Click on the Key Cabinet to collect a metal box and a pack of cigarettes. The screenshot below shows where the Key Cabinet is located.
To leave the house, click on the open exit. Outside, Graham wants a cigarette. Move your mouse to the top of the screen to check the inventory. Right-click on the pack of cigarettes to inspect it. Graham finds only one cigarette left and decides to save it for later.
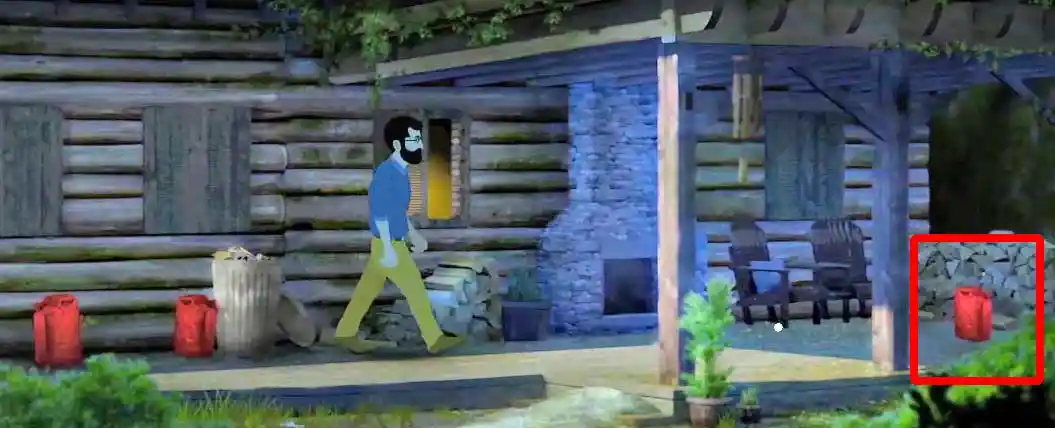
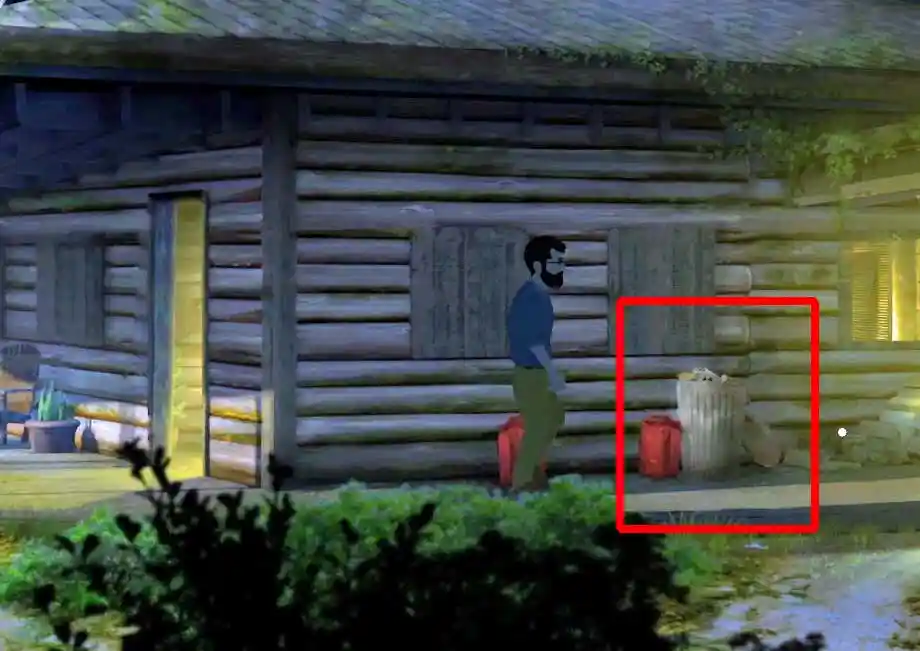
To start fixing the generator, you’ll need gas. Look outside the house and you’ll see a few jerry cans. Left-click on each one to check. The jerry can on the far right still has some gas left, so Graham adds it to his inventory. The jerry can is highlighted in the screenshot below.
You now have everything you need from this area. Return to the driveway with the mailbox and the tool shed. The shed is locked. Go to your inventory and right-click on the small metal box. Inside, you will find the key to the tool shed. Left-click on the key and drag it to the tool shed door to unlock it.
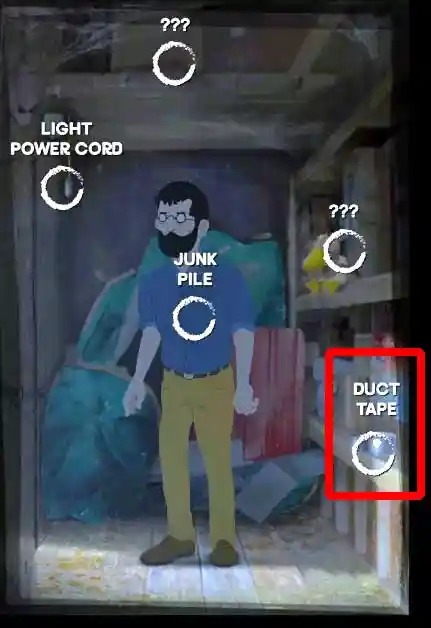
Enter the shed. The inside of the tool shed is dark. There is a light switch, but it won’t work since Graham hasn’t fixed the generator yet. Make sure to pick up the duct tape on the shelf to the right before you exit the shed.
At the driveway, by the tool shed, leave this area by walking to the left. You’ll reach the starting area with the wooden bridge. Graham starts to wonder if “they have gone”. We’ll have to find out by crossing the bridge and going left.
A short cutscene reveals three aggressive wolves on the left side of the area, which is the cause of Graham’s fear. Attempting to interact with a “Rock Pile” on the ground is futile. Instead, return to the right side of the area where the wooden bridge is located.
You have two options from here: either go right to head back to the house, or continue straight ahead and around the bend. This path will lead you to the generator.
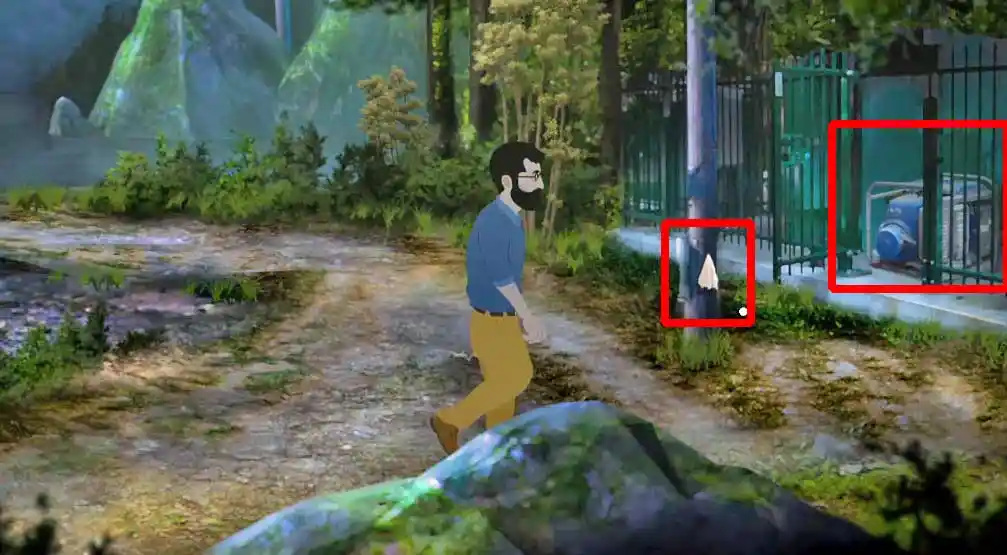
You will reach the Decayed Docks, where you’ll find an old boat, a cloth hanging on a power pole, and the generator on the right. Collect the cloth and click on the generator to repair it.
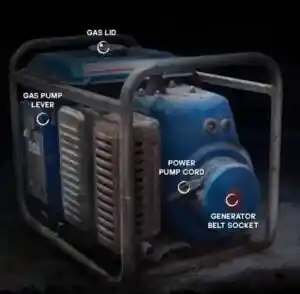
To fix the generator, follow these steps:
- Open the gas tank by lifting the gas lid.
- Fill up the gas tank by dragging and dropping the jerry can from your inventory onto it.
- Don’t forget to close the tank by clicking on the lid again.
- Click on the gas pump lever until you see a green light.
- Try starting up the generator by pulling the power pump cord. If it doesn’t work, proceed to the next step.
- Check the generator belt socket and remove the broken belt by clicking on it.
- Use the duct tape from your inventory to fix the broken belt. Drag and drop the duct tape onto the belt.
- Once the belt is fixed, drag and drop it onto the generator belt socket and close it.
- Now you can start the generator by pulling the power pump cord.
- In the minigame, click when the cursor is on the highlighted, thicker area. Repeat this three times to successfully start the generator.
Chapter 1 – Leaving the Cabin
Leave the cabin and begin your journey
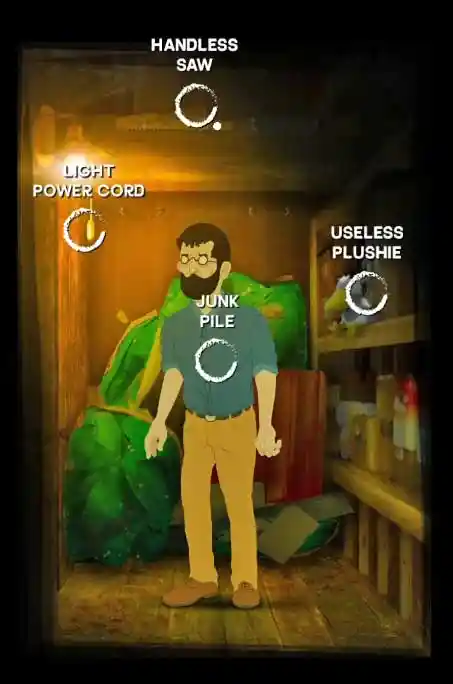
Go back to the house and re-enter the tool shed before going back to the girl. Look for a light power cord in the top left corner and turn it on. This will illuminate the shed, allowing you to see its contents. On the shelf where the duct tape was, there is a plushie called “Useless Plushie,” and above it is a Handless Saw. However, Graham cannot reach the saw when you try to click on it.
Leave the tool shed and go back to the girl. Now that the power is back, Graham will realize that the shotgun was just a broomstick and the girl will see that Graham is not a monster but just a regular guy. When she exits the house, follow her outside to the area with the tool shed and the mailbox. Graham will have a brief conversation with her about her name (Hannah) and pears. Graham decides to find a way to take Hannah to her grandparents. To start this task, ask her to help you reach a place. She will climb onto Graham’s shoulders and you can re-enter the tool shed.
When Hannah enters the shed with you, she will immediately see the Useless Plushie, which she affectionately refers to as Storky. She can pick it up. Next, click on the Handless Saw (refer to the previous screenshot) and complete a small minigame to obtain it. Just click within the empty area. The Handless Saw will then be added to your inventory.
You will leave the tool shed automatically as there is no further action required. Graham will then guide Hannah back to her spot near the mailbox and assist her in climbing down from his shoulders. Hannah will then ask Graham to repair Storky and will hand it over.
Return to the house and enter it, while Hannah stays outside in the area next to the mailbox. Inside the house, look at the Wall Pictures on the wall that shows a lighthouse. Turn it around to read what was written at the back (“The Spring in which we saw each other’s light – G.P.“). Then exit the picture frame area. On the table is a notepad and a butter knife. You can’t use the notepad yet but you can take the butter knife.
To combine the Handless Saw and the Butter Knife in your inventory, drag and drop the Saw onto the Knife. Then, use the duct tape to fix them together. Afterward, you will have a fully functional Saw in your inventory.
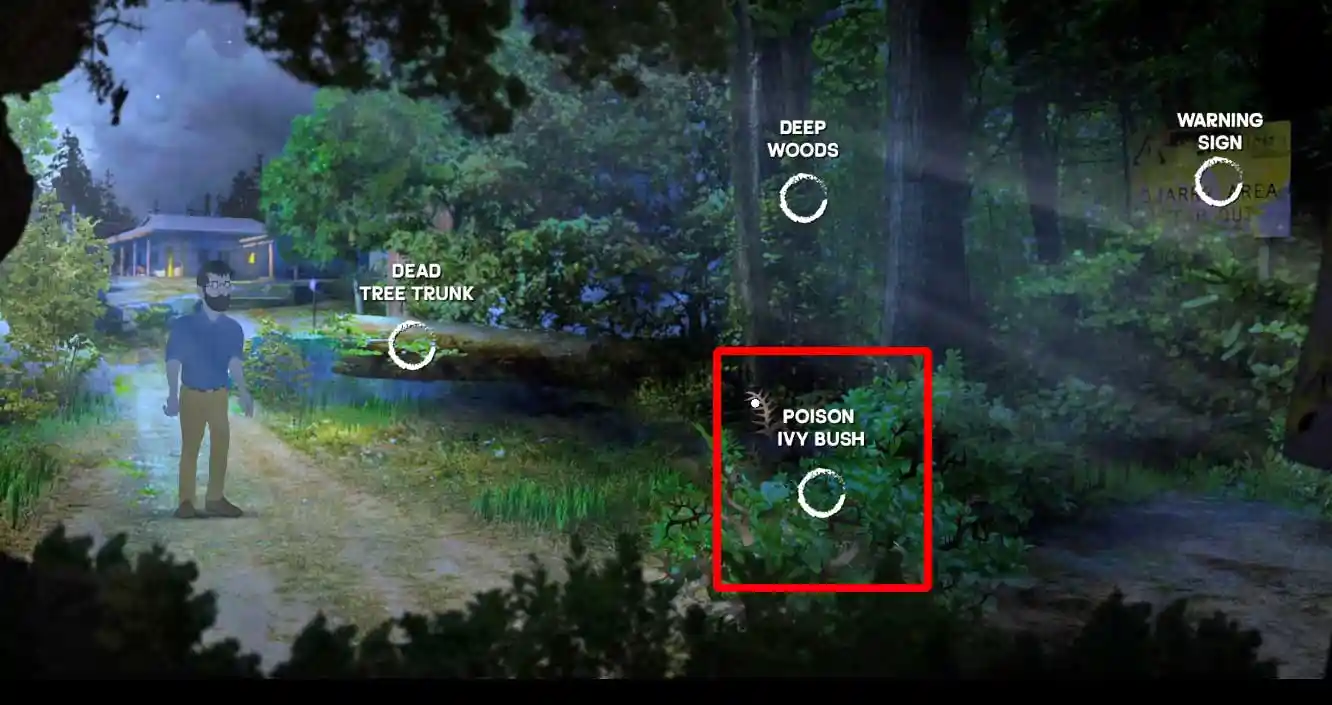
Exit the house and return to Hannah’s area. Proceed south from there. Look for a dark area with a Poison Ivy Bush and a Warning Sign on the right. Use the saw from your inventory to remove the Poison Ivy Bush. Graham will take care of it. Note that the saw will be destroyed in the process, but the Butter Knife will remain intact and go back into your inventory. You can then leave the area to the right.
The new area features an industrial setting with a digger, a red truck, and a damaged tank. Graham is aware of this area and mentions that if they go down there, they won’t be able to return this way due to the muddy slide. Now, you can go back to Hannah and inform her that a way out has been found. She insists that Graham leaves a note for her mother before they leave.
Go back into the house and remember, there’s a notepad on the table. However, there’s nothing to write with when you interact with it. After exploring everything inside the house (try using the broomstick), go back to Hannah and ask if she has a pen. She’ll mention that she used to have crayons, but her mother threw them away… so good news! There’s trash outside the house. Search it and you’ll find a red crayon.
You can now go back to the notepad inside the house. Drag and drop the red crayon onto it to write the note. Afterward, return to Hannah and let her know it’s time to go. This will conclude Chapter 1.
Chapter 2 – Fixing the Power Box
Fix the power box and discover the mine.
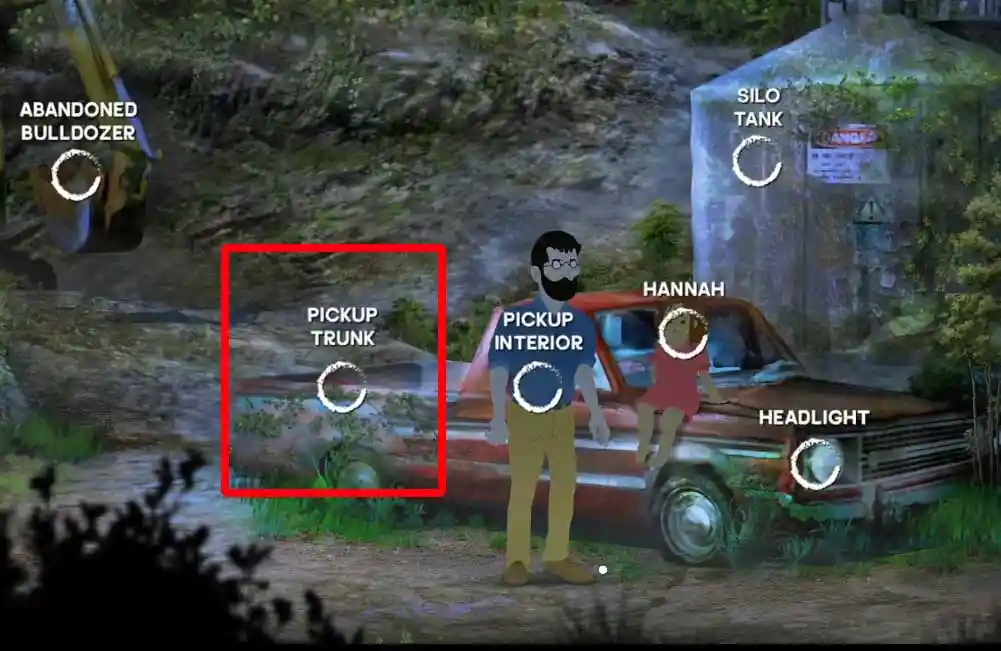
Graham and Hanna begin near the abandoned bulldozer, the red pickup truck, and the silo tanks. On the left, there is a barbed wire fence and gate with a dysfunctional power box. Search the pickup truck’s truck to find an electric connector.
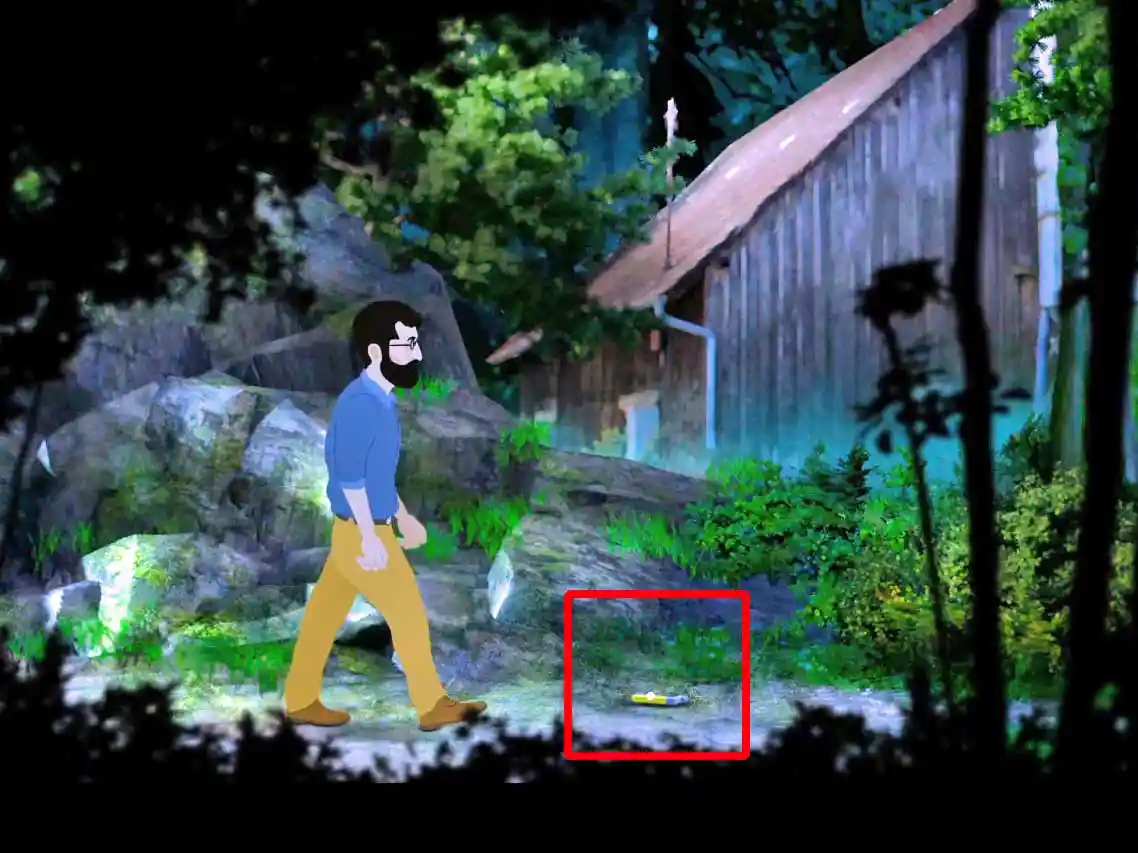
You then have the option to exit through the fence gate on the left or proceed towards the right into a forest. Currently, there is nothing to discover by the red pickup truck. Let’s head to the right first. Here, you will just be on a path through a dark forest, with an old building in the background. The only thing you can find in this area is a small yellow handle on the floor. It’s for the power box next to the fence. Let’s leave that in the inventory for now.
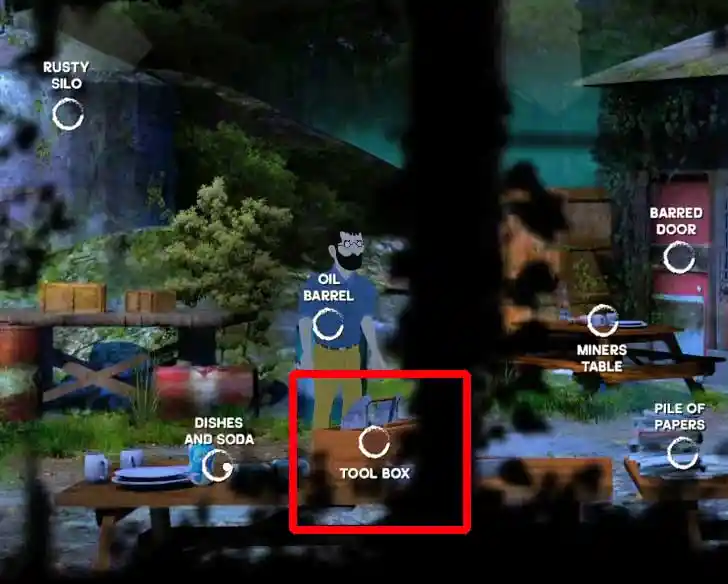
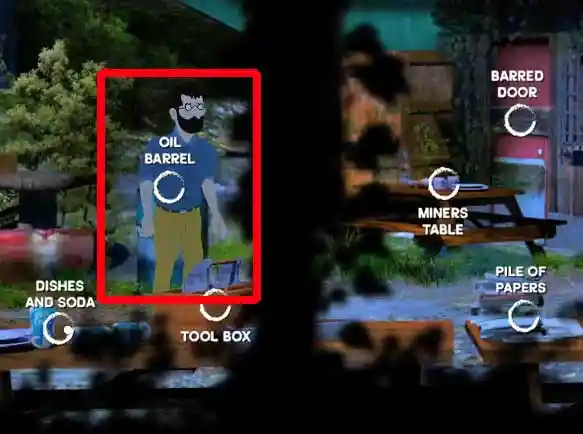
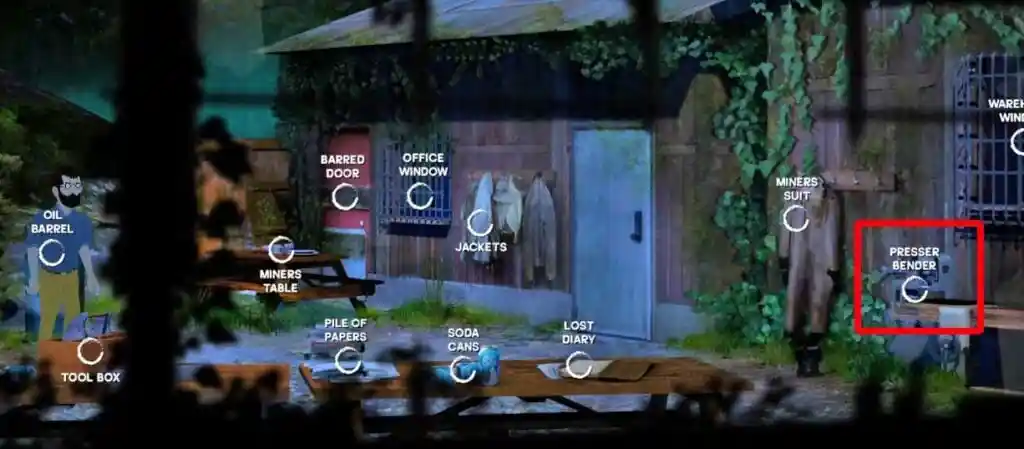
Proceed to the next area on the right. It contains barrels with flammable materials, a few tables, and a large warehouse building to the right. There are plenty of tasks to complete here, and you’ll need to come back at least once. Start by searching the toolbox on one of the tables to find the screwdriver.
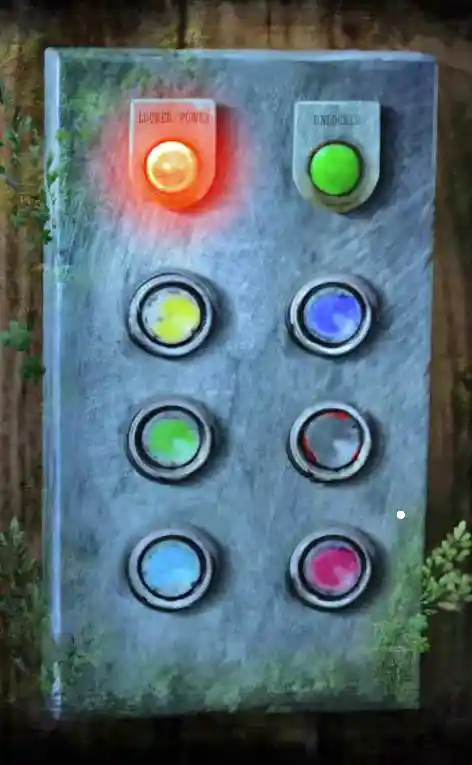
Continue to read the “Lost Diary”, which is also on one of the tables. It contains crucial information that you need for later. First, it mentions a code: 33 16 52. Also, the diary gives you some hints about the amperage of the power box. Next, search the Miners Suit on one of the hangers on the warehouse. You’ll find an ID card with color coding on the back. 1 for blue, 2 for red, 3 for yellow, 4 for light blue, 5 for purple, 6 for green. If you translate the above code with the color coding, you will get yellow, yellow, blue, green, purple, and red. This is important for later.

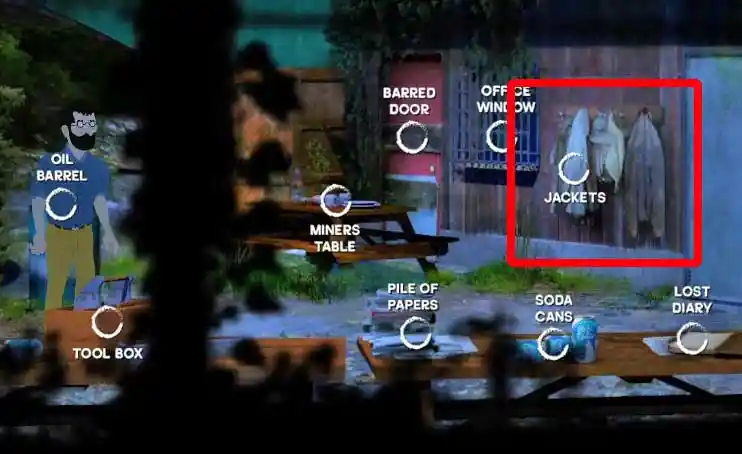
Also, search the jackets on the other warehouse hangers. There is a small red key in one of them.
Remember, you picked up the yellow handle on your way to the warehouse. This handle is needed for the power box at the fence, but it’s too rusty. Use some oil to grease it. To open the lid, use the butter knife on the blue oil barrel. Once open, drag and drop the yellow handle onto the blue oil barrel to grease it. Note that the butter knife will be destroyed in the process.
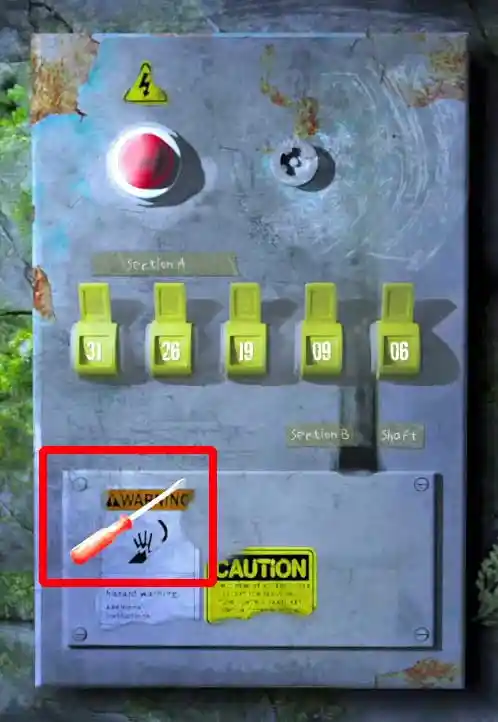
We’ve completed everything possible in the warehouse area for now. Head back to the fence and locate the power box. Use the screwdriver by dragging and dropping it onto the metal plate at the bottom of the power box to open it.
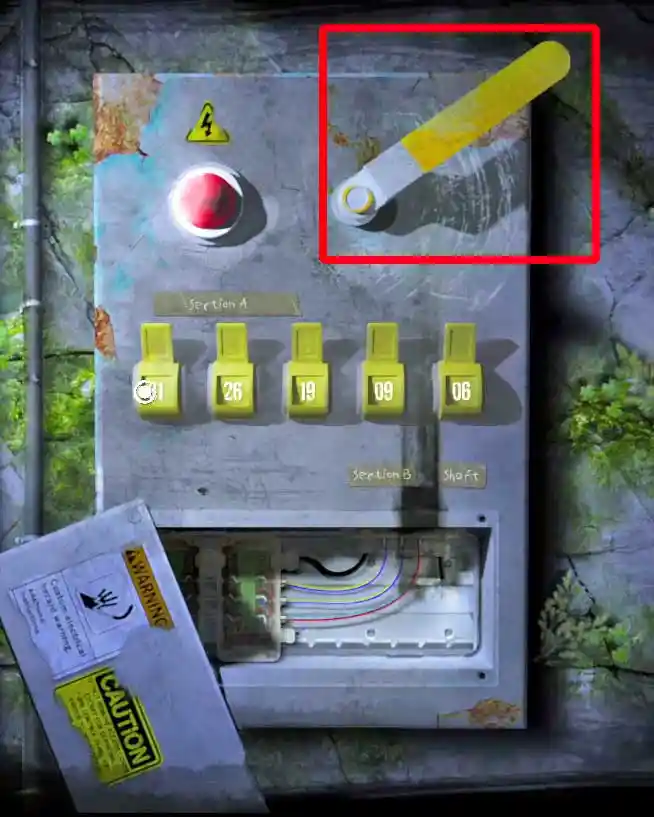
Once the plate is removed, you’ll notice that the bottom wire is burned. Simply click on it to remove it. Then, place the yellow handle from your inventory into the handle slot at the top.
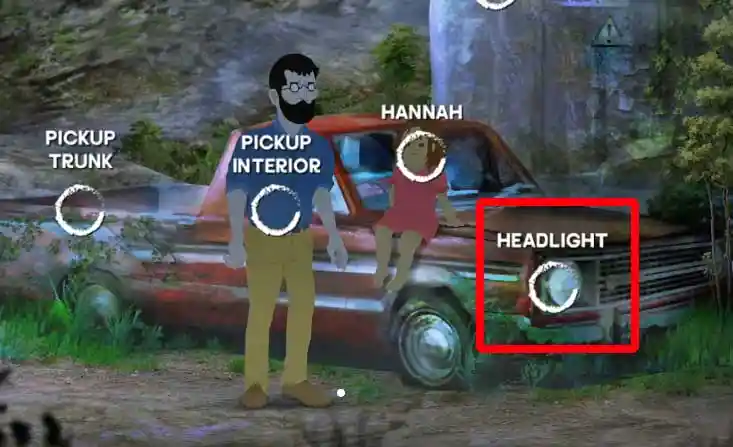
Leave the power box. We need to find two pieces of wiring to repair it. The first one is nearby. Head to the red truck and use the screwdriver on the headlight. You’ll obtain one piece of wiring.
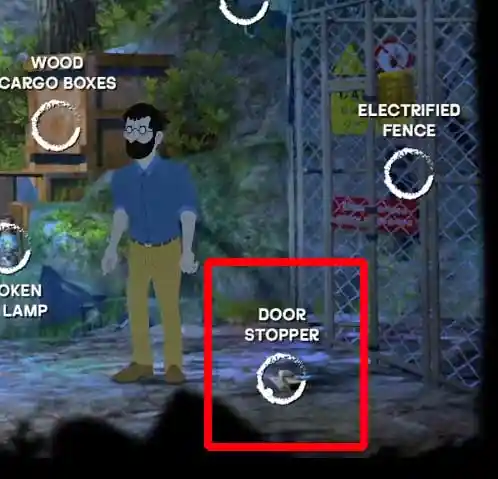
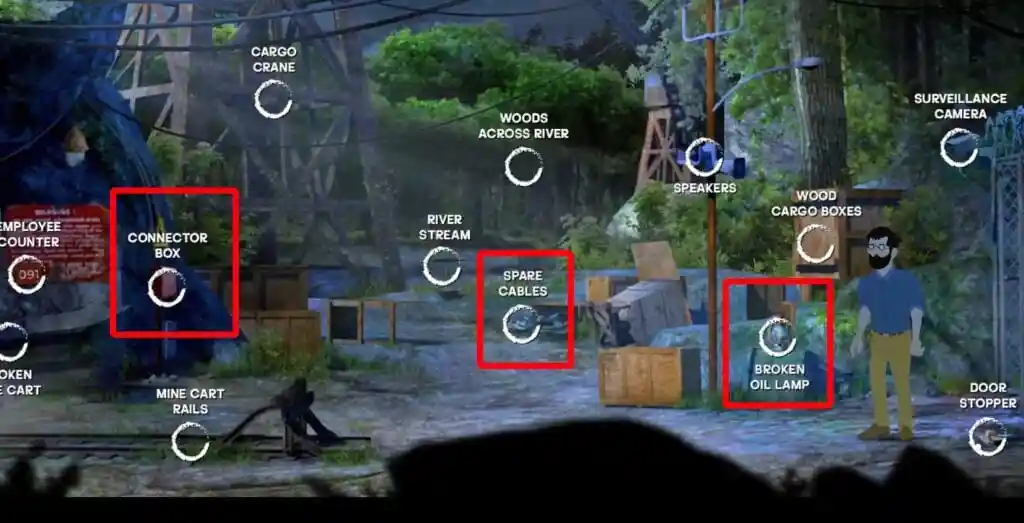
This wire is too short. You’ll need a second one. Go through the fence gate to the left area – the mine. Start by using the screwdriver on the door stopper. You won’t need it after that.
Next, search the Broken Oil Lamp to obtain a piece of wick and another electric connector. Then, look for the spare cables pile at the back to find the second piece of wiring. Before leaving the area, go to the connector box and use the small red key from your inventory to open it. The lock is located in the top right corner. Inside the connector box, you will find two additional electric connectors. Take them.
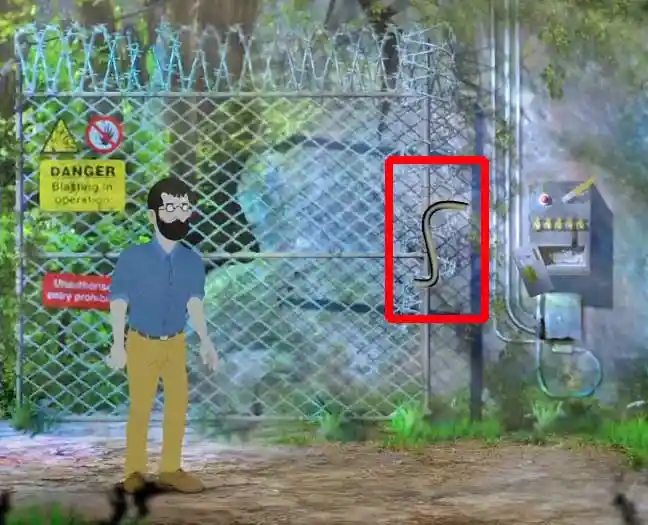
Now, let’s address the power issue. Go back to the power box area. To make the wires functional, ensure that the ends are exposed. To achieve this, drag and drop the wire without exposed ends onto the barbed wire next to the power box.
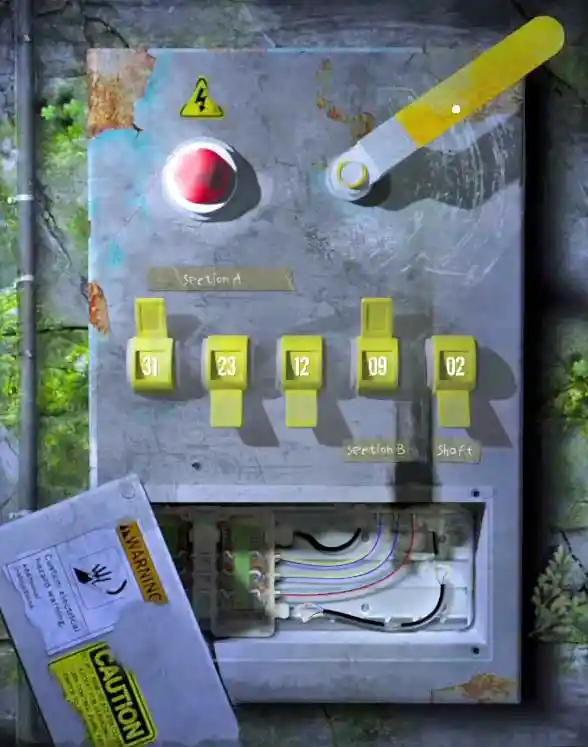
Combine the two wire pieces in your inventory and use them on the power box. To activate the power, set the switches to the numbers 31, 23, 12, 09, and 02, as shown in the screenshot below. Then, use the yellow handle to turn on the power.
Chapter 2 – Mine Generator Puzzle Walkthrough
Solve the power box to light up the mine area
We now have power but we still don’t have all the connector pieces that we need to turn on the power in the mine. Return to the warehouse to the very right and search the jackets again.
Behind the jackets is a now powered card reader with six buttons. Slide the ID card through the card reader and hit the buttons in this order: yellow, yellow, blue, green, purple, and red. This will open the door to the control room. Enter it.
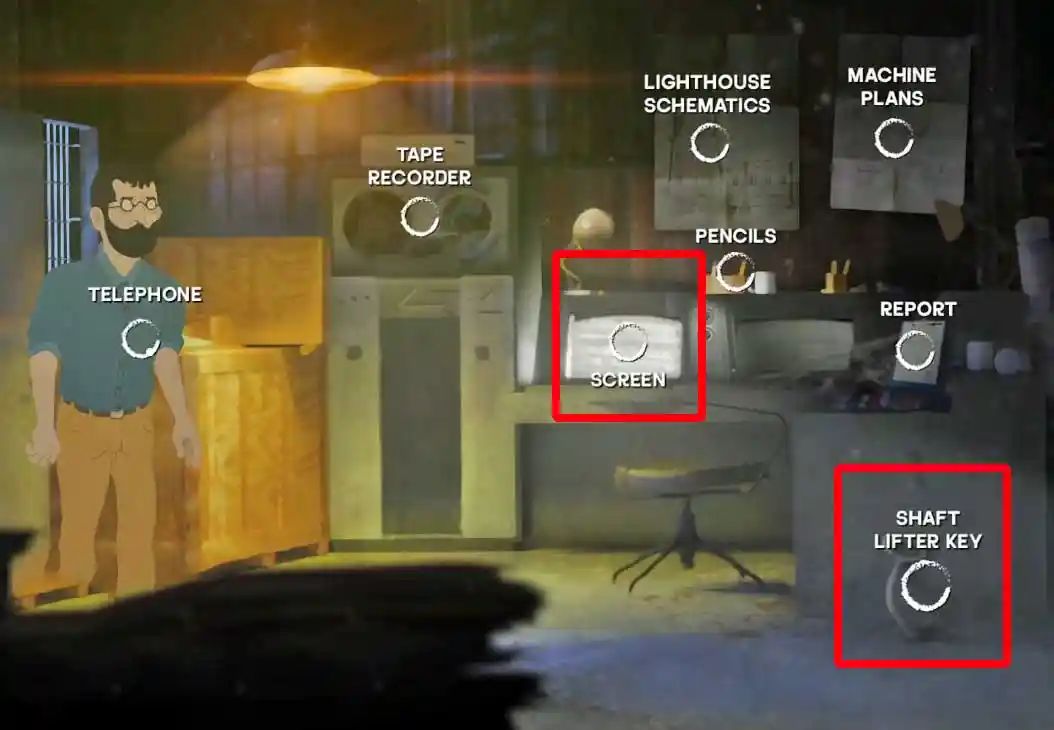
Inside the control room, pick up the Shaft Lifter Key and interact with the screen.
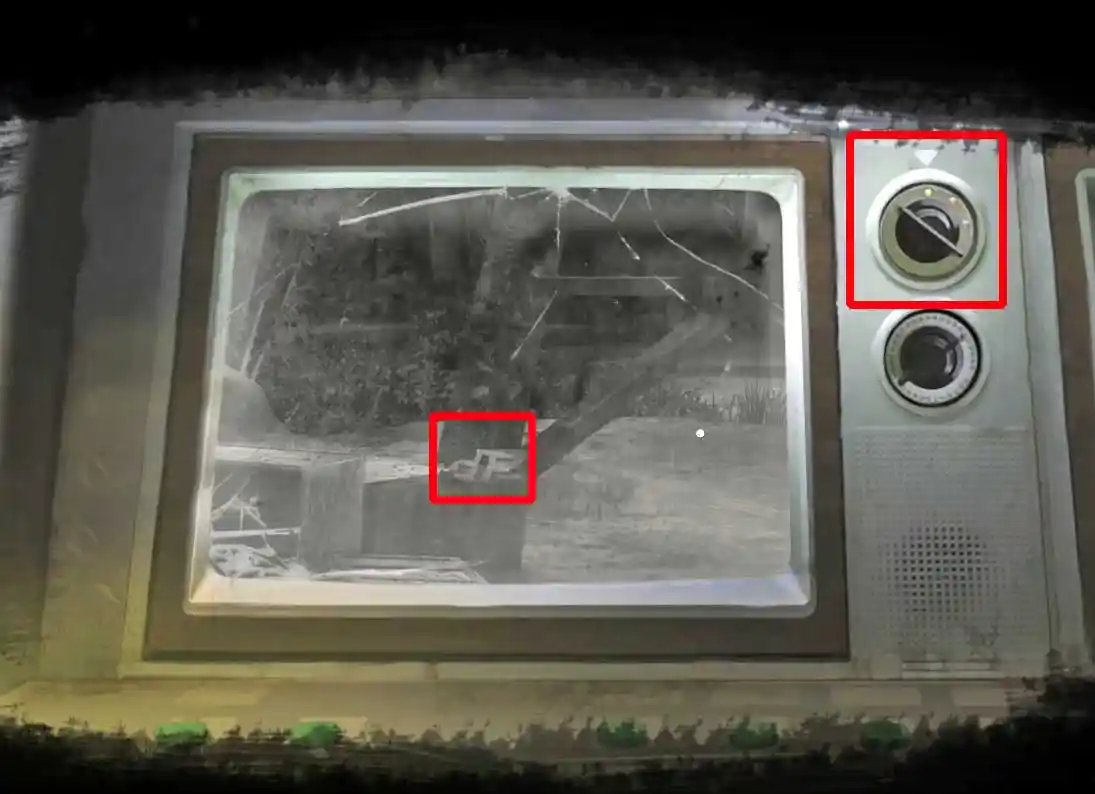
In the screen view, there are three channels available for switching. Go to the yellow channel and navigate to the area indicated in the screenshot below. You will see another electric connector. Click on the monitor to provide Graham with a hint to search in this specific area of the mine.
Exit the control room and use the Shaft Lifter Key on the Presser Bender to the very right. This minigame will fix the Shaft Lifter Key. Just hit the left mouse button when you’re in the open area.
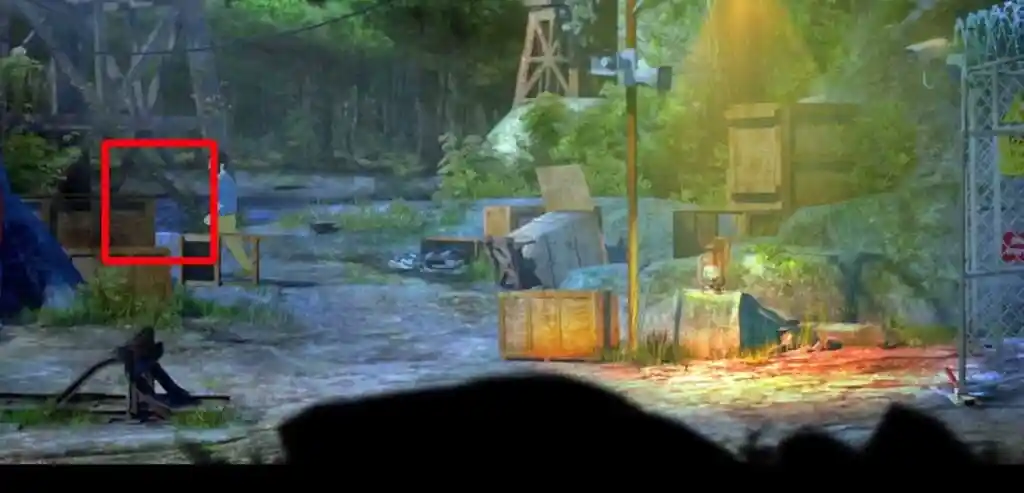
Now we’ve done all there is in the warehouse area. Time to return to the mine. Graham can now retrieve the last crucial electric connector from the location as shown in the screenshot below.
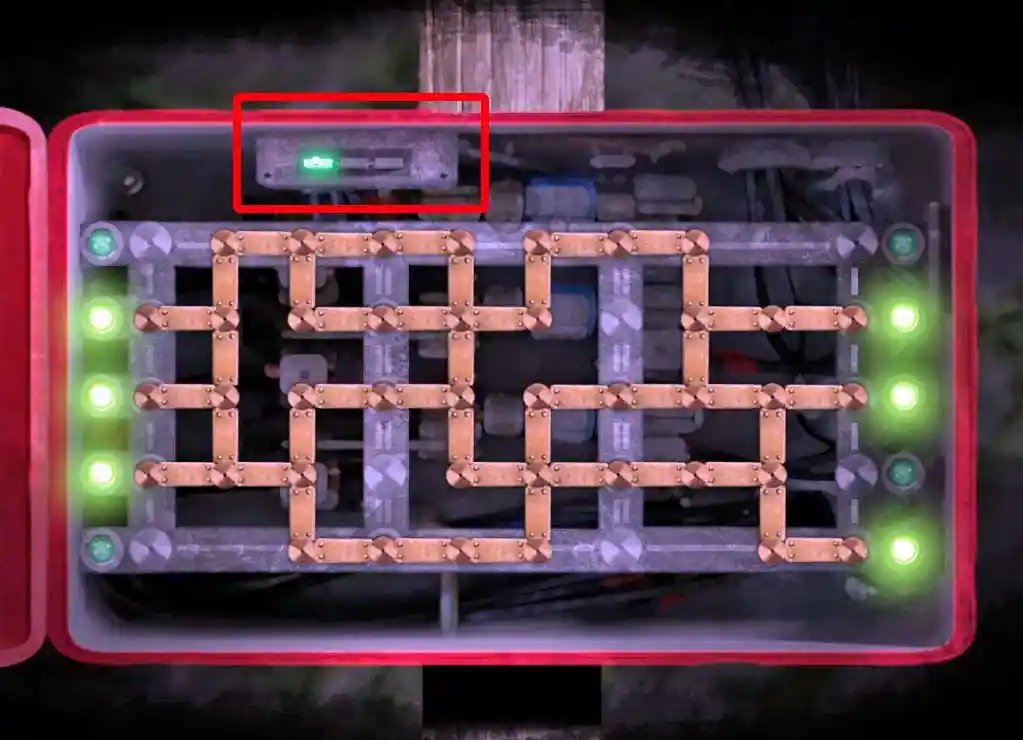
Head over to the connector box and place the electric connectors as shown in the screenshot below. Make sure you also have the first channel selected. This will turn on the light in the mine and you can enter it.
To open the covered mine shaft inside the mine, use the Shaft Key on the shaft on the floor. Afterward, go back to Hannah, have a conversation with her, carry her on your shoulders, and head back to the mine. These actions will mark the end of Chapter 2.
Chapter 3 – Drain The Mine: Valve Puzzle Walkthrough
Turn the correct valves to pump out the water
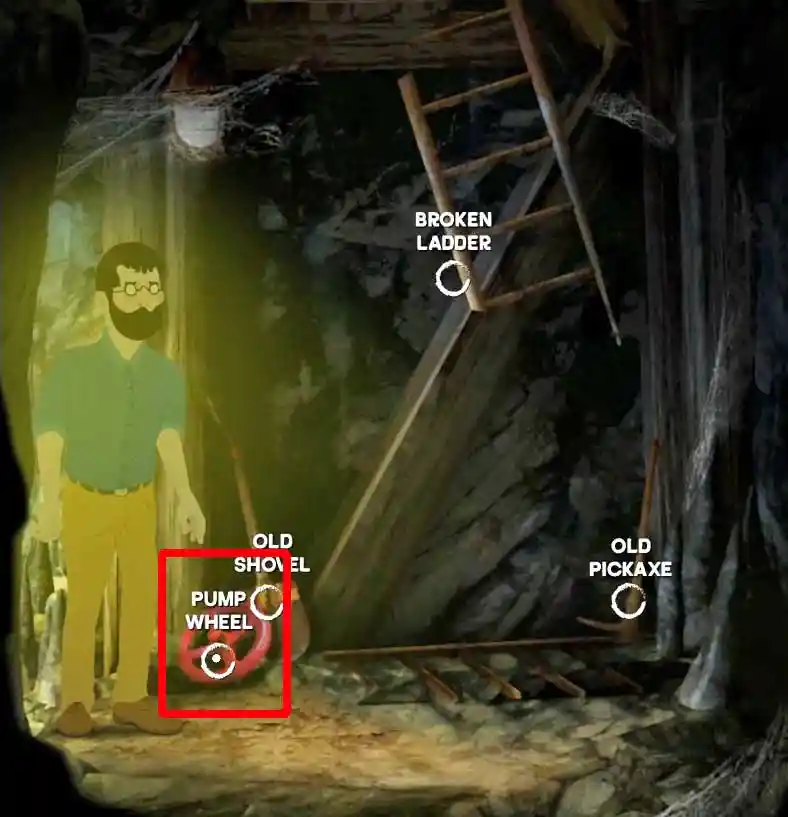
The third chapter of The Mines centers around water management. Once you drain the water, you can exit by heading directly to the left of the entrance. Here’s how: Start by retracing your steps to the right, where you initially descended into the mines. Although the ladder is no longer there, you’ll discover a red valve called The Pump Wheel. Pick it up to proceed.
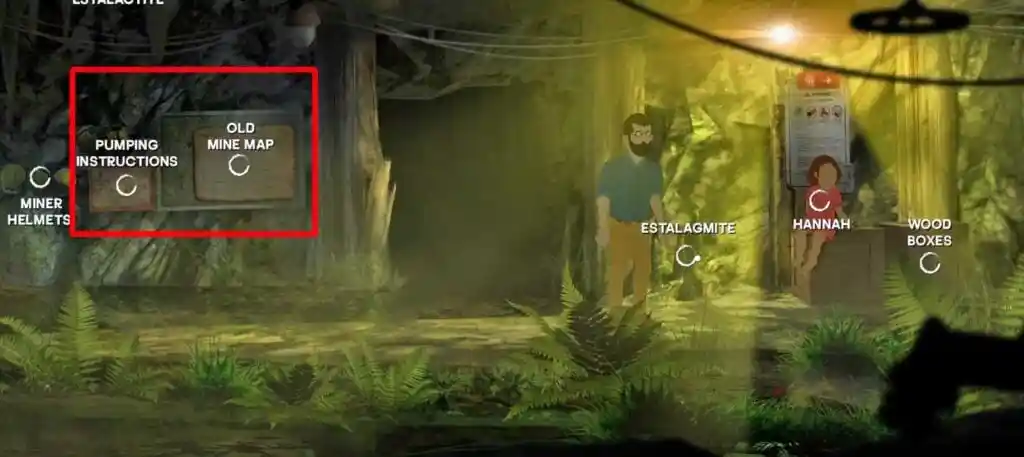
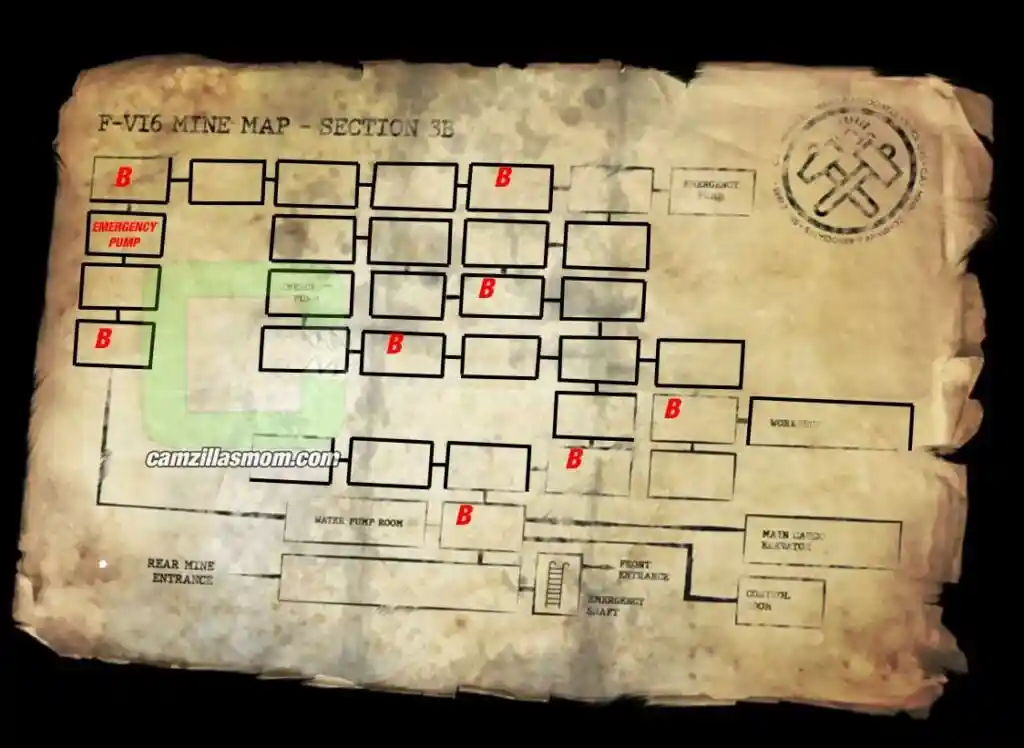
Return to Hannah in the main entrance room. The exit to the left is flooded. But there is a map you can pick up on the wall. It turns out it is very important to find your way in the path to come… also have a look at the Pumping Instructions right next to it. It will show you how to place valves later on.
Unfortunately, the map is damaged and you won’t see the whole area. Let me help you with a reconstructed map with all oil barrels marked with a red “B”:
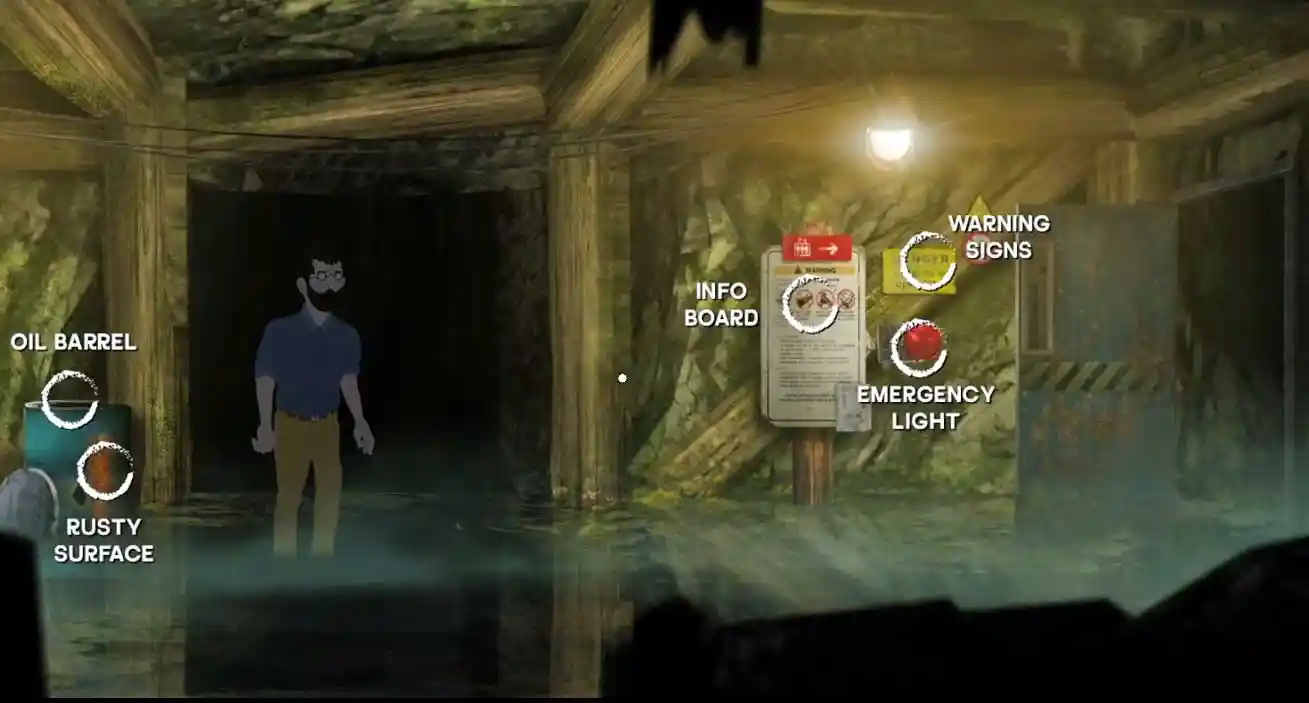
Proceed by leaving Hannah behind and ascending through the passage. Look for a barrel of oil with a rusty surface, as you’ll require it later. Currently, it is too dark to continue through the upward passage. Prior to moving forward, locate an item to illuminate the path. Head towards the Main Cargo Elevator situated on the right.
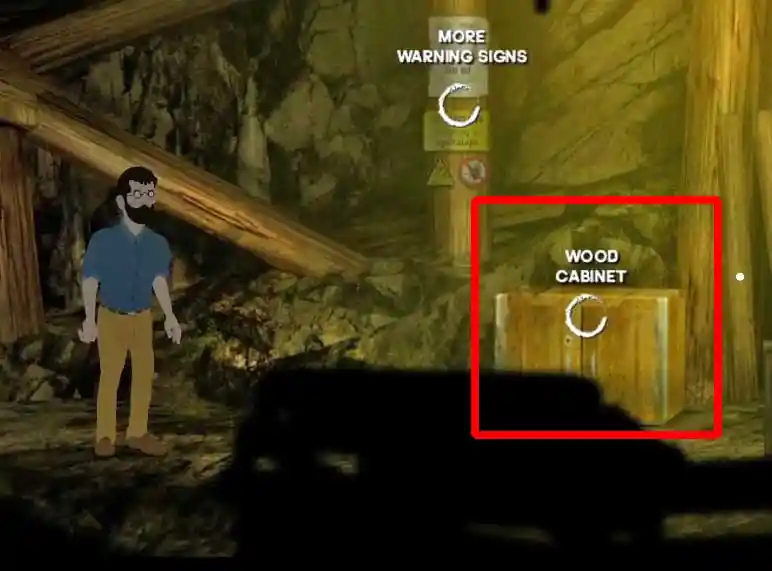
At the main cargo elevator area, locate the Wood Cabinet near the entrance. You can open it by using the ID card on the gap between the doors. This will destroy the ID card, but open the cabinet. Inside is a broken lantern, and when you interact with the “Old Dossier” folders, you will find a small valve. Take both, the lantern and the valve.
Combine the broken lantern with the wick in your inventory. The lantern is partially fixed, but it will leak oil when filled. This means you can only walk short distances in the dark. Remember to refill it with oil barrels while navigating the labyrinthine corridors of the mine. The barrels are marked with a red “B” on the reconstructed map above.
Return to Hannah and talk to her. She found matches and will hand them over. You can light the match on the rusty surface of the oil barrel that you can find in the corridor of the Main Cargo Elevator.
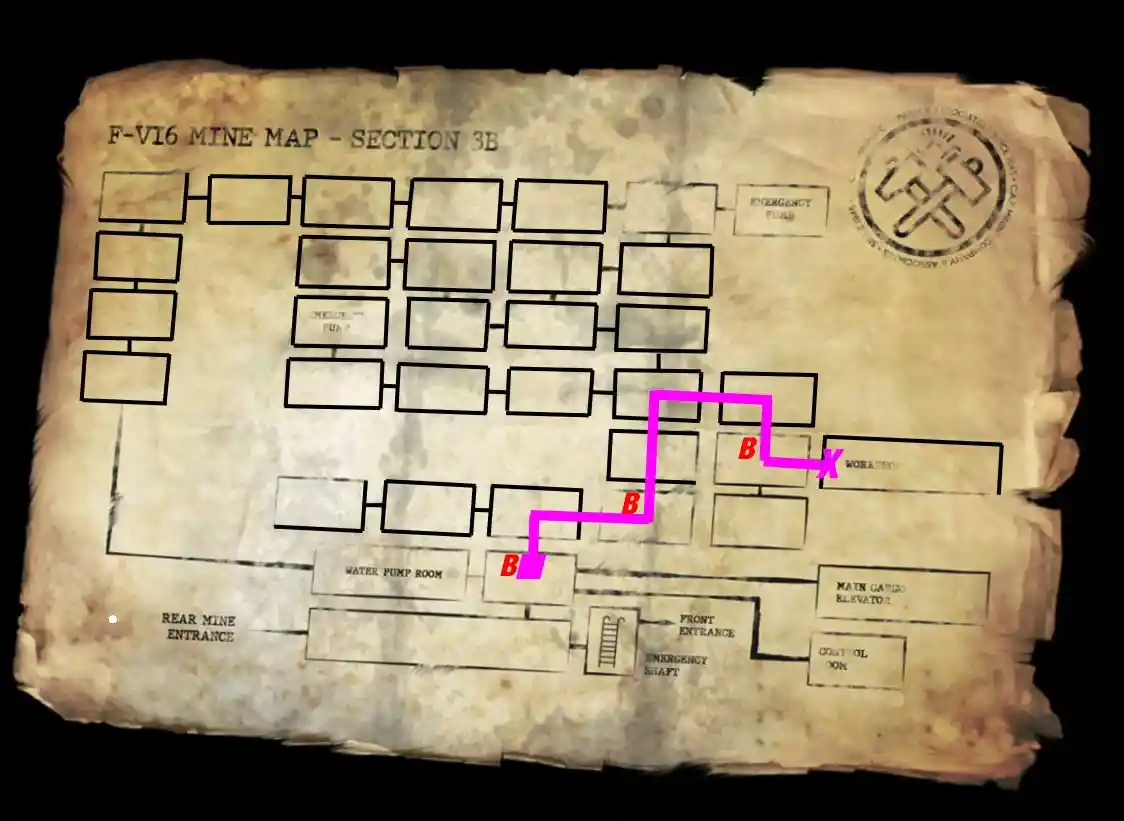
First, let’s head to the Workshop, located above the Main Cargo Elevator on the map. We’ll find a valve there that we need to proceed. It would be inconvenient to have to backtrack for it. We’ll follow this path as highlighted on the map below:
Inside the workshop, pick up the blue valve. That’s all we need from here. Exit when you’re done to the oil barrel in front of the workshop.
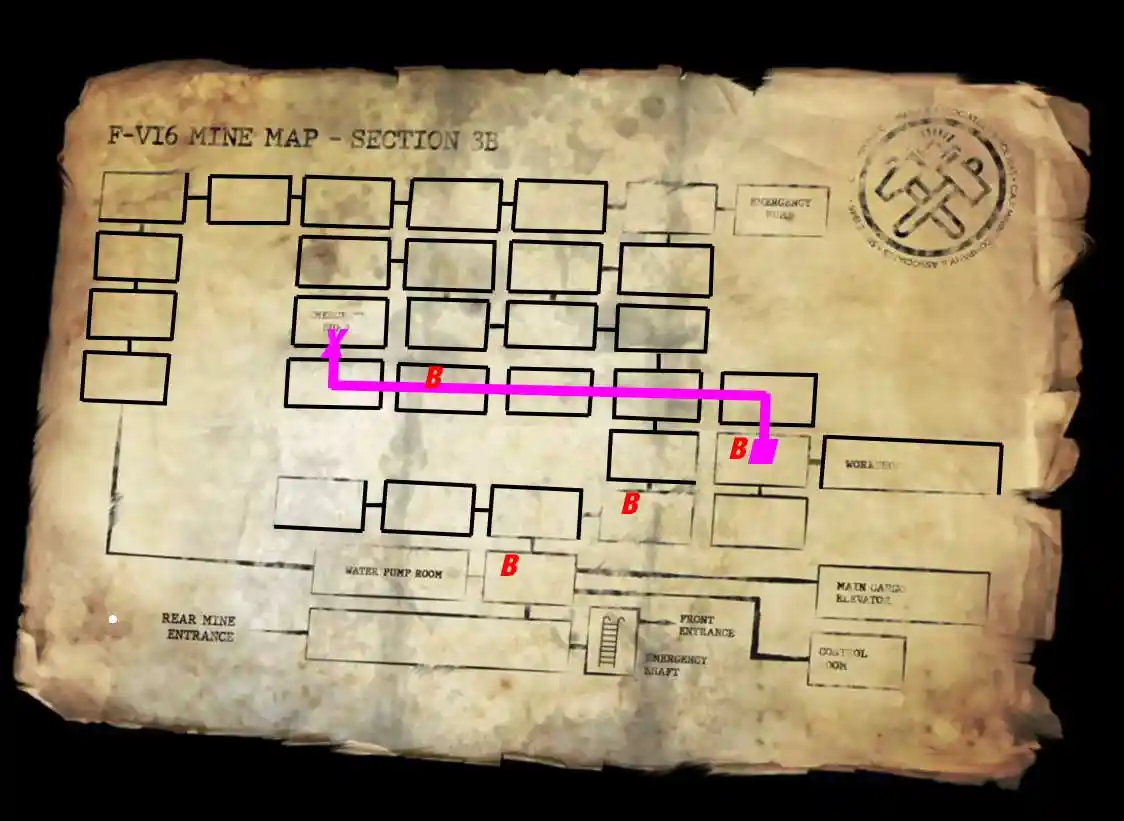
From the barrel at the Workshop, we’re heading to the first emergency pump to the north from there. I’ve again marked the path on the map below:
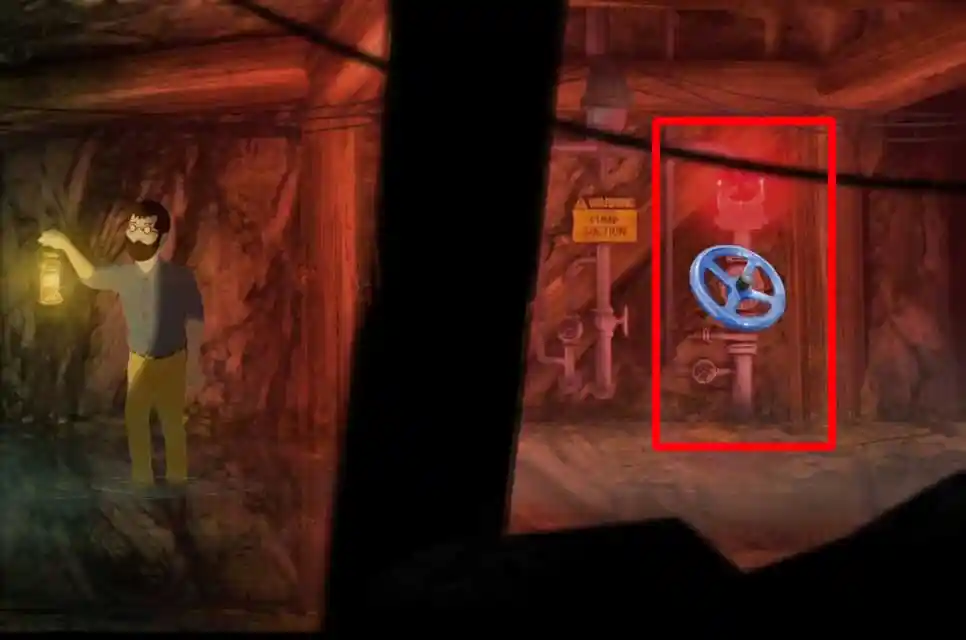
There is no valve at the emergency pump. Take the blue one from your inventory and simply use it. Make sure the light changes from red to green.
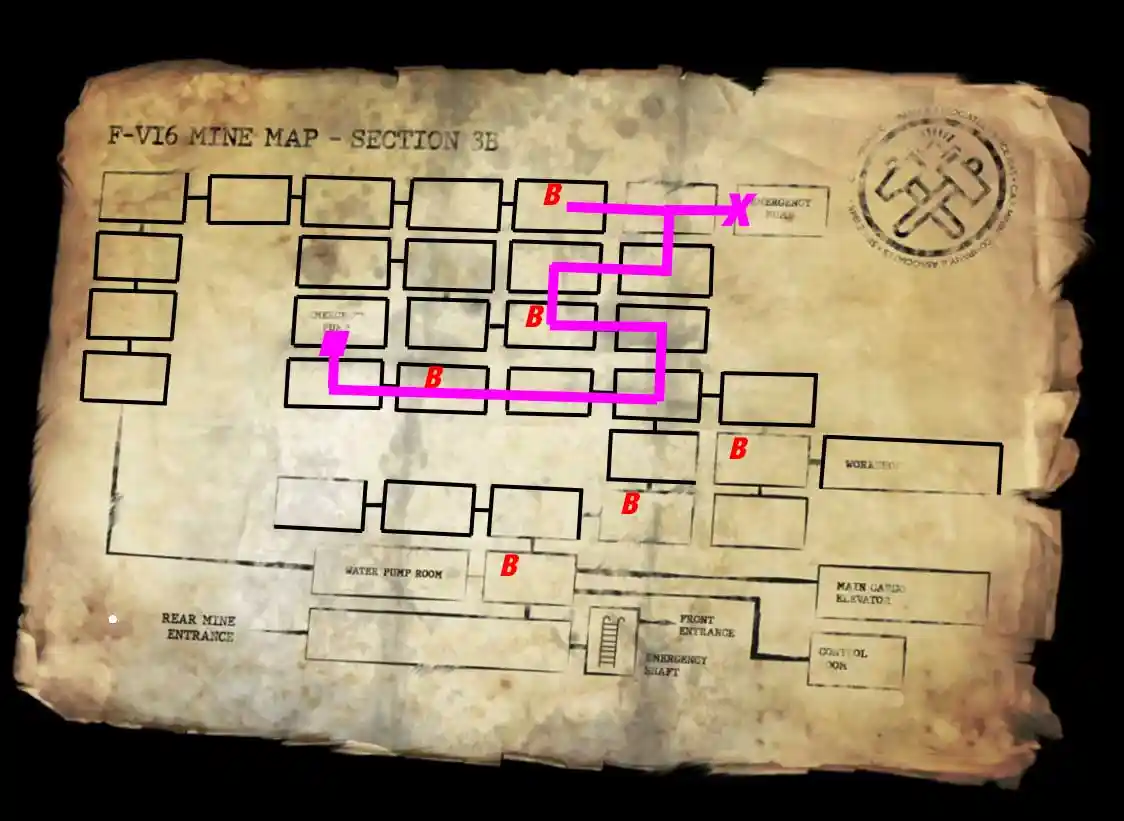
When you have the green light, it’s time to go to the next emergency pump. I’ve marked the path in the map below, starting from the first emergency pump. Notice that the last stretch of the path is first going to the barrel to fill the lamp up; otherwise, you won’t make it.
At the second emergency pump, you’ll find a valve that you simply need to turn to activate the green light. Then, follow the path on the left until you reach the wolves. They will ask you a set of unusual questions. Here are the answers:
1 – I think you’re already full
2 – I just want to help Hannah
3 – I’ll do what I need to
4 – Monsters
5 – It just does
6 – It always is.
The wolves are pleased and release you into the mine unharmed. You are released to the top left corner of the map. Just go down once. There is a third emergency pump. Turn the valve so the light turns green like with the others. Then continue your path down until you reach the Water Pump Room. Here, look at the mine report on the wall. It has the door key tucked to it. Take the key, so you don’t have to take the long way back!
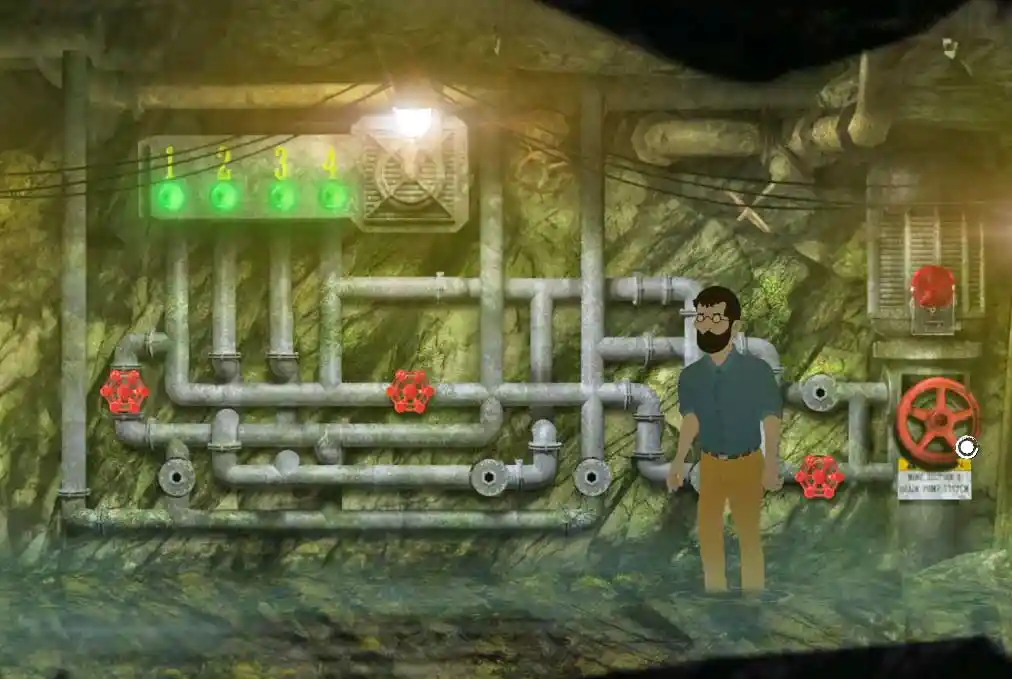
Then, take all the small red valves out. You should now have three small red valves and a big one in your inventory. Place them as shown in the screenshot below. Then turn the big red valve to pump all the water out of the mine.
Chapter 4 – How to Escape the Park
Navigate the park and solve the exit puzzle
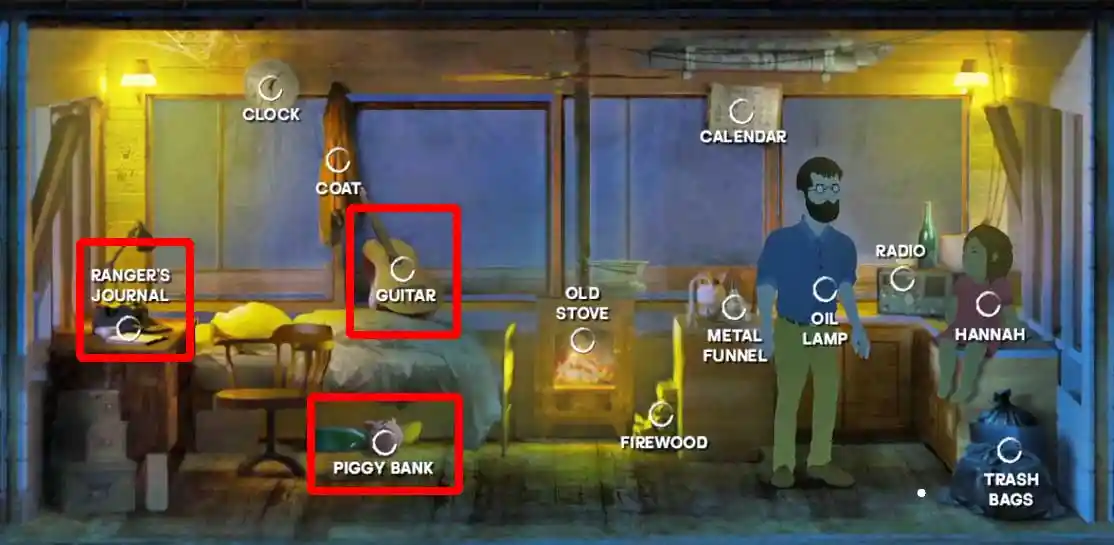
First, there are a few tasks you need to complete inside the ranger station. Begin by inspecting the guitar on the bed using the right mouse button. Graham will notice an item inside the guitar. Next, left-click the guitar to retrieve the item, which is a strange, round, golden disk. After that, retrieve the Piggy Bank from under the bed. Lastly, take a look at the Ranger’s Journal on the table. Before you leave, there is a Metal Funnel in the kitchen. Pick it up as well.
Navigate to the final page containing the pink letter. On the right-hand side, you’ll observe unusual indentations as if someone had written and torn out a section of the paper. Utilize the Red Crayon from your inventory on the blank page to reveal its contents. It will display a park bench and disclose the presence of another hidden disk beneath one of them.
You can now step out of the Ranger Outpost and easily illuminate the entire park by using the Power Box located right next to the door.
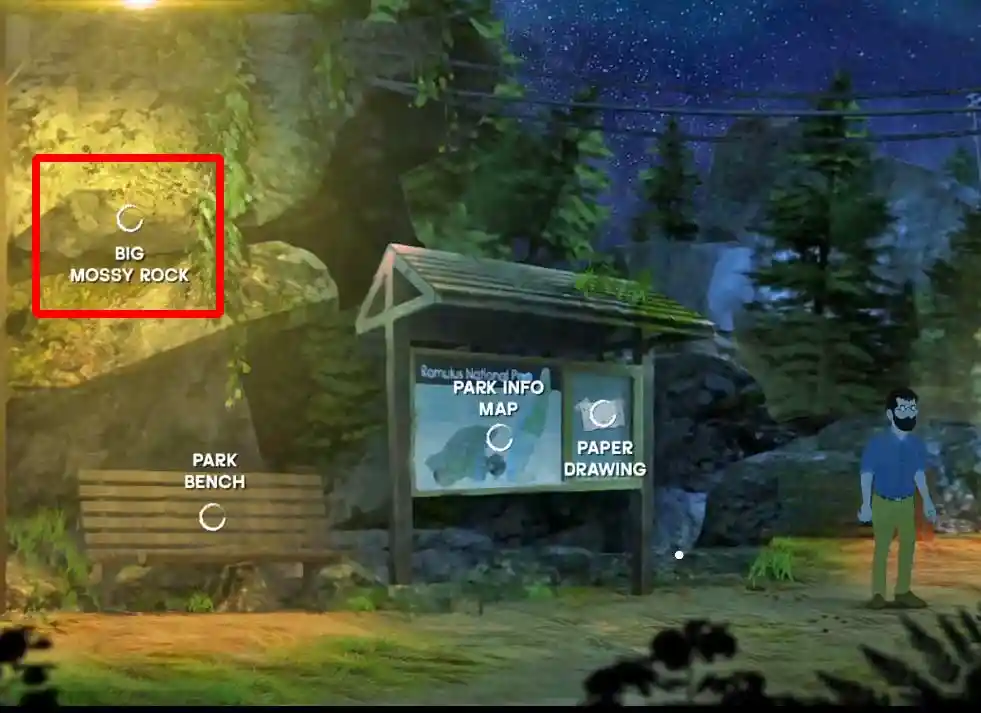
Go down to the ground level. Here’s the mysterious treasure box, but we leave that for now. We’re still missing a piece for it. Head into the park to the right. Here you’ll find an info board with a map, but most importantly, you can smash the Piggy Bank on the Big Mossy Rock to the right. The remnants will end up right in front of the info board, and you can pick up a coin.
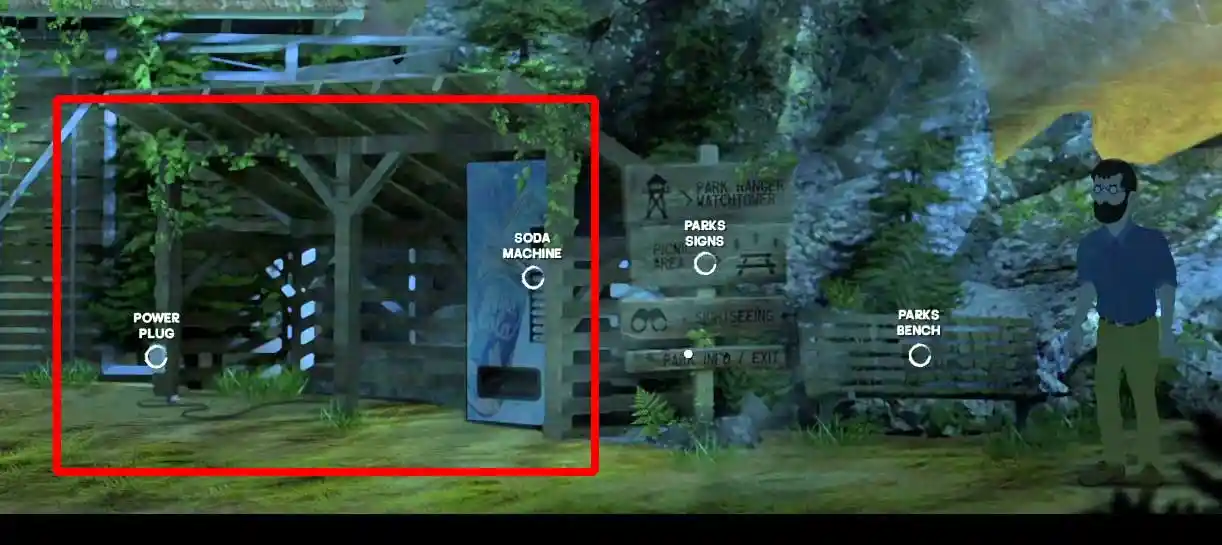
Keep going left. There’s a Soda Machine without power. Plug it in using the power plug. Now the Soda Machine is working, and you can get a soda with a coin.
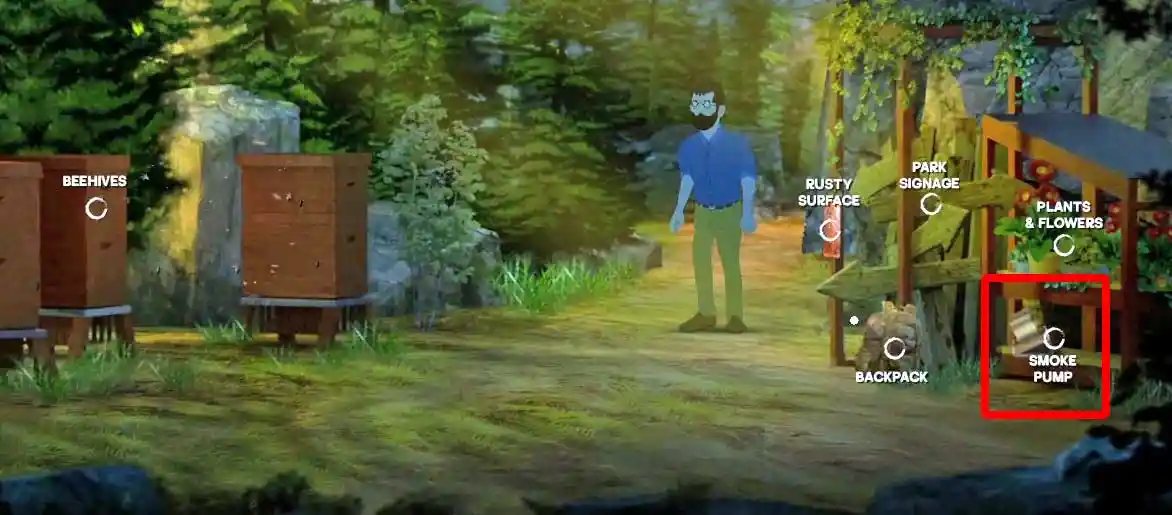
Back at where the park info board is, you can walk forward to get to the Beehives. Graham is scared of the bees and won’t walk past them towards the left. So we have to find a way to get rid of them. Pick up the smoke pump on the shelves with the flowers.
Go back to Hannah on the top of the tower and give her the soda. She will give Graham the empty can. This can be used to build a smoke machine to fend off the bees, but first, it needs holes. To get the holes, leave the tower and go to the park info board area. Head to the right and you will find a Pole with Nails in it. Use the empty can to cover it with holes.

Now you can construct the smoke machine. In your inventory, combine the soda can with the smoke pump and that again with the metal funnel. To make it all stick together, use the duct tape on the construct. This will consume the duct tape.
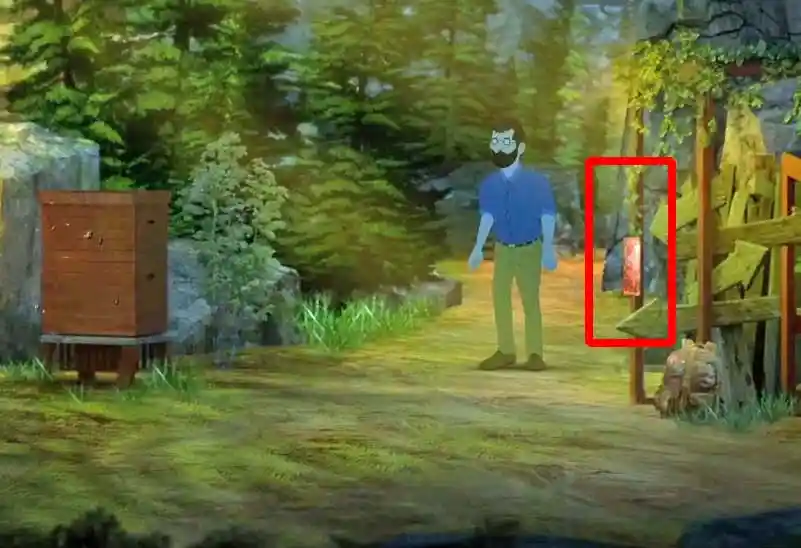
Go back to the bees south of the info board. Check your inventory. You should still have the map for the mines. Use the map as fuel for the smoke machine. Finally, use the last match in your inventory on the Rusty Surface near the flower shelf.
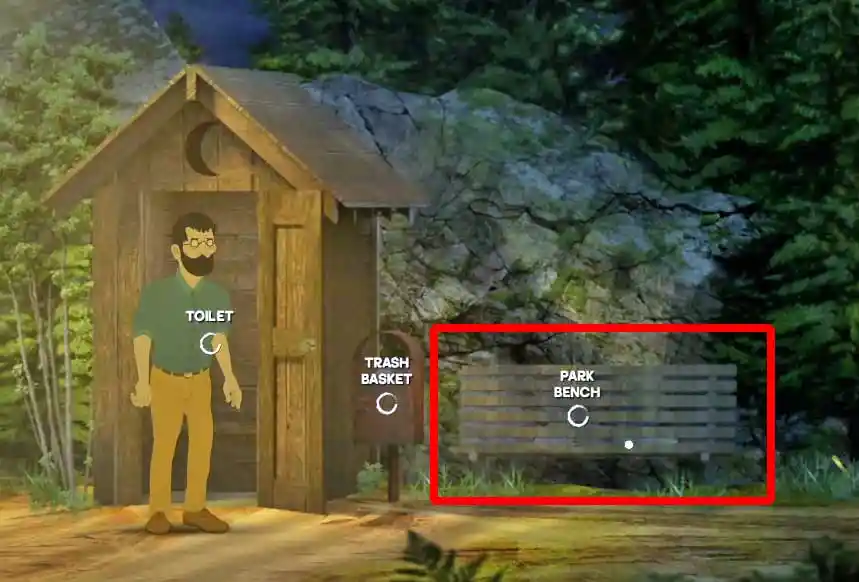
This will cause the bees to disappear. You can then proceed to the left where the toilets are located. Graham will engage in a conversation with the ranger who is trapped in one of the toilets due to a lack of toilet paper. Graham needs to unlock the mysterious chest at the base of the ranger station where the toilet paper is stored. Before returning to the treasure chest, make sure to check the park bench on the right side of one of the toilets. Use right-click to inspect. You will discover a second golden disk.
This will cause the bees to disappear. You can then proceed to the left where the toilets are located. Graham will engage in a conversation with the ranger who is trapped in one of the toilets due to a lack of toilet paper. Graham needs to unlock the mysterious chest at the base of the ranger station where the toilet paper is stored. Before returning to the treasure chest, make sure to check the park bench on the right side of one of the toilets. Use right-click to inspect. You will discover a second golden disk.
Open the mysterious chest
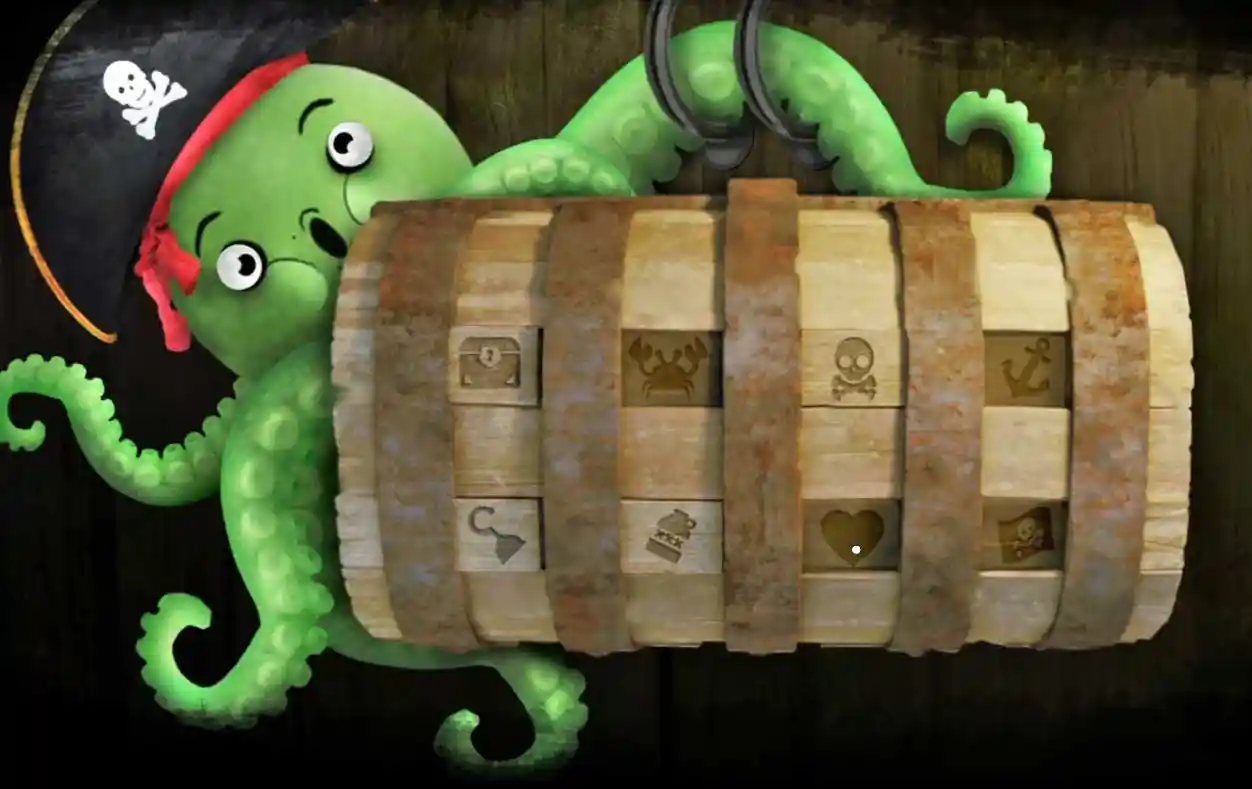
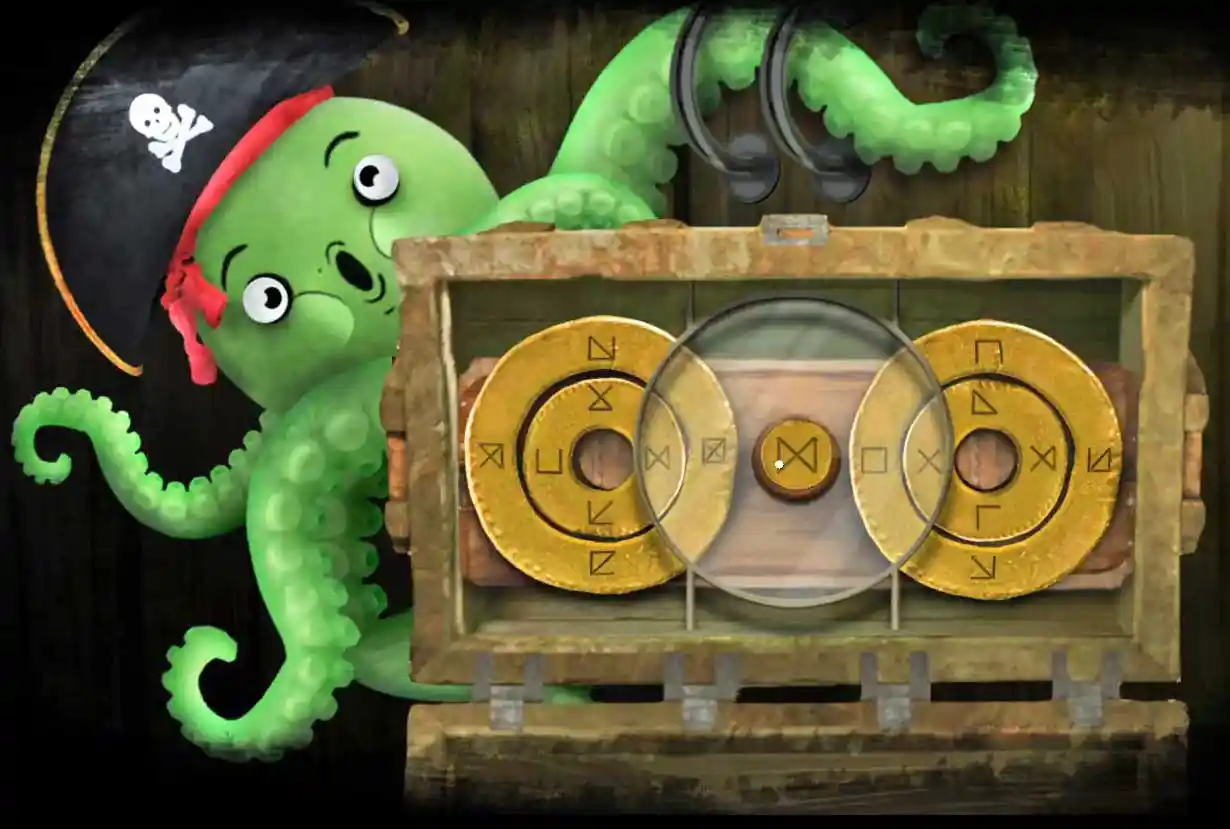
To unlock the chest at the bottom of the ranger tower, you need to use a specific combination of four symbols: a crab, an anchor, a pirate flag, and a heart. The screenshot below displays the combination prior to the lock opening.
Unfortunately, this is not all. The lock opens up another puzzle area, where you have to have the two golden disks. Remember, one of them can be found in the guitar and the other one is hidden underneath the park bench near the toilets. Place the disks into the riddle. There is no wrong or right way of doing the placement. There is a small disk and a big disk.
Then, turn the discs until you get them into the positions as shown below in the screenshot. Press the center button to open the chest.
The treasure chest springs open, and Graham will find that there is nothing he can actually use in there! There’s not even toilet paper, just empty rolls! Go back to the ranger at the toilets and you’ll notice he’s gone. There are only some keys hanging on the toilet door that is now open. Take the keys.
Solving the puzzles in the mine
After a short cutscene, Graham will hear Hannah’s emergency whistle. Halfway on the way back to the Ranger Outpost, the whistle sound stops, and as Graham arrives at the top of the tower, Hannah is gone! To find her, return to the area with the Park Info Board and head right to where the Pole with the Nails is. Continue to go right until you’ve returned to the mines.
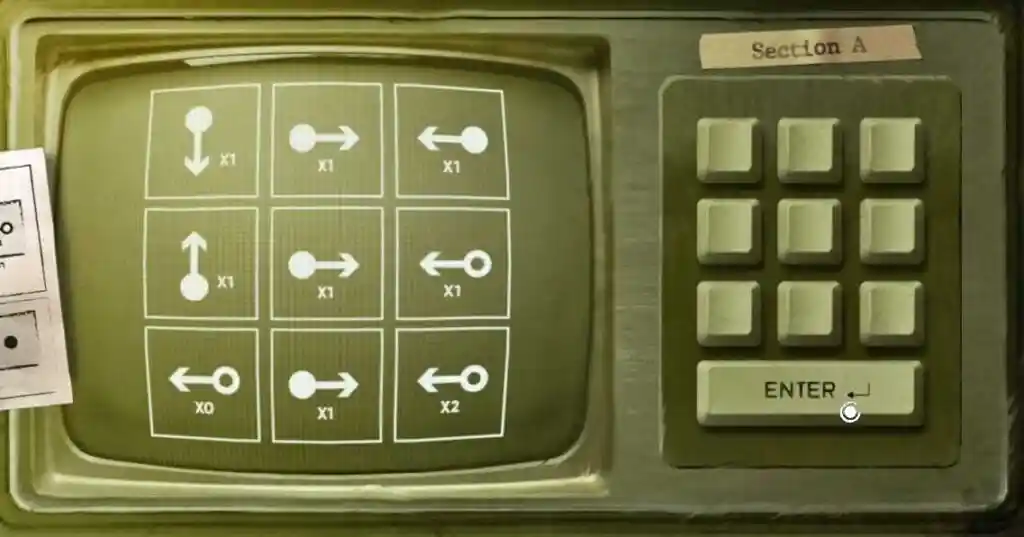
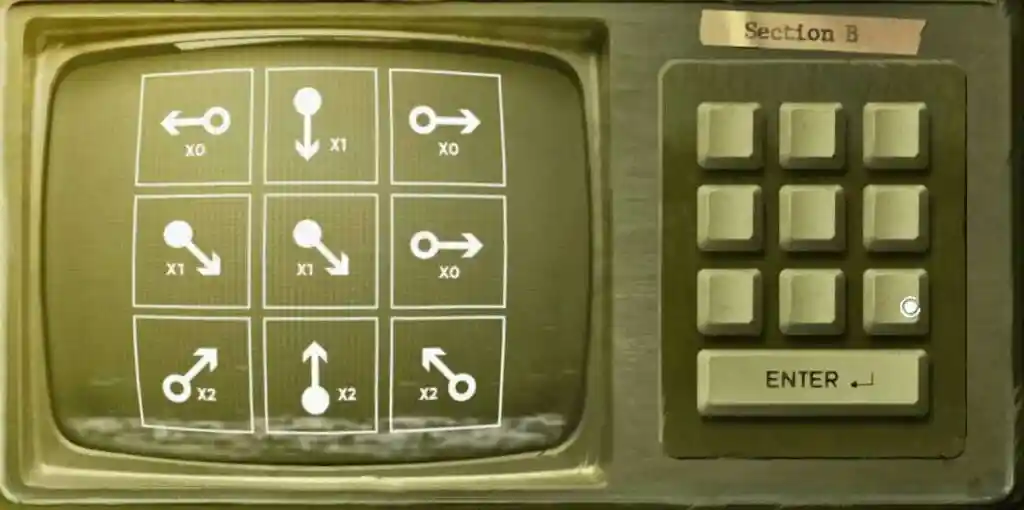
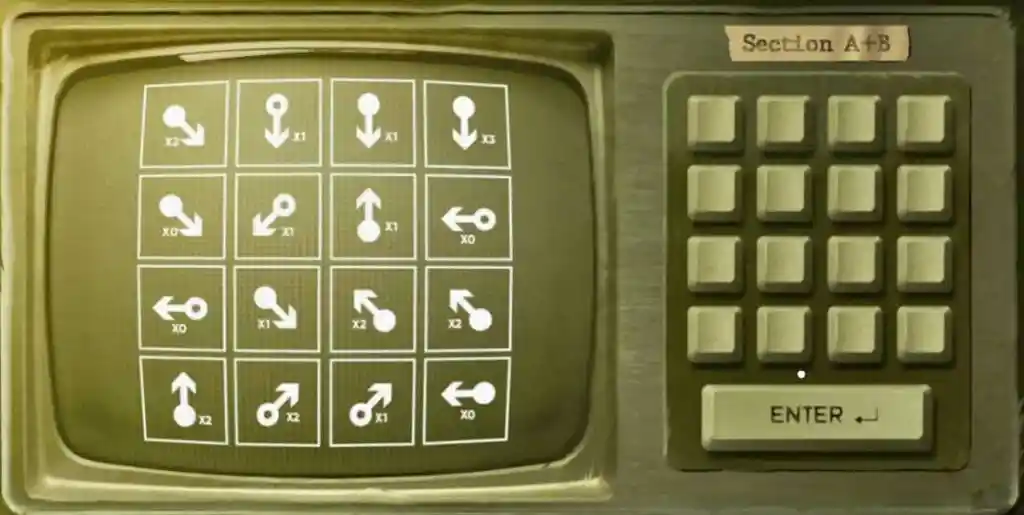
Inside the Mines, go to the corridor with the Main Elevator and the Control Room. The only room accessible is the control room. Enter and you will see Hannah on the monitor – inside the Main Elevator Room – being threatened by a wolf. To help him, you have to solve the three puzzles on those three small monitors by using the keyboard to the right of the monitor.
Now you can operate the lever on the very right of the Control Room. This will make the elevator drop, and Graham can now go save Hannah in the Main Elevator Room. After a small cutscene, Graham and Hannah stand in front of the park gate. There are only two items left in Graham’s inventory. The keys and the tissue. Use the key to open the door of the small “Welcome” building next to the locked gate.
Open the building’s door and locate the main gate keys on the floor. Take the keys and use them on the main gate to initiate a conversation with Hannah. She appears to be very sad, so offer her the tissue from your inventory. Then, accompany her to her grandmother. This will mark the end of Chapter 4.
Chapter 5 – Getting Past the Scientists
Distract the Syren Scientists
Follow the path to the left and pick some Red Peppers from the bush.
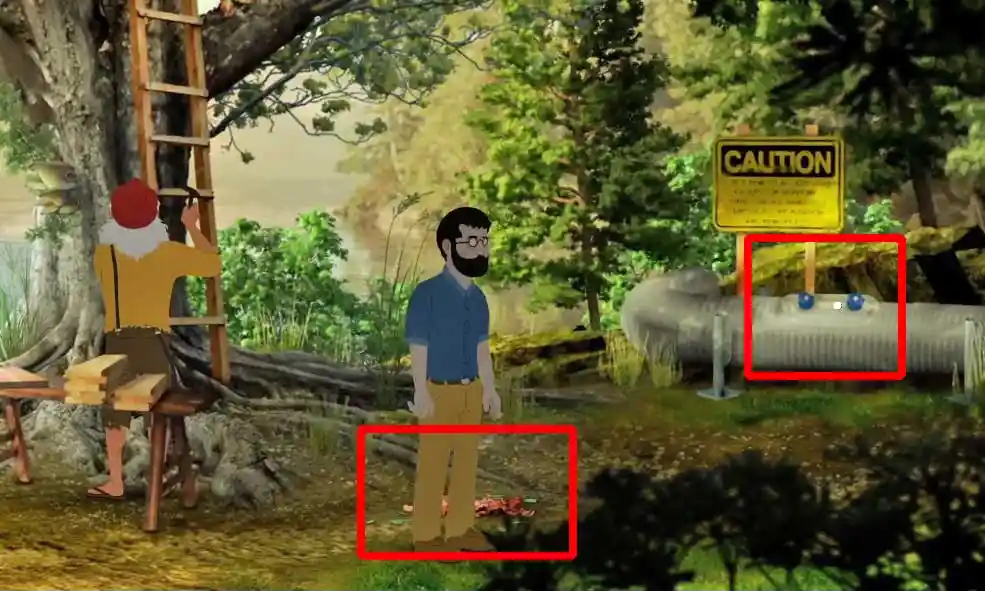
Continue on the path until you reach the “Syren” tents and entrances. There, Graham engages in a conversation with a scientist who is standing at the entrance of their camp, wearing a protective suit. After the chat, turn left and head towards the house, which happens to be Graham’s house. In front of the house, you’ll find an elderly man working on a treehouse. To his right, there is a large silver pipe. You can open the hatch on the pipe. Collect the leaves from the nearby floor and drop them through the open hatch into the pipe.
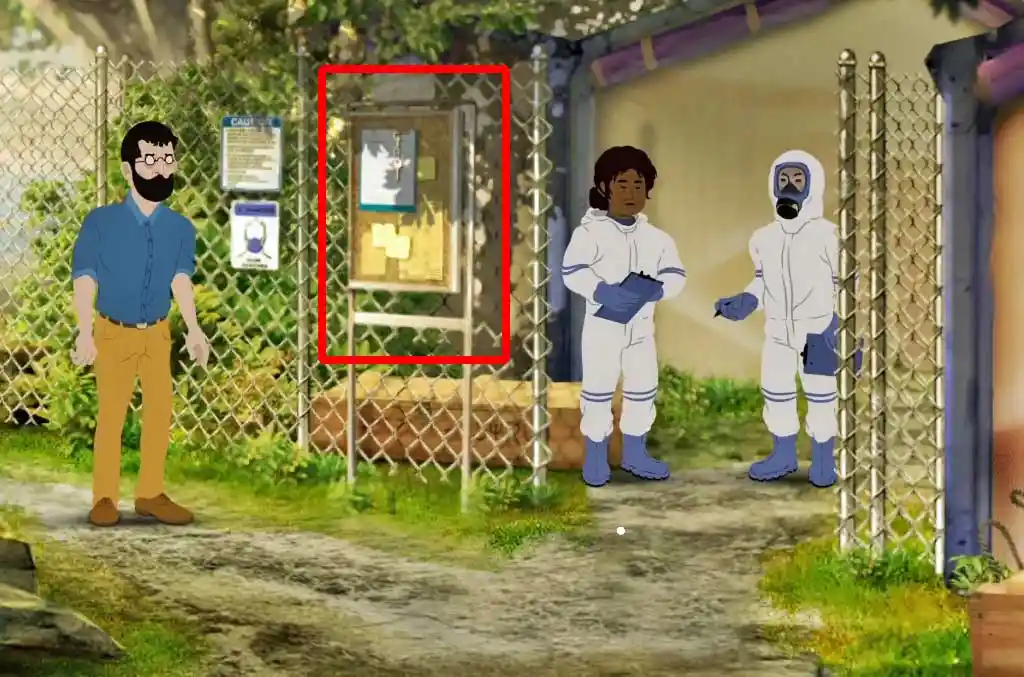
To clog the pipe, you’ll need two additional piles of leaves. One pile is located near the entrance of the Syren camp, and the other is near the red pepper bush. Toss these piles into the pipe, which will divert the attention of the Scientists at the Syren camp. Proceed to the camp entrance and acquire the Info Board along with the key. Don’t forget to add the key to your inventory.
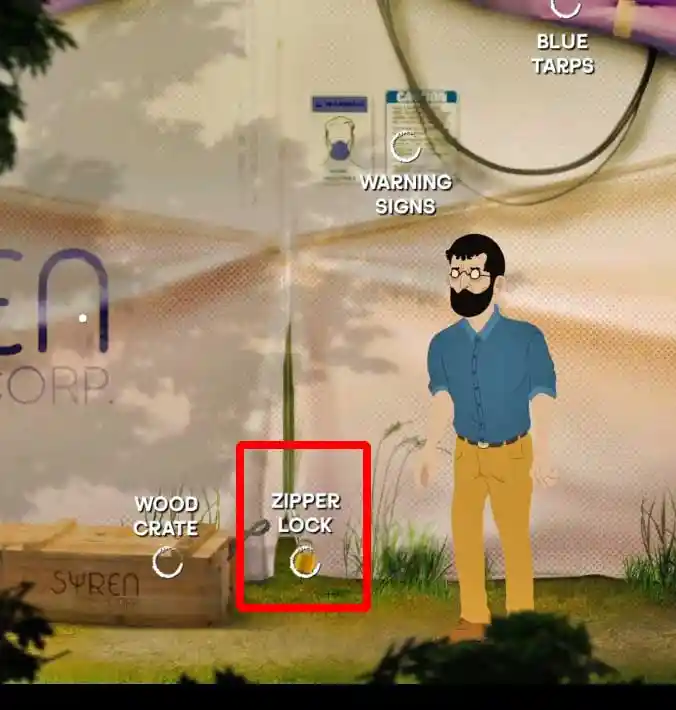
You can now walk to the right of the Syren tent. Find a wooden box on the floor and interact with it to uncover the locked back entrance of the tent. Use the key you just obtained from the info board and drag it onto the padlock to unlock and enter the tent.
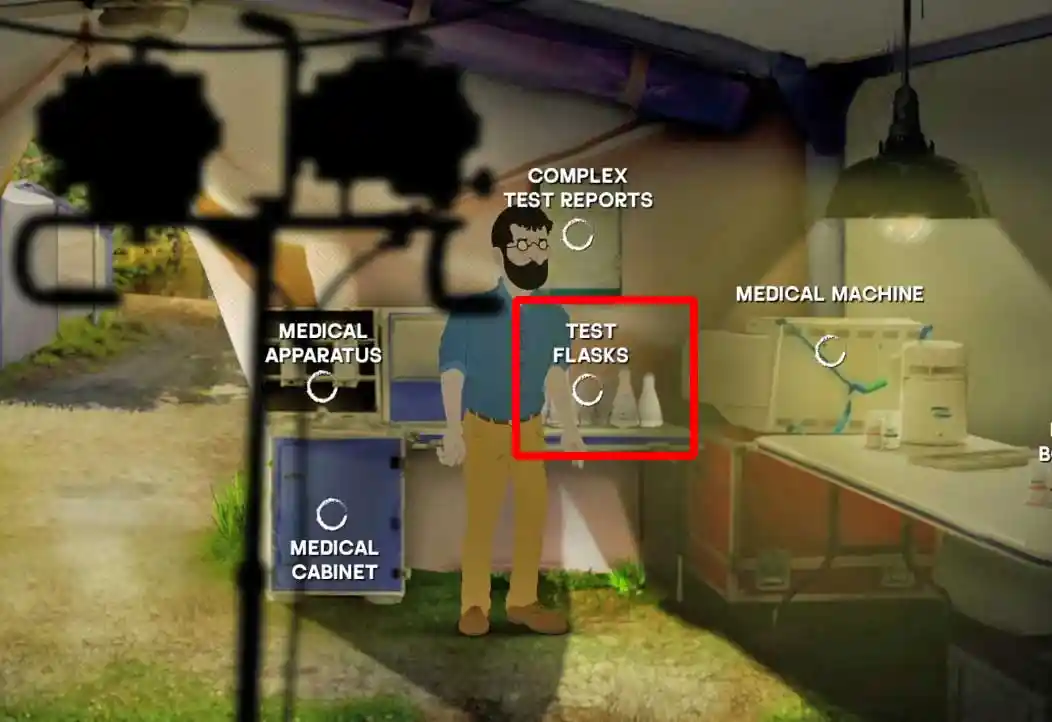
Inside, you’ll find some Test Flasks to the left on top of a table. Take one and leave.
Return to your house and try to enter it. It is locked, but Otto will give you the keys. Inside, interact with the Power Switch, take the Corkscrew, read the journal, and take the Red Lightbulb.
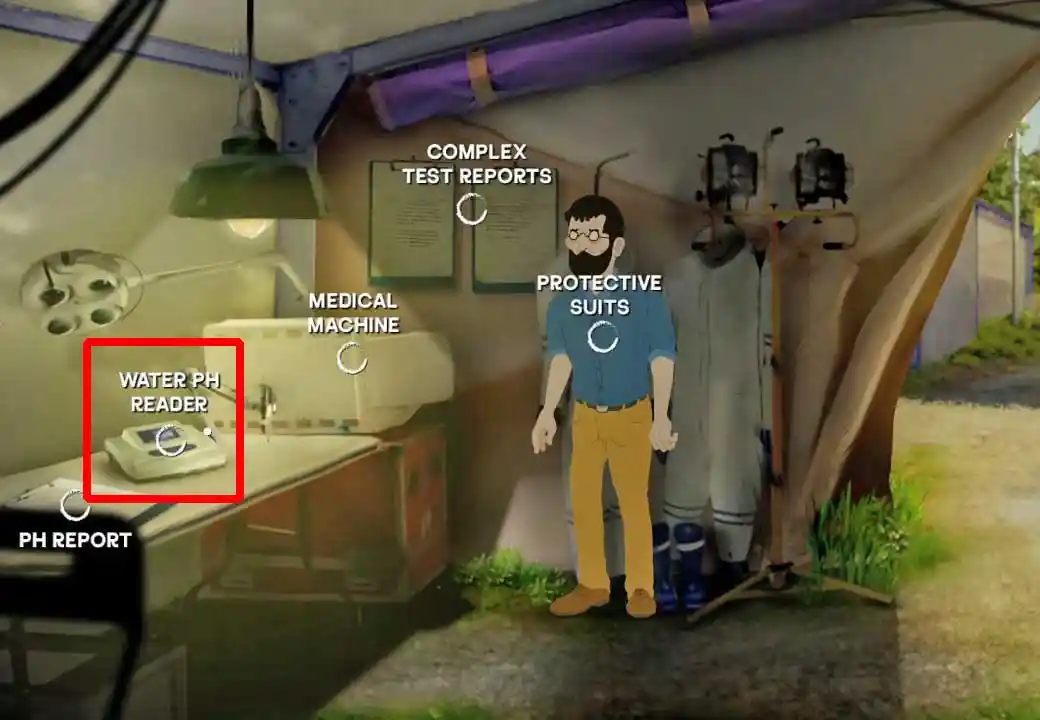
Did you see the metal pot in the house? Grab the red peppers and put them in. Graham will cook them and pour the liquid into the test flask. Take the filled test flask to the Syren tent. One of the scientists will be patrolling outside. Wait for them to pass, then go left. There’s a water pH reader on the table. Use the test flask with the liquid on the water pH reader.
The peppers didn’t work. Go back into the tent and get another Test Flask. After that, go back to Graham’s house and cook the red lightbulb in the metal pot. Take the new liquid back to the Syren tent and use the water pH reader with it.
Go back to the tent and grab another Test Flask. Head back to Otto, who has a pile of rusty nails on the workbench. Click on them and ask if you can have them. Cook the Rusty Nails in the metal pot, then return to the water pH reader to test the resulting liquid. The scientists will be surprised by the outcome and depart.
And with that, Chapter 5 draws to a close.
Chapter 6 – Final Choices: Tent Encounter and Ending
Using the boat
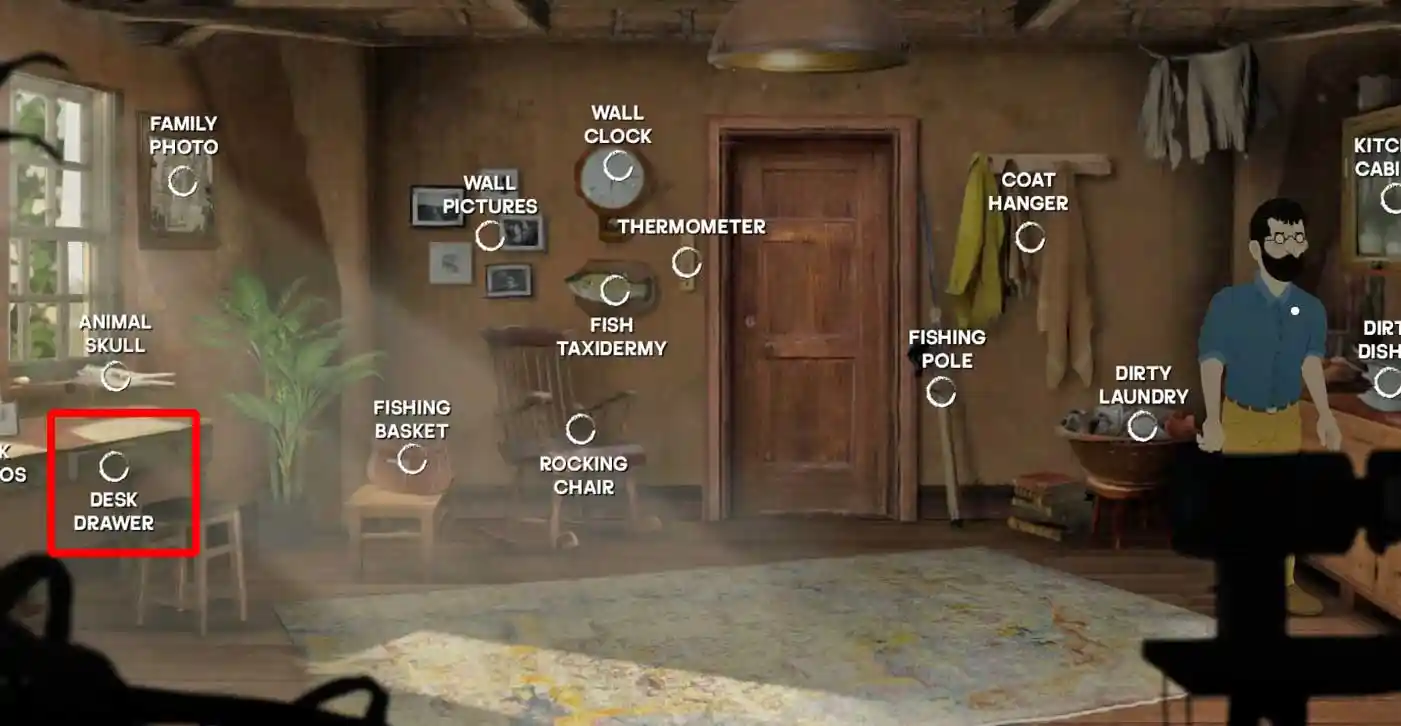
Enter the Syren tent and acquire another Test Flask. However, this time, make your way to their camp. Proceed to the right and continue straight until you reach the lighthouse. The door awaits you, open and inviting. Simply step inside. Inside, open the Desk Drawer and read the journal.
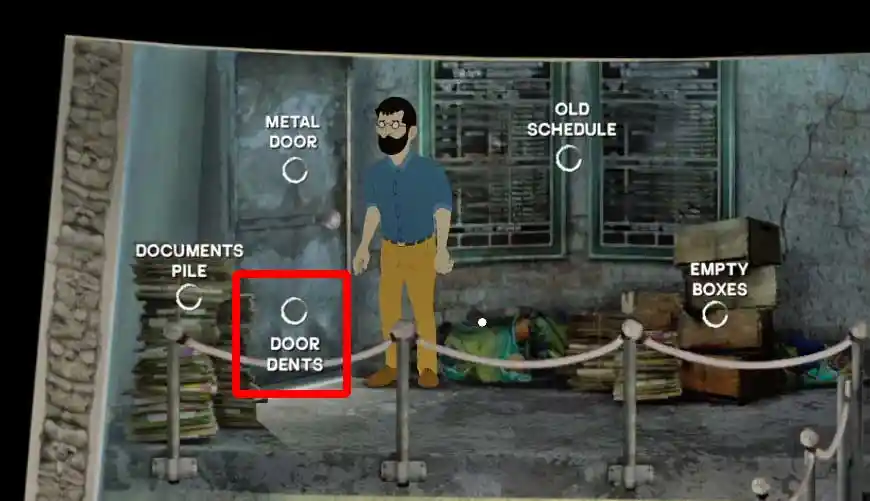
Next, head towards the door leading to the top of the lighthouse. However, you’ll notice that the exit door is currently blocked. Take a closer look at the Door Dents. Left-click on the Door Dents to hear a thumping noise. Once you’ve done that, you should be able to open the door and proceed outside.
At the summit of the lighthouse, outside, locate the rope on the left and give it a tug to retrieve a wine bottle. Once raised, employ the corkscrew to uncork it. Then, proceed to pour the wine into the Test Flask by performing a simple drag-and-drop action.
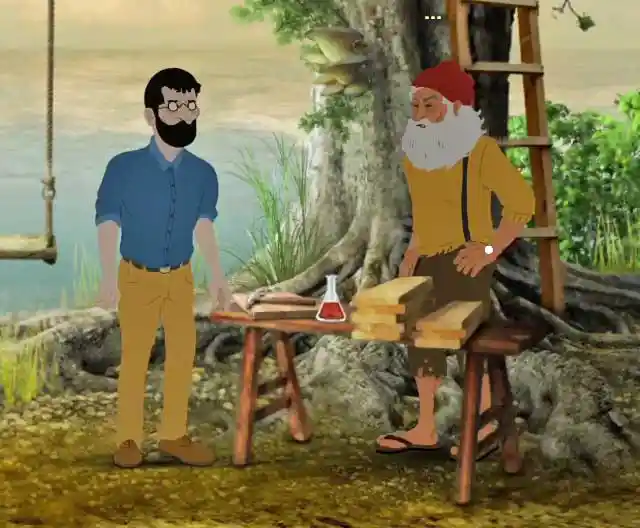
Leave the lighthouse. On the way, Graham mentions needing paddles for the boat. Proceed to Otto and find a hammer where the rusty nails were. Use drag and drop the Wine Flask to lend the hammer from Otto.
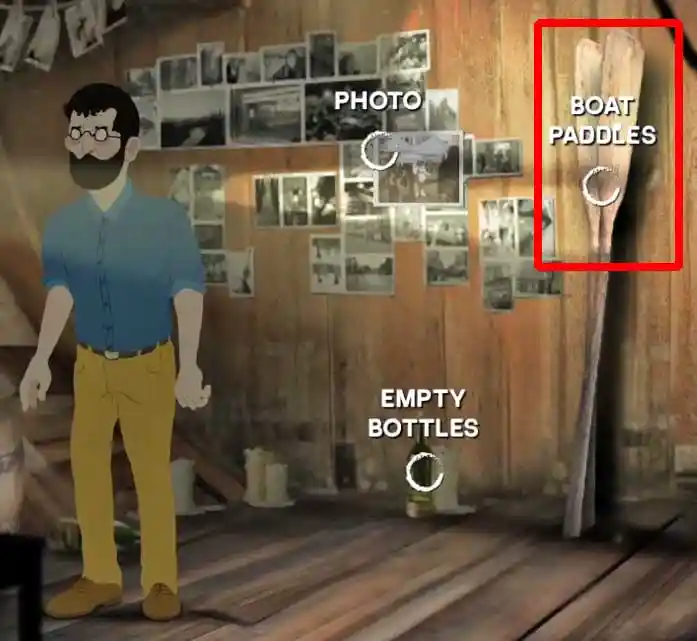
Enter Graham’s house and go to the very left where the boards are blocking a passage. Use the hammer on the boards to be able to go this way. Return the hammer to Otto and return to Graham’s house to use the new passage. It leads to a wrecked trawler. Just enter it, find the Boat Paddles, and take them. Before you leave, have a look at the photo on the wall.
After the cutscene, head to the right towards your house. The game will cut straight to the boat. Use the paddles on the boat. Follow the instructions on the screen to play the rowing mini-game until you reach the shore. Follow the path all the way to the right until you’ve crossed the wooden bridge from the start of the game. Follow the noise to the generator area. Return to the wooden bridge after you’ve found Hannah’s mother, then follow the noise to the house…
The Night is Grey
Release: January 5th, 2024
Developer: Whalestork Interactive
Publisher: Whalestork Interactive
Official Website: https://whalestork.com/
