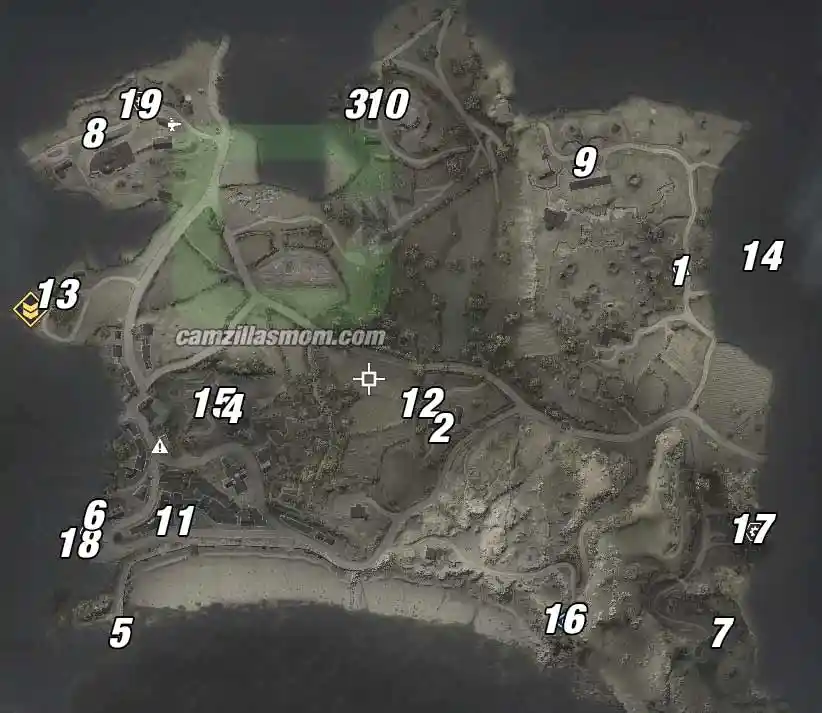
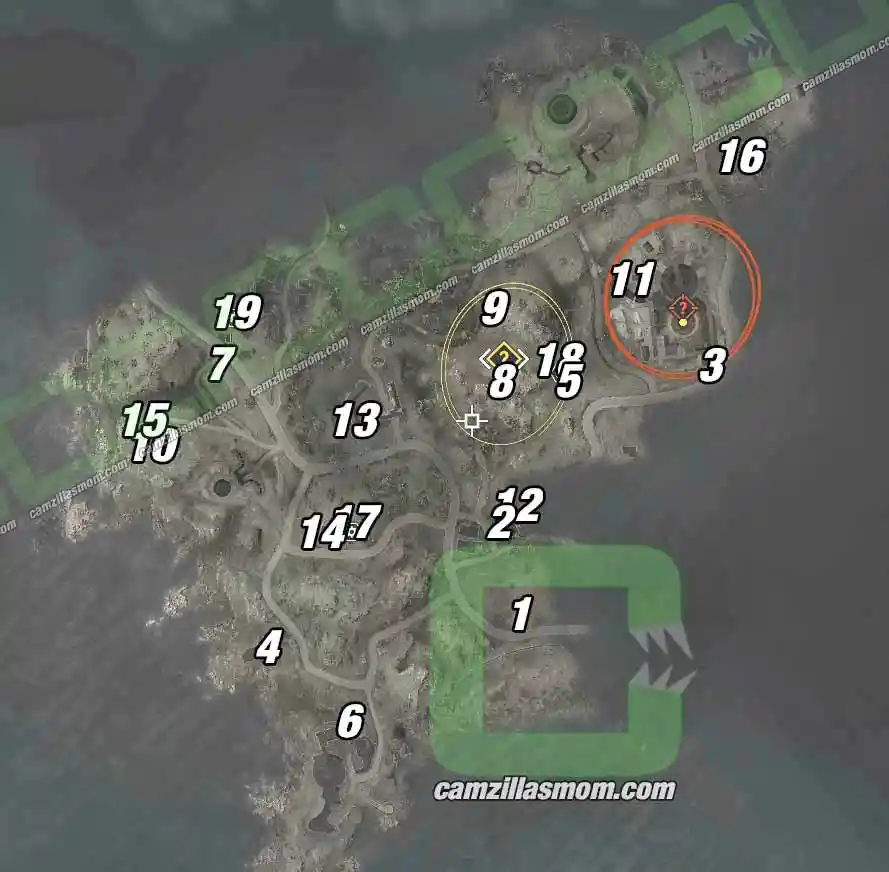
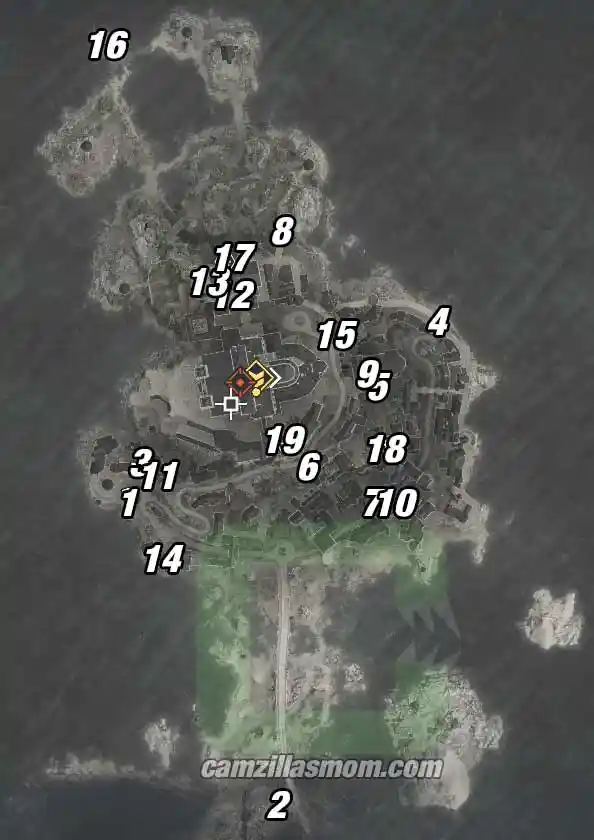
There are nineteen collectibles in Mission 1: The Atlantic Wall in Sniper Elite 5. They are all documented in a specific order under Options -> Service Record -> Collectibles. The Collectibles in this guide are listed below in the same order.
Next: Mission 2 – Occupied Residence
-> More Guides at the Sniper Elite 5 HUB
The Atlantic Wall – Overview Map
Personal Letters
There are six Personal letters, numbered 1-6.
1 – Picked Some Violets
Southeast of the radar and east of the bunker is a little checkpoint with a house. Outside of the house, on top of some boxes, is this document.
2 – Upcoming Delivery
In the center farm with the three buildings, this document is in the southern building of the three on the second level, next to ammo. Just climb the ladder.
3 – Violets Are Wilting
In the attic of the northern farm. There’s a ladder to get up there.
4 – Violets Don’t Wilt
On the top floor of the northernmost house in town is a safe with this intel in it.
5 – Pests in the Garden
In the little lookout right by the sea in the southwestern corner of the map.
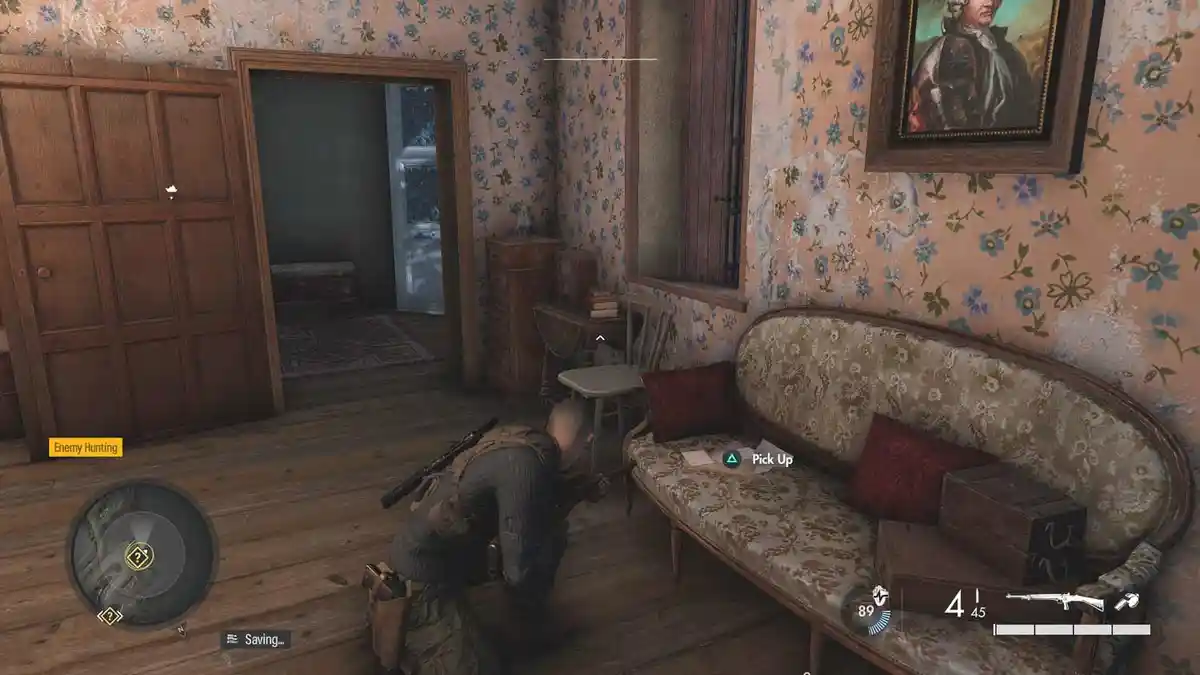
6 – Boches at the Door
At the Resistance Hideout in the very southwest of the map. Ground floor, on the couch.
Classified Documents
There are four Classified Documents, numbered 7-10.
7 – Resistance Captured
The document is in the boathouse, and it is part of the Objective: Secure The Beach.
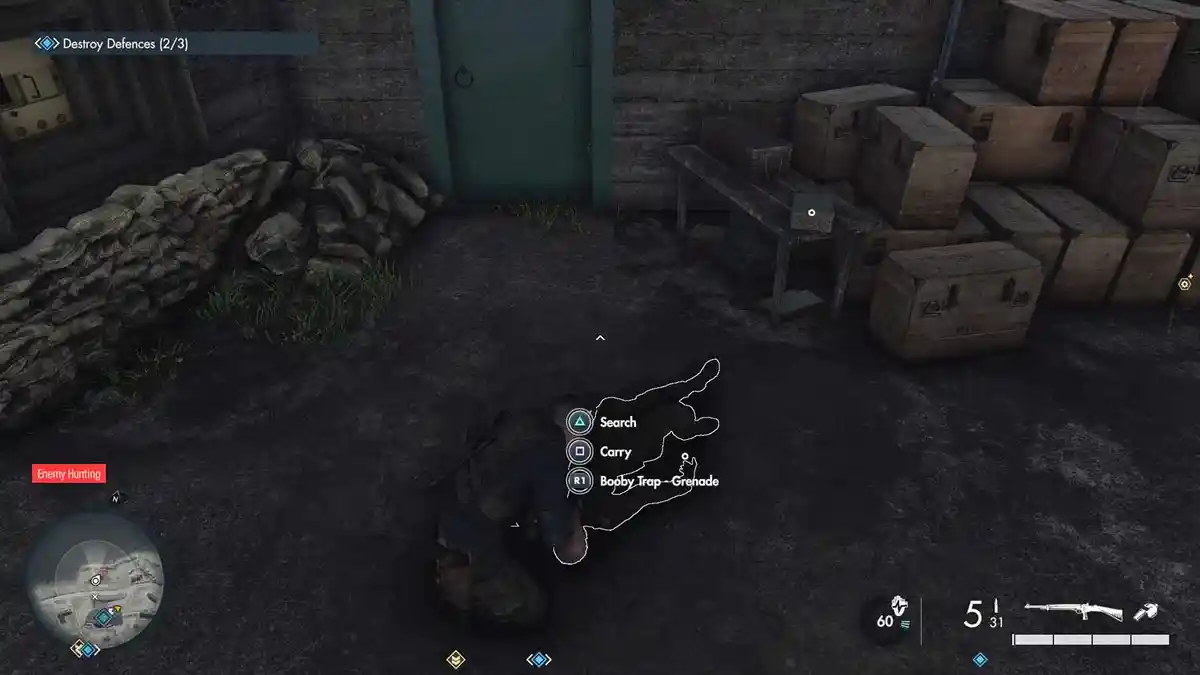
8 – Beach Defences
This document is carried by one of the officers at the “Find a way to Sabotage or Destroy the Gun Battery” Objective. Screenshots show the location where I found the soldier.
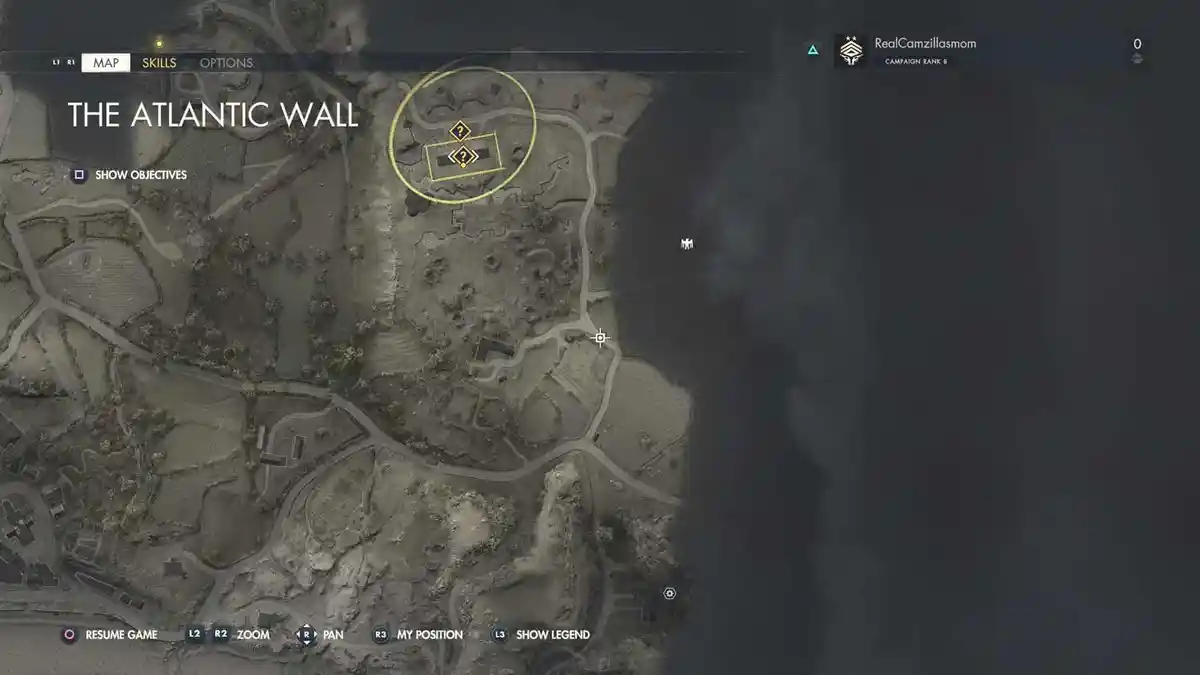
9 – Lacking Air Support
In the area of the “Neutralise Radar” Objective, enter the Bunker and attach one of the Satchel Charges that you can find in the area around the radar to the safe. Blow the safe up, and this document is inside.
10 – Atlantikwall Report
In the north, where one of the Anti Aircraft Guns are and 3 houses – The Northern Farm. This report is inside the safe at ground floor. You can either use a Satchel Charge or you can retrieve the safe code from one of the defeated soldiers nearby.
Hidden Items
There are three Hidden Items, numbered 11-13.
11 – Resistance Photo
At the center square in town, there is a pharmacy. On the second floor is a table with this photograph lying on it.
12 – Radio Tin
The Radio Tin is at the southern farm on the ground floor, in the western barn.
13 – FFI Flag
The FFI Flag is a little flag in the kitchen on the ground floor of the house where you meet Charlie for the “Exfiltrate” Objective.
Stone Eagles
There are three Stone Eagles, numbered 14-16.
14 – Stone Eagle
The Stone Eagle is on top of a building that is outside of the map border in the east of the map.
15 – Stone Eagle
The Stone Eagle is on top of the northernmost house in town – the Hotel. The one on top of the hill.
16 – Stone Eagle
This Stone Eagle is sitting on the bunker just west of the tutorial area. Shoot it from the north, standing on the road.
Workbenches
There are three Workbenches, numbered 17-19.
17 – Rifle Workbench
The Rifle Workbench is the first Workbench you find in the very first Armory.
18 – SMG Workbench
It’s in the attic of the Resistance Hideout in the south west of the map. Just climb up the building on the vines on the wall.
19 – Pistol Workbench
The Pistol Workbench is in the northwest corner of the map. It’s in the building around the “Destroy the Gun Battery” Objective. The building is locked with a key. Loot nearby soldiers to retrieve it.
-> Next: Mission 2 – Occupied Residence
More Sniper Elite 5 Guides
Sniper Elite 5: All Collectibles at The Atlantic Wall
Find all Collectibles from Personal Letters, Classified Documents, to Workbenches at The Atlantic Wa…
Sniper Elite 5: All Collectibles Festung Guernsey
Find all Collectibles from Personal Letters, Classified Documents, to Workbenches at the Festung Gue…
Sniper Elite 5: All Collectibles Libération
Find all Collectibles from Personal Letters, Classified Documents, to Workbenches in Mission 6: Libé…
Sniper Elite 5: All Collectibles Occupied Residence
Find all Collectibles from Personal Letters, Classified Documents, to Workbenches at the Occupied Re…
Sniper Elite 5: All Collectibles Secret Weapons
Find all Collectibles from Personal Letters, Classified Documents, to Workbenches in Mission 7: Secr…
Sniper Elite 5: All Collectibles Spy Academy
Find all Collectibles from Personal Letters, Classified Documents, to Workbenches at the Spy Academy…
About Sniper Elite 5
Release: May 26th, 2022
Developer: Rebellion Developments
Publisher: Rebellion Developments
Official Website: https://rebellion.com/
